For 1990-2009 cars only
Windshield Washer Solvent Heater Replacement WS2, CHW
Removal Procedure
- Open and support the hood.
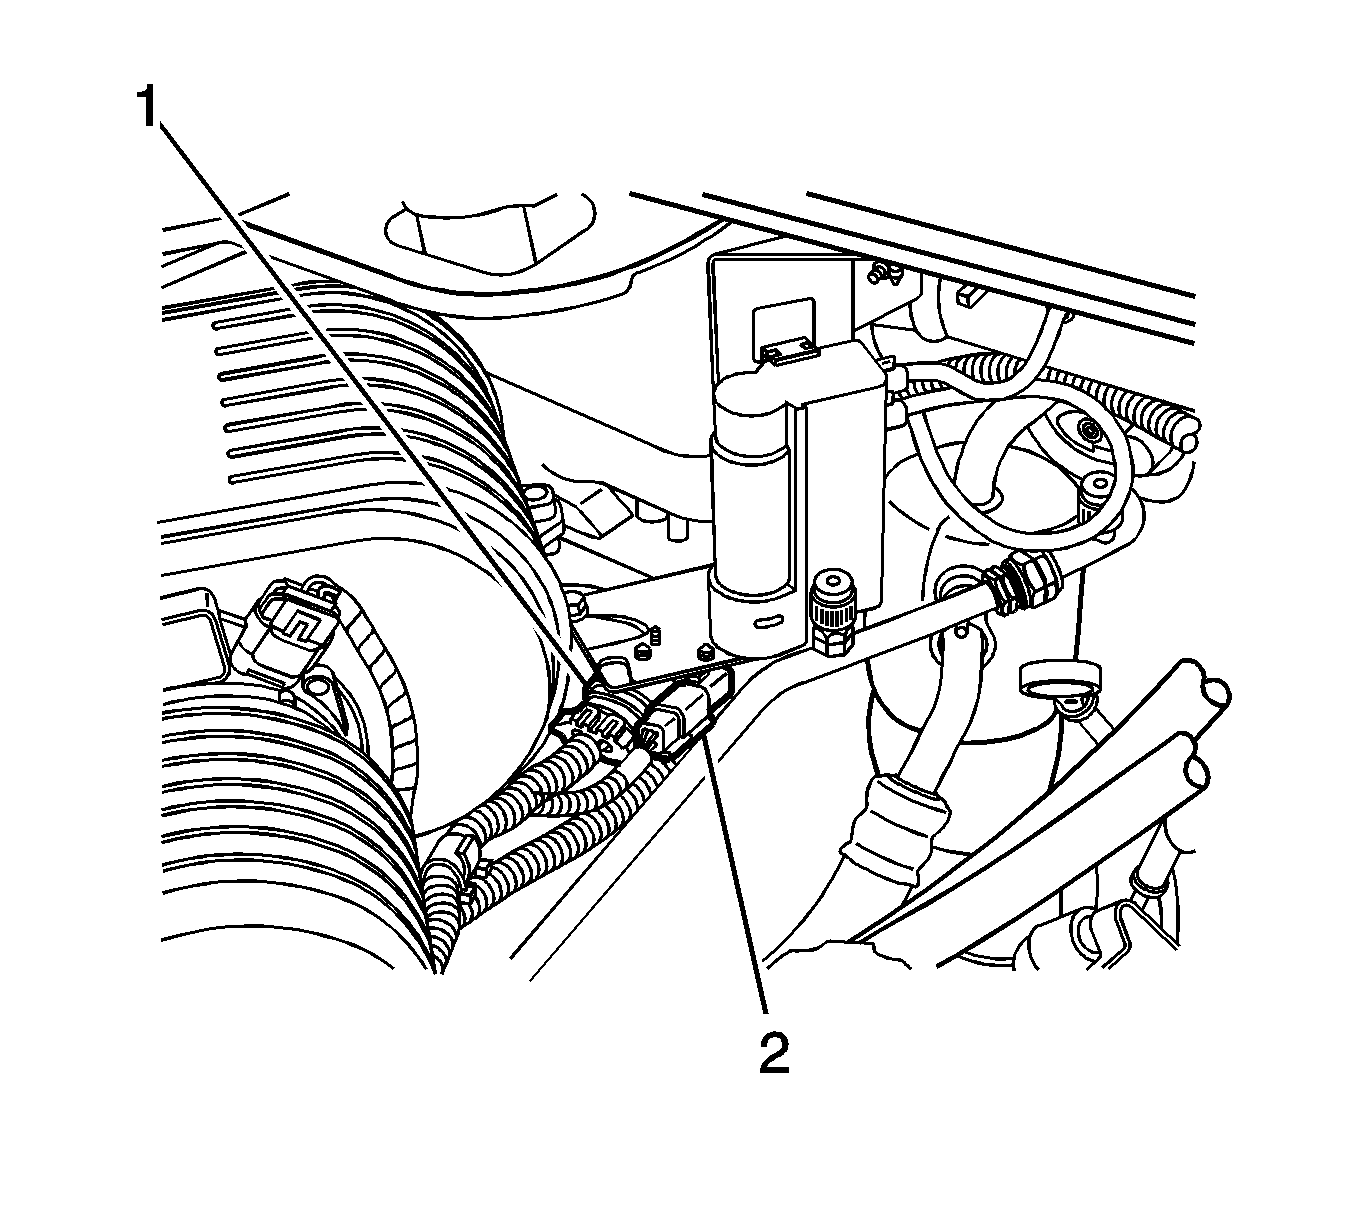
- Disconnect the electrical connectors (1,2) from the heated washer pump.
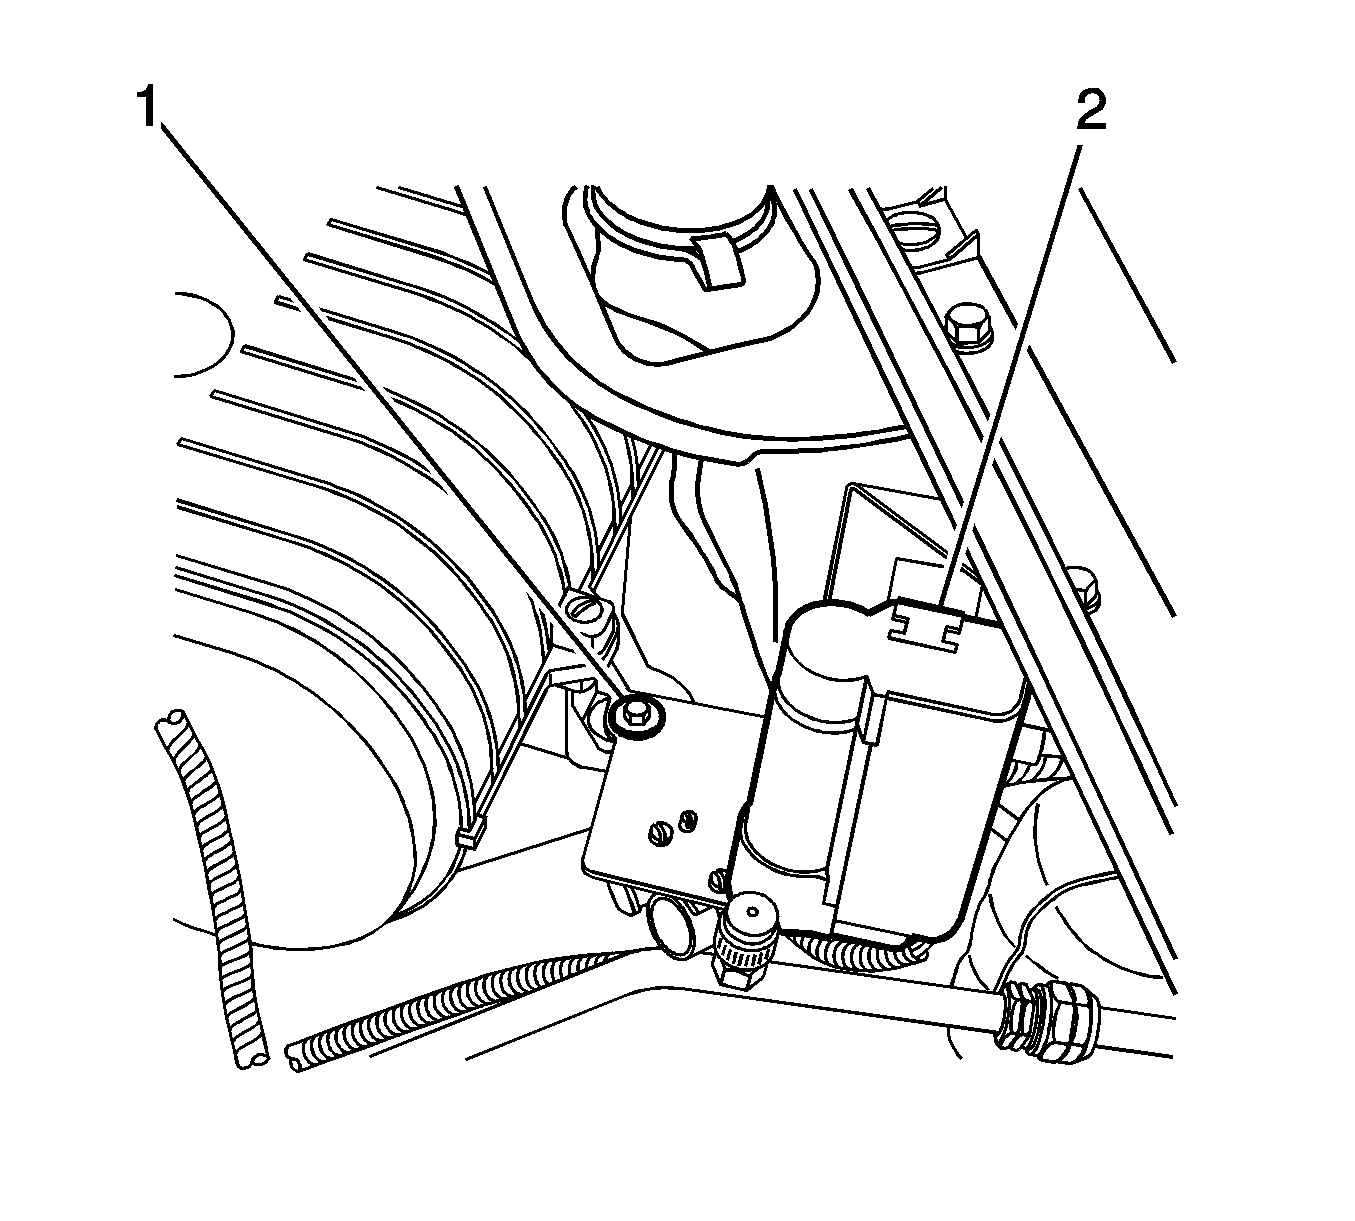
- Remove the rear air box bolt (1) securing the air box and mounting plate for the heated washer solvent unit.
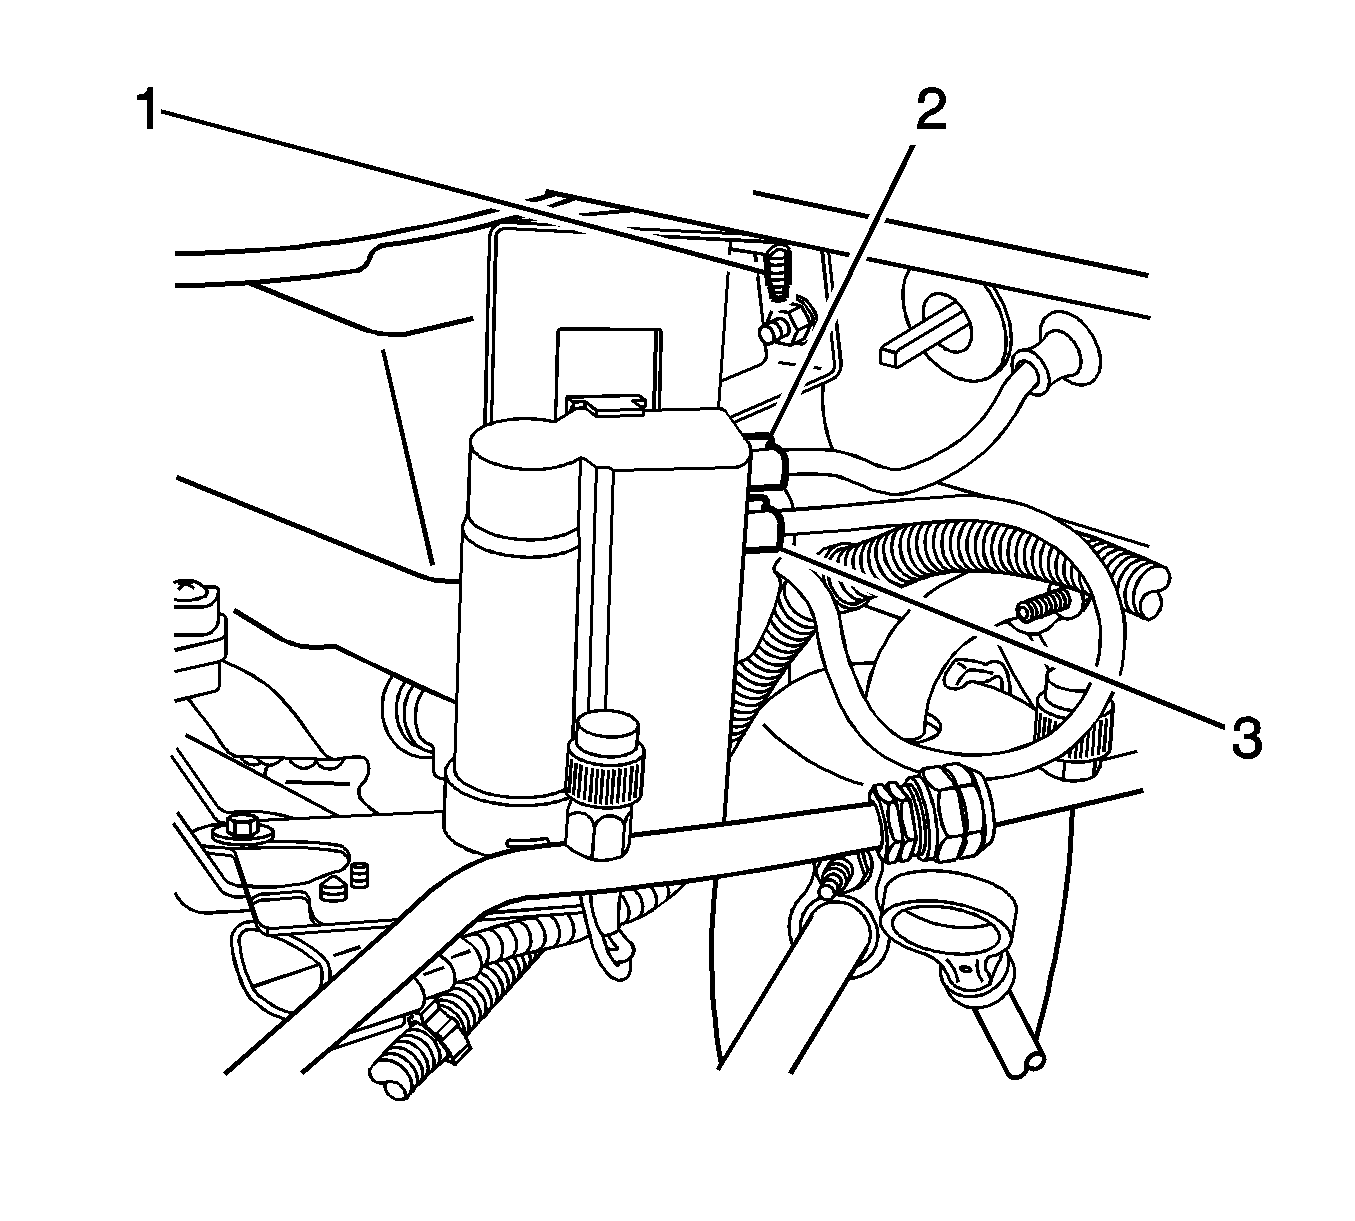
- Remove the upper plenum j nut (1) securing the heated washer pump mounting bracket to the plenum flange.
- Disconnect the upper (outlet) washer plenum hose (2).
- Disconnect the lower (inlet) washer container hose (3) from the heated washer pump.
- Removed the heated washer pump from the vehicle.


Installation Procedure
- Position the heated washer pump in the engine compartment near the washer container.
- Finger start the j nut for the plenum attachment.
- Connect the washer container lower hose (inlet) to the heater pump lower port (3).
- Connect the upper plenum washer hose (outlet) to the heater unit upper port (2).
- Align the lower bracket hole to the air box mounting hole.
- Install the rear air box bolt.
- Connect the two electrical connectors (1,2).
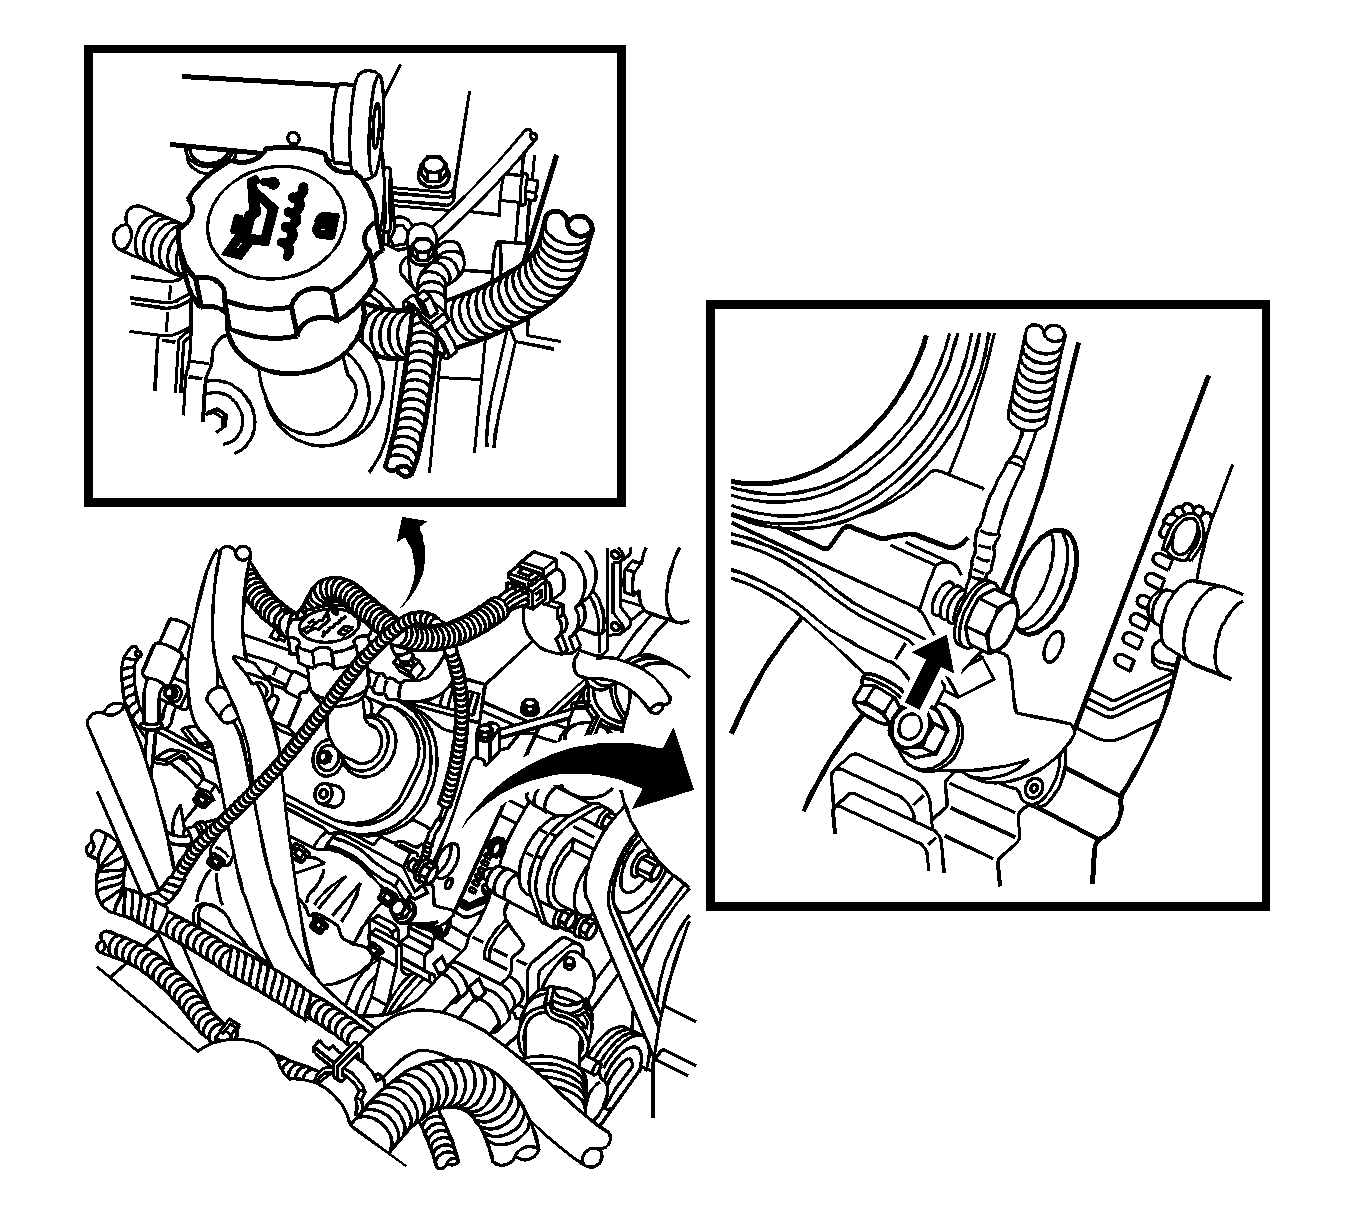
- Check to ensure the ground strap connection is tight.
- Verify and check the operation of the heated washer pump.
- Prime the heated washer fluid unit after installation.
- Cycle the normal wash function until washer fluid sprays from the windshield washer nozzles.
- The normal wash function fills the heated washer unit with washer solvent after replacement.
- Activate the heated washer spray function and inspect for proper operation.


Notice: Refer to Fastener Notice in the Preface section.
Tighten
Tighten the bolt to 8 N·m (6 lb in).


