For 1990-2009 cars only
Removal Procedure
- Mark the location of the liftgate hinges with a grease pencil.
- Remove the liftgate. Refer to Liftgate Replacement .
- Remove the garnish molding. Refer to Body Rear Corner Upper Garnish Molding Replacement .
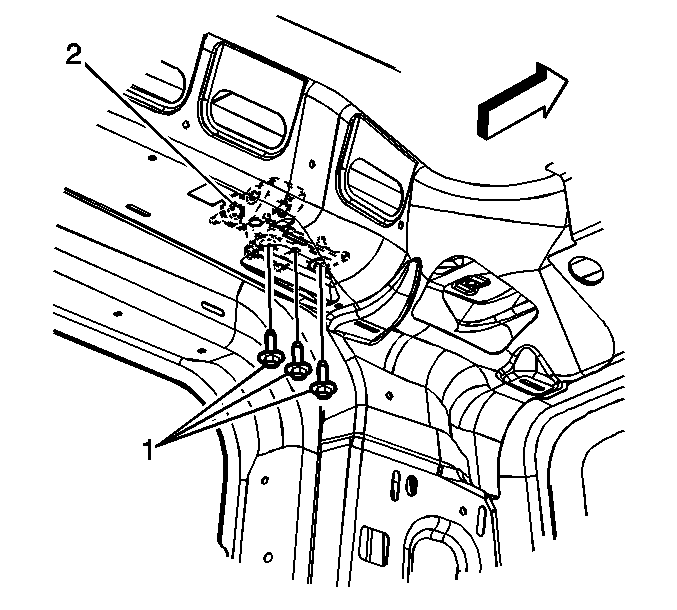
- Remove the hinge bolts (1). It may be necessary to separate the hinge from the vehicle using a flat-bladed tool.
- Remove the hinge (2) from the vehicle.

Installation Procedure
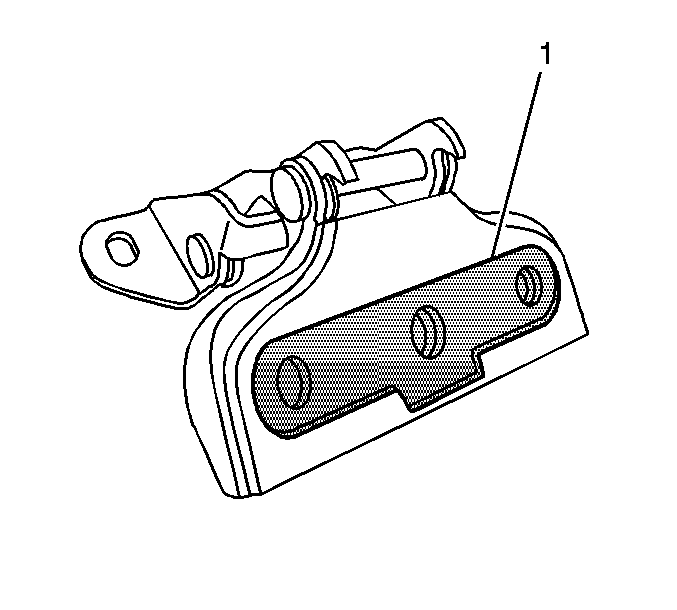
- Apply silicone RTV sealer GM P/N 12346193 (Canadian P/N 10953536) to the entire shaded area of the hinge (1). Failure to do so will result in water and wind getting into the vehicle.
- Align the liftgate hinge to the location marks previously made.
- Install the hinge bolts (1).
- Install the garnish molding. Refer to Body Rear Corner Upper Garnish Molding Replacement .
- Install the liftgate. Refer to Liftgate Replacement .

Important: Ensure that all factory sealer is removed from between the hinge and the vehicle prior to installation.
Notice: Refer to Fastener Notice in the Preface section.

Tighten
Tighten the bolts to 25 N·m (18 lb ft).
