For 1990-2009 cars only
Liftgate Trim Panel Replacement SUV
Removal Procedure
- Remove the lift gate pullstrap. Refer to Liftgate Pull Strap Replacement.
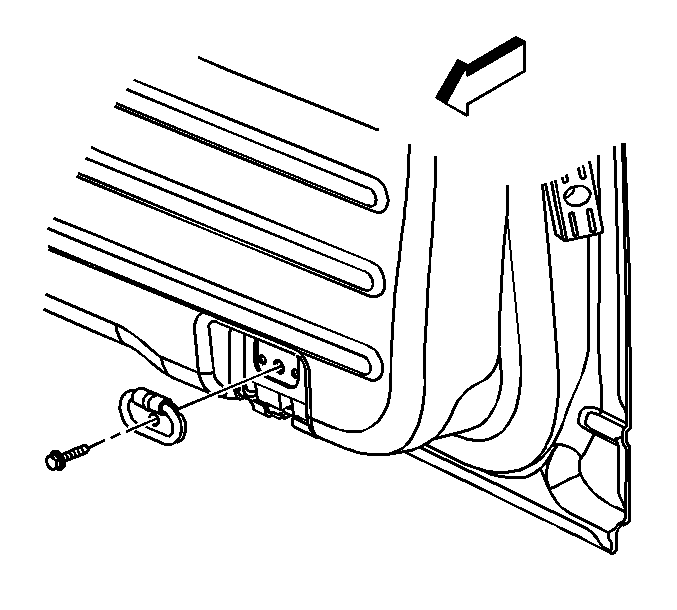
- Remove the bolt that retains the cargo tie down. If equipped.
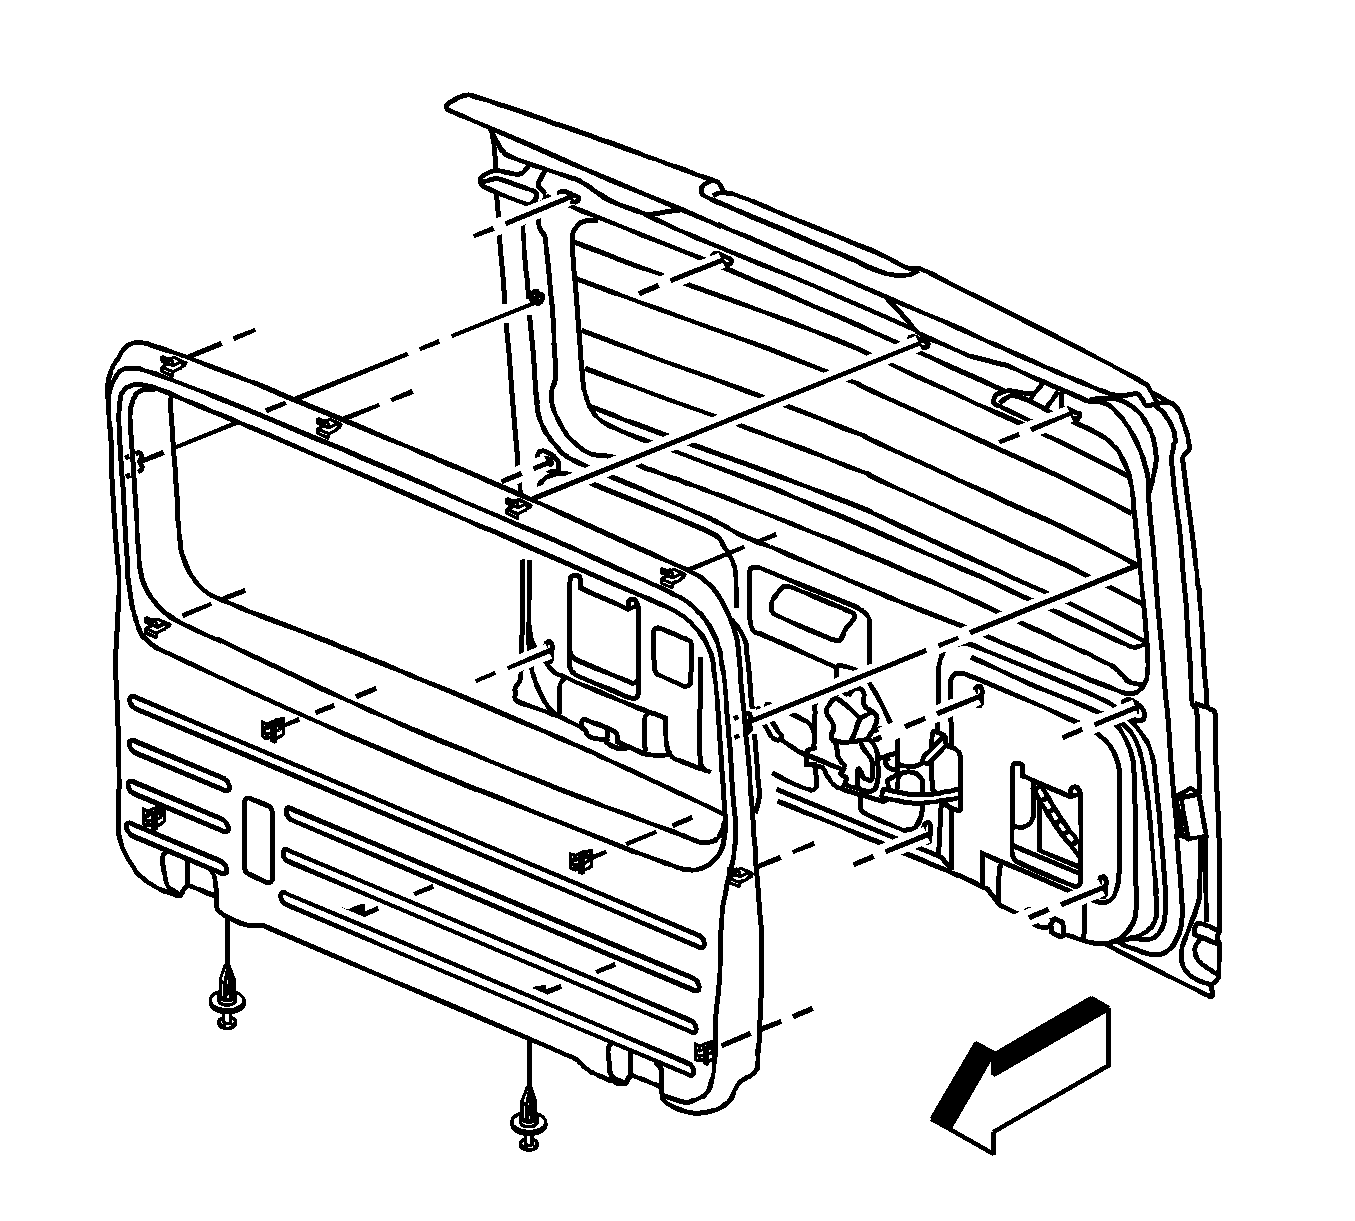
- Remove the 2 push pin fasteners at the bottom edge of the liftgate trim panel
- Gently pull on the lift gate trim panel to disengage the retaining clips.
- Remove the lift gate trim panel from the vehicle.
- Inspect for broken or missing retaining clips and replace the clips as necessary.


Installation Procedure
- If the vehicle is equipped with tie downs and the service replacement part does not have the down holes, drill out the etched holes on the rear of the liftgate panel.
- Install the lift gate trim panel to the vehicle on the liftgate trim panel.
- Install the cargo tie down and secure with the tie down bolt.
- Install the lift gate pullstrap. Refer to Liftgate Pull Strap Replacement.
- Install the 2 push pin fasteners at the bottom edge of the liftgate trim panel.

| 2.1. | Align the retaining clips on the liftgate trim panel with the openings in the lift gate. |
| 2.2. | Gently press inward on the liftgate trim panel to engage the clips. |
Caution: Refer to Fastener Caution in the Preface section.

Tighten
Tighten the bolt to 9 N·m (80 lb in).
