For 1990-2009 cars only
Removal Procedure
- Raise and suitably support the vehicle. Refer to Lifting and Jacking the Vehicle.
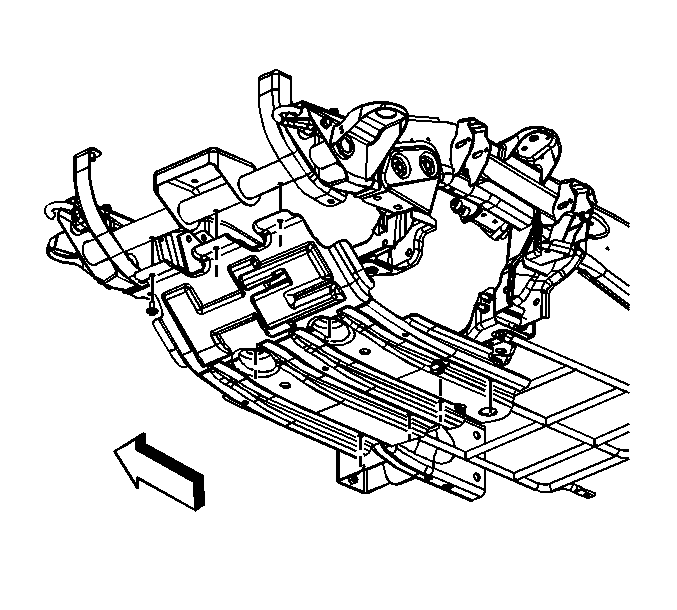
- Remove the bolts from the engine protection shield.
- Remove the engine protection shield.
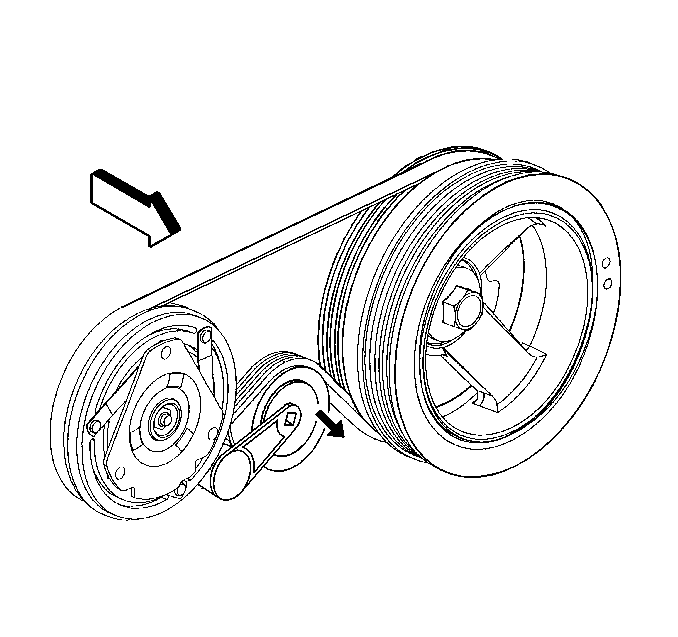
- Install a ratchet into the air conditioning (A/C) belt tensioner adapter opening.
- Rotate the A/C belt tensioner clockwise in order to relieve the tension on the belt.
- Remove the A/C belt from the A/C compressor.
- Slowly release the tension on the A/C belt tensioner.
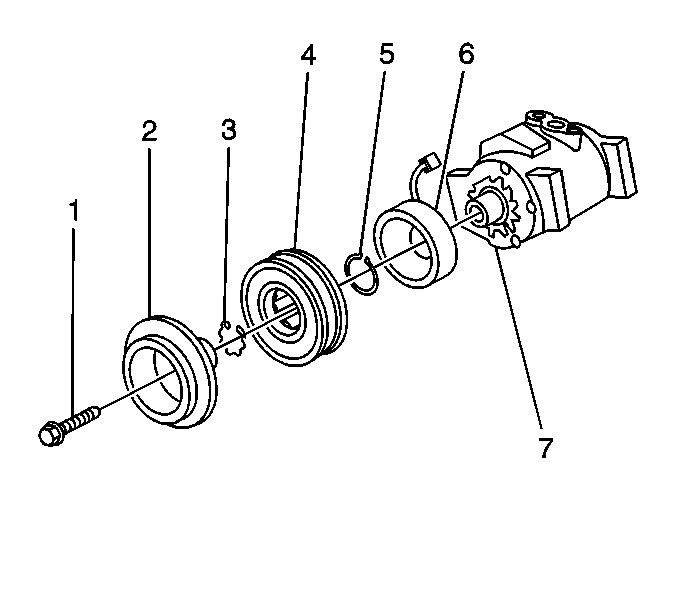
- Remove the clutch plate retaining bolt (1).
- Remove the clutch plate assembly (2).
- Remove the clutch hub/bearing snap ring (3).
- Remove the clutch hub/bearing assembly (4).
- Remove the snap ring (5) from the clutch coil (6).
- Remove the clutch coil (6) from the A/C compressor (7).


Installation Procedure
- Install the clutch coil (6) to the A/C compressor (7).
- Install the snap ring (5) to the clutch coil (6).
- Install the clutch hub/bearing assembly (4).
- Install the clutch hub/bearing snap ring (3).
- Install the clutch plate assembly (2).
- Install the clutch plate retaining bolt (1).
- Install a ratchet into the A/C belt tensioner adapter opening.
- Rotate the A/C belt tensioner clockwise in order to relieve the tension on the belt.
- Install the A/C belt to the A/C compressor.
- Slowly release the tension on the A/C belt tensioner.
- Remove the ratchet from the A/C belt tensioner.
- Install the engine protection shield.
- Install the bolts to the engine protection shield.
- Lower the vehicle.

Caution: Refer to Fastener Caution in the Preface section.
Tighten
Tighten the bolt to 18 N·m (13 lb ft).

Tighten
Tighten the bolt to 30 N·m (22 lb ft).
