For 1990-2009 cars only
Tools Required
J 39400-A Halogen Leak Detector
Removal Procedure
- Recover the air conditioner (A/C) refrigerant. Refer to Refrigerant Recovery and Recharging .
- Remove the drive belt. Refer to Drive Belt Replacement .
- Remove the cooling fan and shroud. Refer to Fan Replacement .
- Disconnect the A/C compressor electrical connector.
- Remove the left front tire. Refer to Tire and Wheel Removal and Installation .
- Remove the left front wheelhouse panel. Refer to Wheelhouse Panel Replacement .
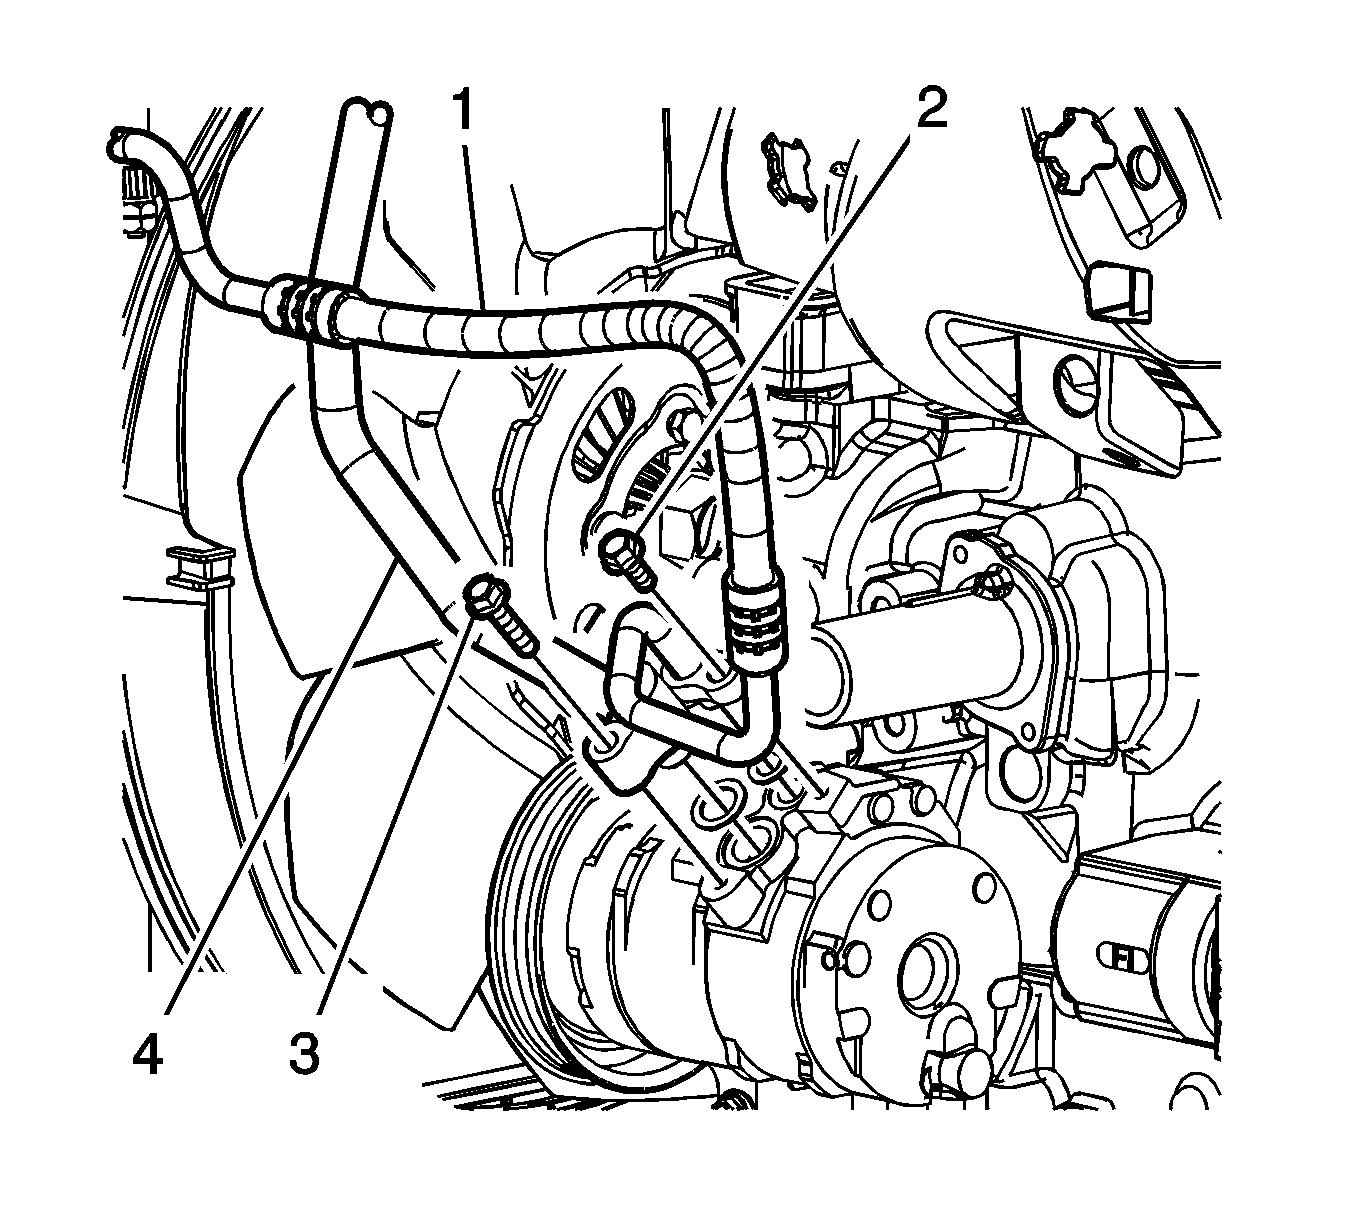
- Remove the A/C discharge hose bolt 2 from the A/C compressor.
- Remove the A/C suction hose bolt 3 from the compressor.
- Remove the A/C compressor hoses (1,4) from the A/C compressor.
- Remove and discard the sealing washers.
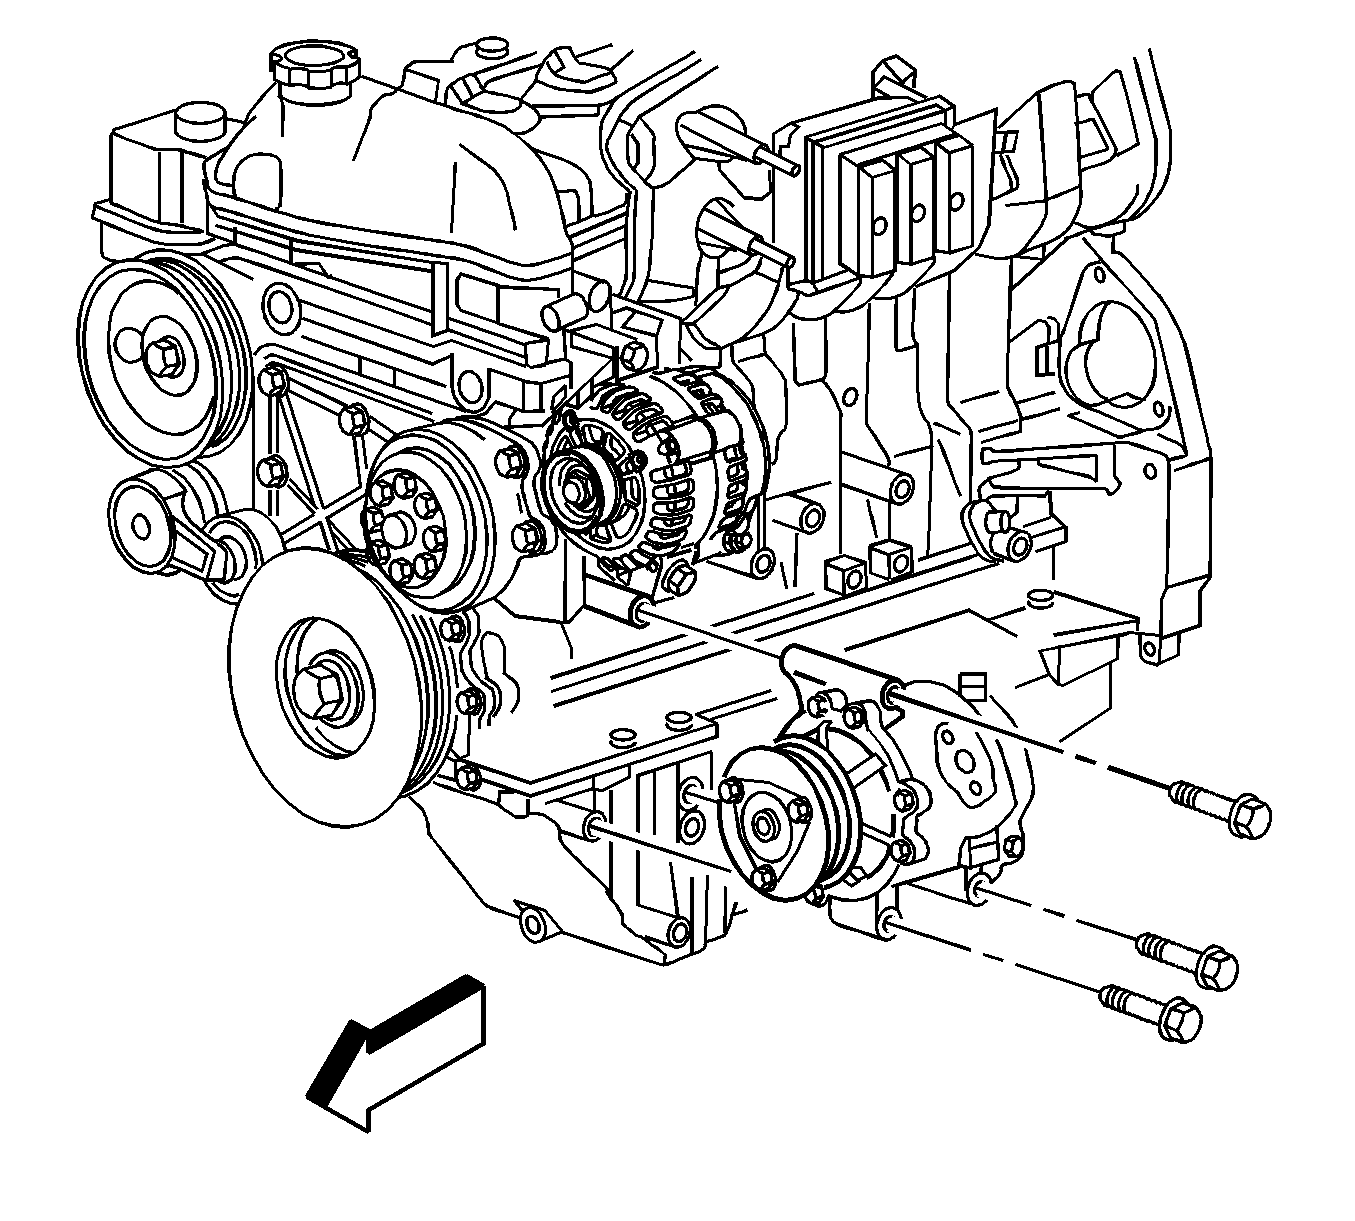
- Remove the A/C compressor mounting bolts from the A/C compressor.
- Remove the A/C compressor from the vehicle.
- Drain and measure the A/C compressor oil. Refer to Air Conditioning Compressor Oil Balancing .
Important: Some system pressure may still exist in the A/C compressor crankcase after you evacuate the system.
Installation Procedure
- Adjust the proper amount of oil to the replacement compressor. Refer to Refrigerant System Capacities .
- Install A/C the compressor to the vehicle.
- Install the A/C compressor mounting bolts.
- Install new sealing washers to the A/C hoses.
- Install the A/C compressor hoses to the A/C compressor.
- Install the A/C suction hose bolt (3).
- Install the A/C discharge hose bolt.
- Connect the compressor electrical connectors.
- Install the cooling fan and shroud. Refer to Fan Replacement .
- Install the drive belt. Refer to Drive Belt Replacement .
- Install the left front wheelhouse liner. Refer to Wheelhouse Panel Replacement .
- Install the left front tire. Refer to Tire and Wheel Removal and Installation .
- Evacuate and recharge the A/C system. Refer to Refrigerant Recovery and Recharging .
- Using J 39400-A leak test the fittings .
Notice: Refer to Fastener Notice in the Preface section.
Tighten
Tighten the bolts to 50 N·m (37 lb ft).
Tighten
Tighten the bolts to 33 N·m (24 lb ft).
