Windshield Washer Solvent Container Replacement Prior to VIN 78135604
Removal Procedure
- Remove the air cleaner assembly. Refer to Air Cleaner Assembly Replacement
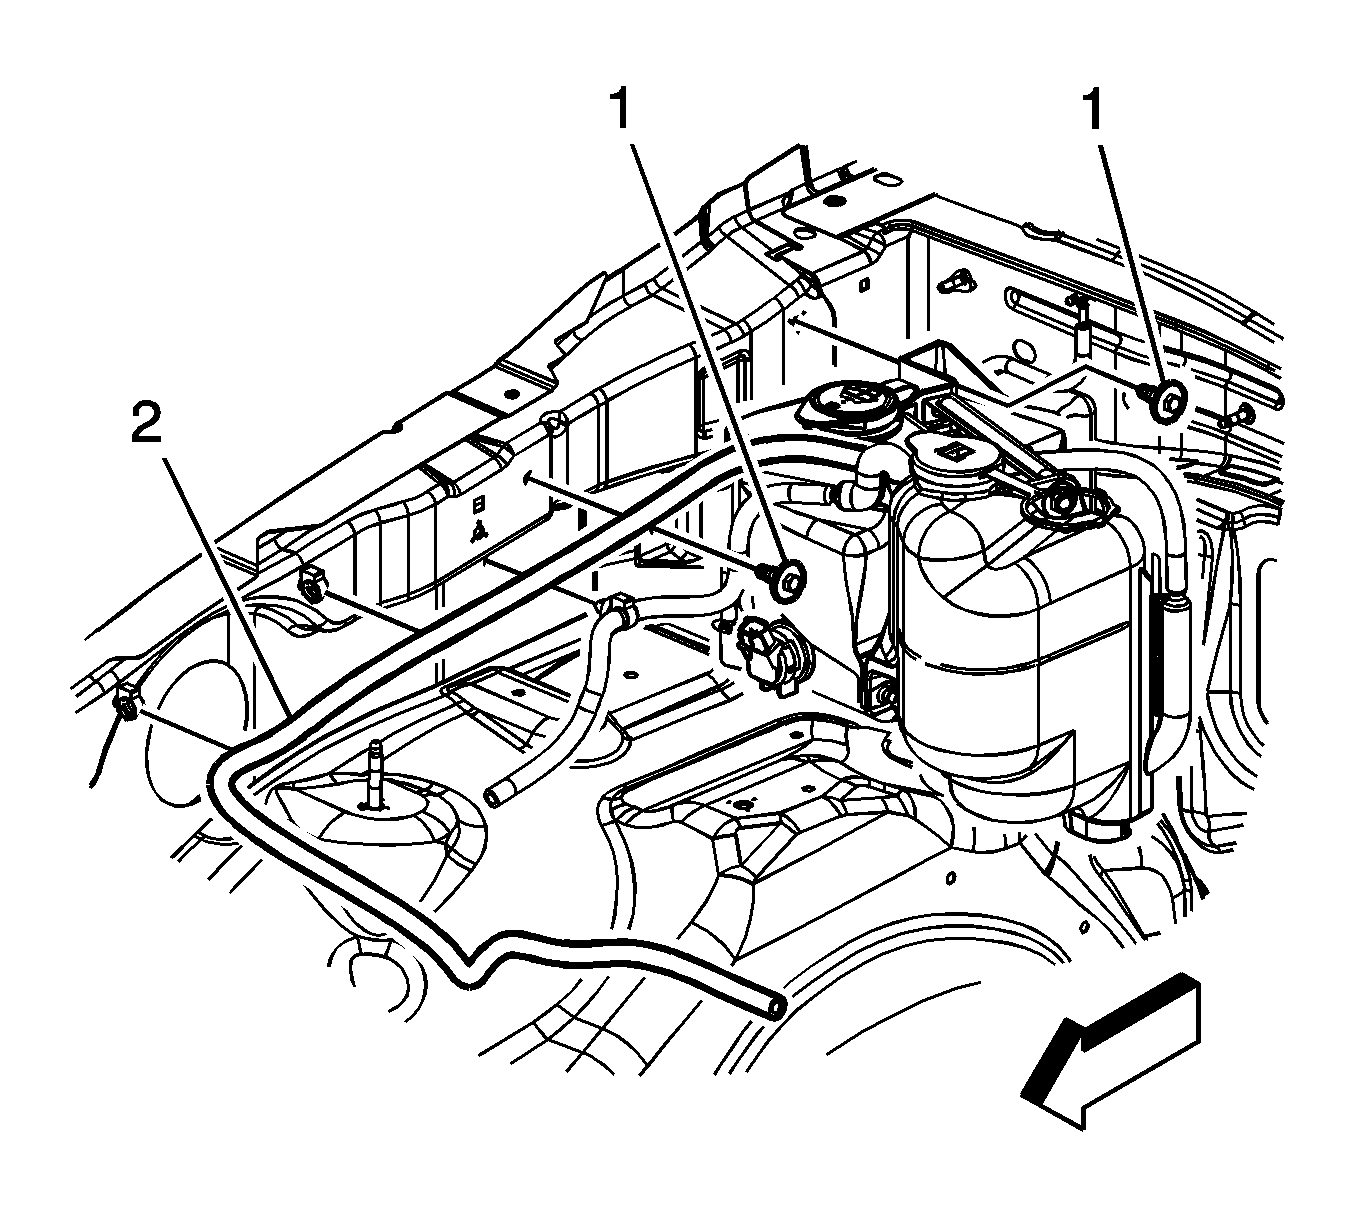
- Remove the washer container to front wheelhouse upper extension bolts (1).
- Disconnect the coolant overflow hose (2) from the wheelhouse upper extension retainer clips.
- Pinch the coolant hose to prevent coolant loss and remove the hose.
- Remove the lower coolant reservoir bolt.
- Disconnect both washer pump electrical connectors.
- Disconnect both washer pump jumper hoses from the air inlet grille panel connections.
- Lift the washer/coolant reservoir assembly from the lower inner fender assembly.
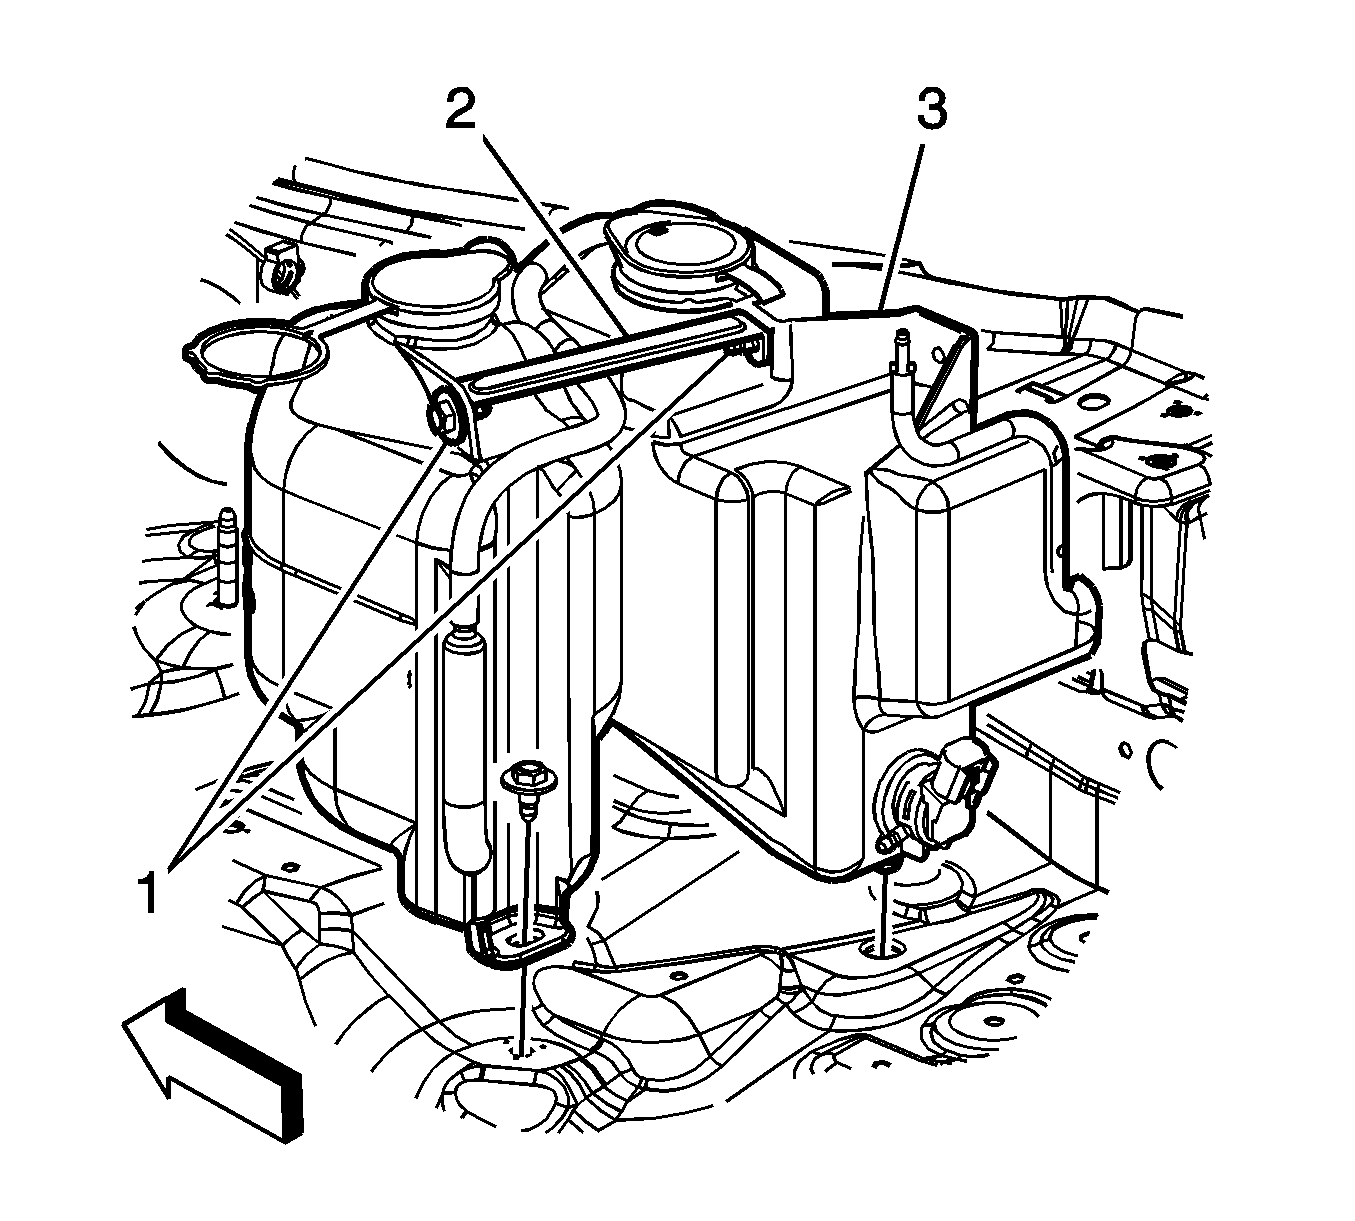
- Remove the bracket bolts (1) and the bracket (2) from the two containers and discard.
Installation Procedure
- Open the black conduit and cut off the front washer pump electrical harness connector.
- Splice in the new front washer pump electrical connector harness. Refer to Wiring Repairs .
- Open the black conduit and cut off the rear washer pump electrical harness connector.
- Splice in the new rear washer pump electrical connector harness.
- Install the new front and rear washer pumps to the washer container.
- Position the new windshield washer/coolant recovery reservoir assembly to the lower inner fender assembly.
- Connect both new washer pump electrical connectors to the front and rear washer pumps.
- Secure the jumper hoses to the washer pumps.
- Connect both washer pump jumper hoses to the air inlet grille panel hose connections.
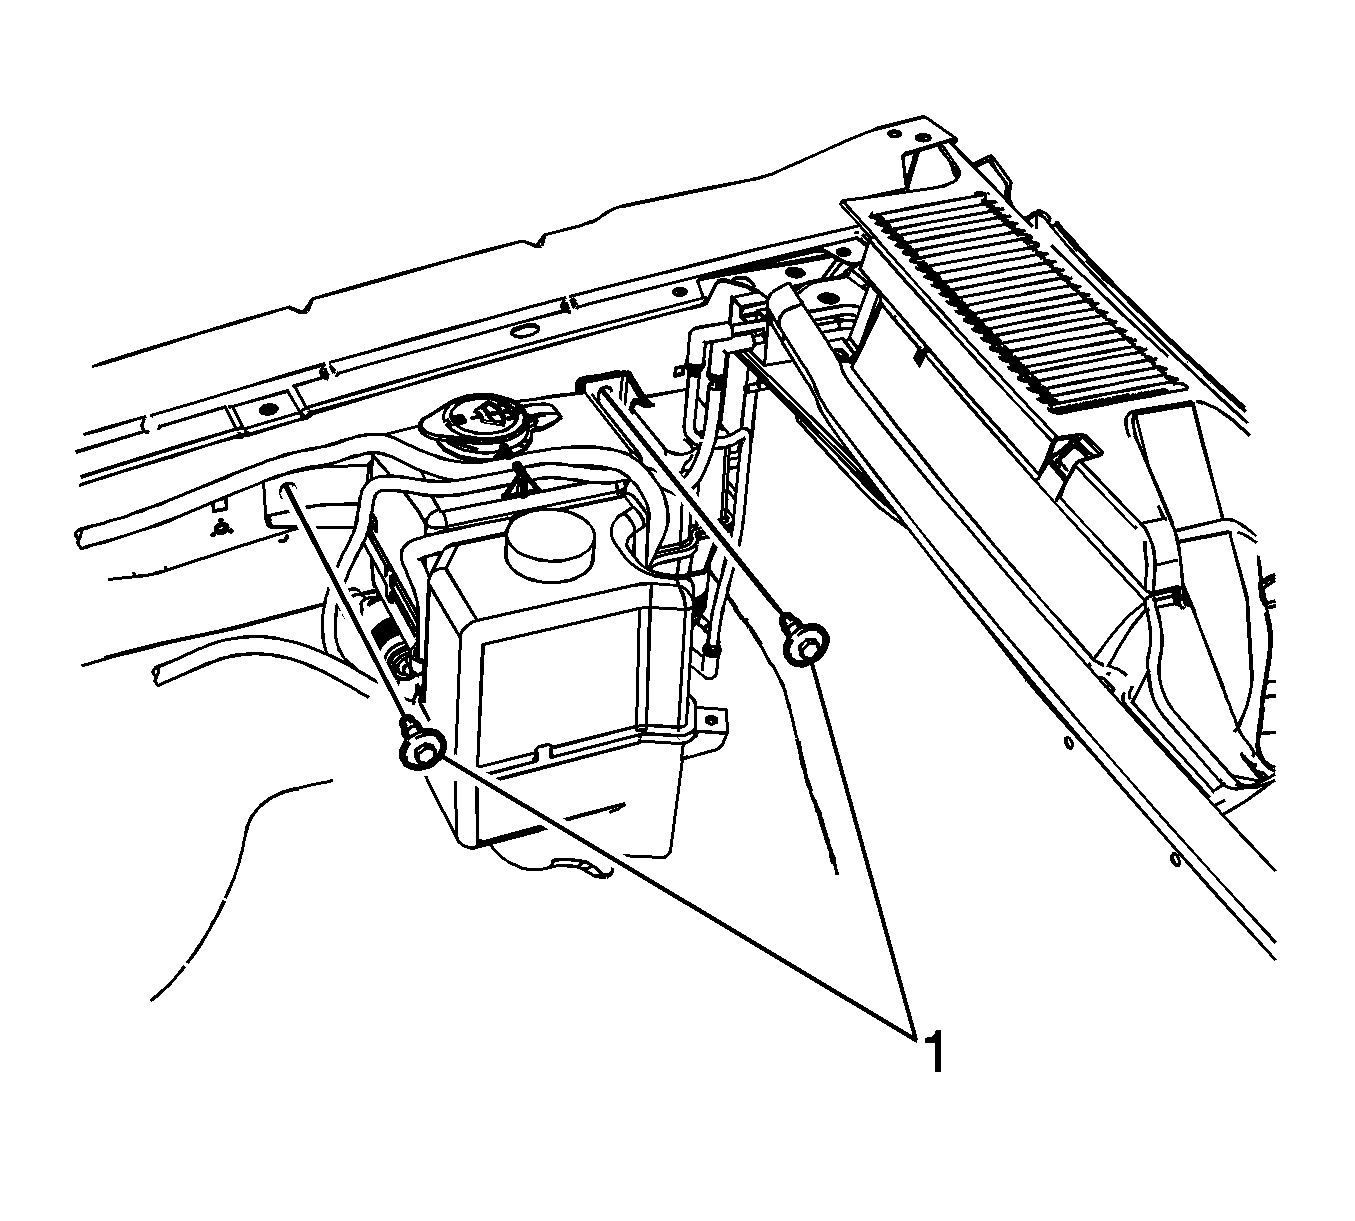
- Install the 2 washer container to front wheelhouse upper extension bolts (1).
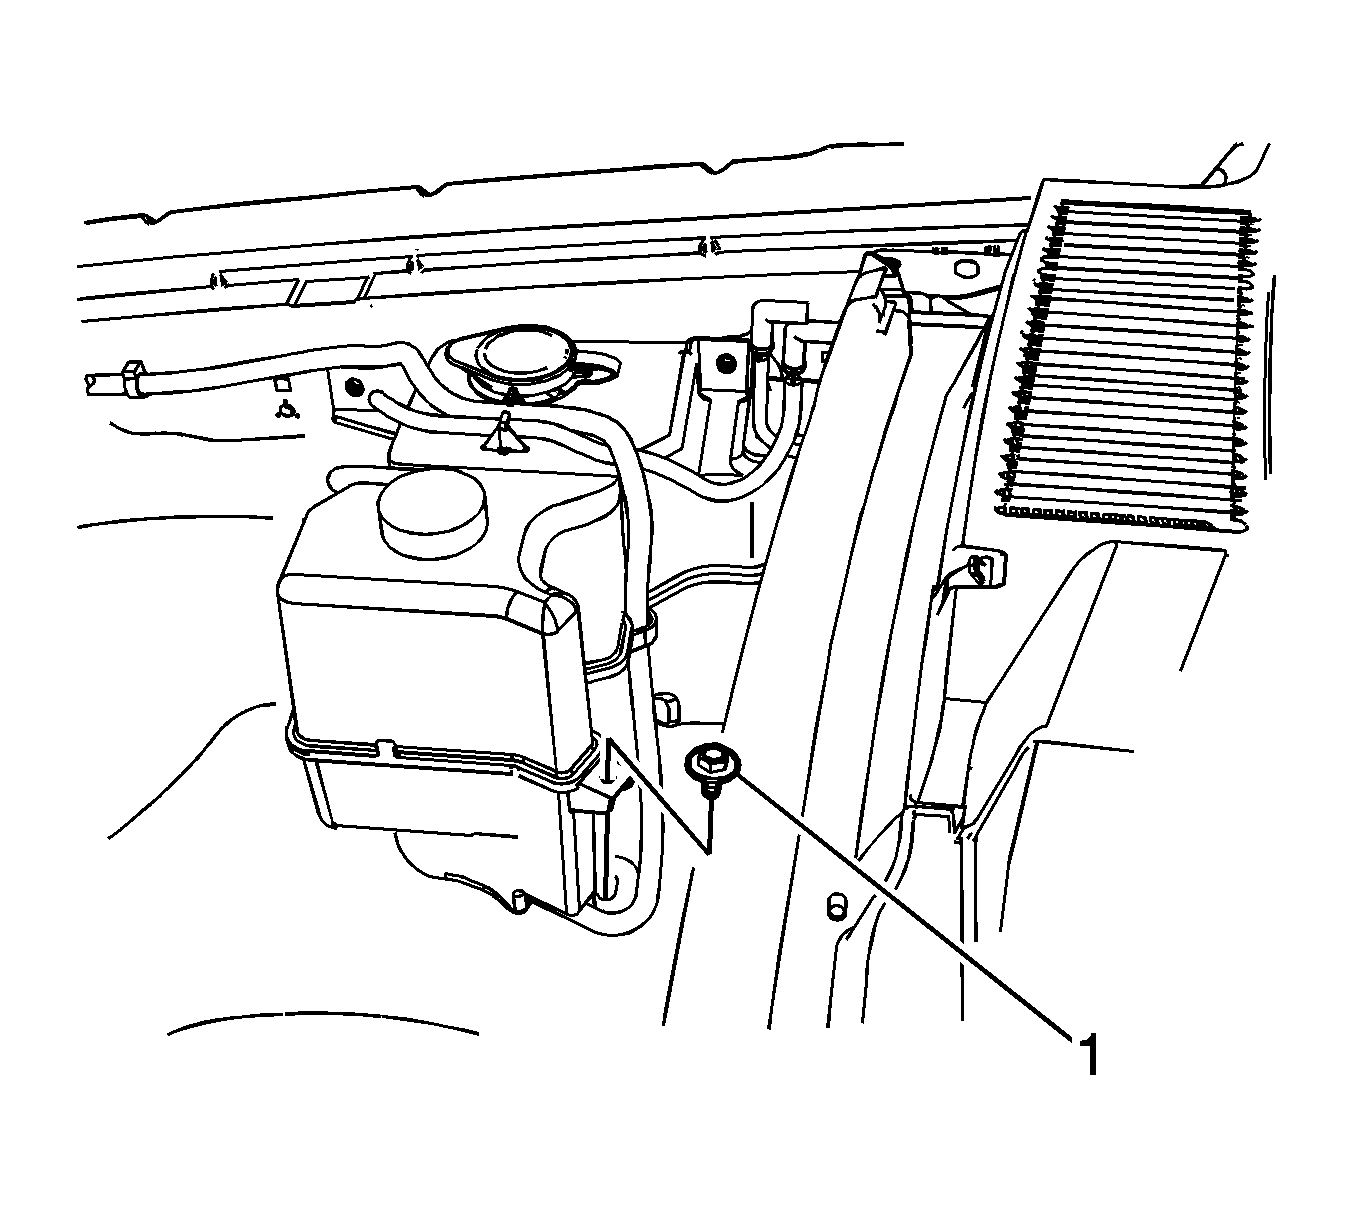
- Install the coolant recovery reservoir bolt (1).
- Install the new coolant reservoir overflow hose and secure the plastic retaining clips on the front upper wheelhouse extension.
- Refill the windshield washer solvent container.
- Fill and top off the engine coolant reservoir.
- Install the air cleaner assembly. Refer to Air Cleaner Assembly Replacement .
- Verify the operation of the windshield wiper washer system.
- Inspect for any fluid leakage.
Notice: Refer to Fastener Notice in the Preface section.
Tighten
9 N·m (80 lb in)
Tighten
9 N·m (80 lb in)
Windshield Washer Solvent Container Replacement Base
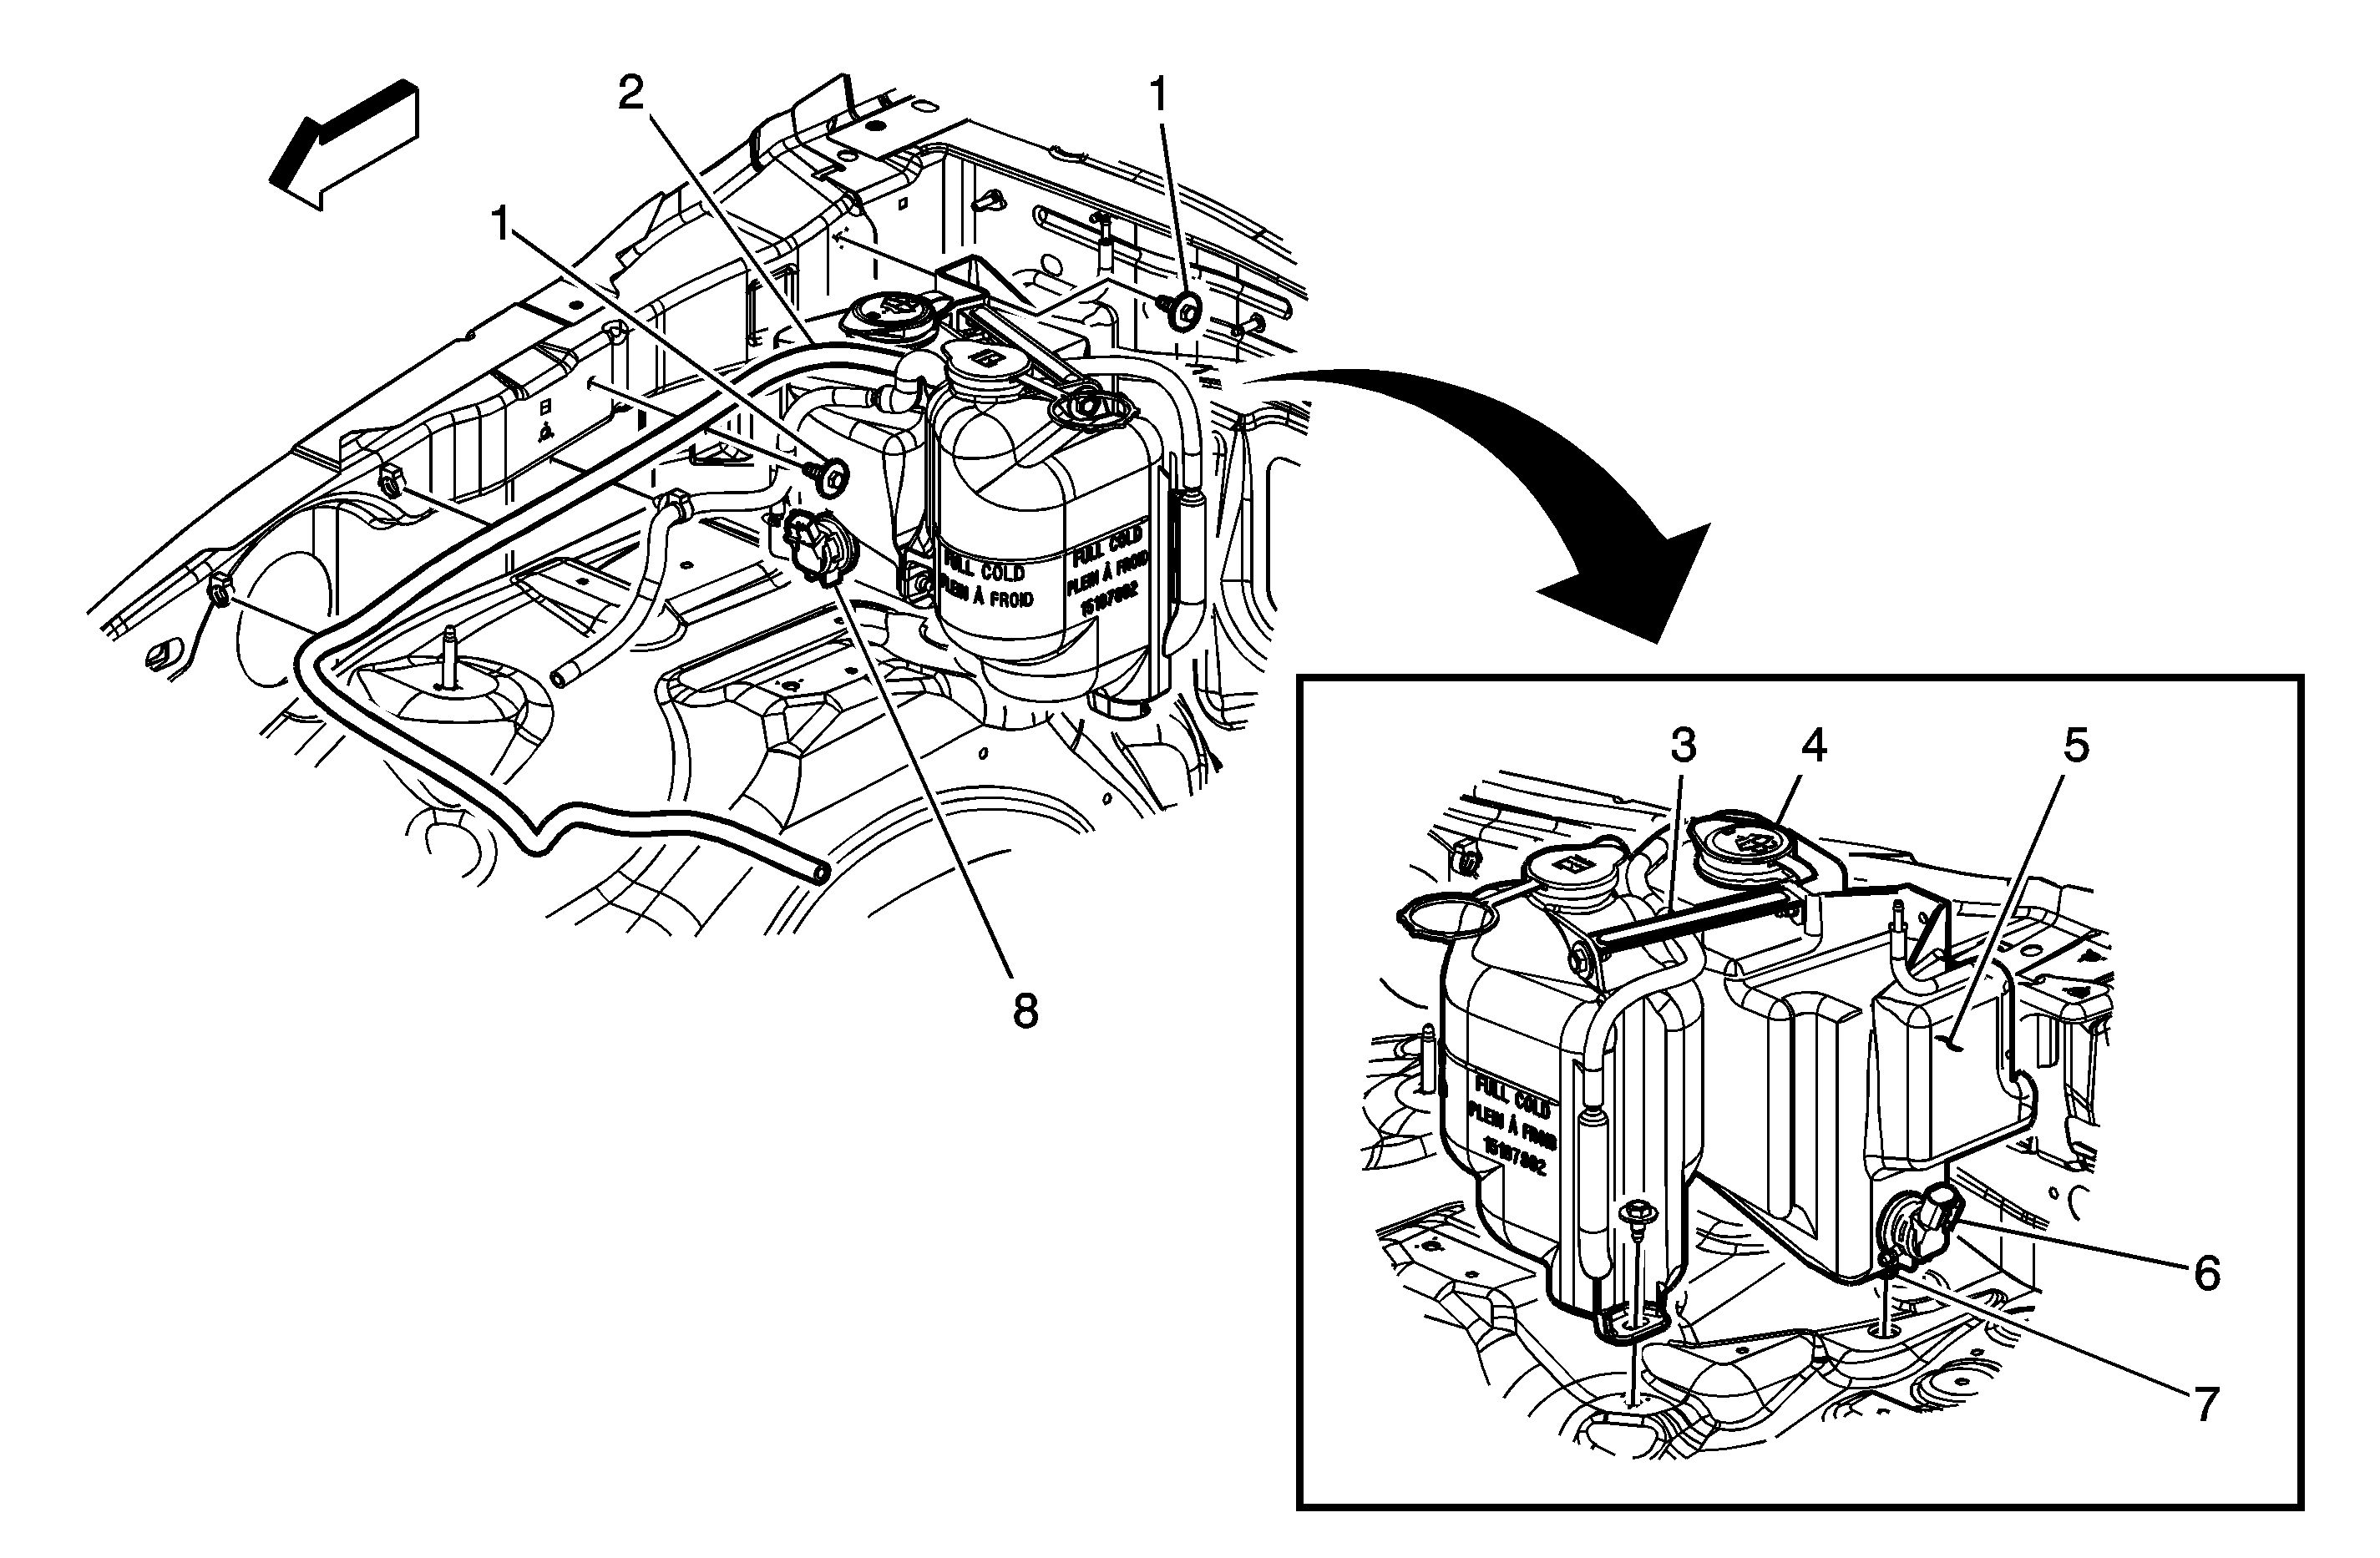
Callout | Component Name |
|---|---|
Preliminary Procedure
| |
1 | Washer Solvent Container Bolt (Qty: 2) Notice: Refer to Fastener Notice in the Preface section. Tighten |
2 | Washer Solvent Container Cap |
3 | Washer Solvent/Coolant Recovery Tank Bracket Bolt Tighten |
4 | Washer Solvent/Coolant Recovery Tank Bracket |
5 | Washer Container Rear Washer Pump Hose |
6 | Front Washer Pump with Grommet |
7 | Washer Container Front Washer Pump Hose |
8 | Rear Washer Pump with Grommet |
Windshield Washer Solvent Container Replacement Post VIN 78135604
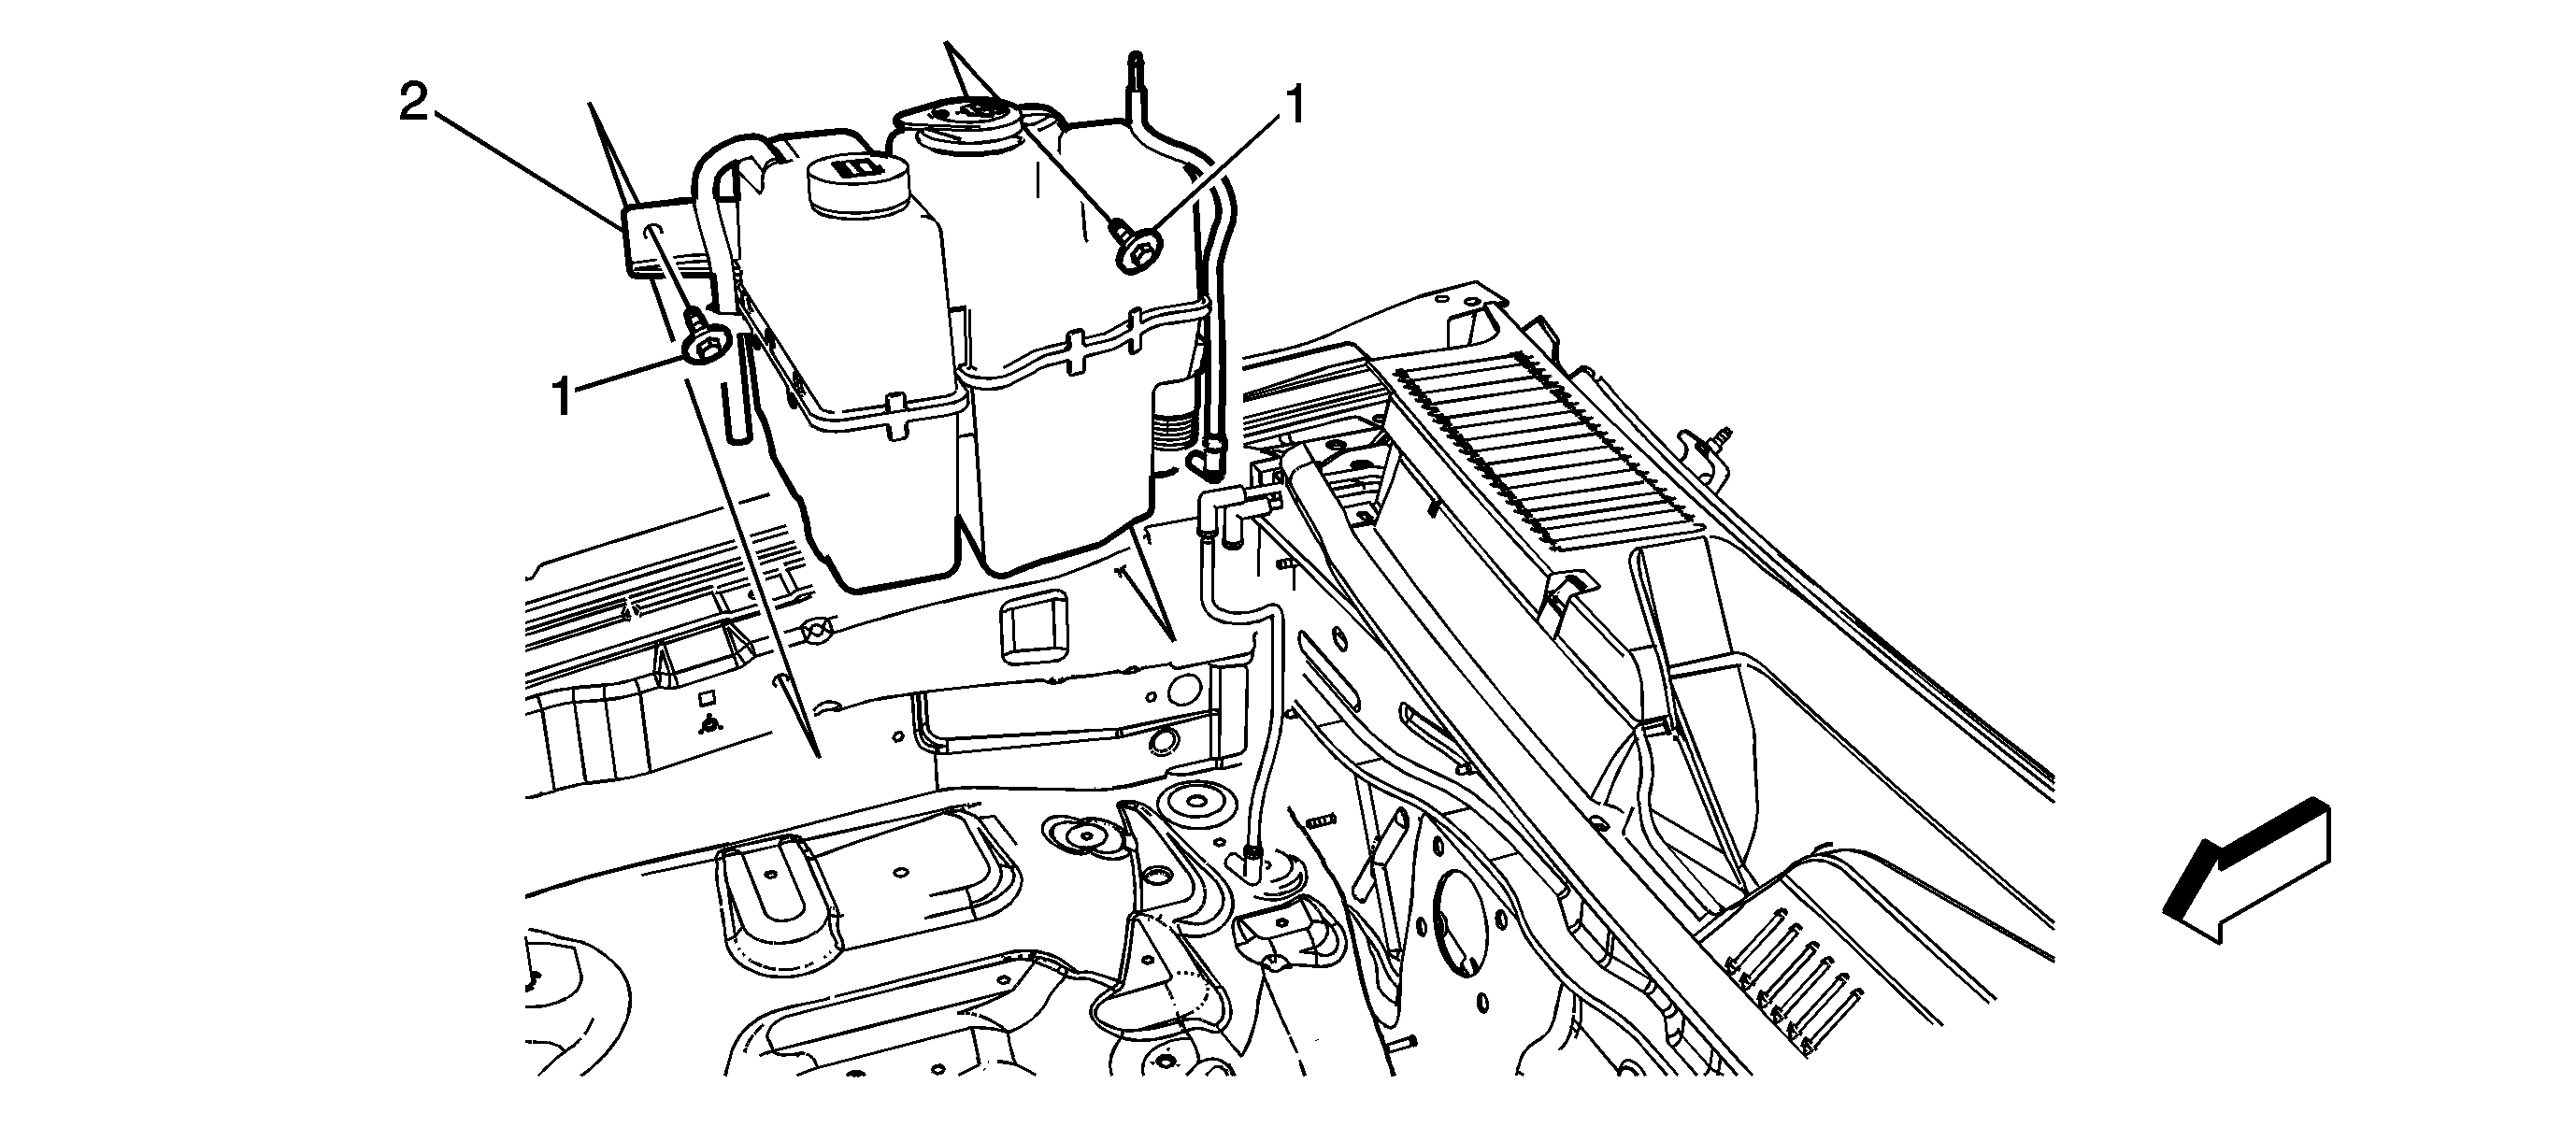
Callout | Component Name |
|---|---|
Preliminary ProcedureRemove the air cleaner assembly. Refer to Air Cleaner Assembly Replacement . | |
1 | Windshield Washer Solvent Container Assembly Bolt (Qty: 2) Notice: Refer to Fastener Notice in the Preface section. Procedure
Tighten |
2 | Windshield Washer Solvent Container Assembly |
