Notice: Refer to Fastener Notice in the Preface section.
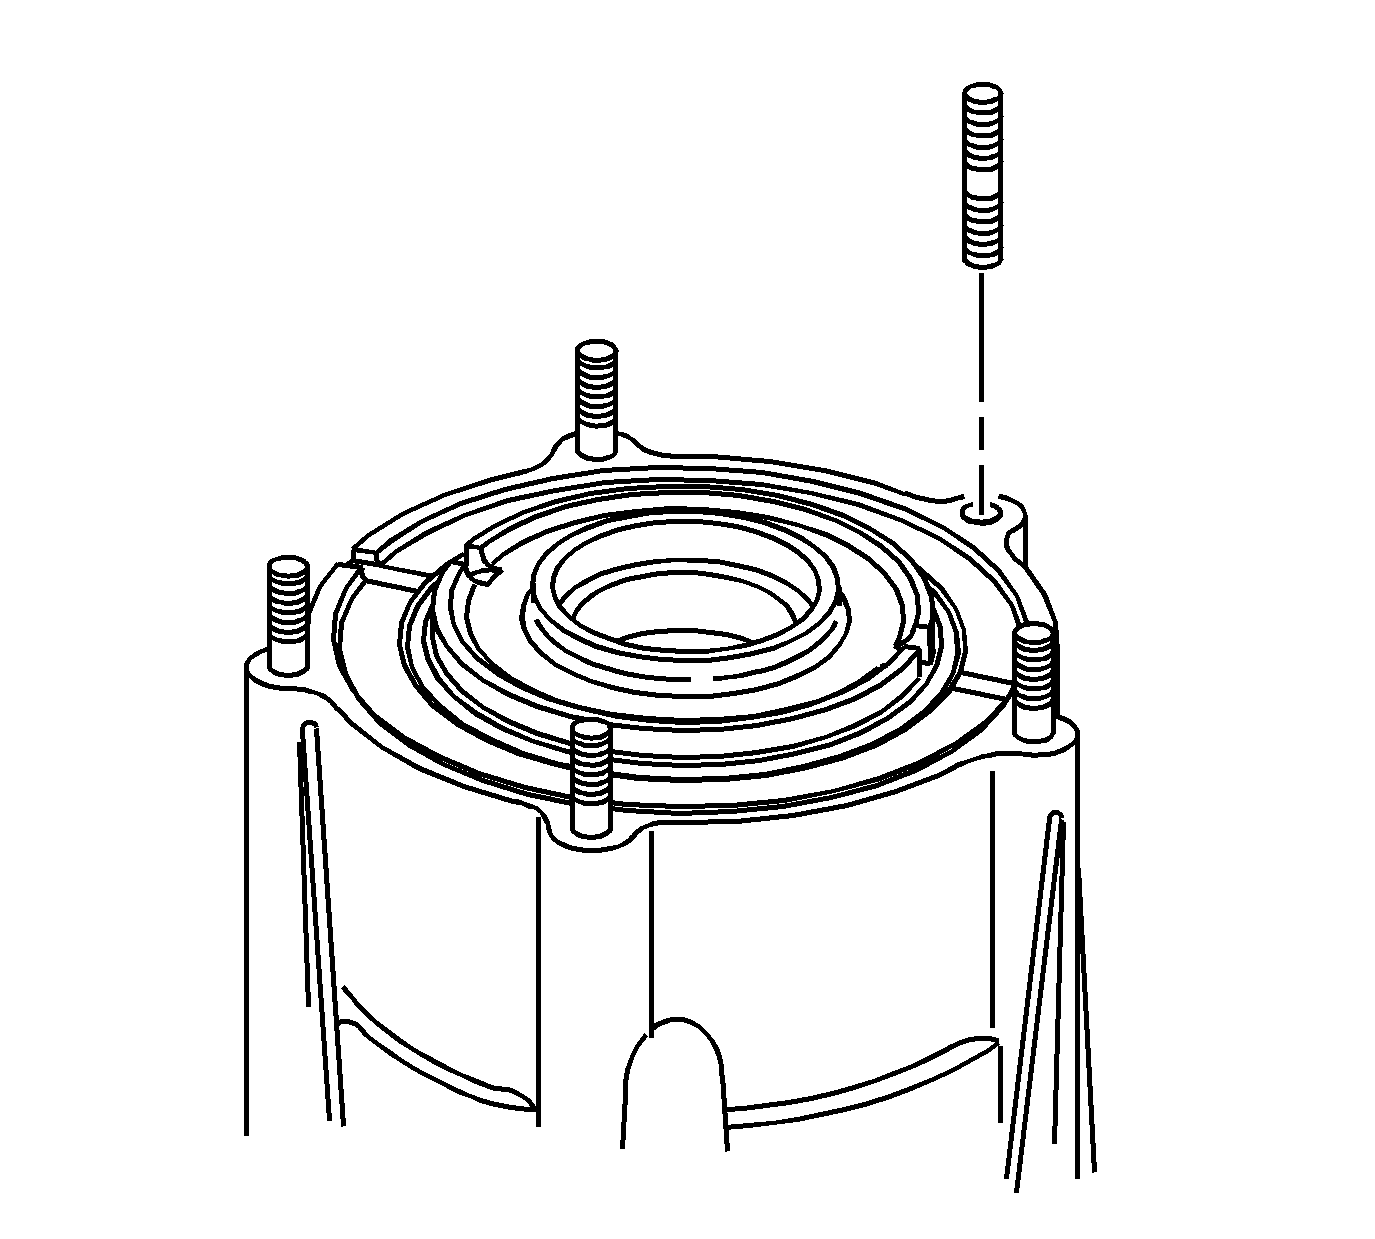
- If removed, install the transfer case mounting studs.
Tighten
Tighten the adapter studs to 14 N·m (10 lb ft).
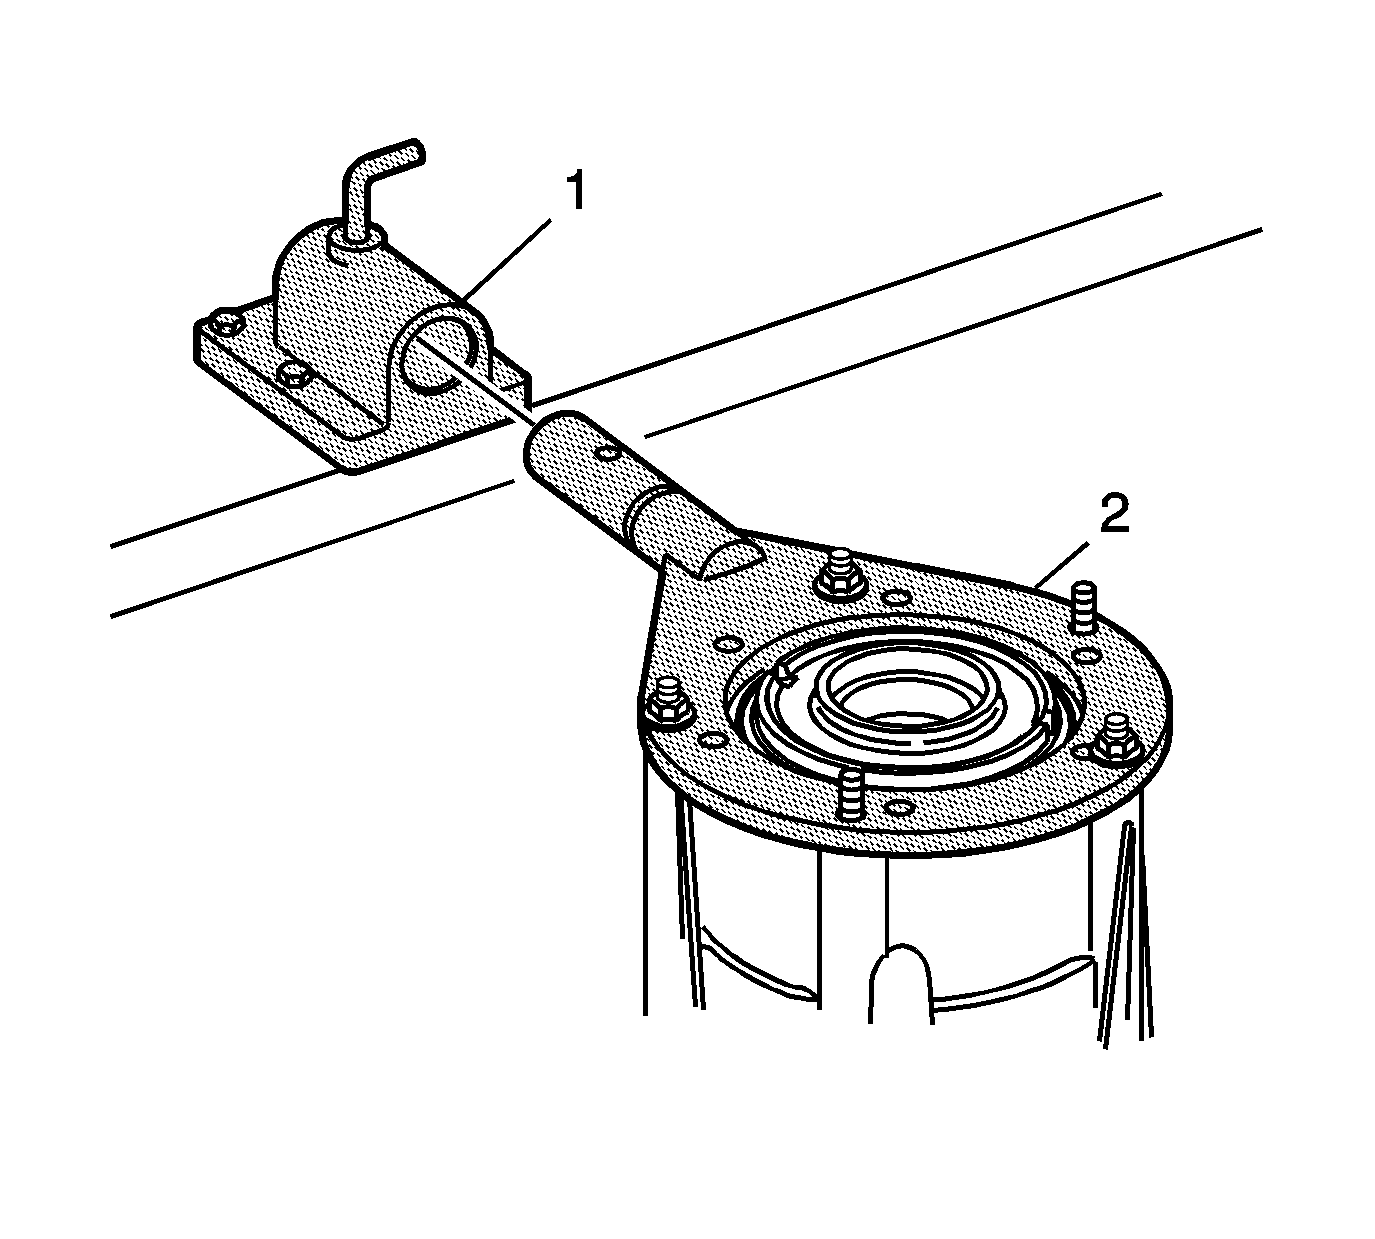
- Using the adapter studs, attach the
J 45759
to the front transfer case. All of the assembly procedures can be performed with the case mounted to the
J 45759
.
- Install the
J 45759
(2) into the
J 3289-20
(1) and secure with the pivot pin.
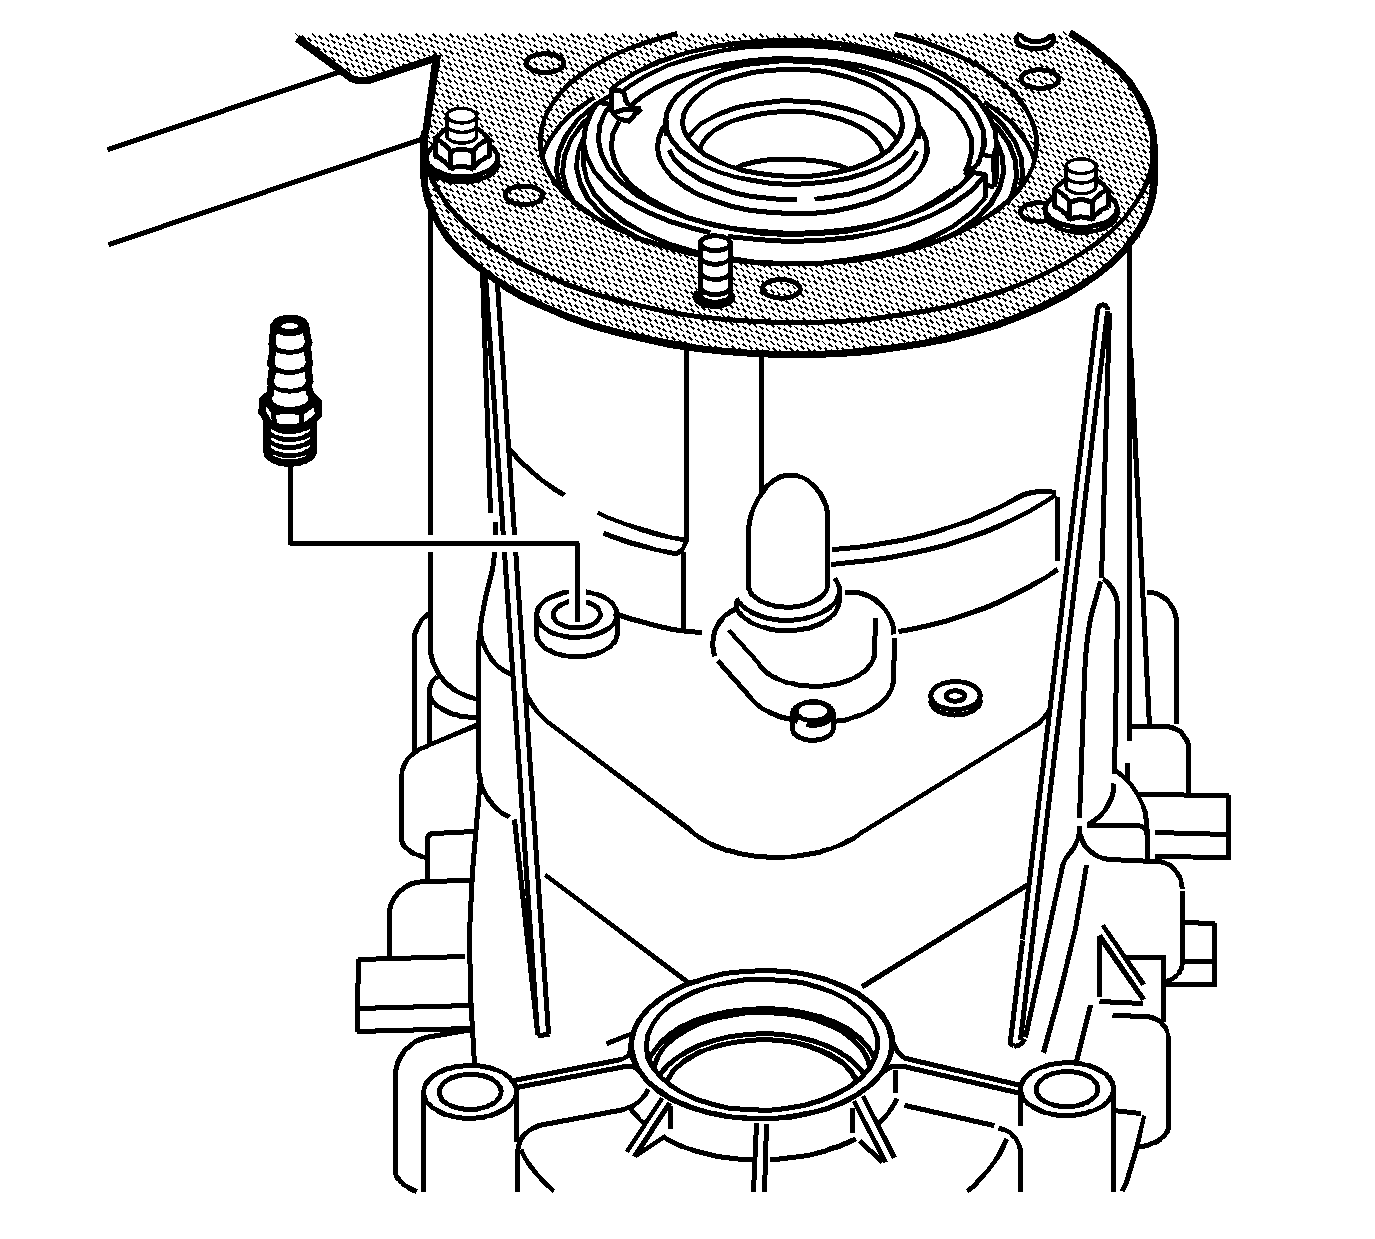
- If the vent is removed, apply pipe sealant GM P/N 12346004 (Canadian P/N 10953480)
to the threads on the vent.
- Install the vent.
Tighten
Tighten the vent to 6 N·m (53 lb in).
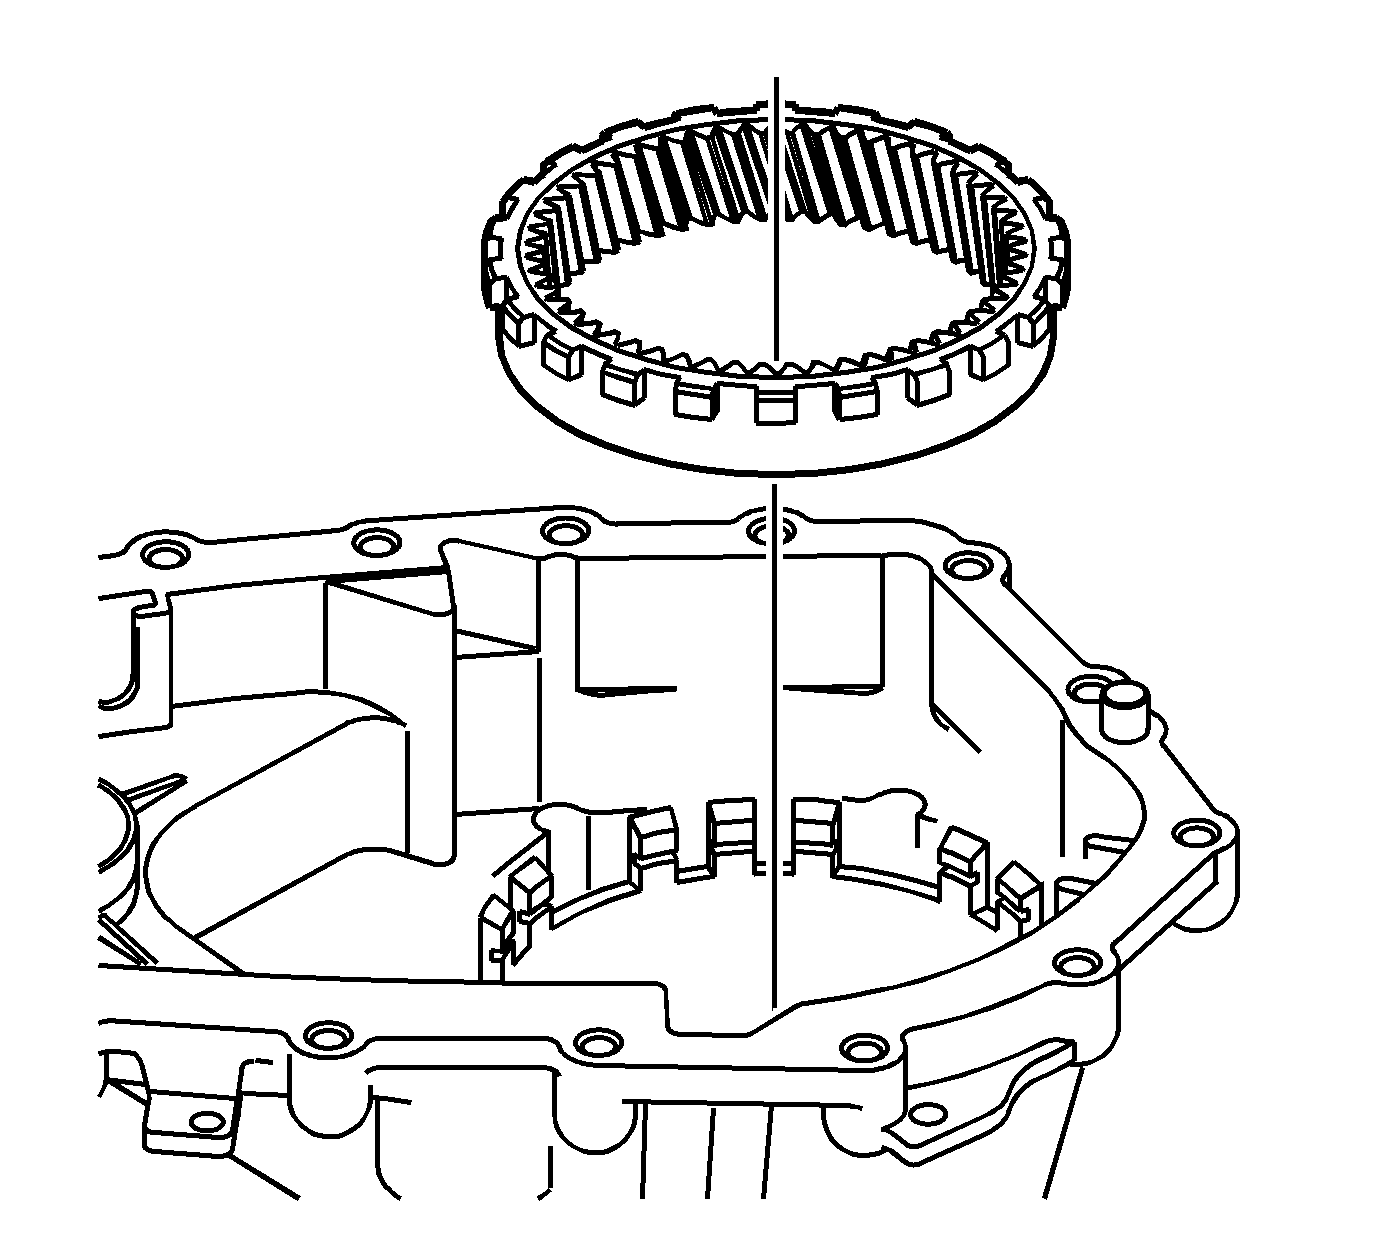
- Install the ring gear in the front case half.
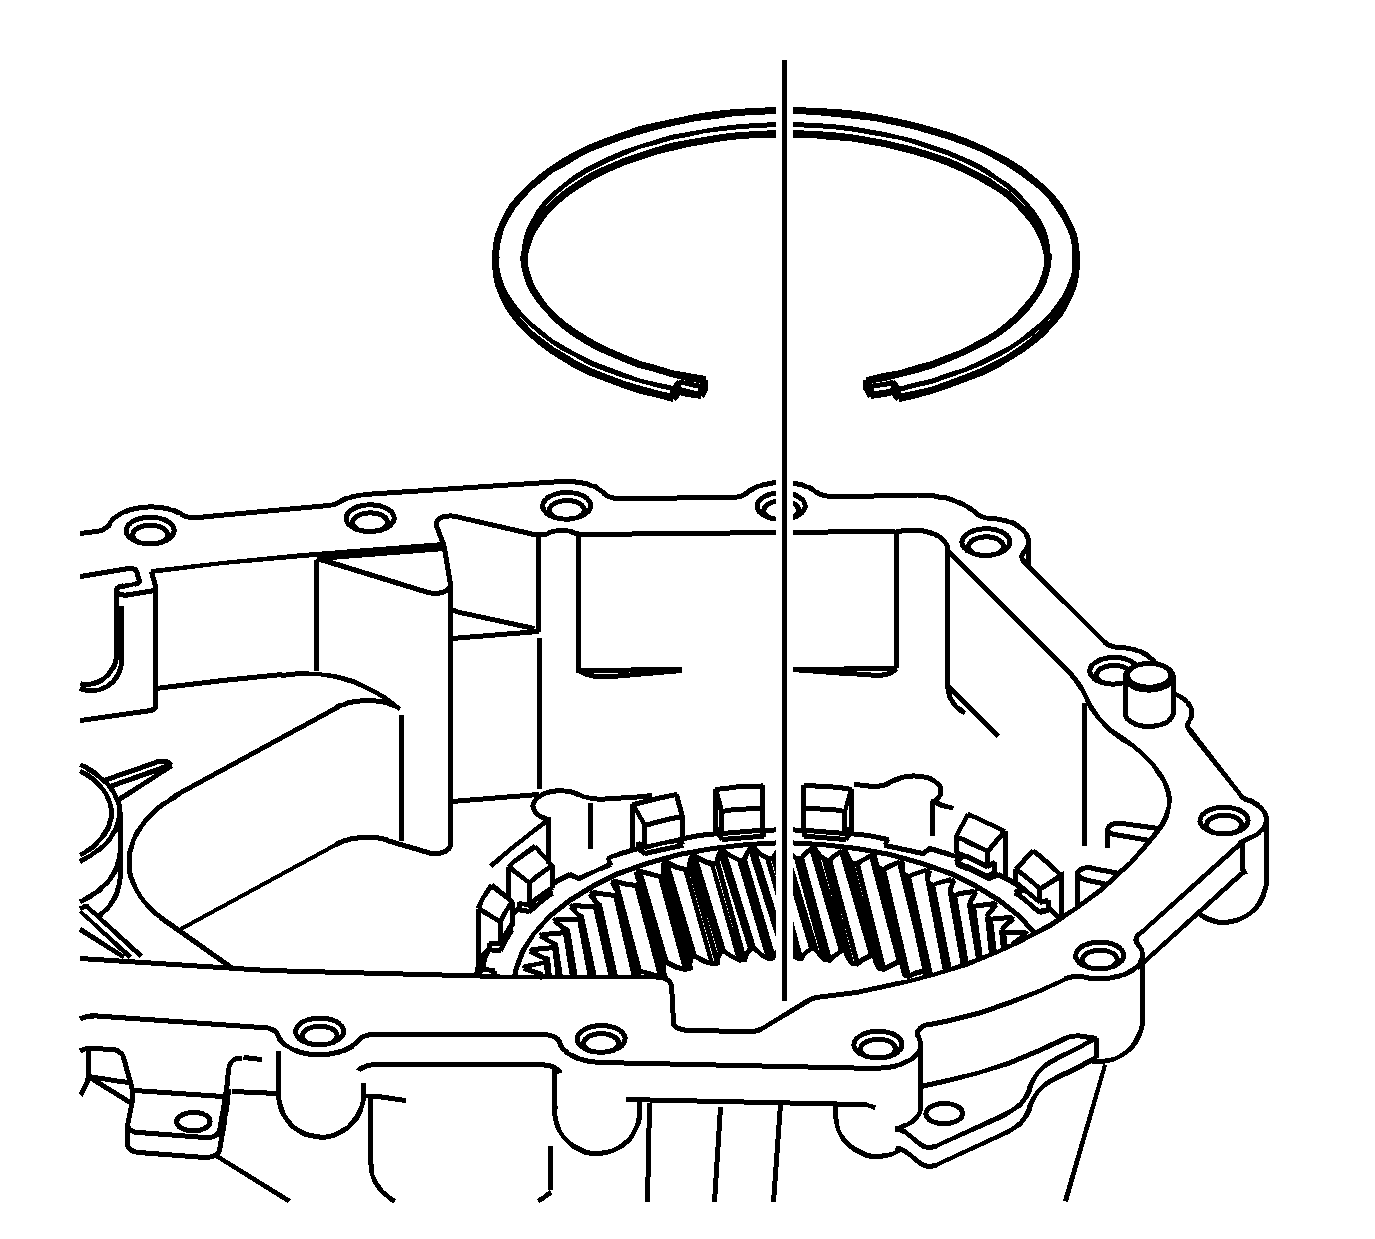
- Install a NEW ring gear retaining ring.
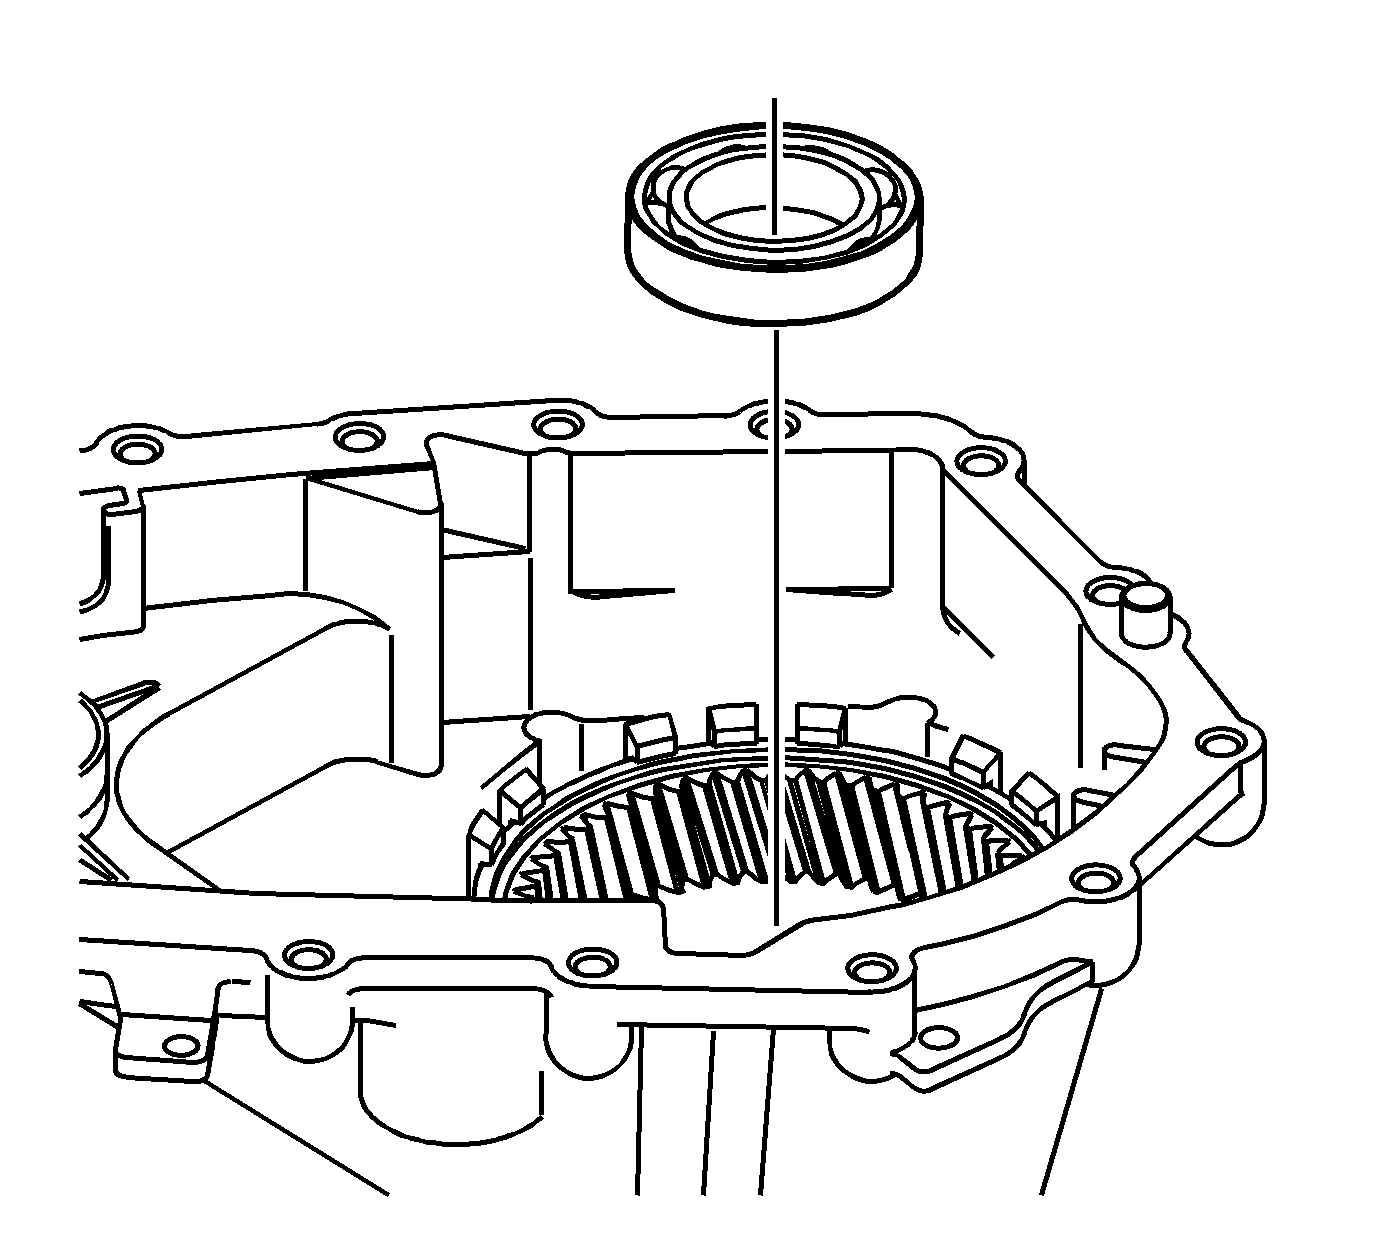
Important: Lubricate all of the bearings and bearing journals with transfer case fluid during installation.
- Install the input shaft bearing in the front case half.
| • | Use a hammer and a brass drift only on the outer bearing race. |
| • | Ensure the bearing is kept square to the bore while installing. |
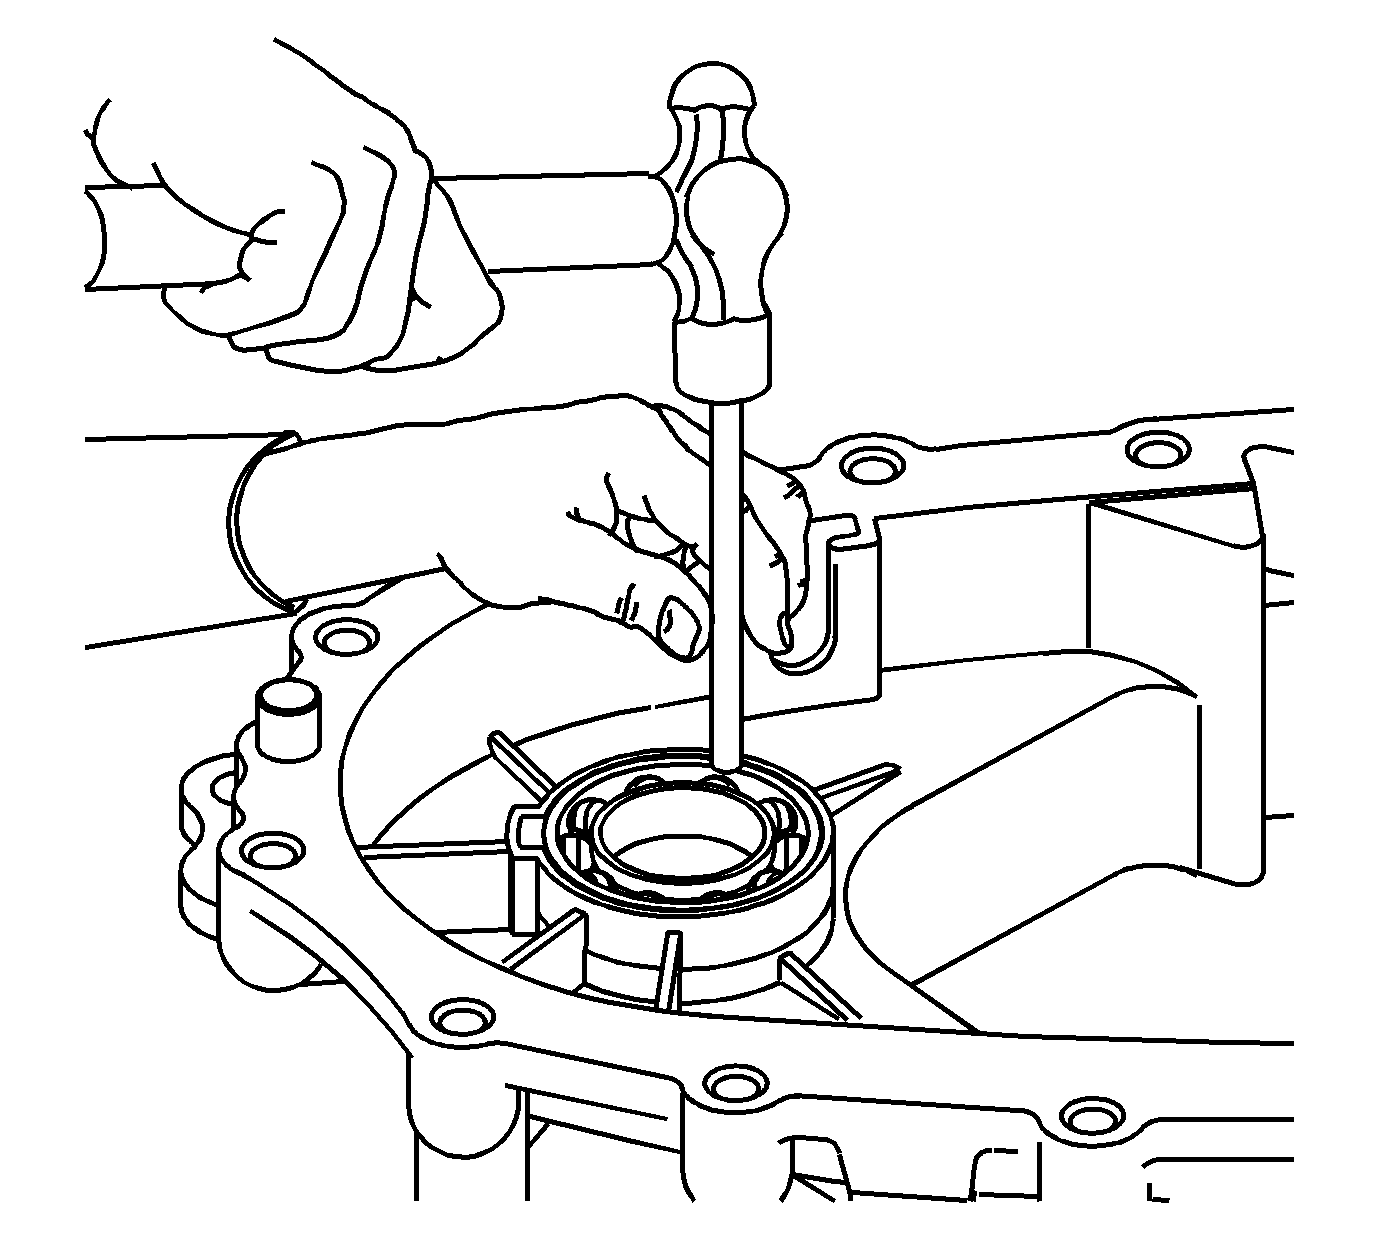
- Install the front output shaft front
bearing in the front case half.
| • | Use a hammer and a brass drift only on the outer bearing race. |
| • | Ensure the bearing is kept square to the bore while installing. |
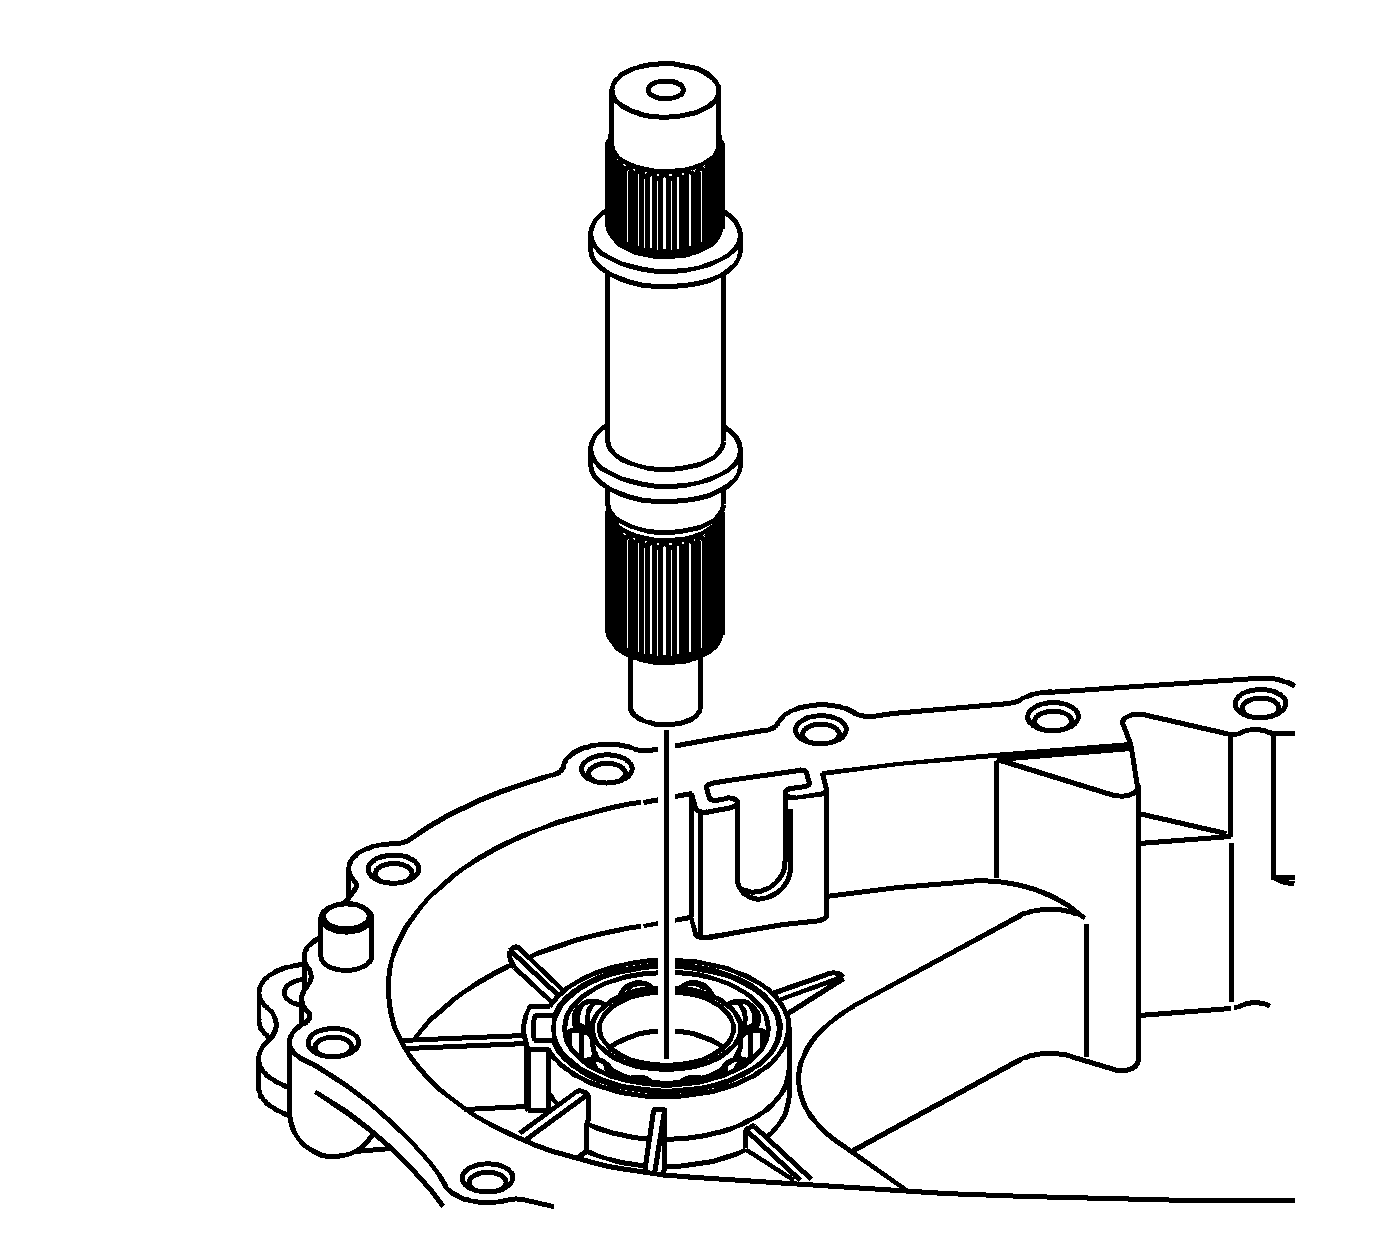
- Install the front output shaft.
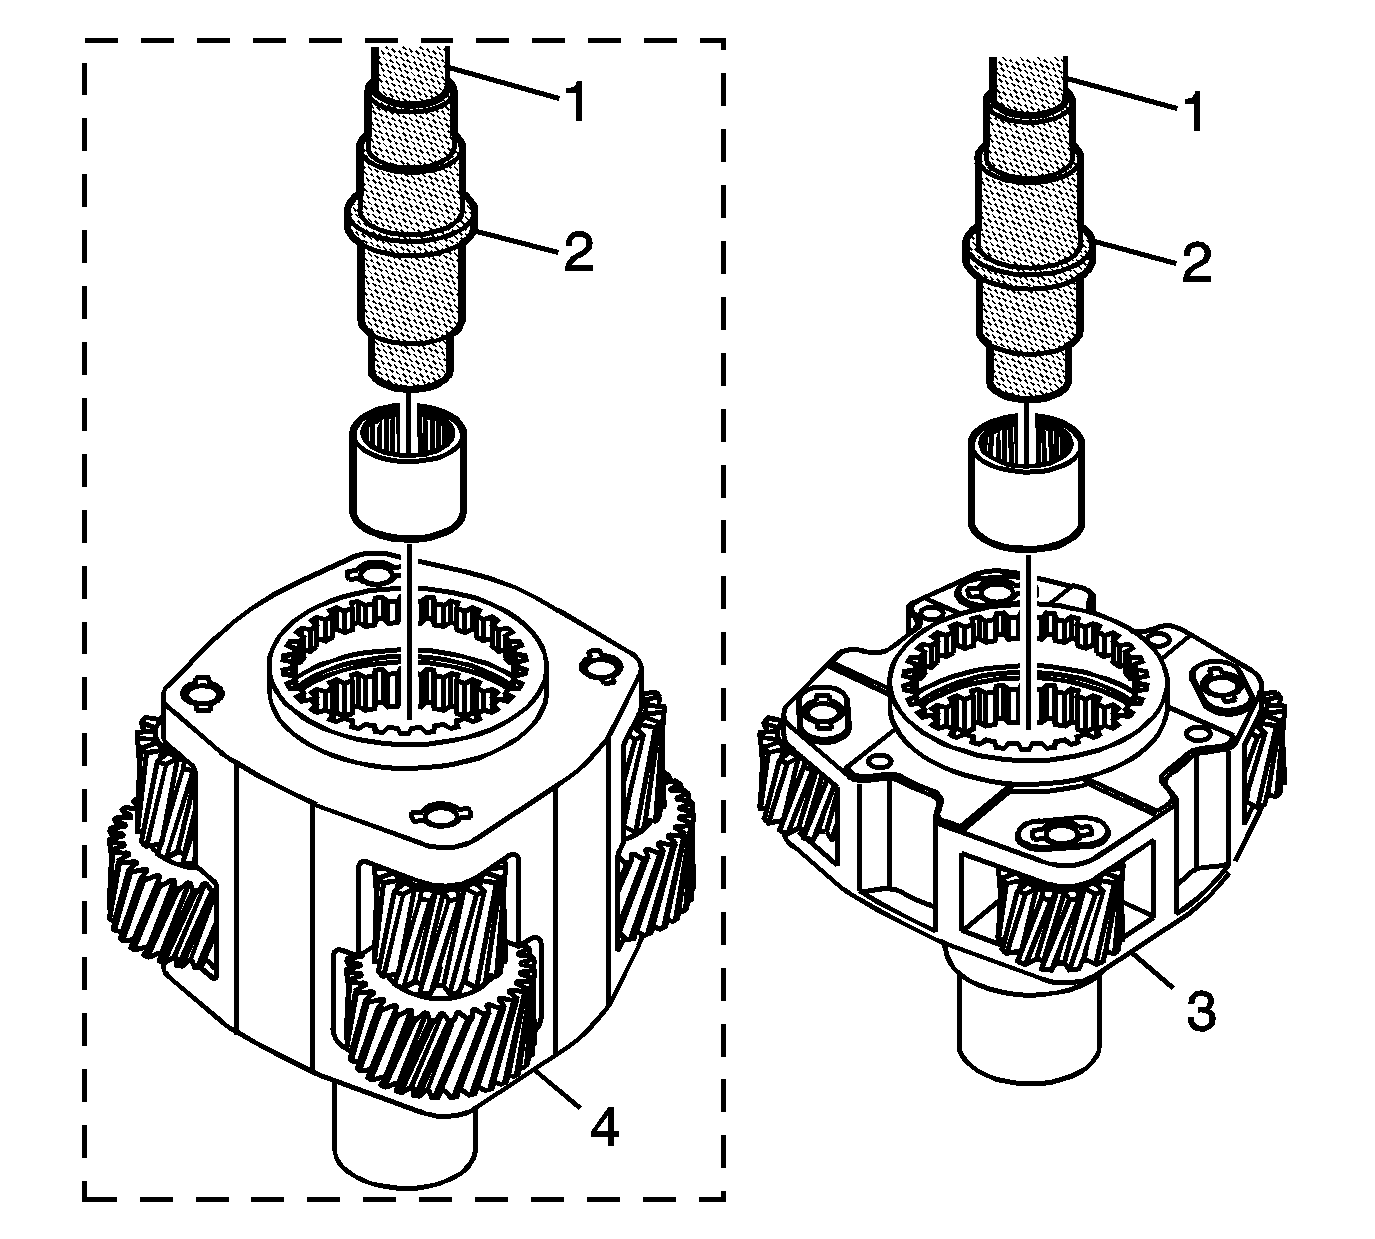
Important: DT-47946
is a double ended tool. In order to install the mainshaft front support bearing to the proper depth, ensure the correct end of the
DT-47946
is used.
For the BW 4493 planetary carrier, the short reach end of the tool is used.
For the BW 4494 planetary carrier, the long reach end of the tool is used.
- Using the
J 42176
(1) and the
DT-47946
(2), install the mainshaft front support bearing in the high/low planetary carrier assembly
model 4493 (3) or 4494 (4).
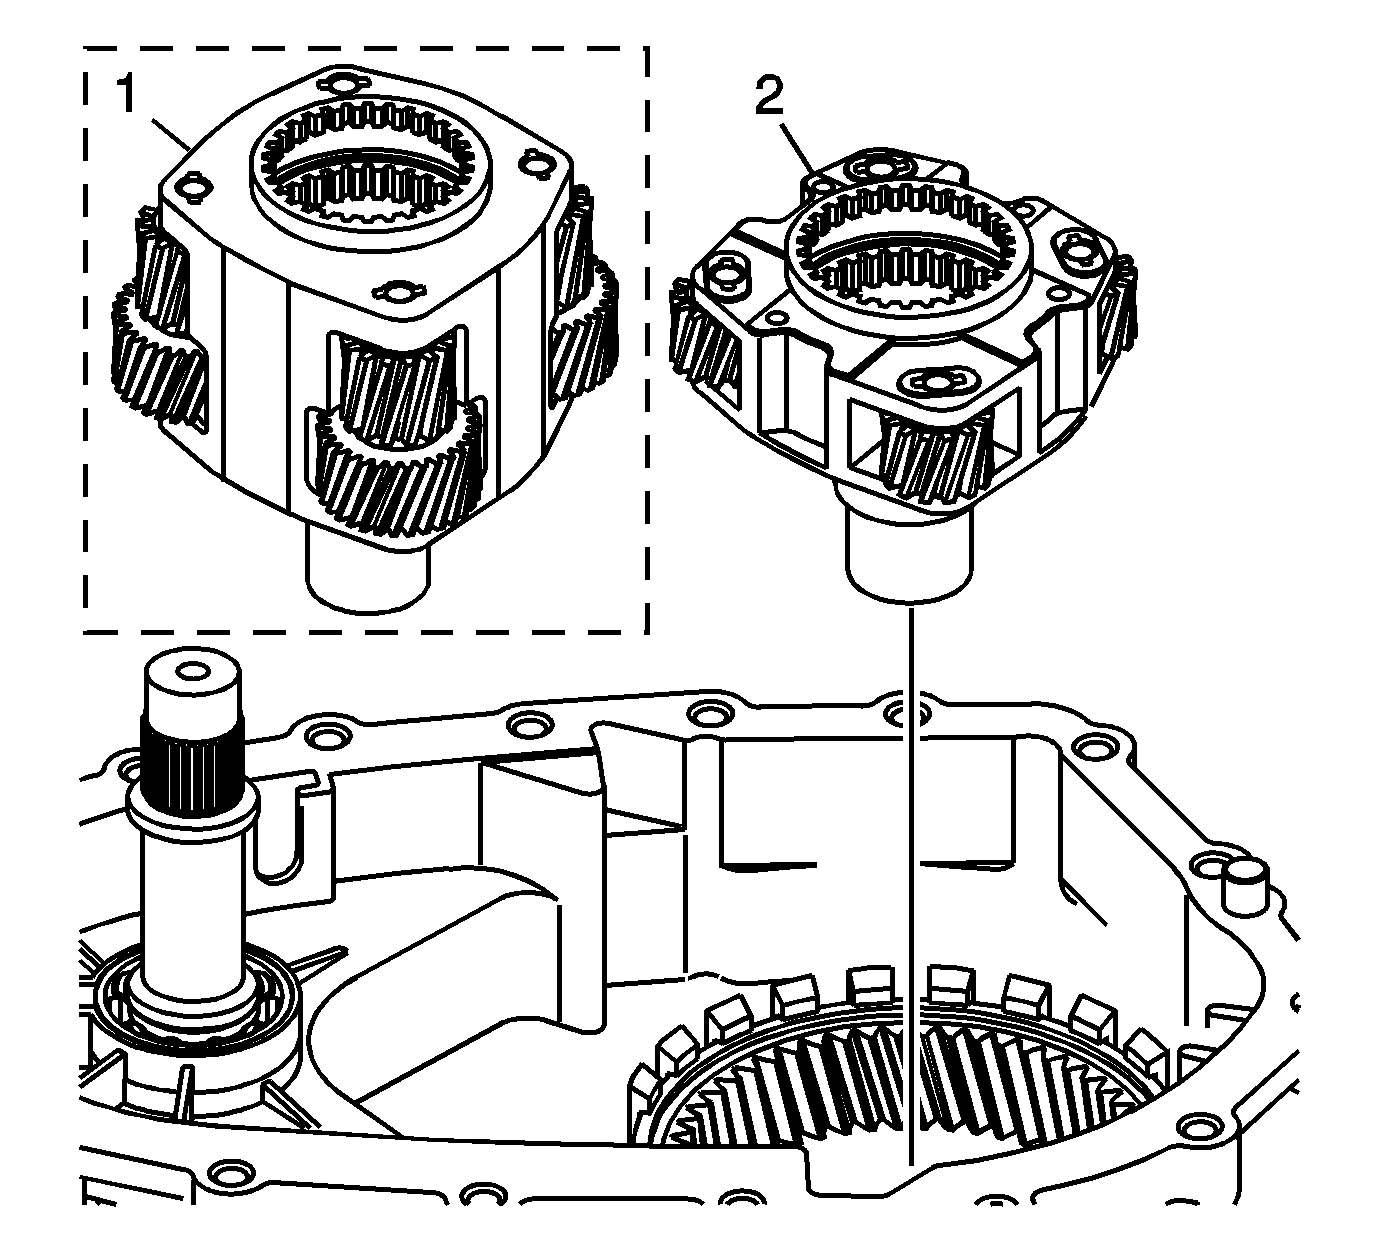
- Install the high/low planetary carrier assembly model 4494 (1) or 4493 (2).
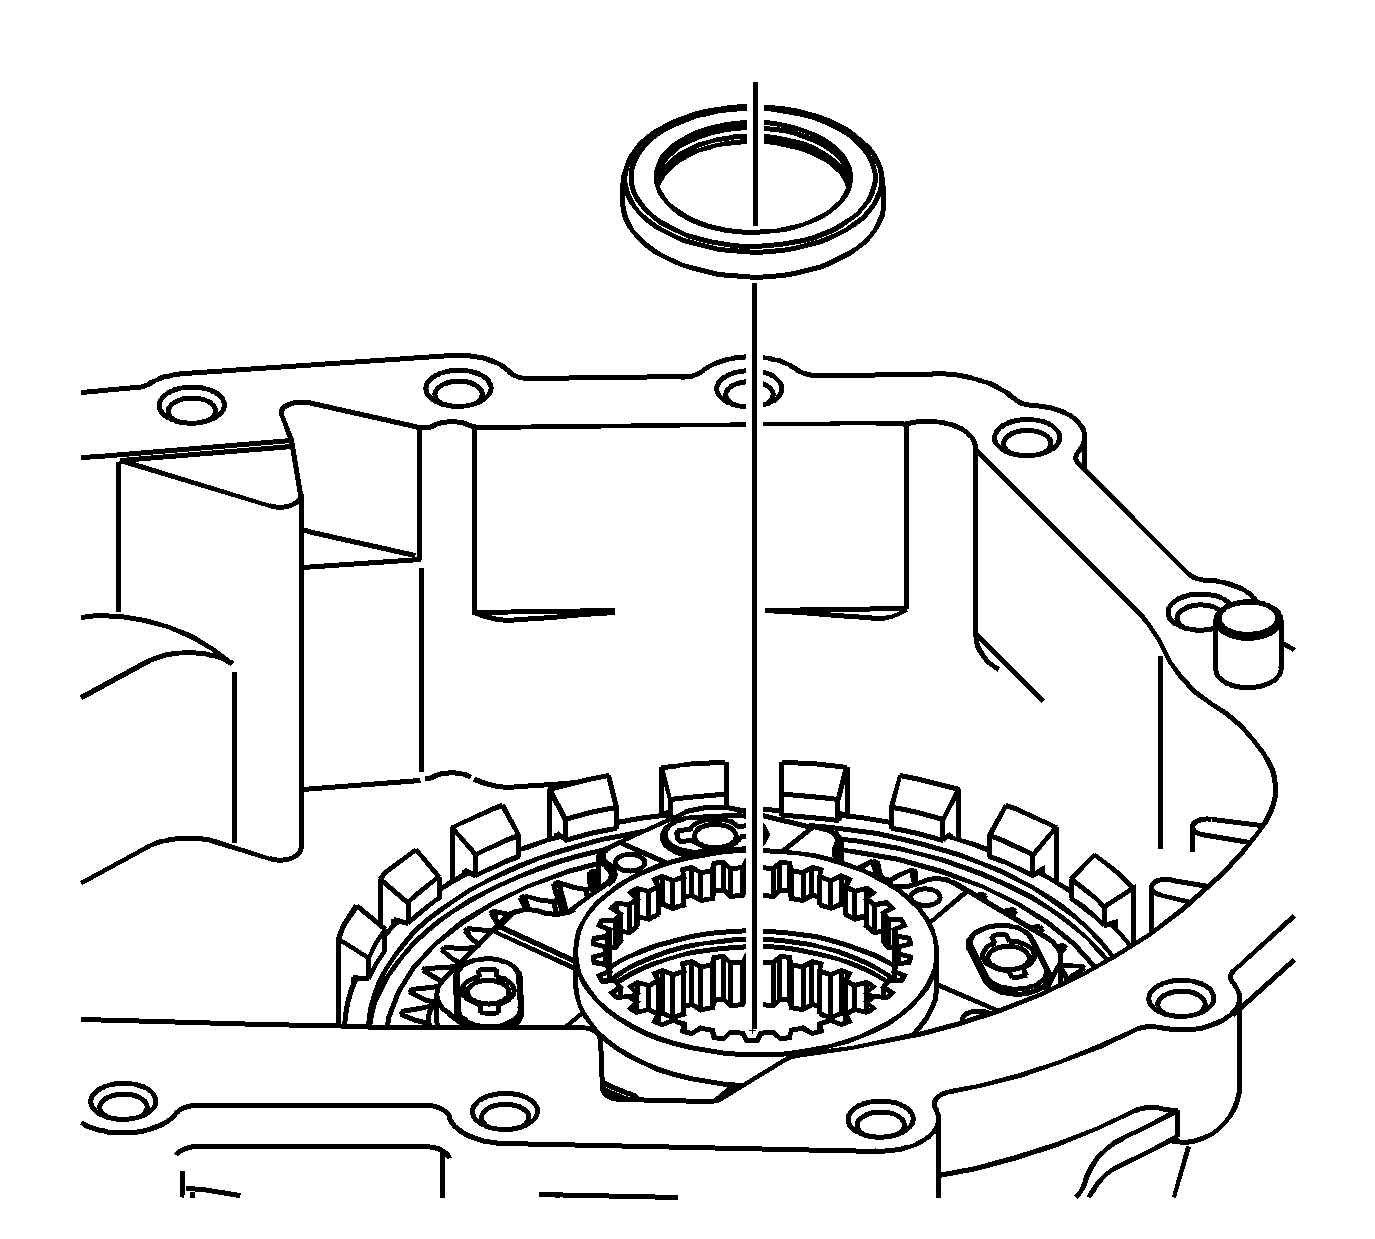
- Lubricate the input shaft needle thrust bearing with
J 36850
or equivalent.
- Install the input shaft thrust bearing.
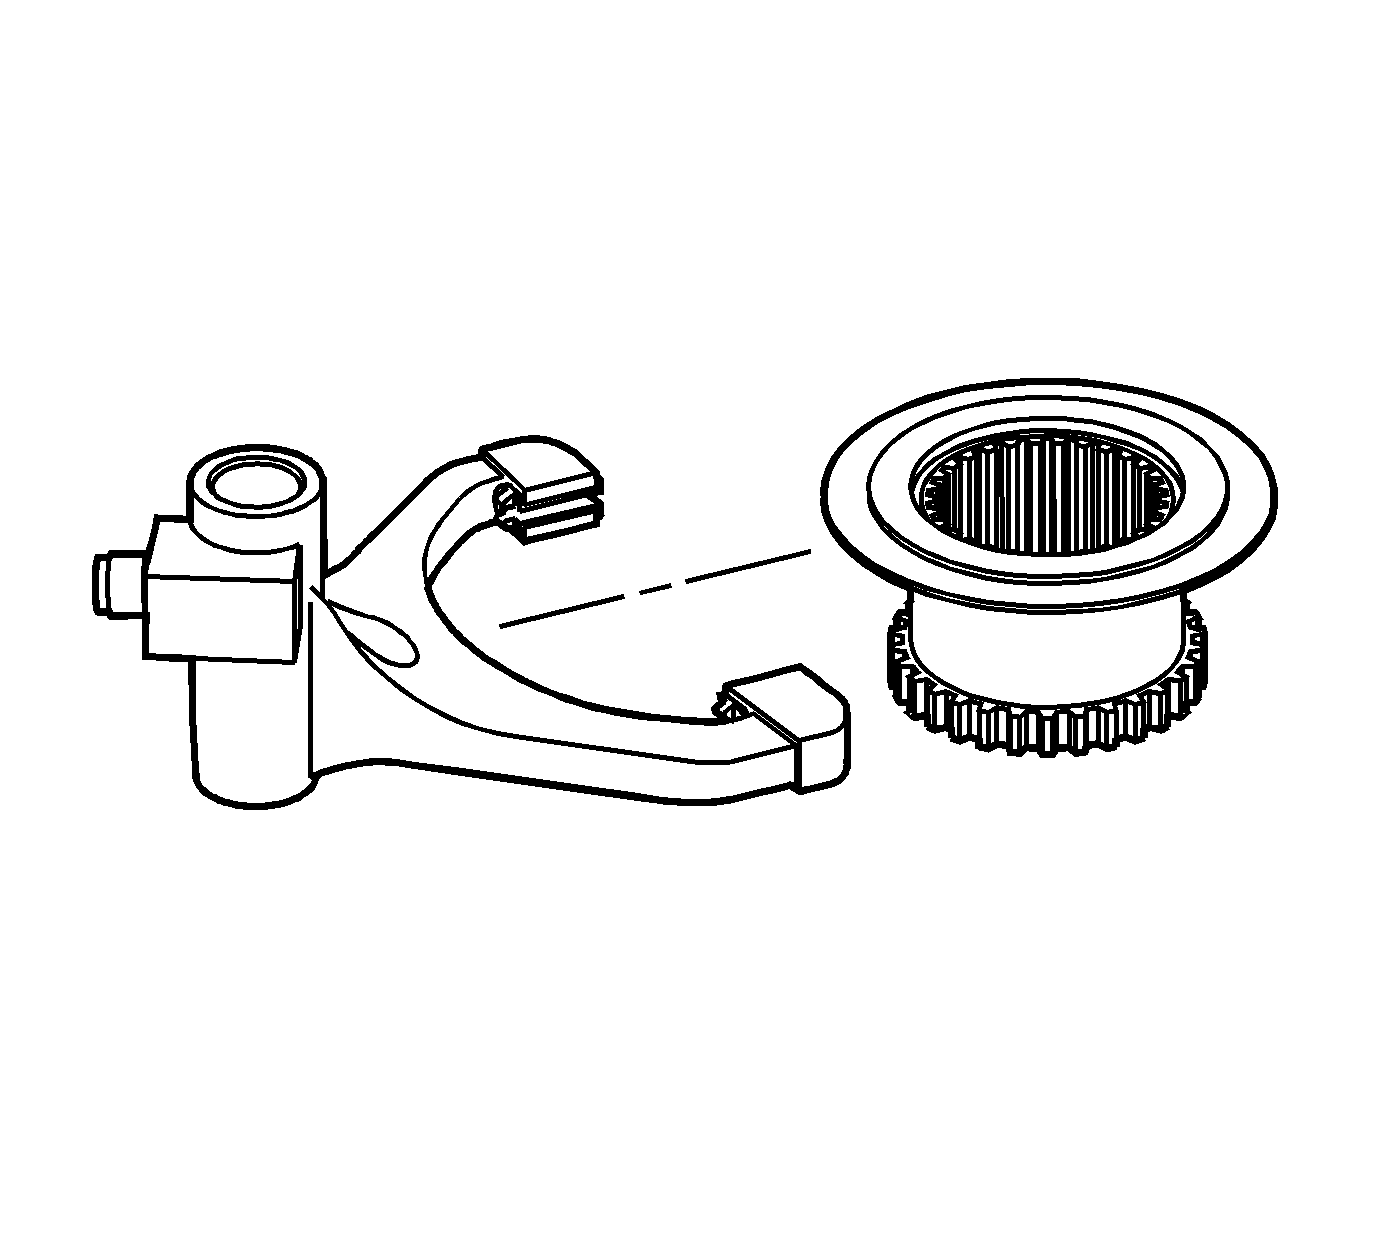
- Install new shift fork pads, if removed.
- Install the high/low range sleeve in the high/low range fork.
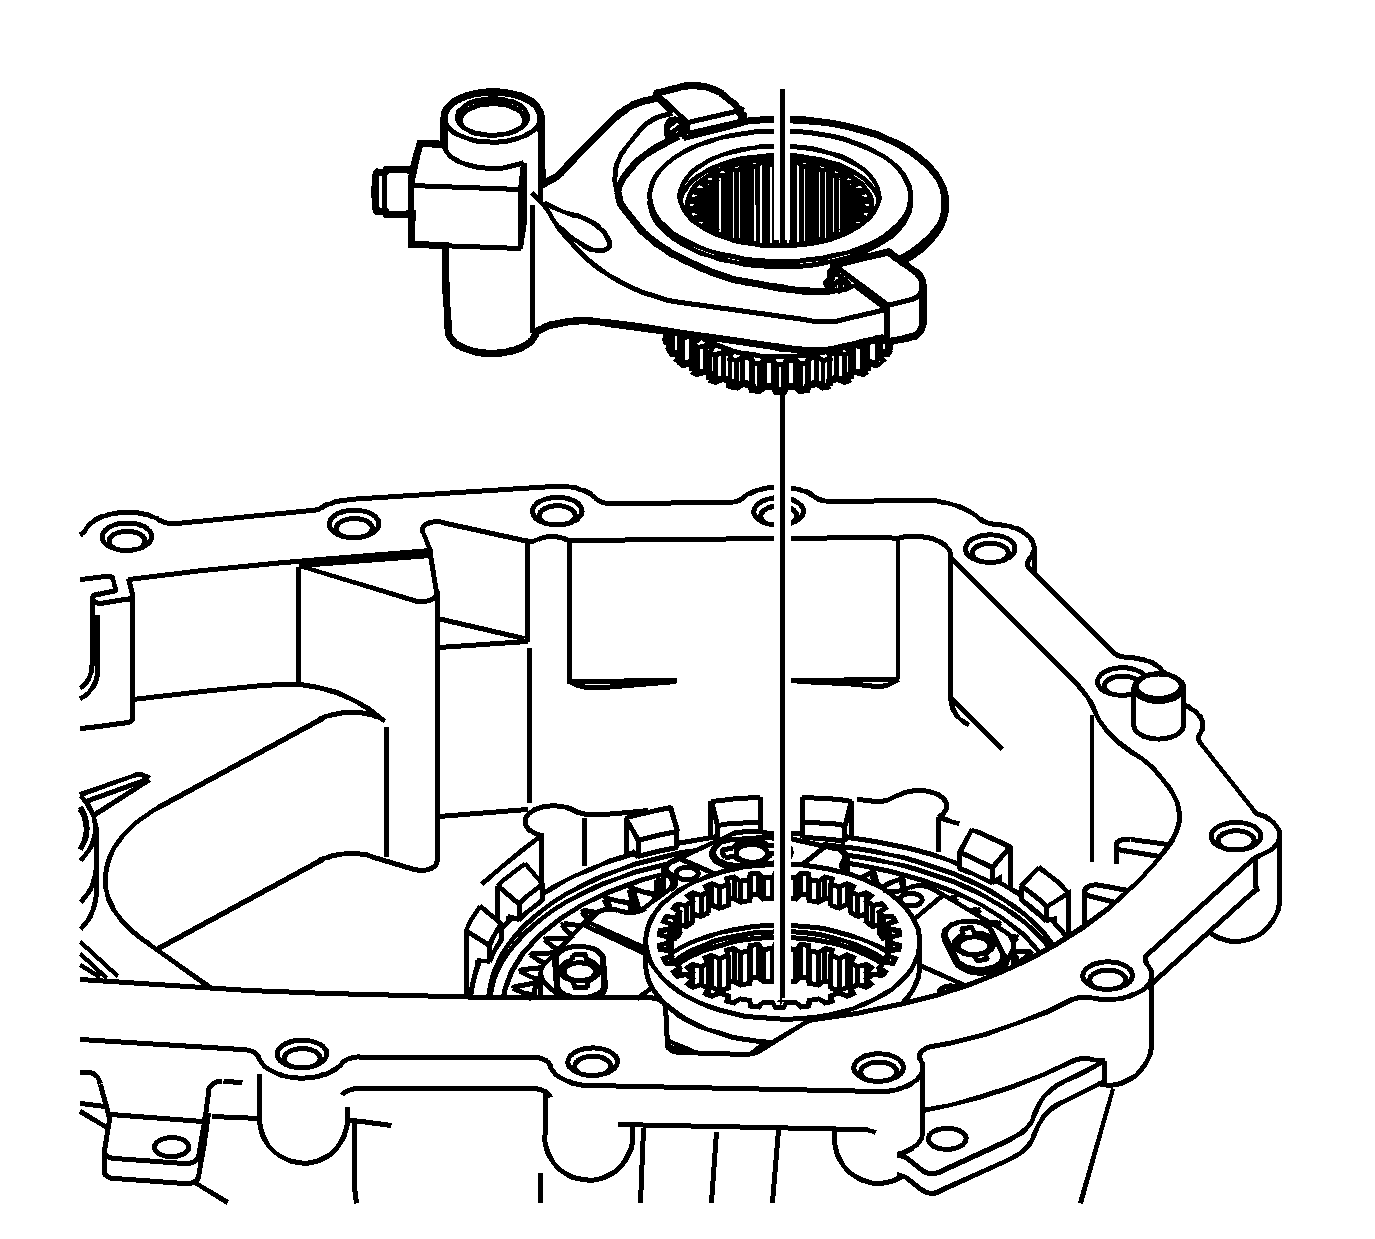
- Align the gear teeth on the high/low
range shift sleeve to the high/low planetary carrier.
- Install the high/low range shift fork and the high/low range sleeve.
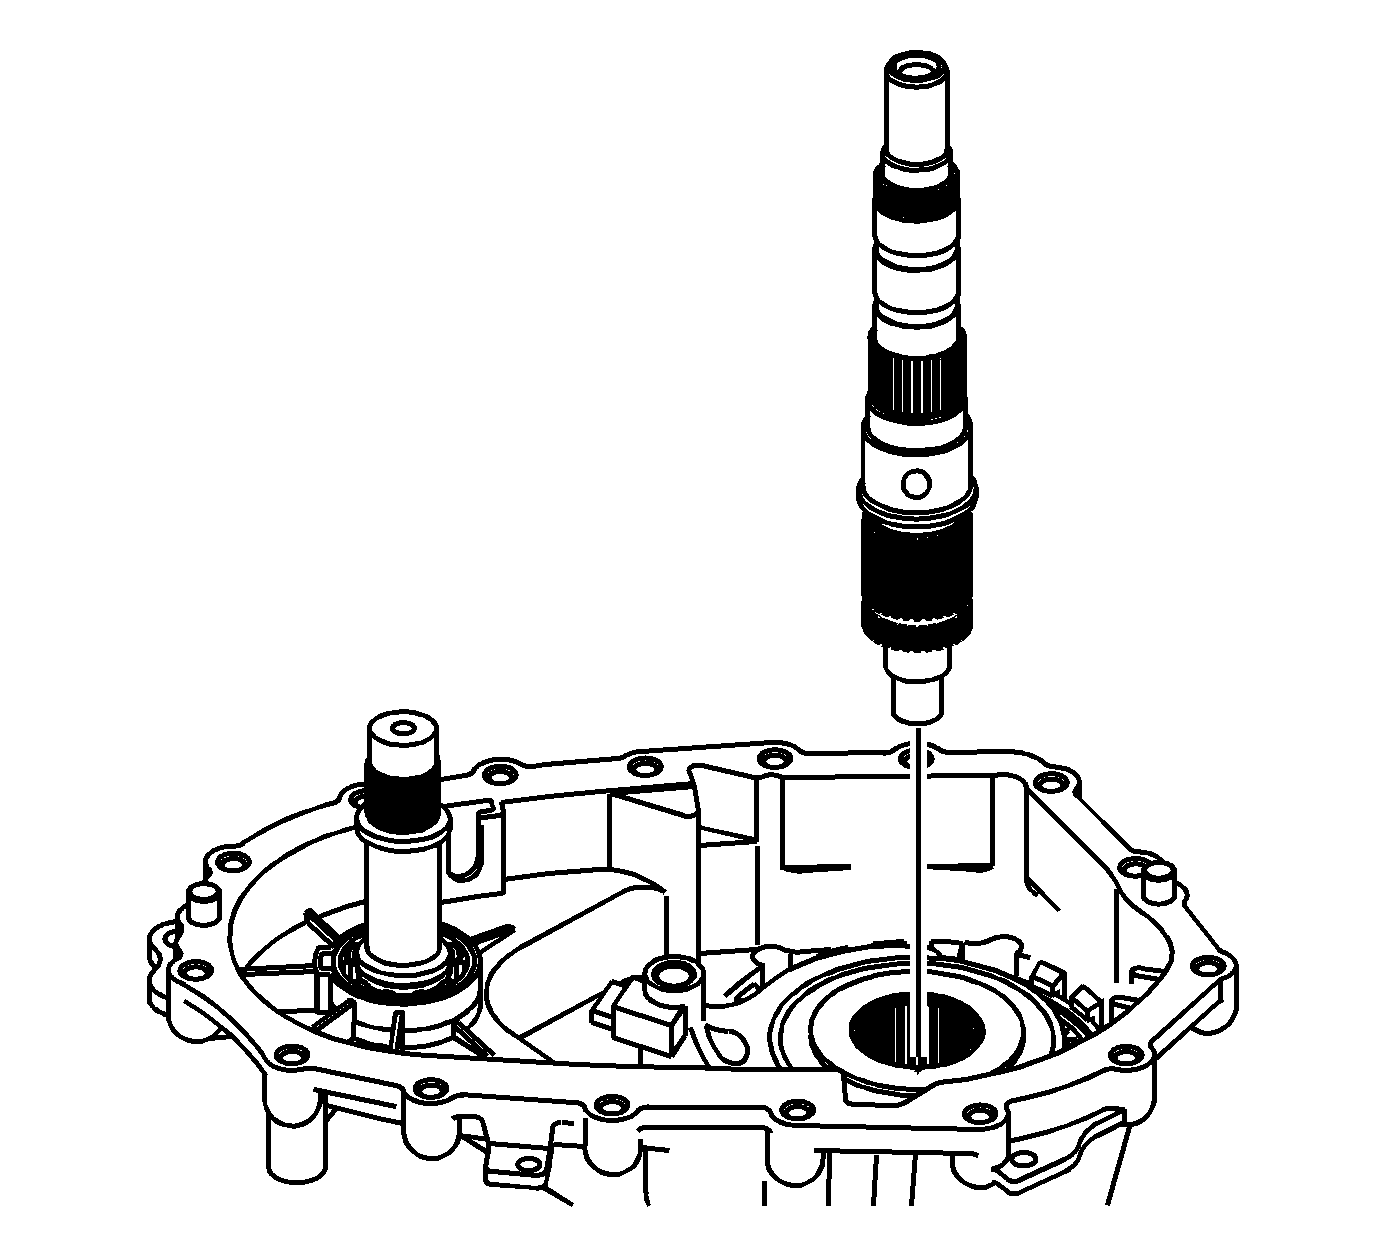
- Install the mainshaft.
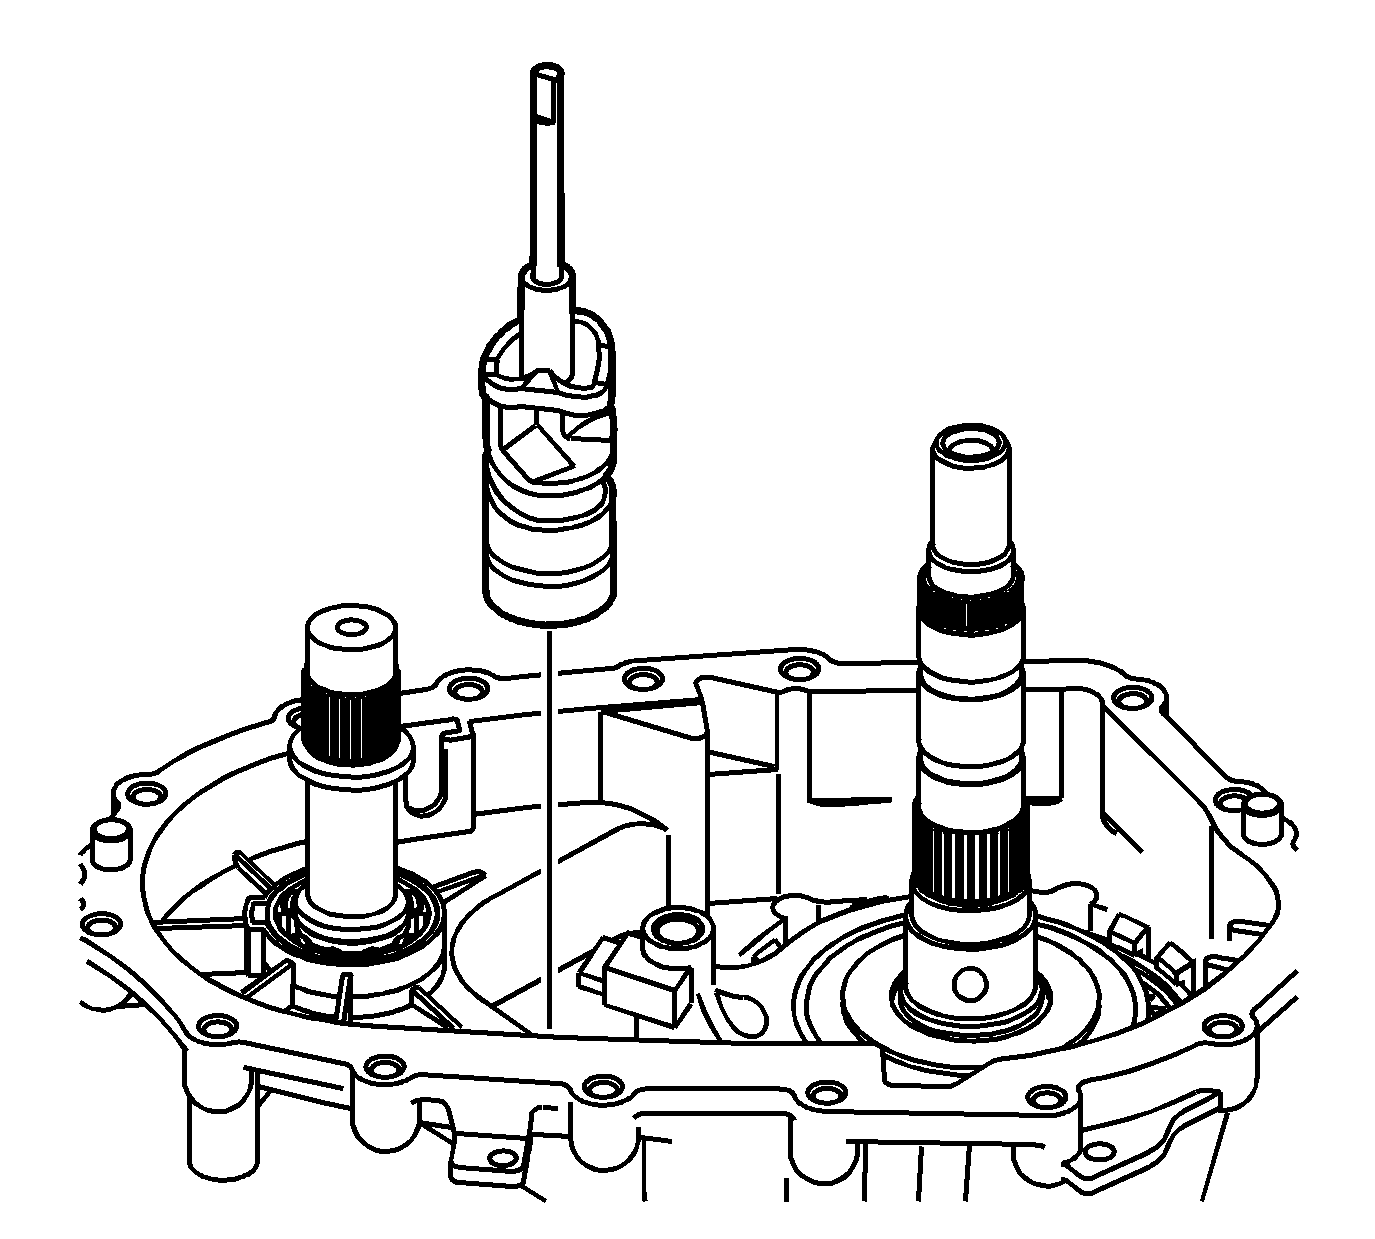
Notice: In order to prevent component damage, properly remove and install the shift cam and shaft assembly. When removing or installing the shift cam and shaft assembly, keep the shaft straight
and do not tilt. Tilting the shift cam and shaft assembly in the transfer case housing will break the tip on the end of the shaft.
- Install the shift cam and shaft assembly.
| 20.1. | Install the shift cam and shaft assembly straight, with the tip into the hole in the case. |
| 20.2. | Rotate the high/low range shift fork to position the shift fork roller in the shift cam slot. |
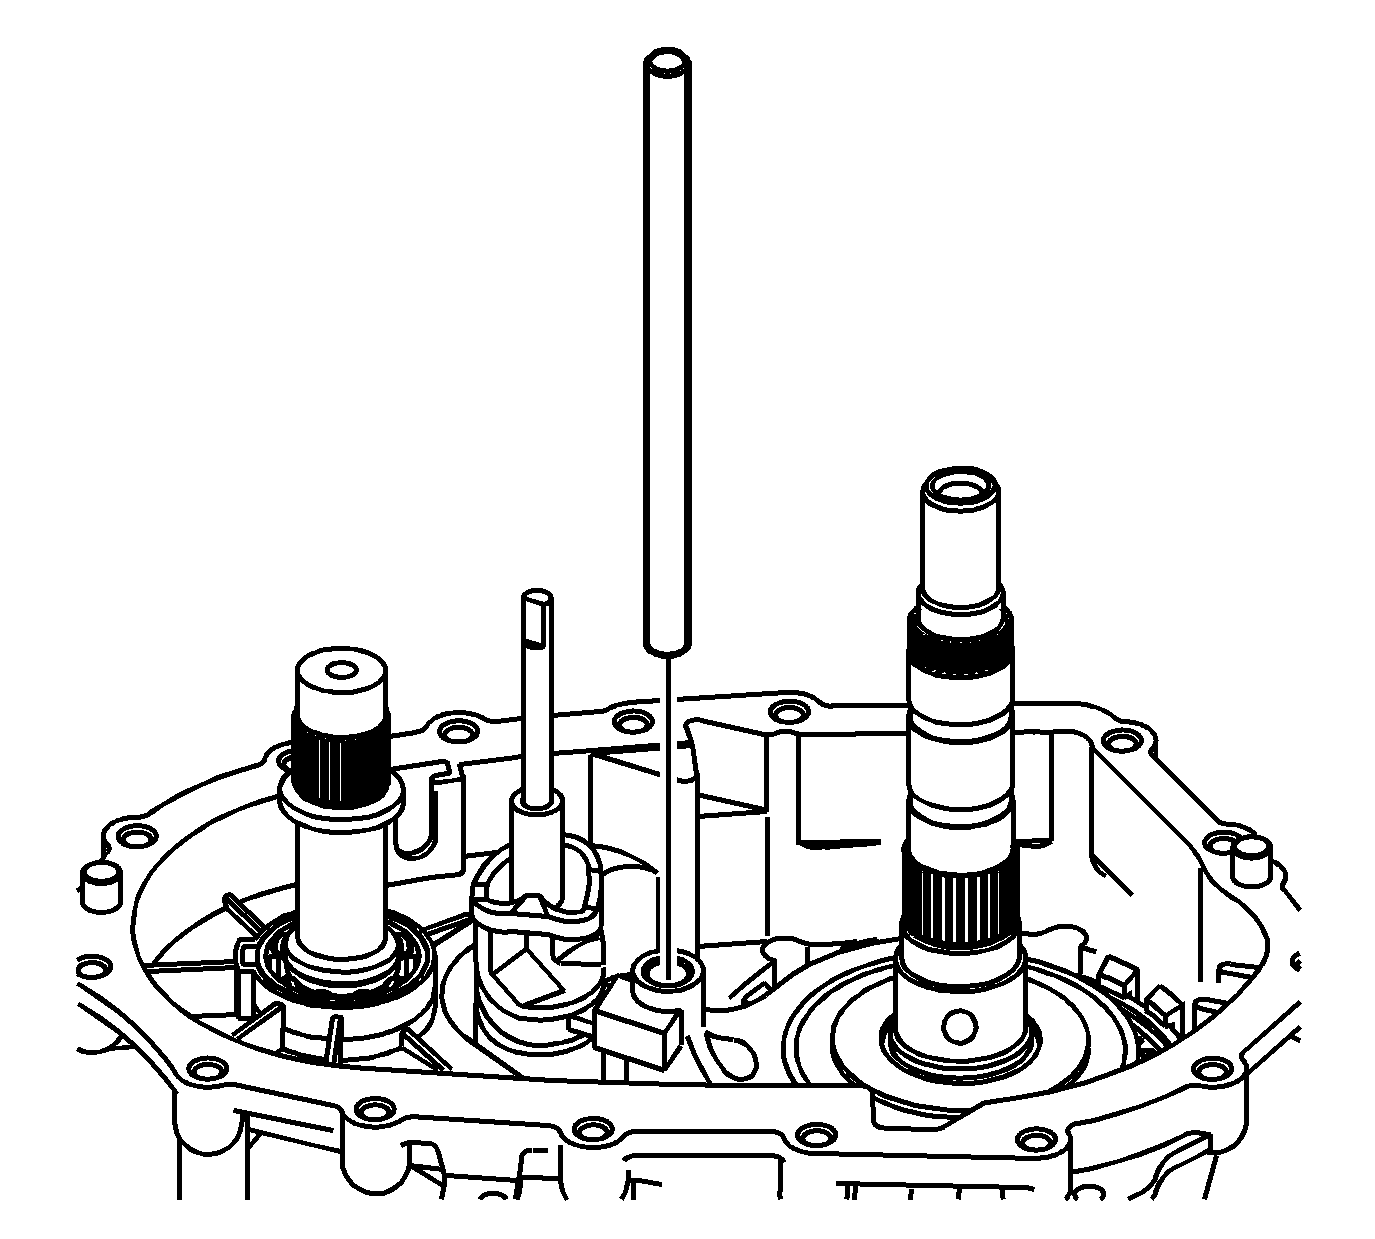
- Install the shift fork shaft.
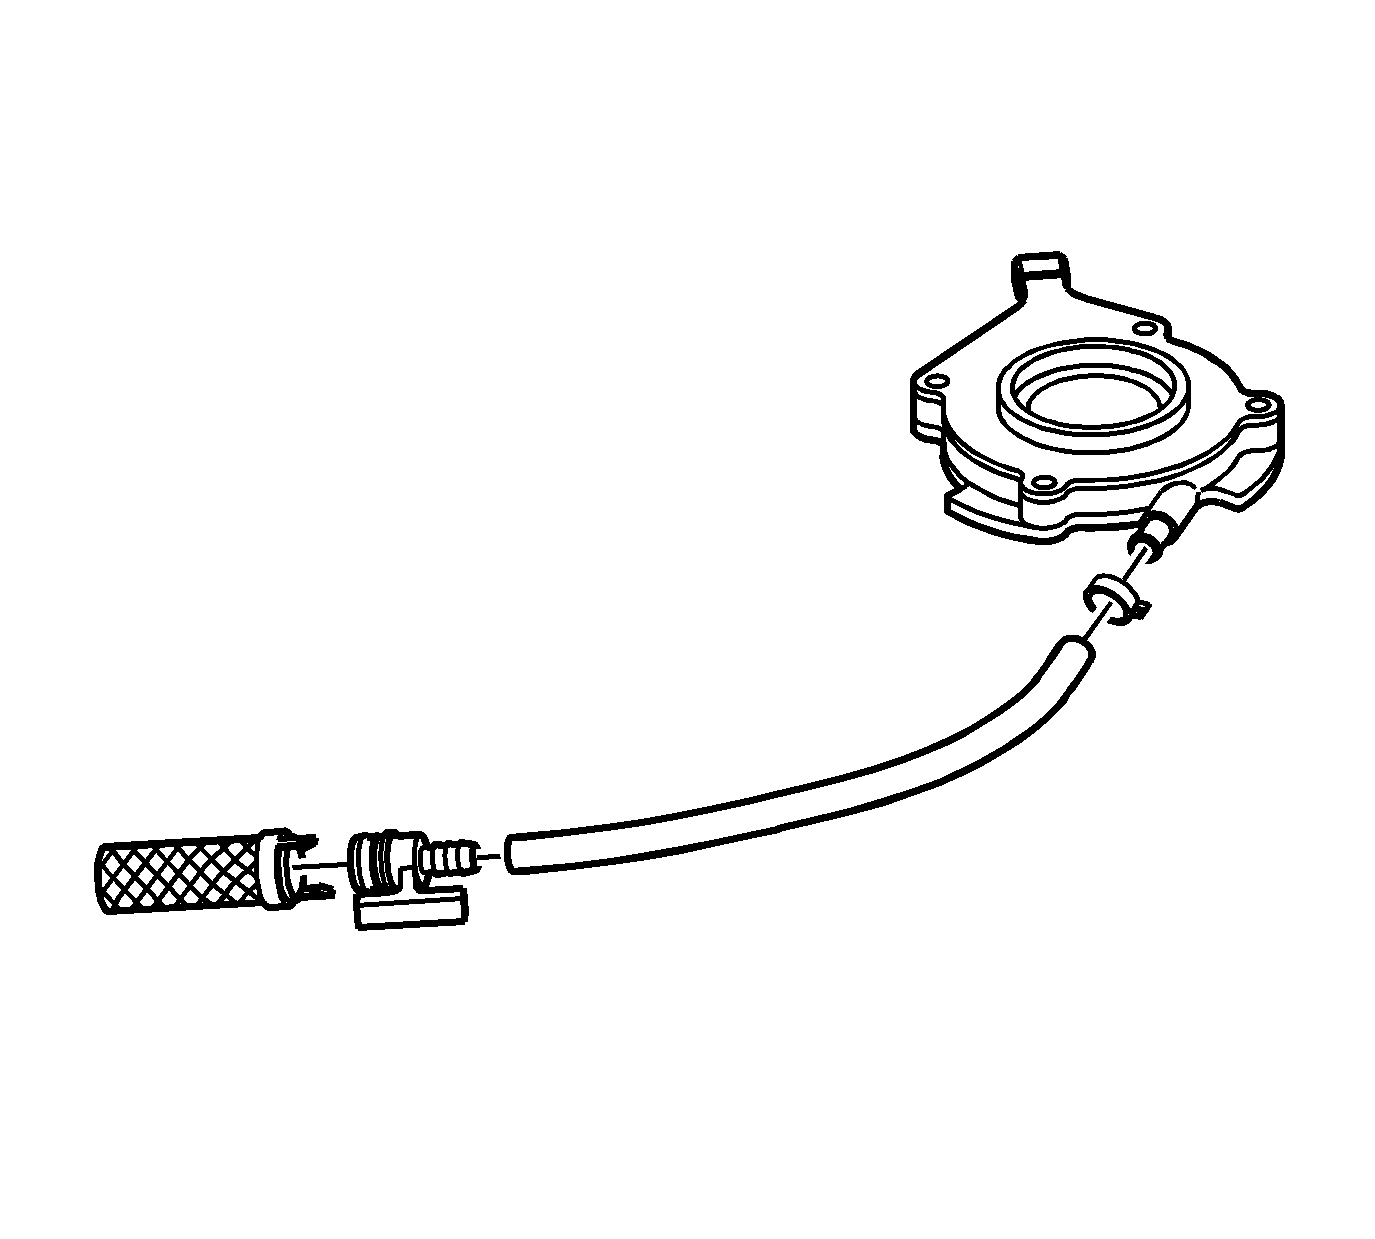
- Connect the oil pump hose to the oil
pump screen.
- Connect the oil pump hose to the oil pump.
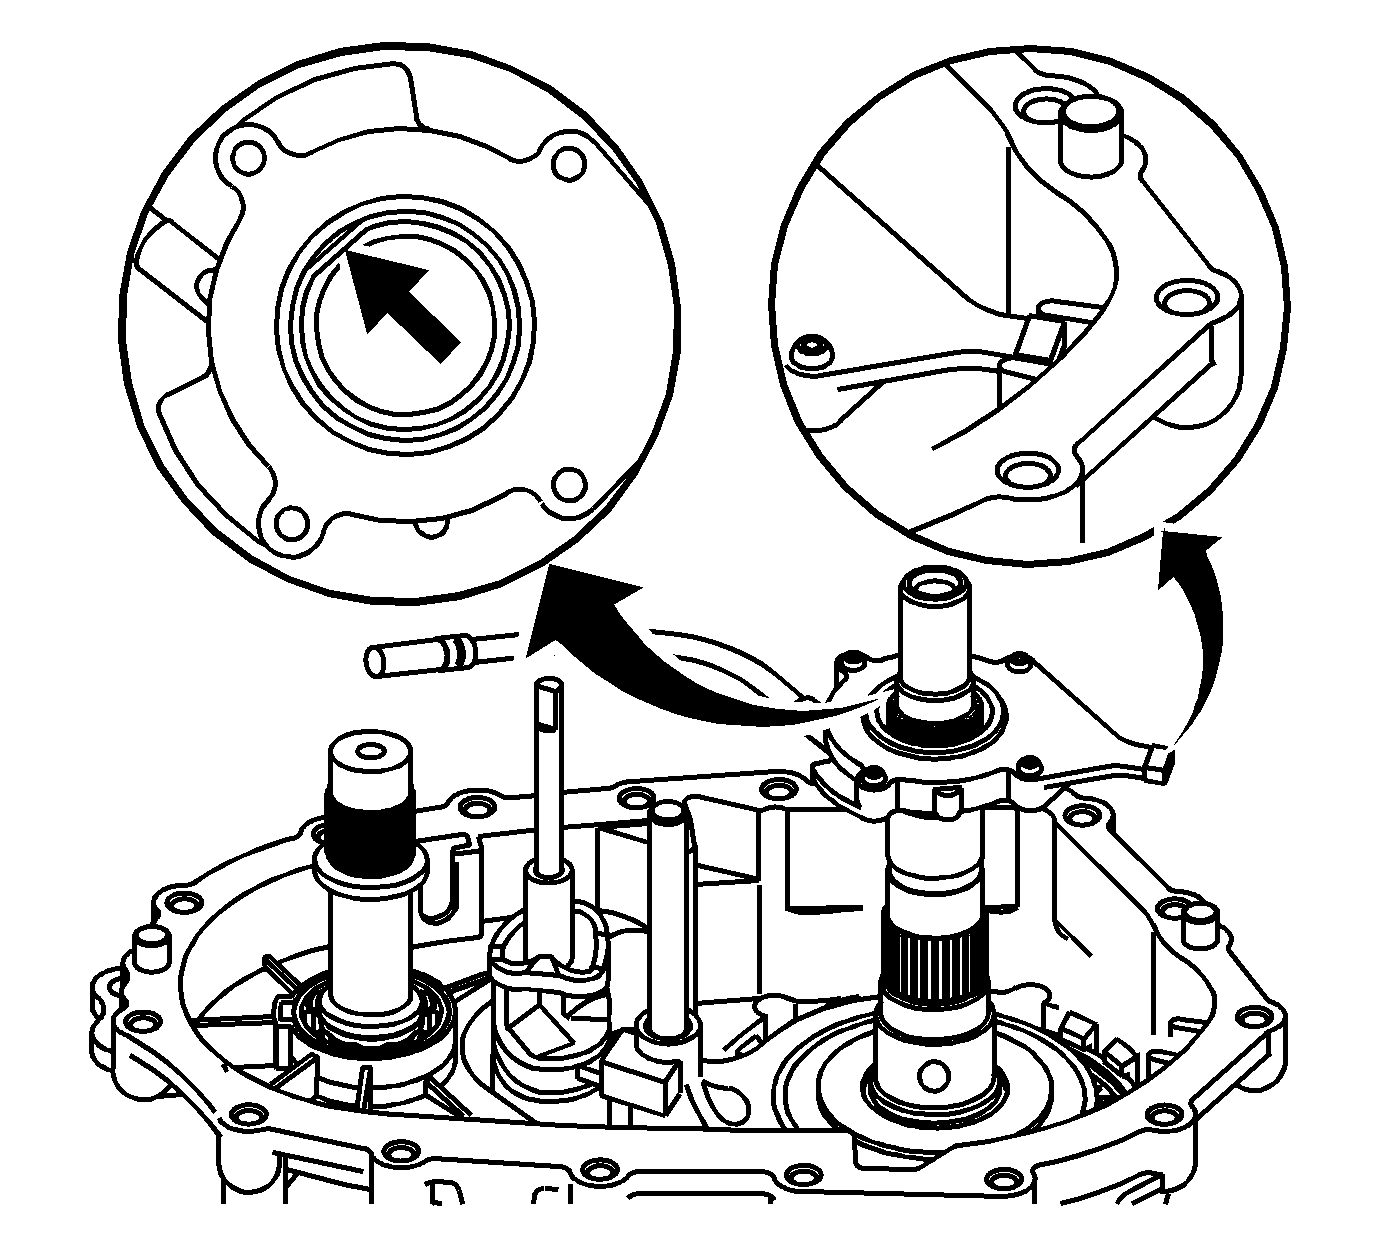
- Install the oil pump assembly with
the hose and screen.
| 24.1. | Align the square boss of the oil pump gear with the flat area on the mainshaft. |
| 24.2. | Install the oil pump in the slot of the front case half. Ensure the wear clip is on the oil pump. |
| 24.3. | Install the oil pump screen in the front case half. |
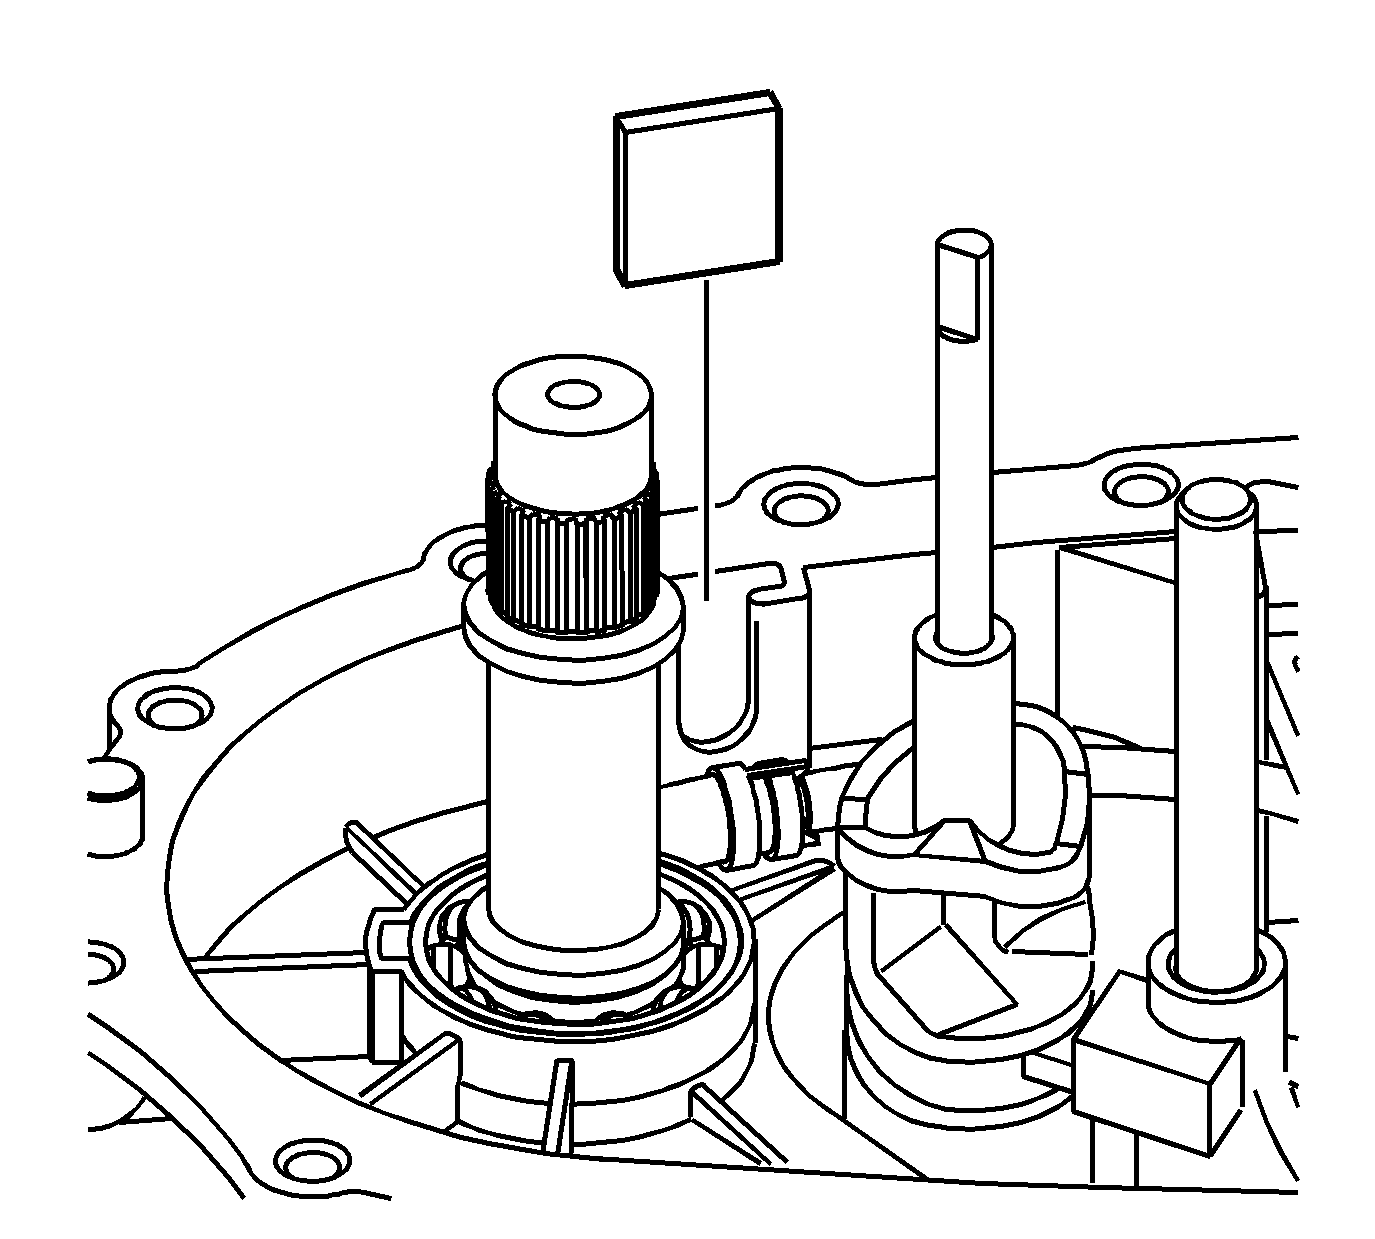
- Install the magnet.
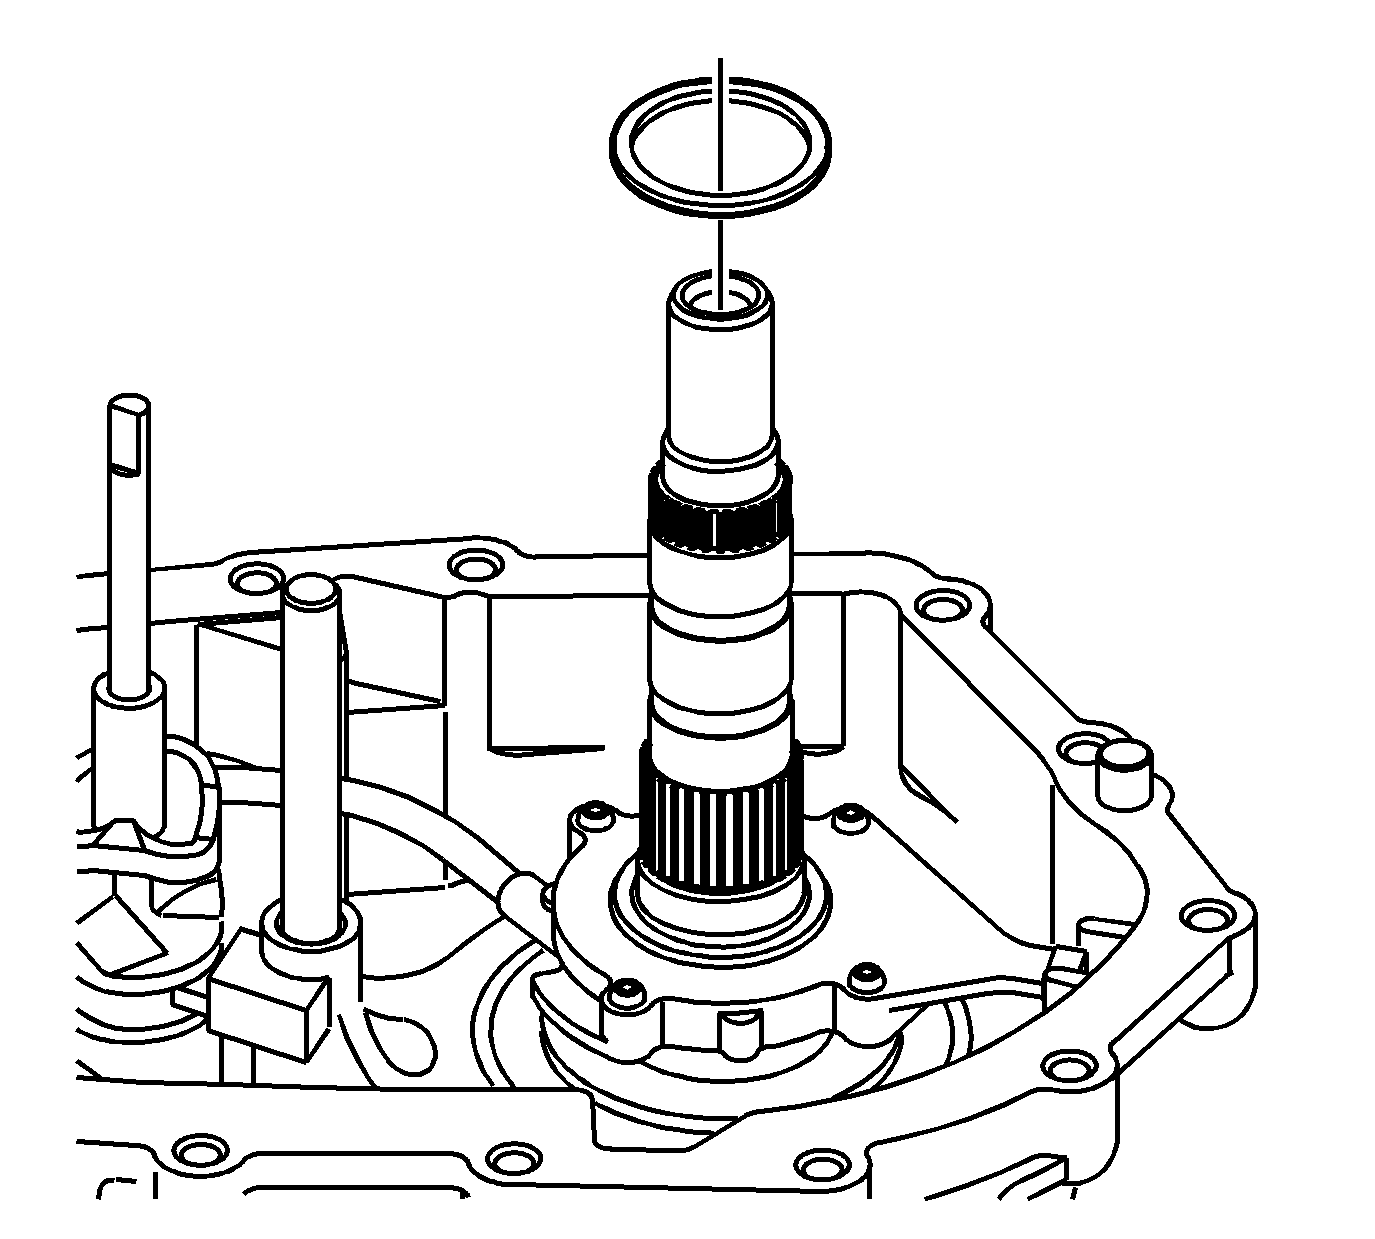
- Install the lower center support bearing thrust washer.
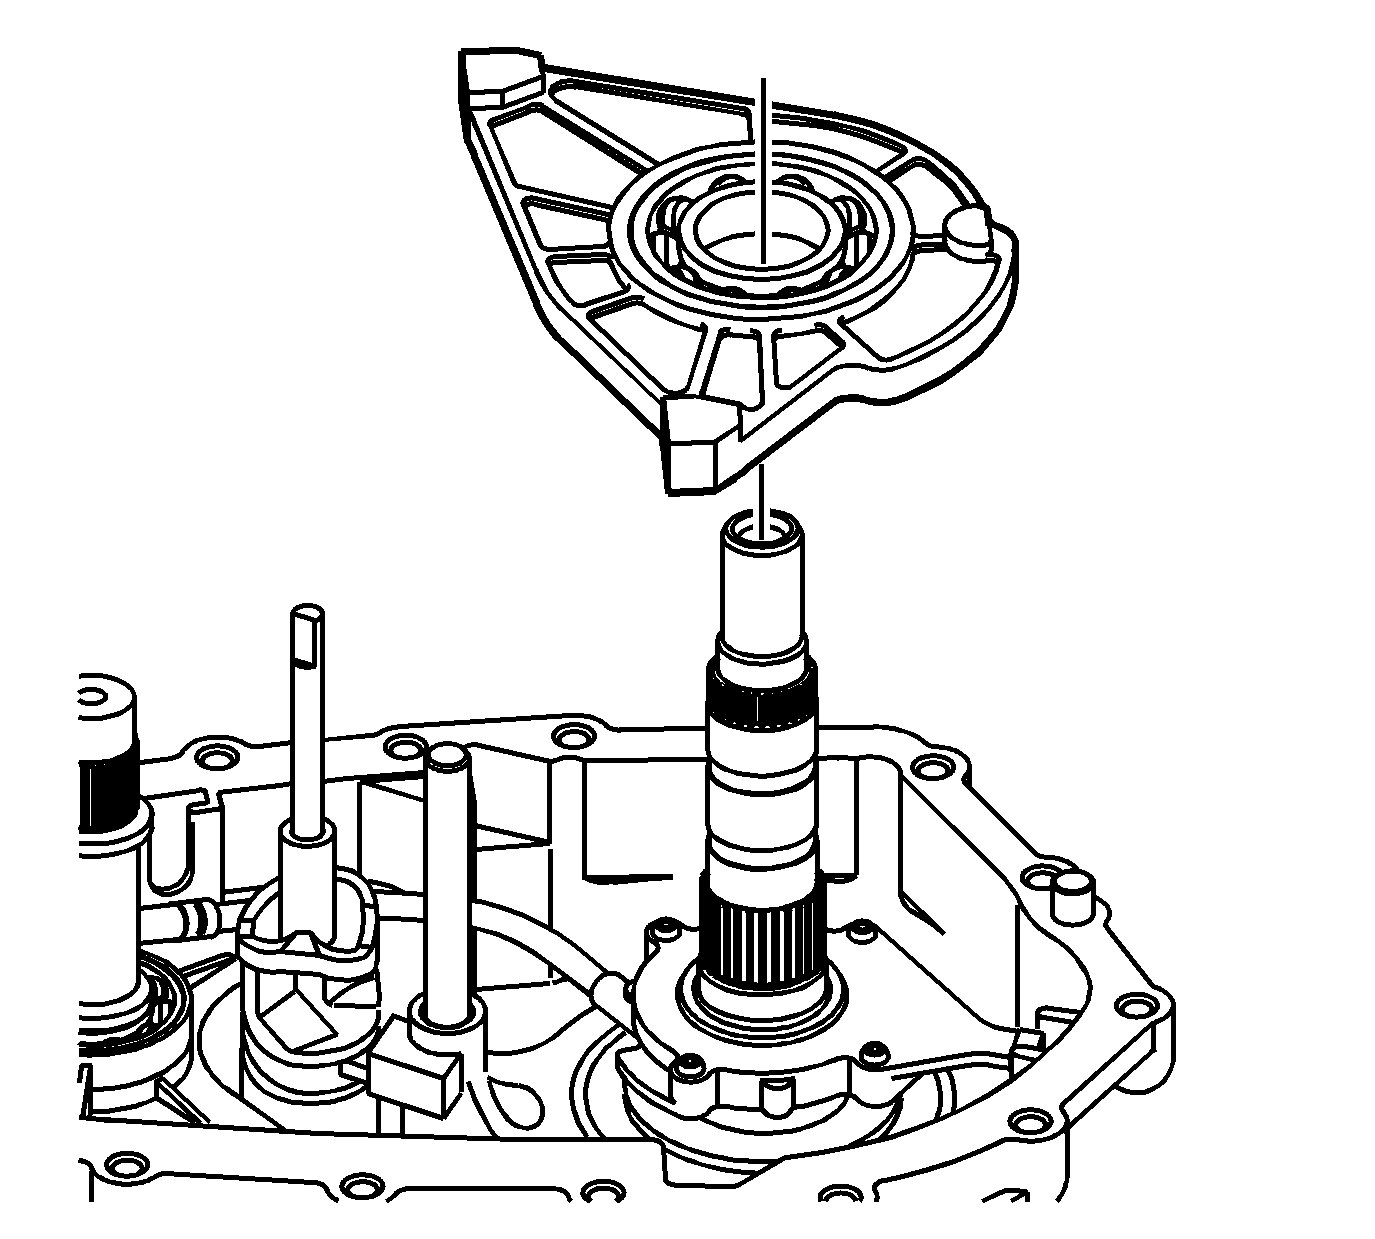
- Install the center bearing support.
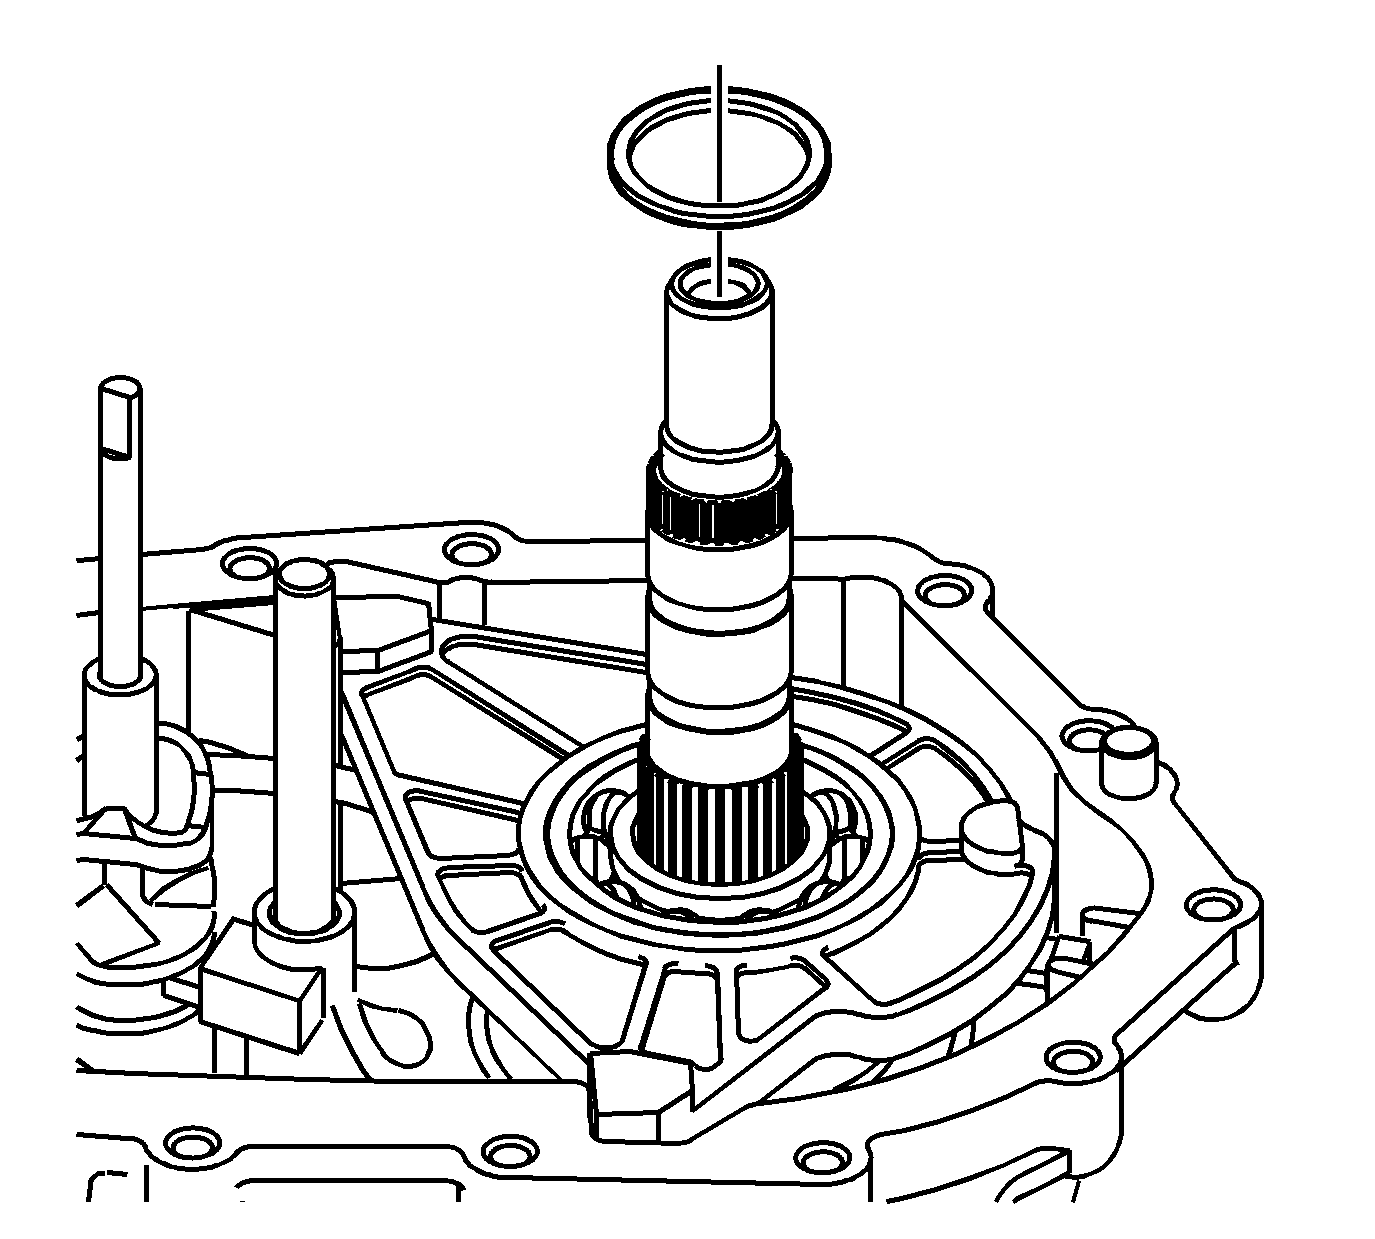
- Install the upper center bearing support thrust washer.
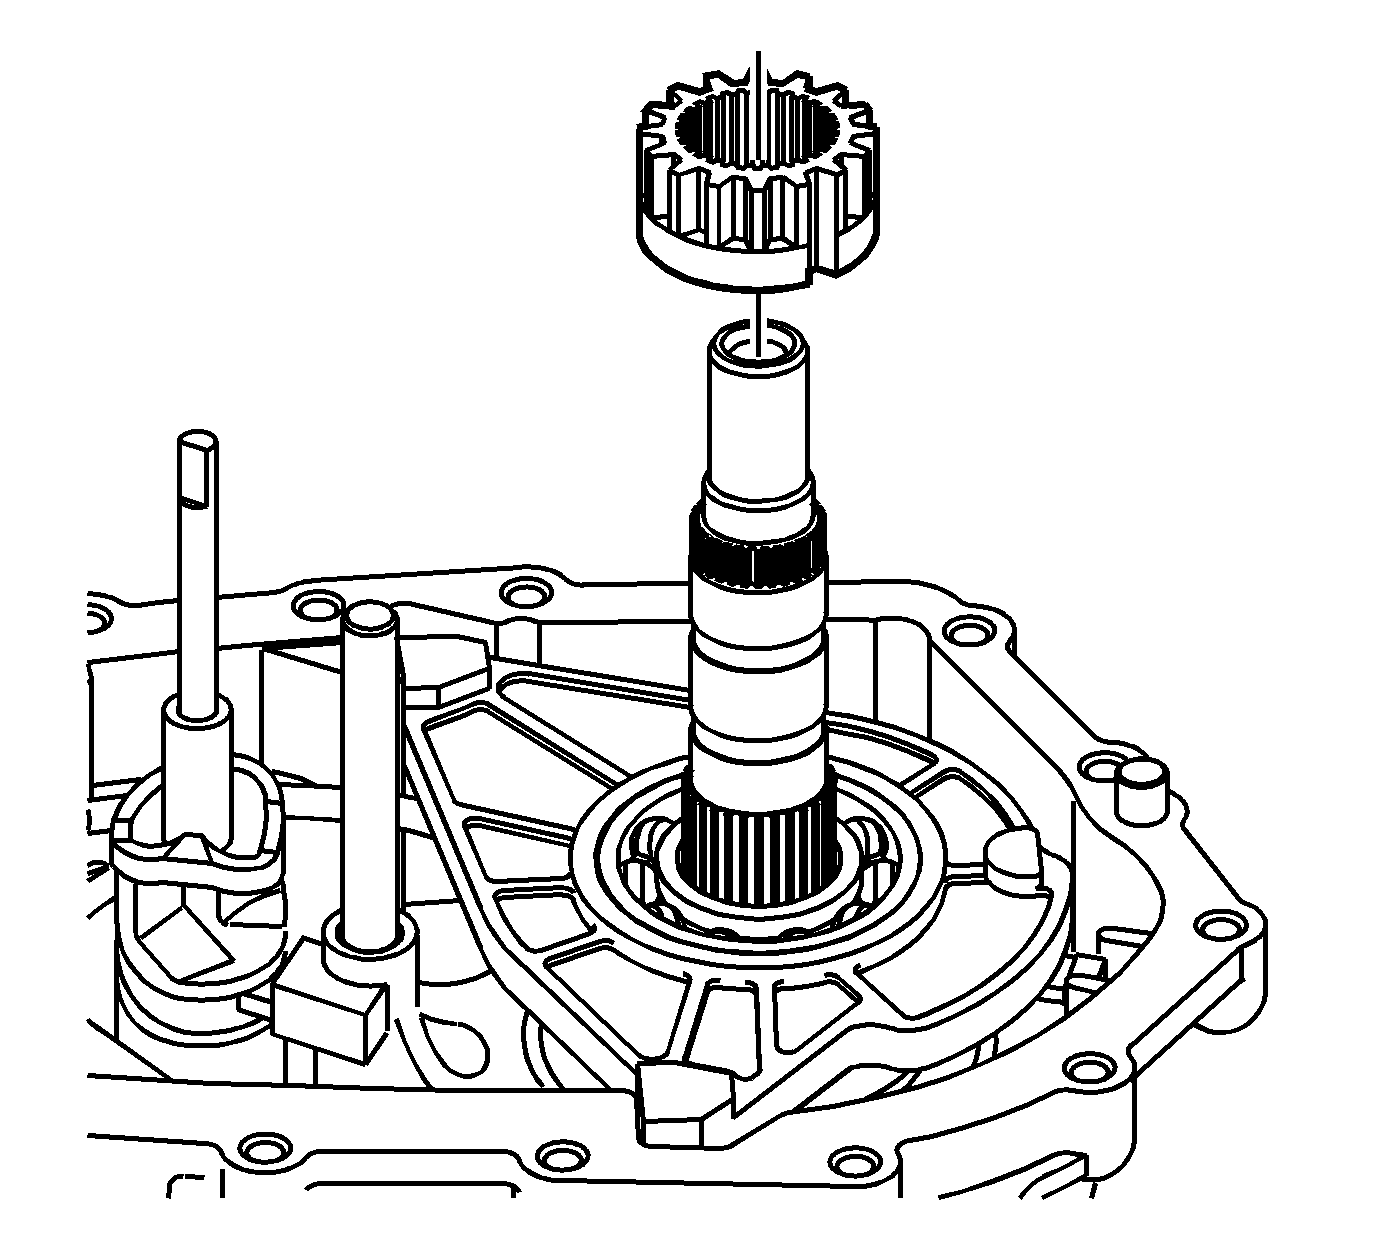
- Install the inner lockup hub.
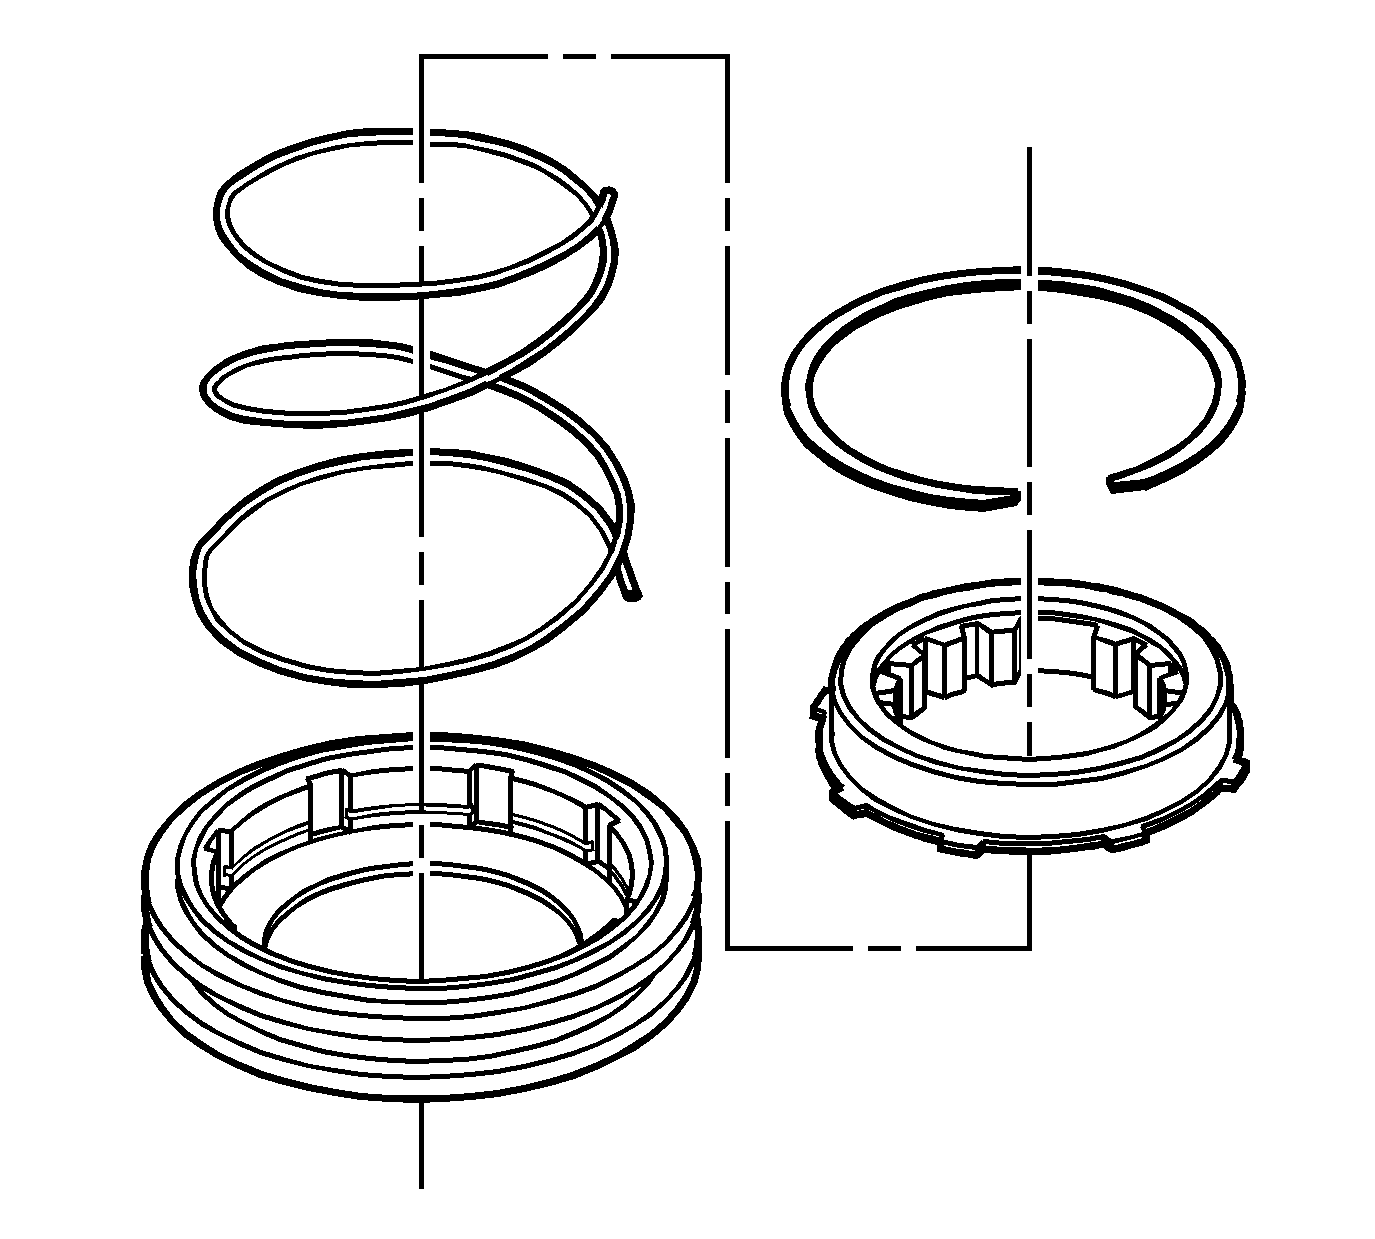
- Assemble the lockup mode shift collar assembly, if necessary.
| 30.1. | Install the spring in the collar. |
| 30.2. | Install the hub, with the external tabs toward the spring. |
| 30.3. | Install the retainer ring in the collar. |
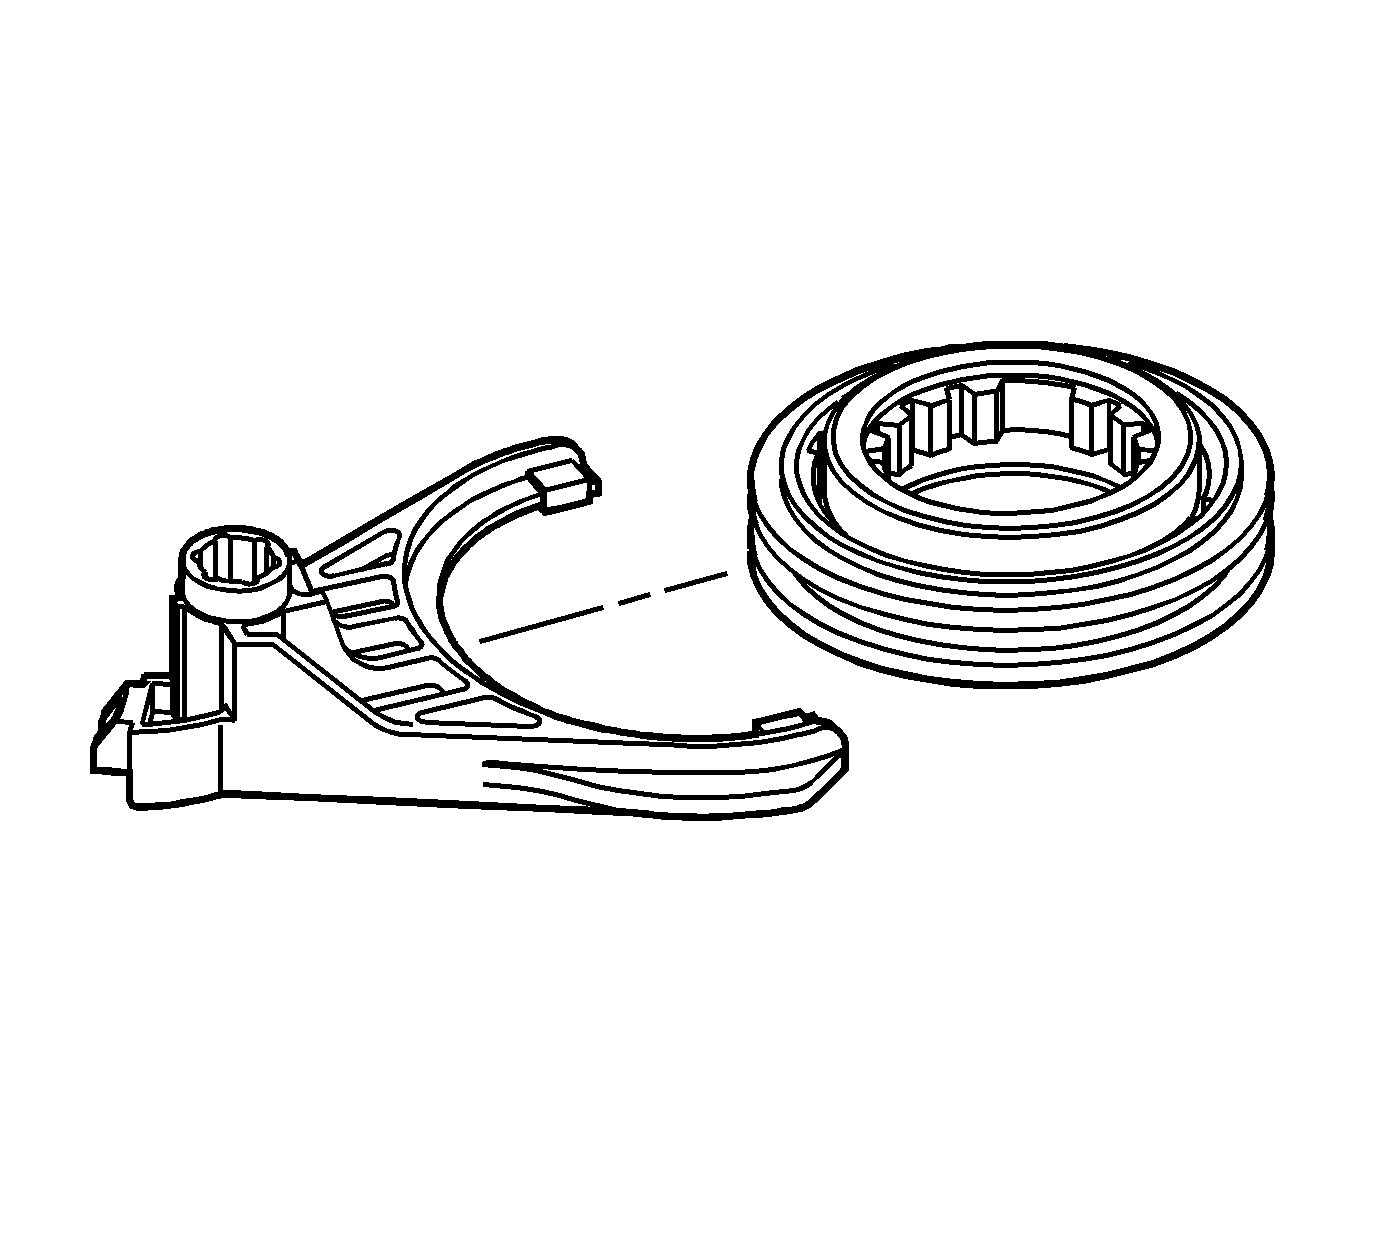
- Install the lockup mode shift fork
to the lockup mode shift collar assembly.
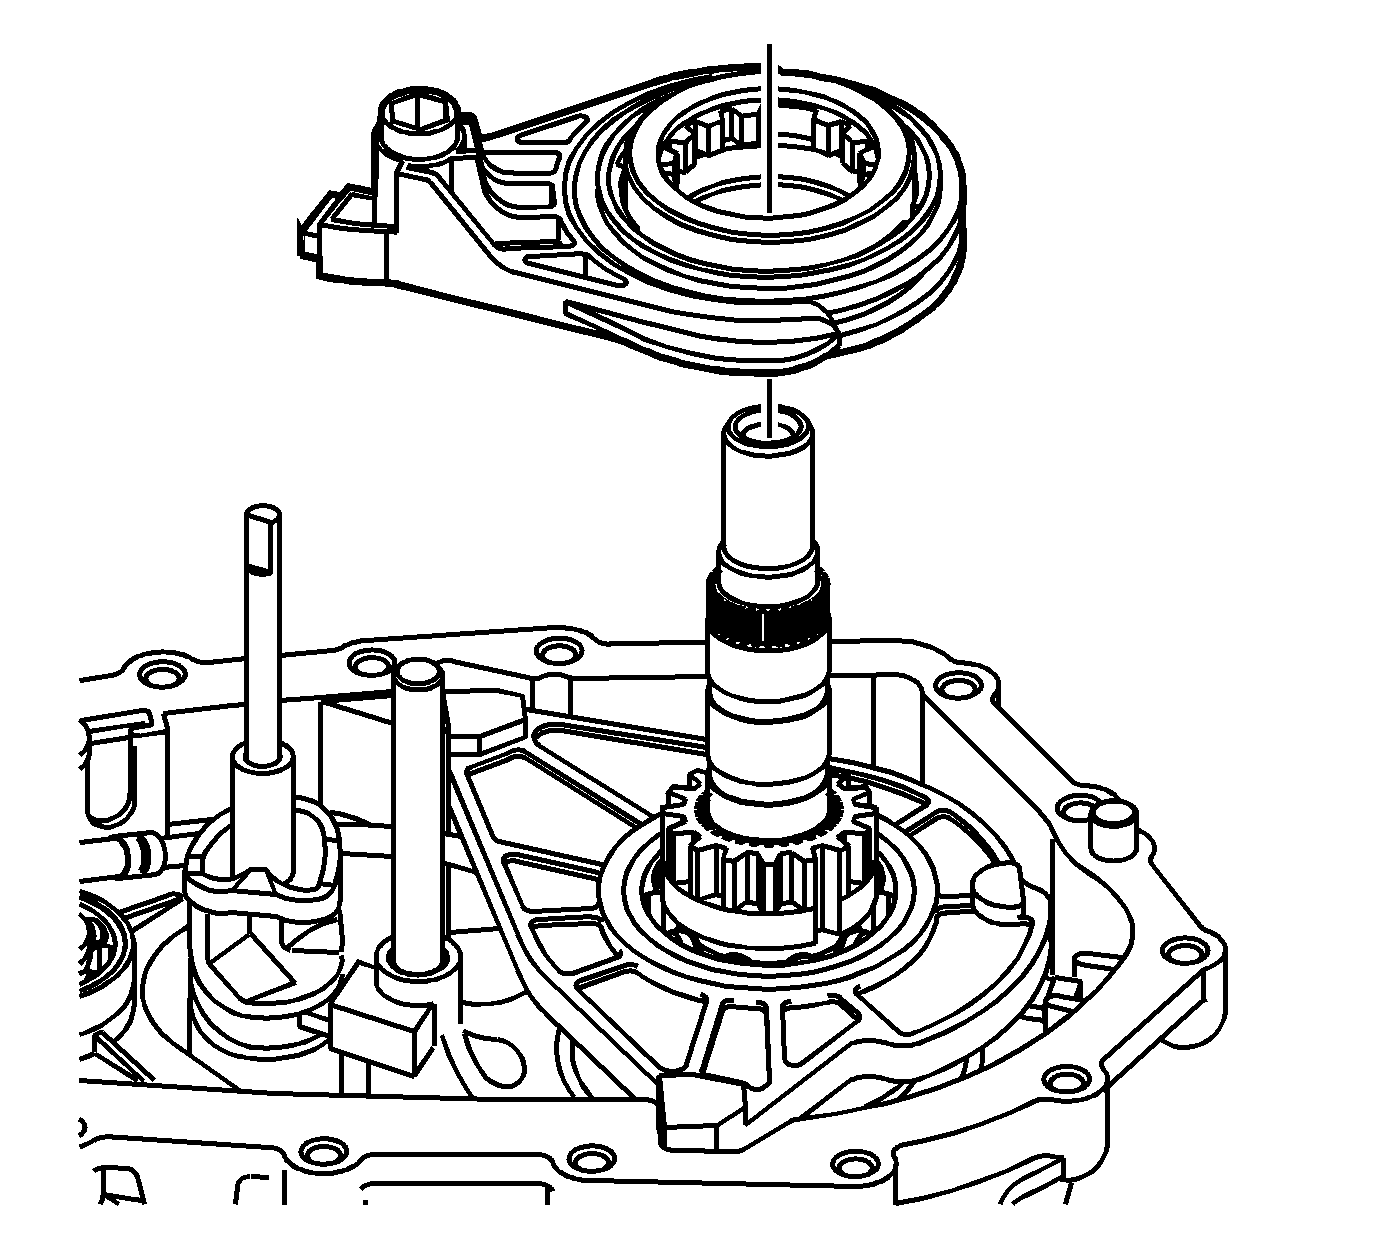
- Install the lockup mode shift collar
assembly and lockup mode shift fork.
| • | Slide the shift fork and collar assembly over the shift fork shaft. |
| • | Turn the mainshaft in order to align the slot on the inner lockup hub with the large tooth area on the hub of the lockup shift collar assembly. |
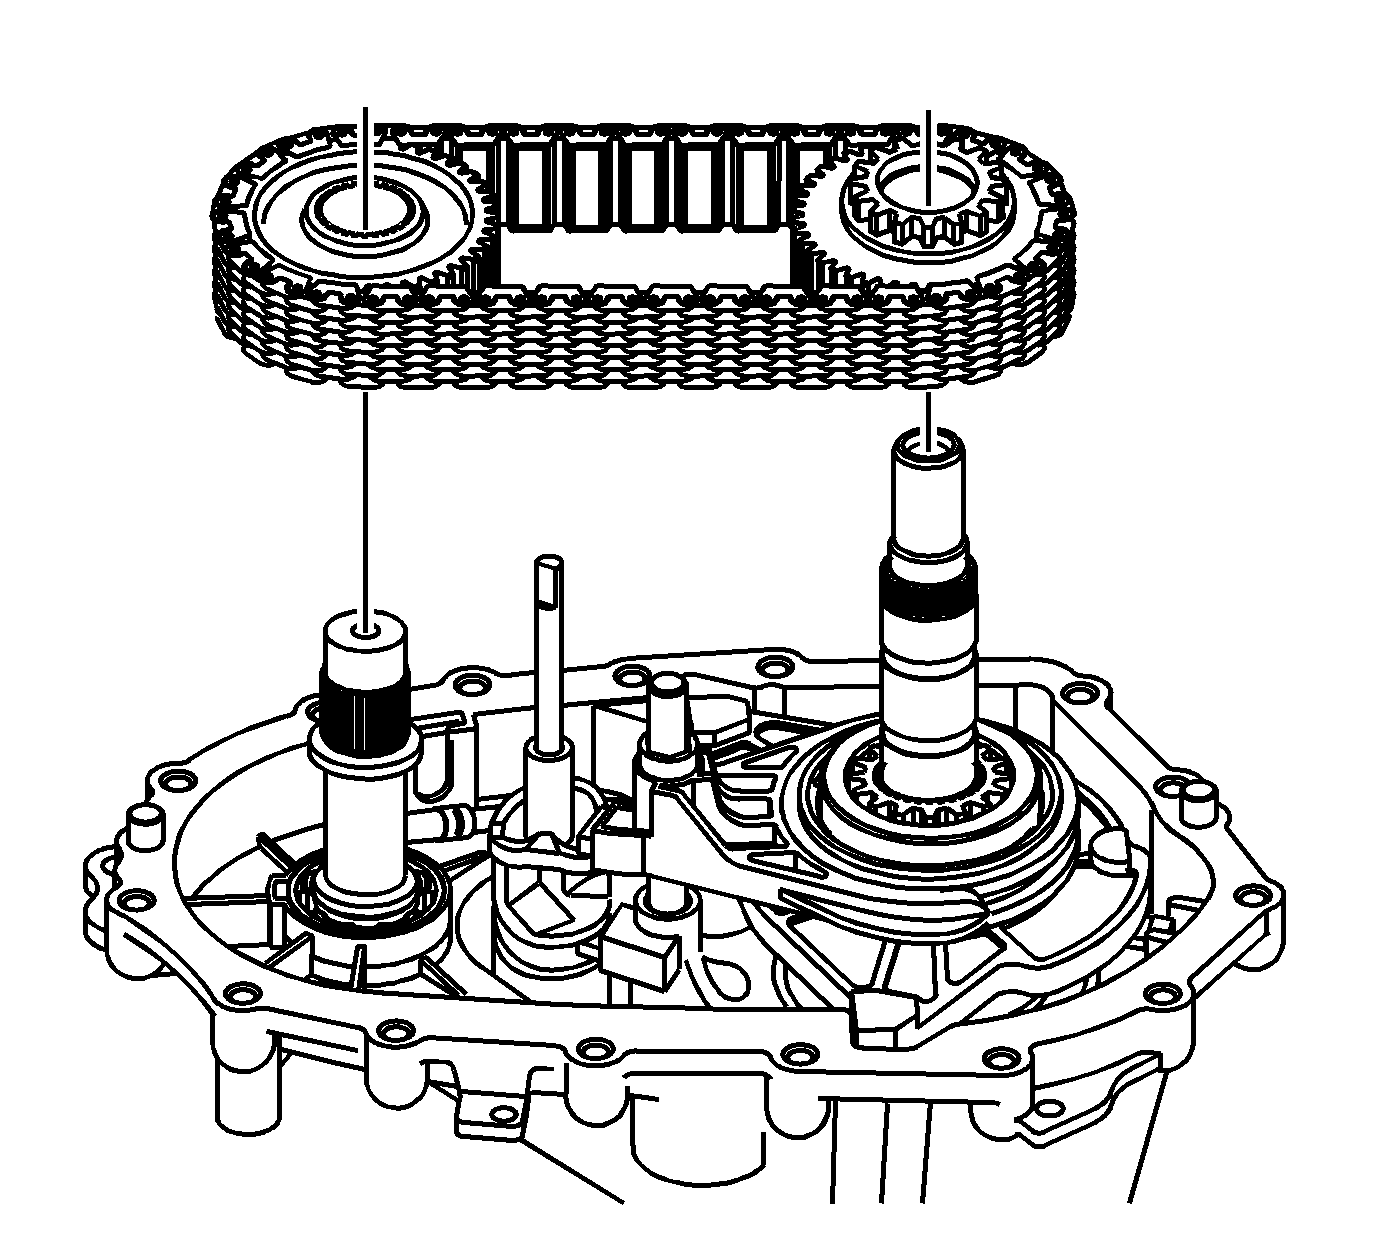
Important: If using the chain and sprockets again, ensure to align the marks of the drive chain and sprockets.
- Install the drive chain and sprockets.
| • | The blue link on the chain faces up. |
| • | Align the drive sprocket engagement teeth with the lockup shift assembly hub teeth. |
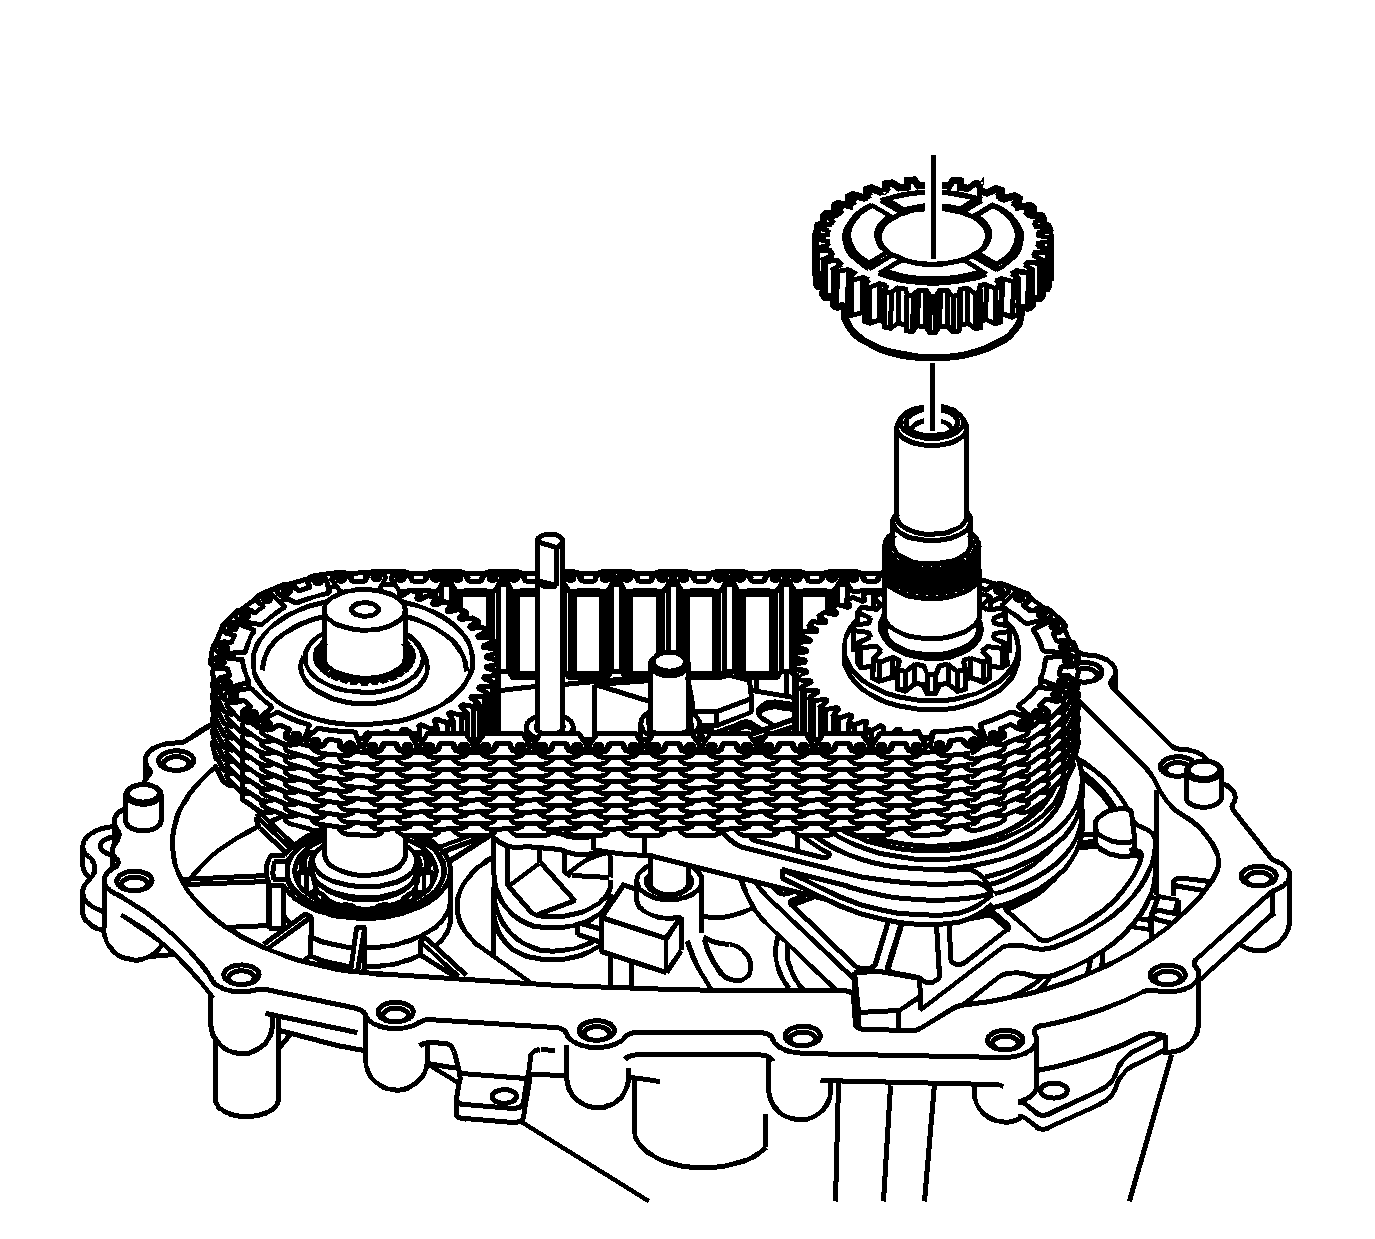
- Install the front output sun gear.
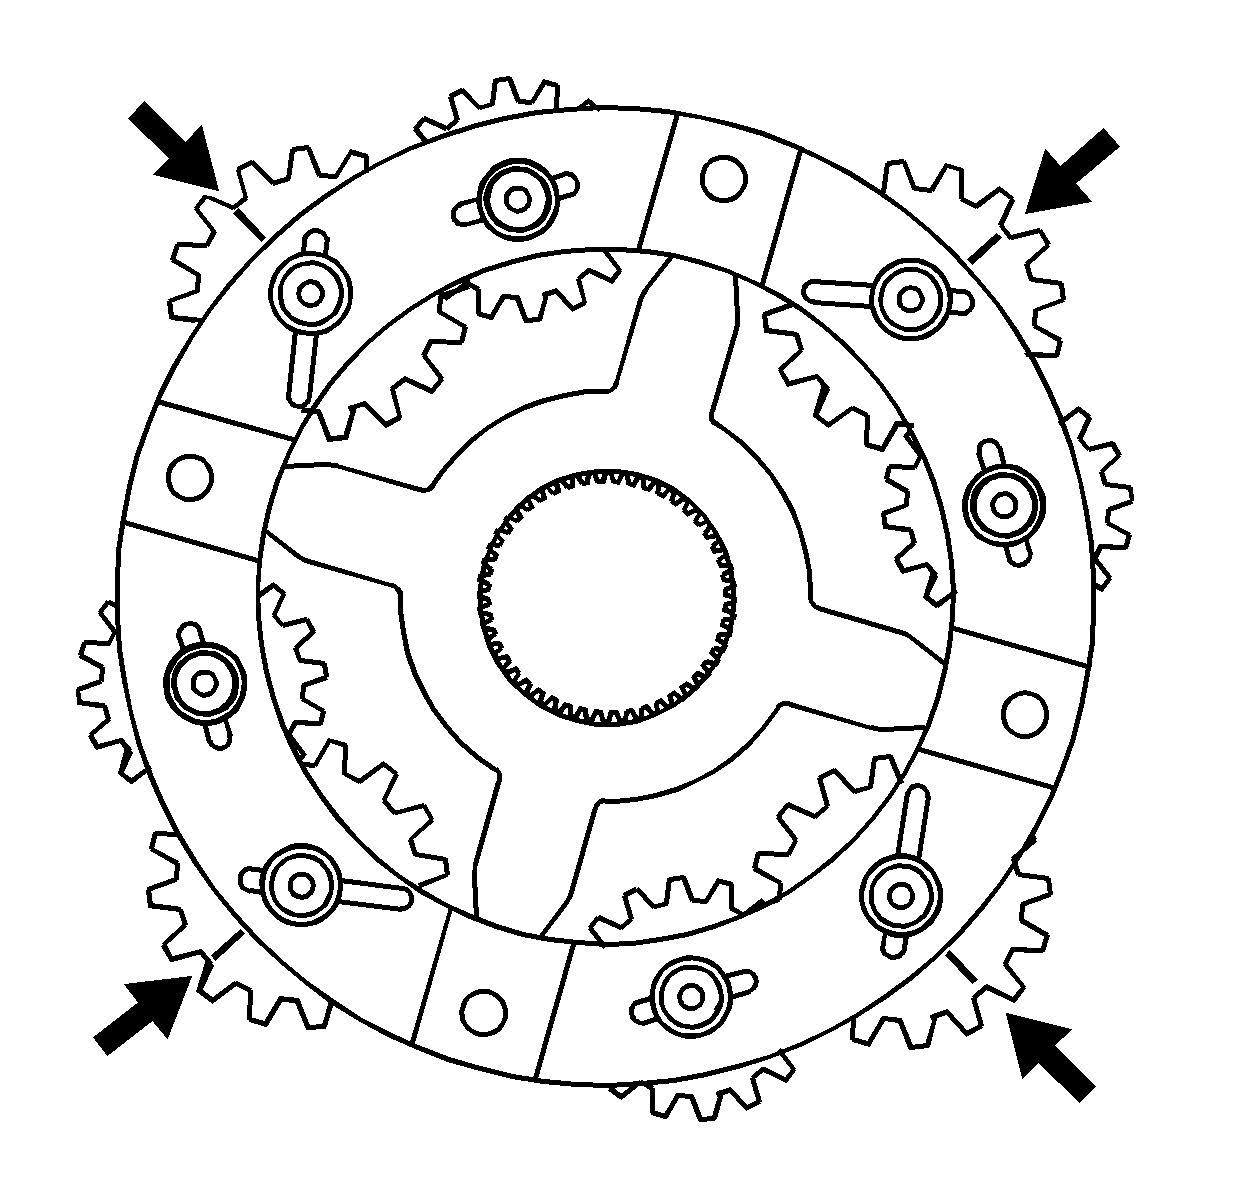
Important: The planetary differential gears are timed to the sun gears. If the gears are not timed properly, the differential will not rotate without binding.
- With the rear side of the planetary differential facing up, align the marks on the pinion gears. Position the alignment marks with an area on the planetary differential that can be reference for all gears.
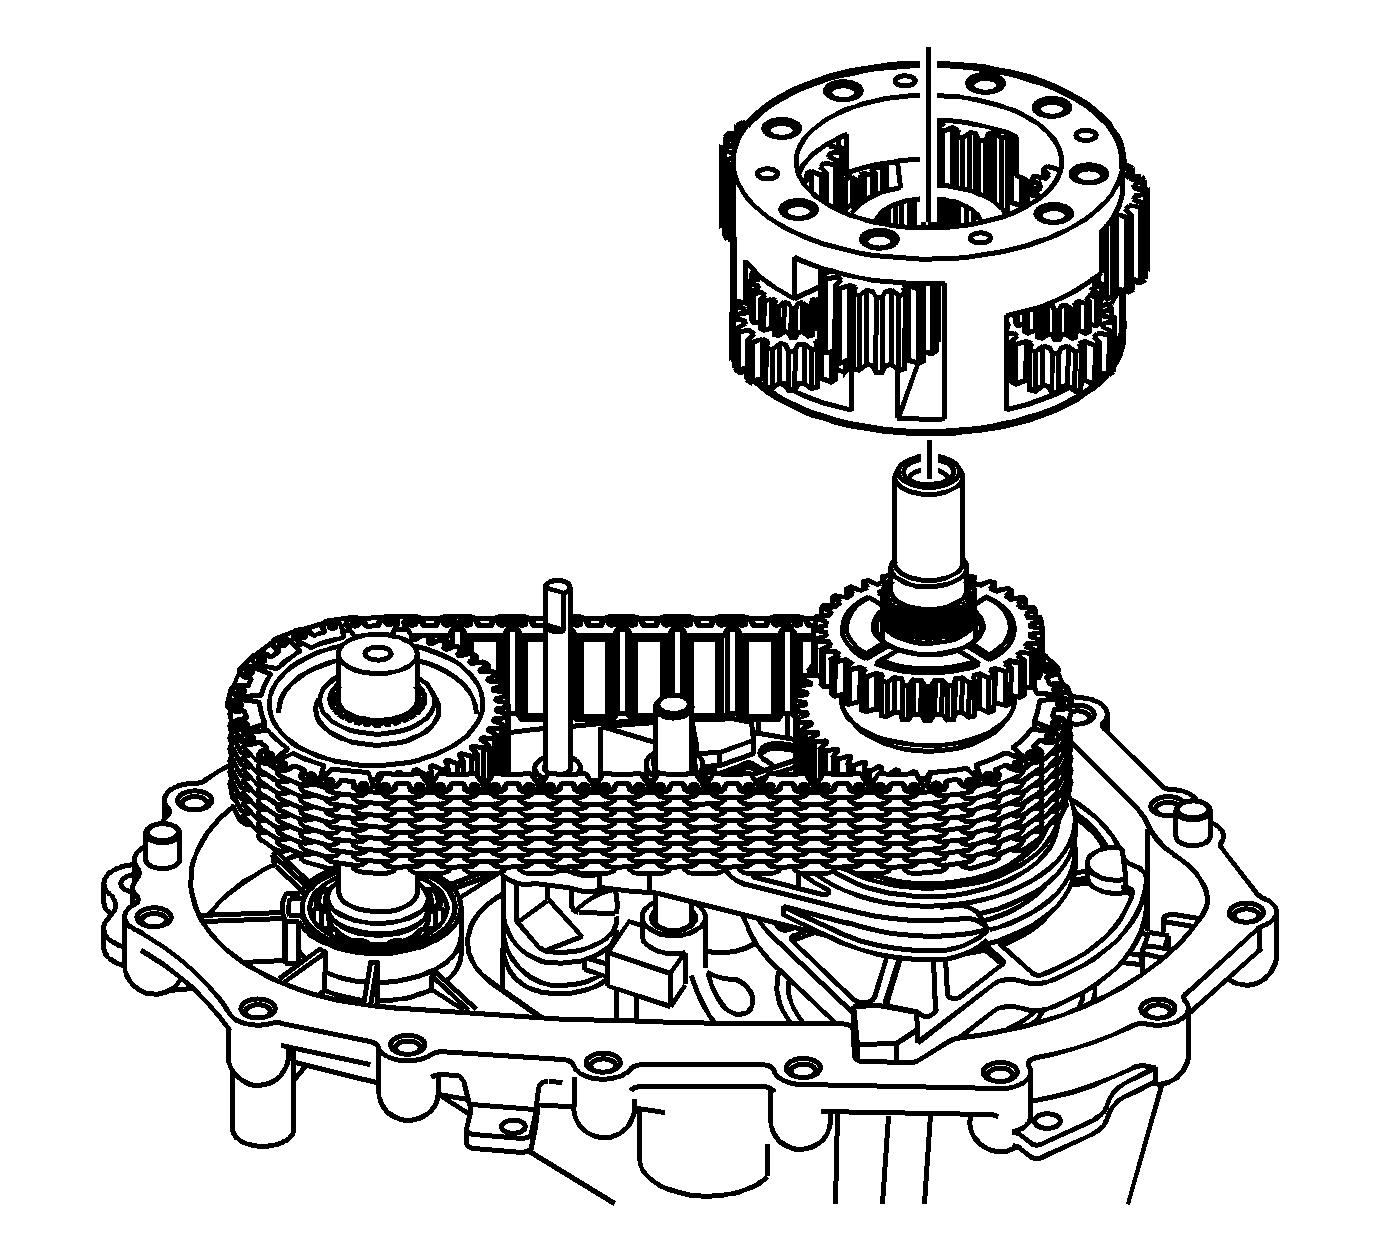
- Install the planetary differential assembly.
| • | Do not rotate the planetary differential pinion gears when installing. |
| • | Ensure the alignment marks are in position. |
| • | The single row pinion gears face rearward, or up. The double row pinion gears face forward, or down. |
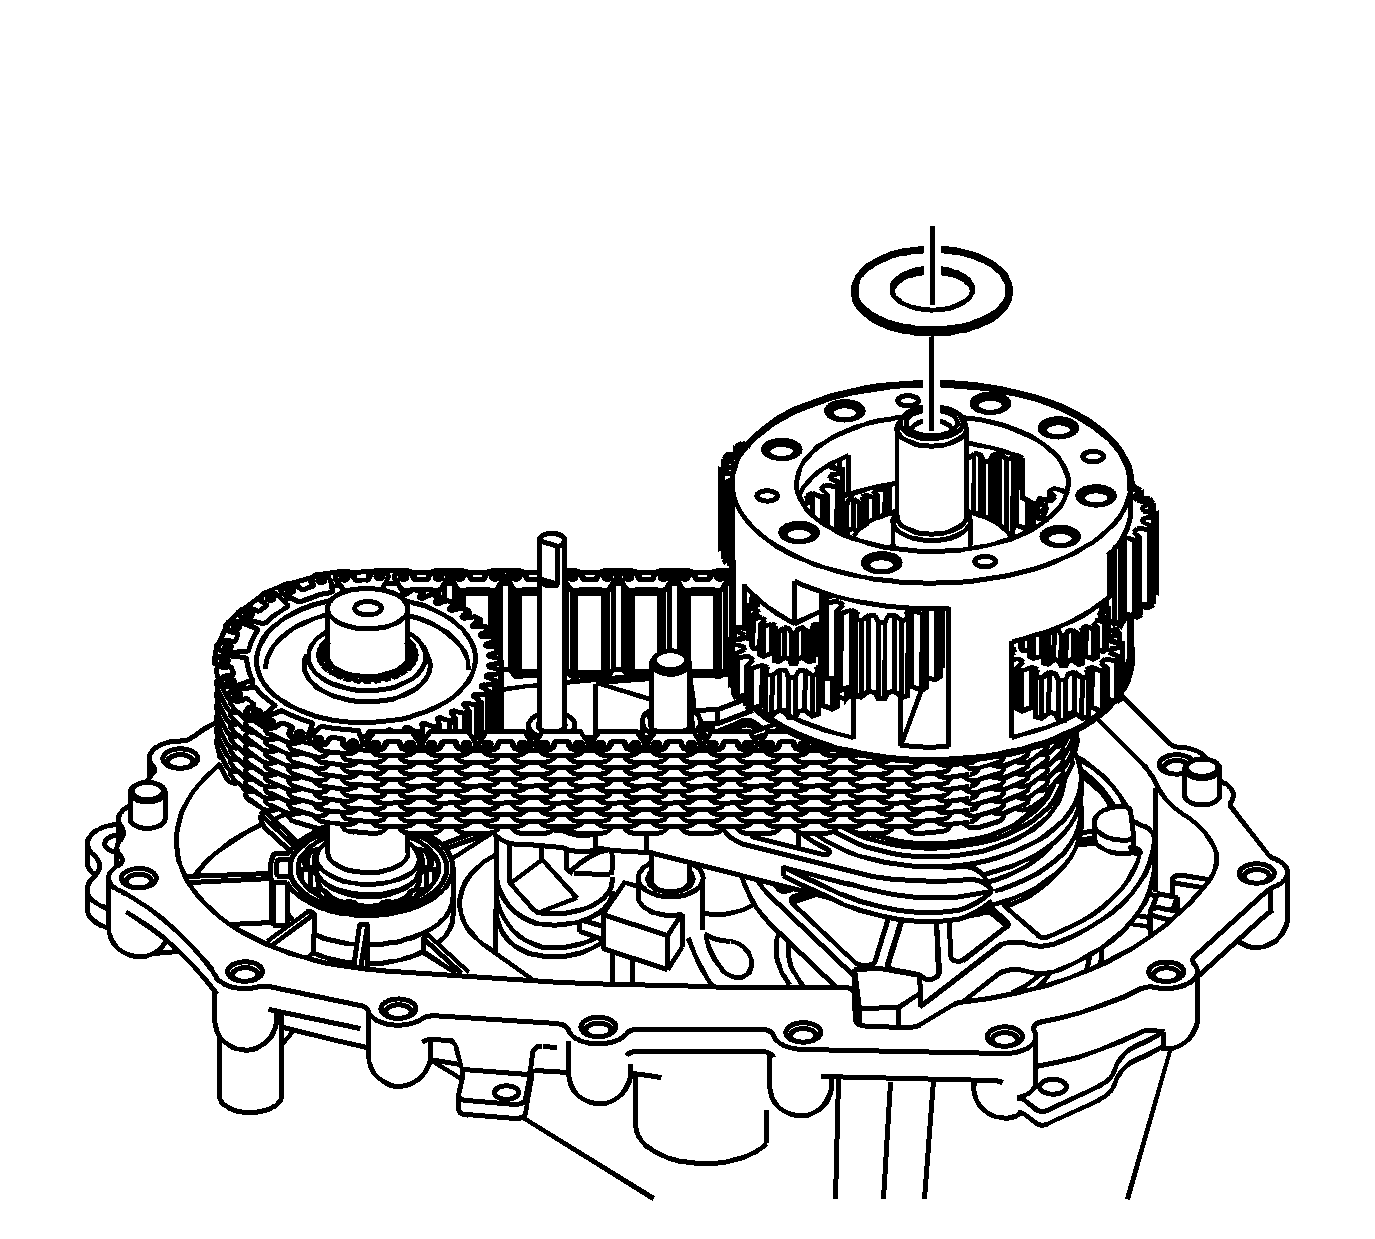
- Lubricate the rear output shaft thrust washer with
J 36850
or equivalent.
- Install the rear output shaft thrust washer.
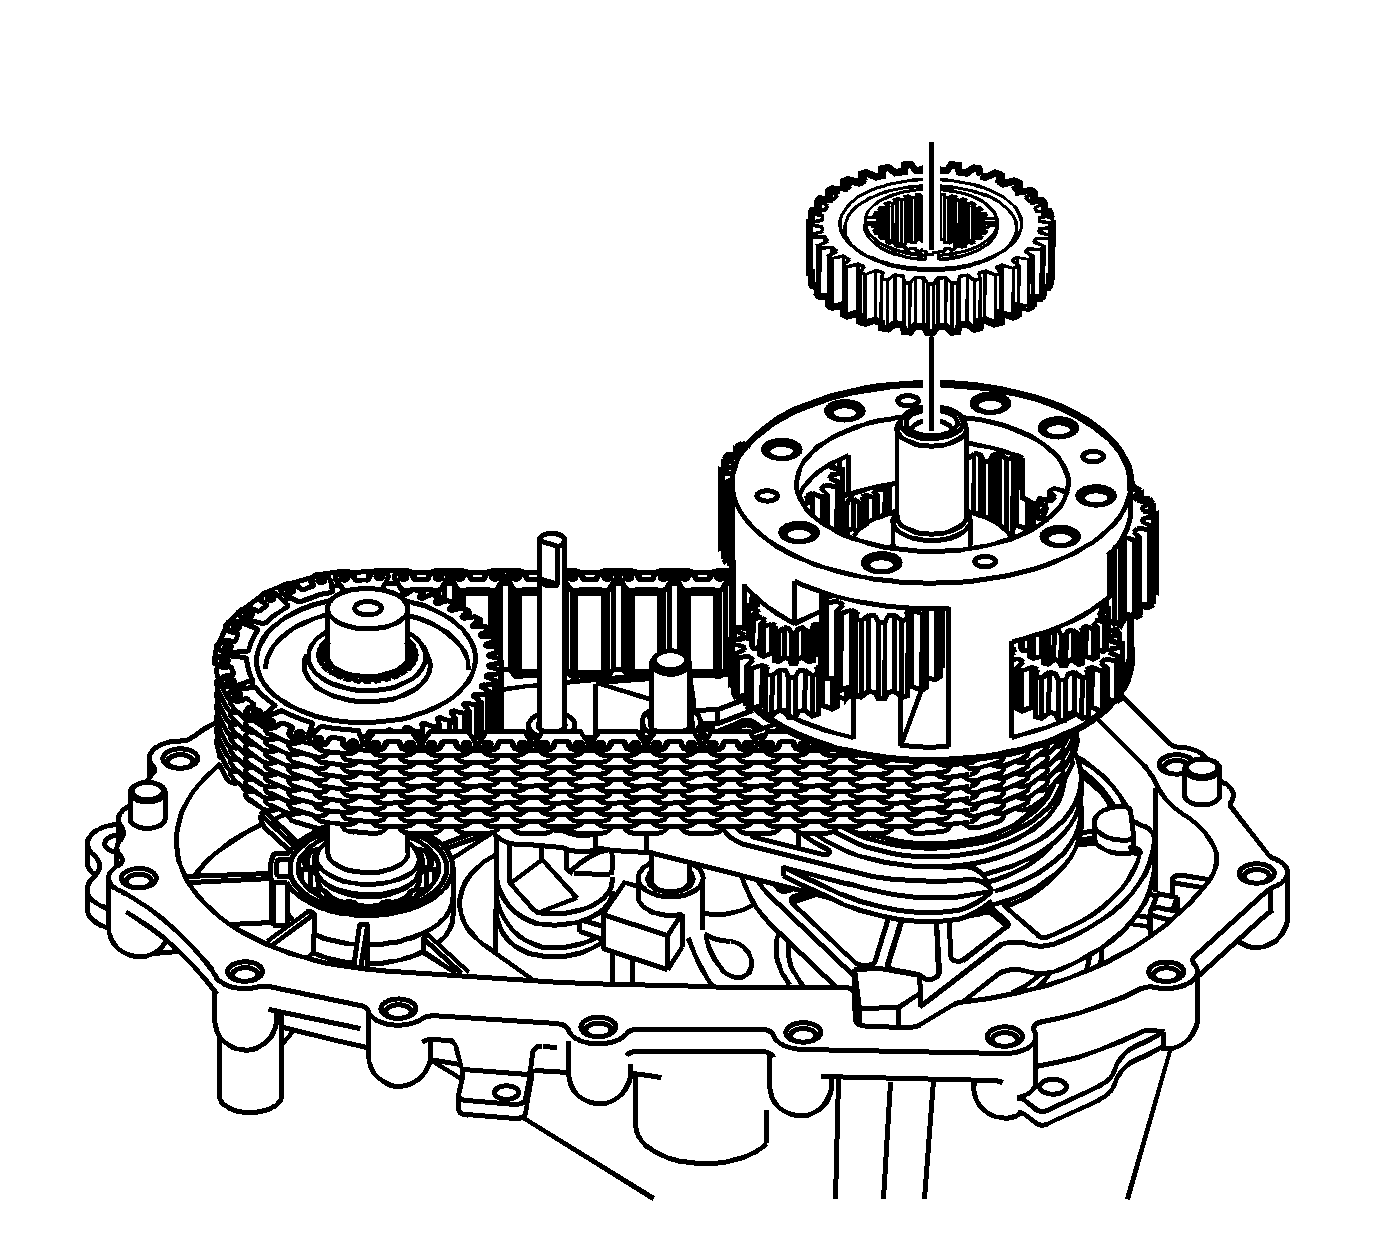
- Install the rear output sun gear.
| • | The shoulder side of the gear faces up. |
| • | Do not rotate the differential pinion gears. |
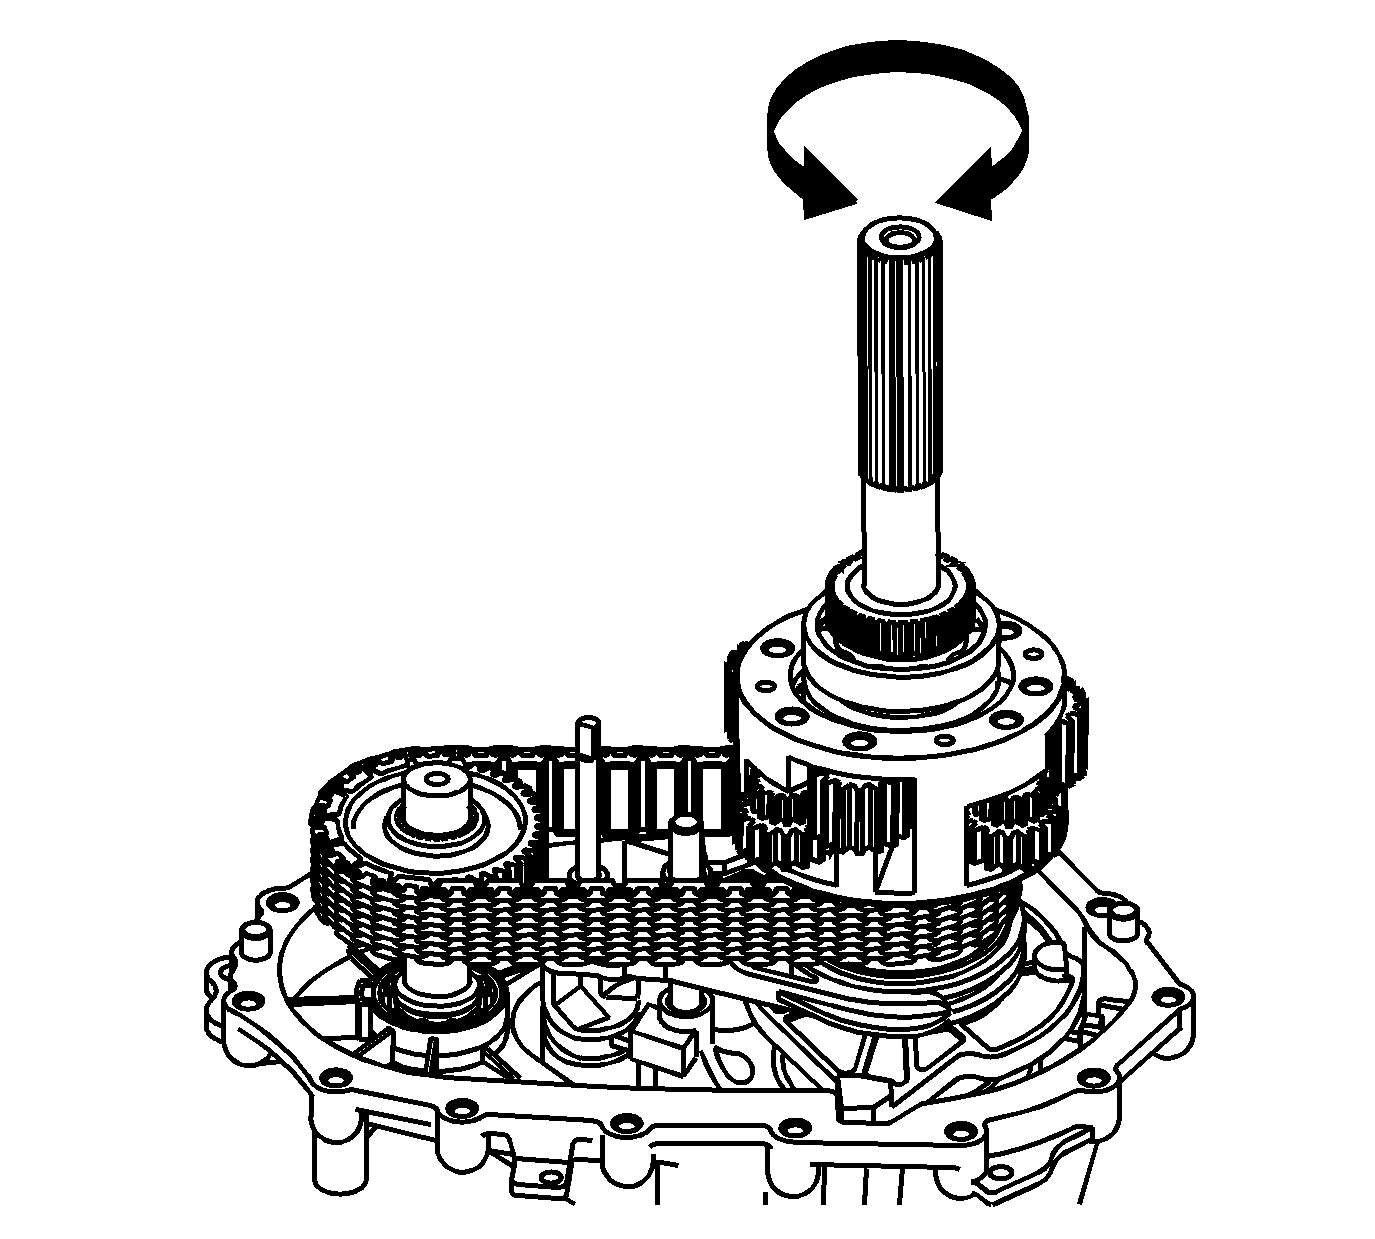
- Temporarily install the rear output
shaft to the planetary differential and the rear output sun gear.
- Rotate the rear output shaft 3 or 4 revolutions to rotate the planetary differential pinion gears. If properly aligned, the pinion gears will rotate freely and there will be no binding.
- Remove the rear output shaft without disturbing the rear sun gear.
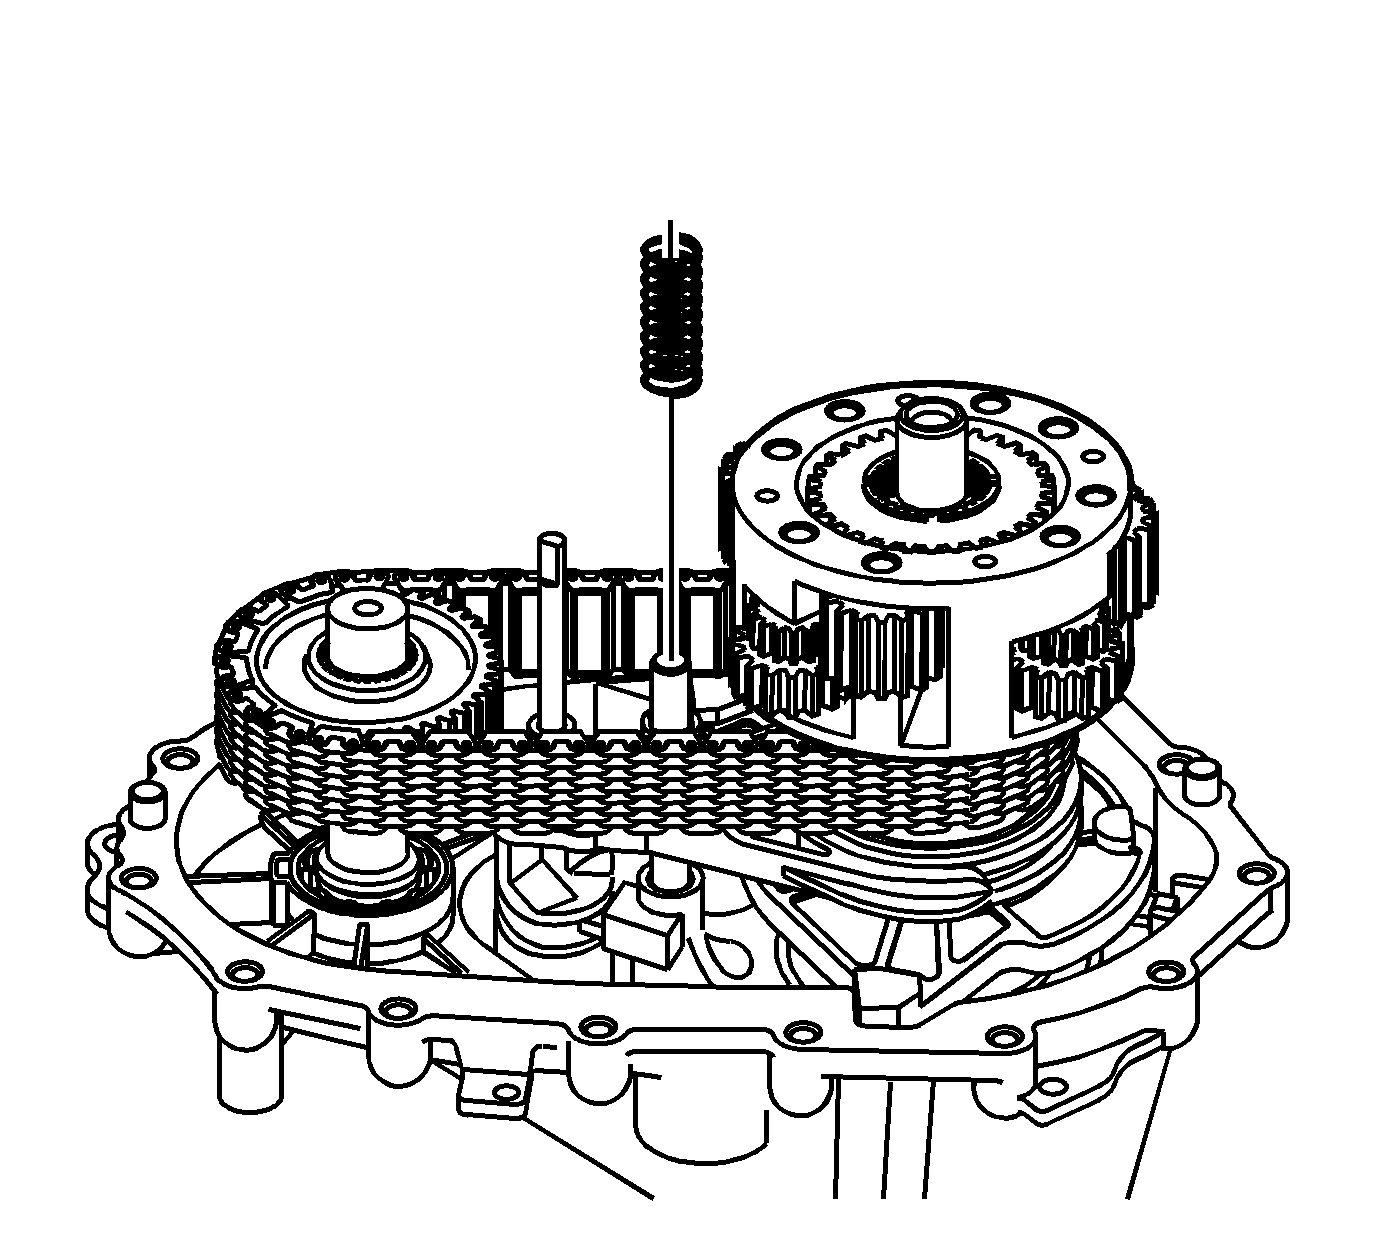
- Install the shift fork shaft spring.
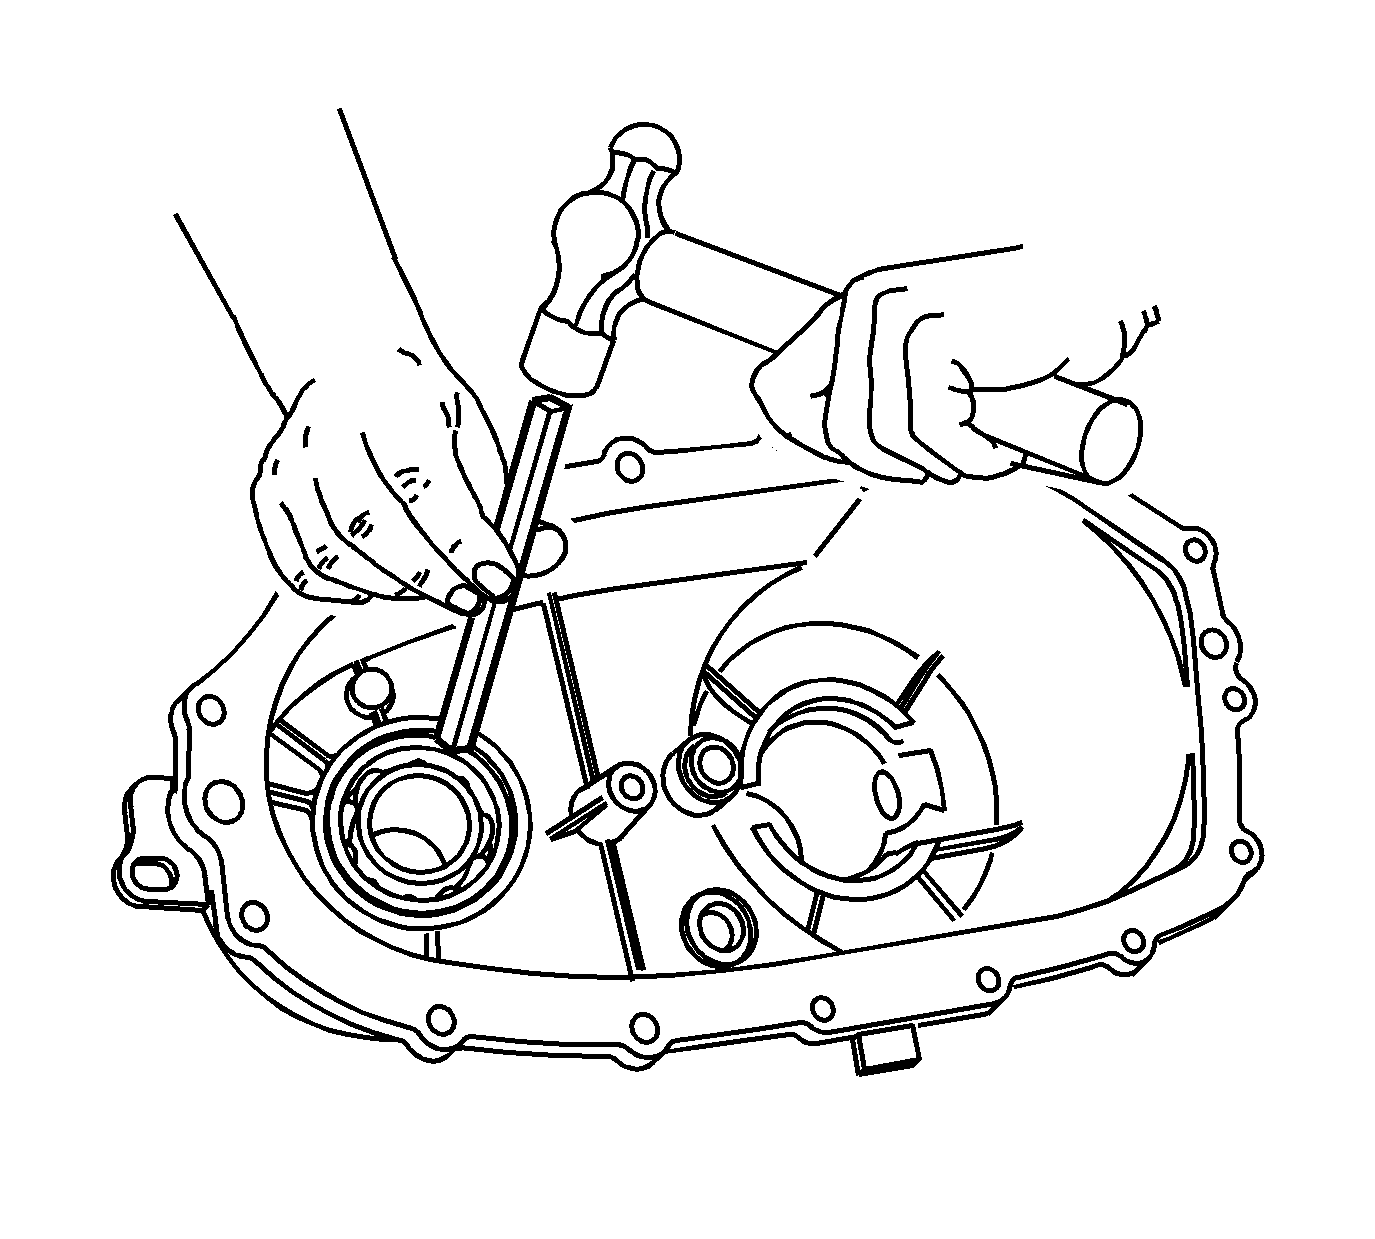
- Install the front output shaft rear
bearing in the rear case half.
| • | Use a hammer and a brass drift only on the outer bearing race. |
| • | Ensure the bearing is kept square to the bore while installing. |
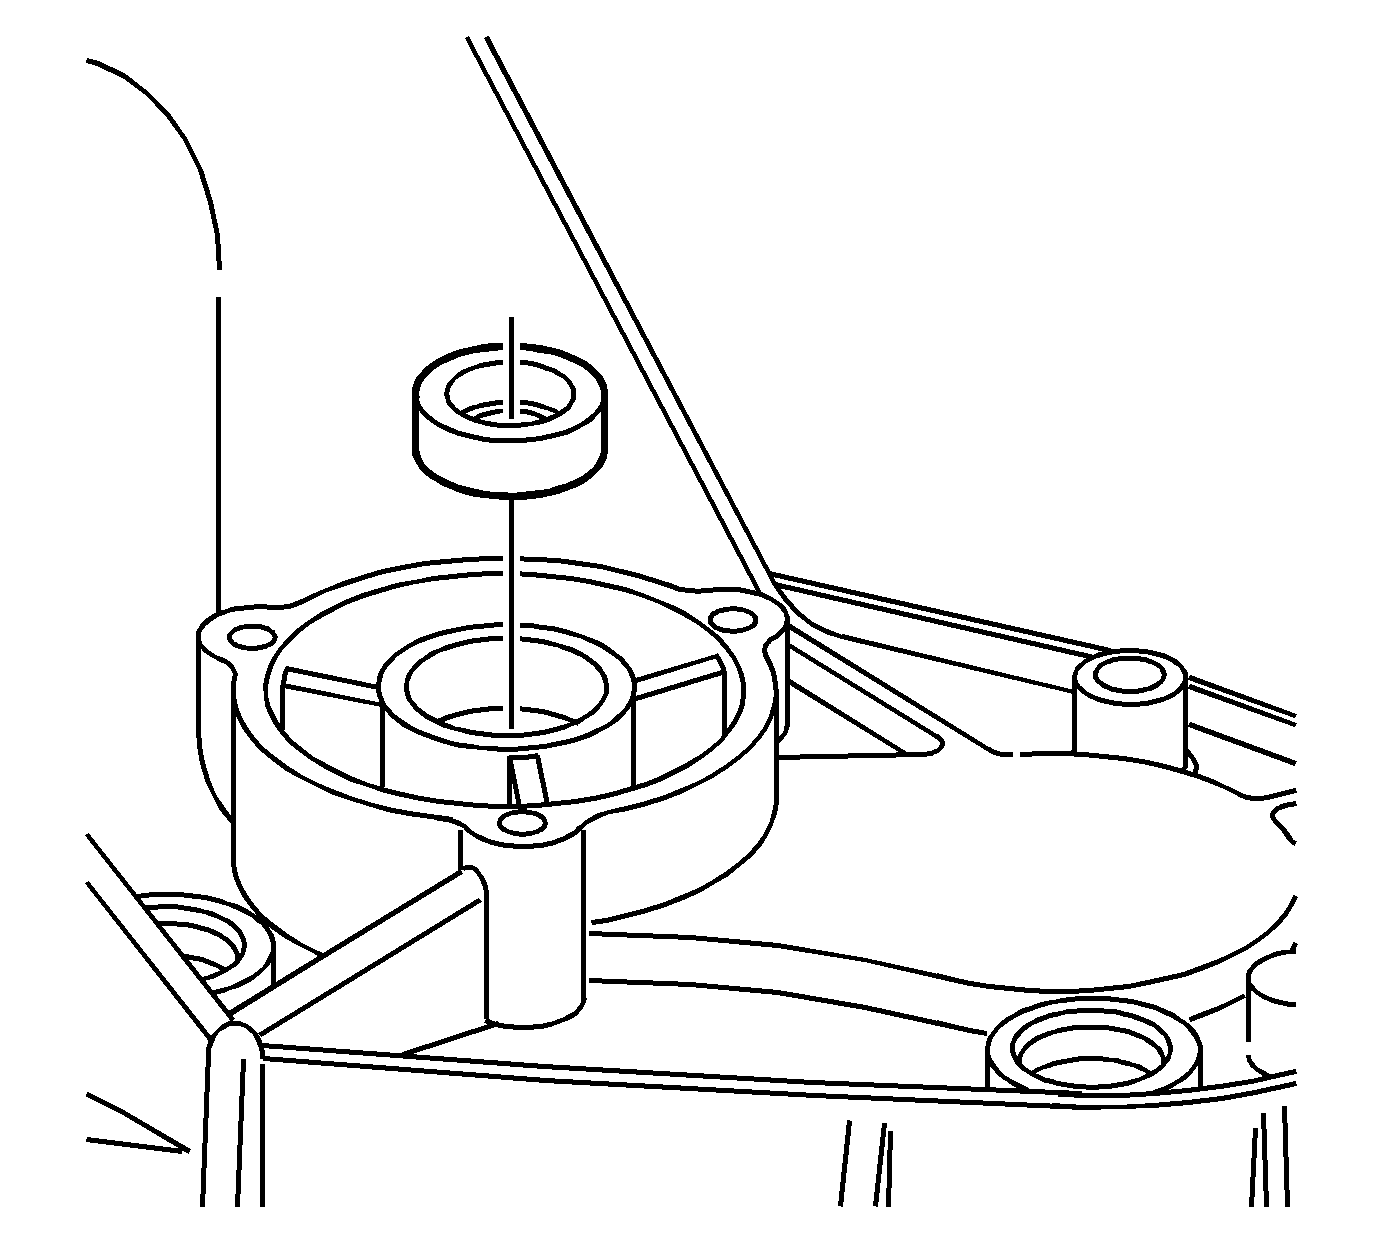
- Install the shift shaft seal. The seal will install using hand pressure. The spring
side, or opened side, of the seal faces outward.
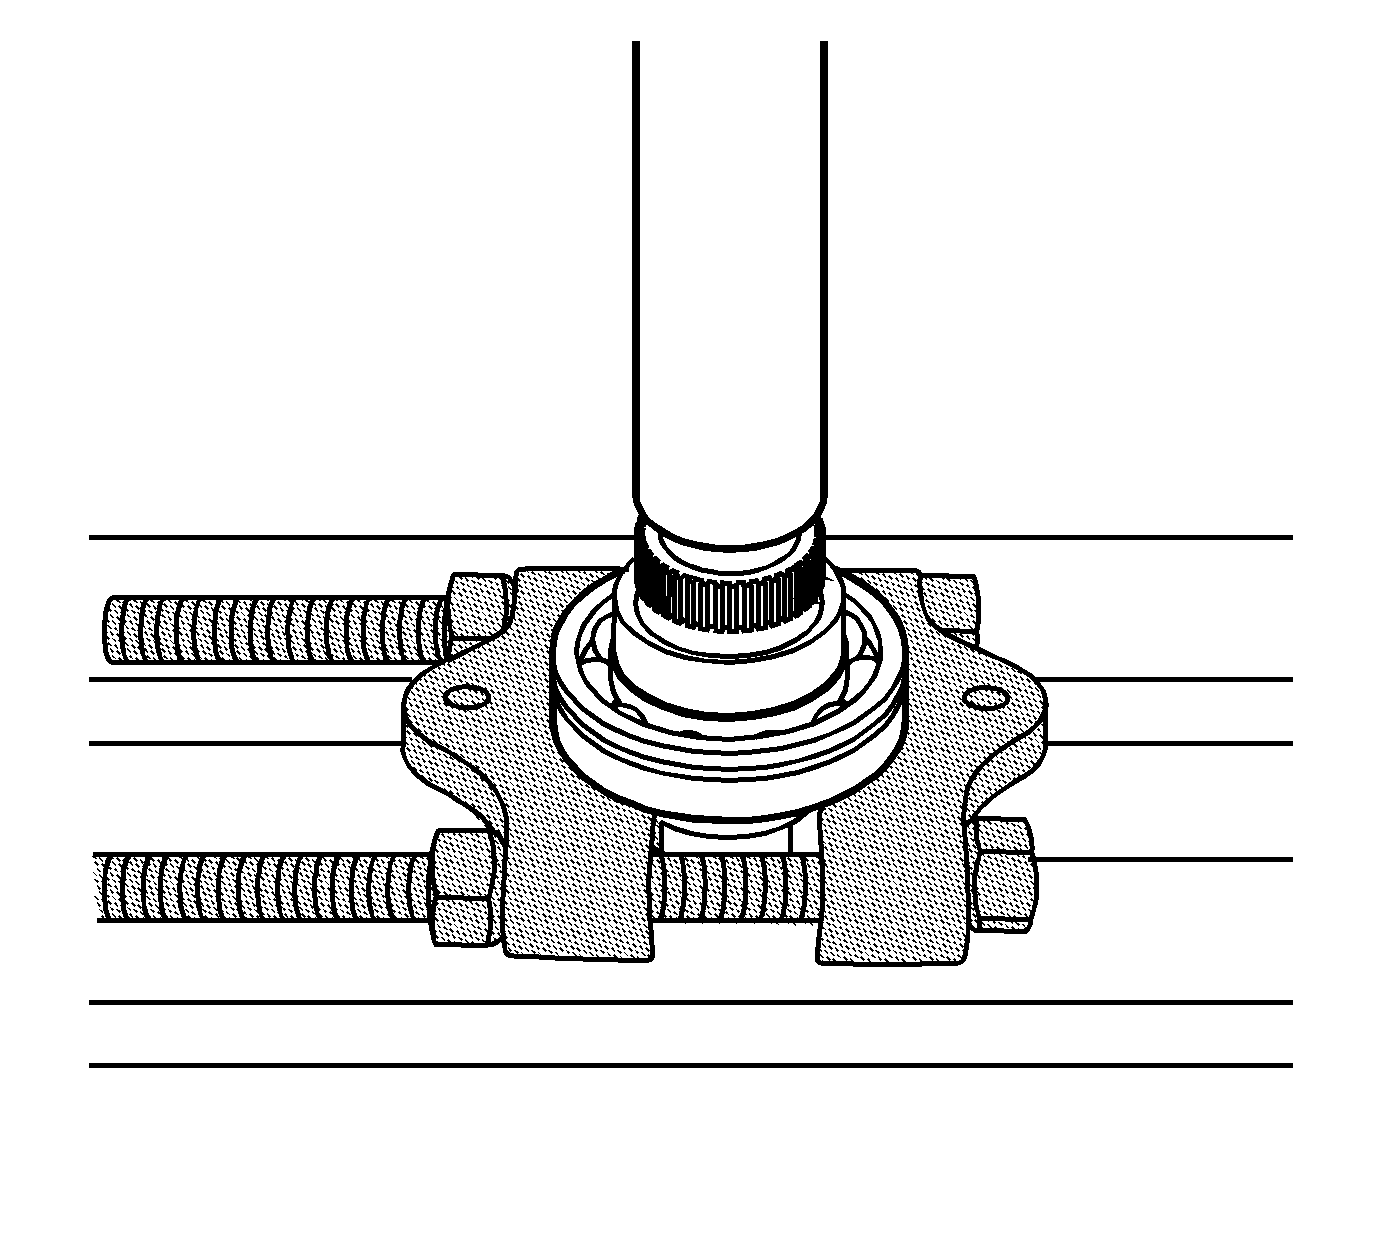
- Using a hydraulic press and the
J 22912-B
, install the rear output shaft bearing.
| • | The retaining ring groove on the bearing goes toward the input end, or forward. |
| • | Use a suitable press plate on the end of the rear output shaft. |
| • | Ensure the bearing is supported on the inner race. |
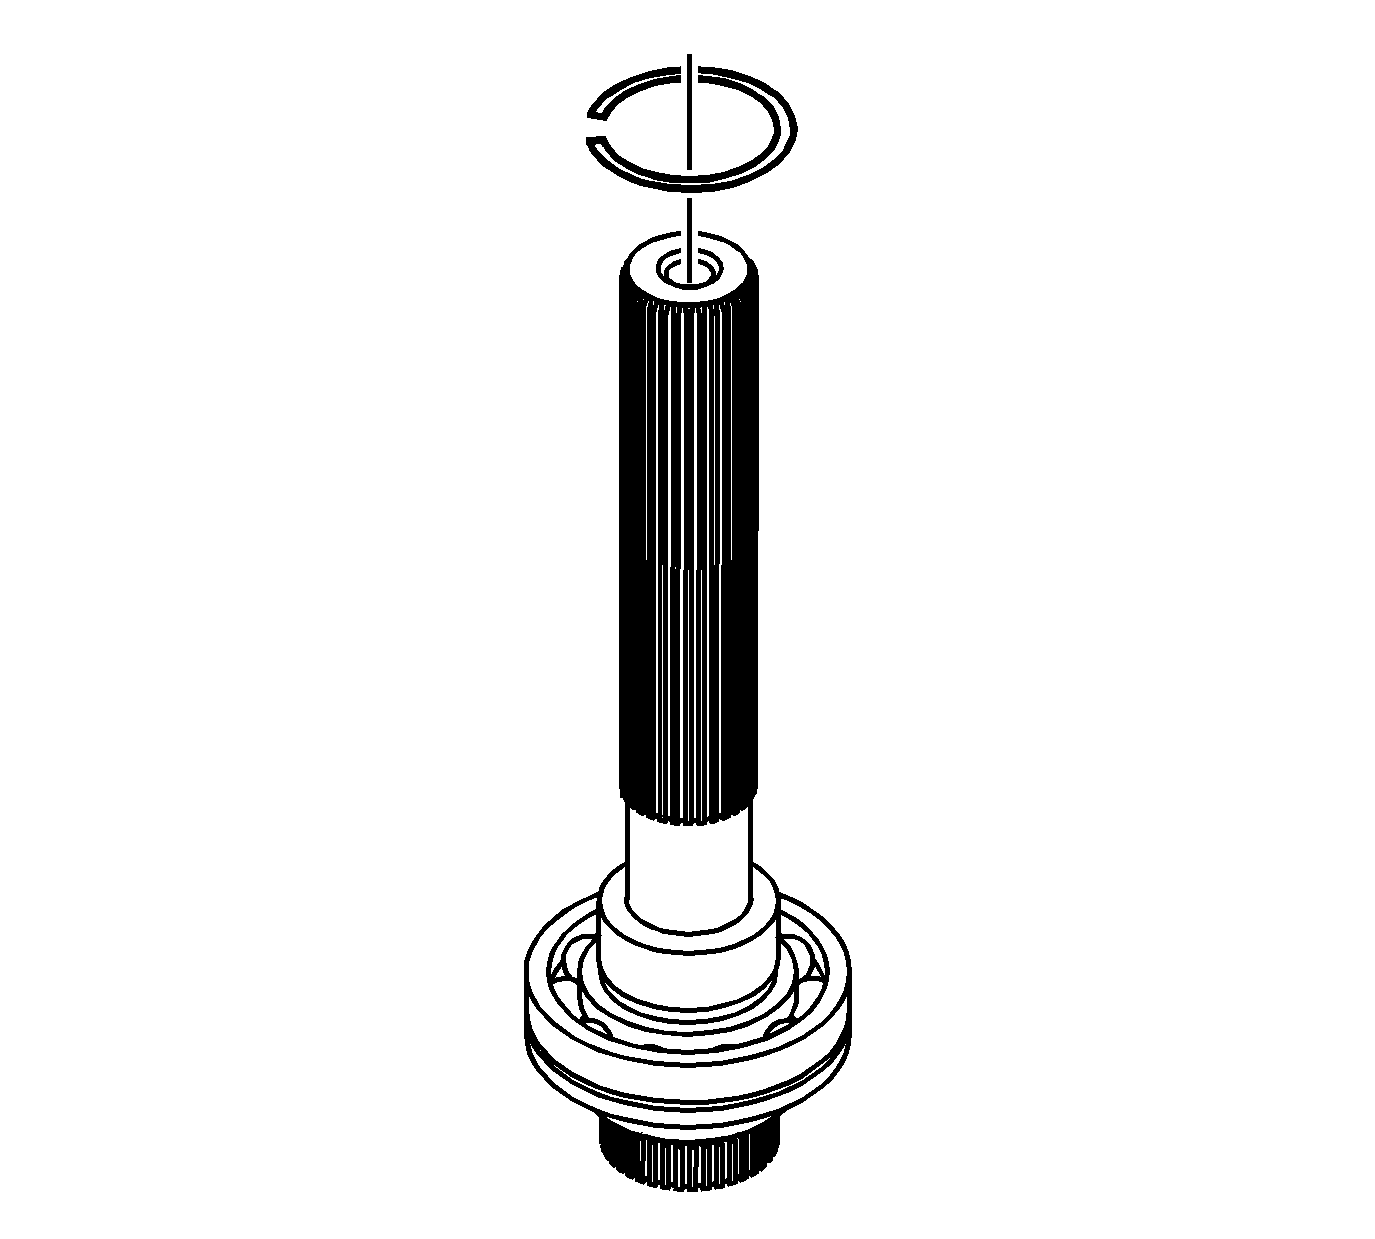
- Install a NEW rear output shaft bearing
retaining ring.
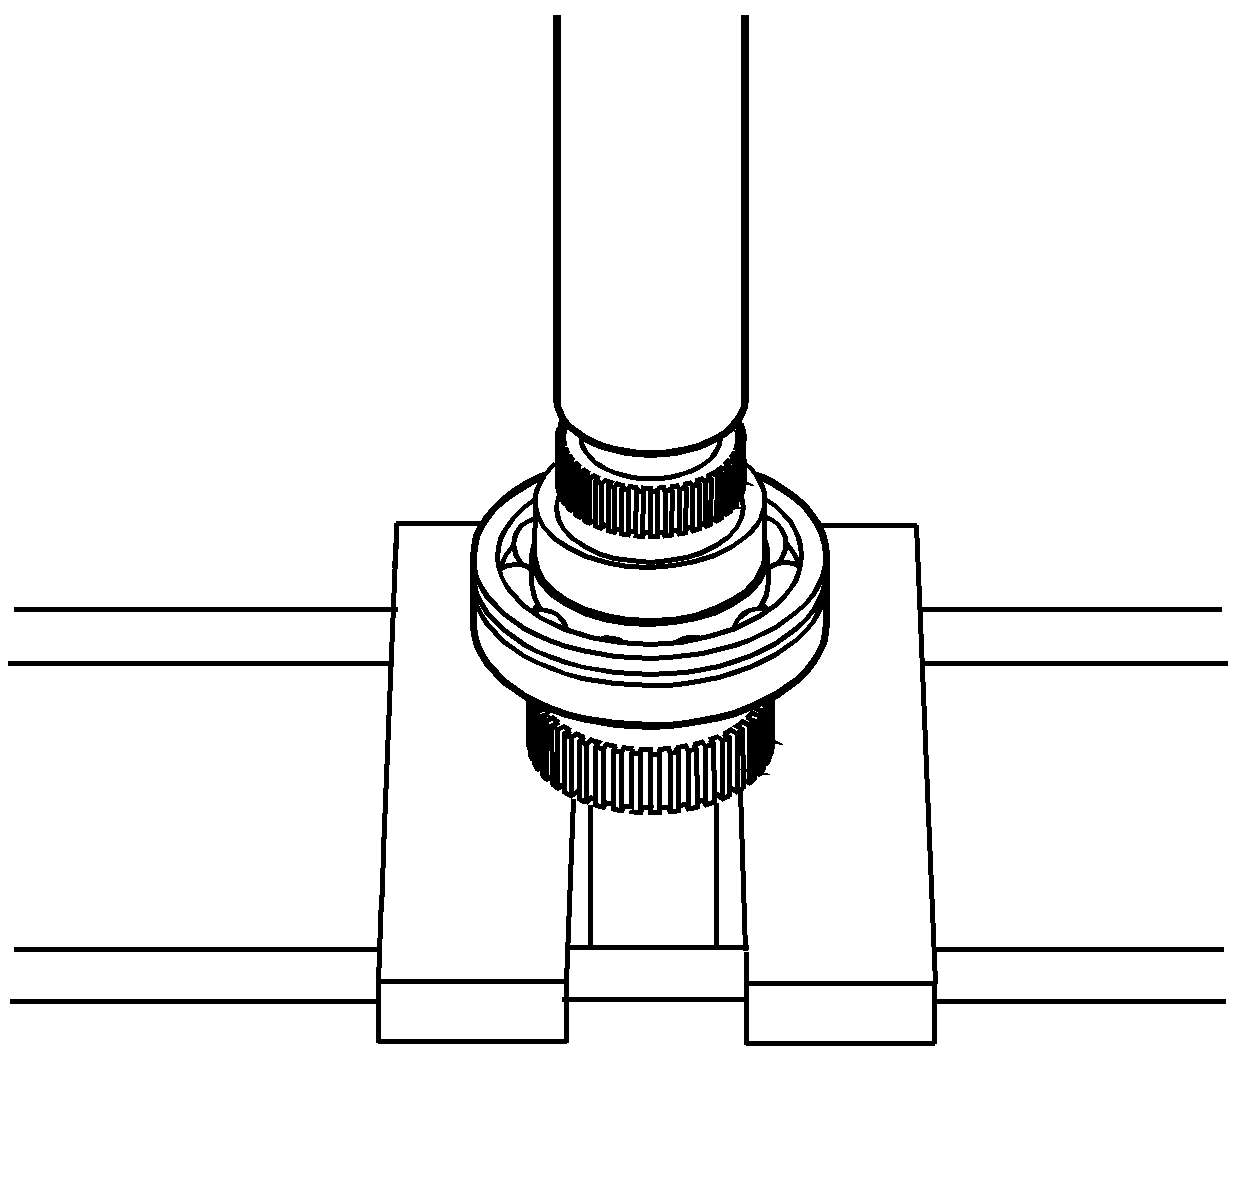
- Using a hydraulic press, install a NEW speed sensor tone wheel.
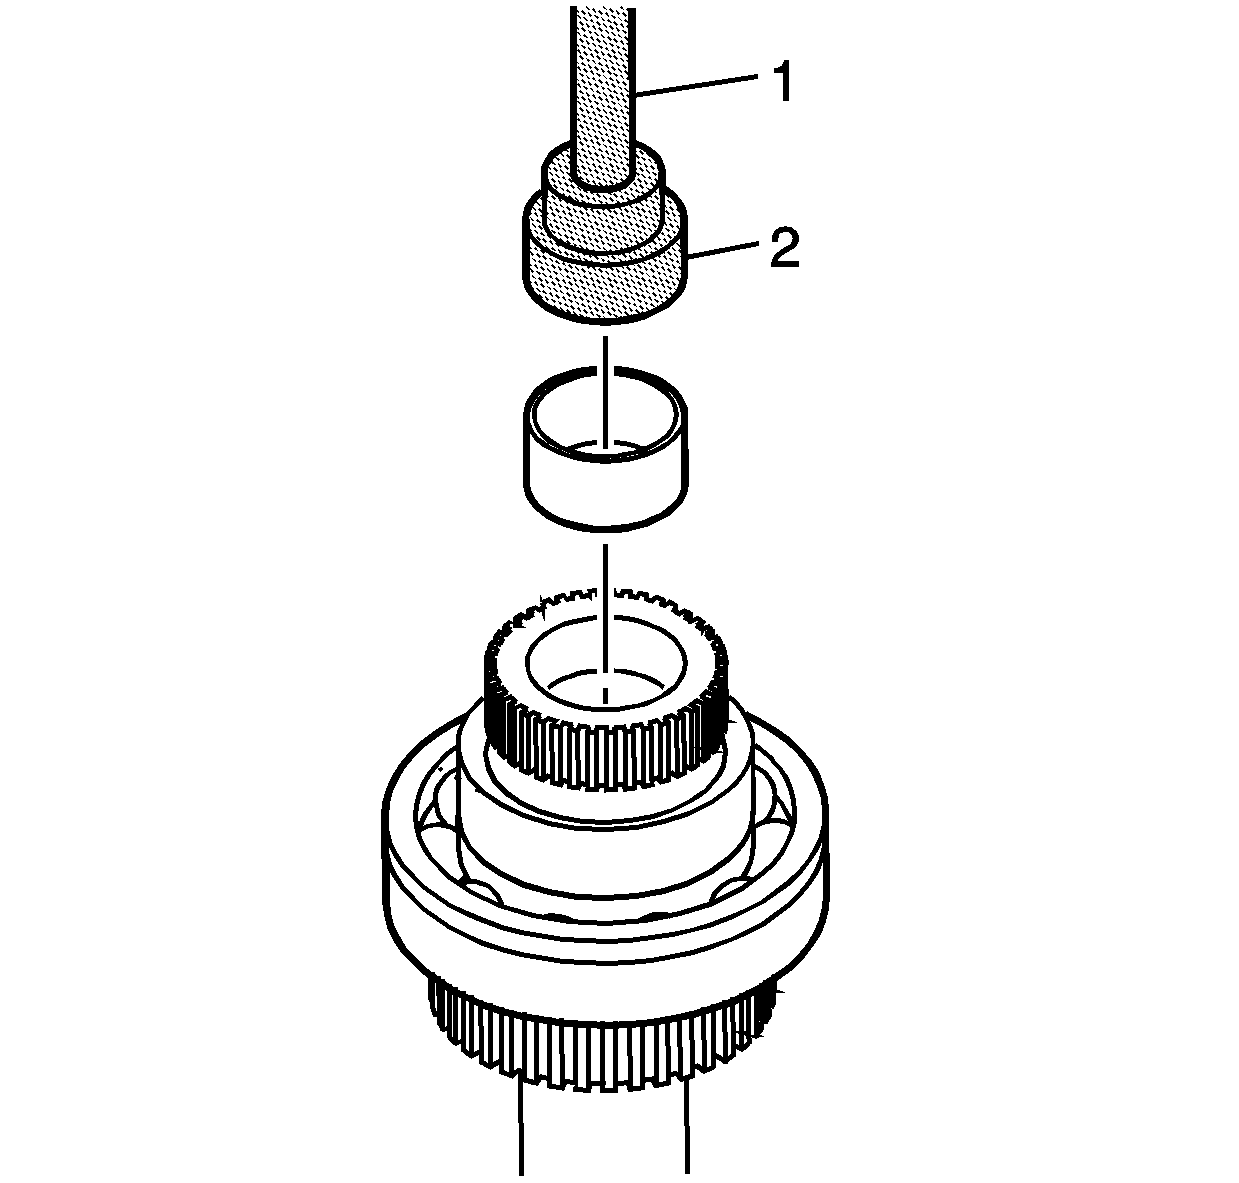
- Using the
J 42176
(1) and
J 45757
(2), install the mainshaft rear support bushing in the rear output shaft.
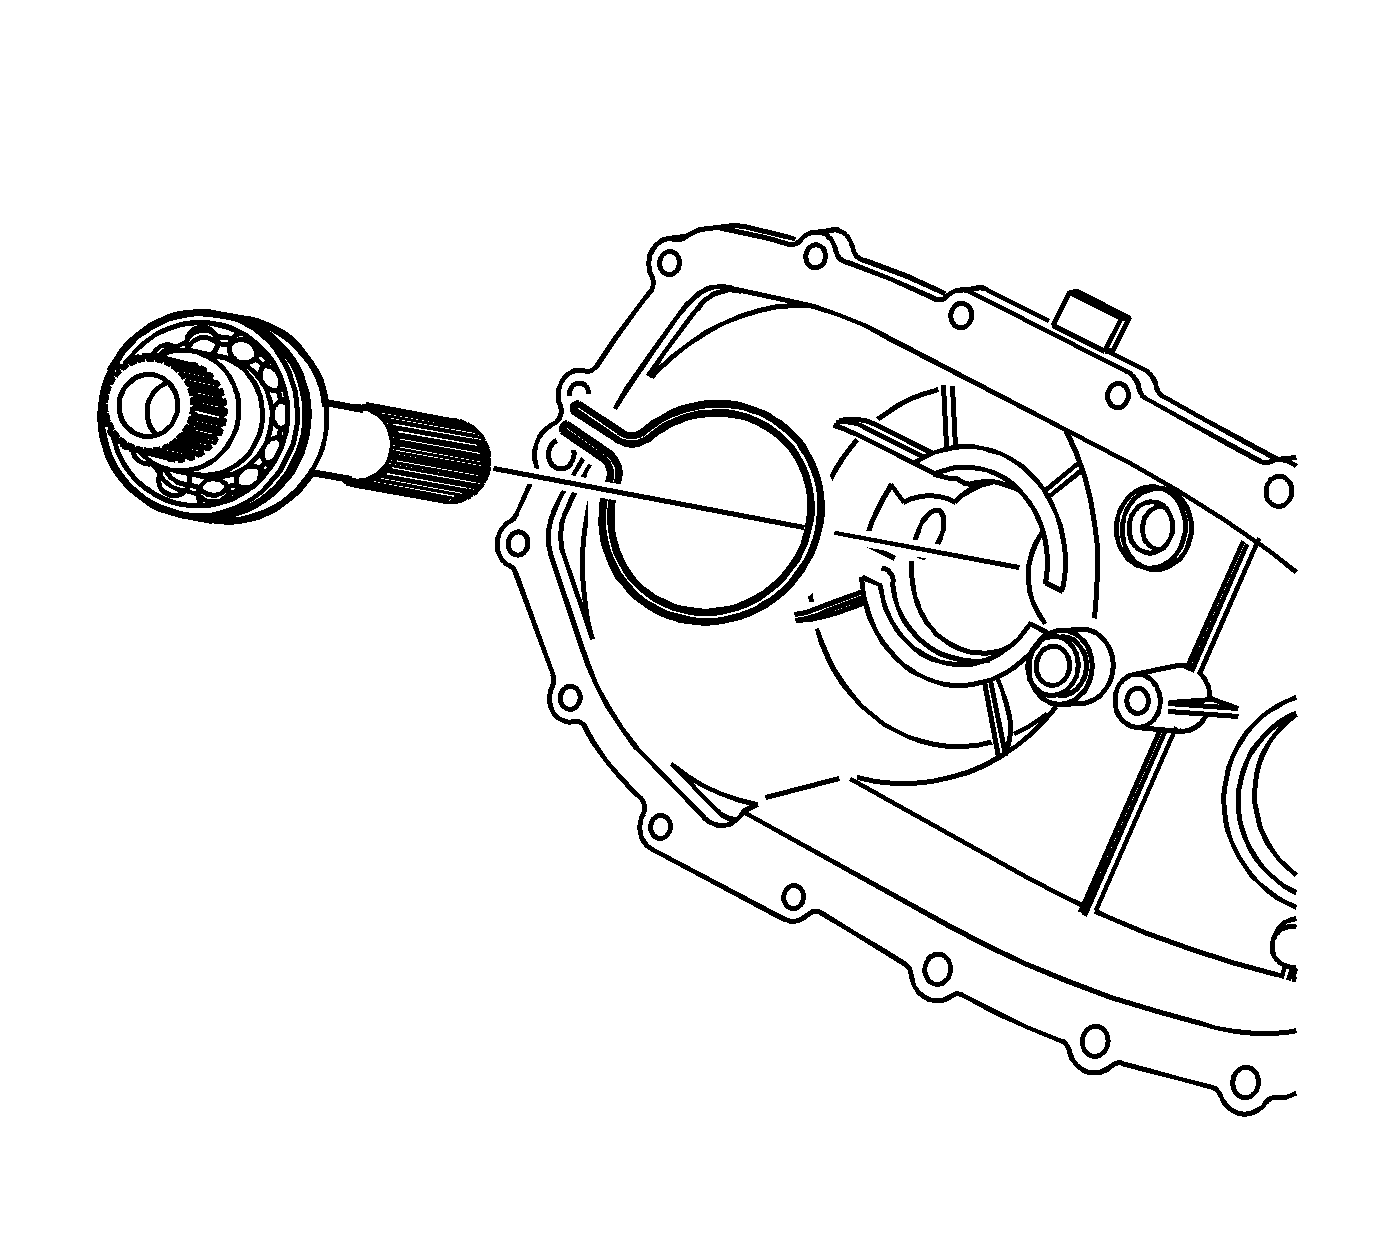
- Install the rear output shaft in the rear case half.
| 50.1. | Spread the rear output shaft bearing outer retaining ring. |
| 50.2. | Install the rear output shaft bearing outer retaining ring until it is seated in the bearing groove. |
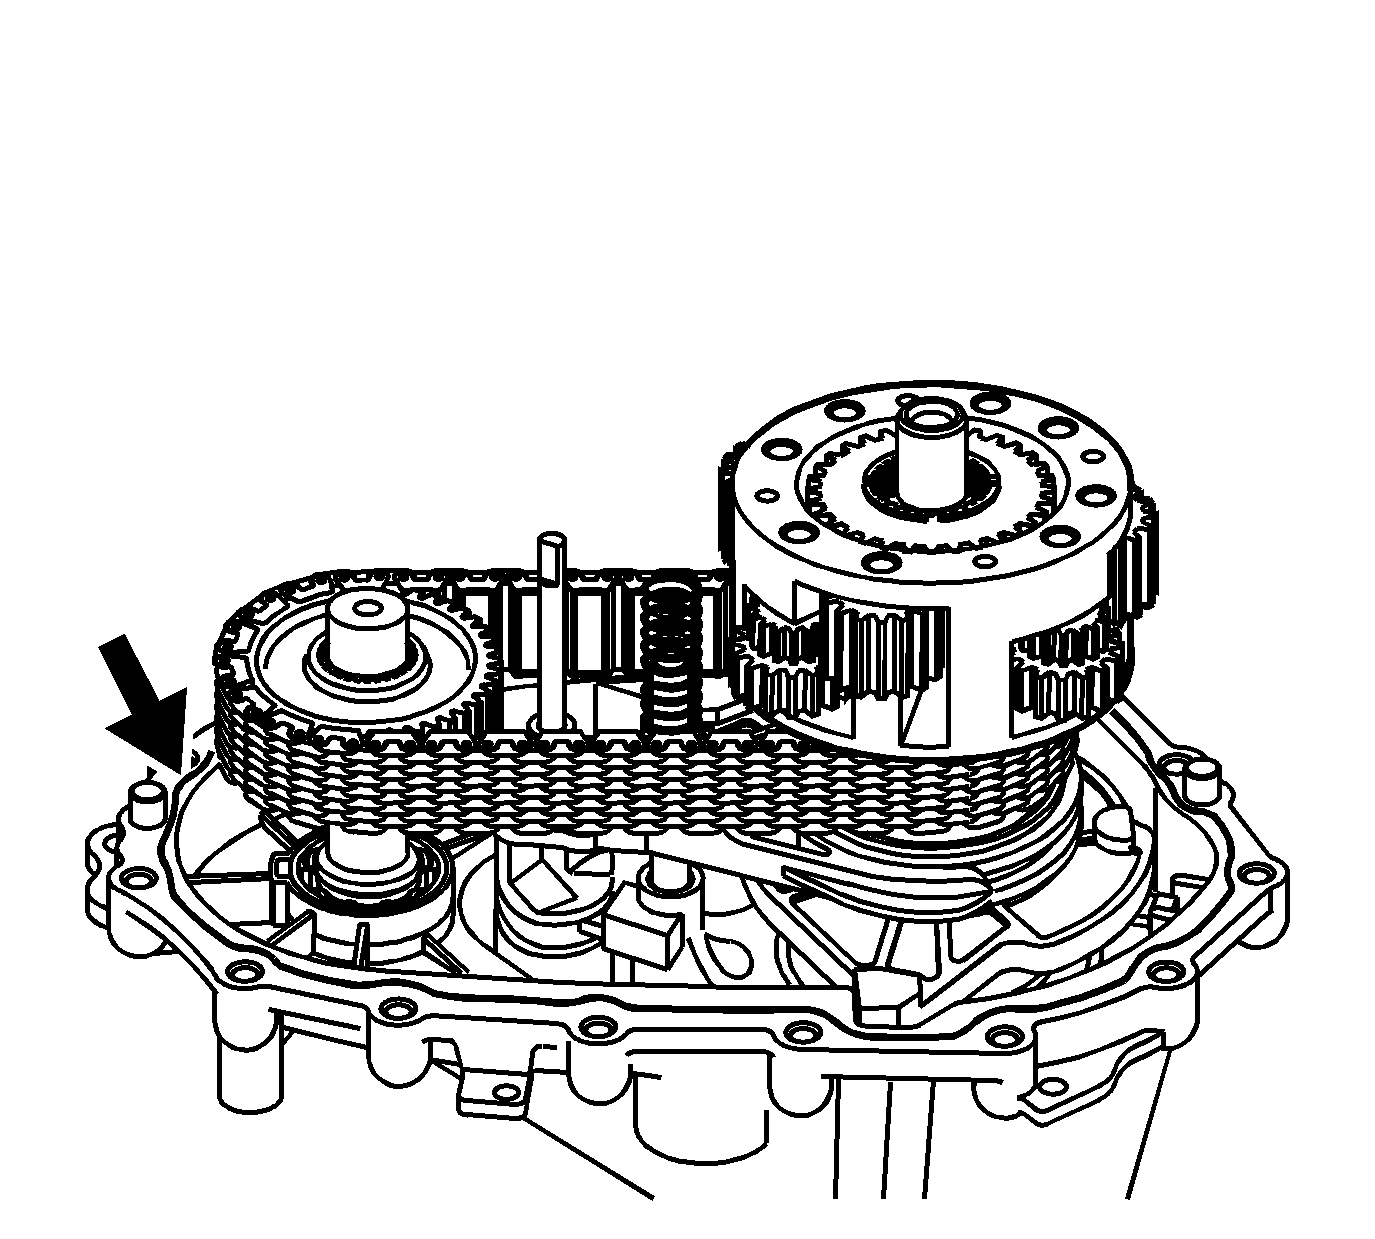
Notice: Apply the proper amount of sealant to the flange when assembling the transfer case. Excessive amounts of sealant can plug the oil pump screen, resulting in internal component failure.
Important:
| • | Ensure that both the sealing surfaces on the front and rear case halves are free of dirt, oil, and cleaning solvent. |
| • | Ensure the locating pins are installed in the case halves. |
- Install the locating pins in the front case and rear case half, if necessary.
- Apply a 3.175 mm (1/8 in) bead of room temperature vulcanizing (RTV) sealant GM P/N 12345739 (Canadian P/N 10953541), or equivalent, to the mating surfaces of the front case half.
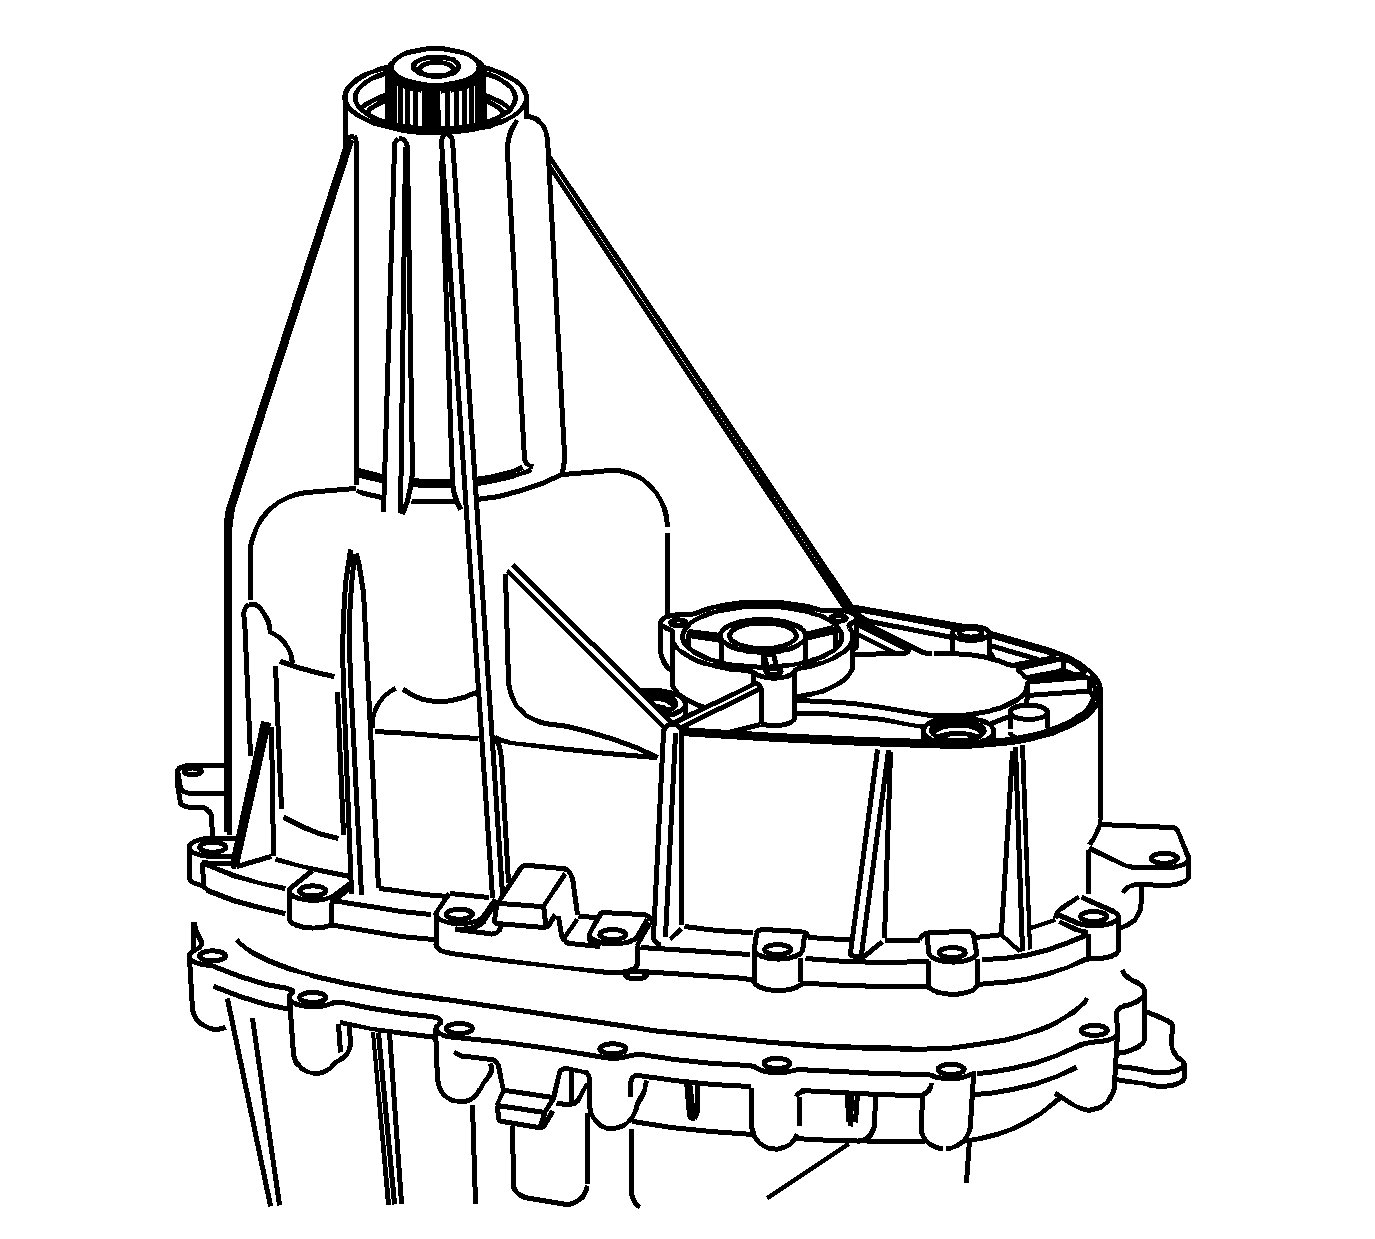
- Lower the rear case half into place.
The
rear output shaft may require rotating to align the teeth with the planetary differential.
Notice: This component is made of magnesium. Proper assembly is required to
prevent damage. Ensure the magnesium transfer case housings are properly
insulated from all external steel components, or galvanic corrosion will occur.
New nylon coated case bolts and aluminum washers must be used. Use only aluminum
fill and drain plugs. Use only aluminum brackets under the case bolts. Ensure
new seals are installed that have a rubber insulated outside diameter and
have no tears or cuts. Extensive damage will occur if there is galvanic corrosion
between the magnesium and steel components.
- Inspect the case bolts nylon coating for cuts or tears.
- Replace the case bolts if there is any damage to the nylon coating.
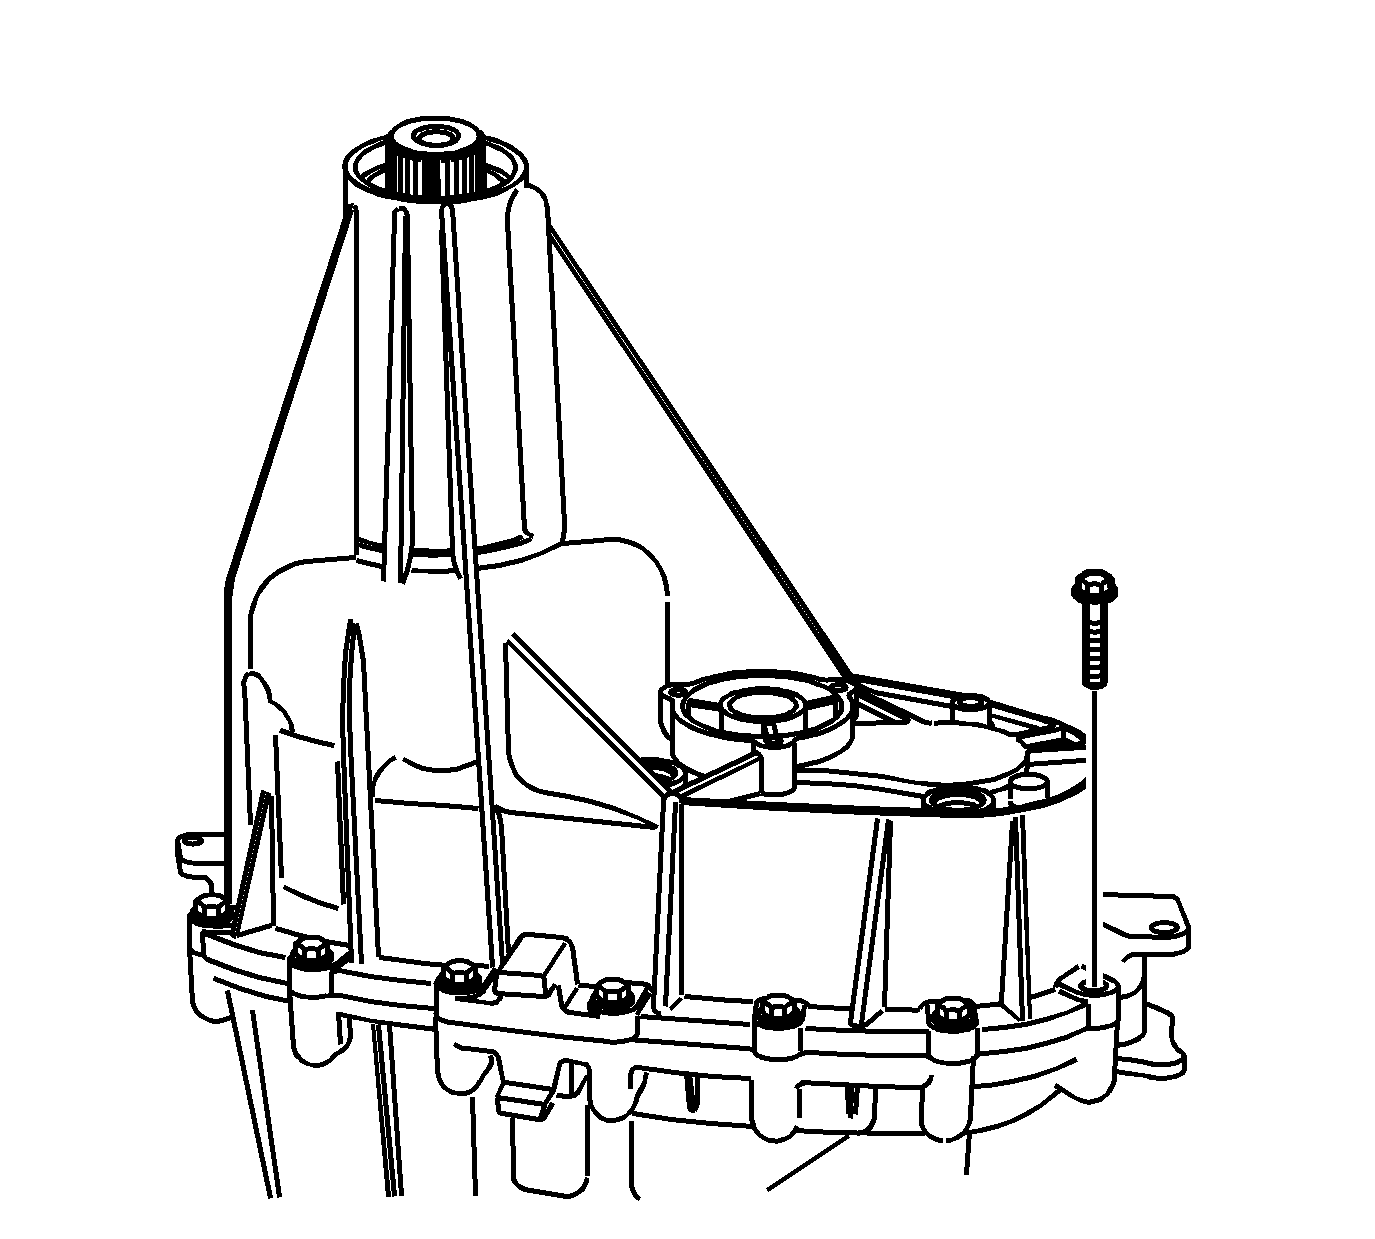
Important: The case bolts are self-tapping. They must be hand started. Do not use power assisted tools to install the bolts.
- Install the case bolts with washers, and the brackets.
Tighten
Tighten the case bolts to 25 N·m (18 lb ft).
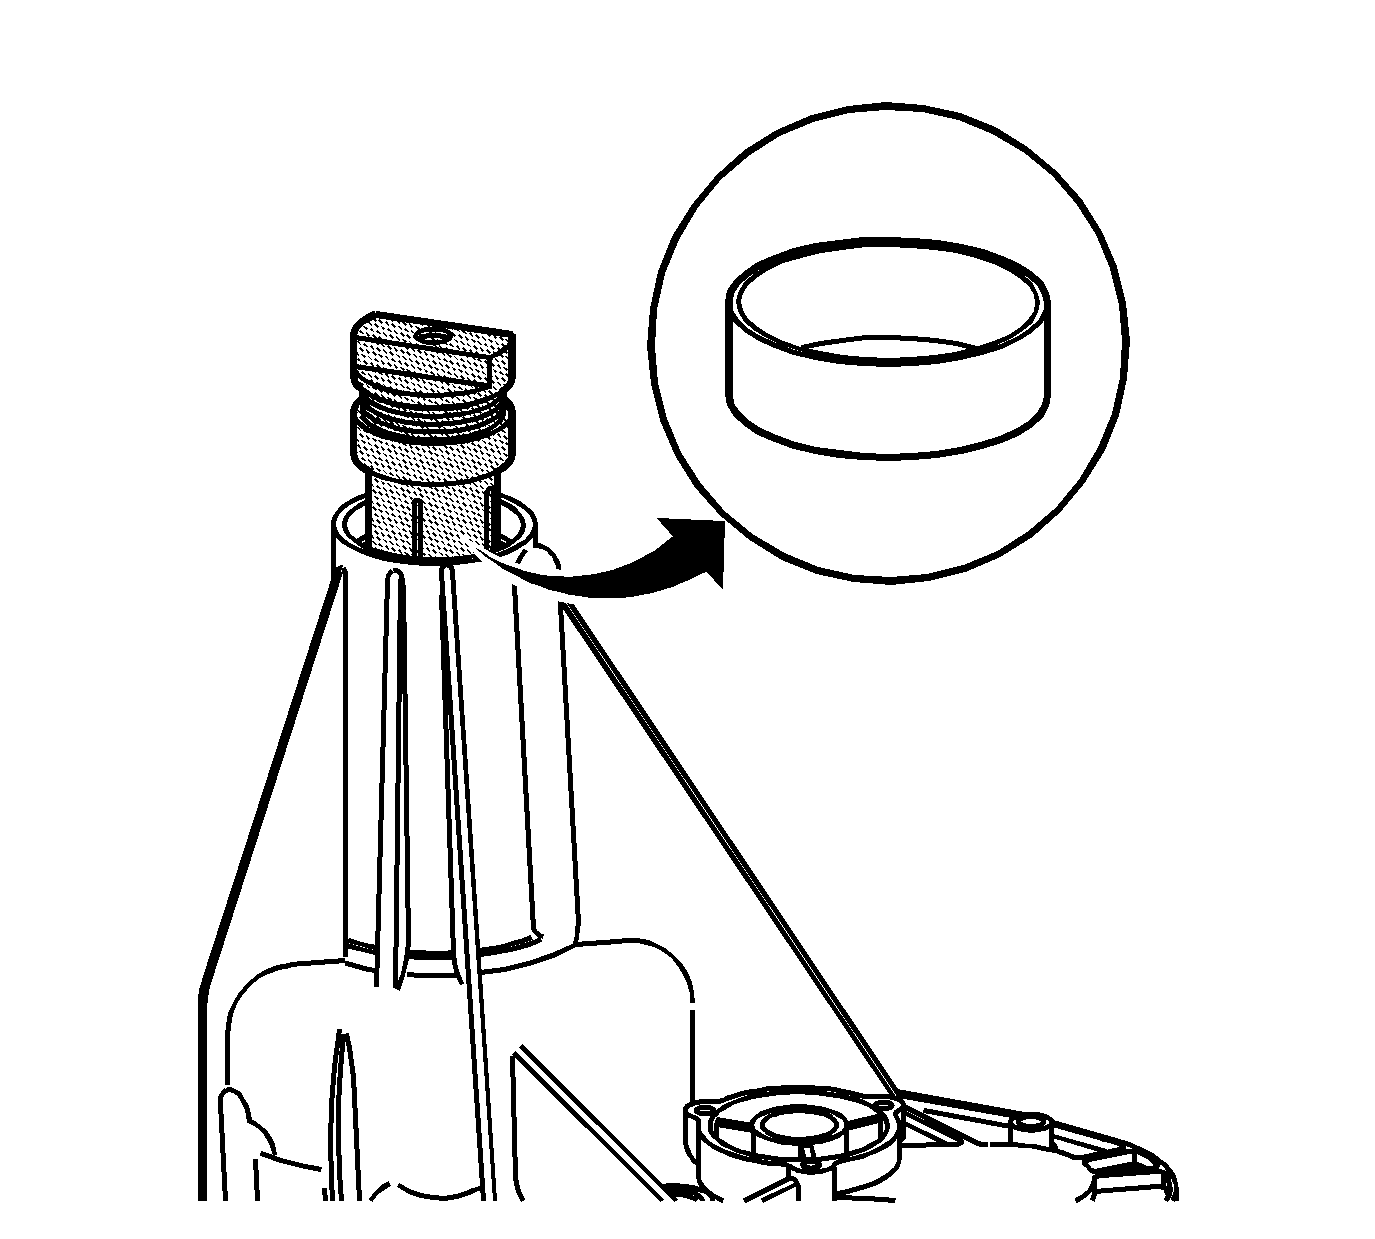
- Using the
J 45380
, install
the output shaft bushing, if removed or new.
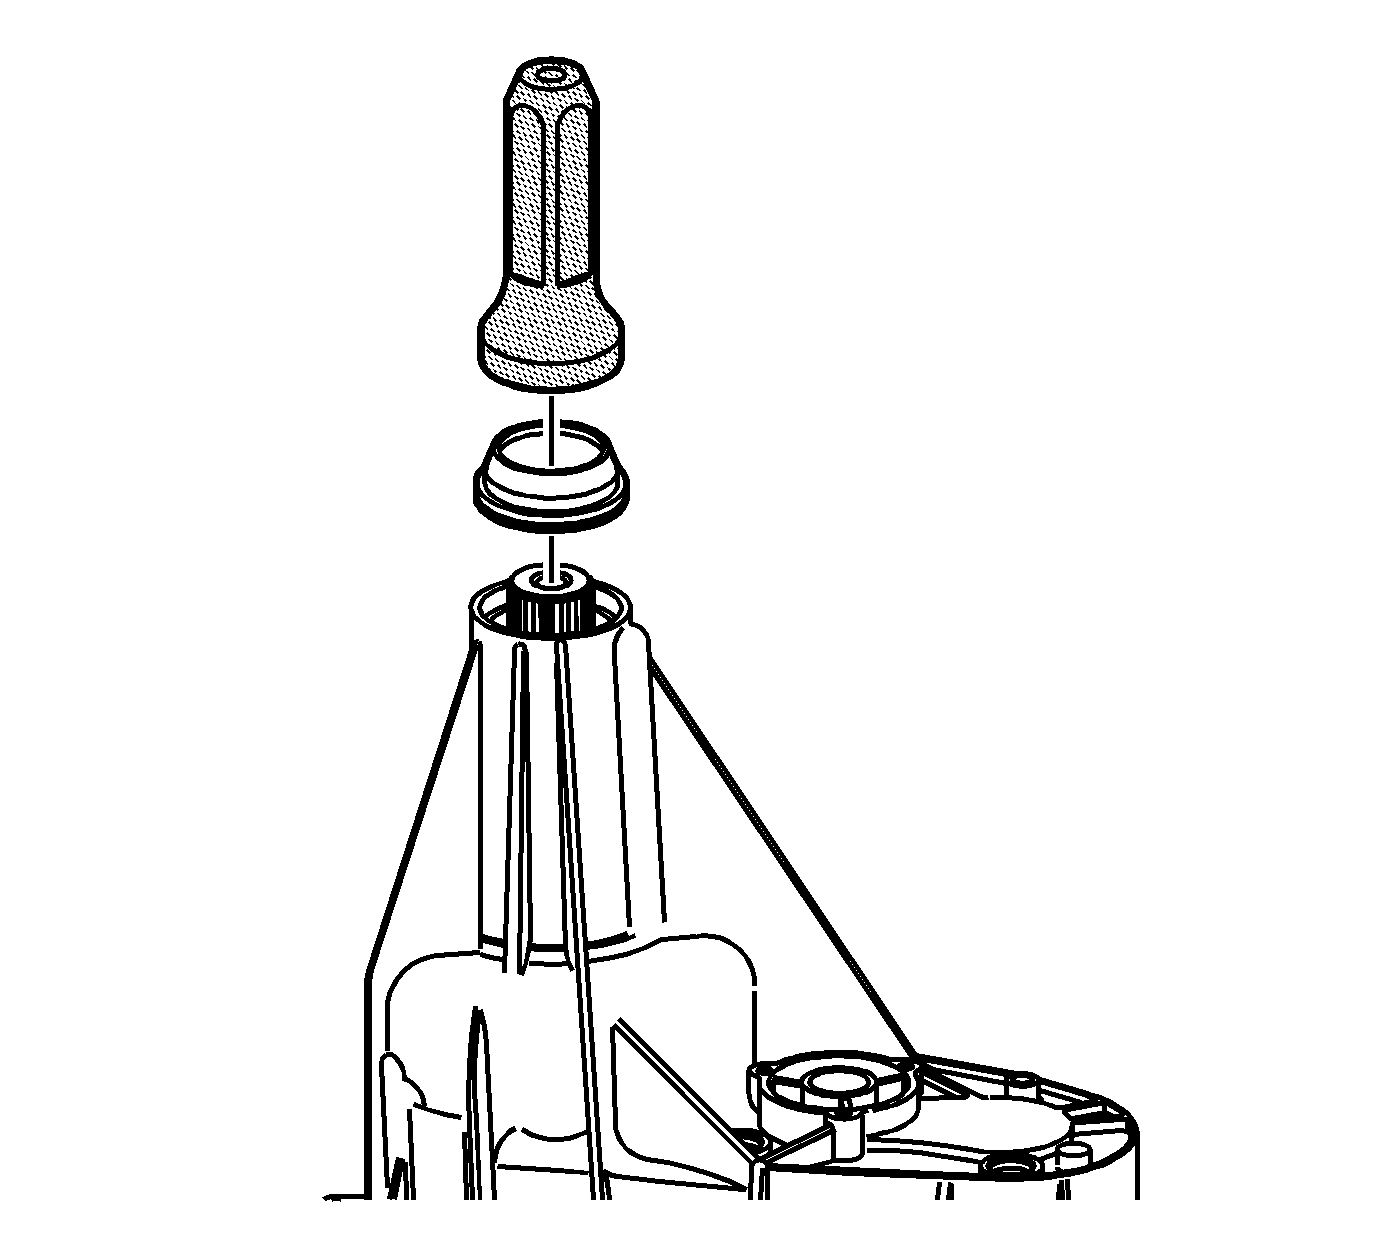
- Using the
J 45756
, install the rear output shaft seal.
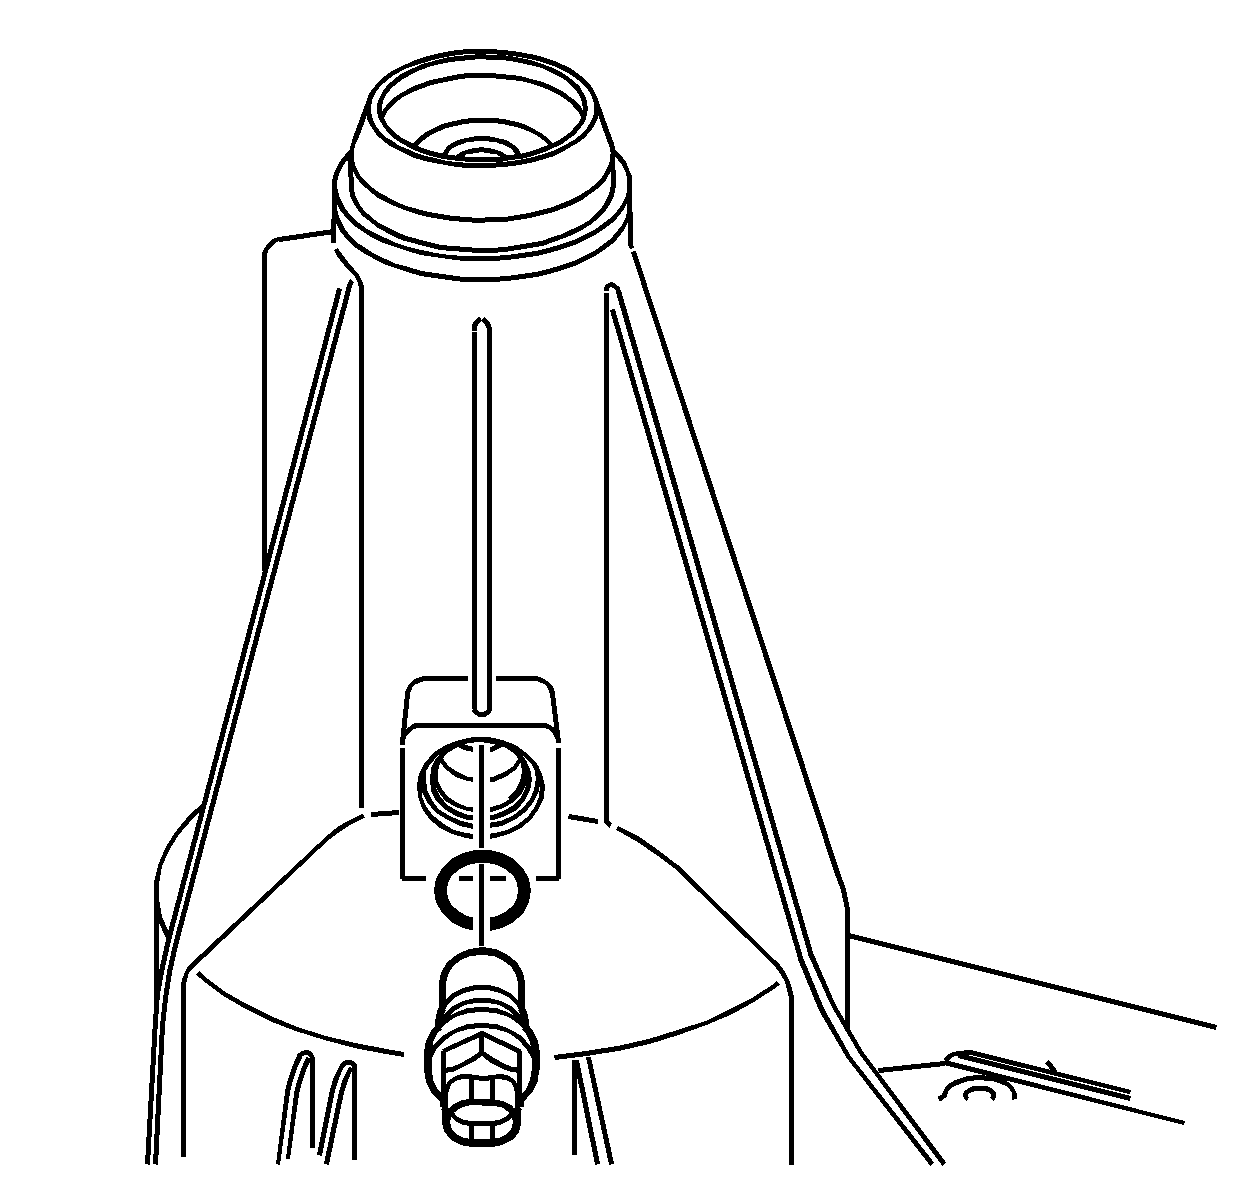
- Install the vehicle speed sensor with a new O-ring
seal.
Tighten
Tighten the speed sensor to 17 N·m (13 lb ft).
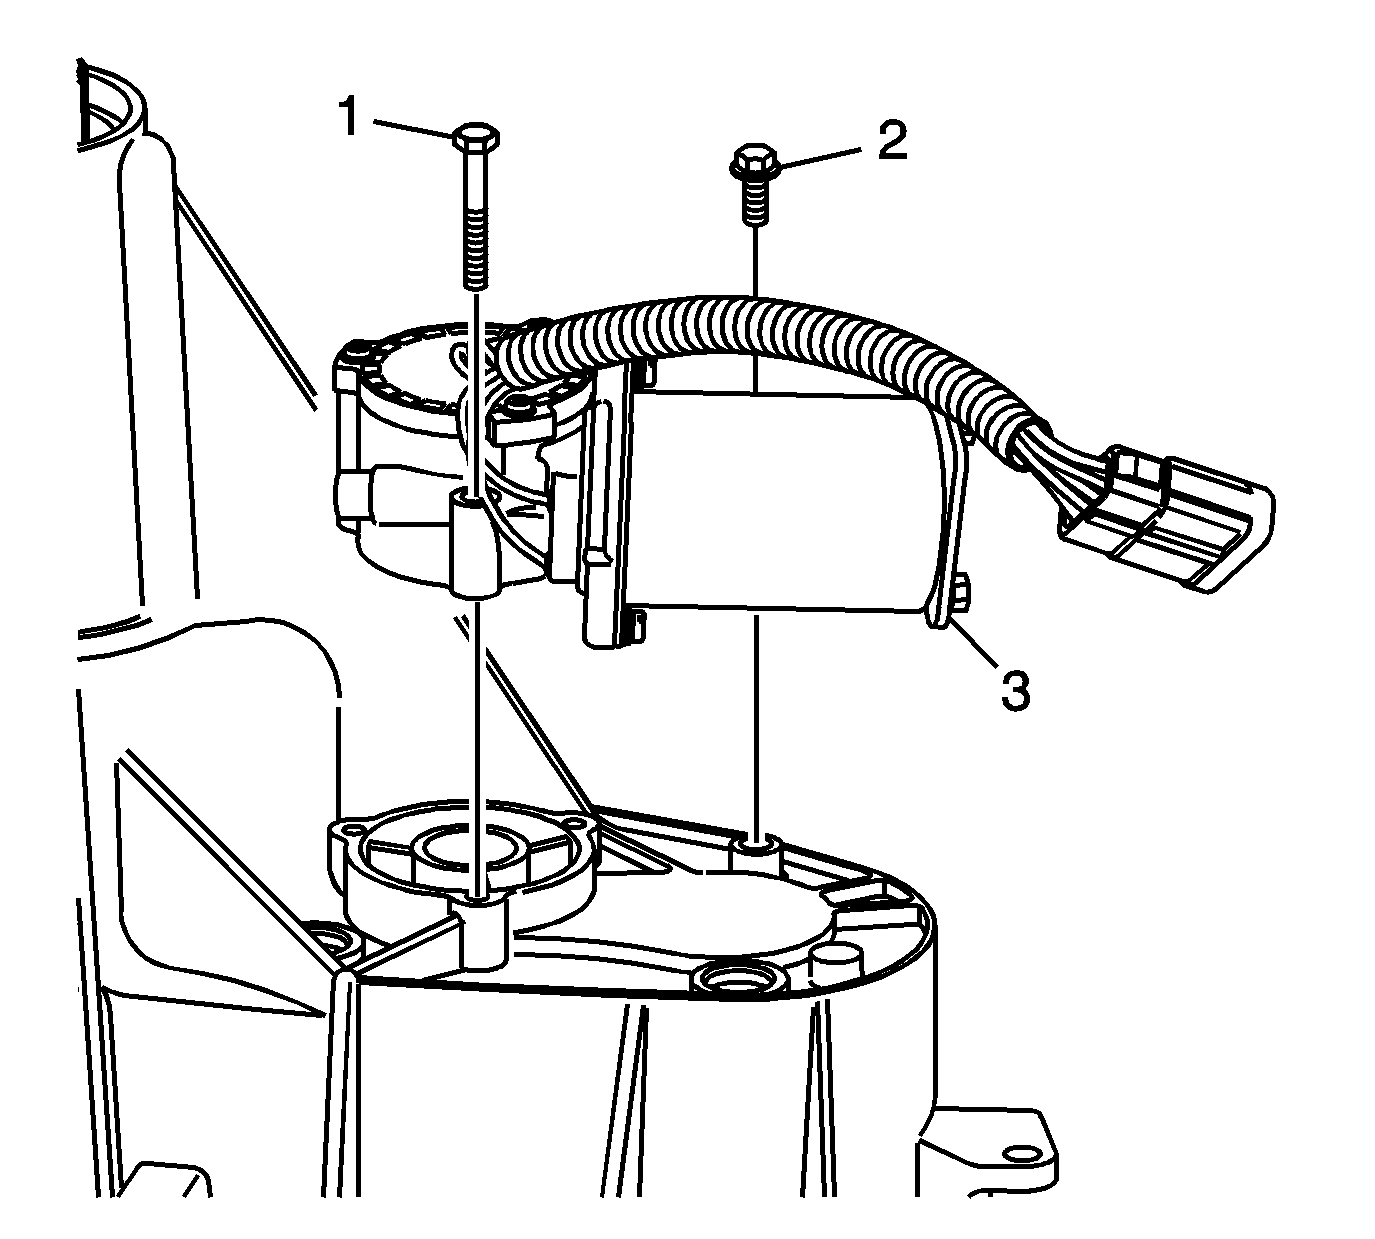
- Apply a 3.175 mm (1/8 in) bead of RTV sealant GM P/N 12345739
(Canadian P/N 10953541), or equivalent, to the sealing surface of the encoder motor assembly.
- Install the encoder motor assembly (3). Rotate the shift detent lever to align to the encoder motor.
- Loosely install the encoder motor mounting bolts (1).
- Loosely install the encoder motor bracket bolt (2).
Tighten
| • | Tighten the encoder motor mounting bolts to 10 N·m (89 lb in). |
| • | Tighten the encoder motor bracket bolt to 10 N·m (89 lb in). |
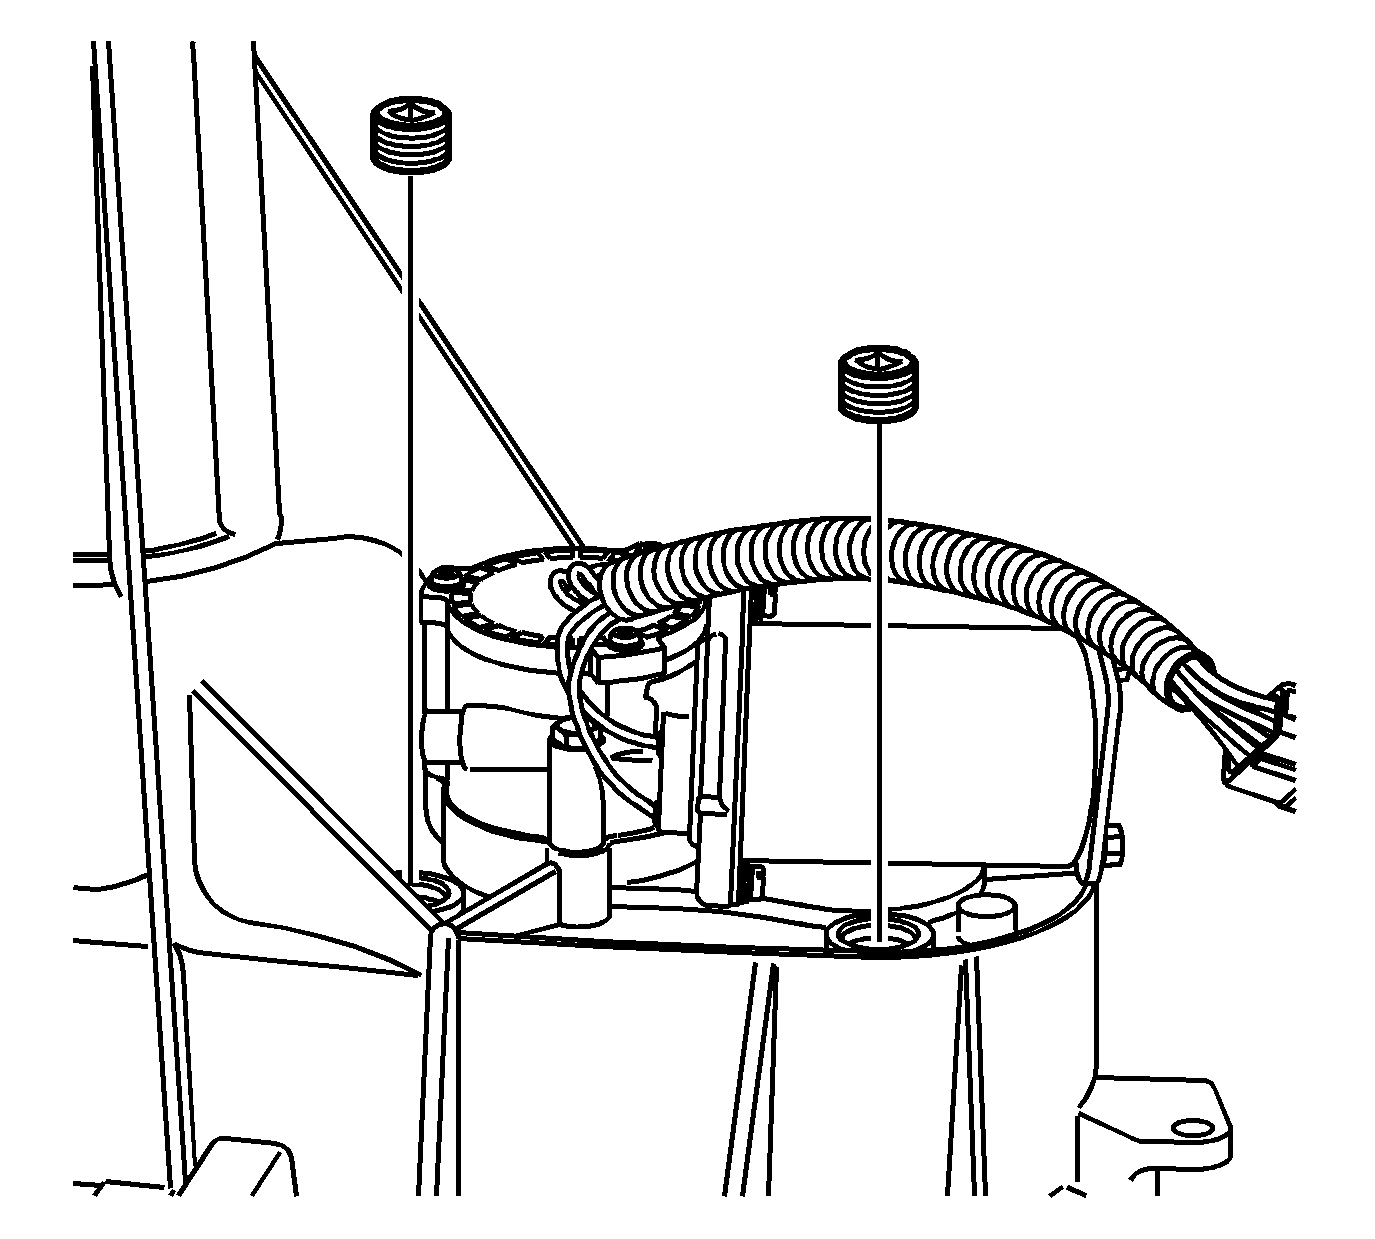
- Apply pipe sealant GM P/N 12346004 (Canadian P/N 10953480)
to the threads on the drain plug and fill plug.
- Install the drain plug and the fill plug.
Tighten
Tighten the drain plug and fill plug to 16 N·m (12 lb ft).
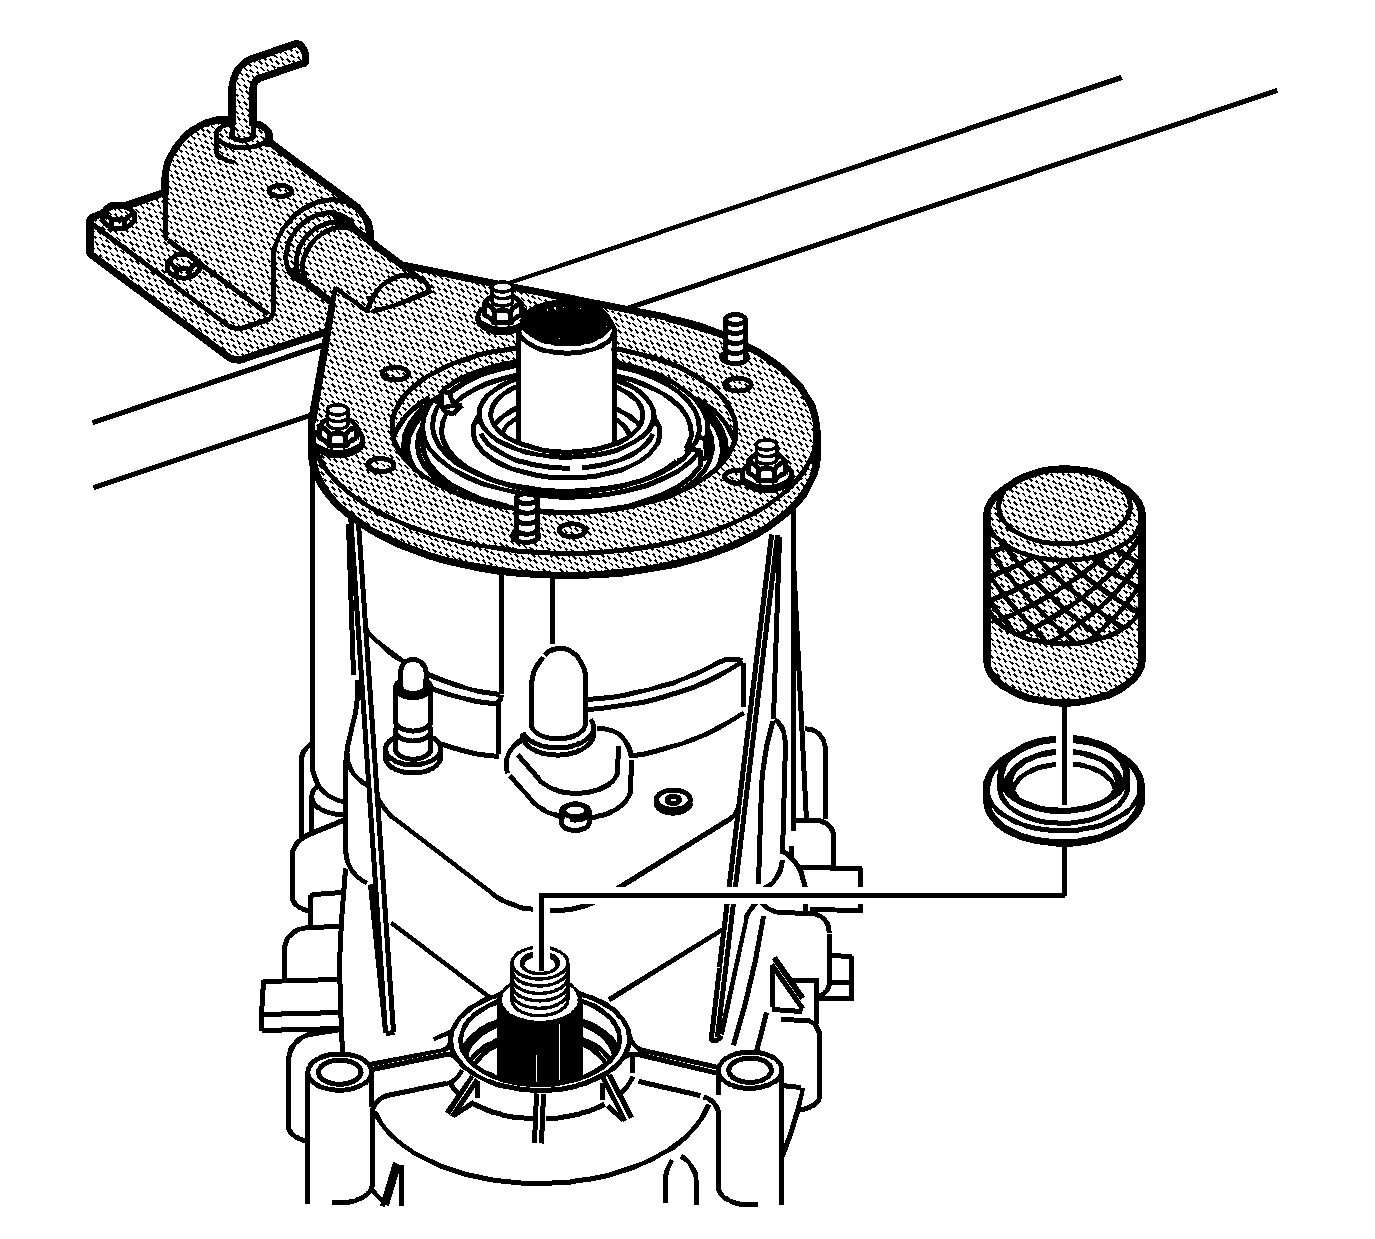
- Using the
DT-47847
, install
the front output shaft seal.
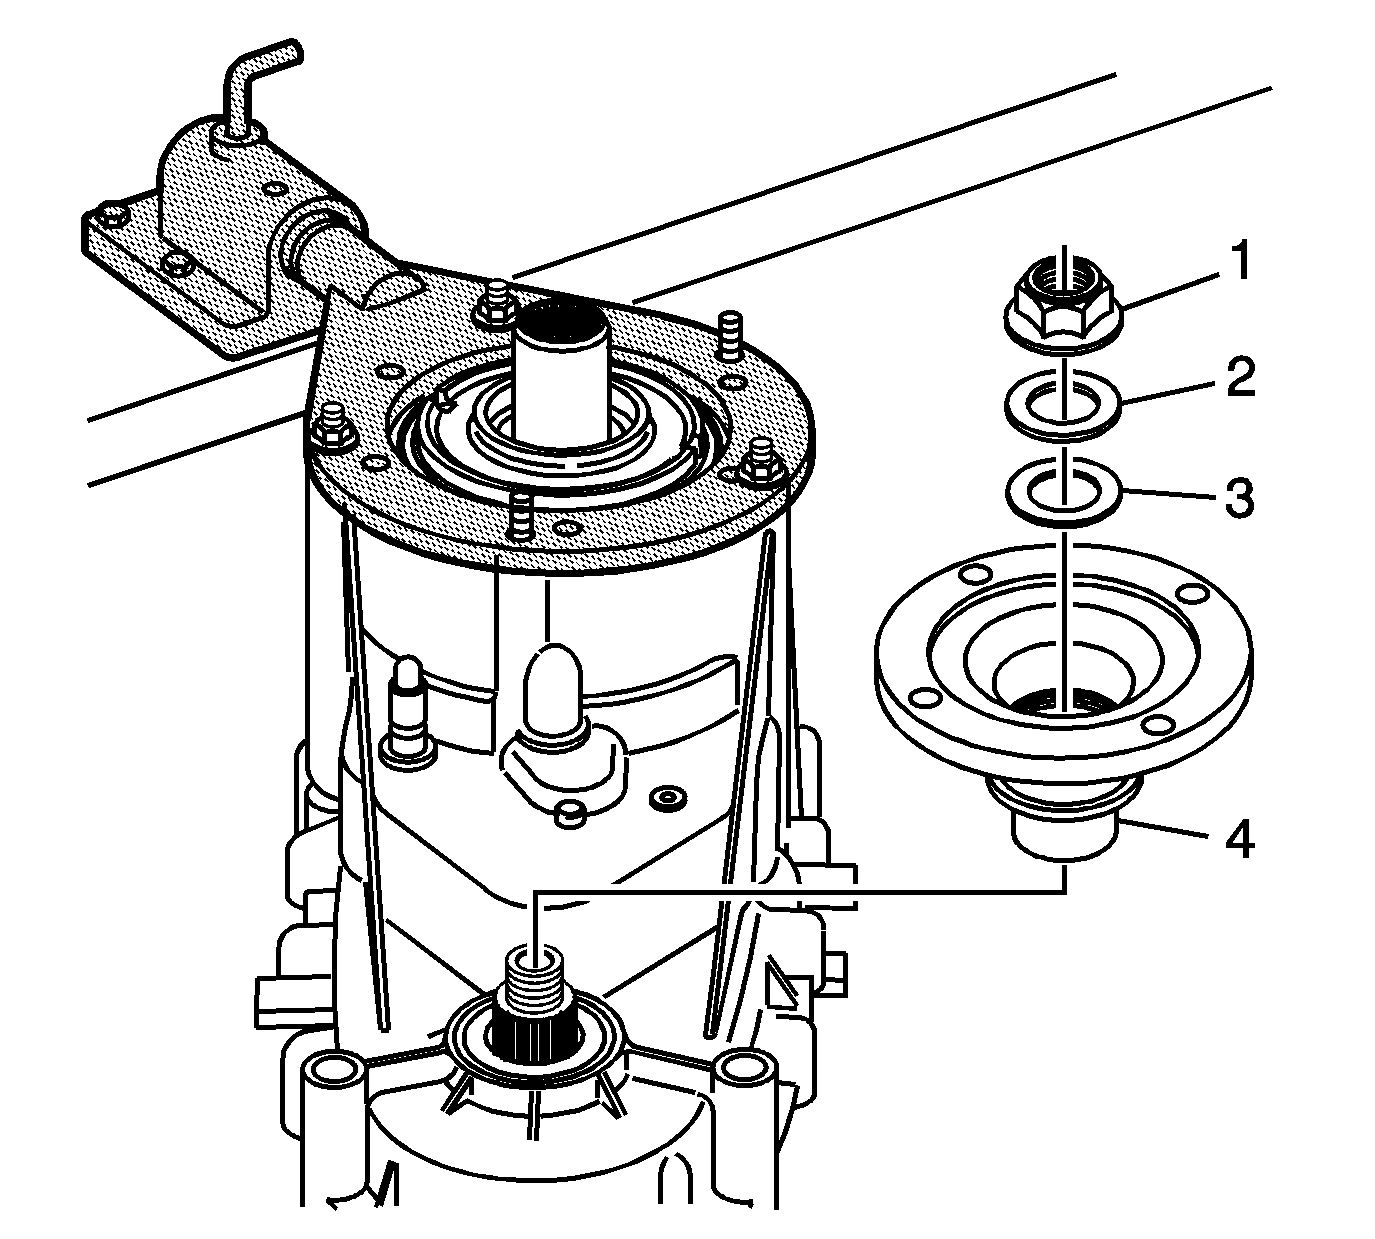
- Install the front output shaft flange (4).
Important: Ensure the seal is fully seated before installing the washer and nut.
- Install the front output shaft flange seal (3).
- Install the front output shaft flange washer (2).
- Install a NEW front output shaft flange nut (1).
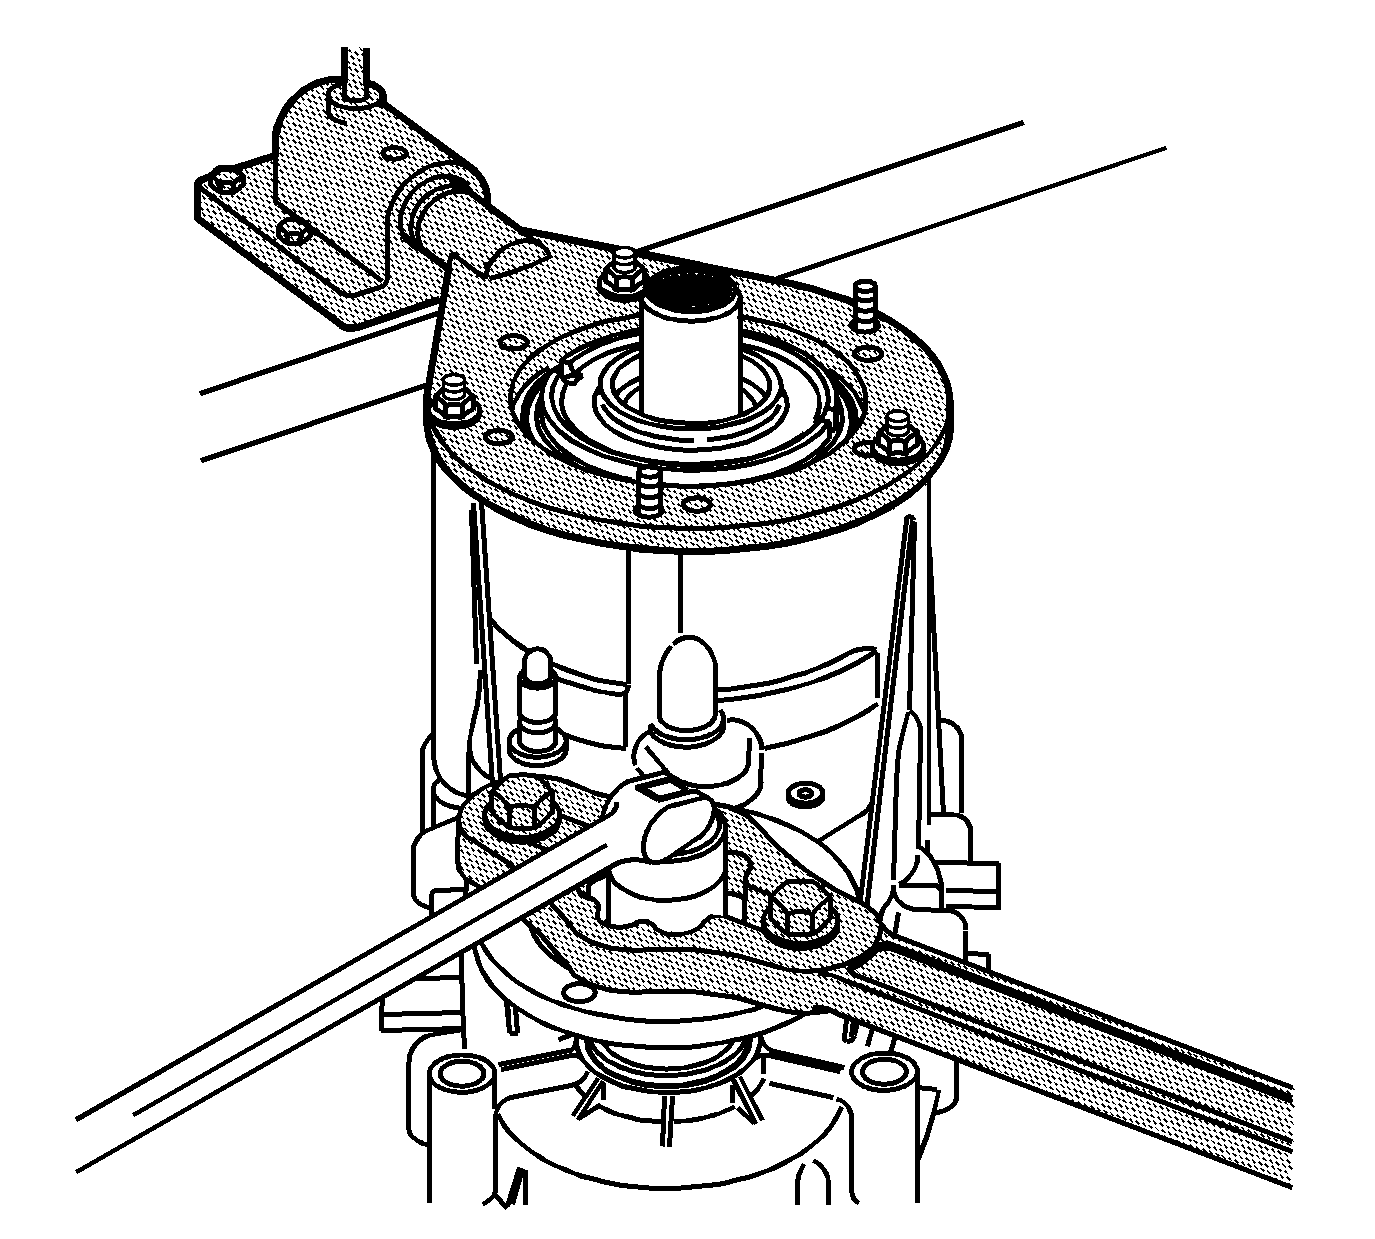
- Install the
J 8614-01
to the
front output shaft flange.
- Hold the
J 8614-01
and tighten the front output shaft flange nut.
Tighten
Tighten the front output shaft flange nut to 319 N·m 235 lb ft.
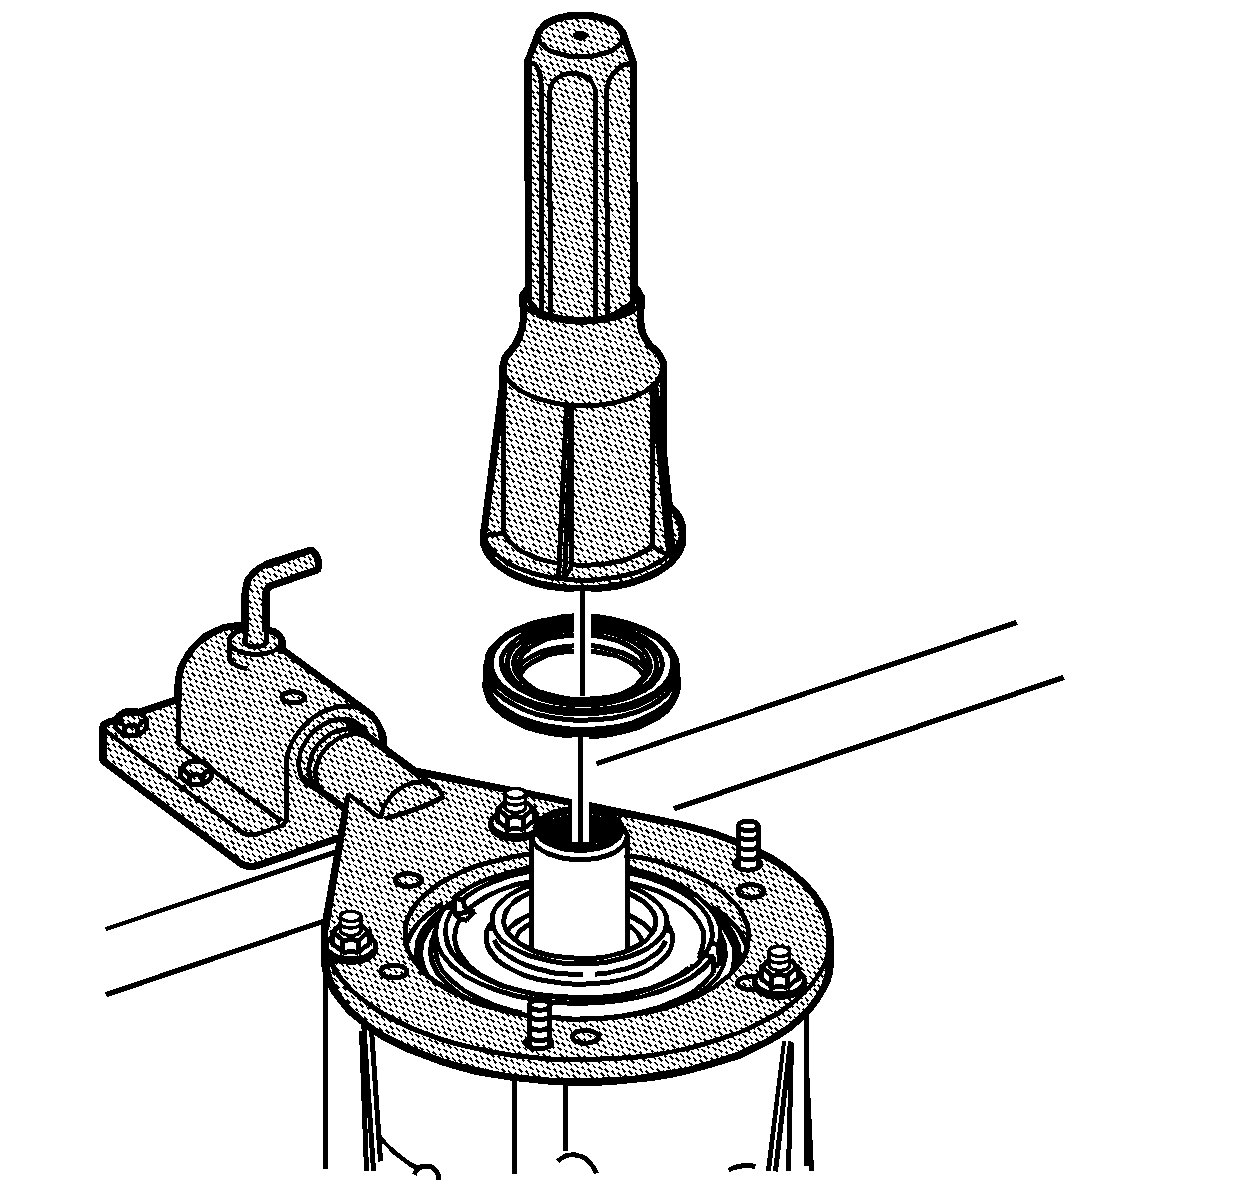
- Using the
J 42738
, install the input shaft seal.
- Remove the transfer case from the
J 45759
.


