Removal Procedure
Caution: Refer to Exhaust Service Caution in the Preface section.
Caution: Refer to Protective Goggles and Glove Caution in the Preface section.
- Raise and support the vehicle. Refer to
Lifting and Jacking the Vehicle
.
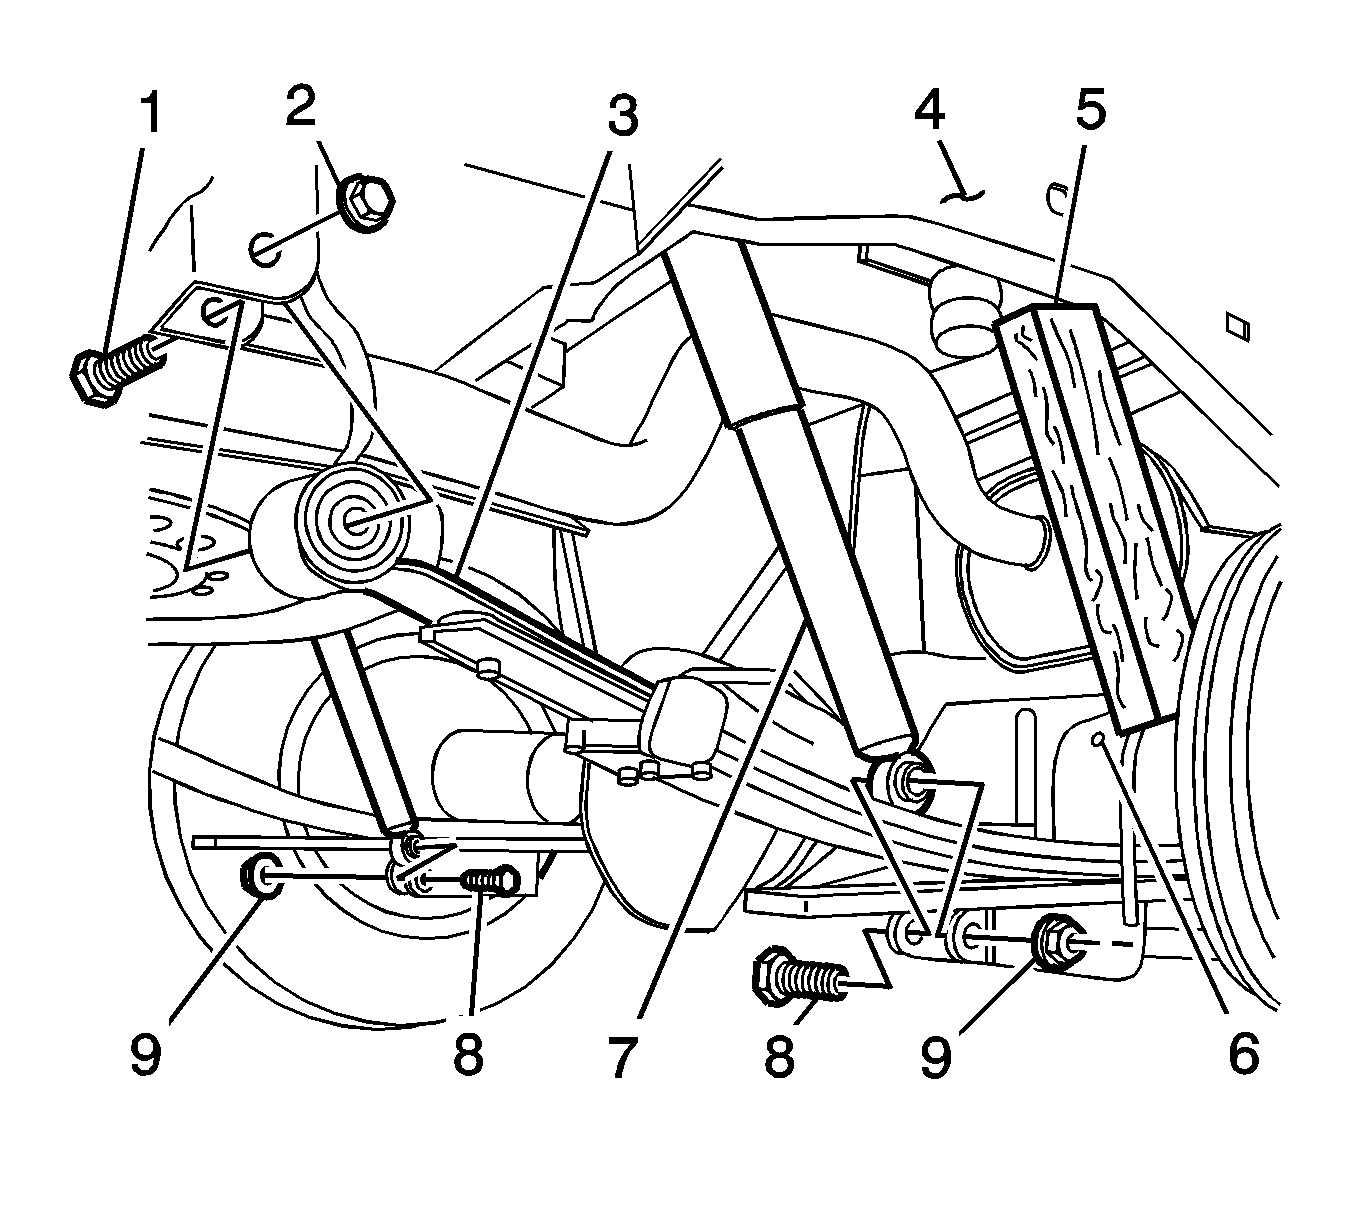
Important: Use care not to over extend the rear brake hose.
- Complete the following in order to gain clearance to remove the muffler:
| 2.1. | Remove the lower shock absorber nuts (9) and bolts (8). |
| 2.2. | Remove the right rear leaf spring nut (2) and bolt (1). |
| 2.3. | Wedge a block of wood (5) between the frame (4) and the rear axle (6). |
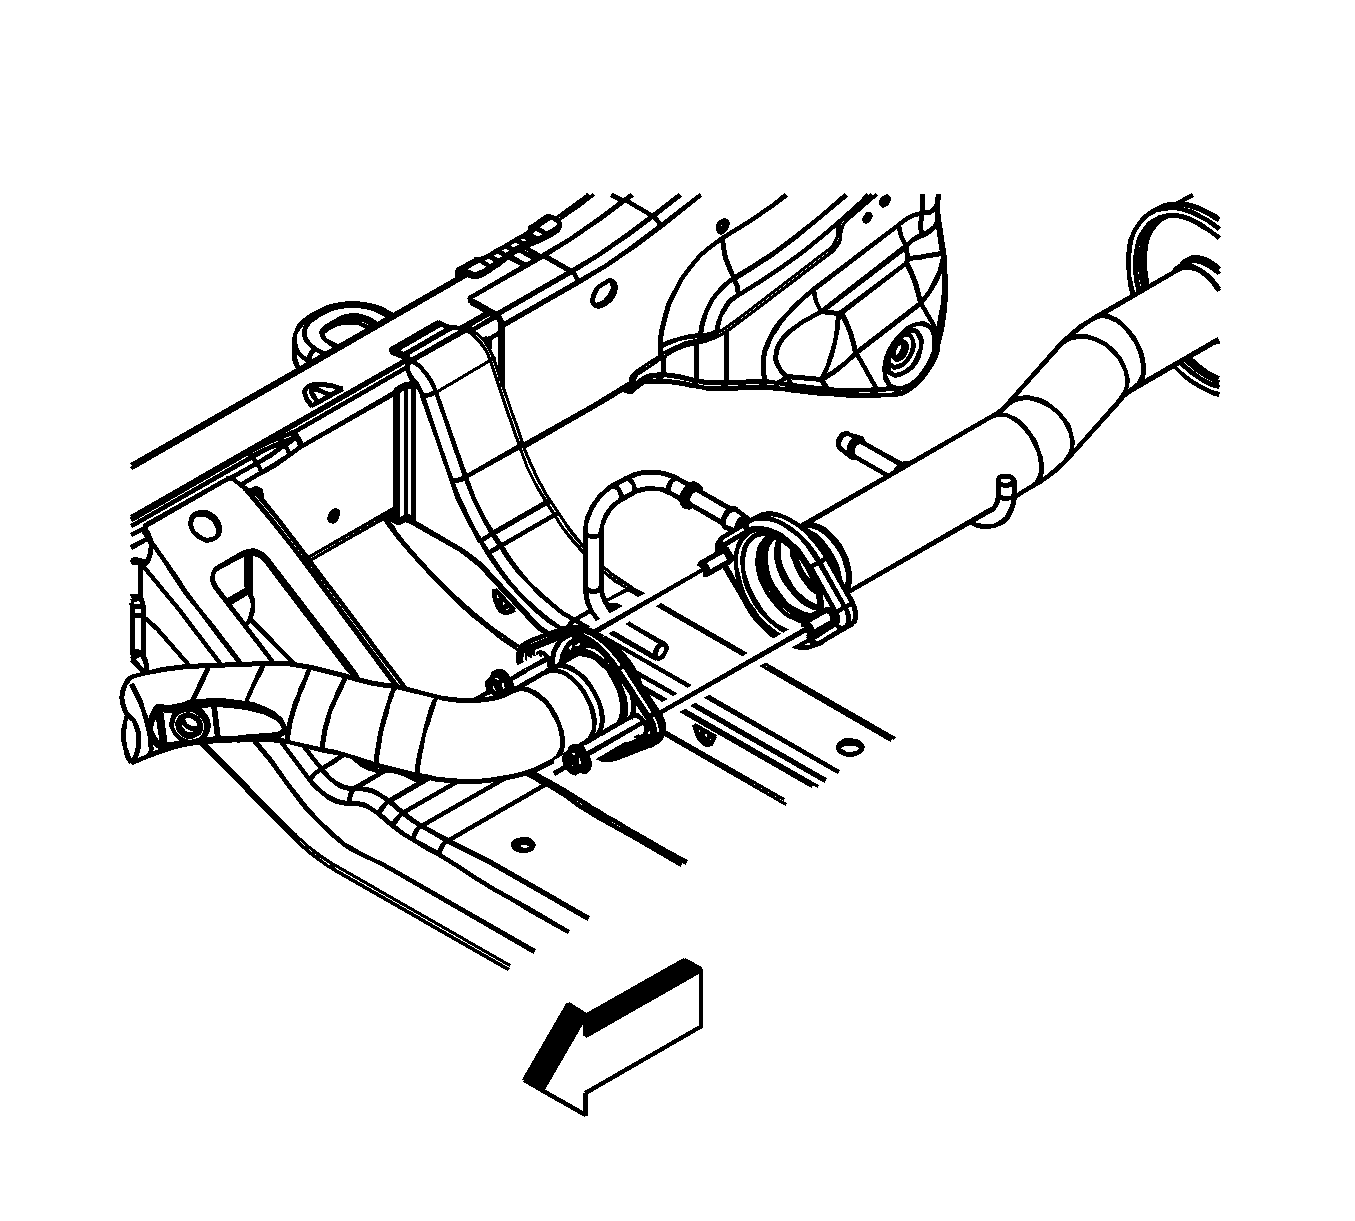
- Remove the nuts securing the muffler to the catalytic converter.
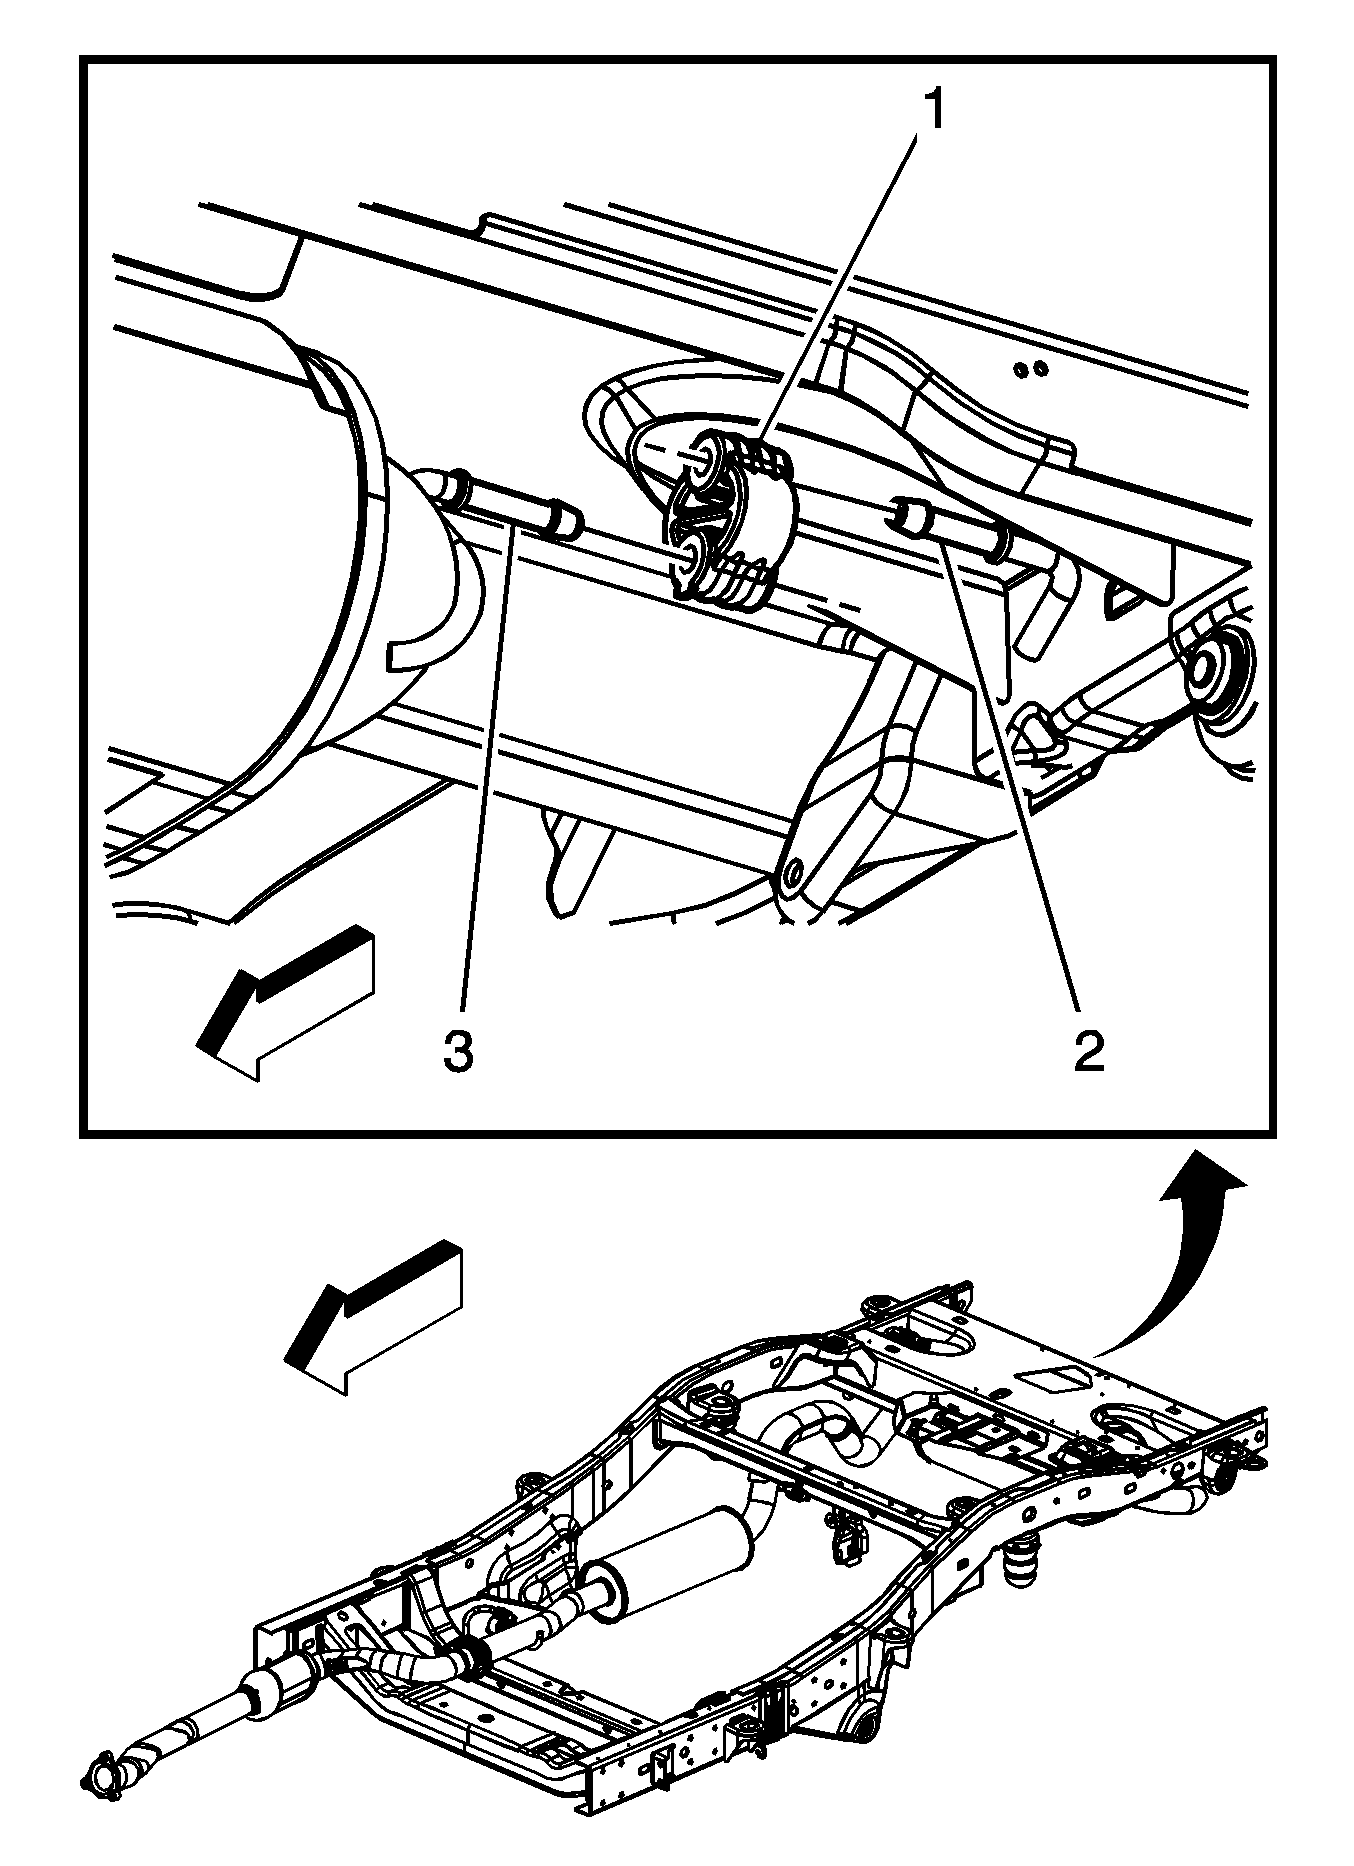
Important: Do not use oil base lubricants.
- Apply a soapy solution to the exhaust muffler hanger rod (3) in order to ease the removal of the exhaust hanger (1).
- Pry the exhaust hanger (1) free from the exhaust muffler hanger rod (3).
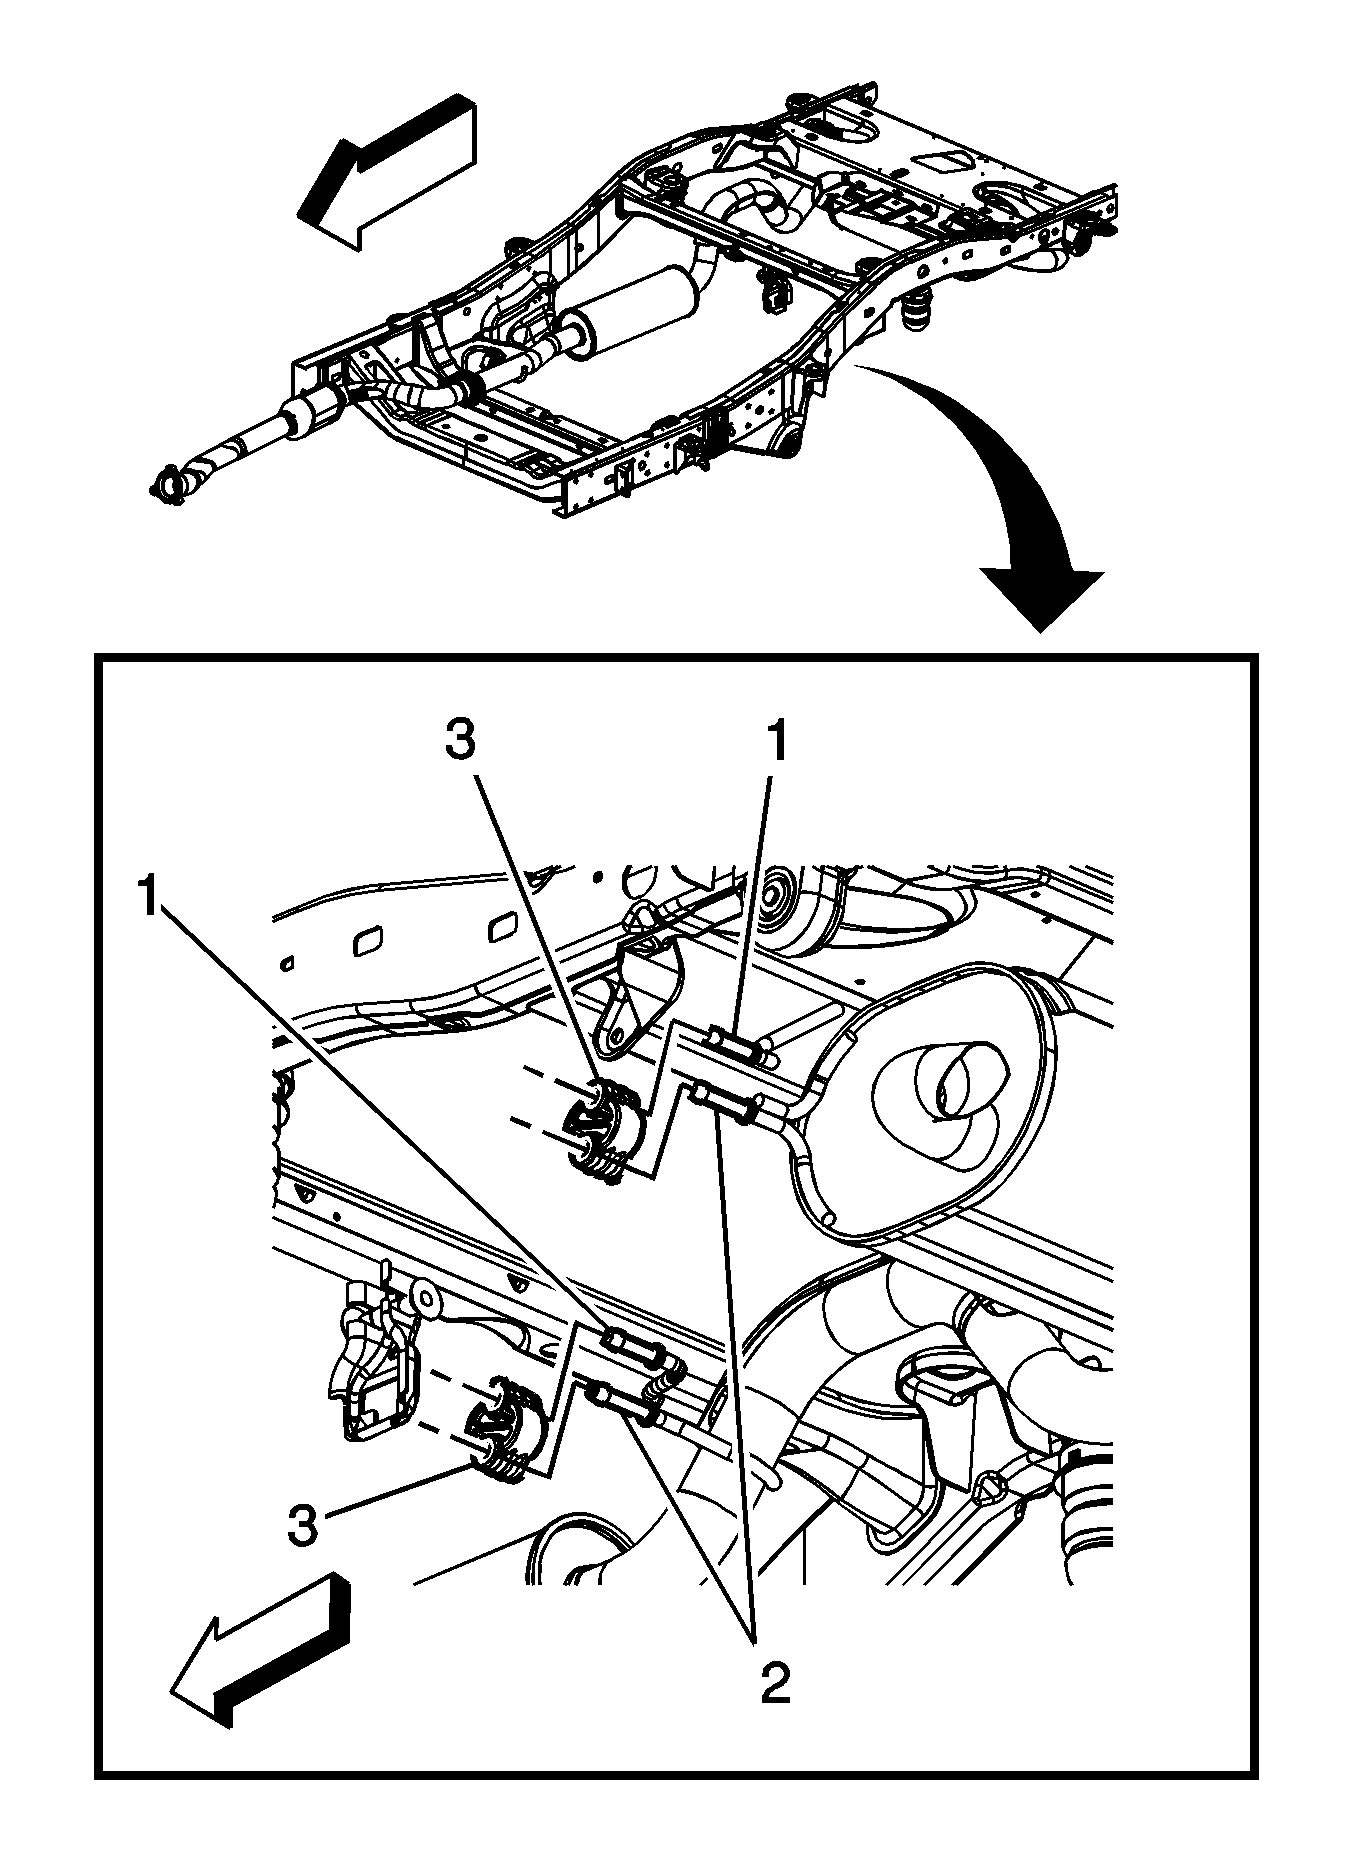
Important: Do not use oil base lubricants.
- Apply a soapy solution to the exhaust muffler hanger rod (2) in order to ease the removal of the exhaust hanger (3).
- Pry the exhaust hanger (3) free from the exhaust muffler hanger rod (2).
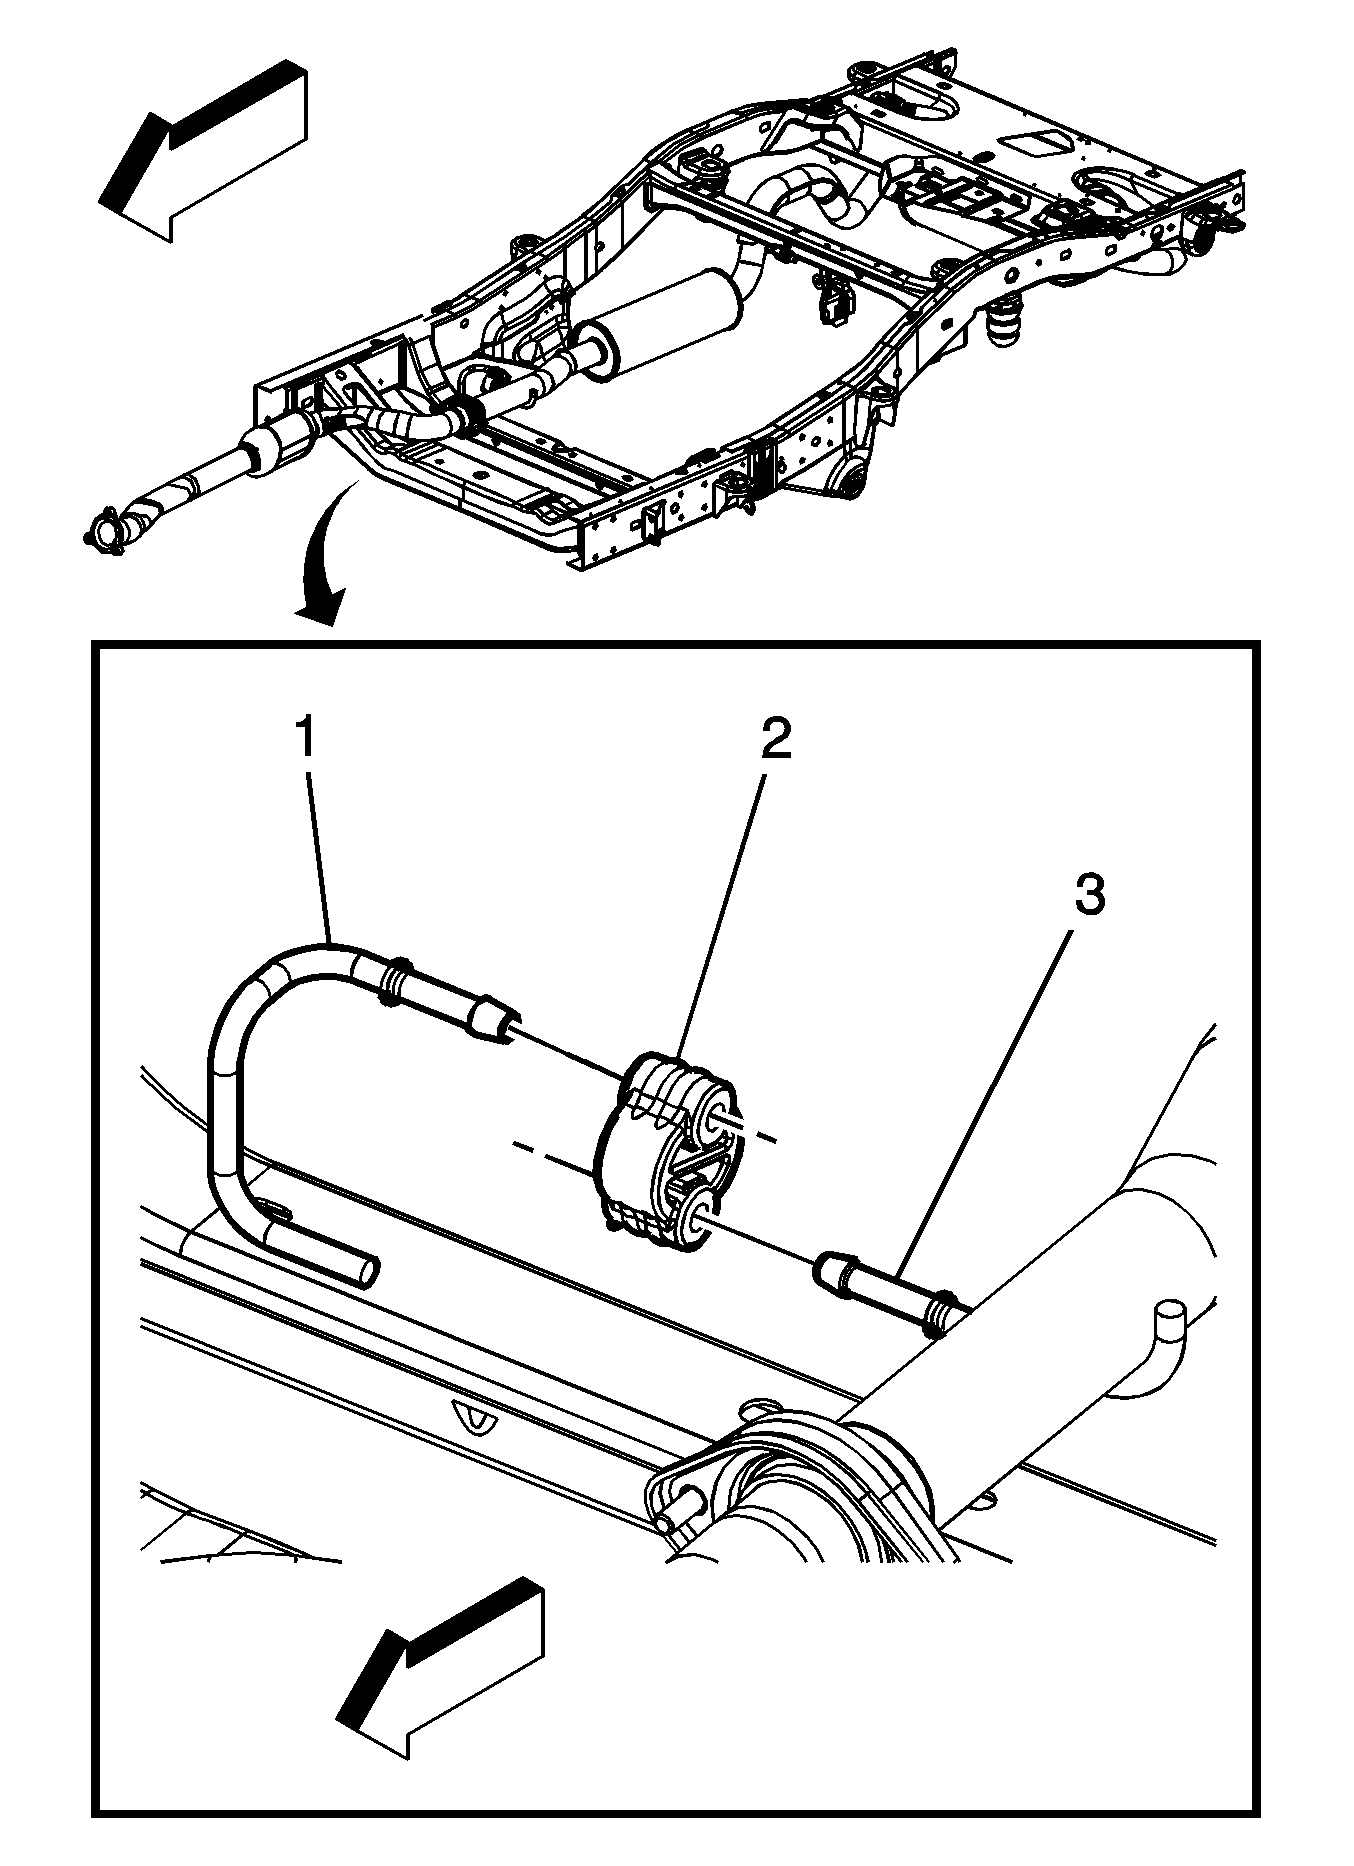
Important: Do not use oil base lubricants.
- Apply a soapy solution to the exhaust muffler hanger rod (3) in order to ease the removal of the exhaust hanger (2).
- Pry the exhaust hanger (2) free from the exhaust muffler hanger rod (3).
- Complete the following in order to remove the muffler from the vehicle:
| 10.1. | Slide the muffler rearward from the catalytic converter. |
| 10.2. | Rotate the muffler 90 degrees counterclockwise from the rear. |
| 10.3. | Carefully remove the muffler rearward from the vehicle. |
Installation Procedure
- Complete the following in order to install the muffler to the vehicle:
| 1.1. | With the muffler turned 90 degrees counterclockwise from the rear, carefully insert the muffler over the rear axle until the flange is near the catalytic converter. |
| 1.2. | Rotate the muffler clockwise 90 degrees to the installed position. |
| 1.3. | Slide the muffler forward into position, aligning the studs with the rear of the catalytic converter. |

Important: Do not use oil base lubricants.
- Apply a soapy solution to the following in order to ease the installation of the hanger (2):
| • | The inner diameter of the exhaust muffler hanger (2) |
| • | The exhaust muffler hanger rod (3) |
- Press the exhaust muffler hanger (3) over the exhaust pipe hanger rod (1).

Important: Do not use oil base lubricants.
- Apply a soapy solution to the following in order to ease the installation of the hanger (3):
| • | The inner diameter of the exhaust muffler hanger (3) |
| • | The exhaust muffler hanger rod (2) |
- Press the exhaust muffler hanger (3) over the exhaust pipe hanger rod (1).

Important: Do not use oil base lubricants.
- Apply a soapy solution to the following in order to ease the installation of the hanger (1):
| • | The inner diameter of the exhaust muffler hanger (1) |
| • | The exhaust muffler hanger rod (3) |
- Press the exhaust muffler hanger (1) over the exhaust pipe hanger rod (3).
Notice: Refer to Fastener Notice in the Preface section.

- Install the nuts securing the muffler to the catalytic converter. Tighten the muffler nuts by hand until each contacts the metal flange.
Tighten
Tighten the nuts to 45 N·m (33 lb ft).

- Remove the block of wood (5) from between the frame (4) and rear axle (6).
- Install the right rear leaf spring bolt (1) and nut (2).
Tighten
Tighten the bolt and nut to 85 N·m (63 lb ft).
- Install the lower shock absorber bolts (8) and nuts (9).
Tighten
Tighten the bolts and nuts to 95 N·m (70 lb ft).
- Inspect the exhaust system for leaks and underbody contact.
- Lower the vehicle.


