For 1990-2009 cars only
Tools Required
J 45938 Alignment Socket
Removal Procedure
- Raise and support the vehicle. Refer to Lifting and Jacking the Vehicle .
- Remove the tire and wheel assembly. Refer to Tire and Wheel Removal and Installation .
- Support the lower control arm at ride height.
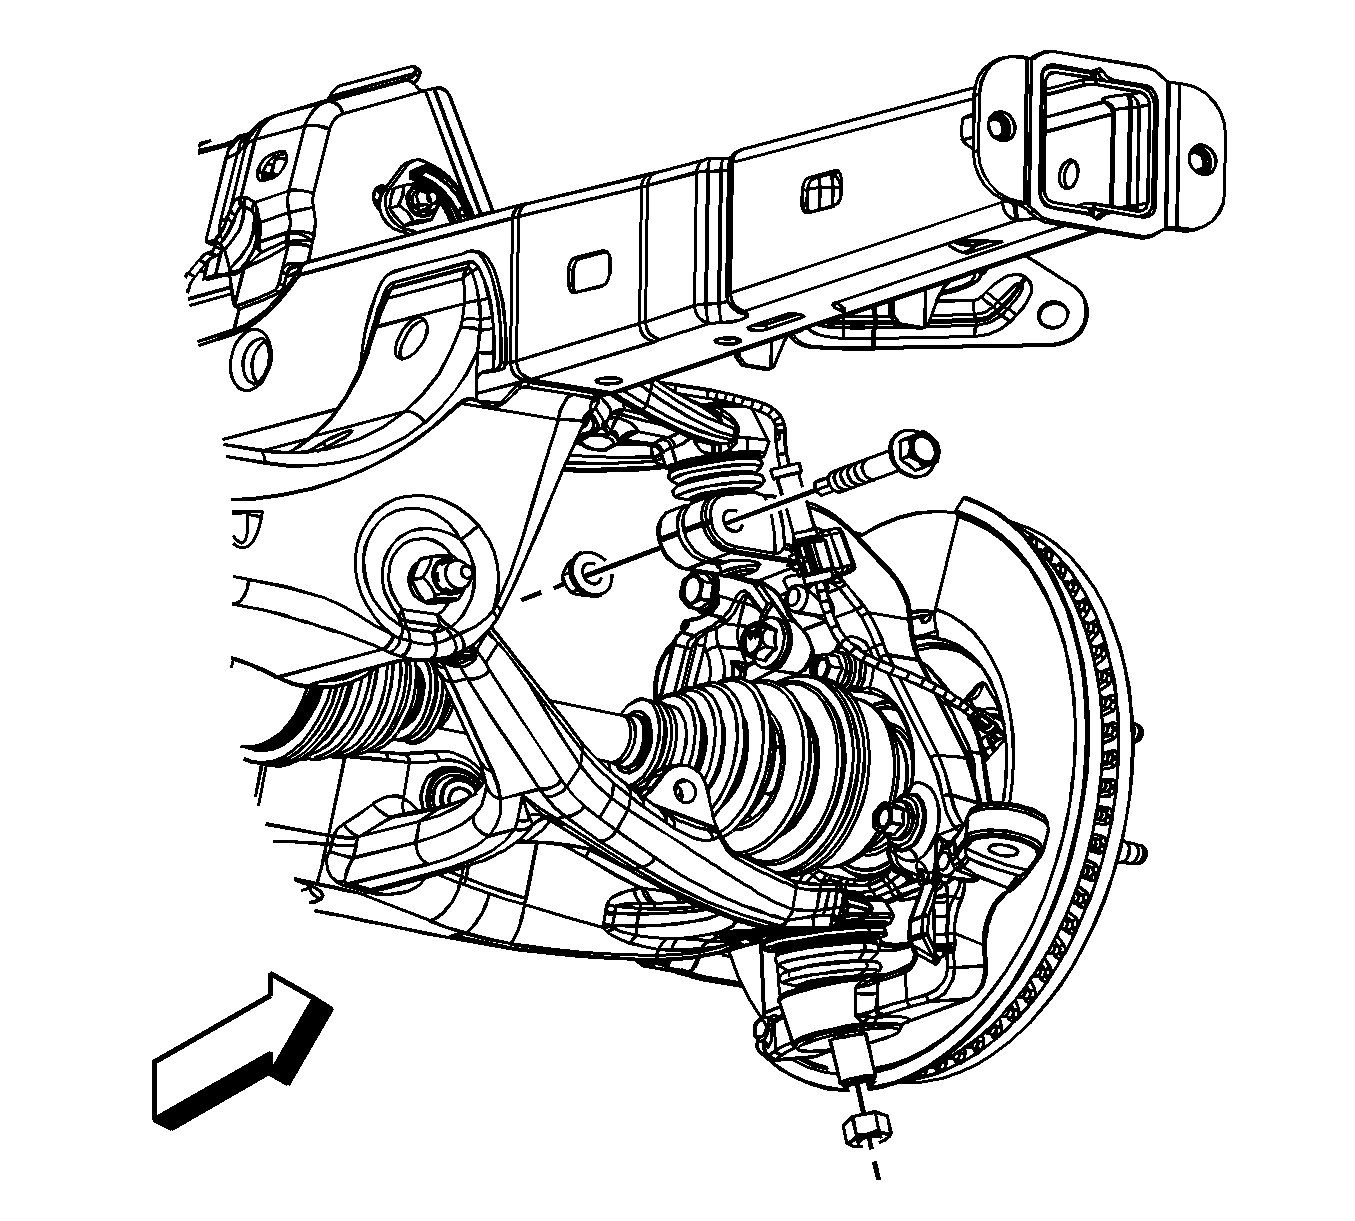
- Remove the wheel speed sensor bracket bolt.
- Disconnect the wheel speed sensor brackets.
- Disconnect the front brake hose from the upper control arm. Refer to Front Brake Hose Replacement .
- Disconnect the upper control arm from the ball stud by removing the pinch bolt.
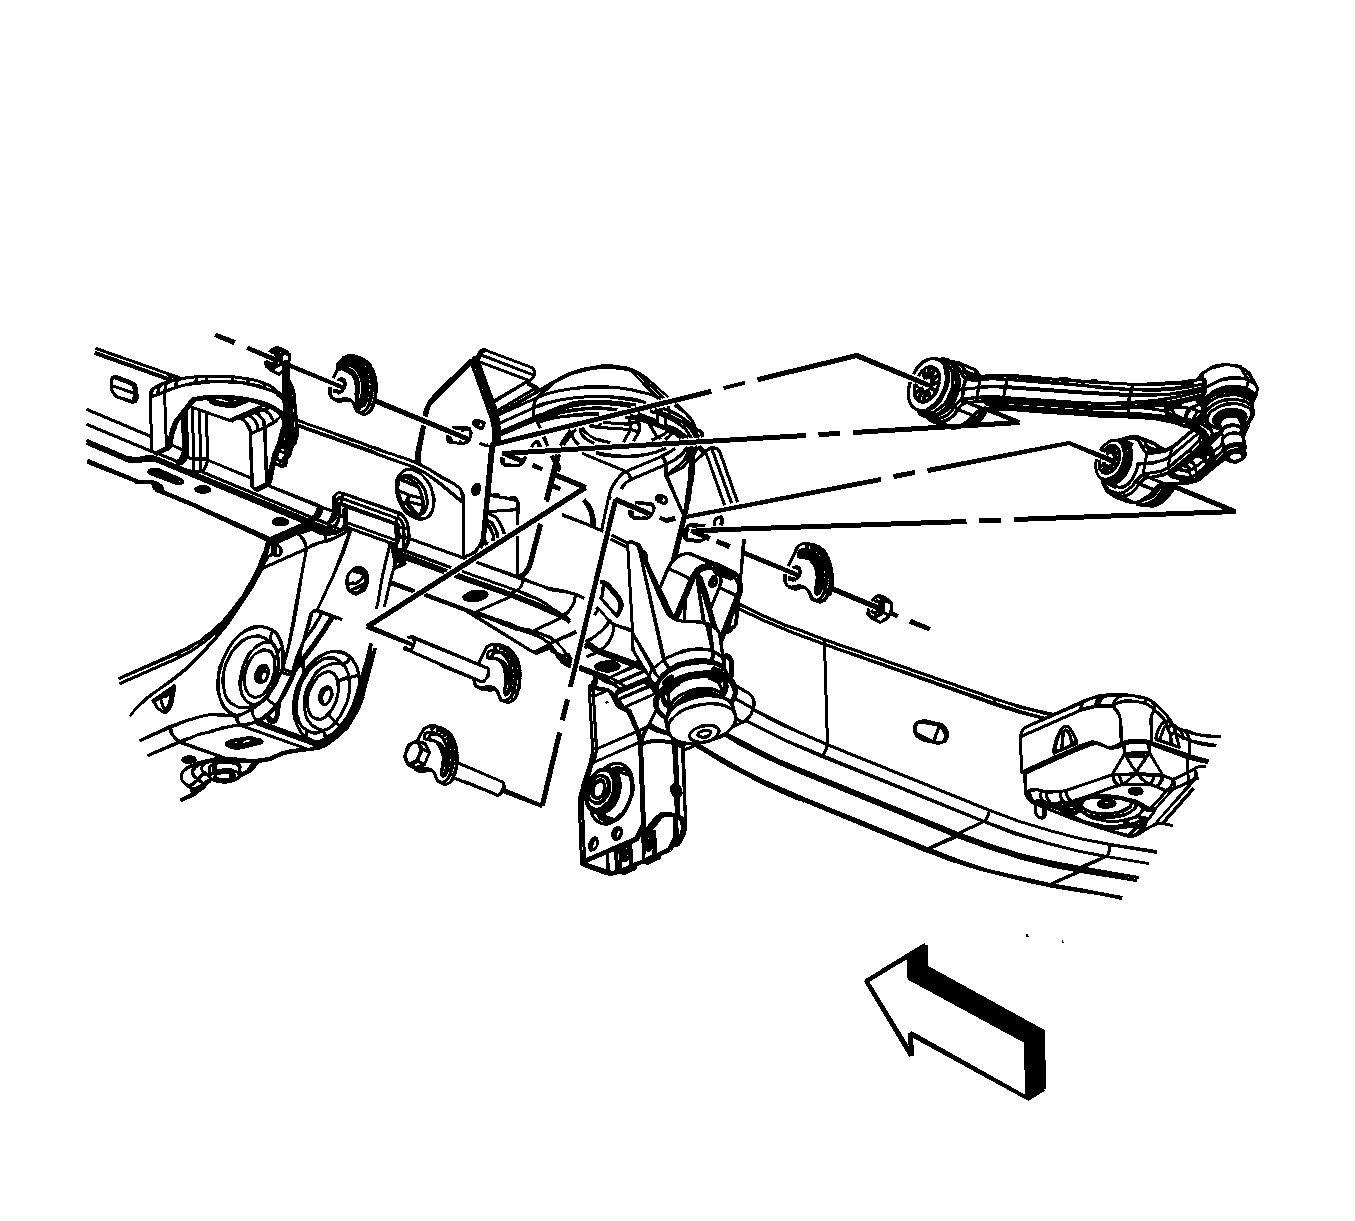
- Remove the upper control arm nuts and the adjustment cams.
- Remove the upper control arm bolts.
- Remove the upper control arm.


Installation Procedure
- Install the upper control arm.
- Install the upper control arm nuts and the adjustment cams. Do not tighten.
- Connect the upper control arm to the ball stud by installing the pinch bolt.
- Connect the wheel speed sensor brackets.
- Install the wheel speed sensor bracket bolt.
- Connect the front brake hose to the upper control arm. Refer to Front Brake Hose Replacement .
- Install the tire and wheel assembly. Refer to Tire and Wheel Removal and Installation .
- Remove the lower control arm support.
- Lower the vehicle.
- With the vehicle at ride height, tighten the upper control arm nuts.
- Verify the wheel alignment. Refer to Wheel Alignment Specifications .

Notice: Refer to Fastener Notice in the Preface section.

Tighten
Tighten the nut to 70 N·m (51 lb ft).
Tighten
Tighten the nut to 20 N·m (15 lb ft).
Tighten
Using the
J 45938
, tighten the nuts to 155 N·m (114 lb ft).
