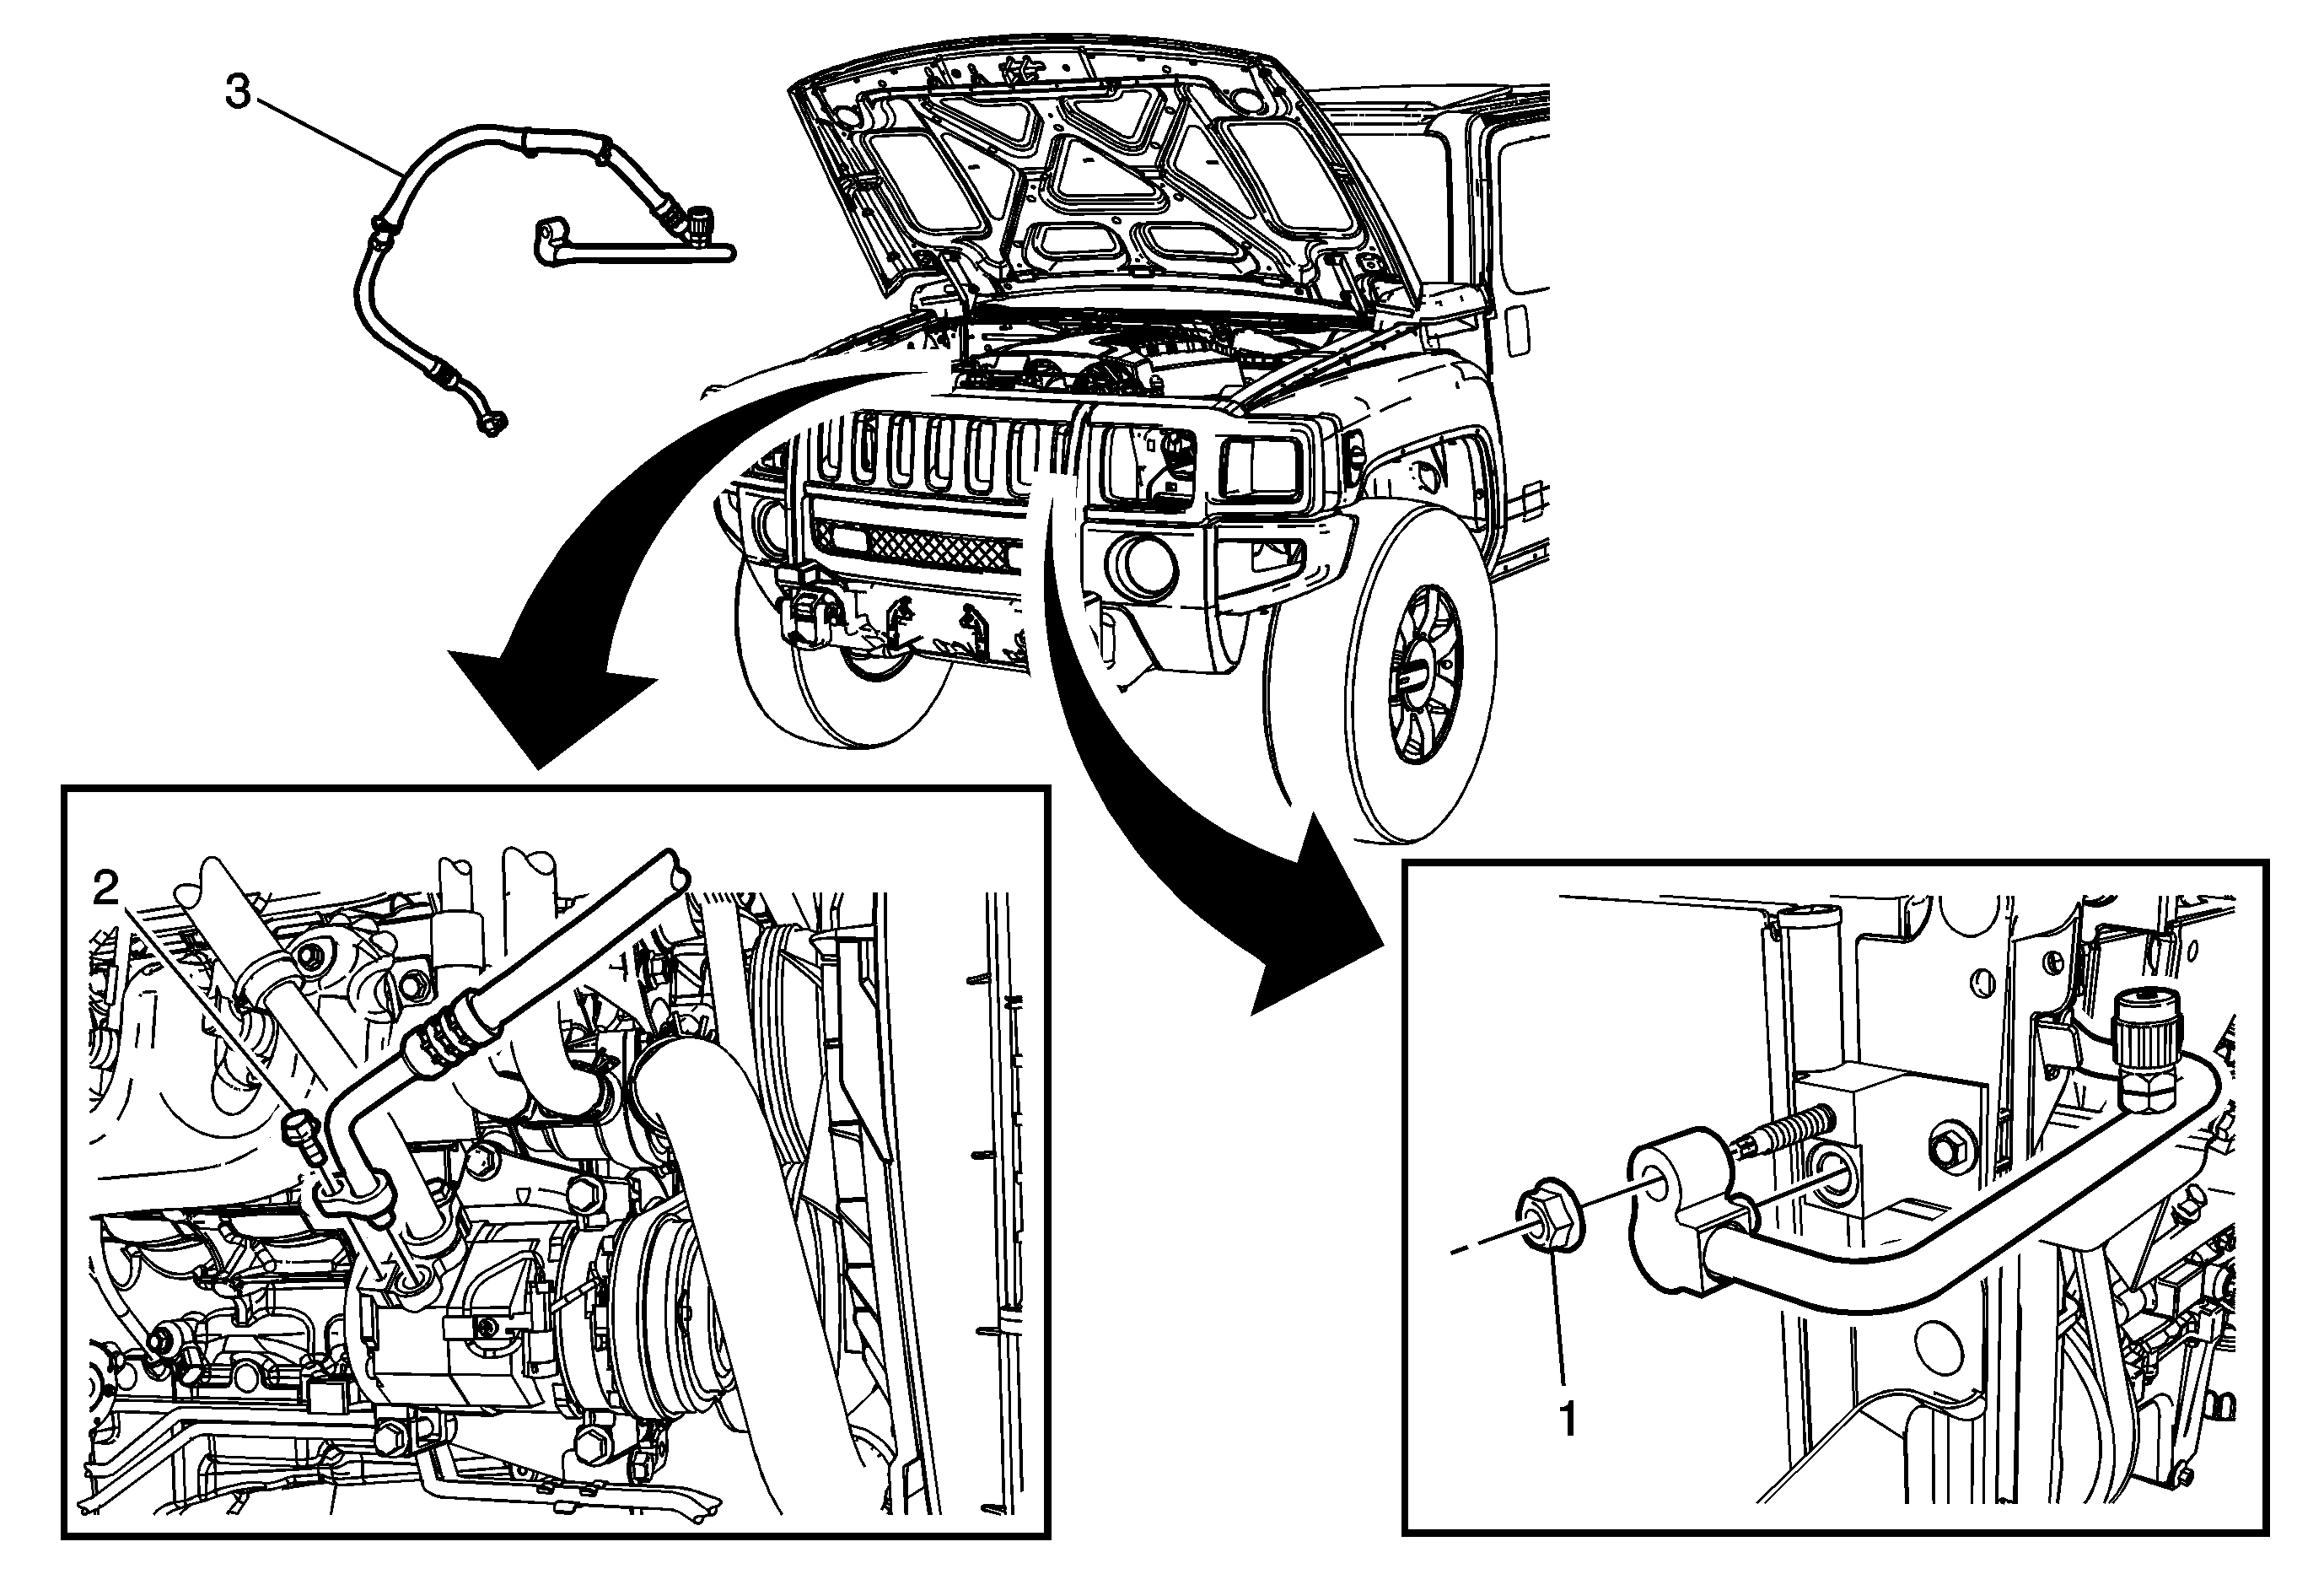
Discharge Hose Replacement LH8

Callout | Component Name |
|---|---|
Preliminary Procedure
| |
1 | A/C Compressor and Condenser - Hose Assembly Nut Notice: Refer to Fastener Notice in the Preface section. ProcedureRemove and discard the sealing washer. Refer to Sealing Washer Replacement . Tip Tighten |
2 | A/C Compressor and Condenser - Hose Assembly Bolt ProcedureRemove and discard the sealing washer. Refer to Sealing Washer Replacement . Tighten |
3 | Tube Assembly - A/C Condenser and A/C Evaporator |
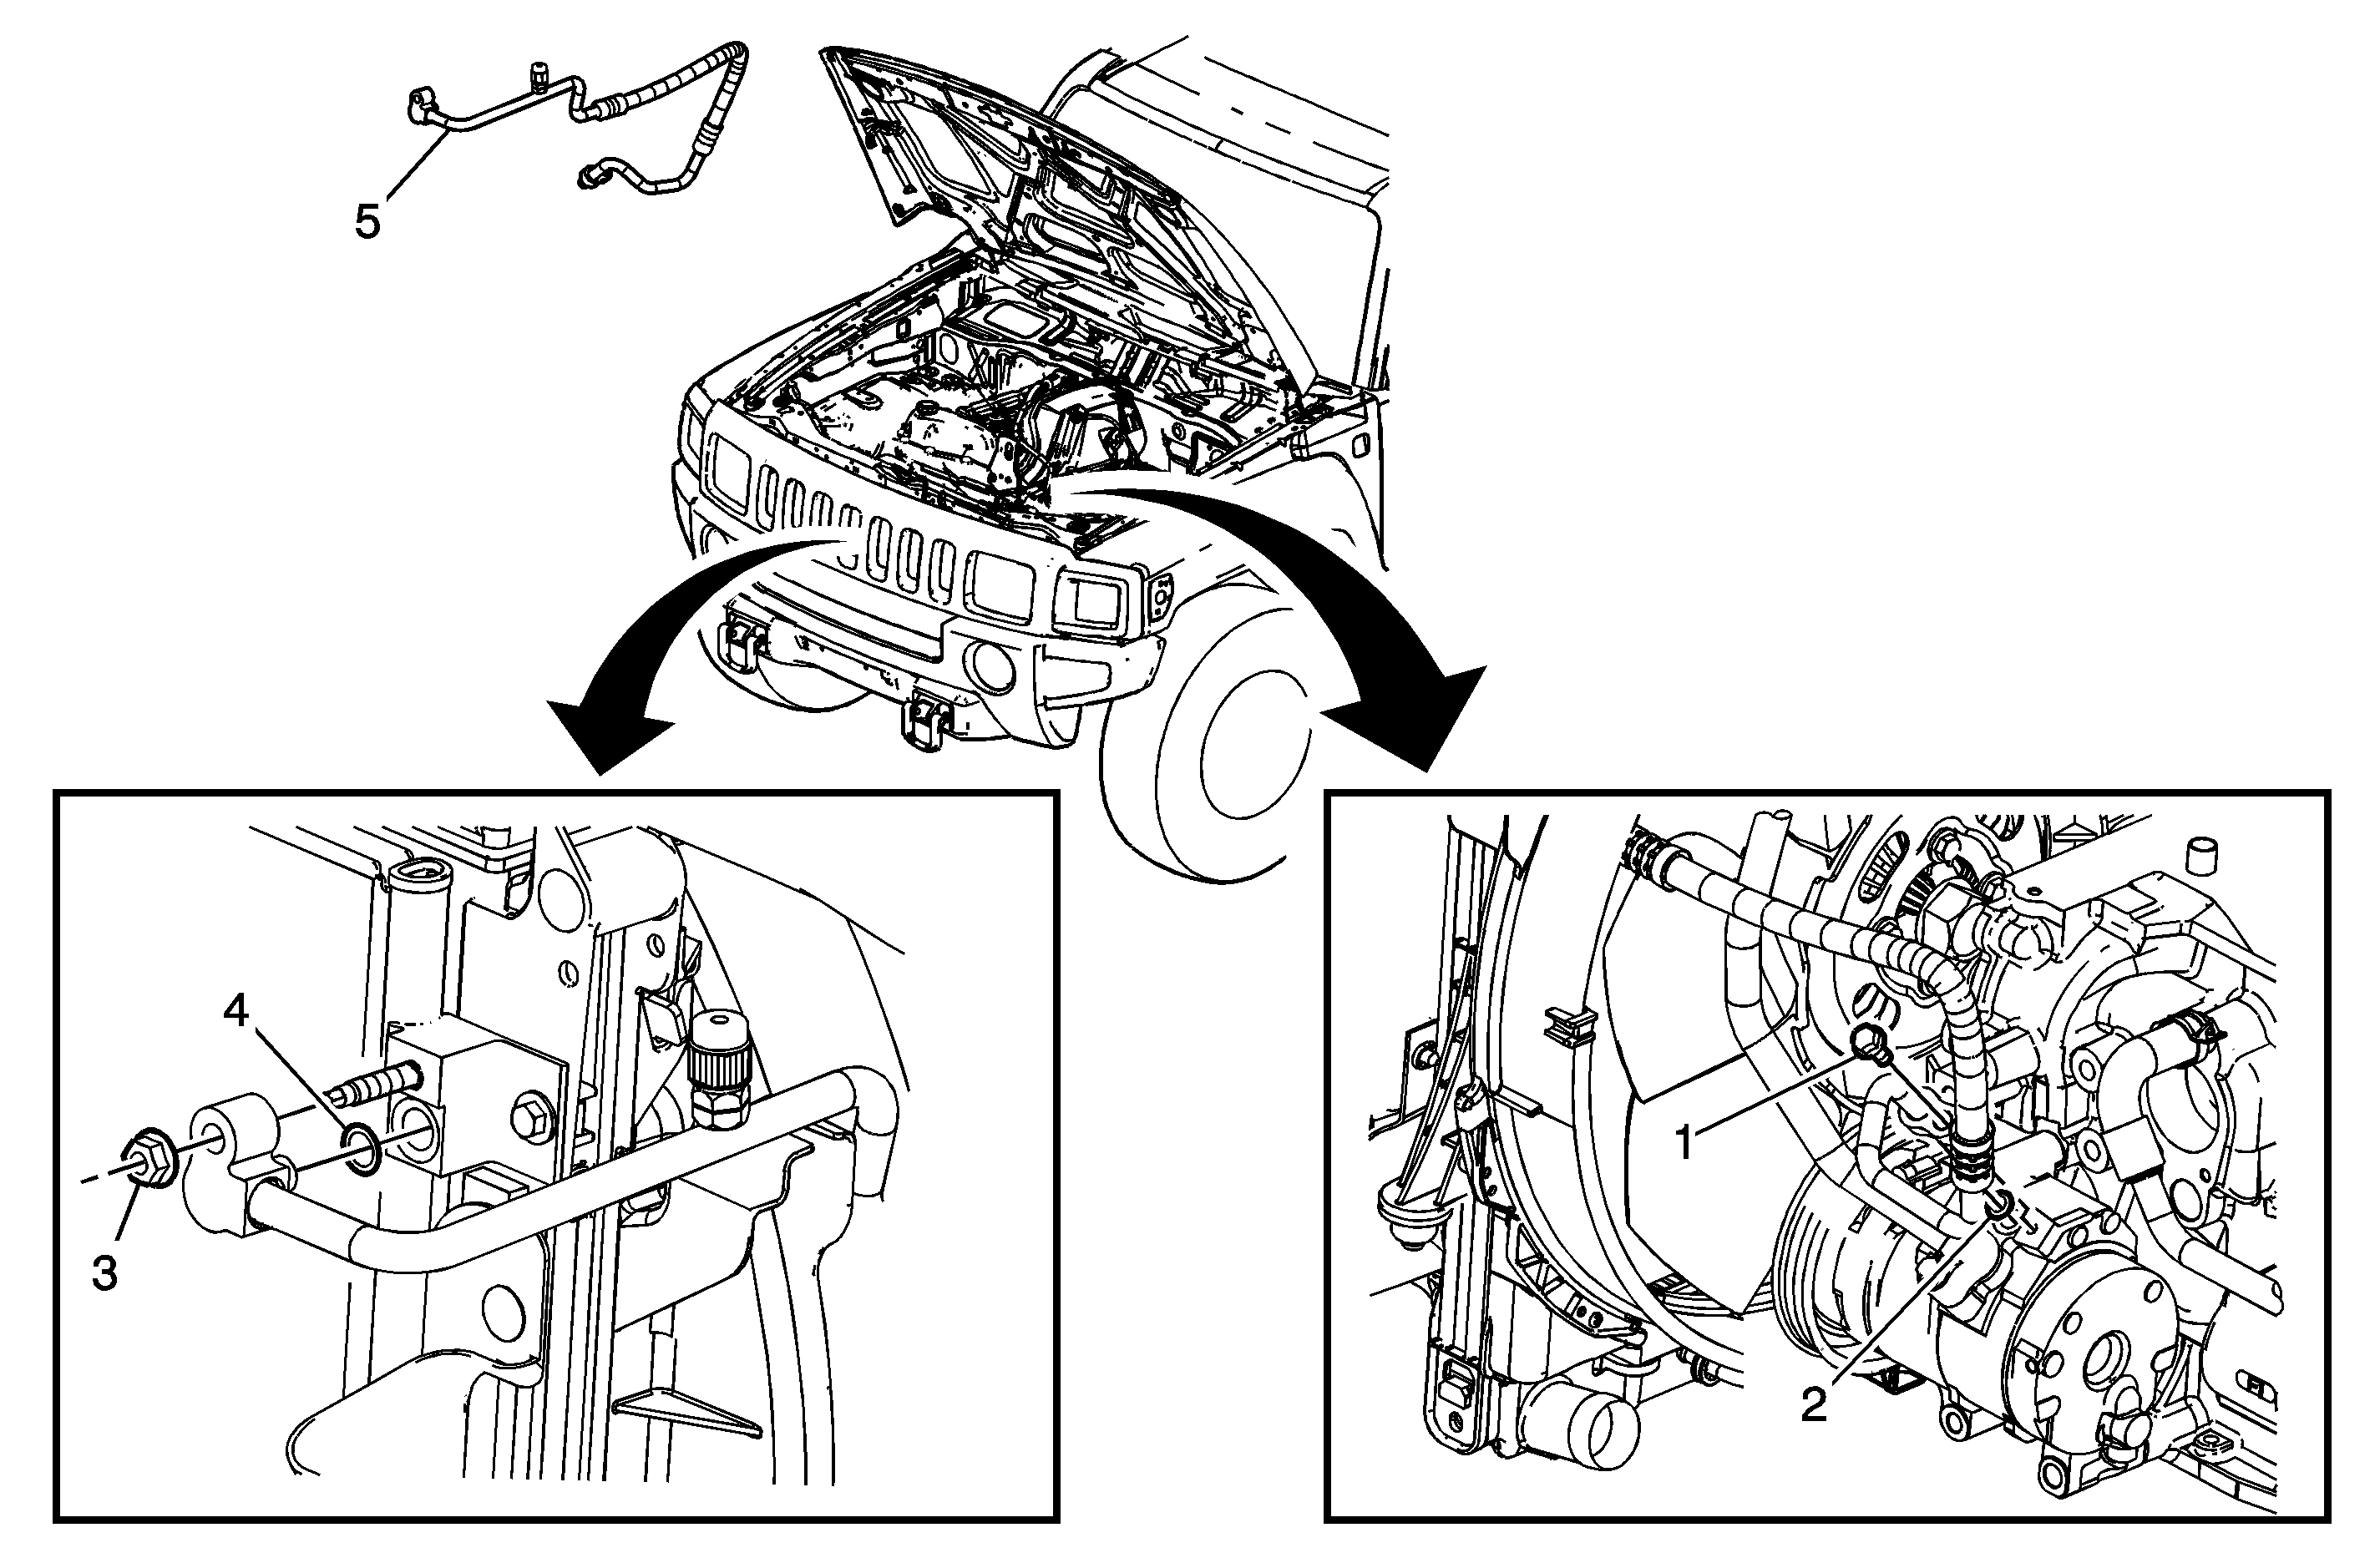
Discharge Hose Replacement LLR

Callout | Component Name | ||||
|---|---|---|---|---|---|
Preliminary Procedure
| |||||
1 | A/C Compressor and Condenser - Hose Assembly Bolt Notice: Refer to Fastener Notice in the Preface section. Tighten | ||||
2 | Sealing Washer Tip
| ||||
3 | A/C Compressor and Condenser - Hose Assembly Nut Tighten | ||||
4 | Sealing Washer Tip
| ||||
5 | A/C Compressor and Condenser Hose Assembly | ||||
