For 1990-2009 cars only
Tools Required
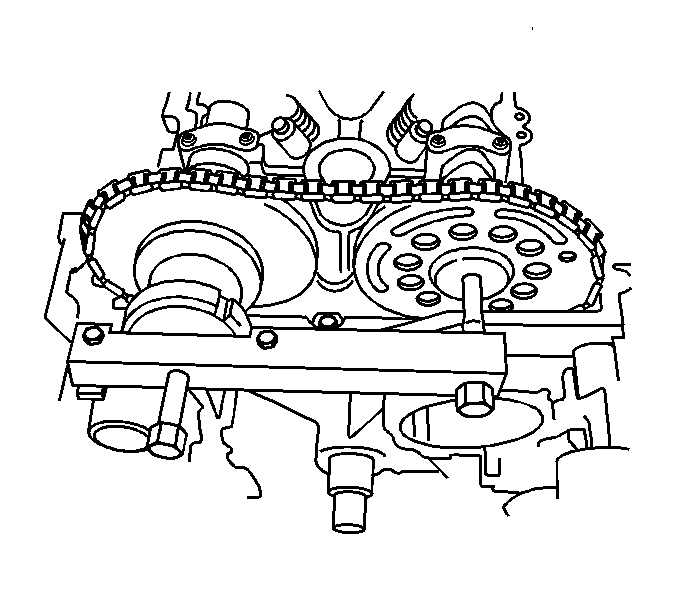
| • | J 44221 Camshaft Holding Tool |
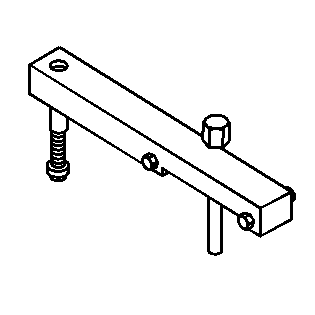
| • | J 44222 Camshaft Sprocket Holding Tool |
| • | J 45059 Angle Meter |
Removal Procedure
- Remove the camshaft cover. Refer to Camshaft Cover Replacement .
- Remove the exhaust camshaft position (CMP) sensor. Refer to Camshaft Position Sensor Replacement - Exhaust .
- Remove the intake CMP sensor. Refer to Camshaft Position Sensor Replacement - Intake .
- Rotate the crankshaft in the engine rotational direction clockwise, until the #1 piston is at top dead center (TDC) on the compression stroke.
- Install the J 44221 to the rear of the camshafts.
- Remove and discard the intake and the exhaust camshaft sprocket bolts.
- Install the J 44222 onto the cylinder head and adjust the horizontal bolts into the camshaft sprockets in order to maintain chain tension and keep from disturbing the timing chain components.
- Carefully slide the sprockets with the timing chain from the camshafts to the J 44222 .
- Alternately loosen the camshaft cap bolts a few turns at a time until all valve spring pressure has been released.
- Remove the camshaft caps.
- Remove the J 44221 from the camshafts.
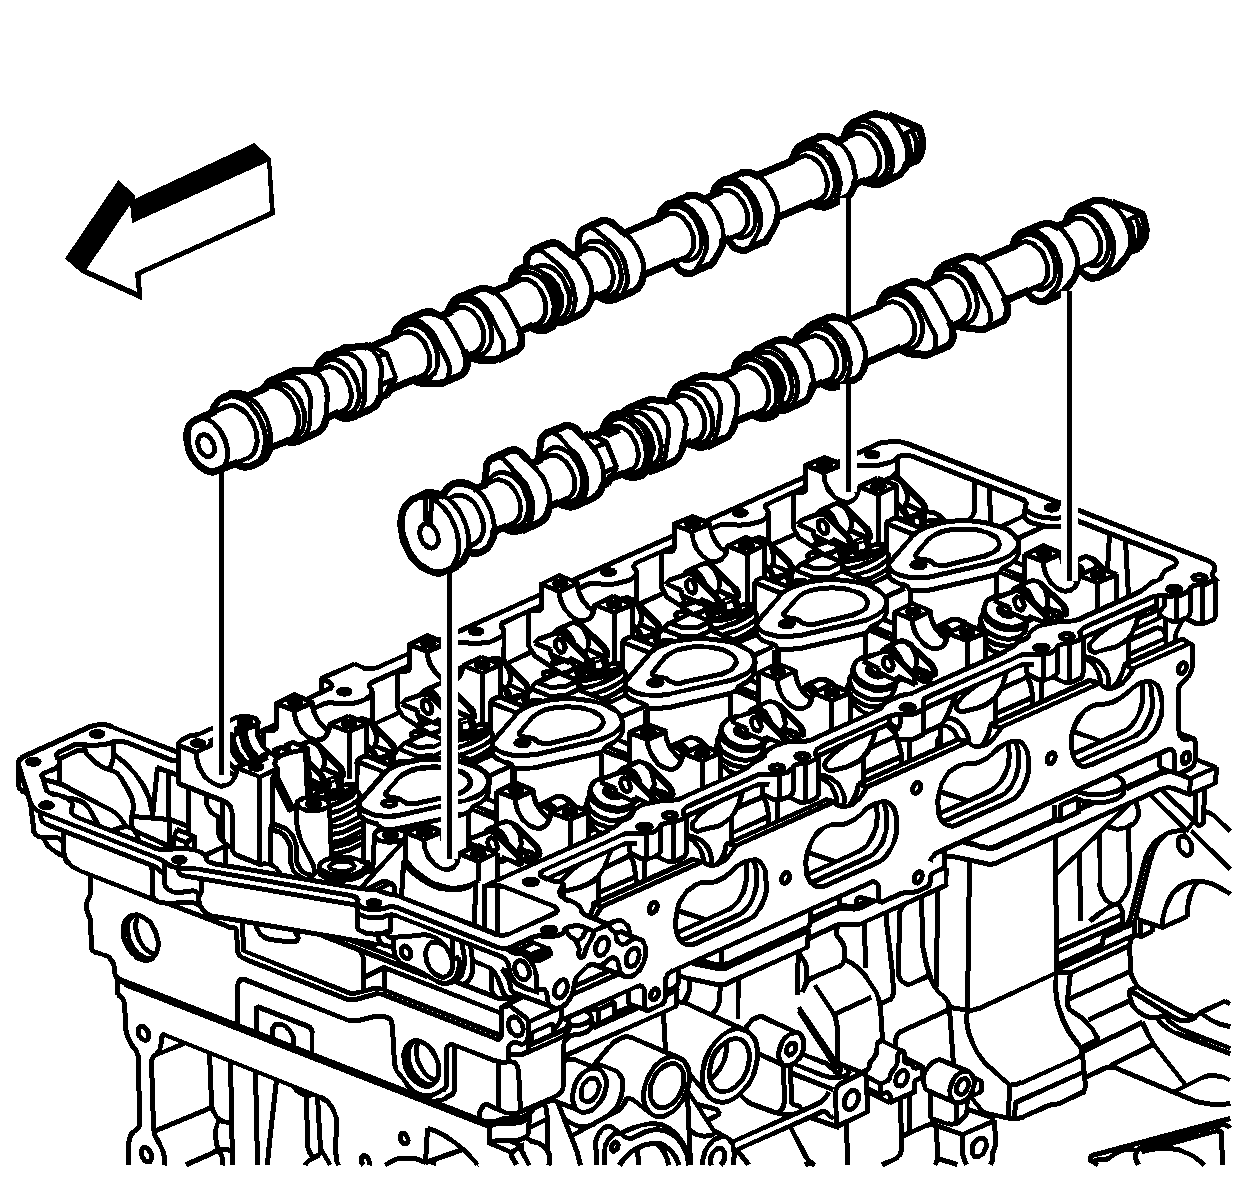
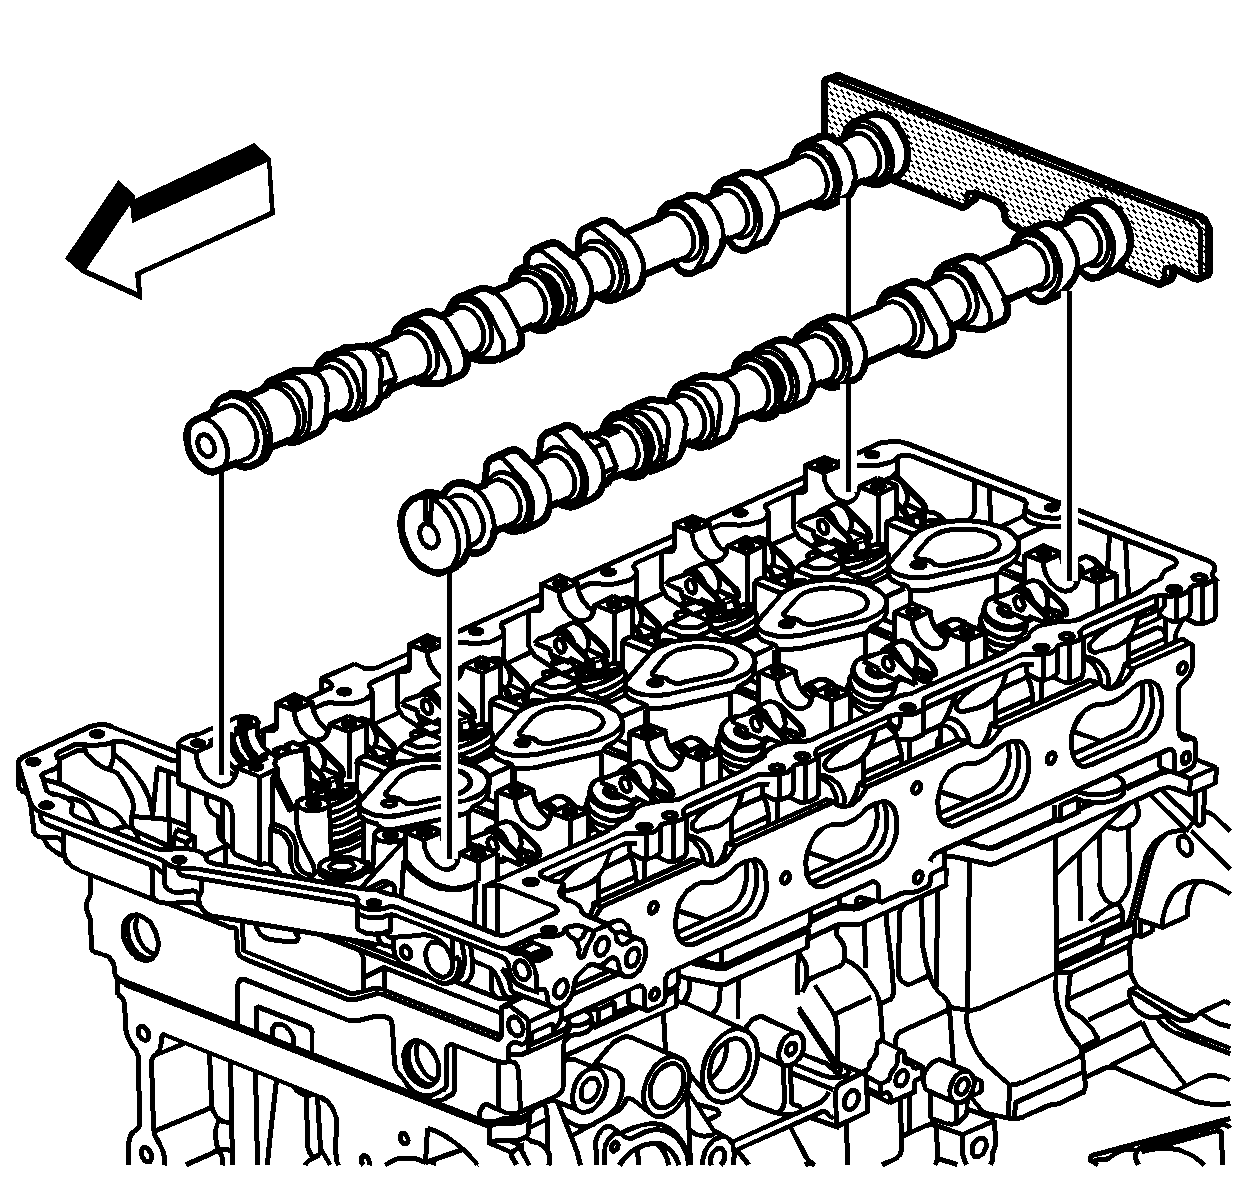
- Remove the camshafts from the cylinder head.
- Clean and inspect the camshafts. Refer to Camshafts Cleaning and Inspection .
Caution: Refer to Camshaft Holding Tool Caution in the Preface section.


Important: Place the camshaft caps in a rack to ensure the caps are installed in the same location from which they were removed.
Installation Procedure
- Coat the camshaft journals, camshaft journal thrust face, and camshaft lobes with clean engine oil.
- Install the J 44221 with the camshaft flats up and the #1 piston at TDC.
- Install the intake and exhaust camshafts to their original positions.
- Observe the markings on the camshaft caps. Each camshaft cap is marked in order to identify its location. The markings have the following meanings:
- Install the camshaft caps according to the identification marks.
- Install the camshaft cap bolts. Tighten the bolts evenly in order to compress the valve springs before final torque.
- Carefully slide the sprockets with the timing chain from the J 44222 to the camshafts.
- Remove the J 44222 from the cylinder head.
- Install the new intake camshaft sprocket bolt.
- Install the new exhaust camshaft actuator bolt.
- Tighten the intake camshaft sprocket bolt a first pass to 20 N·m (15 lb ft). Using the J 45059 rotate the bolt a final pass an additional 100 degrees.
- Tighten the exhaust camshaft sprocket bolt a first pass to 25 N·m (18 lb ft). Using the J 45059 rotate the bolt a final pass an additional 135 degrees.
- Remove the J 44221 from the camshafts.
- Install the intake CMP sensor. Refer to Camshaft Position Sensor Replacement - Intake .
- Install the exhaust CMP sensor. Refer to Camshaft Position Sensor Replacement - Exhaust .
- Install the camshaft cover. Refer to Camshaft Cover Replacement .
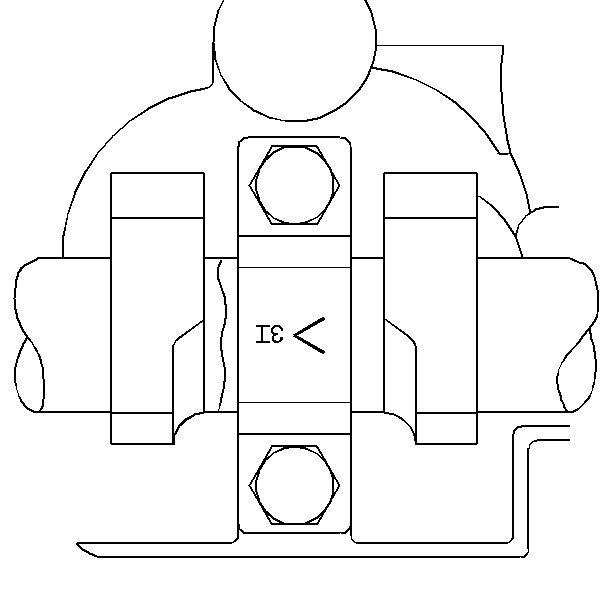
| • | The arrow should point to the front of the engine |
| • | The number indicates the position from the front of the engine |
| • | The "E" indicates the exhaust camshaft. |
| • | The "I" indicates the intake camshaft. |
Notice: Refer to Fastener Notice in the Preface section.
Tighten
Tighten the bolts to 12 N·m (106 lb in).
Important:
• To aid in aligning the sprockets to the camshafts, use a 25 mm (1 in) wrench on the hex of the camshafts to rotate • Ensure the alignment pins are properly engaged with the camshafts
Tighten
