Range Selector Lever Cable Replacement 3.7L
Removal Procedure
- Ensure the vehicle is in the park position.
- Raise and support the vehicle. Refer to Lifting and Jacking the Vehicle .
- Complete the following in order to disconnect the range selector cable (3) from the transmission range selector lever ball stud.
- Remove the retainer (4) from the range selector cable (3).
- Push the range selector cable locking tabs inward toward each other to release from the bracket (2).
- Lower the vehicle.
- Remove the cowl side trim panel. Refer to Cowl Side Trim Panel Replacement .
- Pull the driver side carpet up, enough to access the range selector cable.
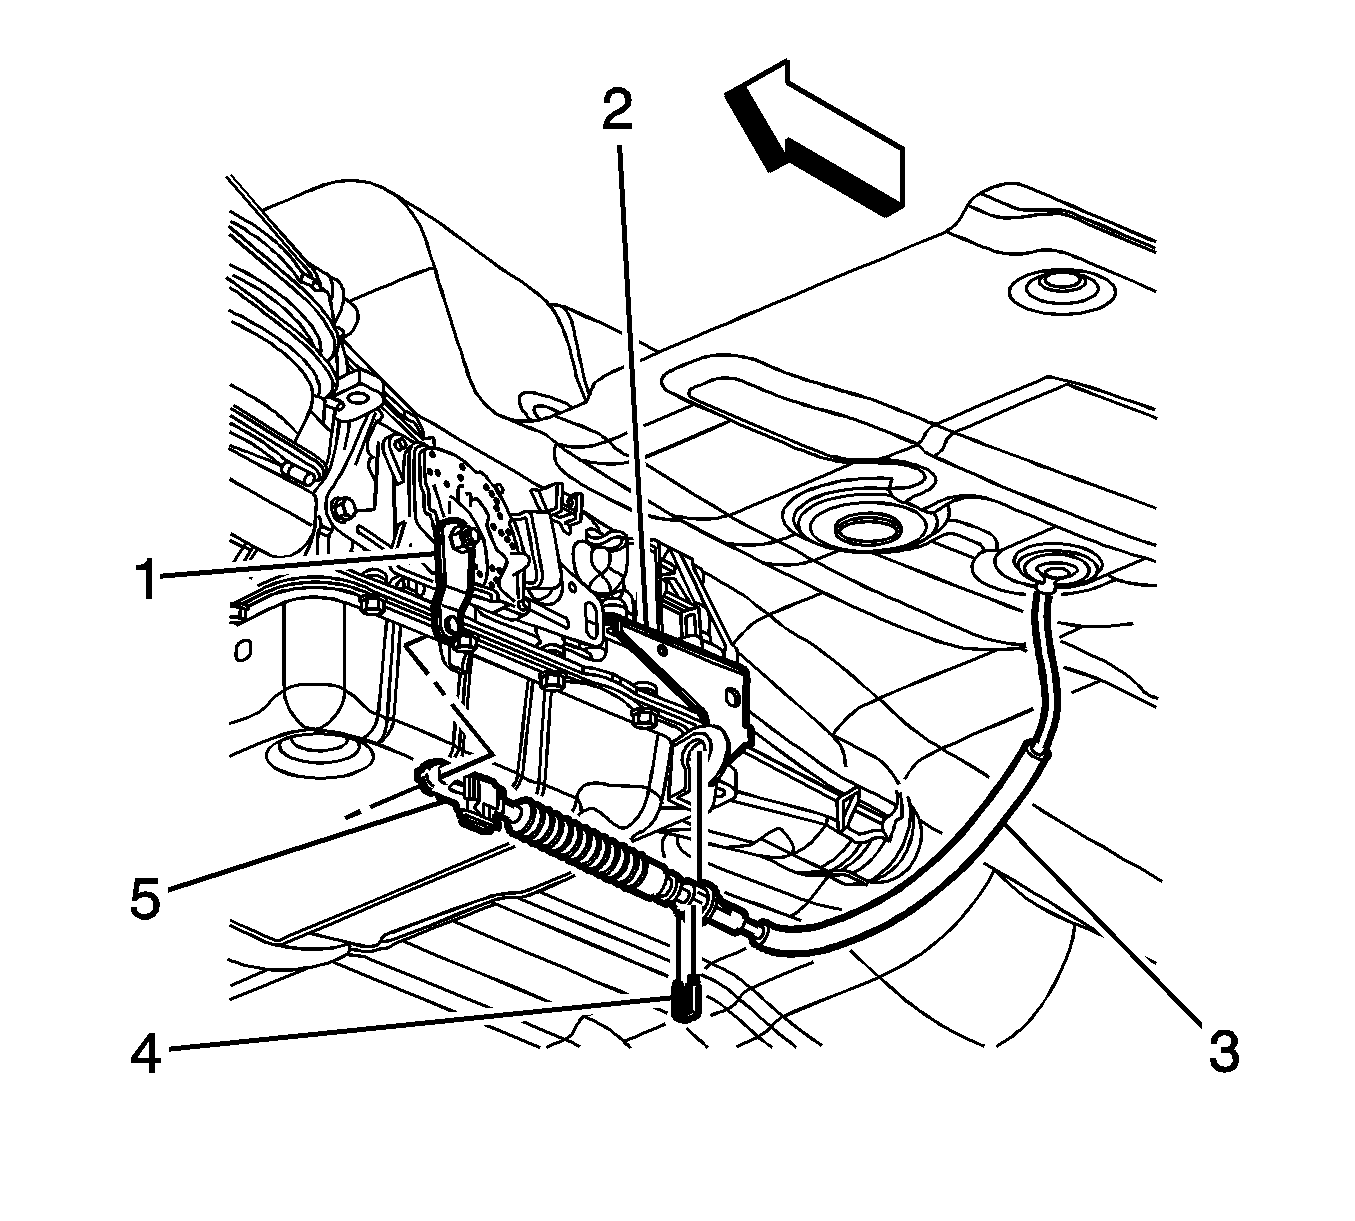
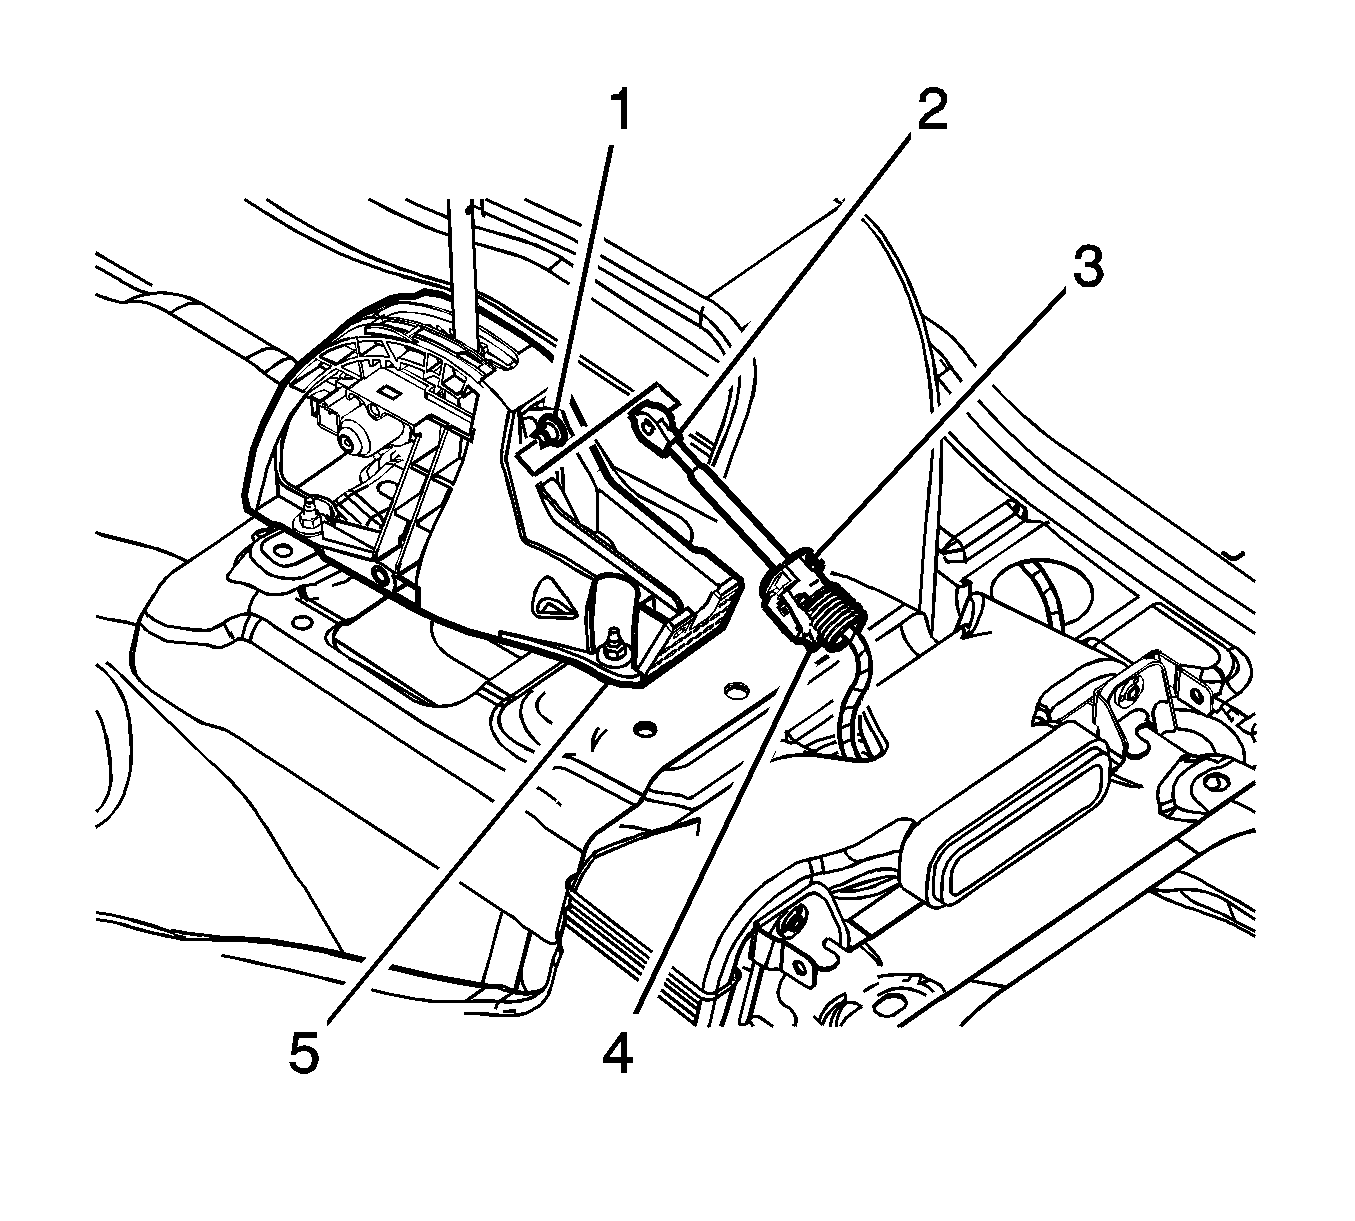
- Pull the cable grommet (2) up through the floor panel.
- Make note of the cable routing under the heat duct (3).
- Use a flat-bladed tool to separate the range selector cable (2) from the transmission range selector lever ball stud (1).
- Release the cable retainer (4) from the shift control assembly (5).
- Remove the range selector cable (3) from the vehicle.
Important: Do not pull on the boot portion of the cable.
| 3.1. | Insert a flat-bladed tool between the range selector cable end (5) and the range selector lever (1). |
| 3.2. | Pry the range selector cable end (5) away from the range selector lever (1). |
Installation Procedure
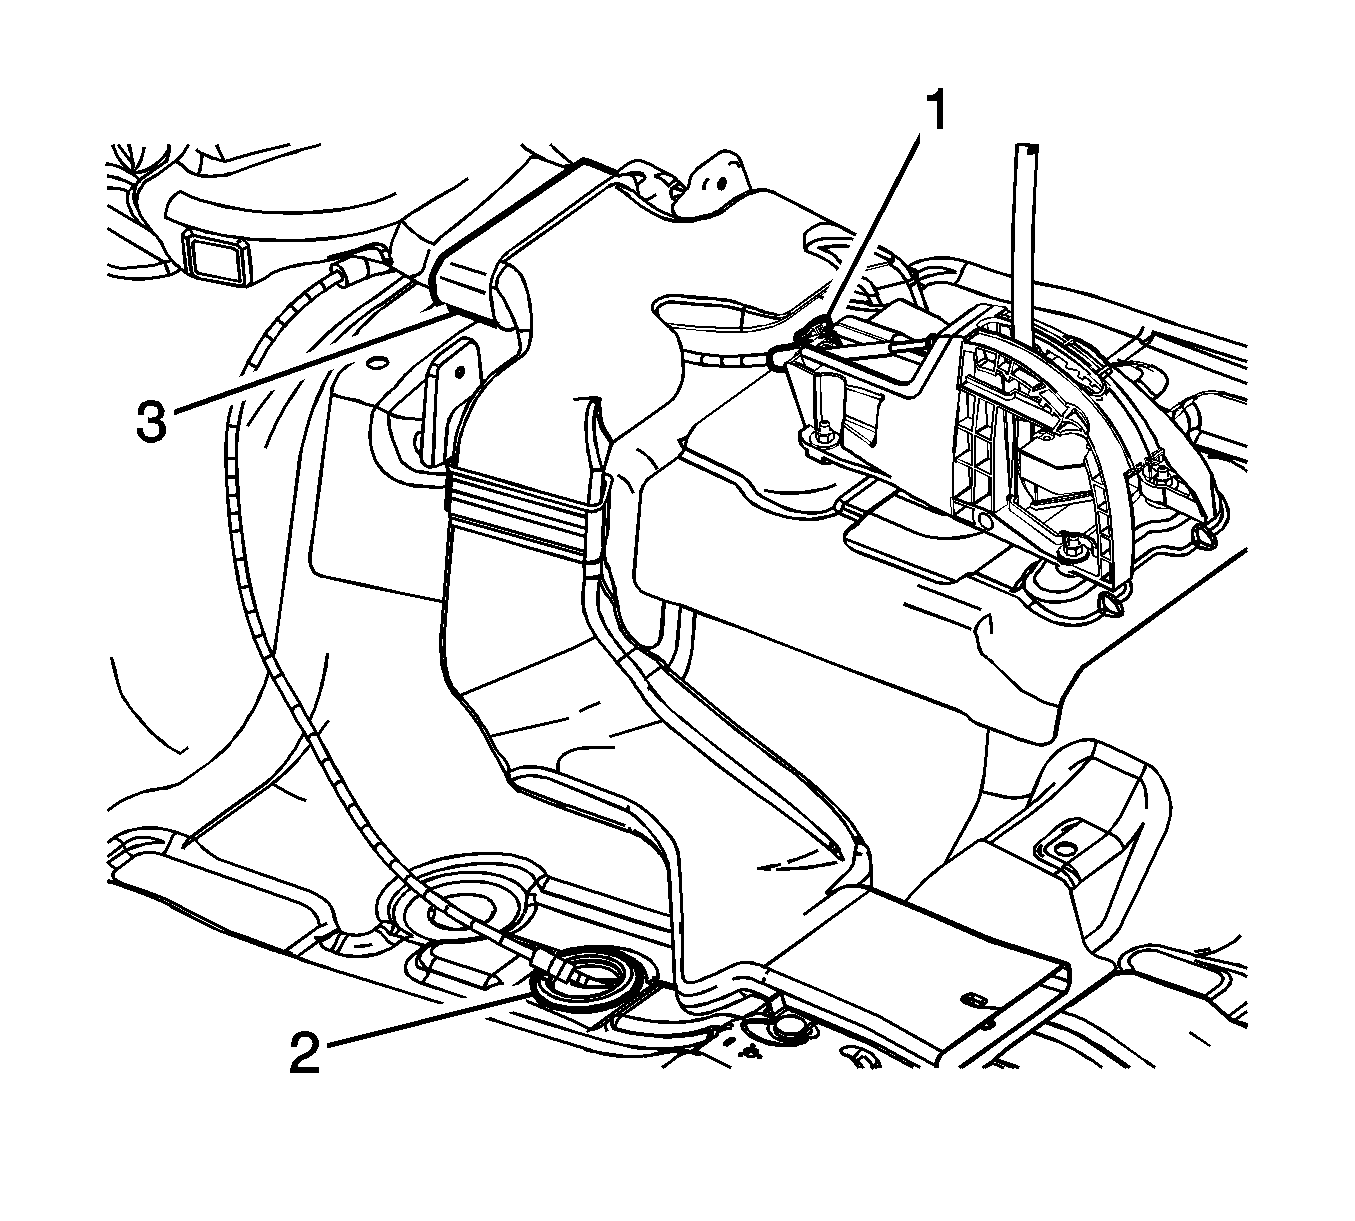
- Insert the range selector cable through the floor panel and seat the cable grommet (2).
- Route the range selector cable under the heat duct (3).
- Install the range selector cable (3) to the shift control assembly (5).
- Ensure the cable retainer (4) is secured to the shift control assembly (5).
- Push the range selector cable end (2) onto the range selector lever ball stud (1).
- Reposition the drivers side carpet to the floor panel.
- Inspect below the accelerator pedal for binding, to ensure full range of motion.
- Install the cowl side trim panel. Refer to Cowl Side Trim Panel Replacement .
- Raise and support the vehicle. Refer to Lifting and Jacking the Vehicle .
- Install the range selector cable (3) to the bracket (2).
- Install the retainer (4) to the range selector cable (3).
- Remove and discard the primary lock lockout pin if a new cable is being installed.
- Install the range selector cable end (5) to the range selector lever (1).
- Adjust the automatic transmission range selector cable. Refer to Range Selector Lever Cable Adjustment .
- Lower the vehicle.


Range Selector Lever Cable Replacement 5.3L
Important: The range selector cable can be disassembled and removed as two independent sections when removal of the complete cable is not necessary, or the cable can remain together and be removed as one piece not requiring disassembly of the cable.
Disassembling Cable
- Set the parking brake.
- Ensure that the shift control lever is in the park (P) position.
- Raise and support the vehicle. Refer to Lifting and Jacking the Vehicle .
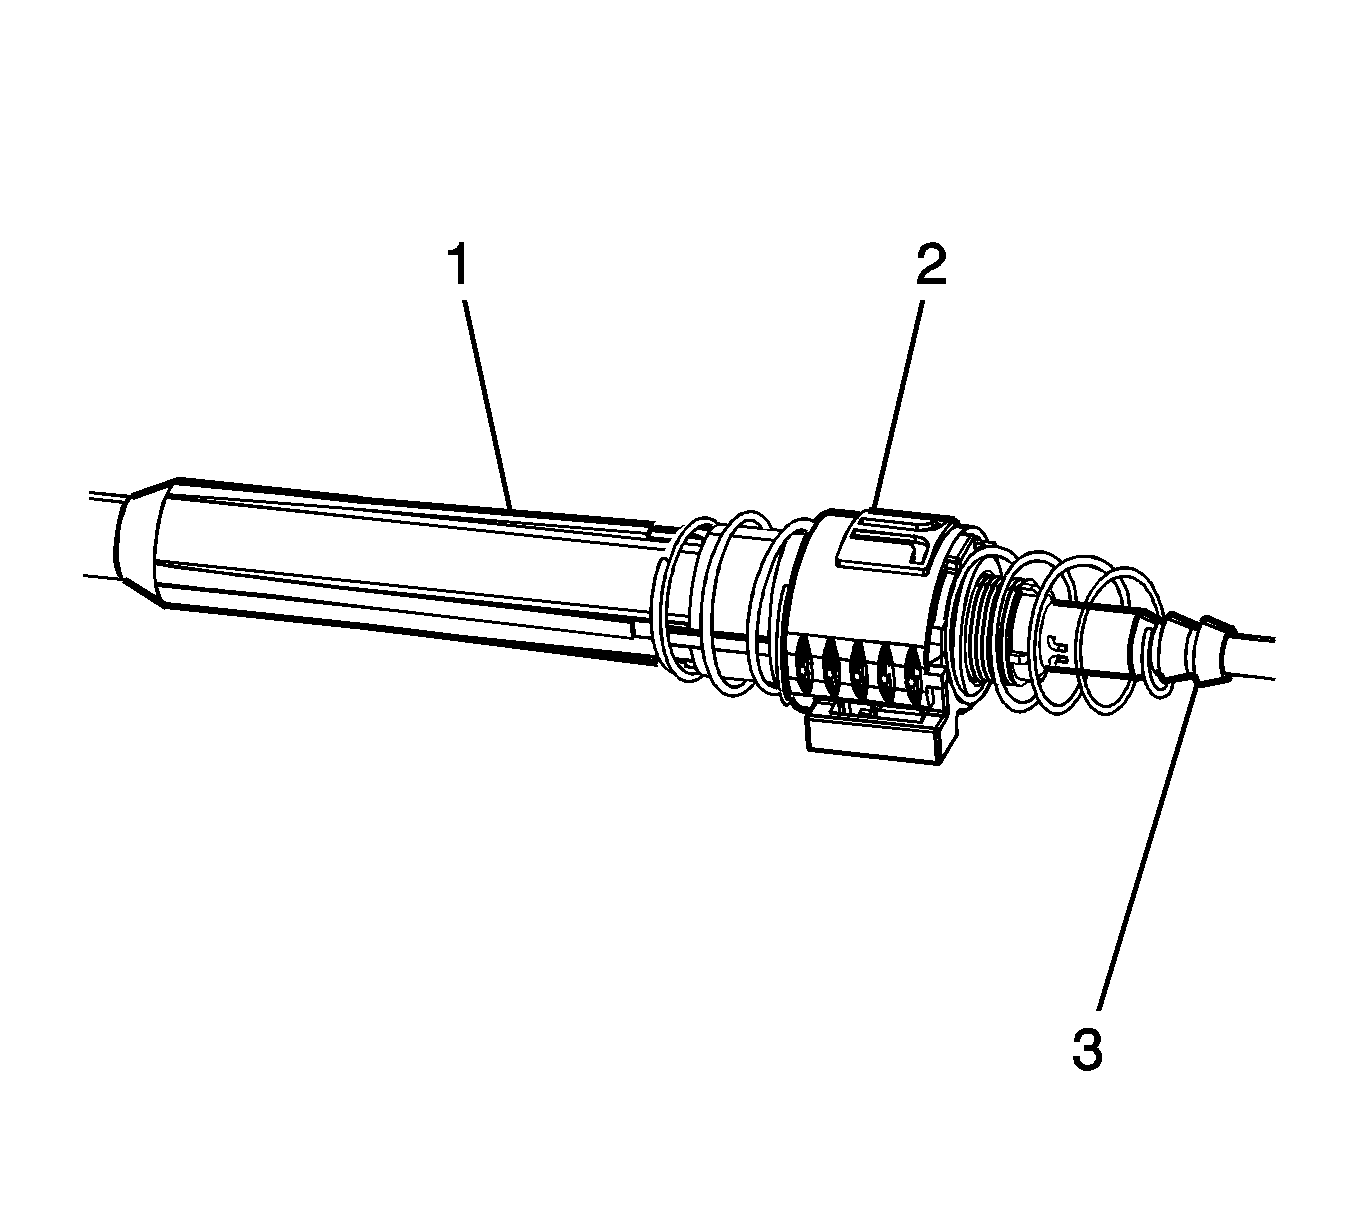
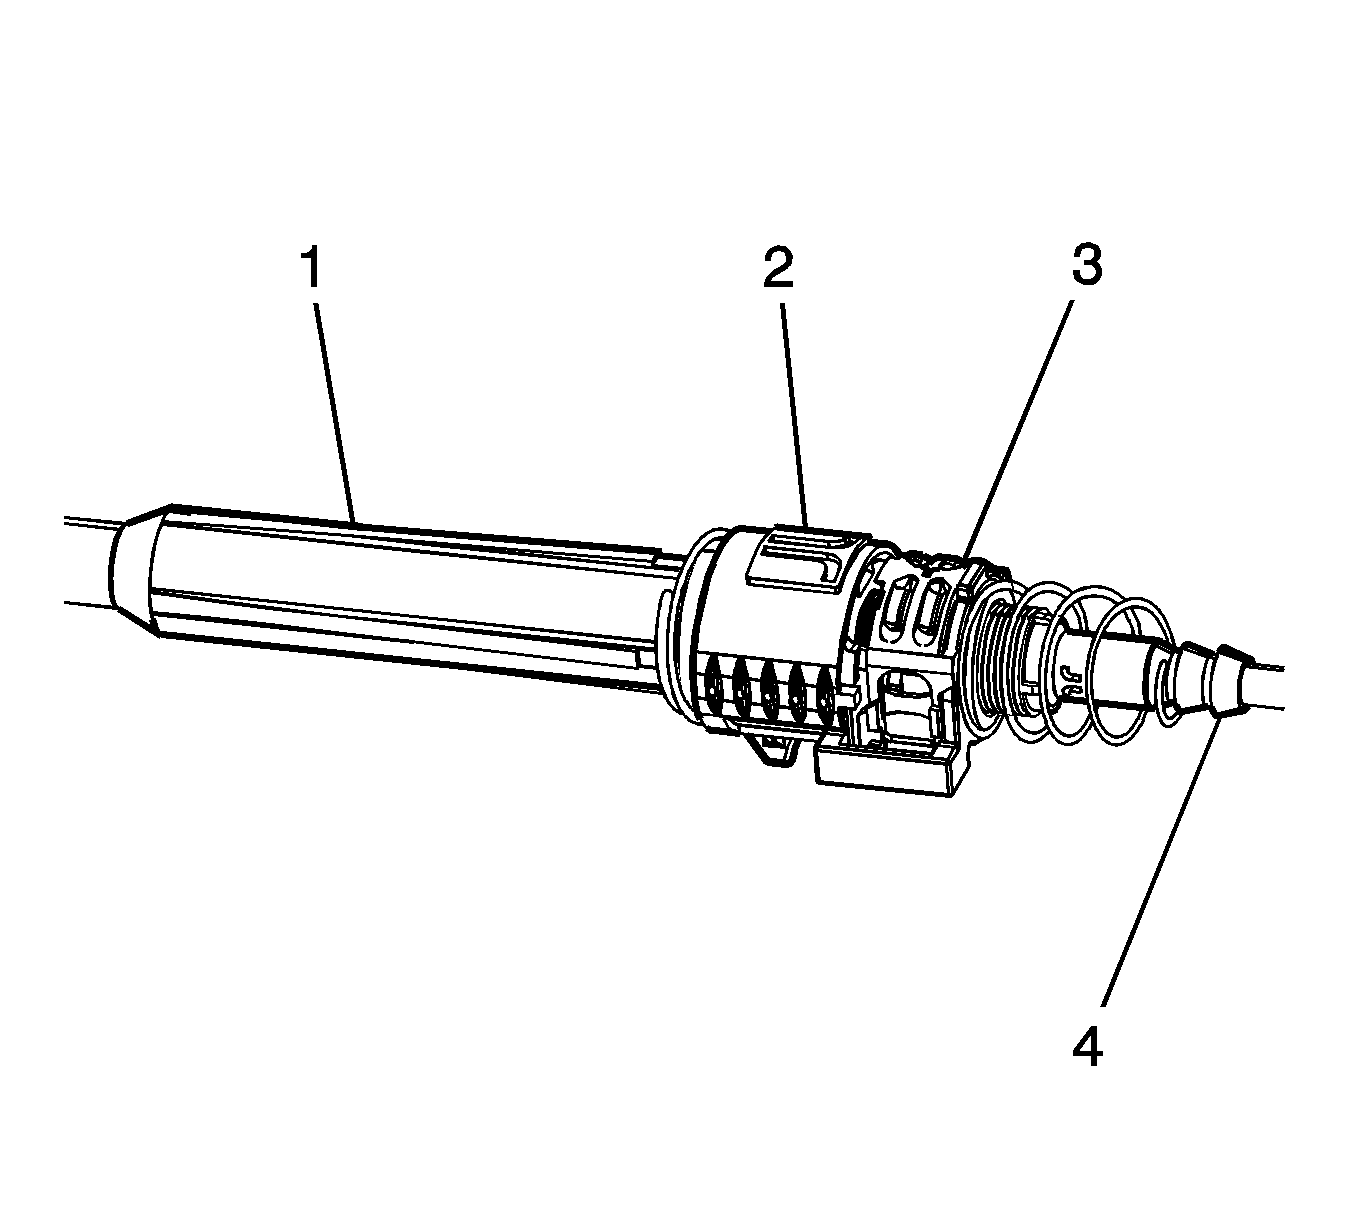
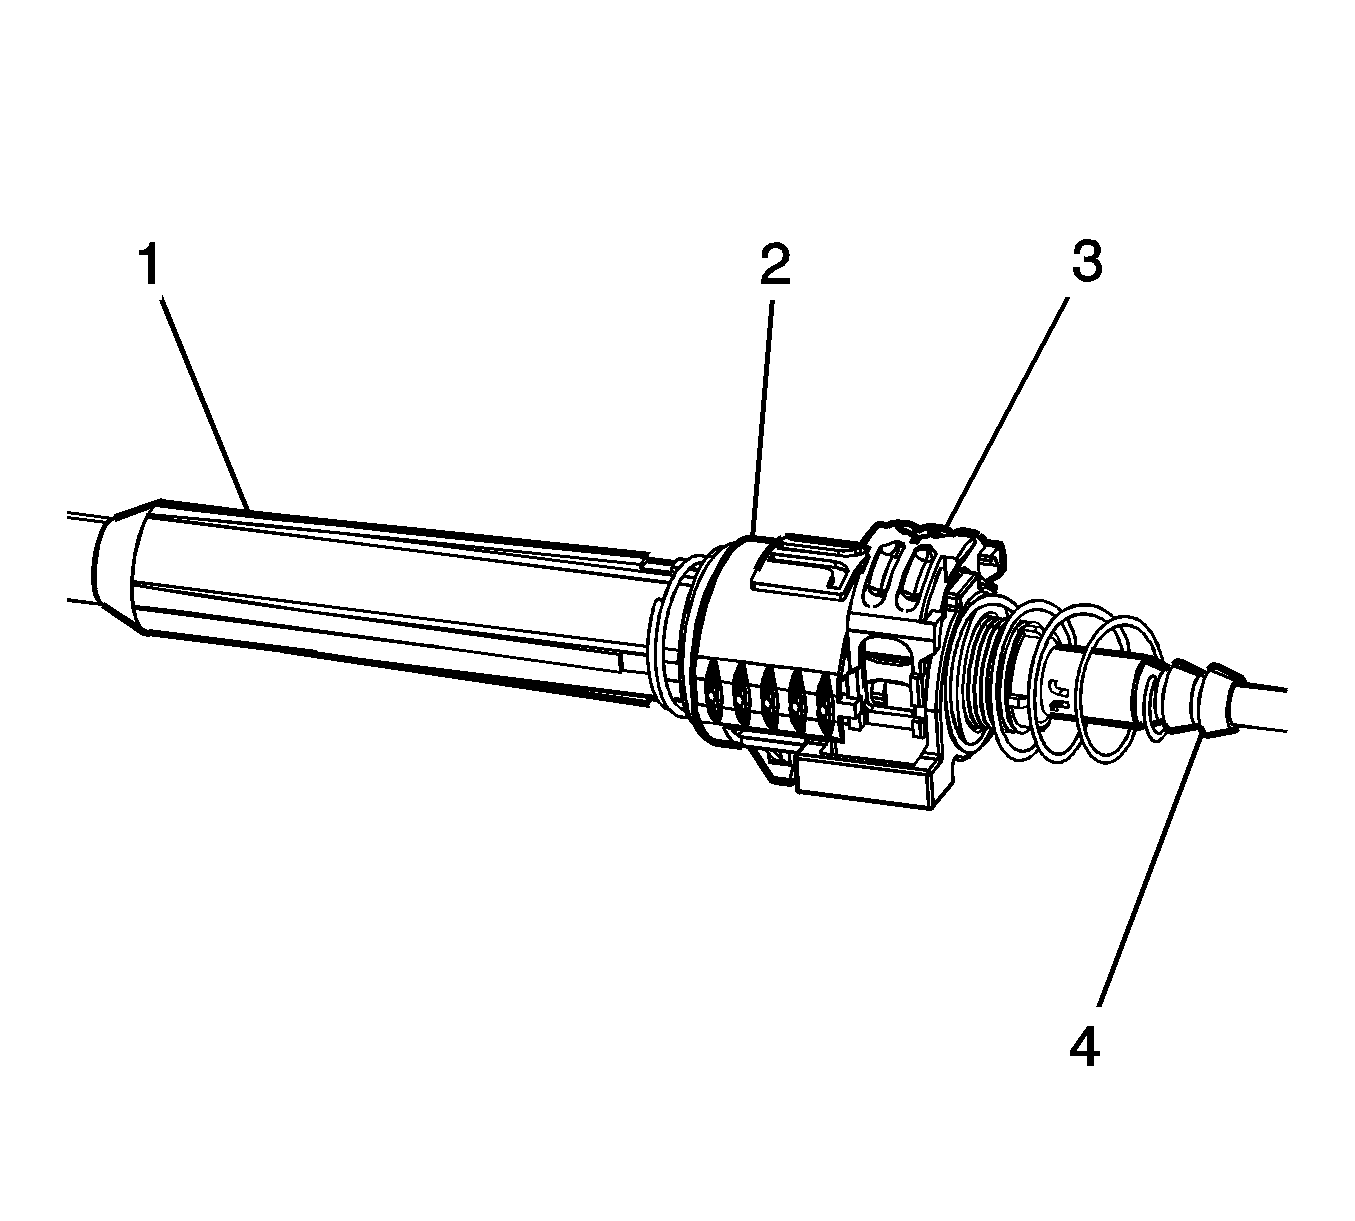
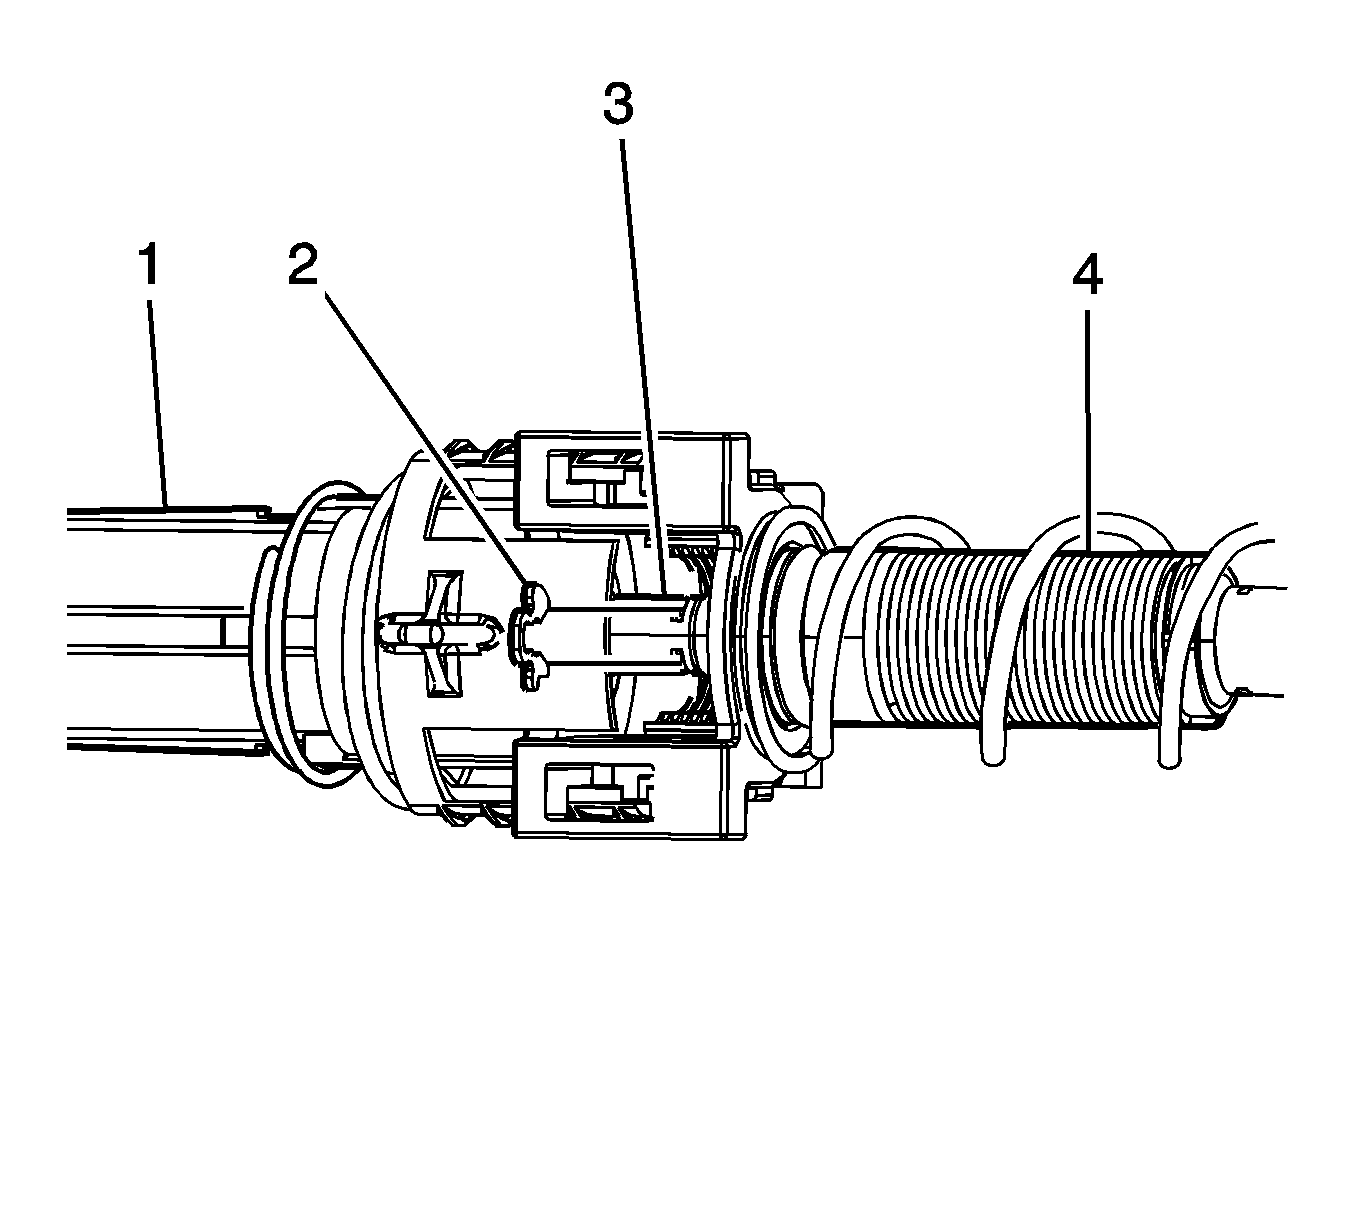
- Pull back the spring loaded cover (2) to expose the cable adjustment lock (3).
- Lift the cable adjustment lock (3) up to unlock both halves of the range selector cable (1, 4).
- Rotate the range selector cable to expose the retaining clip (5).
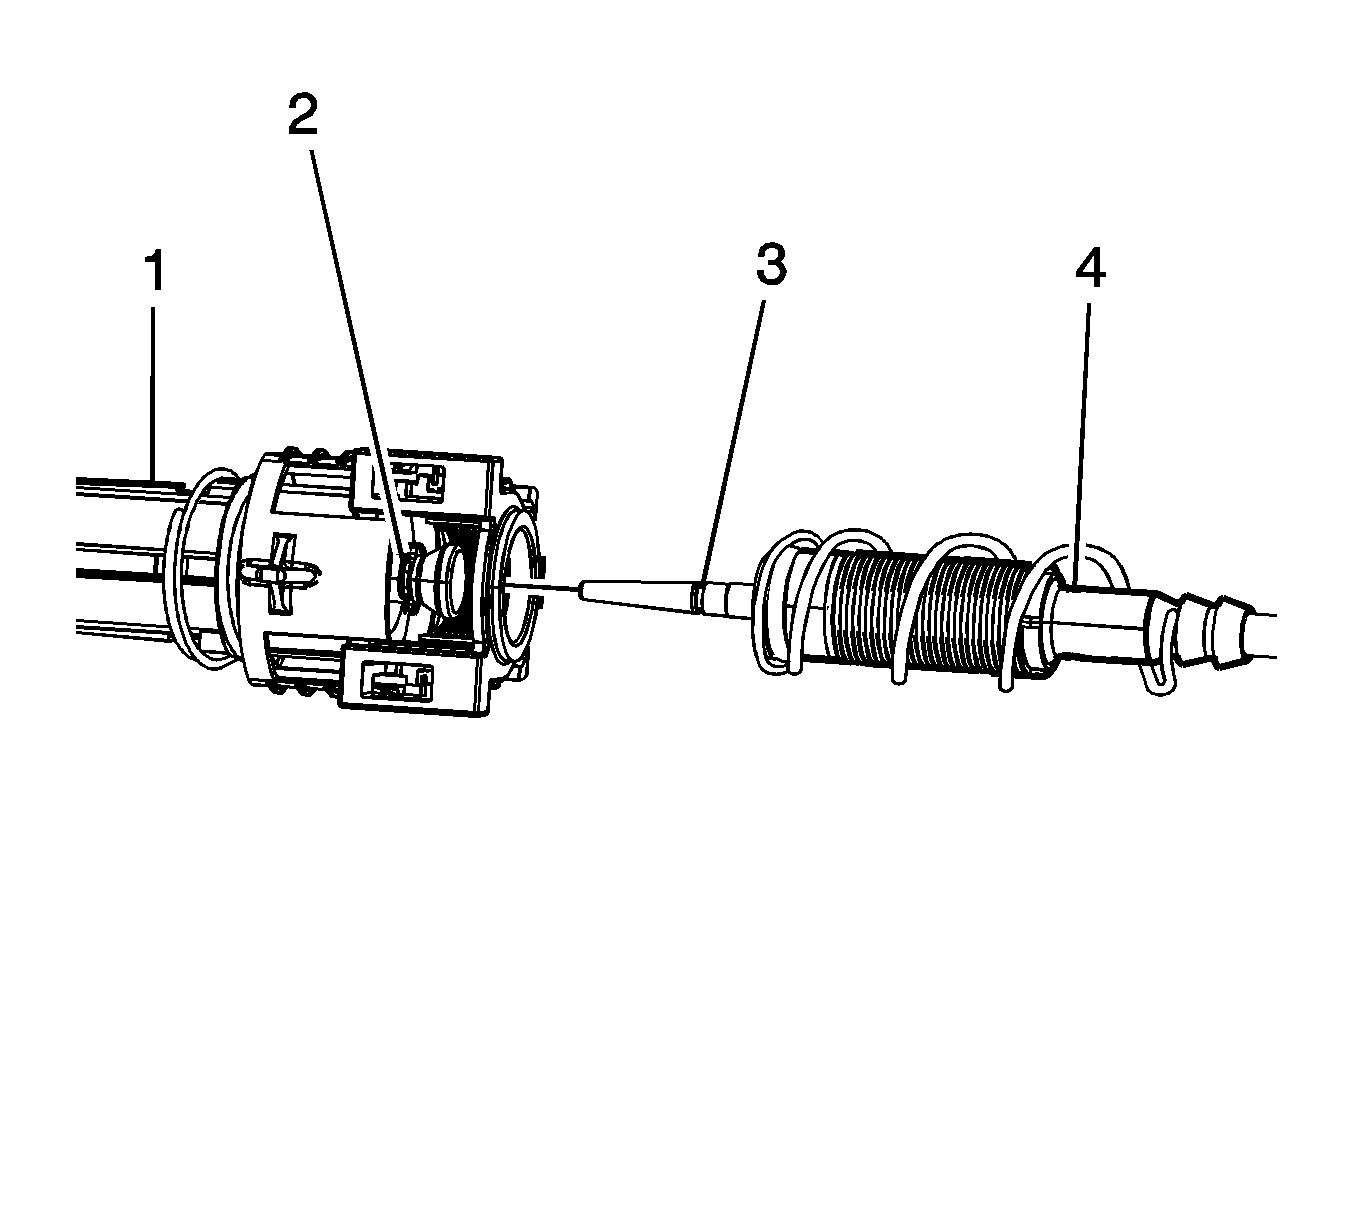
- Remove the retaining clip (2) from the range selector cable (3).
- Separate the shift control end of the cable (1) from the transmission end of the cable (2).
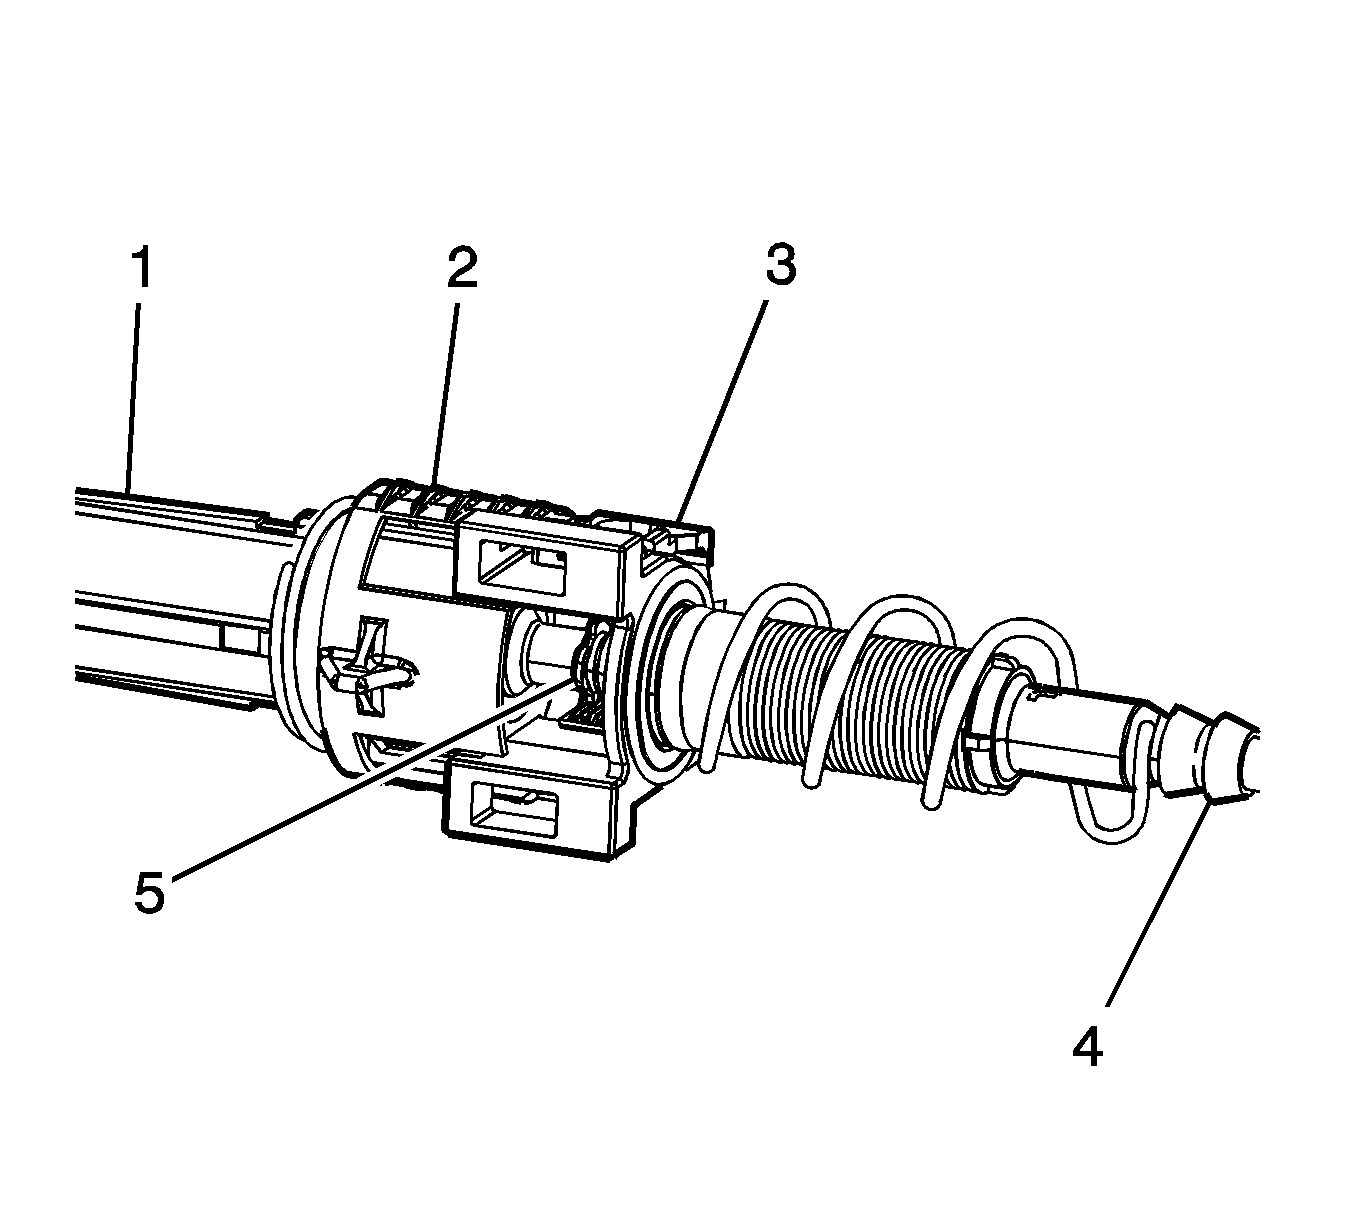
It may be necessary to pull the transaxle end of the range selector cable (4) out of the shift control end of the range selector cable (1) to fully expose the retaining clip (5).
Cable Removal - Transmission End
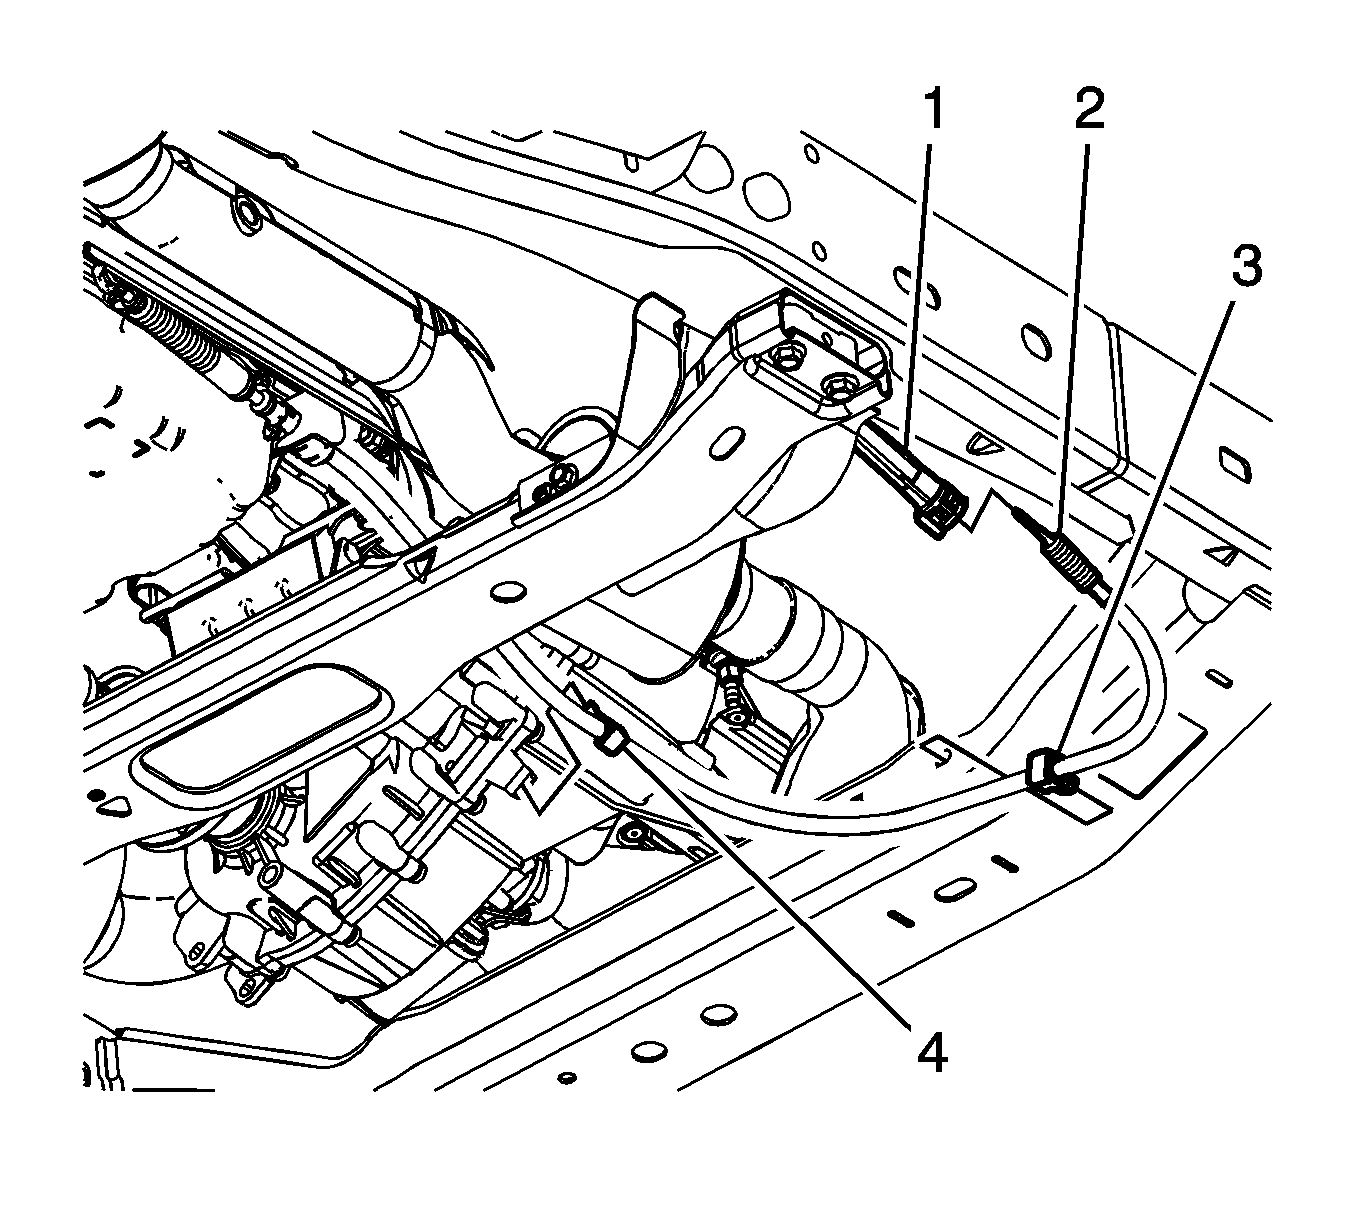
- Remove the range selector cable retainer (4) from the transfer case.
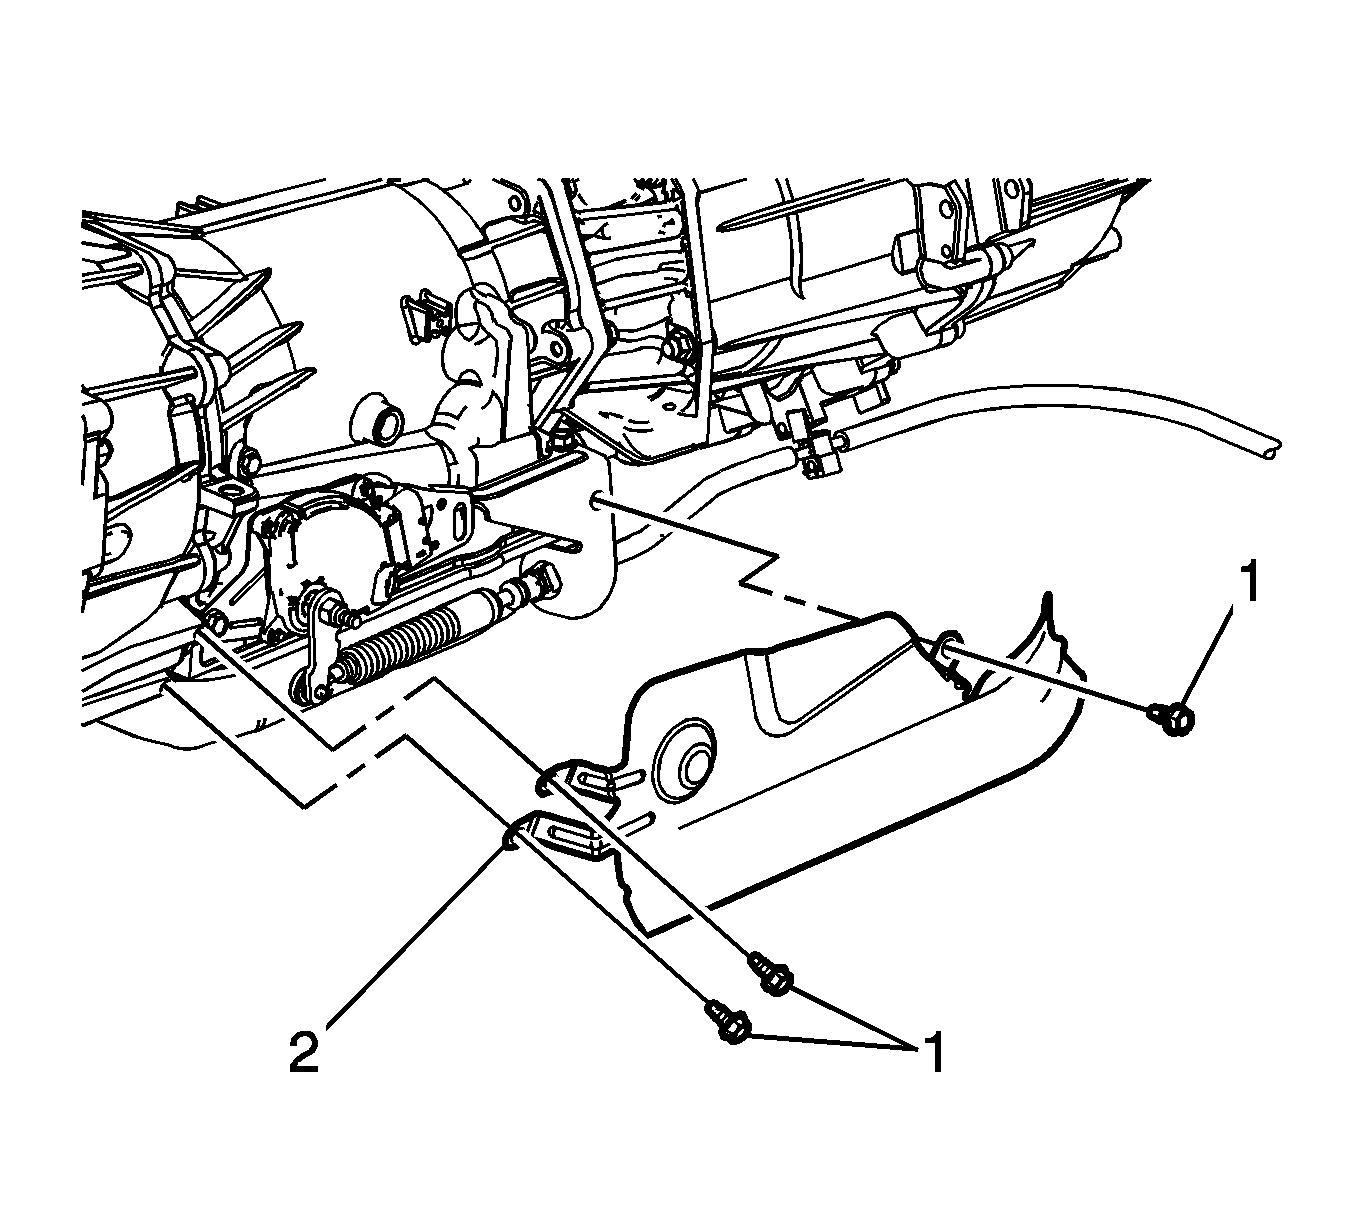
- Remove the heat shield bolts (1).
- Remove the heat shield (2).
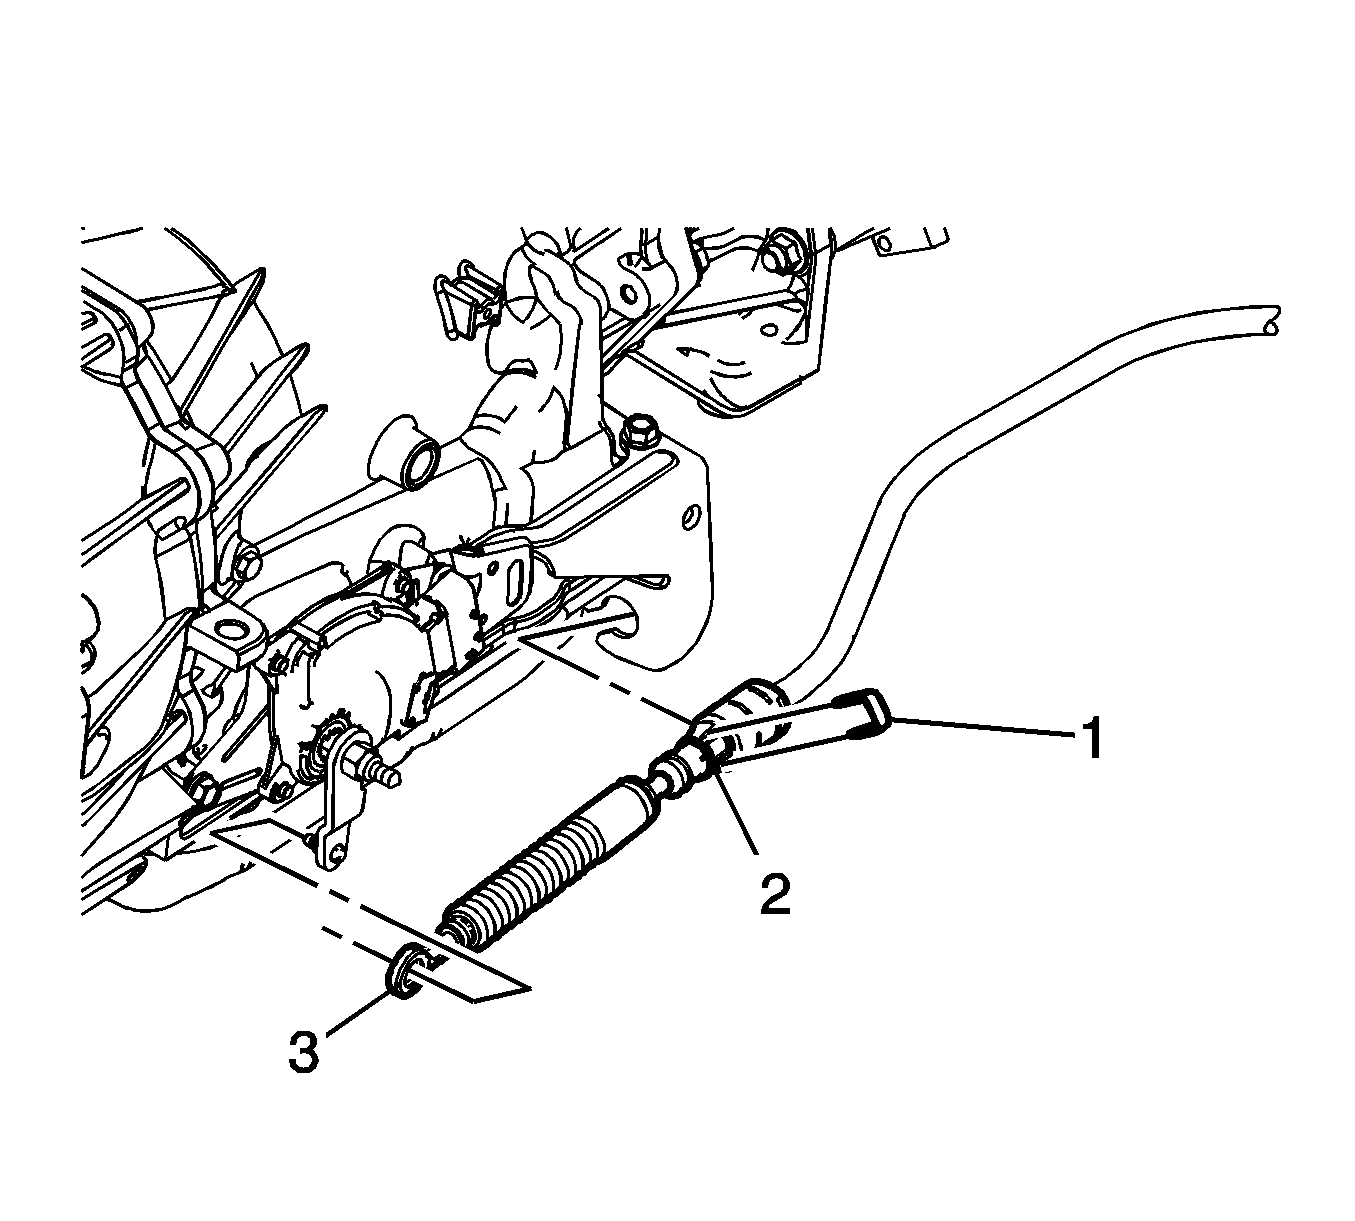
- Disconnect the range selector cable end (3) from the range selector lever.
- Remove the retainer (1) from the range selector cable (2).
- Push the range selector cable locking tabs (2) inward toward each other to release the cable from the bracket.

Remove the range selector cable retainer (3) from the frame.
Important: Do not pull on the boot portion of the cable.
Cable Removal - Shift Control End
- Lower the vehicle.
- Remove the cowl side trim panel. Refer to Cowl Side Trim Panel Replacement .
- Pull the driver side carpet up, enough to access the range selector cable.
- Pull the cable grommet (2) up through the floor panel.
- Make note of the cable routing under the heat duct (3).
- Use a flat-bladed tool to separate the range selector cable (2) from the transmission range selector lever ball stud (1).
- Release the cable retainer (4) from the shift control assembly (5).
- Remove the range selector cable (3) from the vehicle.


Cable Installation - Shift Control End
- Insert the range selector cable through the floor panel and seat the cable grommet (2).
- Route the range selector cable under the heat duct (3).
- Install the range selector cable (3) to the shift control assembly (5).
- Ensure the cable retainer (4) is secured to the shift control assembly (5).
- Push the range selector cable end (2) onto the range selector lever ball stud (1).
- Reposition the drivers side carpet to the floor panel.
- Inspect below the accelerator pedal for binding, to ensure full range of motion.
- Install the cowl side trim panel. Refer to Cowl Side Trim Panel Replacement .


Cable Installation - Transaxle End
- Raise and support the vehicle. Refer to Lifting and Jacking the Vehicle .
- Install the range selector cable (2) to the range selector cable bracket. Ensure the range selector cable retaining tabs fully engage the range selector cable bracket.
- Install the retainer (1) to the range selector cable (2).
- Connect the range selector cable end (3) to the transaxle range switch lever.
- Install the heat shield (2).
- Install the heat shield bolts (1).
- Install the range selector cable retainer (4) to the transfer case.
Important: Ensure the range selector cable is routed exactly as originally positioned in the vehicle to avoid coming into contact with potential hazards such as hot, sharp, and moving objects.


Notice: Refer to Fastener Notice in the Preface section.
Tighten
Tighten the bolts to 10 N·m (89 lb in).

Install the range selector cable retainer (3) to the frame.
Assembling Cable
- Install the cable retaining clip (2).
- Push the transaxle end of the range selector cable (4) into the shift control end of the range selector cable (1) until the cable retaining clip (5) is fully locked into the range selector cable groove (3).
- Ensure that the shift control lever and the transaxle range select lever are both in the park (P) position.
- Ensure the transaxle cable end (4) is not being held and that the spring is allowed to tension the cable.
- Depress the cable adjustment lock (3) in order to lock both halves of the range selector cable (1, 4).
- Release the spring loaded cover (2) allowing it to cover the cable adjustment lock.
- Adjust the automatic transmission range selector cable. Refer to Range Selector Lever Cable Adjustment .
- Lower the vehicle.
