For 1990-2009 cars only
Exhaust Manifold Replacement LLR
Removal Procedure
Caution: Refer to Exhaust Service Caution in the Preface section.
Caution: Refer to Protective Goggles and Glove Caution in the Preface section.
- Remove the secondary air injection (AIR) check valve. Refer to Secondary Air Injection Check Valve Replacement .
- Remove the exhaust seal. Refer to Exhaust Seal Replacement .
- Remove the exhaust manifold heat shield. Refer to Exhaust Manifold Heat Shield Replacement .
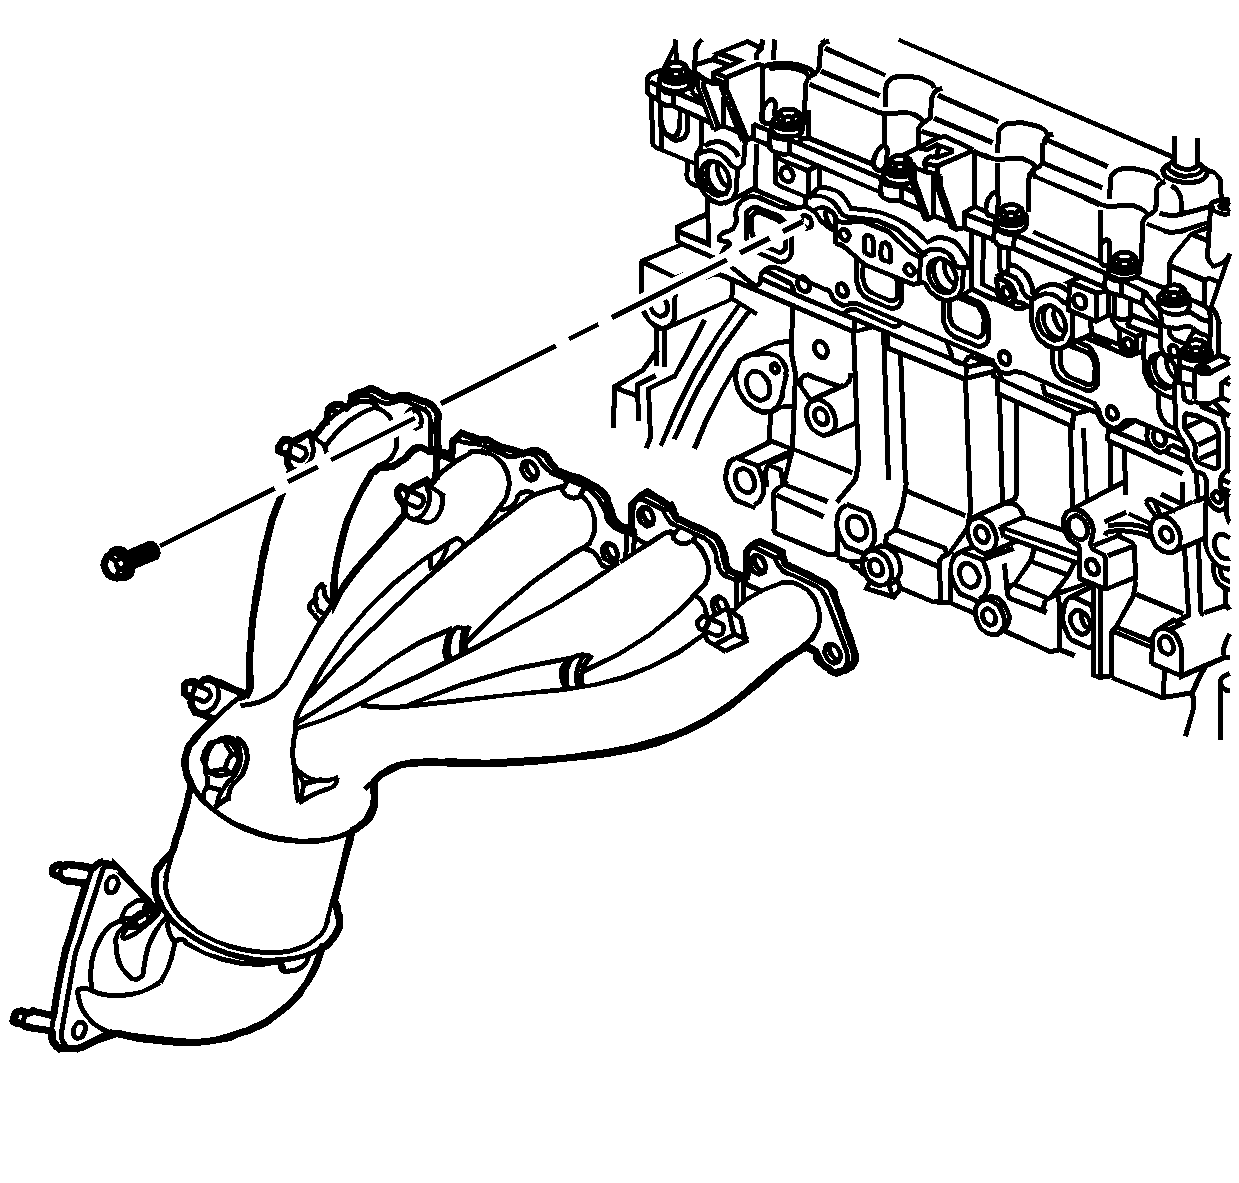
- Remove the exhaust manifold bolts.
- Remove the exhaust manifold.
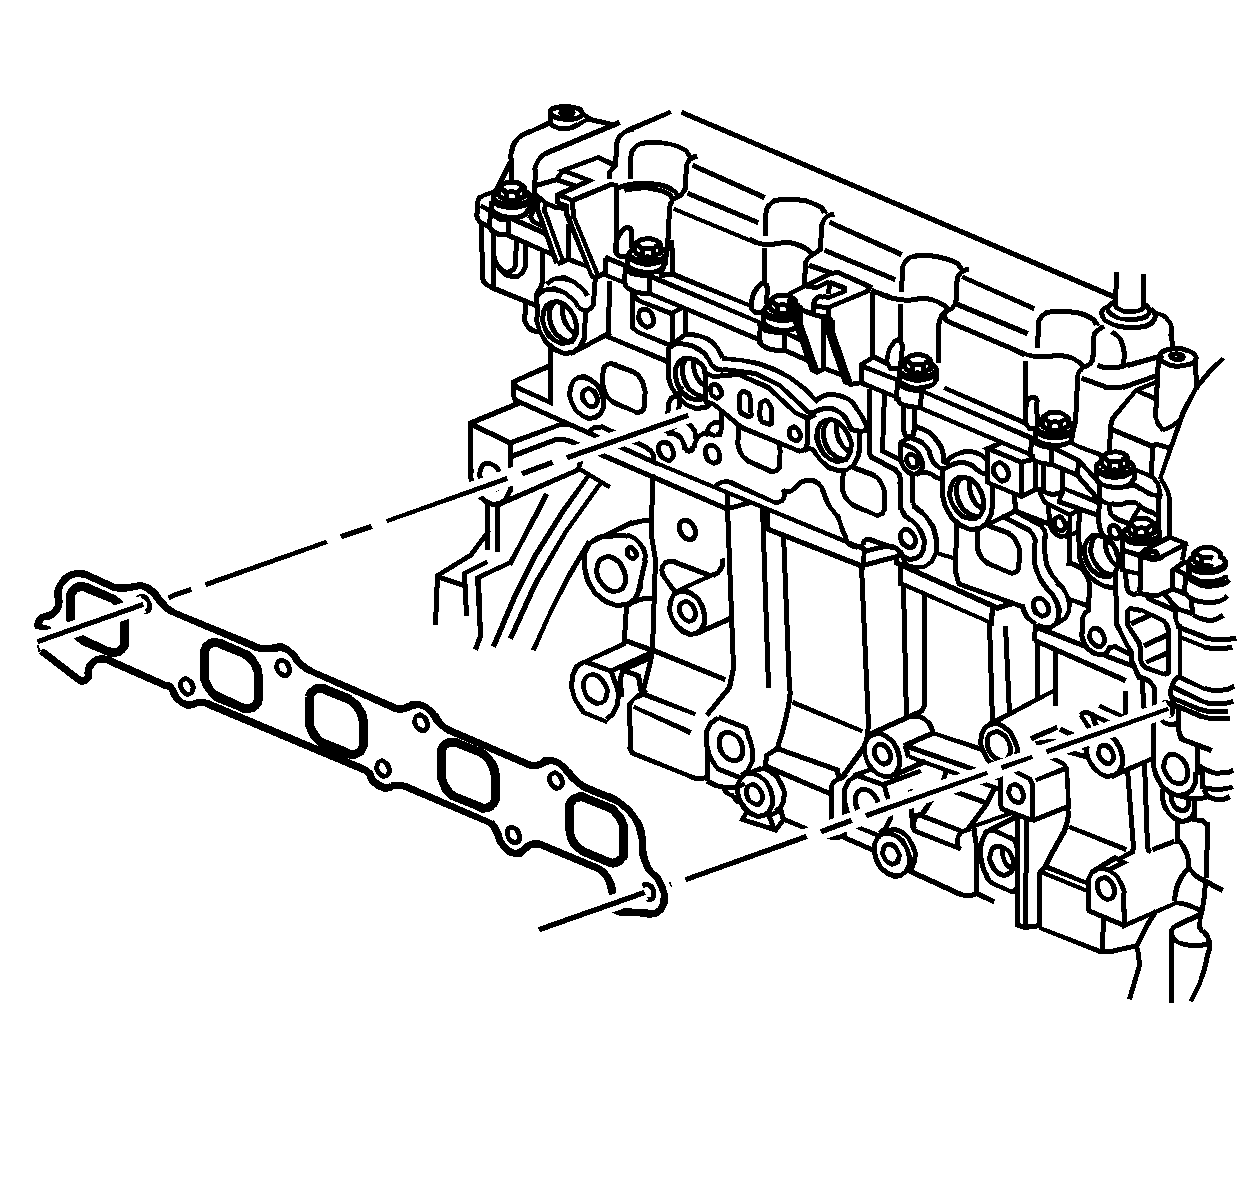
- Remove and discard the exhaust manifold gasket.
- Clean and inspect the exhaust manifold. Refer to Exhaust Manifold Cleaning and Inspection .


Installation Procedure
- Clean and apply threadlock GM P/N 12345493 (Canadian P/N 10953488) to the exhaust manifold bolt threads.
- Position a NEW exhaust manifold gasket onto the cylinder head.
- Position the exhaust manifold against cylinder head.
- Install the exhaust manifold bolts.
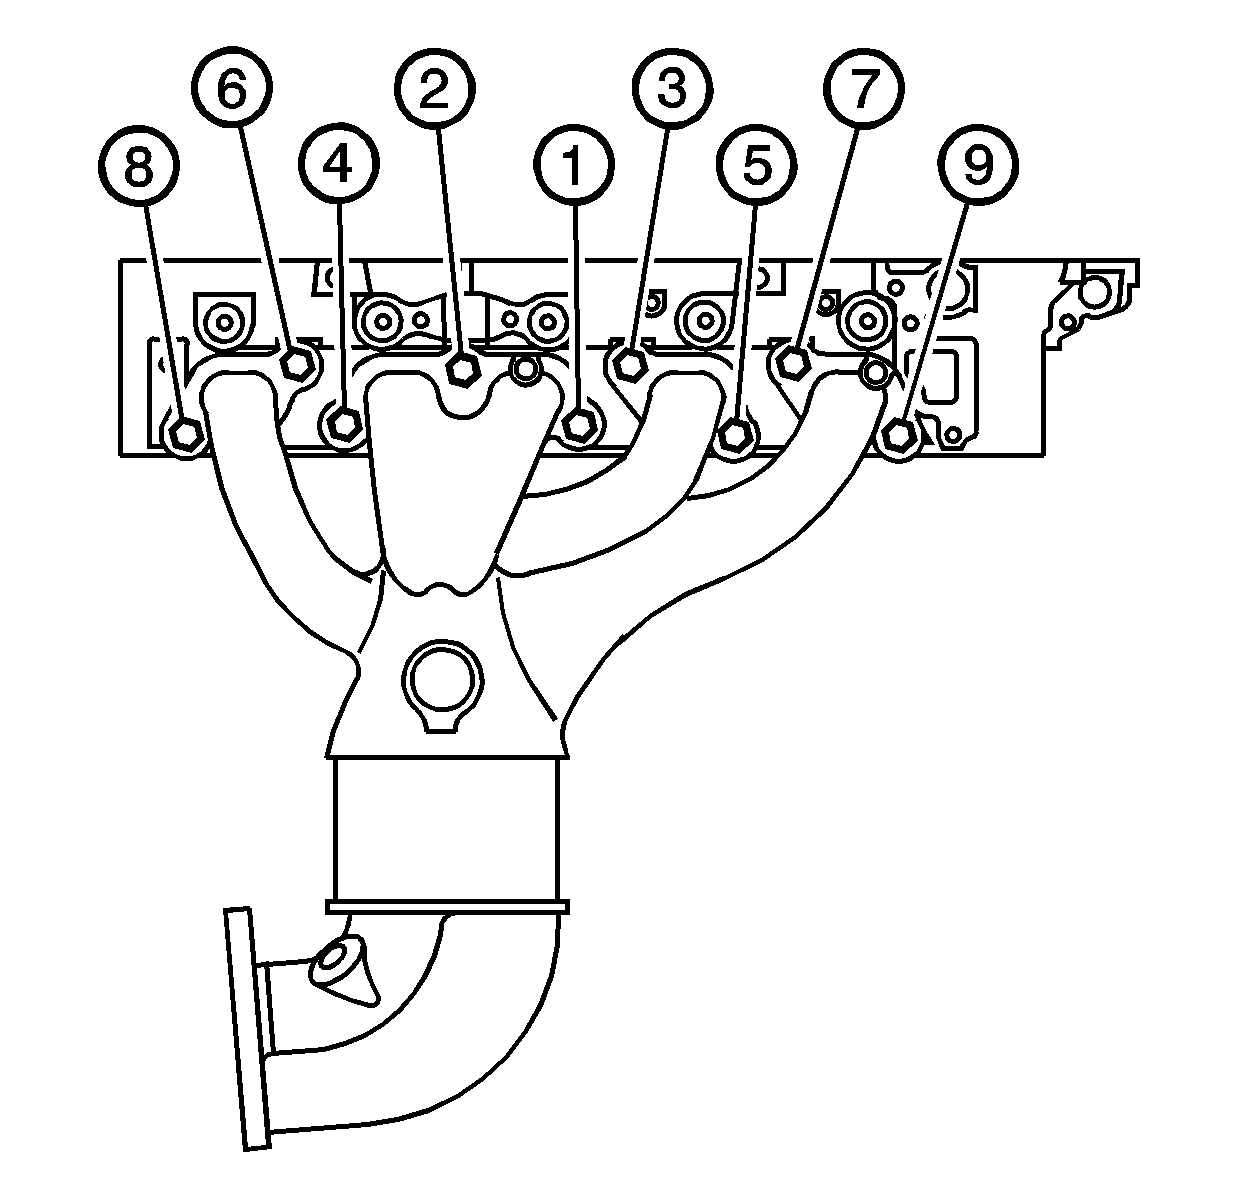
- Tighten the exhaust manifold bolts.
- Tighten the bolts a first pass in sequence to 20 N·m (15 lb ft).
- Tighten the bolts a second pass in sequence to 20 N·m (15 lb ft).
- Tighten the bolts a final pass in sequence to 20 N·m (15 lb ft).
- Install the exhaust manifold heat shield. Refer to Exhaust Manifold Heat Shield Replacement .
- Install the exhaust seal. Refer to Exhaust Seal Replacement .
- Install the AIR check valve. Refer to Secondary Air Injection Check Valve Replacement .


Notice: Refer to Fastener Notice in the Preface section.

Tighten
