Oil Leak or Oil Spots on Driveway and/or Garage Floor After Routine Maintenance Engine Oil Change (Install Moisture Sealant Patch)

| Subject: | Oil Leak or Oil Spots on Driveway and/or Garage Floor After Routine Maintenance Engine Oil Change (Install Moisture Sealant Patch) |
| Models: | 2006-2008 HUMMER H3 |
| with Vortec™ 3.5L, 3.7L or 5.3L Engine (VINs 6, E, L -- RPOs L52, LLR, LH8) |
| Attention: | Vehicles exhibiting the condition found in this bulletin do not have an actual oil leak. DO NOT perform an engine oil change or add oil, ONLY perform the procedure below. In addition, perform this procedure prior to the vehicle's next oil change on all H3 vehicles. |
Condition
Some customers may comment on an oil leak or oil spots left on their driveway and/or garage floor. This condition usually occurs after the vehicle has had a routine maintenance engine oil change.
Cause
The removal of the engine oil drain plug and/or the oil filter from the vehicle may allow the old engine oil to become trapped inside the frame. Over time the oil residue may seep out slowly, causing the oil spots on the driveway or garage floor.
Correction
Important: There are two different procedures listed below based upon the engine.
Procedure for 3.5L (RPO L52) or 3.7L (RPO LLR) Engine
Clean off any engine oil residue and install moisture sealant patches using the procedure below.
- Hoist and raise the vehicle. Refer to Lifting and Jacking the Vehicle in SI.
- Remove the oil pan skid plate. Refer to Oil Pan Skid Plate Replacement in SI.
- Remove the engine shield. Refer to Engine Shield Replacement in SI.
- Clean off any oil residue from the engine shield and oil pan skid plate.
- Apply engine degreaser, GM P/N 12378482 (in Canada, use 992878), or equivalent to the inside of the frame brace access hole (1).
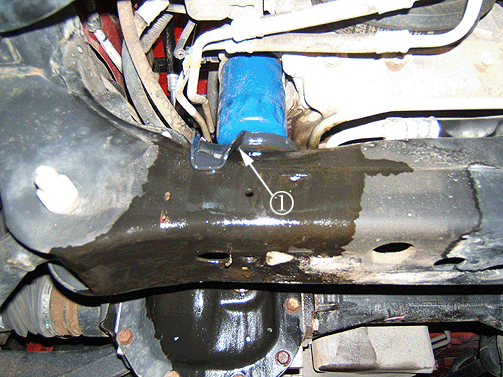
- Apply engine degreaser to the top of oil filter drain shield (1).
- Apply engine degreaser to the inside and outside of the right front frame rail.
- Hose off the engine degreaser.
- Use shop air to dry off the inside and outside of the frame brace and frame rails.
- Dry around the frame brace access hole with shop cloth.
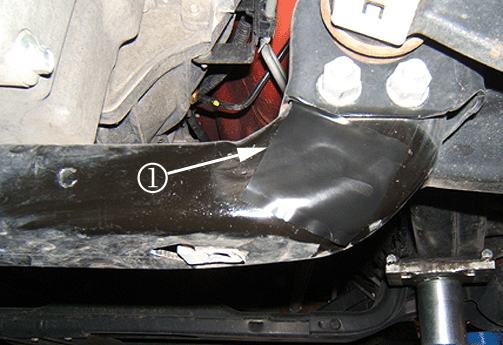
- Obtain a 3M™ Scotch® Electrical Moisture Sealant Patches, P/N 06149, or equivalent and peel the protective backing off the patch.
- Attach a moisture sealant patch (1) over the frame brace access hole.
- Locate the engine oil filter drain shield located on right front frame rail.
- Obtain two 3M™ Scotch® Electrical Moisture Sealant Patches, P/N 06149, or equivalent.
- Cut the two patches down to 38 mm (1½ in) by 38 mm (1½ in).
- Clean and dry the tops of the two oil filter shield retainers (1).
- Attach the patches to the top of the oil filter shield retainers.
- Install the engine shield. Refer to Engine Shield Replacement in SI.
- Install the oil pan skid plate. Refer to Oil Pan Skid Plate Replacement in SI
- Lower the vehicle.
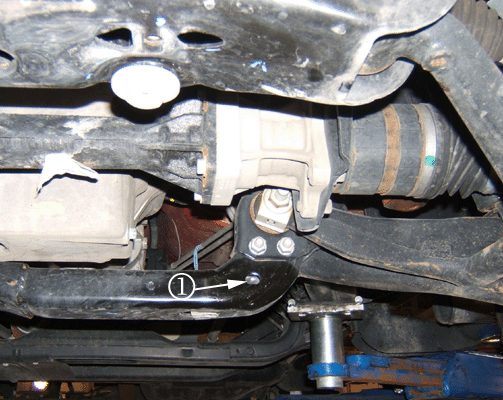
3.5L (RPO L52) Engine Oil Filter and Shield Shown
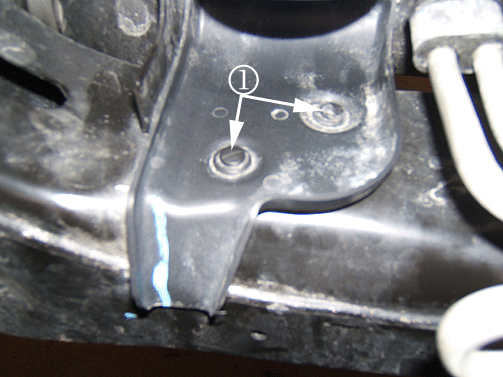
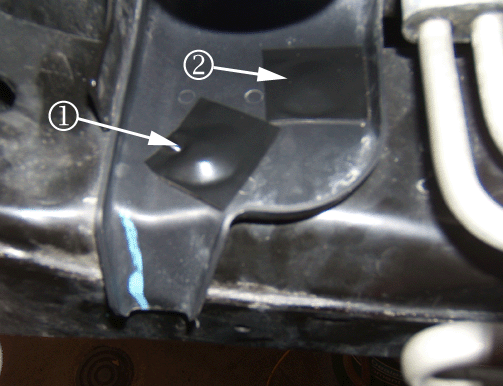
| 17.1. | Peel the protective backing off a patch and attach the patch to the top of the first retainer (1). |
| 17.2. | Peel the protective backing off of the second patch and attach the patch to the top of the second retainer (2). |
Procedure for 5.3L (RPO LH8) Engine
Clean off any engine oil residue and install a moisture sealant patch using the procedure below.
- Hoist and raise the vehicle. Refer to Lifting and Jacking the Vehicle in SI.
- Remove the oil pan skid plate. Refer to Oil Pan Skid Plate Replacement in SI.
- Clean off any oil residue from the oil pan skid plate.
- Apply engine degreaser, GM P/N 12378482 (in Canada, use 992878), or equivalent to the inside hole (1) of the crossmember frame brace.
- Hose off the engine degreaser.
- Use shop air to dry off the inside and outside of the frame brace.
- Dry around the frame brace access hole.
- Obtain a 3M™ Scotch® Electrical Moisture Sealant Patches, P/N 06149, or equivalent and peel the protective backing off the patch.
- Attach a moisture sealant patch (1) over the frame brace access hole.
- Install the oil pan skid plate. Refer to Oil Pan Skid Plate Replacement in SI.
- Lower the vehicle.
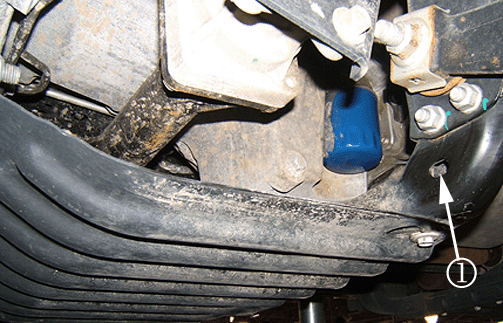
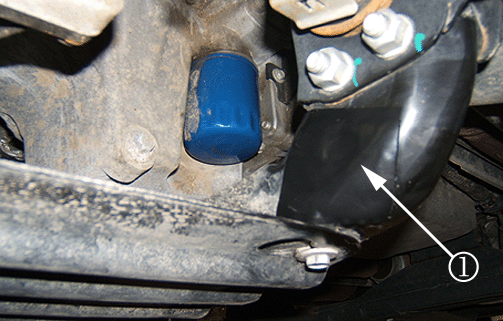
Parts Information
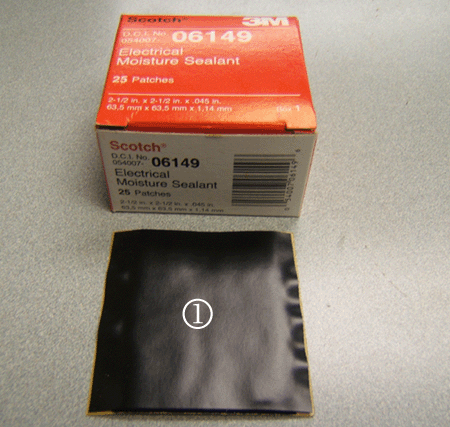
Purchase 3M™ Scotch® Electrical Moisture Sealant Patches (1), P/N 06149 or equivalent material locally.
Part Number | Description | Qty | Material Allowance |
|---|---|---|---|
06149 | 3M™ Scotch® Electrical Moisture Sealant Patches (25 per box) | 1 (LH8) 3 (L52 & LLR) | $1.00 per vehicle ($1.01 in Canada) $3.00 per vehicle ($3.03 in Canada) |
Warranty Information
For vehicles repaired under warranty, use:
Labor Operation | Description | Labor Time |
|---|---|---|
J7527* | Install Moisture Sealant Patch to Frame Brace Access Hole | 0.4 hr |
Add | Install Patches to Oil Filter Shield Retainers (RPOs L52, LLR) | 0.1 hr |
*This labor operation number is for bulletin use only. This number will not be published in the Labor Time Guide. | ||
