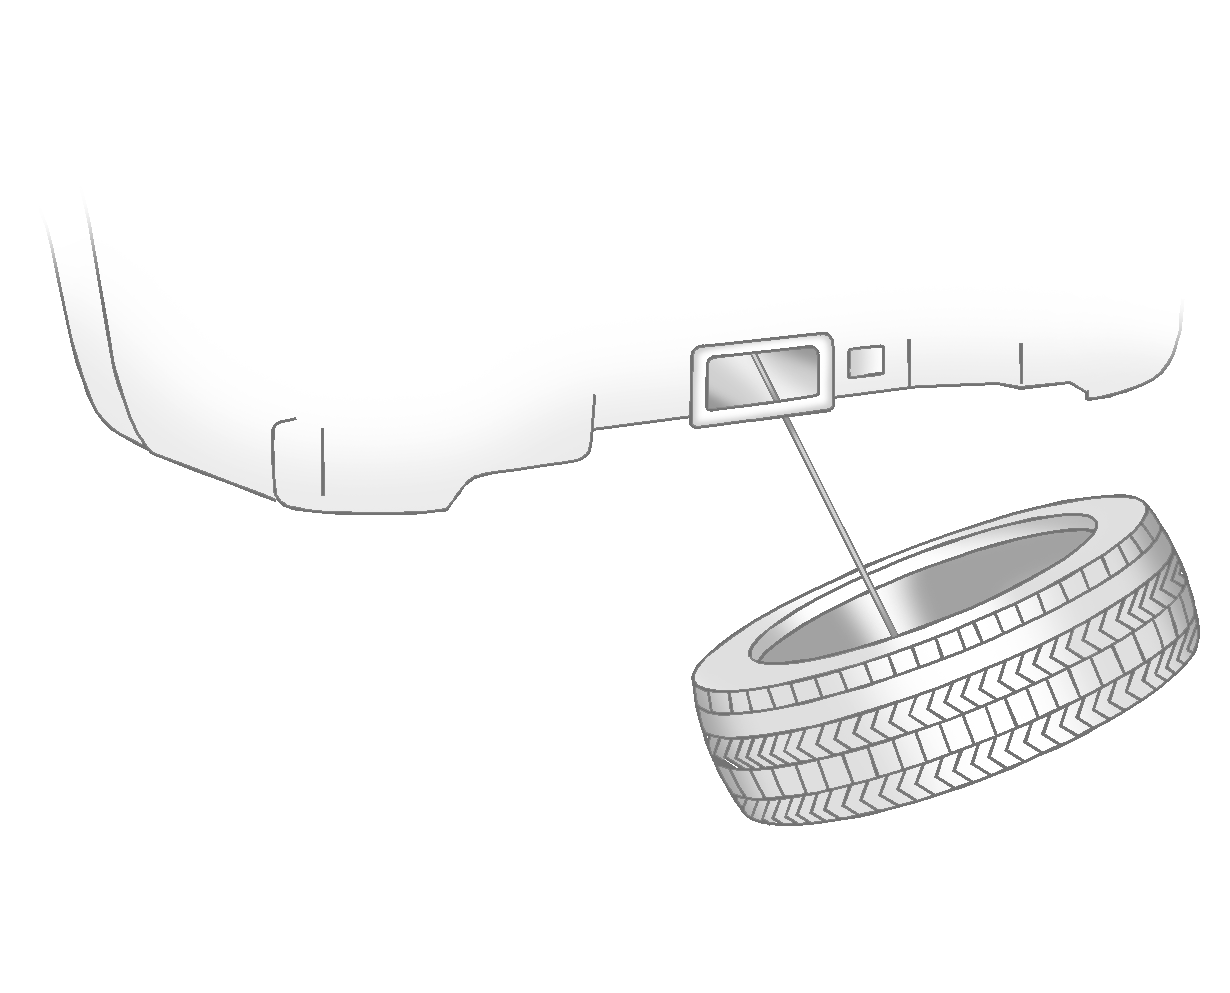
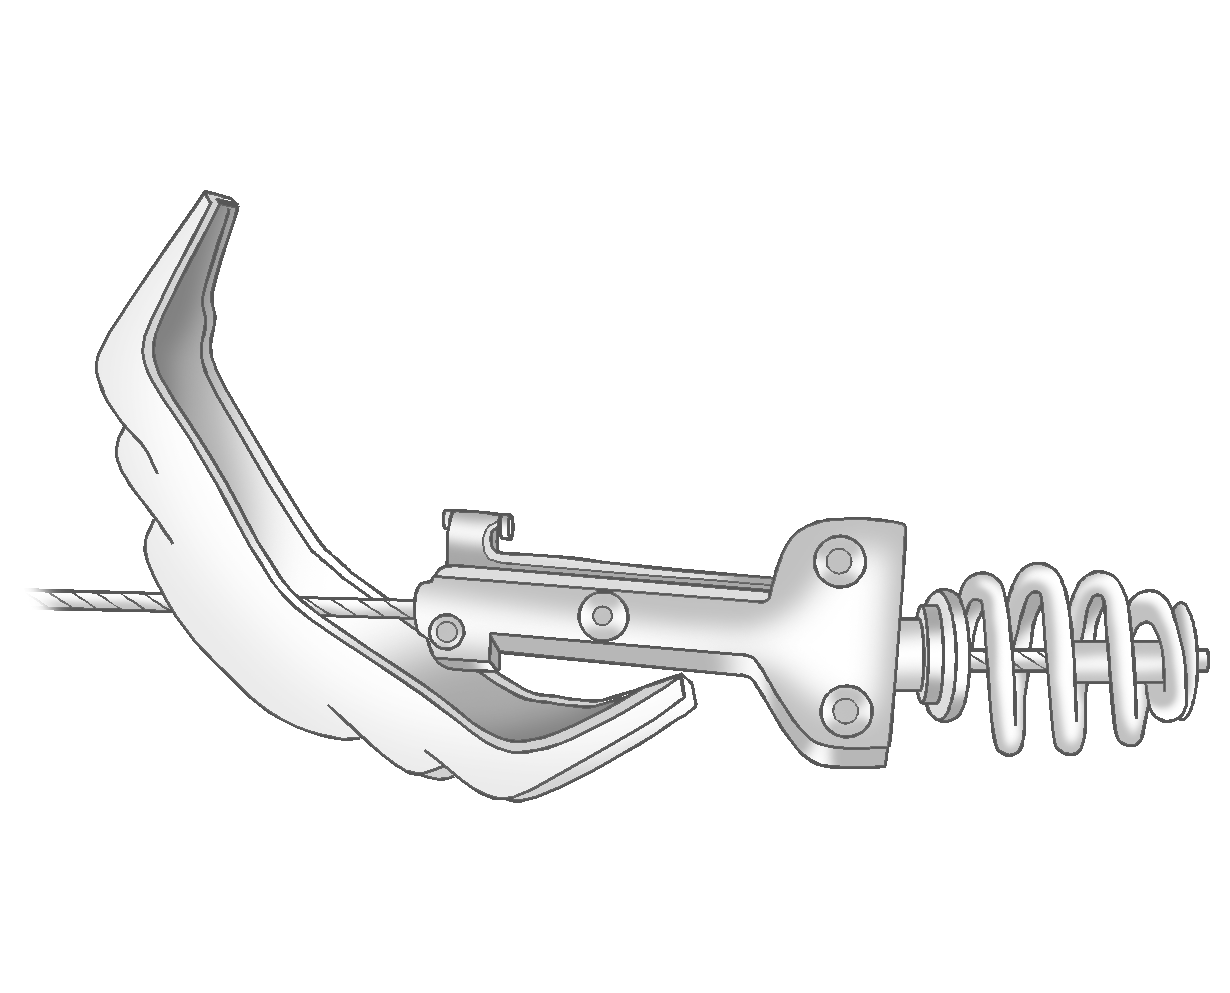
Removing the Spare Tire and Tools H3
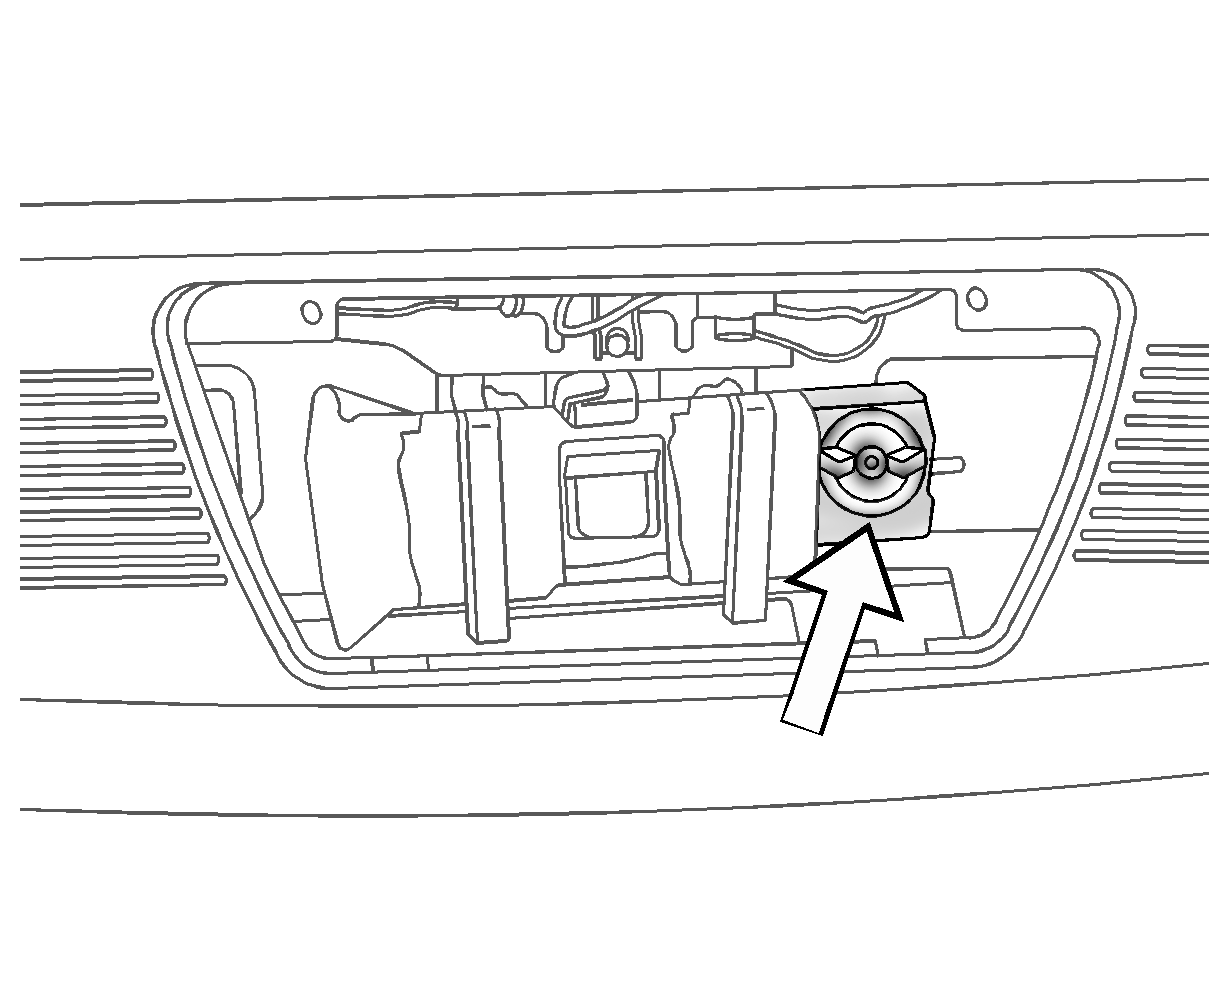
The equipment needed is located in the swing-gate, behind a cover. To remove the equipment:
- Open the swing-gate. See Swing-gate.
- Remove the cover, located on the inside of the swing-gate, by lifting the two latches.
- Turn the wing nut counterclockwise to release the jack tool bag and jack and remove them.
- Undo the straps that secure the jack tool bag to the jack.
- Open the tool bag to find the following tools, which are used to remove the spare tire and flat tire:
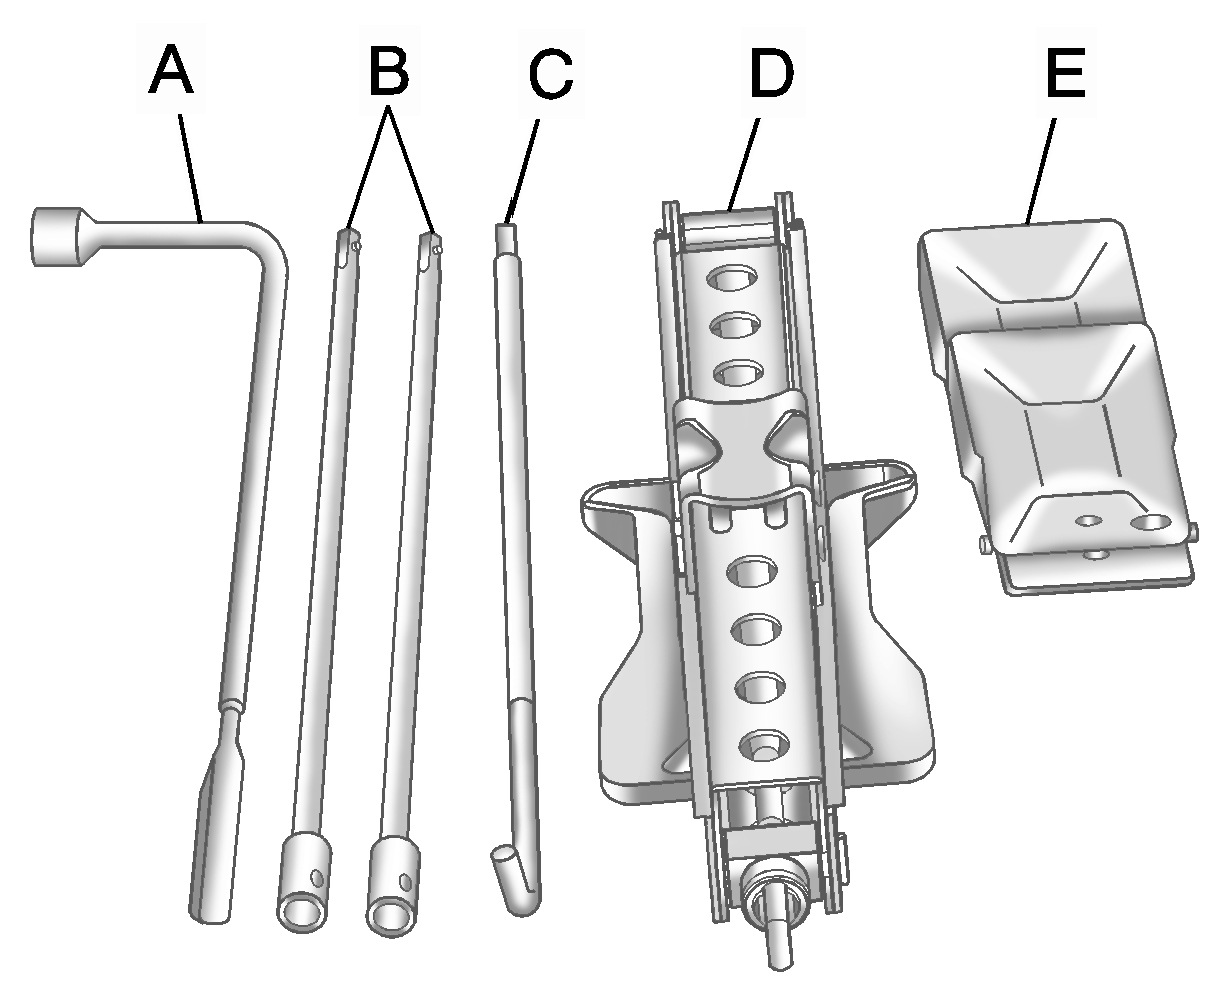
Wheel Wrench
Jack Handle Extensions
Jack Handle
Jack
Wheel Blocks
The spare tire is attached to the outside of the swing-gate. To remove the spare tire:
- If the vehicle has a spare tire cover release the latch by pulling the latch straight back and turning it away from the cover at the same time.
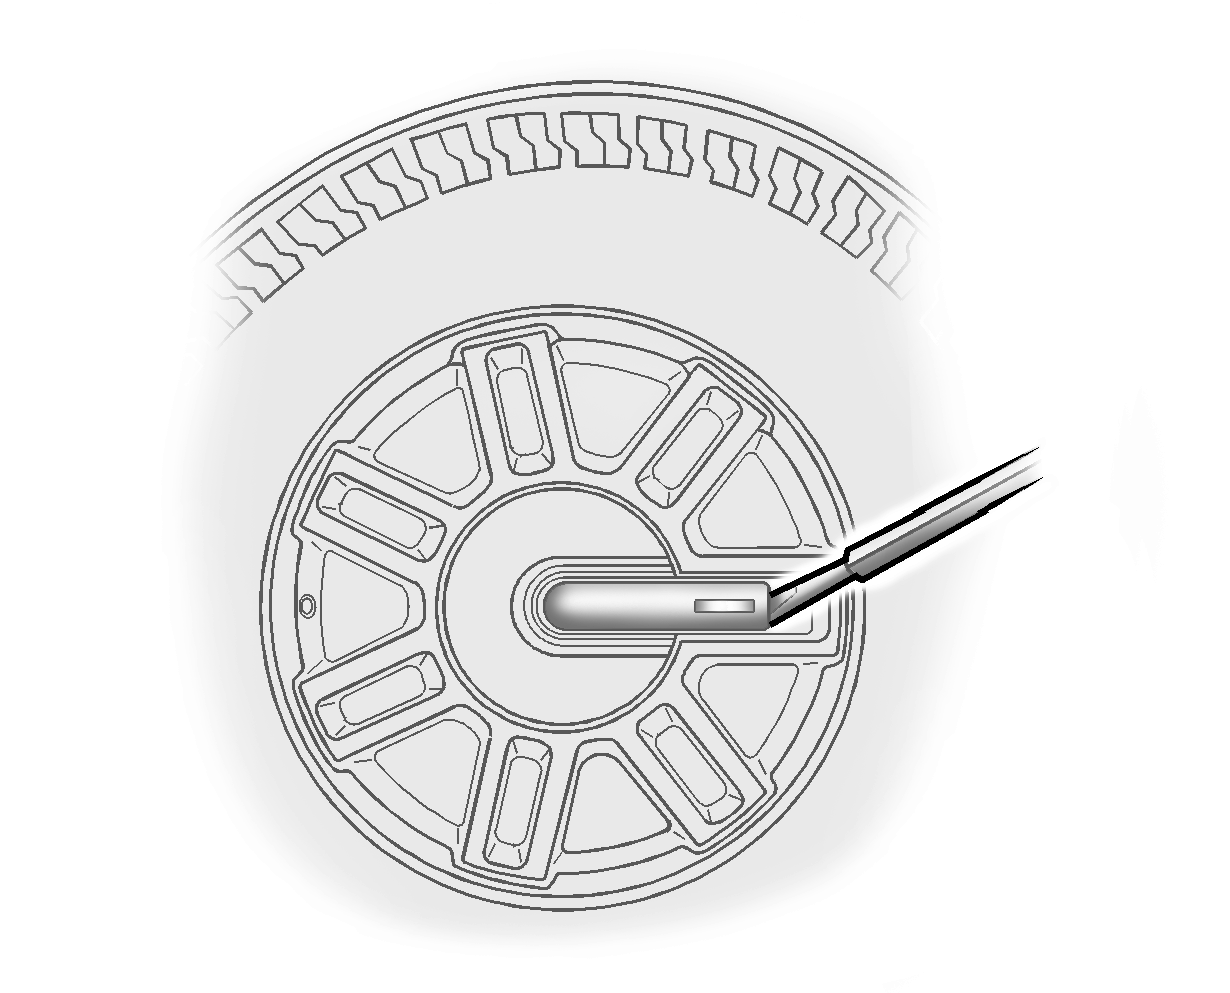
- Remove the center cap, if equipped, by placing the flat end of the wheel wrench in the slot on the wheel and gently pry the center cap out.
- Use the wheel wrench to remove the wheel nuts securing the spare tire.
- You may need assistance to remove the spare tire. Pull off and gently lower the spare tire to the ground. Set it next to the flat tire.
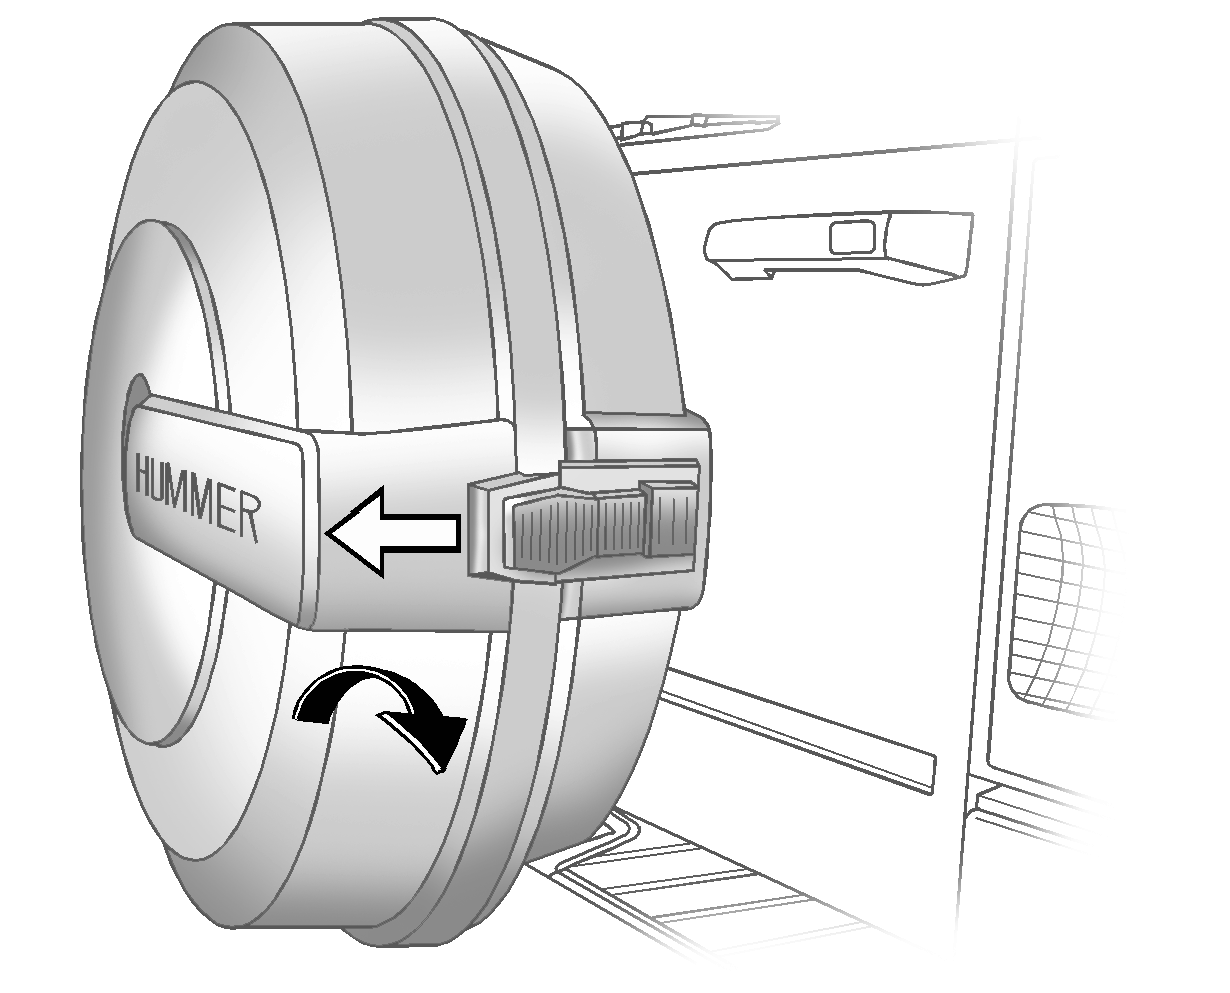
Notice: Opening the endgate before completely closing and latching the spare tire cover may result in damage to your vehicle. Close and latch the spare tire cover before opening the endgate to avoid possible damage.
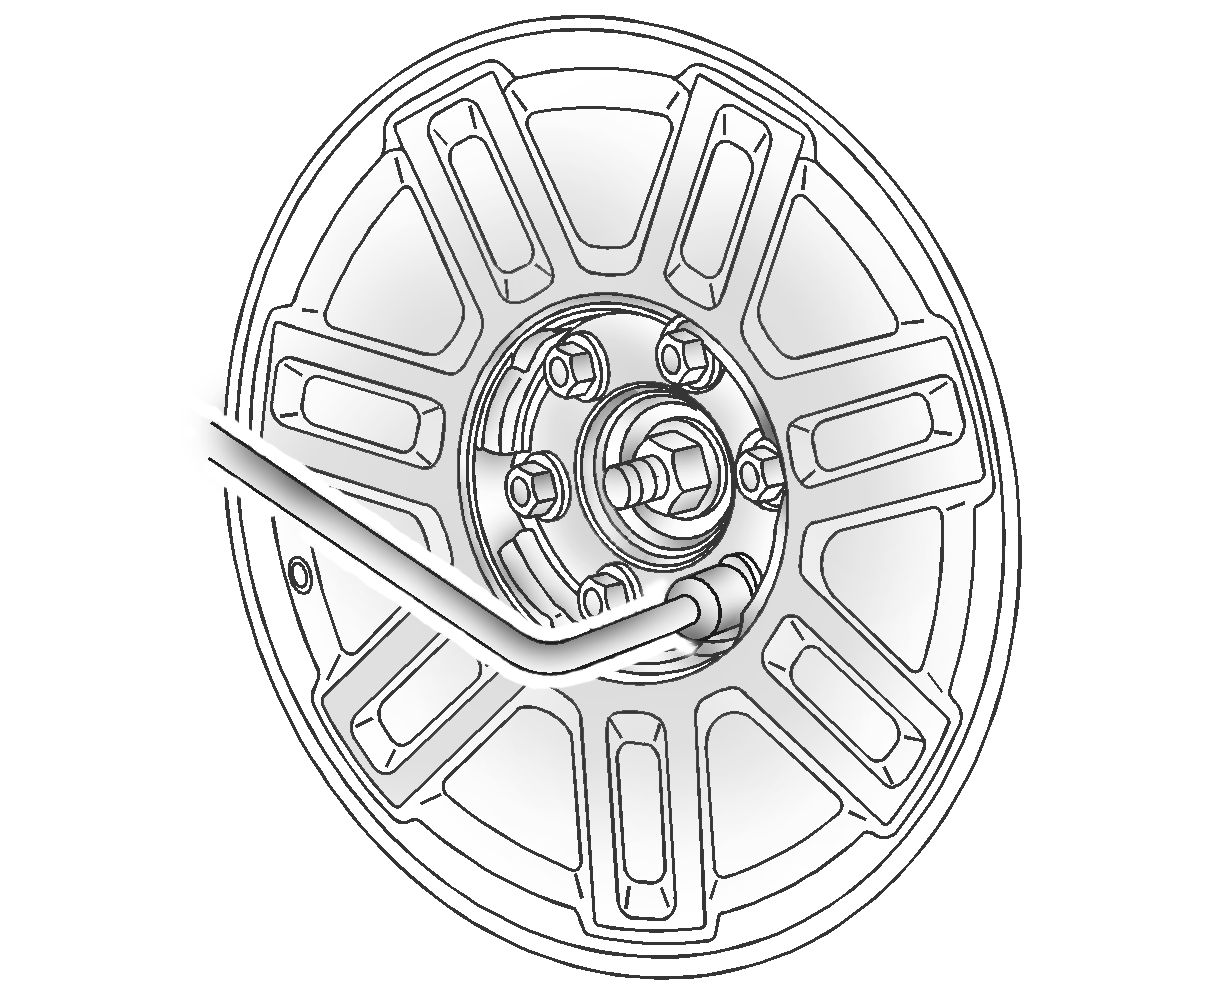
If the vehicle has locking lug nuts, the key is supplied in the tool bag. Use the key along with the wheel wrench to remove the wheel nuts from the tire.
Removing the Spare Tire and Tools H3T
To access the jack and tools located under the rear seat:
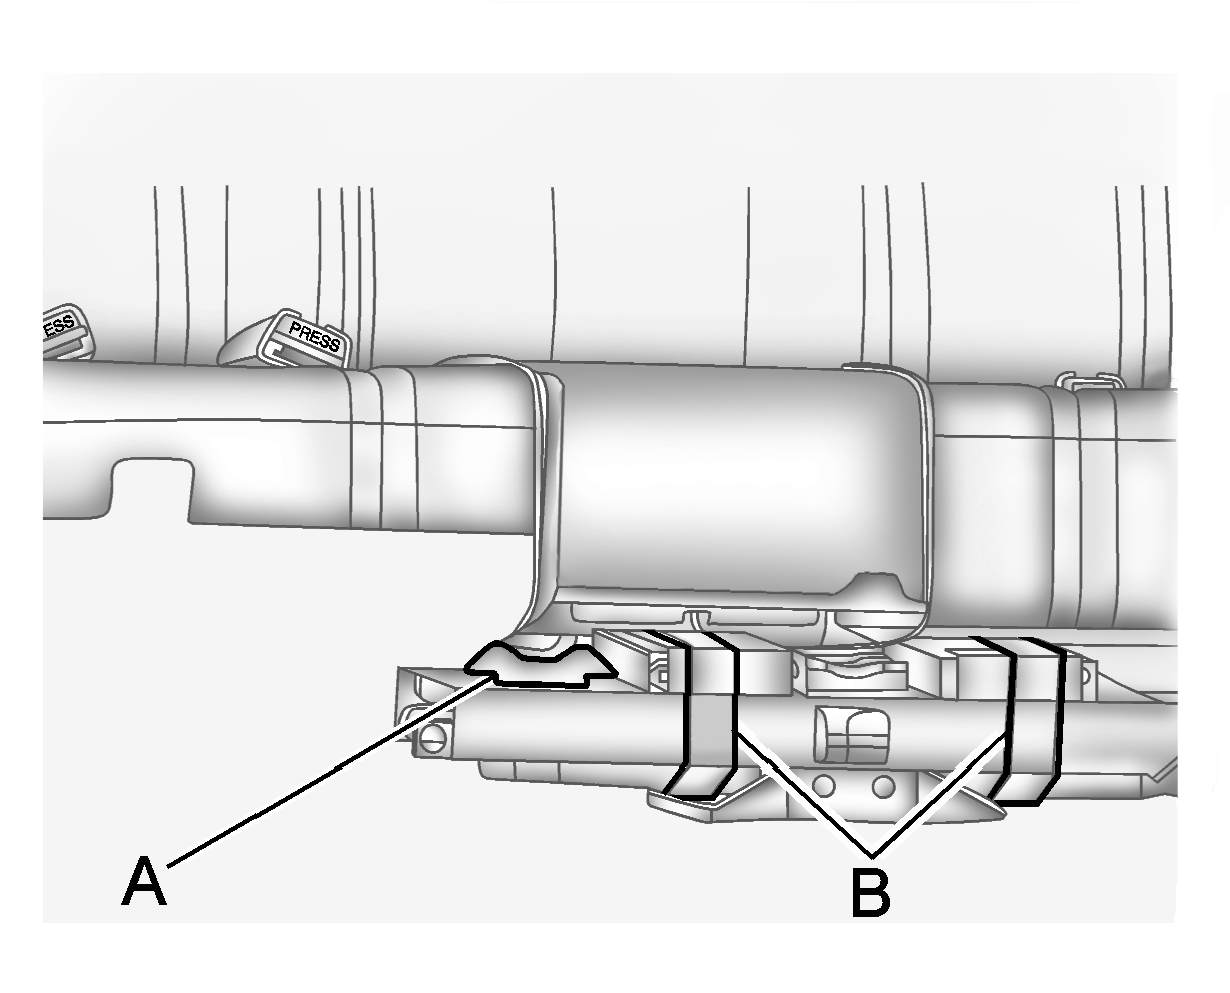
- Turn the wing nut (A) counterclockwise to release the jack and tools.
- Remove the jack and tool kit from the bracket.
- Release the straps (B) that secure the tool bag to the jack.
The following tools are used to remove the spare tire and flat tire.

Wheel Wrench
Jack Handle Extensions
Jack Handle
Jack
Wheel Blocks
To access the spare tire:
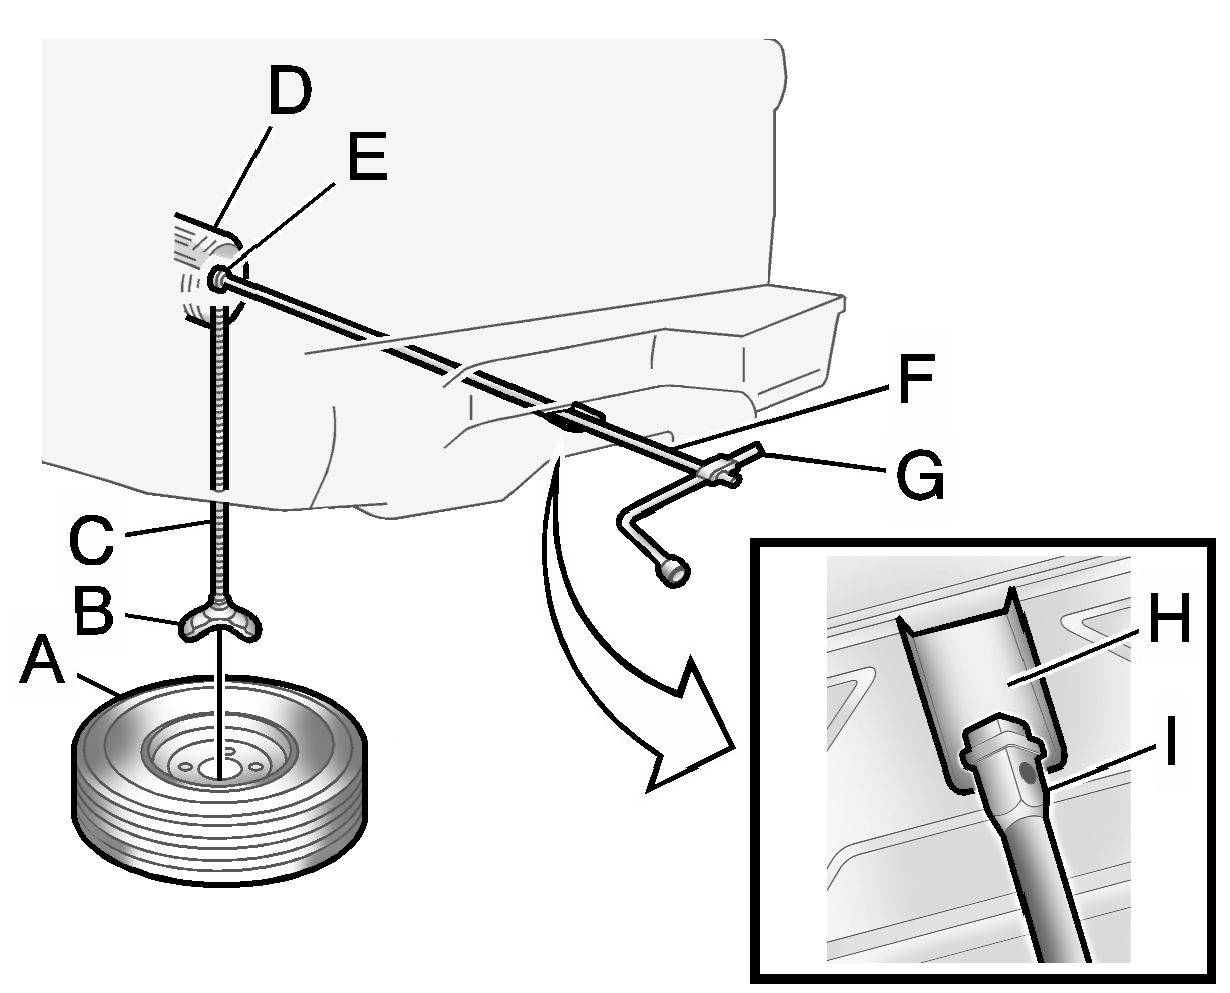
Spare Tire/Flat Tire (Valve Stem Pointed Down)
Tire/Wheel Retainer
Hoist Cable
Hoist Assembly
Hoist Shaft
Jack Handle Extension(s)
Wheel Wrench
Hoist Shaft Access Ramp
Hoist End of the Extension Tool
- Assemble the two jack handle extensions (F) and wheel wrench (G).
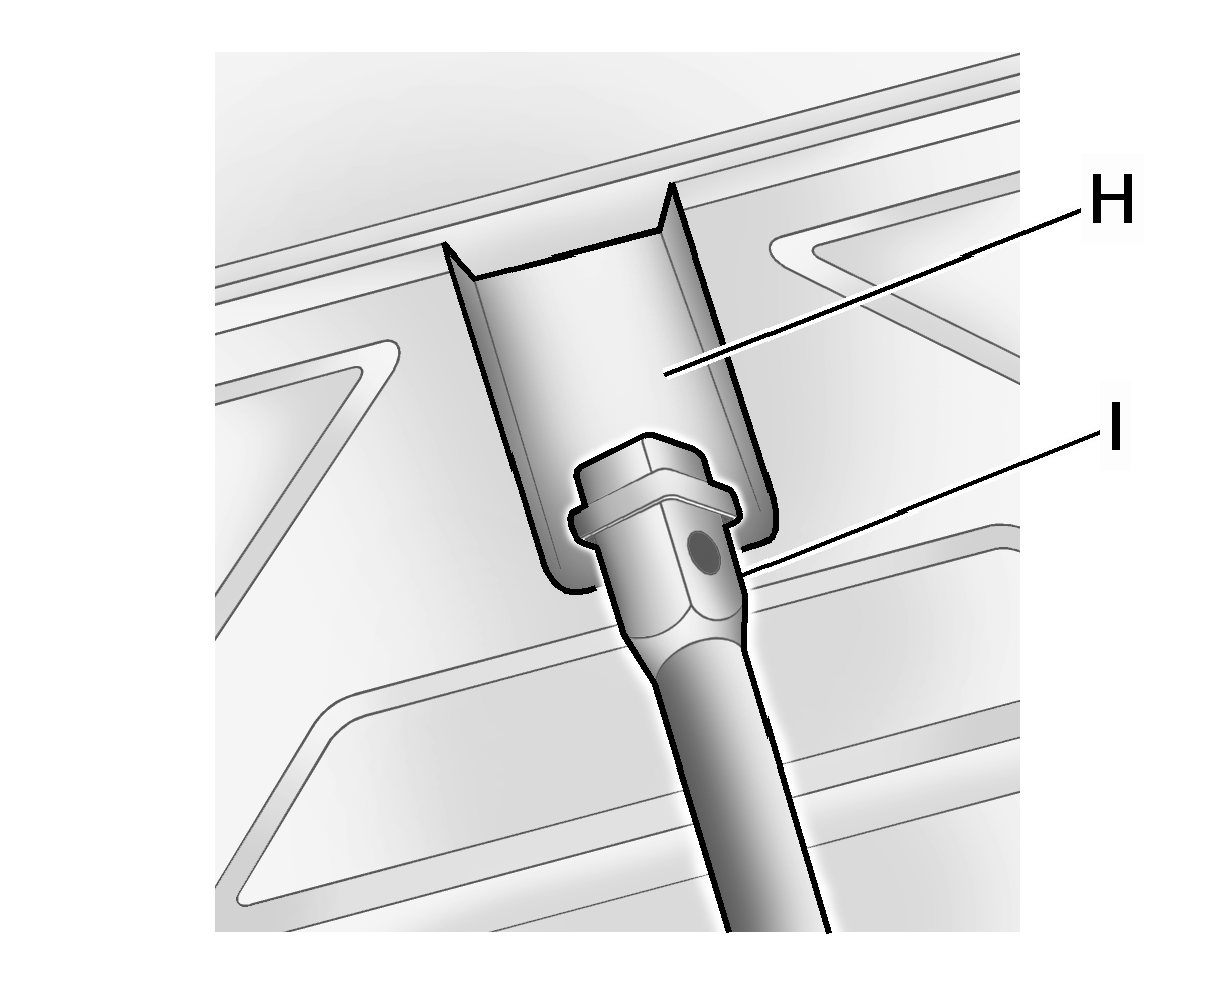
- Insert the hoist end of the extension tool (I) through the hoist shaft access ramp (H).
- The hoist end of the extension tool (I) must connect to the hoist shaft (E). The hoist end of the extension tool is used to lower the spare tire.
- Turn the wheel wrench (G) counterclockwise to lower the spare tire (A) to the ground. Continue to turn the wheel wrench (G) until the spare tire (A) can be pulled from under the vehicle.
- Pull the spare tire towards you.
- Tilt the tire, with slack in the cable, to access the tire/wheel retainer (B).
- Separate the retainer from the guide pin by sliding the retainer up the pin while pressing down on the latch. When the retainer is separated from the guide pin, tilt the retainer and pull it through the center of the wheel along with the cable and guide pin.
- Put the spare tire near the flat tire.
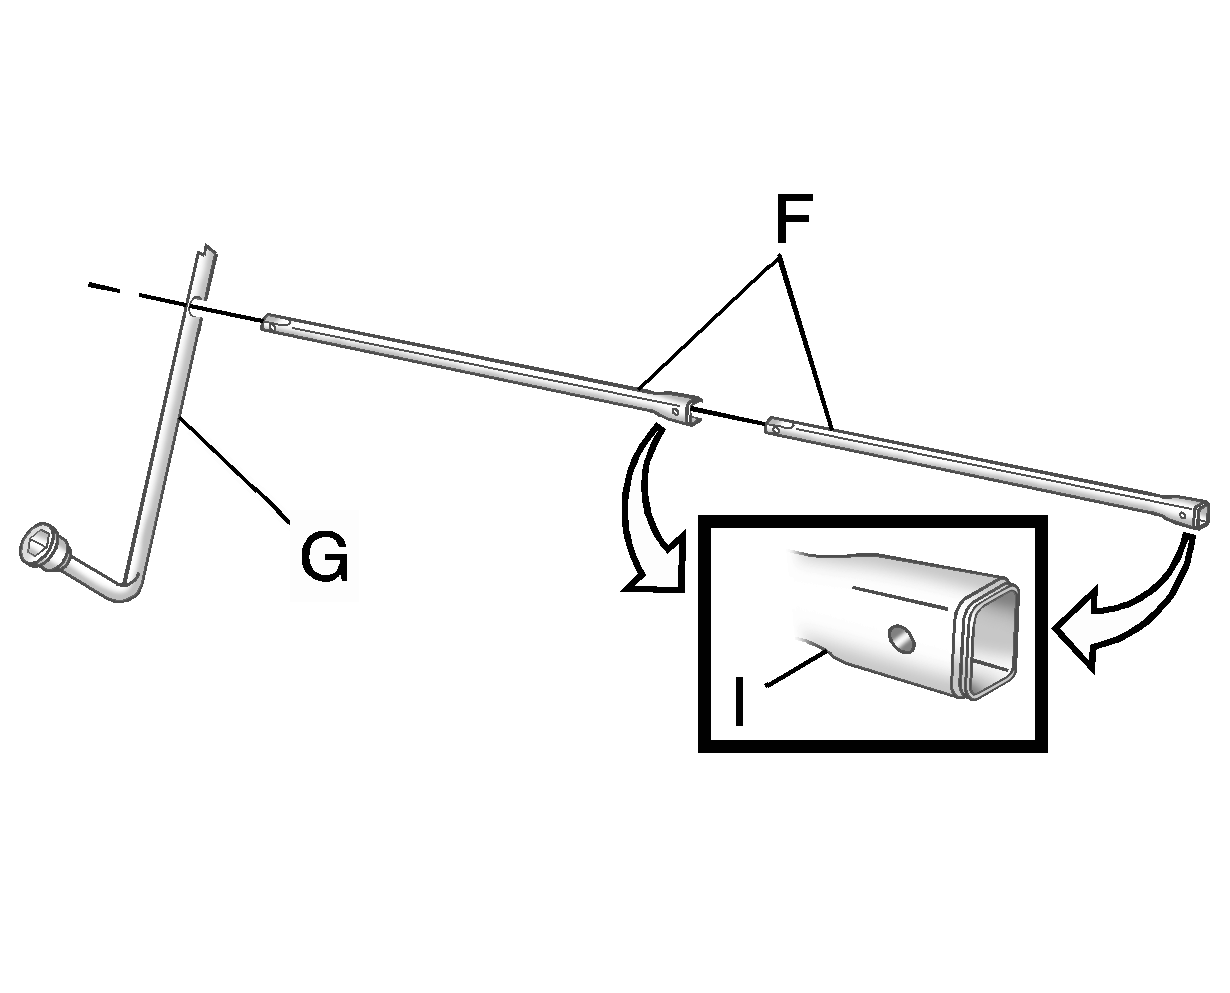
Do not use the chiseled end of the wheel wrench.
If the spare tire does not lower to the ground, the secondary latch is engaged. See Secondary Latch System.
