Vehicles with the rear vision camera system are designed to help the driver while the vehicle is backing up. The area behind the vehicle is displayed on the screen in the inside rear view mirror. Read this entire section before using the camera system.
When the key is in the ON/RUN position and the driver shifts the vehicle into R (Reverse), the video image appears from inside the rear view mirror. Once the vehicle is shifted out of R (Reverse), the image disappears.
The display may have a guideline overlay that can help the driver align the vehicle when backing into a parking spot.
Turning the Rear Vision Camera System On or Off
To turn off the rear vision camera system, press and hold , located on the inside rearview mirror, until the left indicator light turns off. The rear camera vision display is now disabled.
To turn the rear vision camera system on again, press and hold until the left indicator light illuminates. The rear vision camera system display is now enabled and the display will appear in the mirror normally.
Caution: The Rear Vision Camera (RVC) system does not replace driver
vision. RVC does not:
• Detect objects that are outside the camera's field of view, below the
bumper, or underneath the vehicle. • Detect children, pedestrians, bicyclists, or pets.
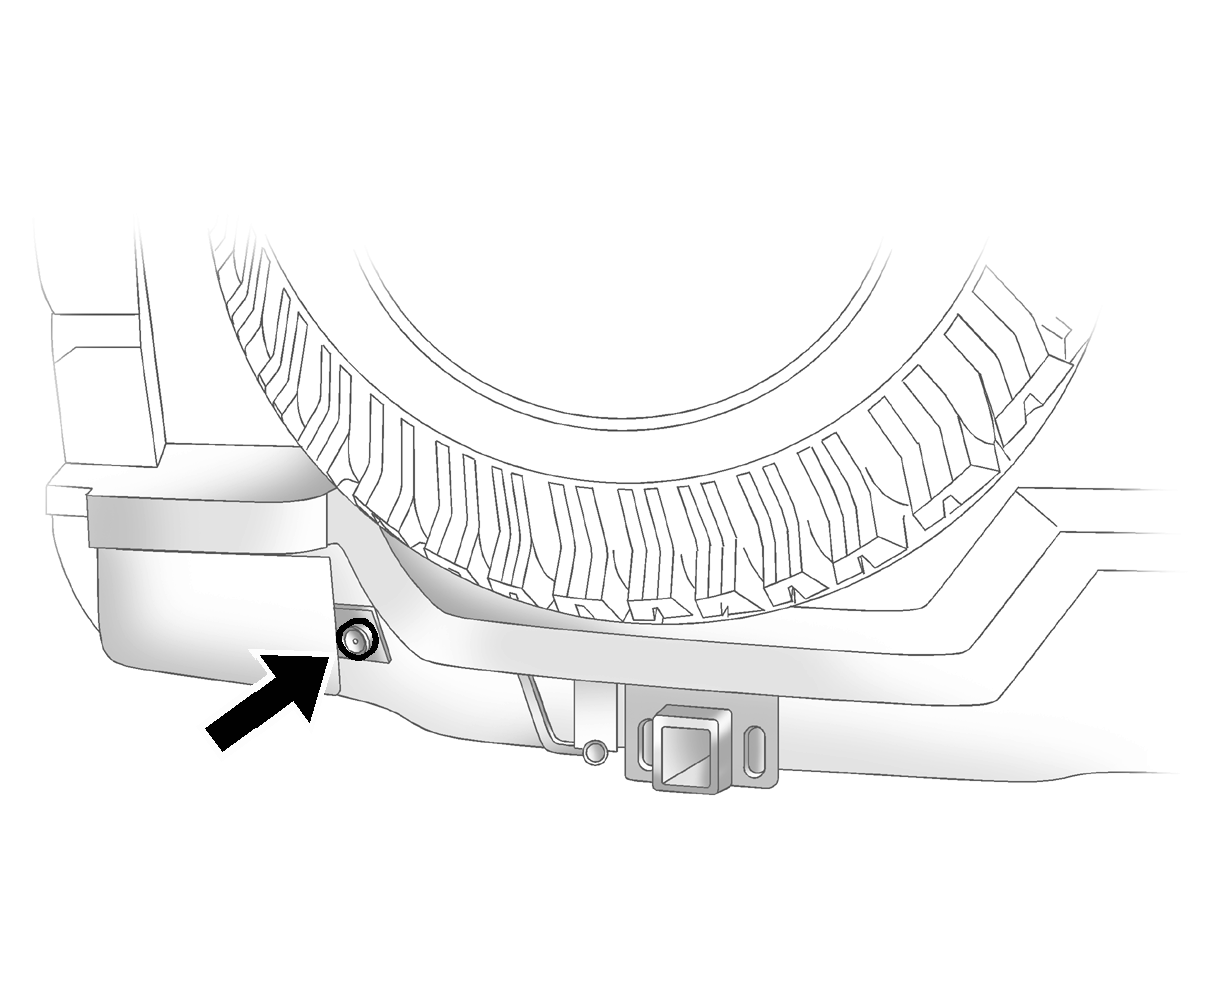
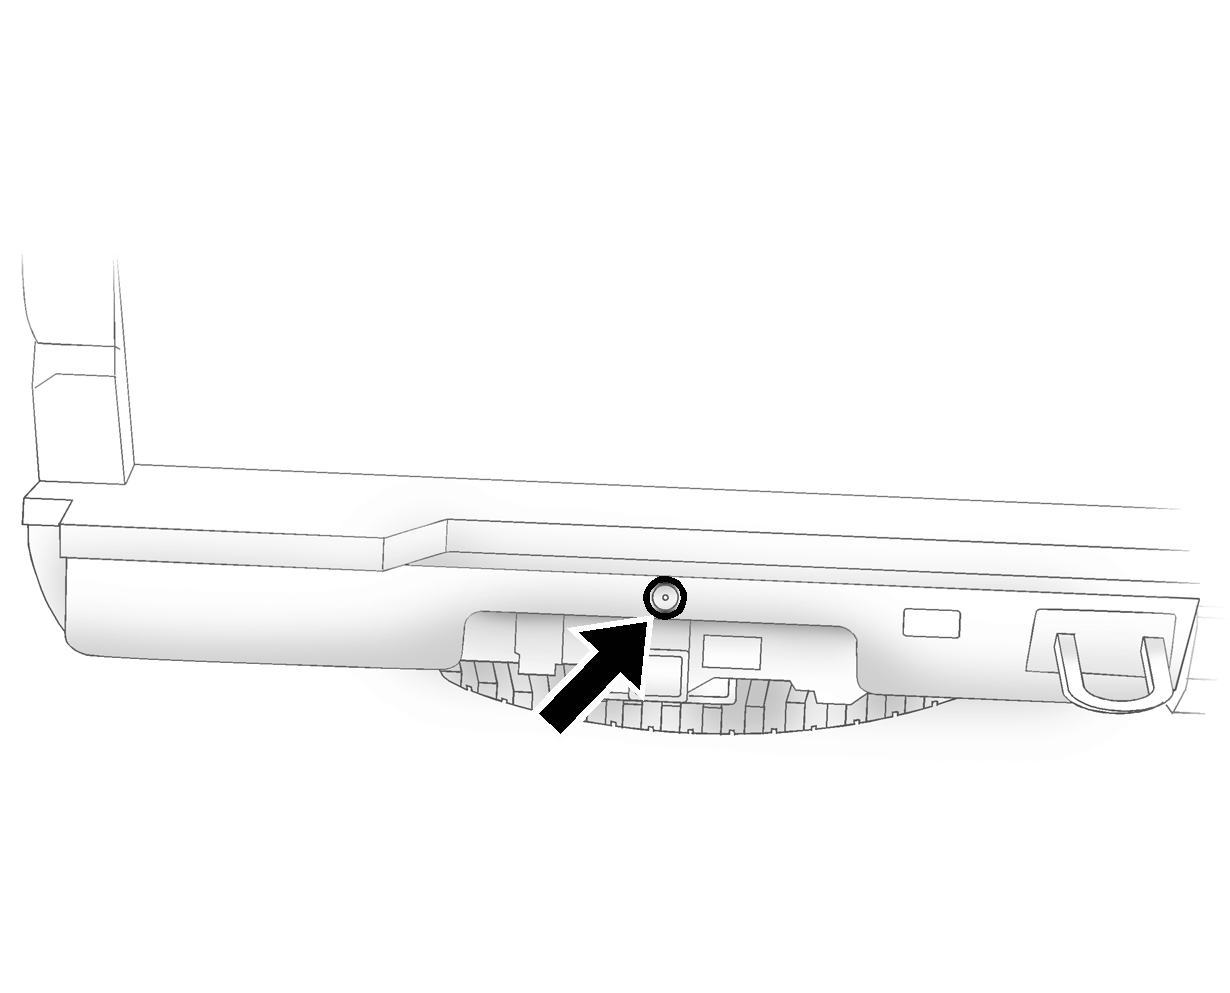
Rear Vision Camera Location
View of H3 Camera Location

View of H3T Camera Location

The image on the screen is provided by the camera located on the rear bumper.
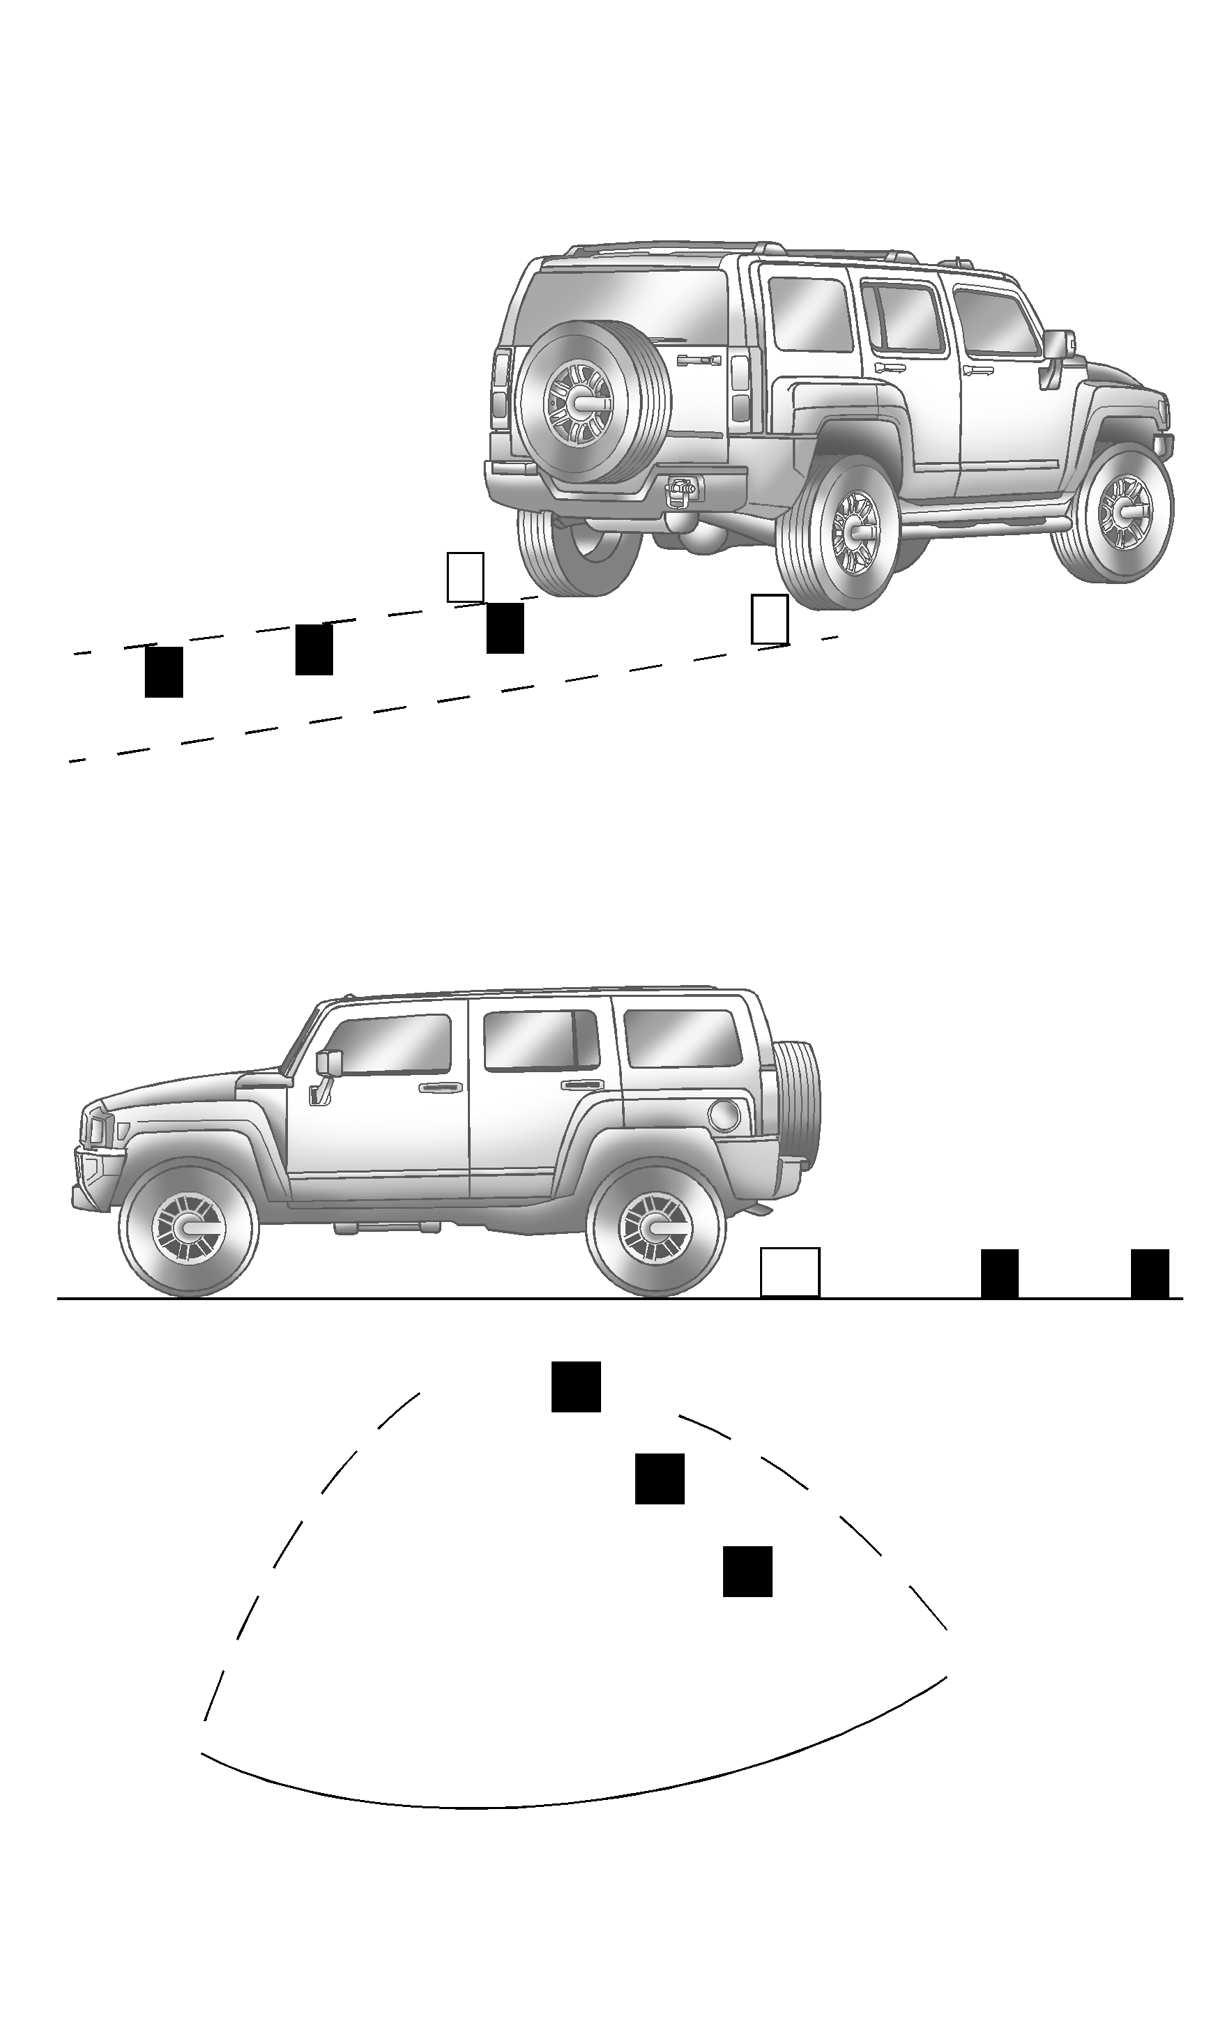
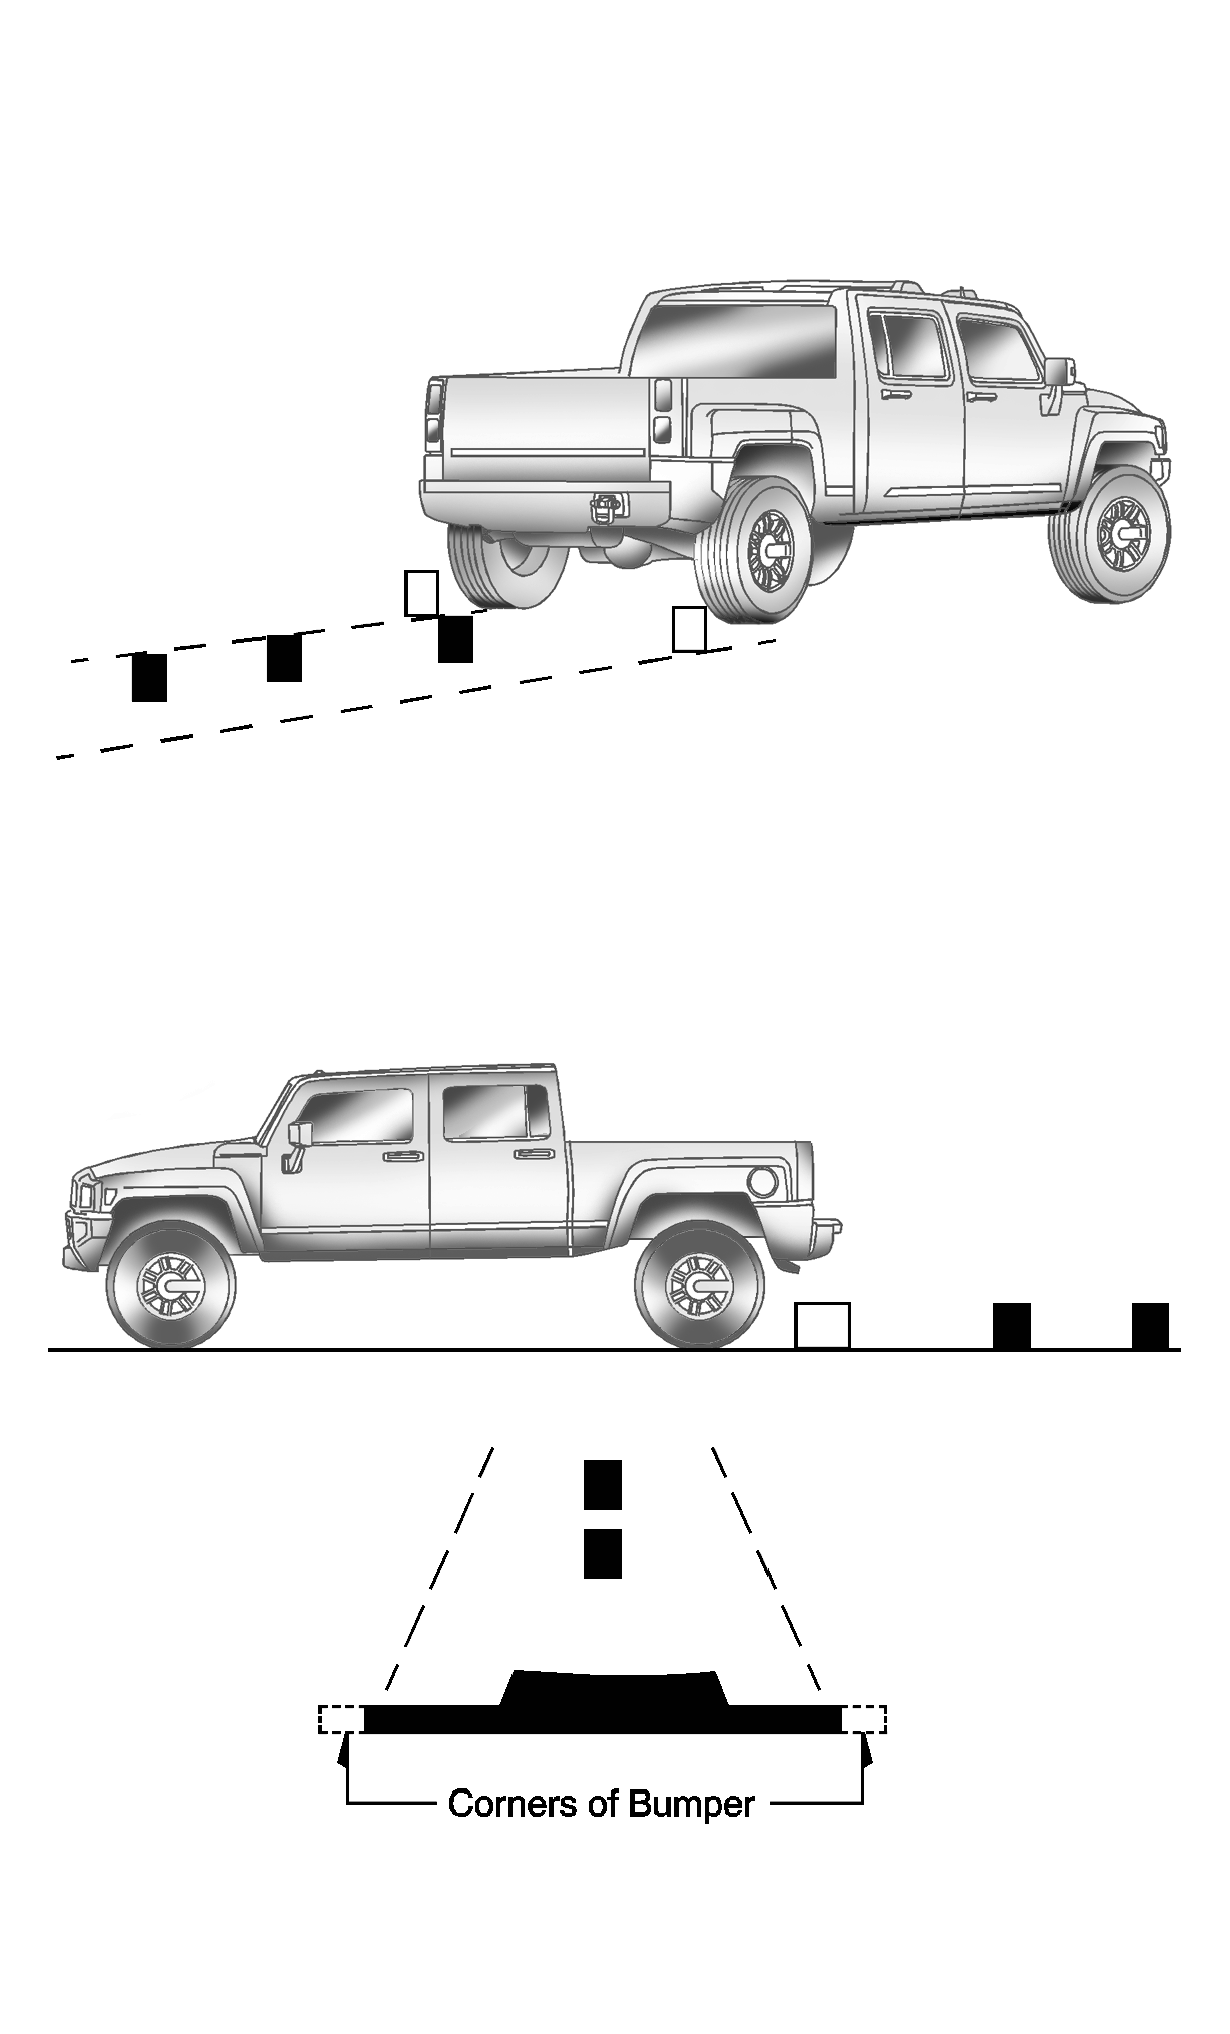
The image from the camera that appears on the screen appears farther than the actual distance. The area displayed by the camera is limited. The camera does not display objects which are close to either corner of the bumper or under the bumper. On the H3, the spare tire and carrier extends rearward of the rear bumper. The area displayed on the screen may vary according to vehicle orientation or road conditions.
The following illustration shows the field of view that the camera provides.
H3 Field of View

Notice: The spare tire extends farther away from rear of the vehicle than the trailer hitch shown on rear vision camera display. The spare tire could hit an object even though there appears to be enough distance on the display between the trailer hitch and objects behind you causing vehicle or property damage. Do not use this system to judge the distance between the spare tire and objects behind you.
H3T Field of View

When the System Does Not Seem To Work Properly
The rear vision camera system may not work properly or display a clear image:
| • | In the dark. |
| • | When the sun or the beam of headlamps is shining directly into the camera lens. |
| • | If ice, snow, mud, or anything else builds up on the camera lens. Clean the lens, rinse it with water, and wipe it with a soft cloth. |
| • | If the back of the vehicle is in an accident, the position and mounting angle of the camera may change or the camera may be affected. Be sure to have the camera and its position and mounting angle checked at your dealer/retailer. |
| • | If there are extreme temperatures or extreme temperature changes. |
The rear vision camera system display in the rearview mirror may turn off or not appear as expected due to a loss of video signal, or no video signal present during the reverse cycle. The display will be blank and the left indicator light will slowly flash as long as the vehicle is in R (Reverse) or until the condition returns to normal.
Pressing and holding when the left indicator light is flashing will turn off the video display along with the left indicator light.
