For 1990-2009 cars only
Generator Replacement LLR
Removal Procedure
- Disconnect the negative battery cable. Refer to Battery Negative Cable Disconnection and Connection.
- Remove the drive belt. Refer to Drive Belt Replacement.
- Raise and support the vehicle only high enough to access the air conditioning (A/C) compressor through the wheelhouse. Refer to Lifting and Jacking the Vehicle.
- Remove the left front wheel. Refer to Tire and Wheel Removal and Installation.
- Remove the left wheelhouse liner. Refer to Front Wheelhouse Liner Replacement.
- Disengage the A/C compressor electrical connector from the bracket.
- Recover the A/C system. Refer to Refrigerant Recovery and Recharging.
- Disconnect the A/C condenser and evaporator lines from the compressor.
- Remove the A/C compressor mounting bolts (2, 3) ONLY.
- Lower the vehicle.
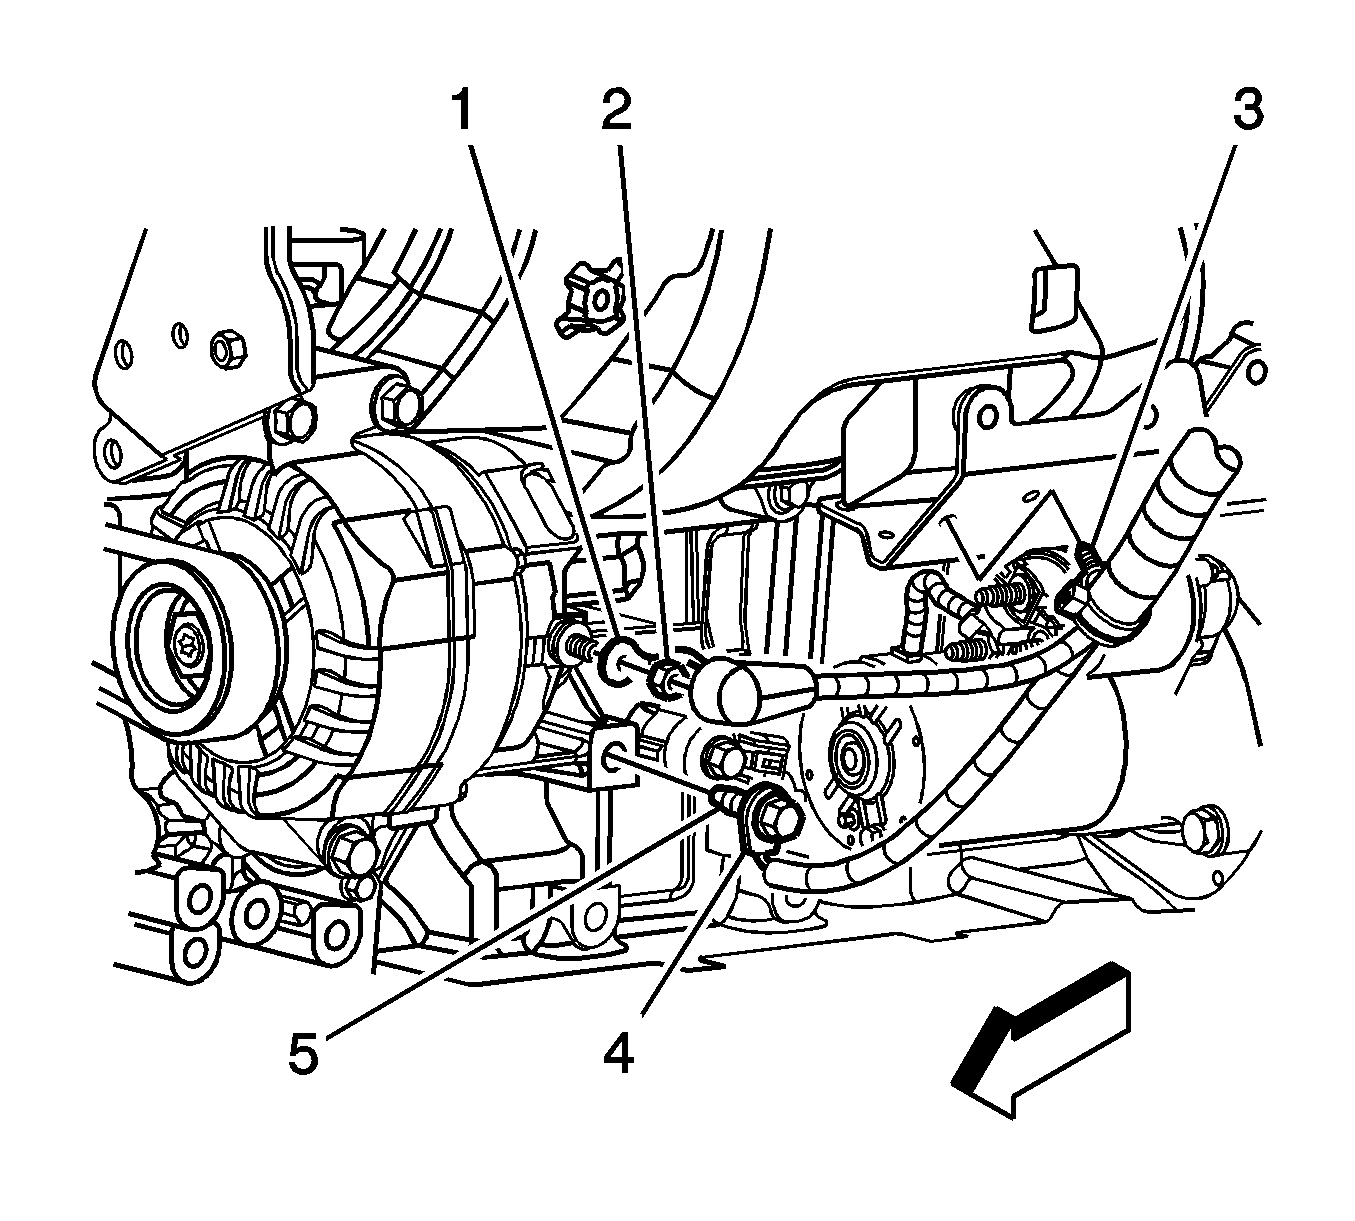
- Reposition the protective boot from the generator output BAT terminal.
- Remove the generator output BAT terminal nut (2) and remove the generator lead (1) from the generator.
- Disconnect the generator electrical connector.
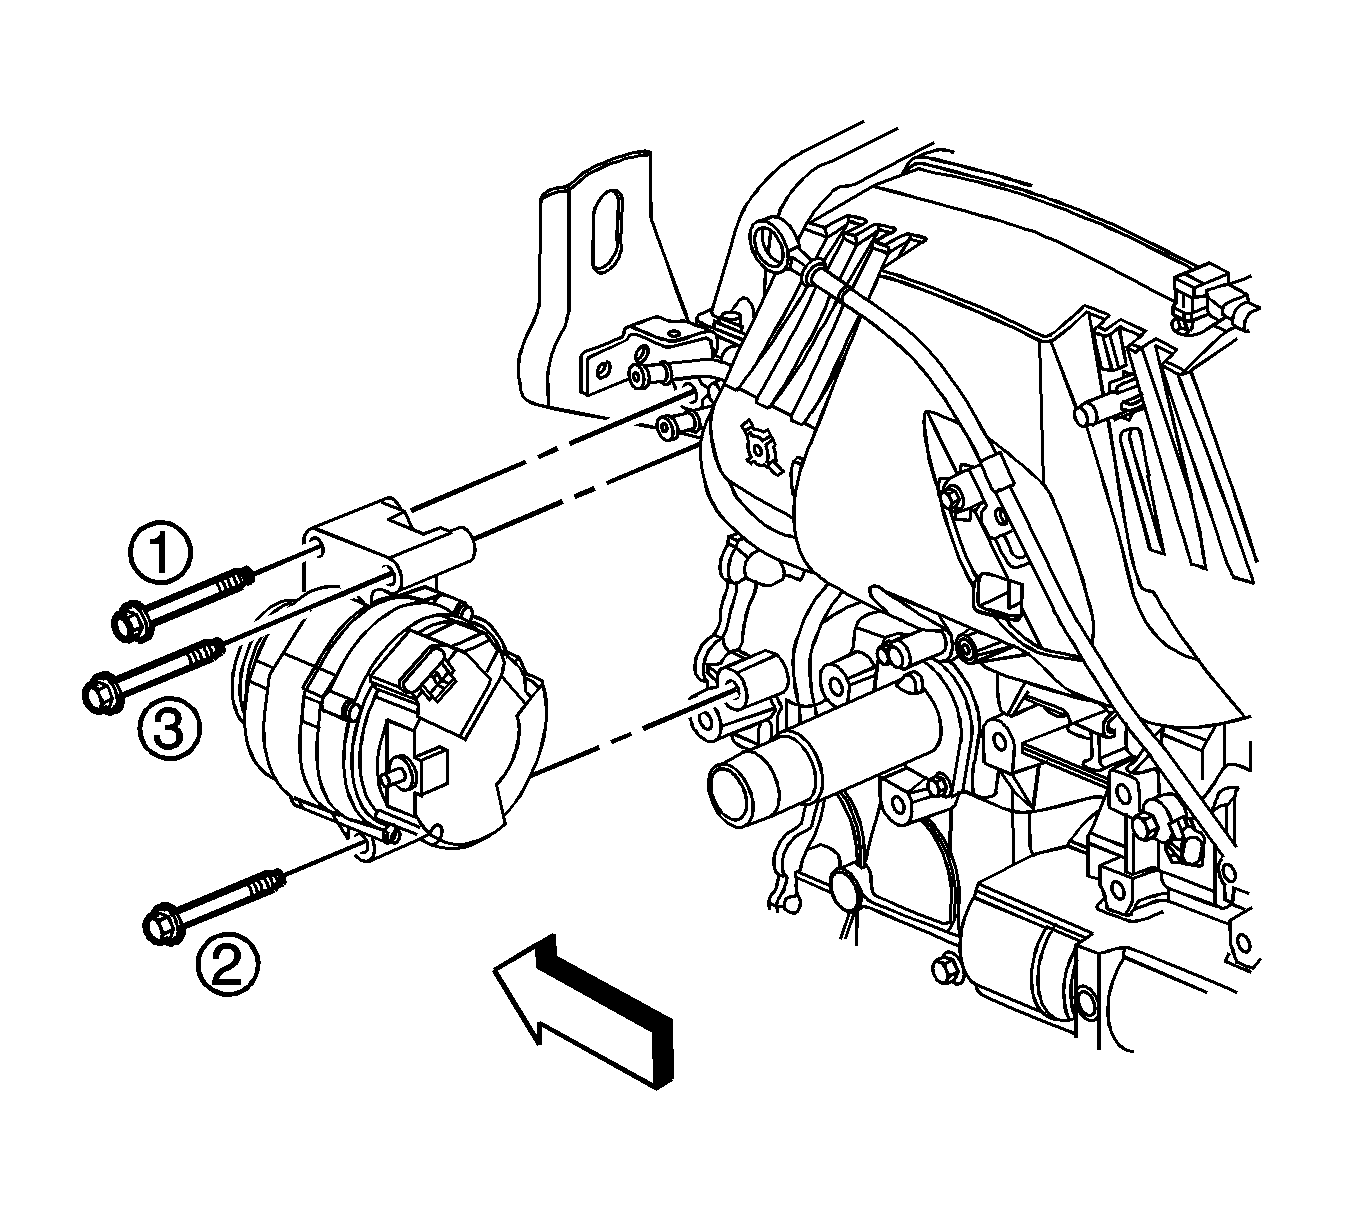
- Remove the 3 generator bolts.
- Position the A/C compressor forward, in order to gain clearance to remove the generator.
- Remove the generator.
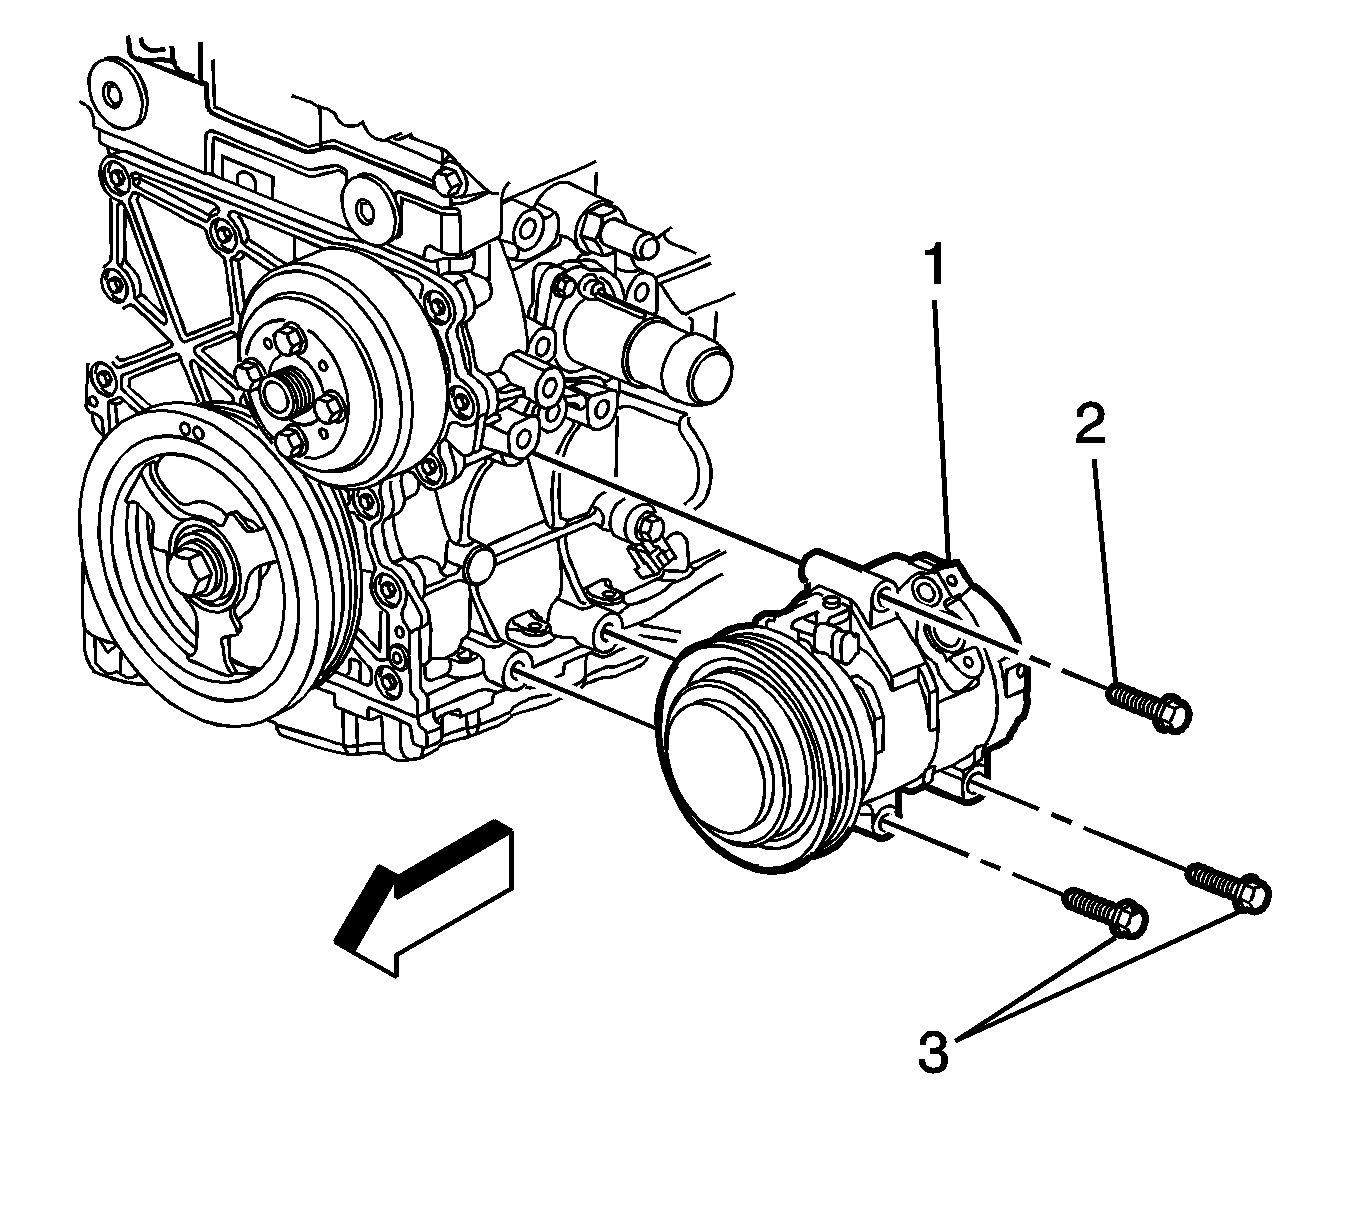
The upper mounting bolt (2) will remain with the A/C compressor (1).
Installation Procedure
- Position the generator to the engine.
- Install the 3 generator bolts and tighten in sequence to 50 N·m (37 lb ft).
- Install the generator lead (1) to the generator and install the generator output BAT terminal nut (2) and tighten to 20 N·m (15 lb ft).
- Position the protective boot onto the generator output BAT terminal.
- Connect the generator electrical connector.
- Raise and support the vehicle only high enough to access the A/C compressor through the wheelhouse. Refer to Lifting and Jacking the Vehicle.
- Position the A/C compressor (1) to the engine.
- Install the A/C compressor mounting bolts (2, 3) and tighten to 50 N·m (37 lb ft).
- Connect the condenser and evaporator lines to the compressor.
- Attach the A/C compressor electrical connector to the bracket.
- Install the left wheelhouse liner. Refer to Front Wheelhouse Liner Replacement.
- Install the left front wheel. Refer to Tire and Wheel Removal and Installation.
- Lower the vehicle.
- Install the drive belt. Refer to Drive Belt Replacement.
- Connect the negative battery cable. Refer to Battery Negative Cable Disconnection and Connection.
- Charge the A/C system. Refer to Refrigerant Recovery and Recharging.
Caution: Refer to Fastener Caution in the Preface section.


Generator Replacement LH8
Removal Procedure
- Disconnect the negative battery cable. Refer to Battery Negative Cable Disconnection and Connection.
- Remove the intake manifold cover. Refer to Upper Intake Manifold Sight Shield Replacement.
- Remove the accessory drive belt. Refer to Drive Belt Replacement - Accessory.
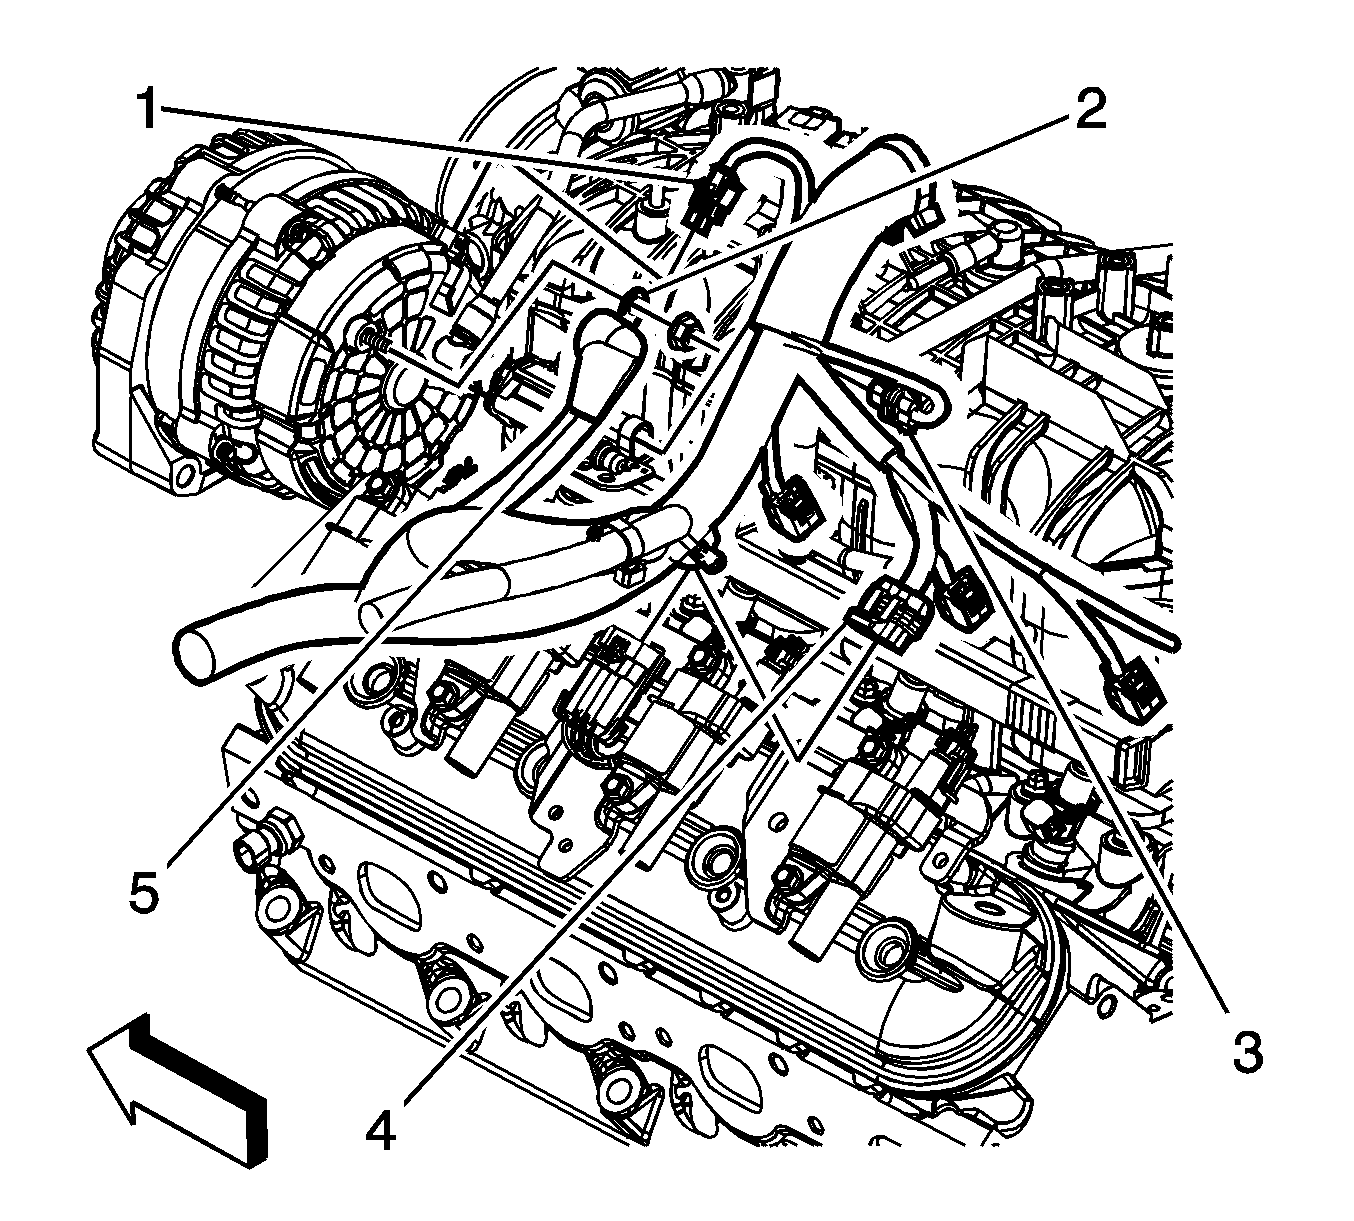
- Disconnect the engine wiring harness electrical connector (1) from the generator.
- Reposition the engine wiring harness/positive battery cable boot (5).
- Remove the engine wiring harness/positive battery cable nut from the generator.
- Remove the engine wiring harness/positive battery cable (2) from the generator.
- Remove the generator bolts.
- Remove the generator.
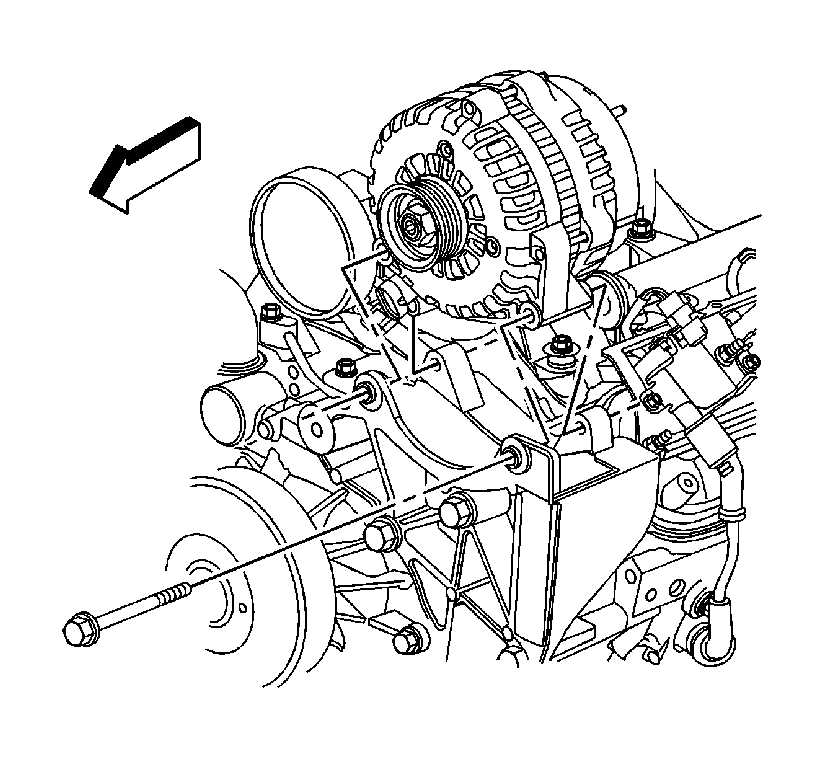
Installation Procedure
- Install the generator.
- Install the generator bolts.
- Install the engine wiring harness/positive battery cable (2) to the generator.
- Install the engine wiring harness/positive battery cable nut to the generator.
- Position the engine wiring harness/positive battery cable boot (5).
- Connect the engine wiring harness electrical connector (1) to the generator.
- Install the accessory drive belt. Refer to Drive Belt Replacement - Accessory.
- Install the intake manifold cover. Refer to Upper Intake Manifold Sight Shield Replacement.
- Connect the negative battery cable. Refer to Battery Negative Cable Disconnection and Connection.

Caution: Refer to Fastener Caution in the Preface section.
Tighten
Tighten the bolts to 50 N·m (37 lb ft).

Tighten
Tighten the nut to 9 N·m (80 lb in).
