GM Service Manual Online
For 1990-2009 cars only

Windshield Side Reveal Molding Replacement H3 with UVF
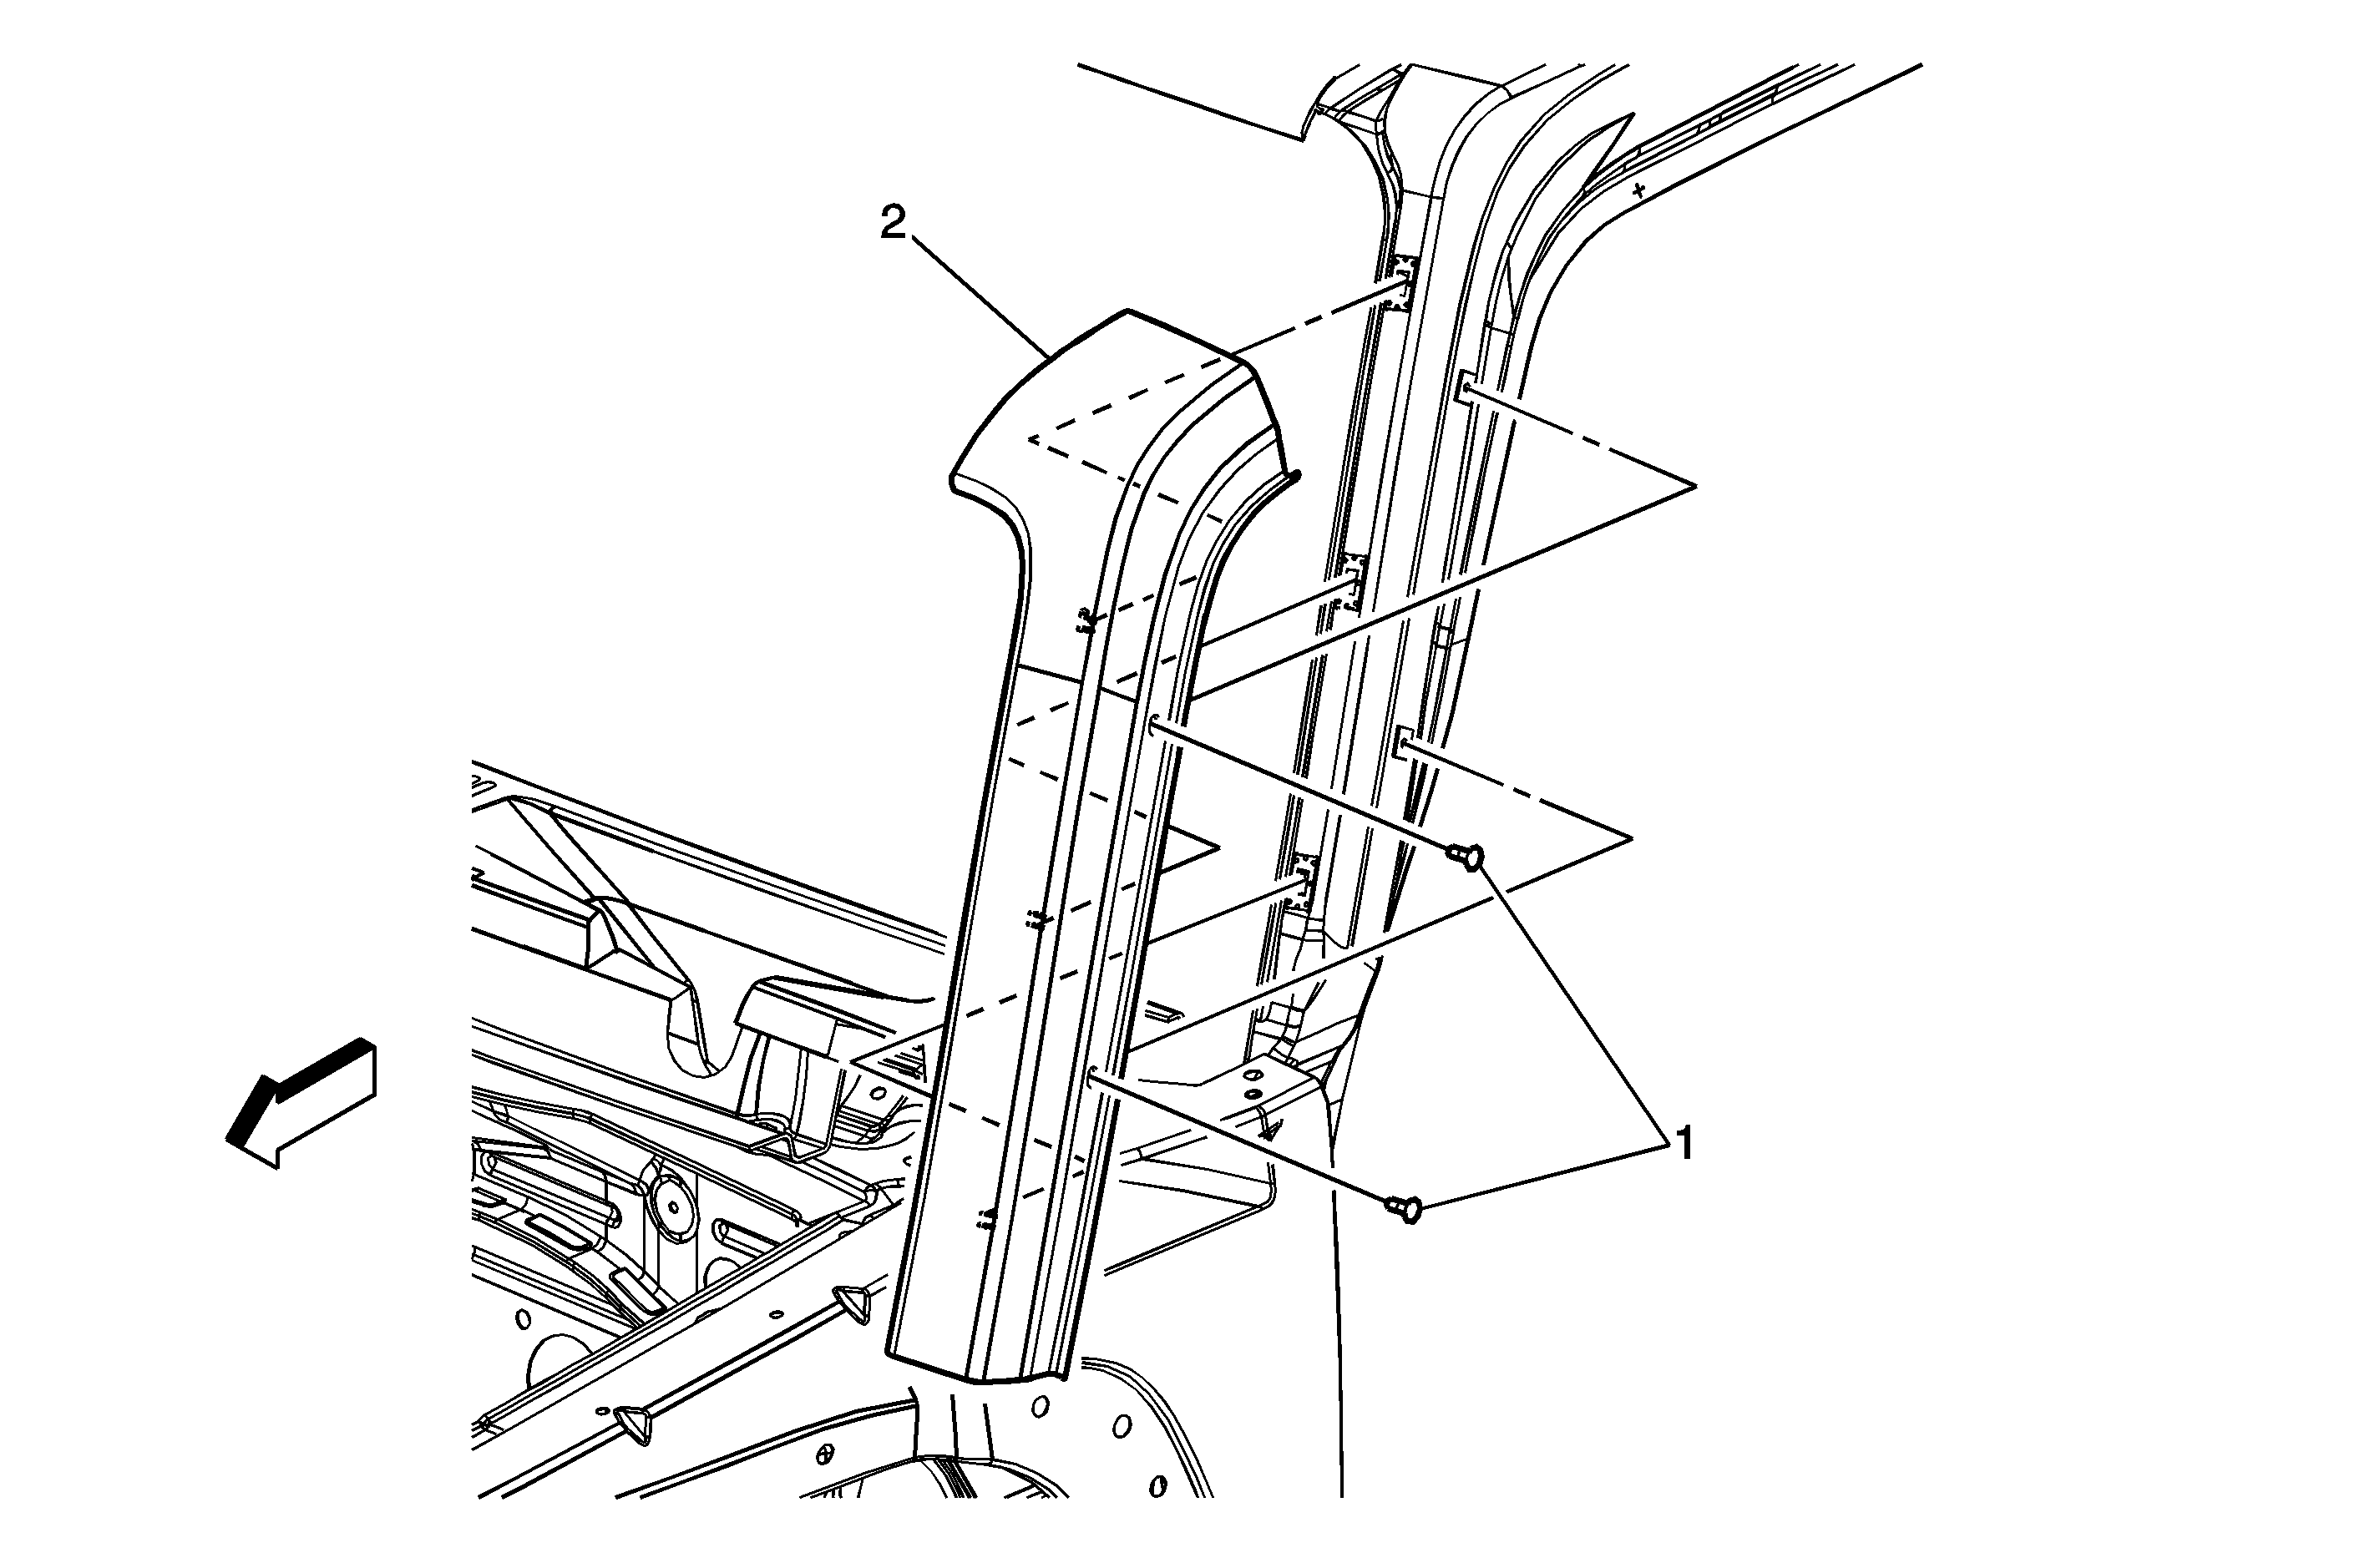

Object Number: 1558347  Size: MF

Callout

Component Name

Preliminary Procedure

  1. Remove the front intake air duct hole cover assembly. Refer to Front Intake Air Duct Hole Cover Replacement.
  2. Open the passenger side front door and release the auxiliary weatherstrip up to the roof header in order to access the windshield side reveal molding screws.

1

Windshield Side Reveal Molding Screw (Qty: 2)

Caution: Refer to Fastener Caution in the Preface section.

Tighten
2 N·m (18 lb in)

2

Windshield Side Reveal Molding

Procedure

  1. Remove the screws.
  2. Pull reveal molding forward to release the tabs from the integral retention clips.
  3. Re-install the retention clips to the tabs on the molding if not damaged.
  4. Ensure the foam pad is attached to the upper inside edge of the reveal molding.
  5. Transfer the front view camera to the new windshield side reveal molding, (if equipped). Refer to Front View Camera Replacement.

Windshield Side Reveal Molding Replacement H3T


Object Number: 1558347  Size: MF

Callout

Component Name

Preliminary Procedure

  1. Remove the front intake air duct hole cover assembly. Refer to Front Intake Air Duct Hole Cover Replacement.
  2. Open the driver or passenger side front door and release the auxiliary weatherstrip up to the roof header in order to access the windshield side reveal molding screws.

1

Windshield Side Reveal Molding Screw (Qty: 2)

Caution: Refer to Fastener Caution in the Preface section.

Tighten
2 N·m (18 lb in)

2

Windshield Side Reveal Molding

Procedure

  1. Remove the screws.
  2. Pull reveal molding forward to release the tabs from the integral retention clips.
  3. Re-install the retention clips to the tabs on the molding if not damaged.
  4. Ensure the foam pad is attached to the upper inside edge of the reveal molding.

Windshield Side Reveal Molding Replacement Without UVF


Object Number: 1558347  Size: MF

Callout

Component Name

Preliminary Procedure

  1. Remove the non functional air inlet grille panel. Refer to Non-Functional Air Inlet Grille Panel Replacement.
  2. Open either the left or right front door and release the auxiliary weatherstrip up to the roof header to access the windshield side reveal molding screws.

1

Screws, Windshield Reveal Molding (Qty: 2)

Caution: Refer to Fastener Caution in the Preface section.

Tip
Pull reveal molding forward to release the tabs from the integral retention clips.

Tighten
2 N·m (18 lb in)

2

Molding, Windshield Reveal