For 1990-2009 cars only
Removal Procedure
- Remove the instrument panel (I/P) compartment door. Refer to Instrument Panel Compartment Door Replacement.
- Remove the right I/P outer trim cover. Refer to Instrument Panel Outer Trim Cover Replacement - Right Side.
- Unfold the service panel located above the I/P compartment door.
- Remove the screws retaining the digital radio receiver to the I/P structure.
- Lower the receiver from the I/P.
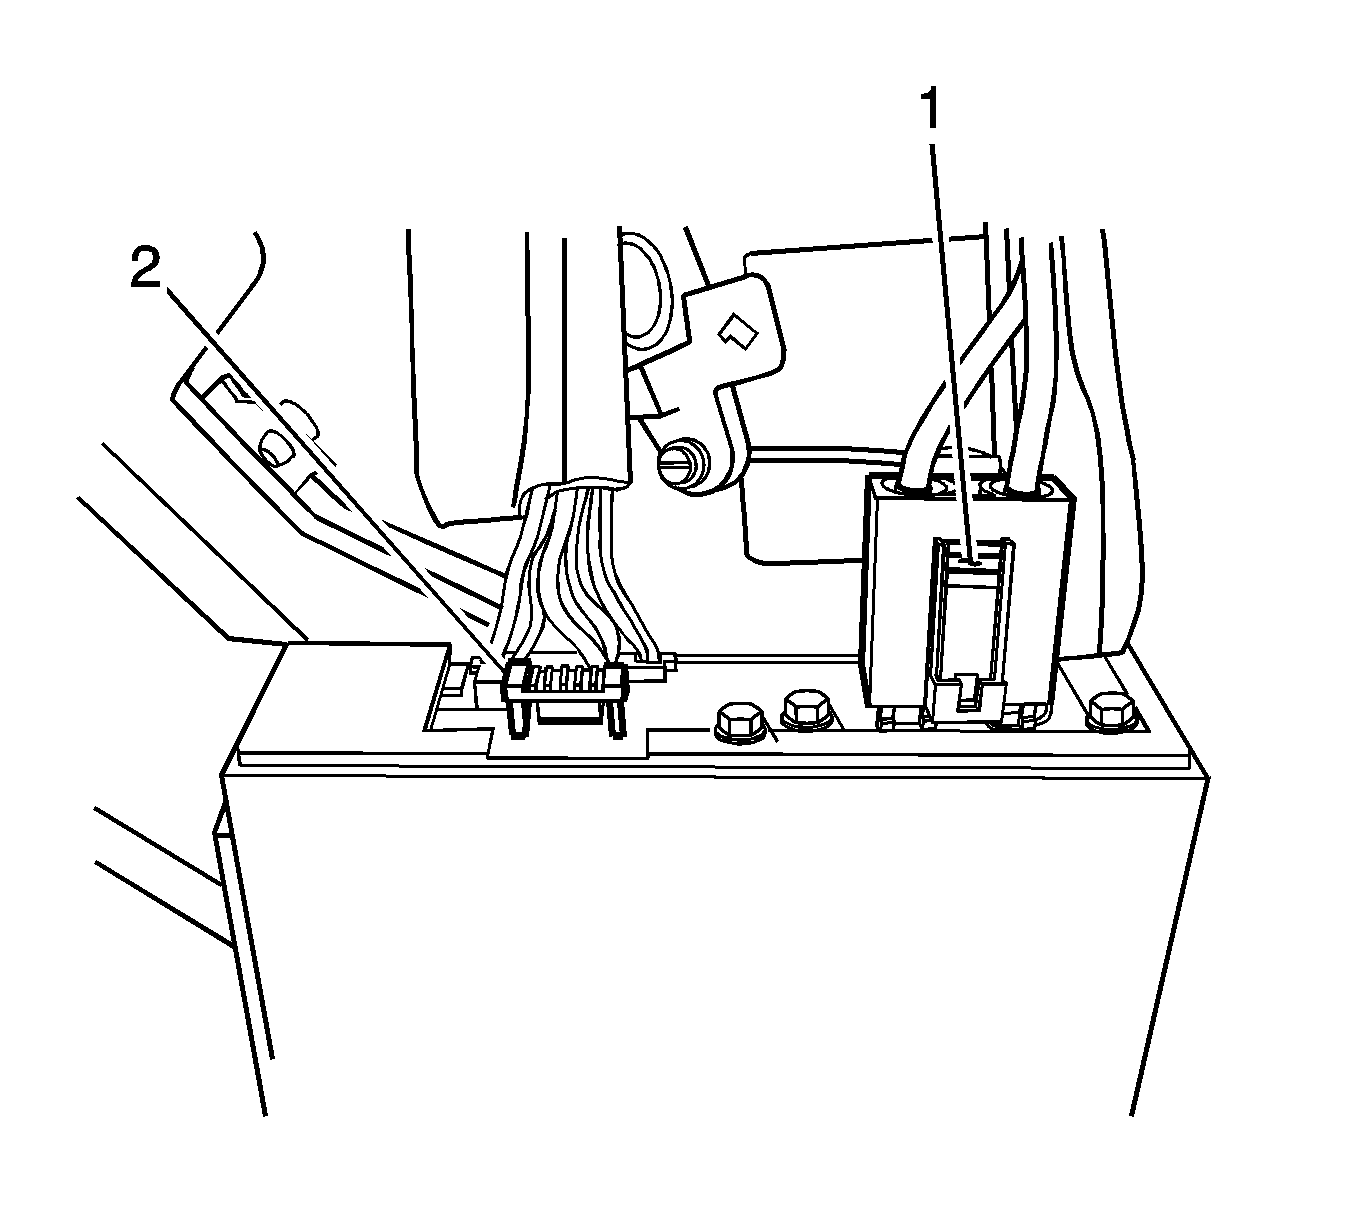
- Disconnect the electrical connector by pushing on the release lever (1).
- Remove the connector position assurance (CPA) (2) from the electrical connector.
- Remove the connector from the receiver.
- Remove the receiver from the vehicle.
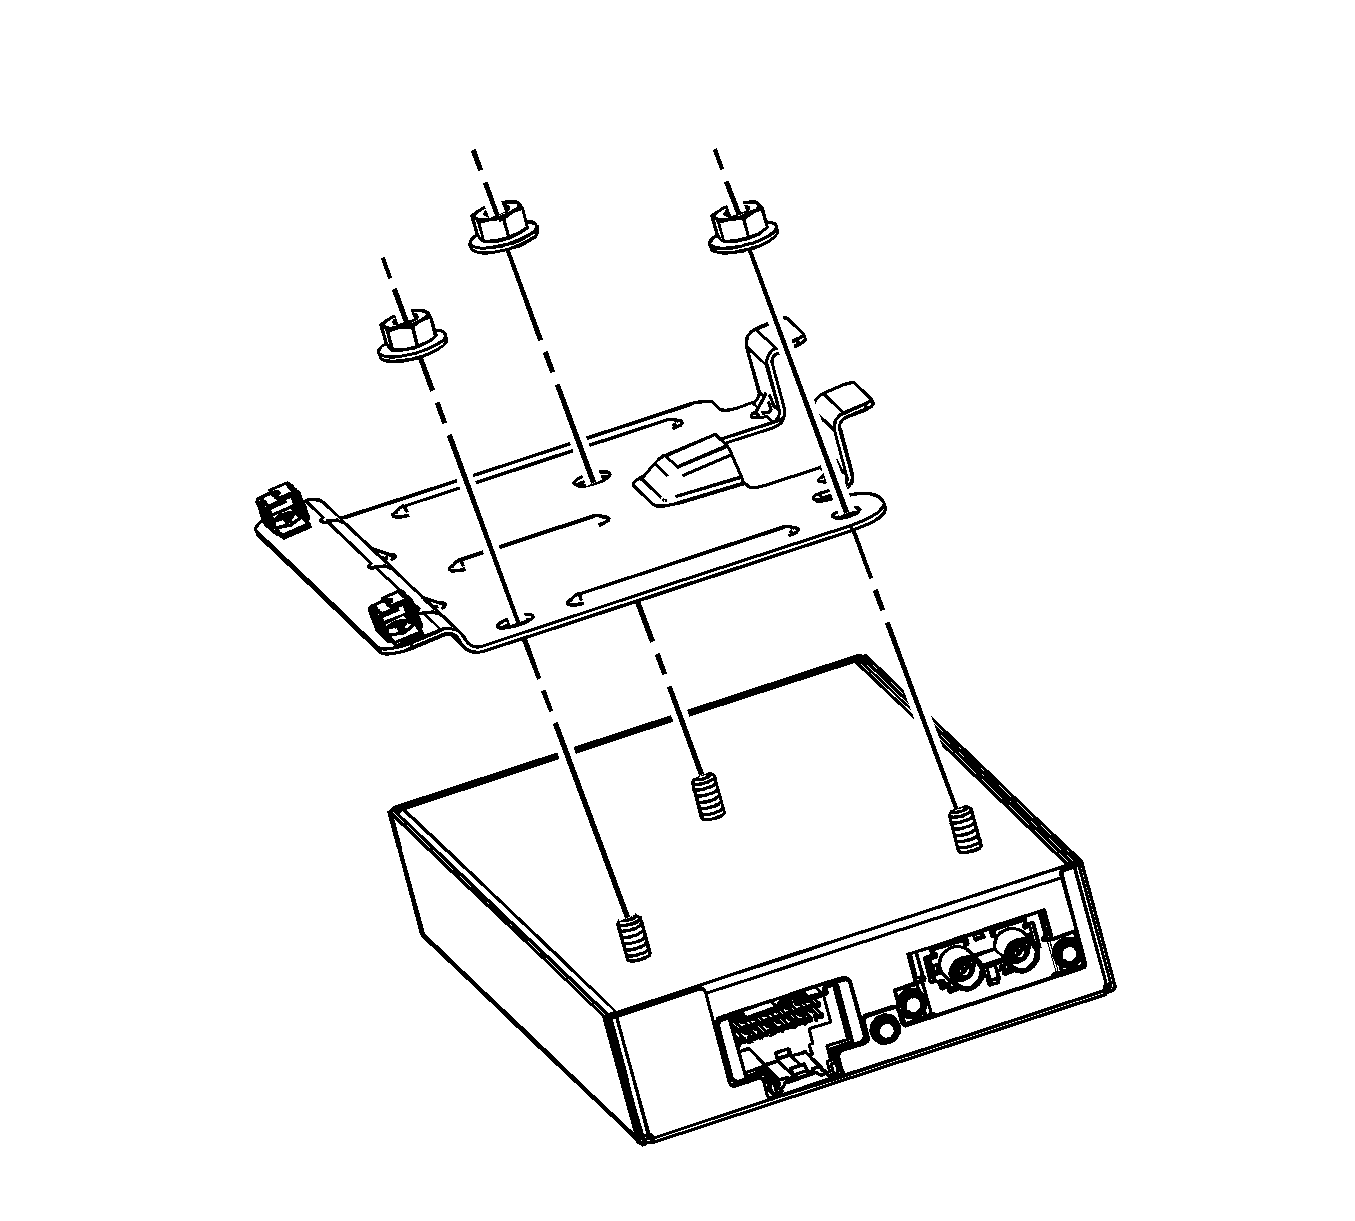
- If replacing the receiver, remove the nuts retaining the receiver to the mounting bracket.
- Remove the receiver from the mounting bracket.
Note: Do NOT swap digital radio receivers between vehicles. Swapping digital receivers between vehicles will activate the digital radio Theftlock®, and "XM Theftlock®" will display.
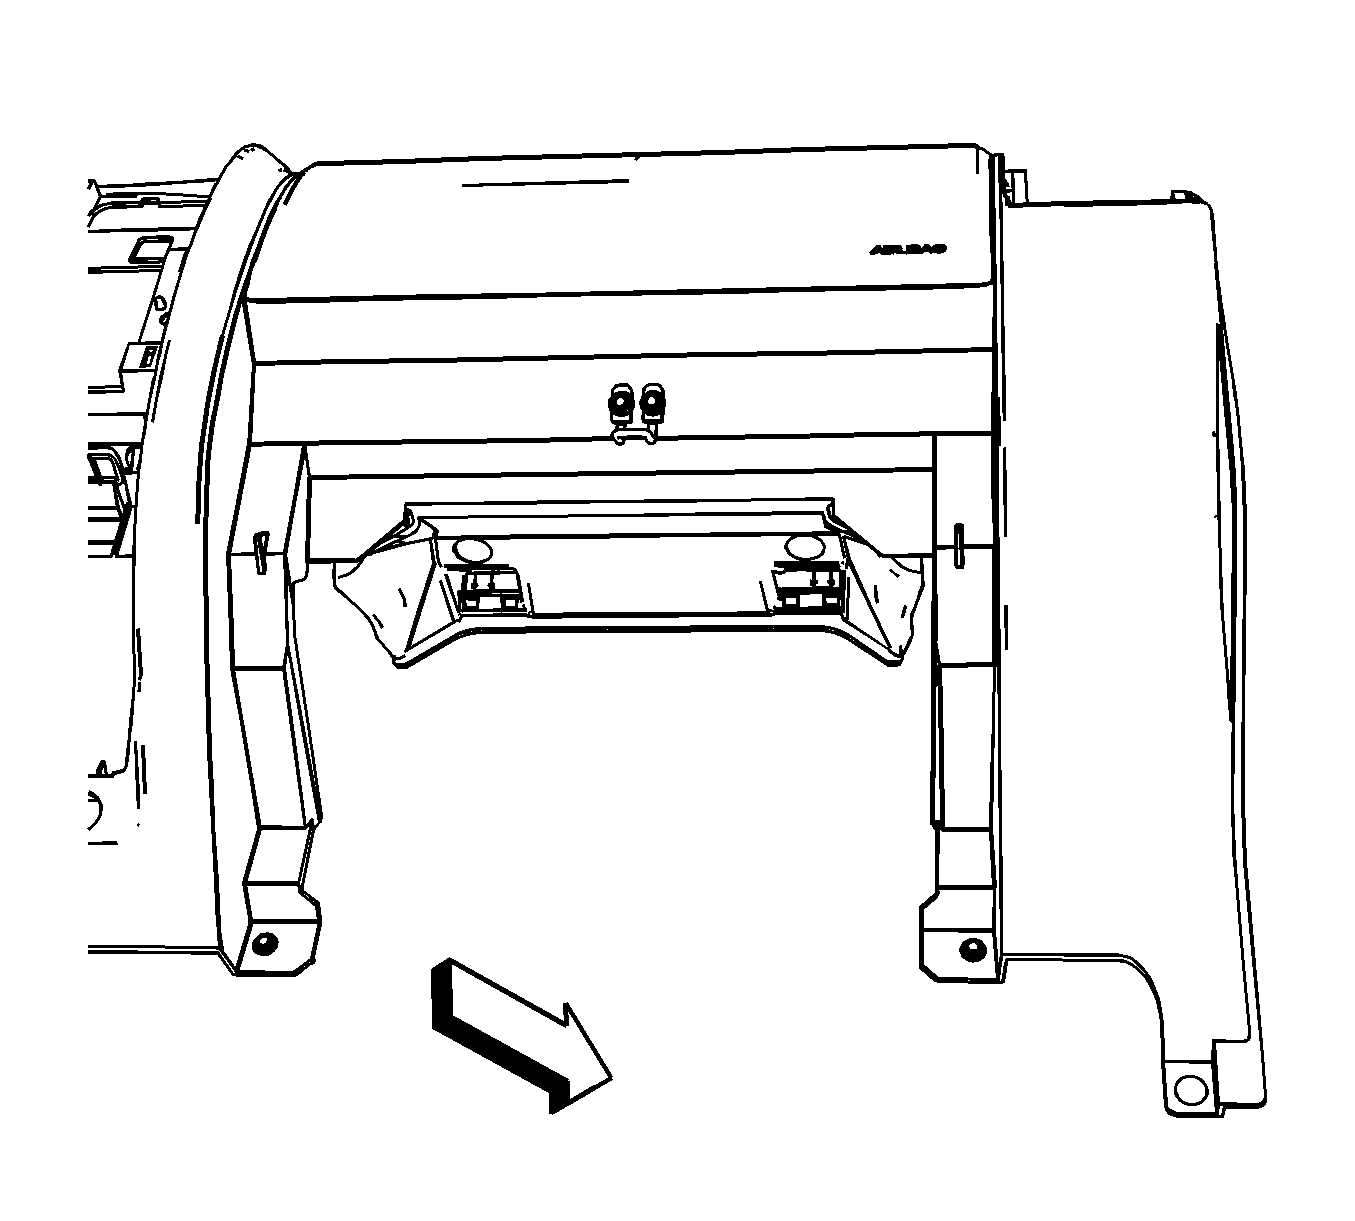
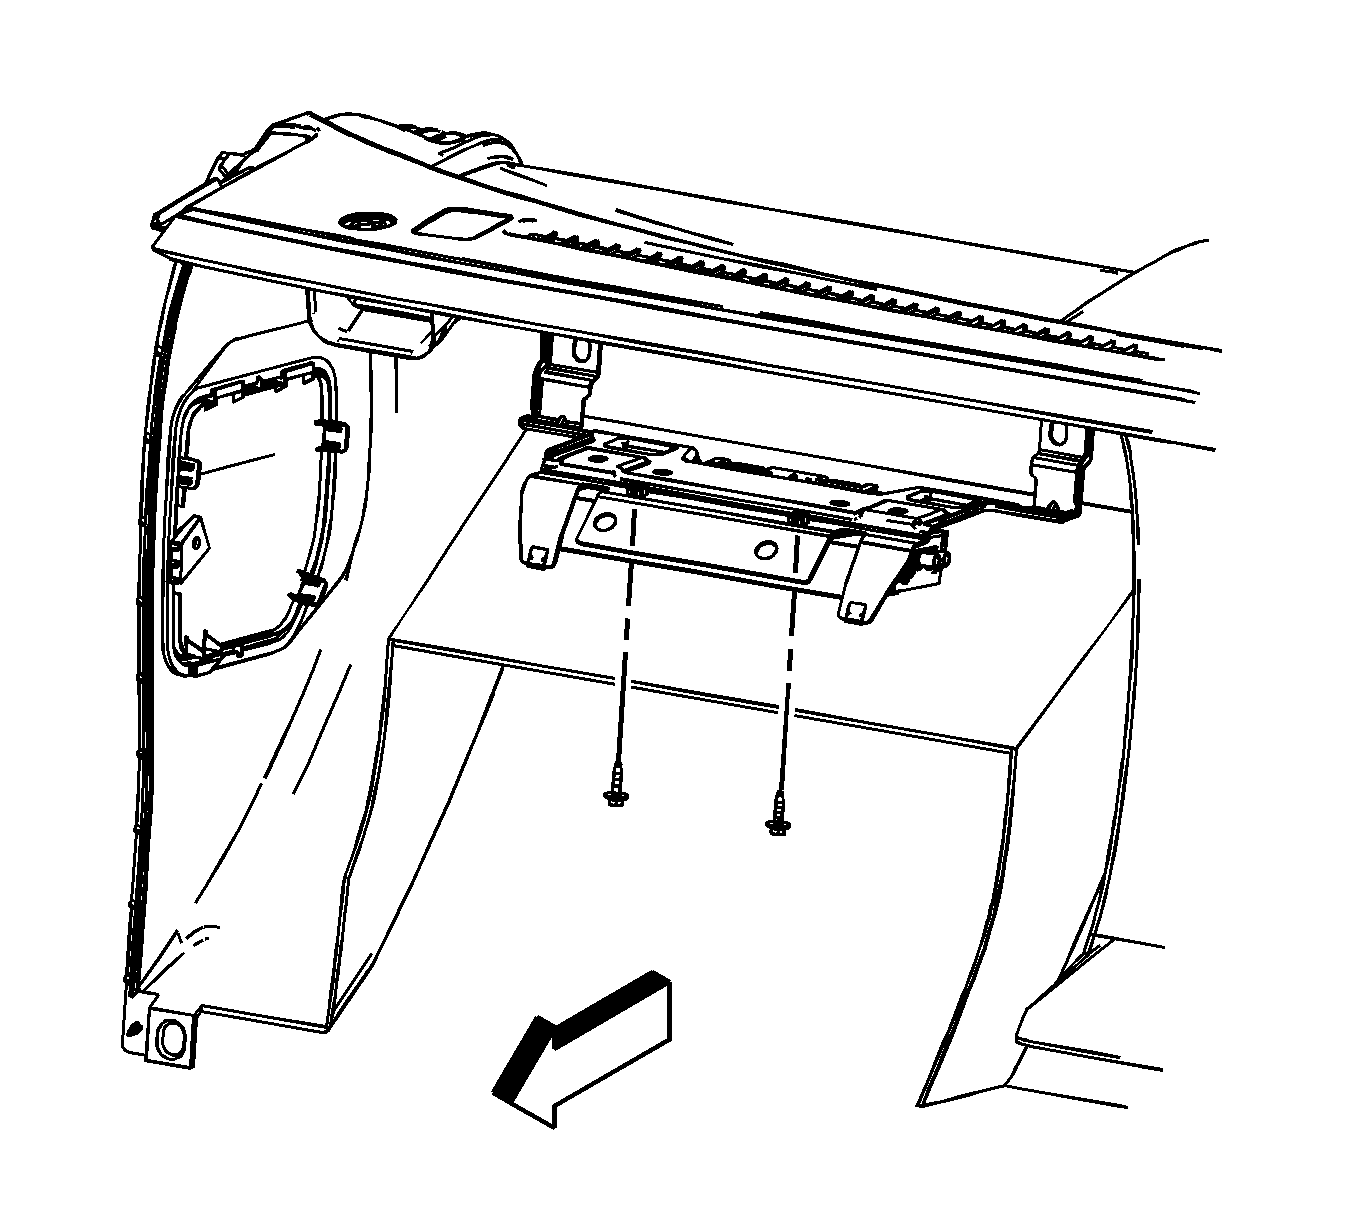
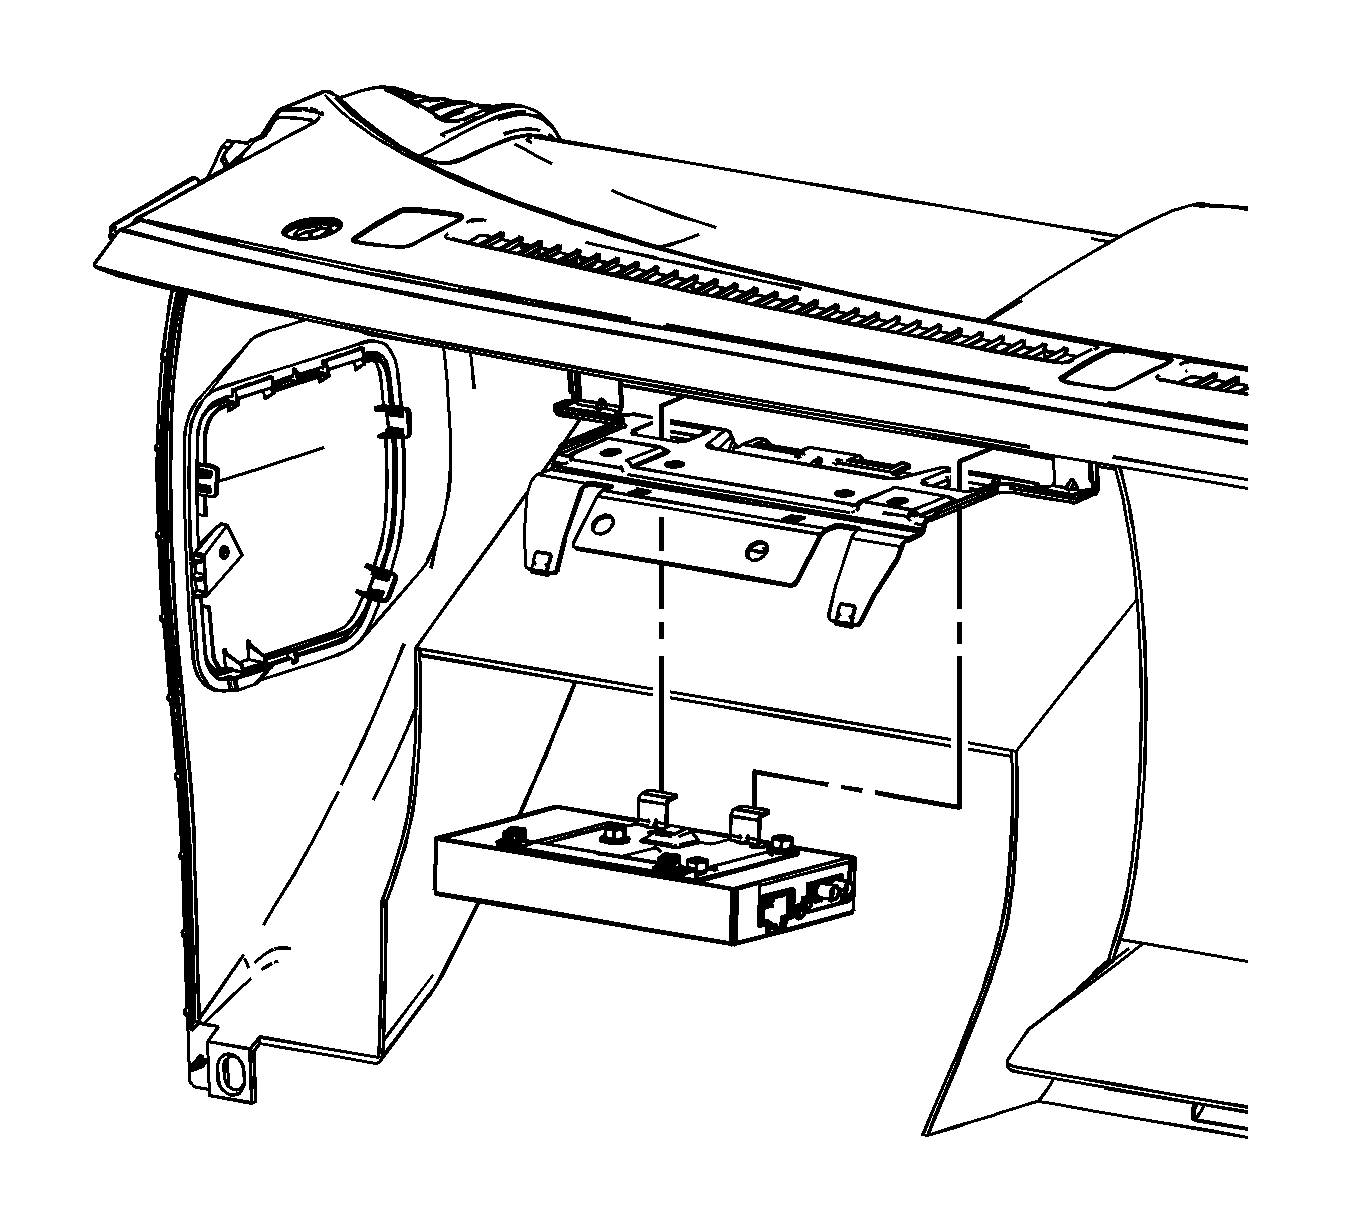
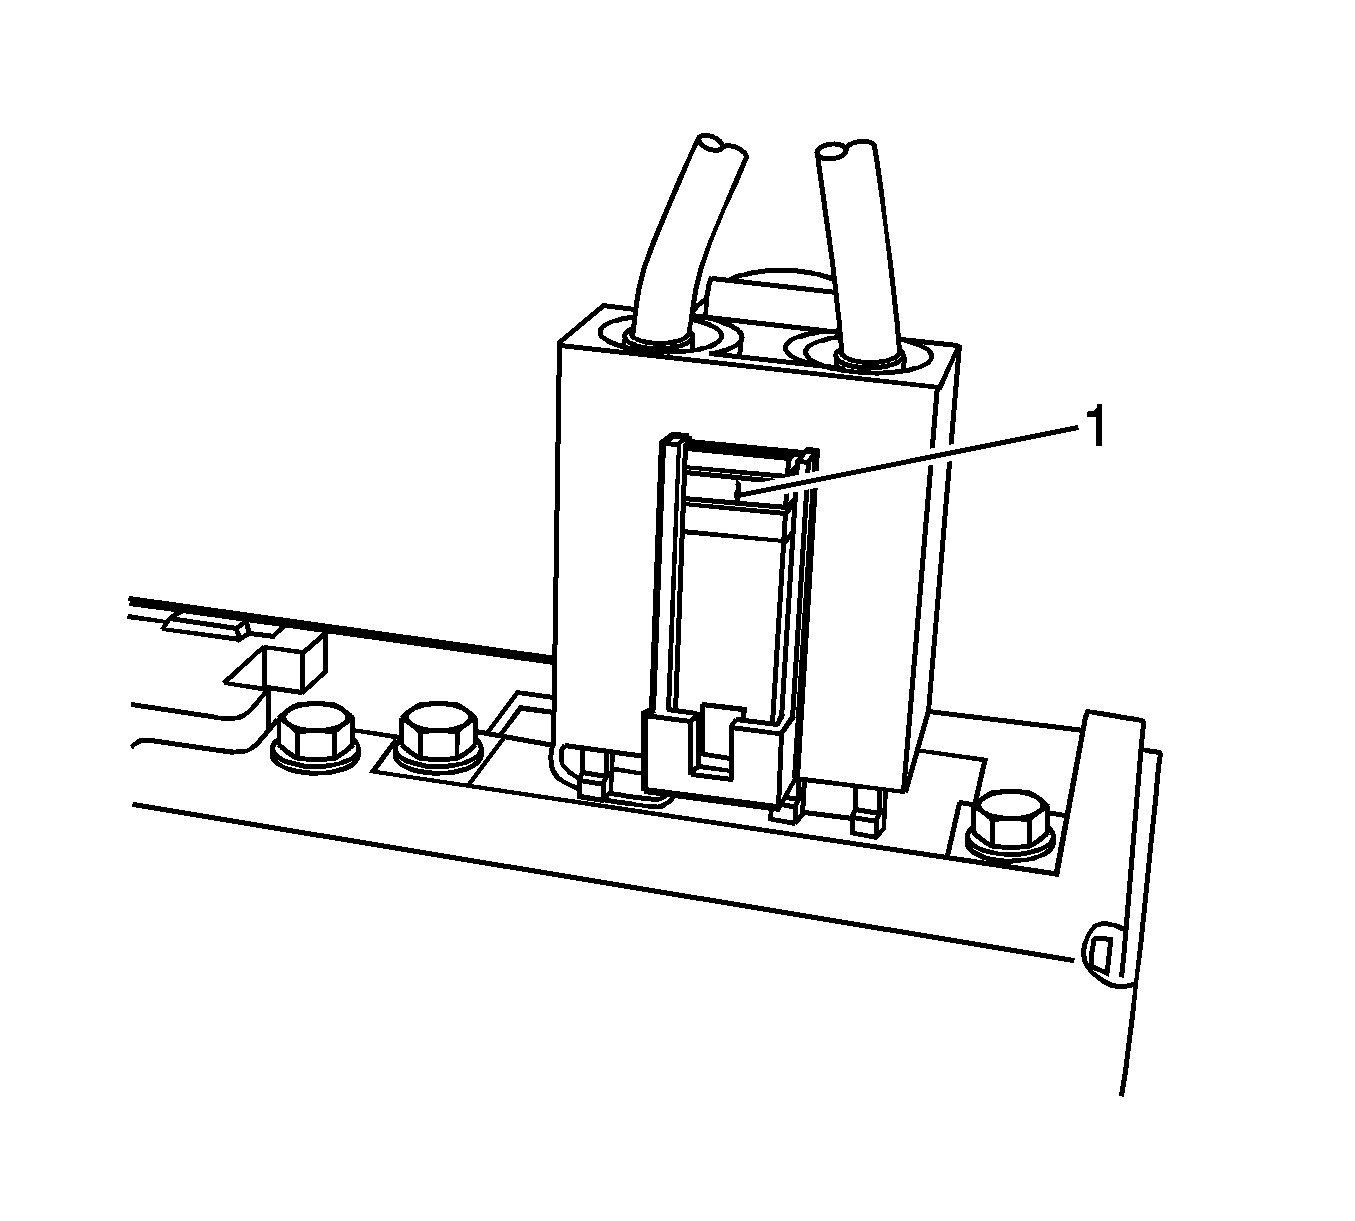
Note: Do not attempt to pry or slide the electrical connector release lever (1).
Installation Procedure
- If replacing the receiver, install the receiver to the mounting bracket and install the retaining nuts.
- Position the receiver to the I/P.
- Connect the receiver electrical connectors.
- Install the CPA (2) to the electrical connector.
- Install the receiver to the I/P.
- Install the screws retaining the digital radio receiver to the I/P structure.
- Close the service panel located above the I/P compartment door.
- Install the I/P compartment door. Refer to Instrument Panel Compartment Door Replacement.
- Install the I/P outer trim cover. Refer to Instrument Panel Outer Trim Cover Replacement - Right Side.
- For programming and set up, Refer to Control Module References.
Caution: Refer to Fastener Caution in the Preface section.

Tighten
Tighten the nuts to 3 N·m (26 lb in).


Tighten
Tighten the screws to 3 N·m (27 lb in).

