Special Tools
| • | EN 46105 Camshaft Locking Tool |
| • | EN 46111 Crankshaft Rotation Socket |
| • | EN 46112 Tensioner Retraction Pins |
Removal Procedure
- Remove the primary timing chain.
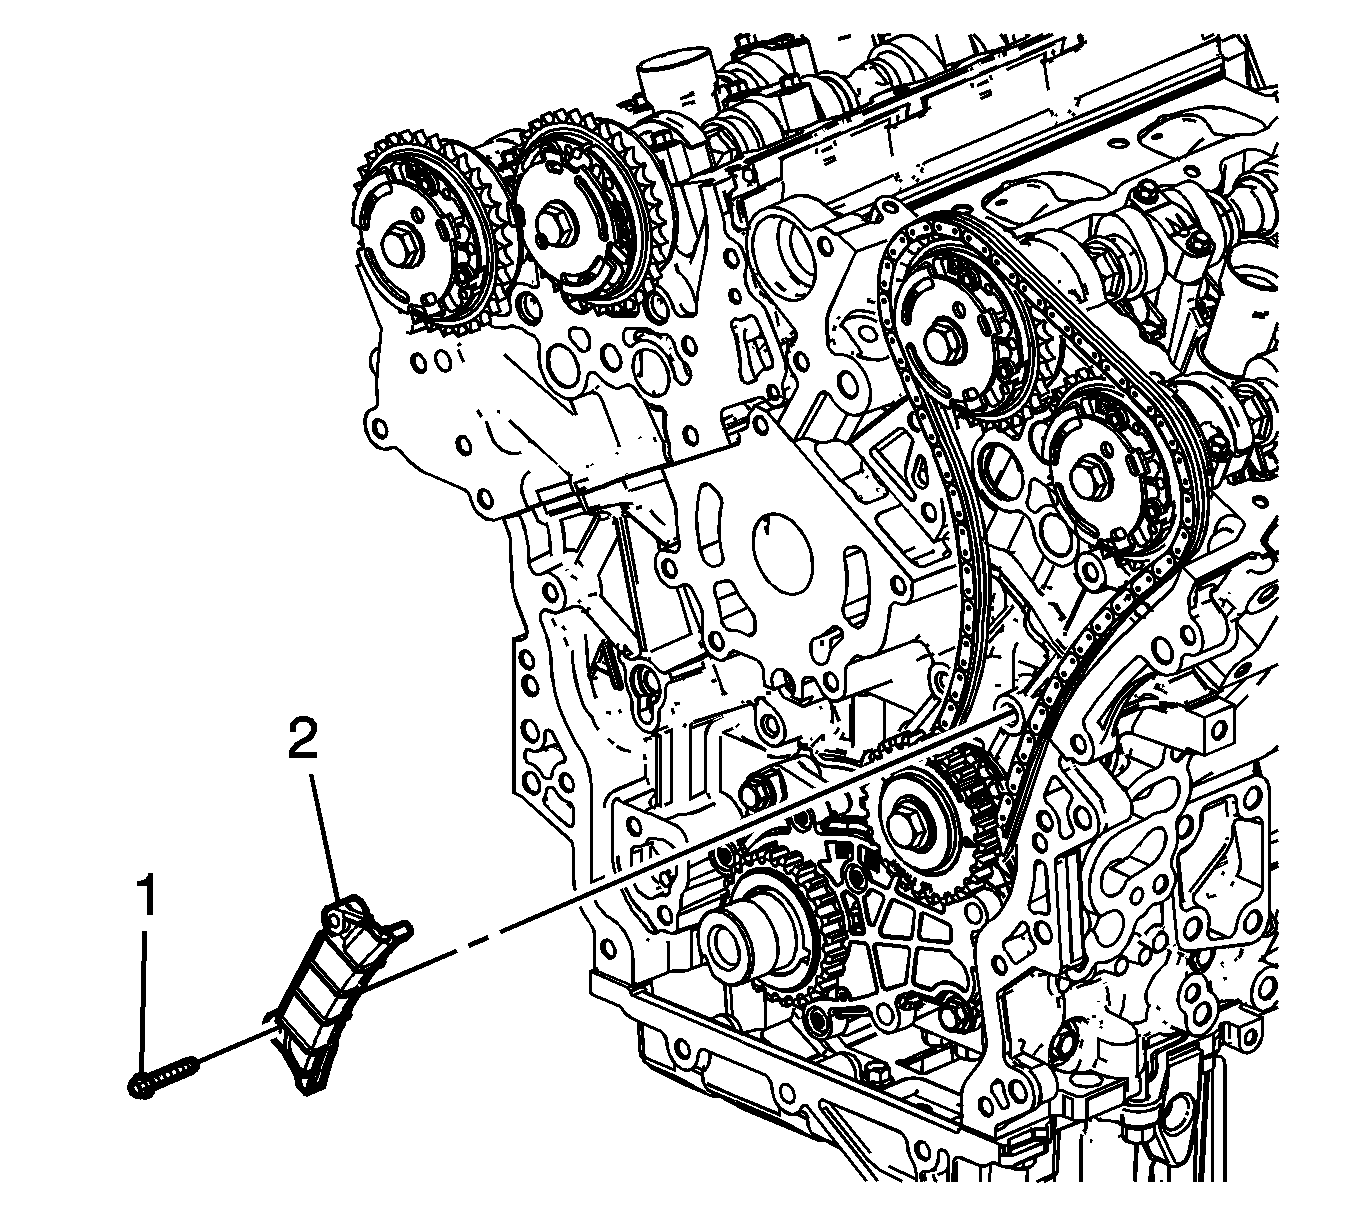
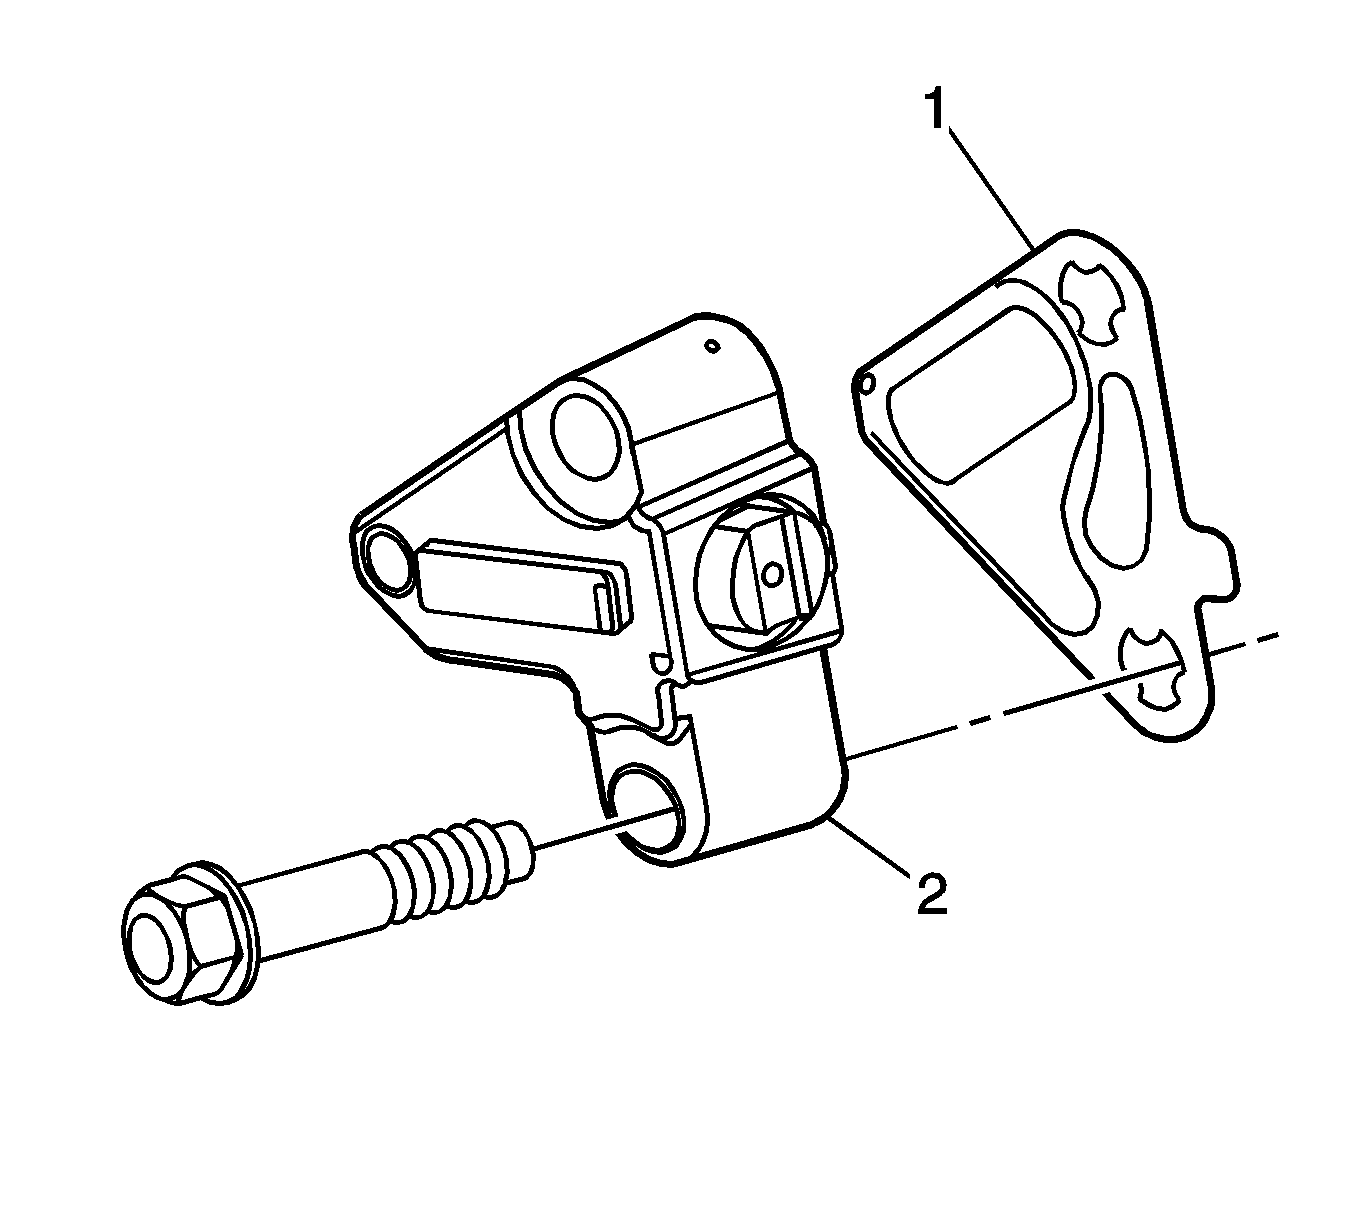
- Remove the two bank 2 secondary timing chain tensioner bolts (1) and remove the tensioner (2).
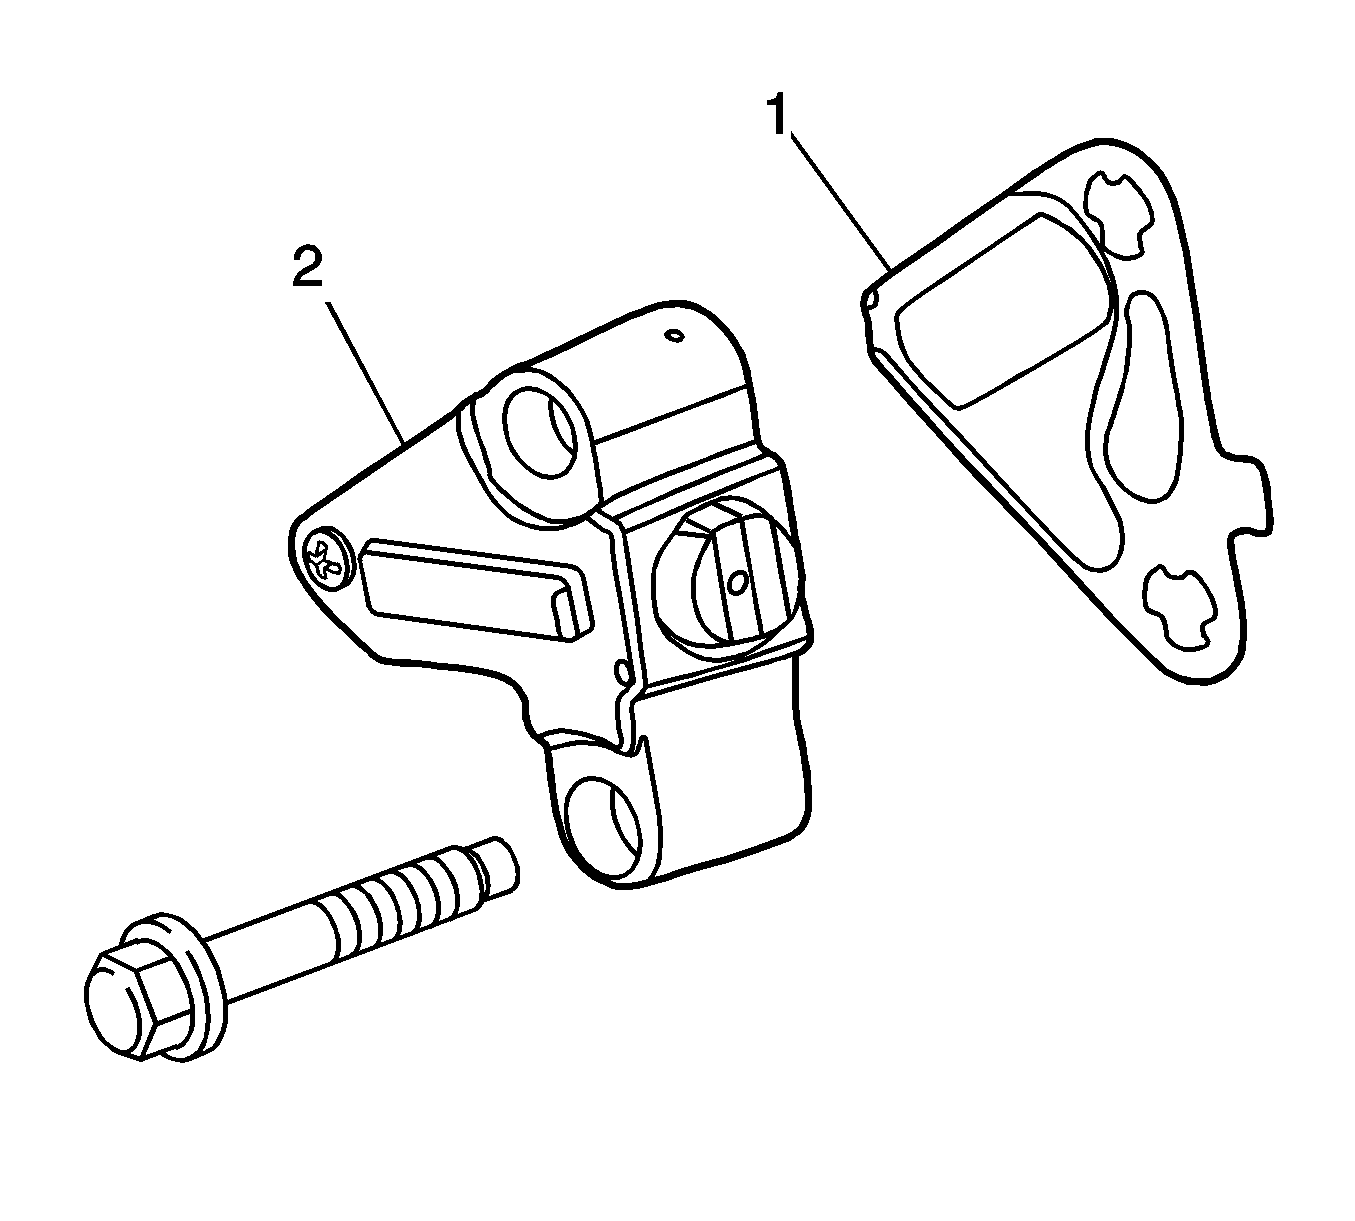
- Remove the gasket (1) from the tensioner (2) and discard the gasket.
- Inspect the tensioner mounting surface on the bank 2 cylinder head for burrs or any defects that would affect the sealing of a new tensioner gasket.
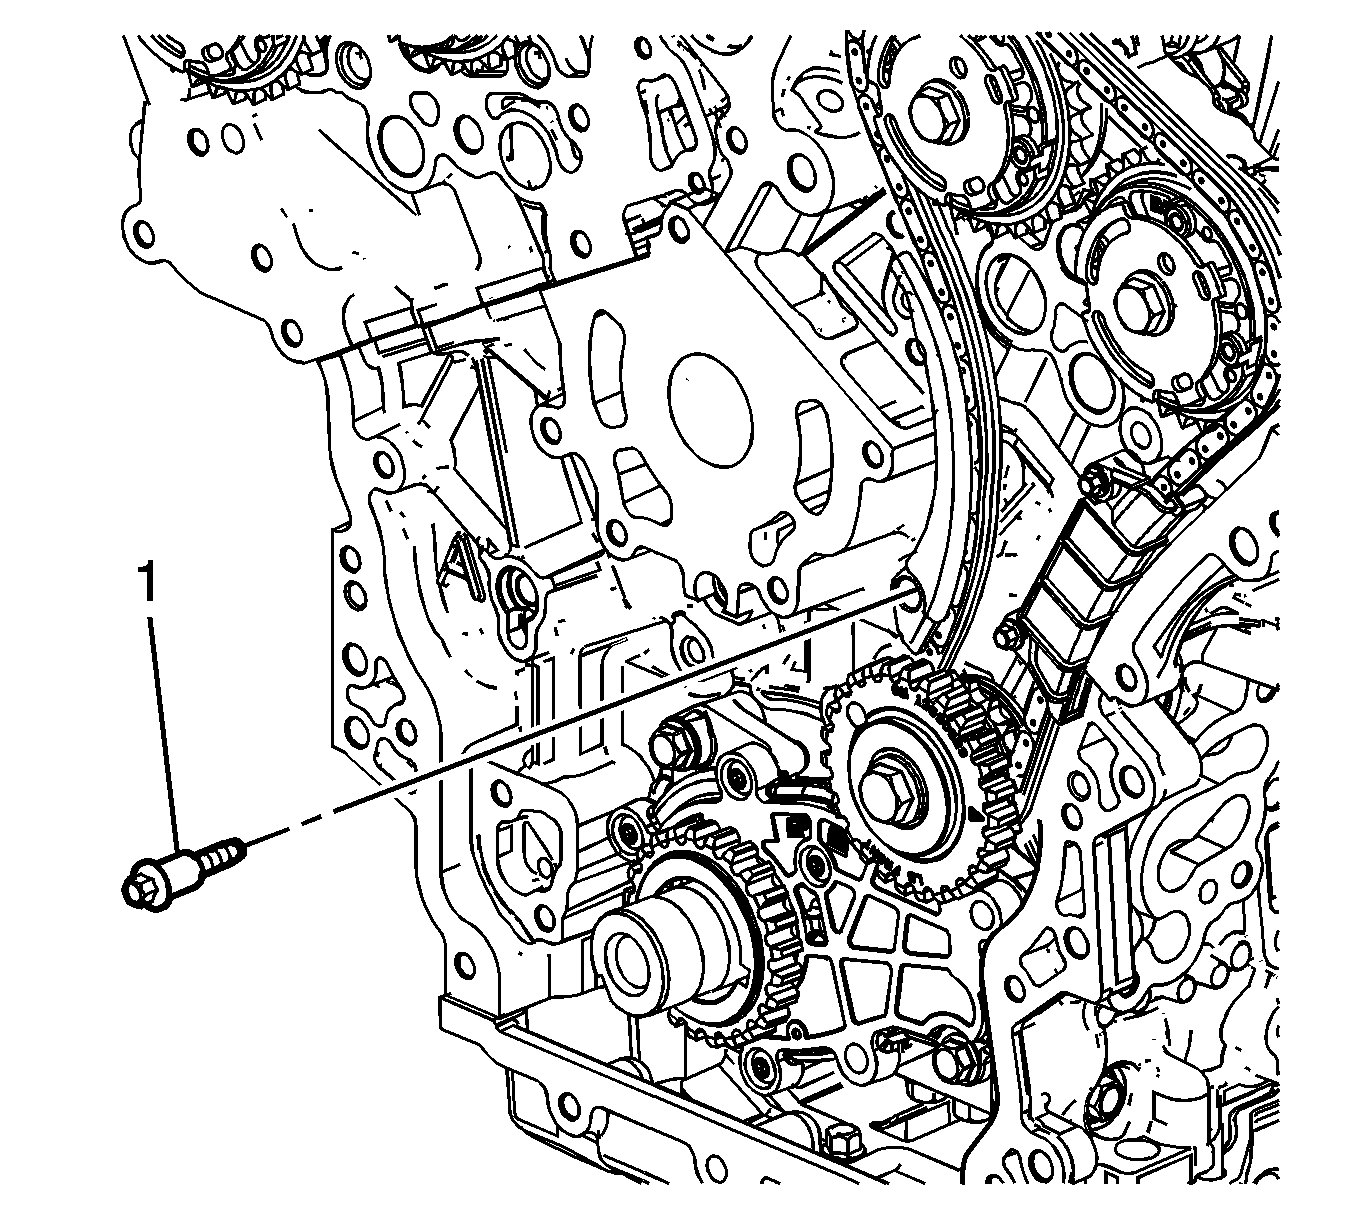
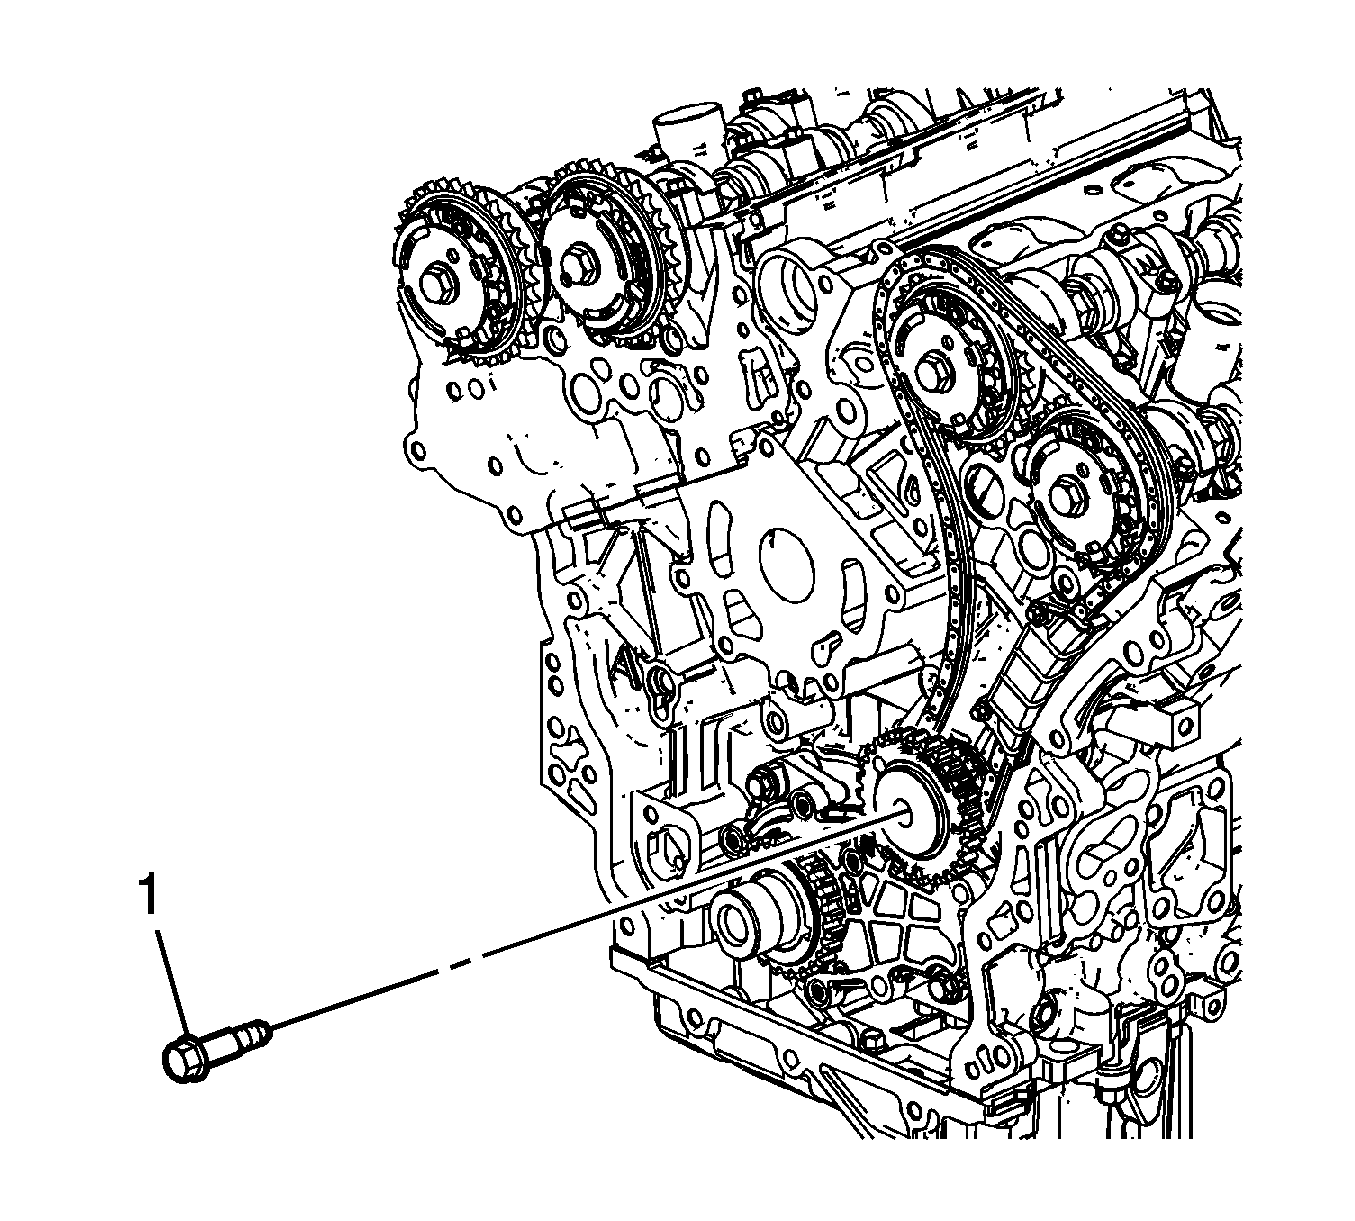
- Remove the bank 2 secondary timing chain shoe bolt (1).
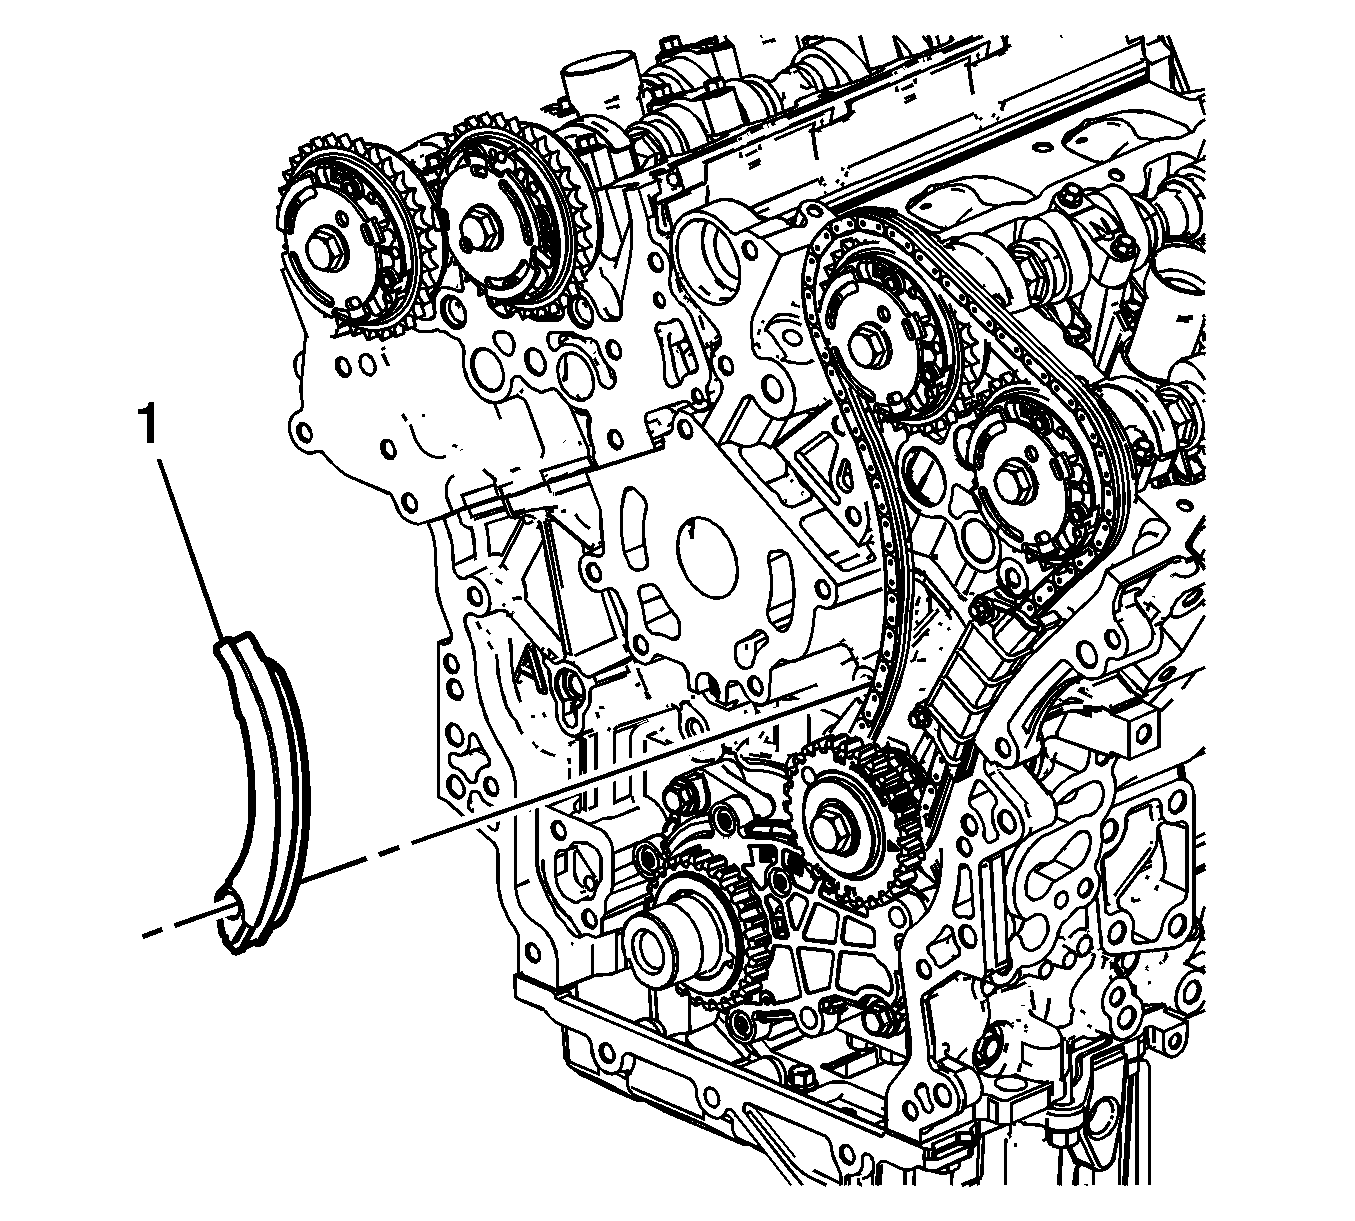
- Remove the bank 2 secondary timing chain shoe (1).
- Remove the bank 2 secondary timing chain guide bolt (1), two places, and remove the guide (2).
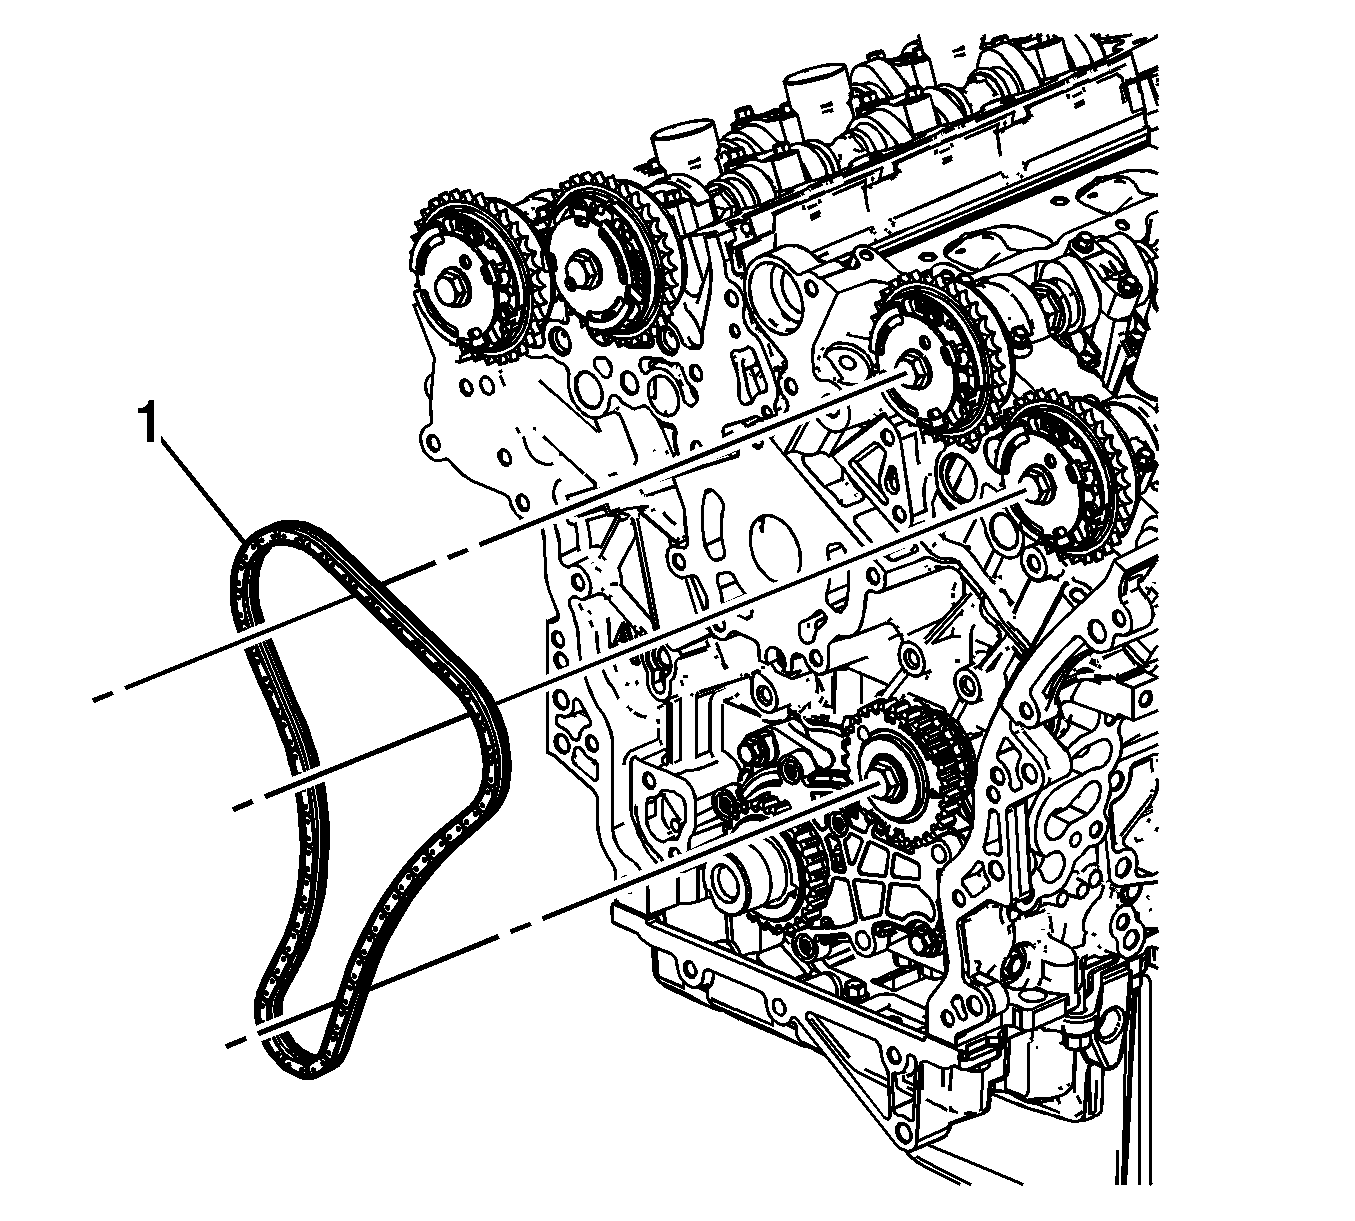
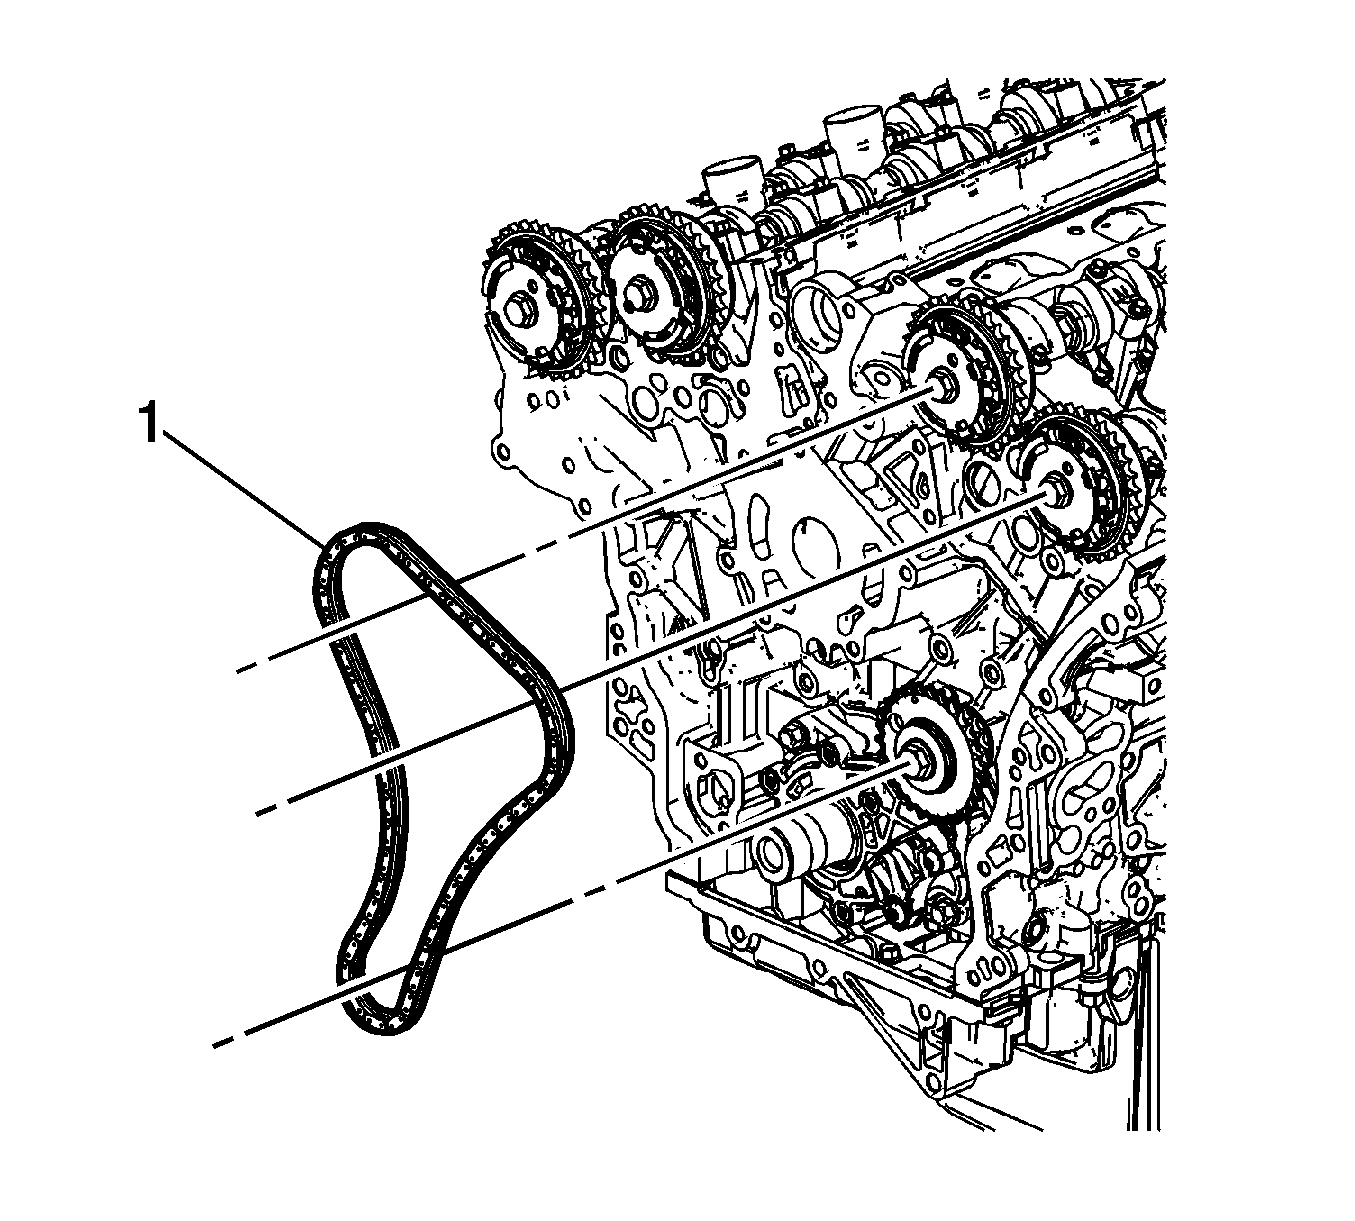
- Remove the bank 2 secondary timing chain (1) from the camshaft position actuators and the camshaft intermediate driveshaft sprocket.
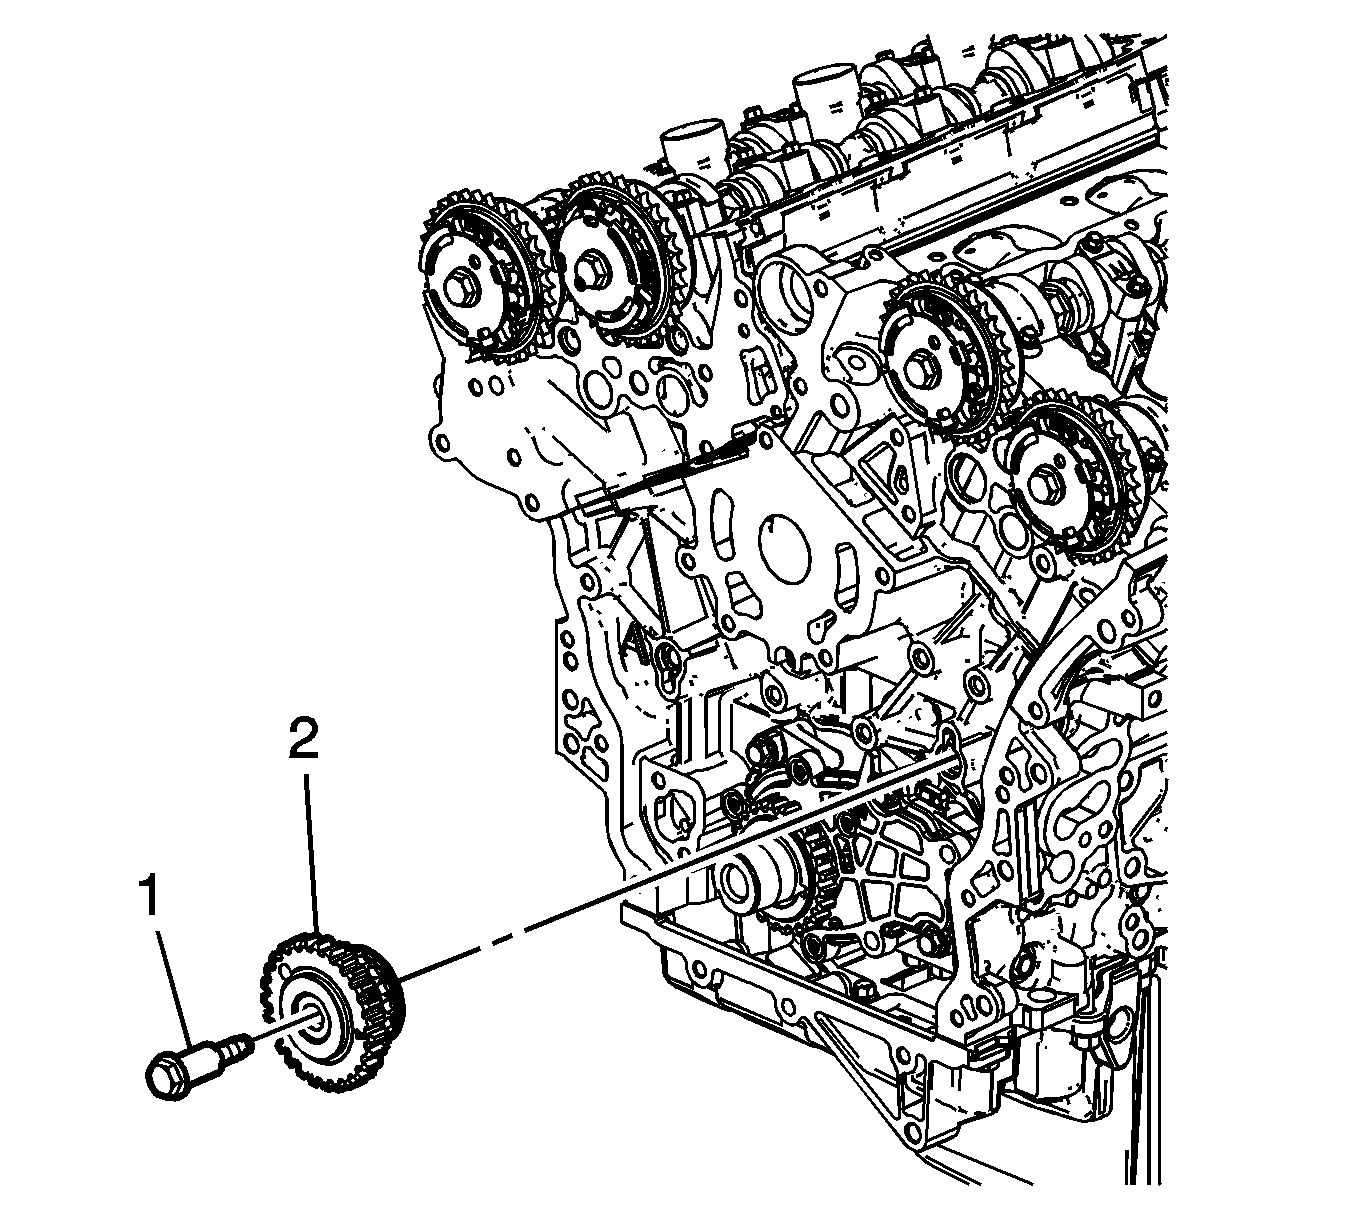
- If required, remove the bank 2 camshaft intermediate driveshaft sprocket bolt (1) and remove the sprocket (2).
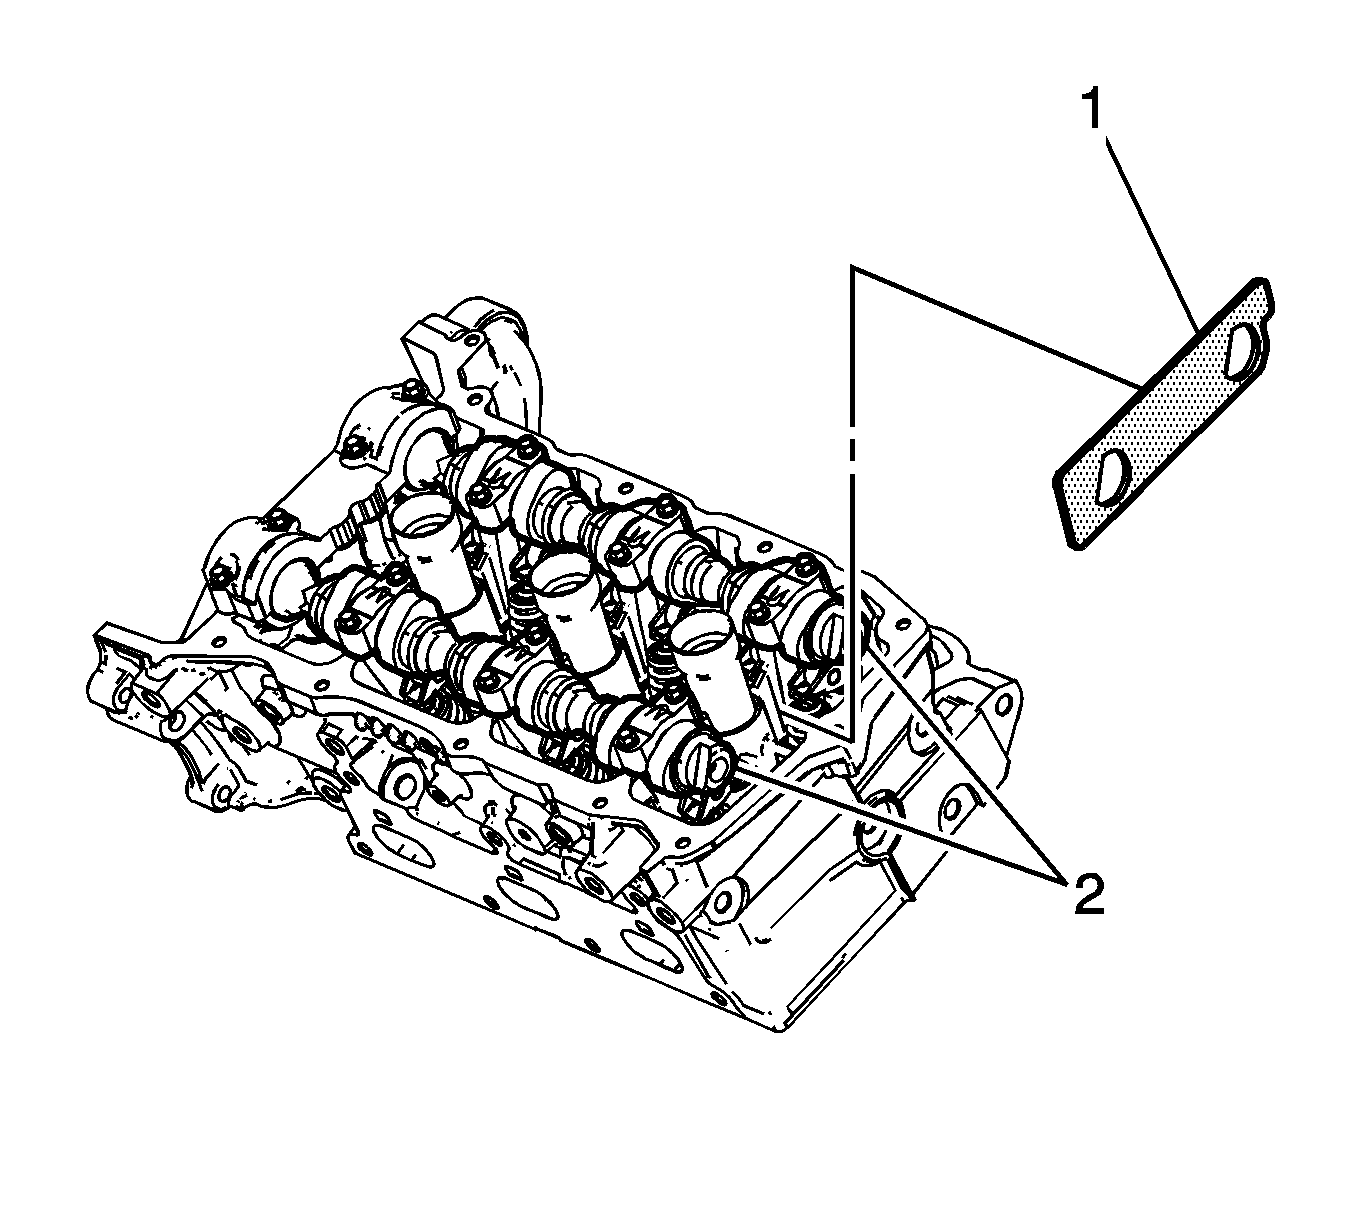
- Remove EN-46105-2 (1) from the bank 2 cylinder head camshafts (2).
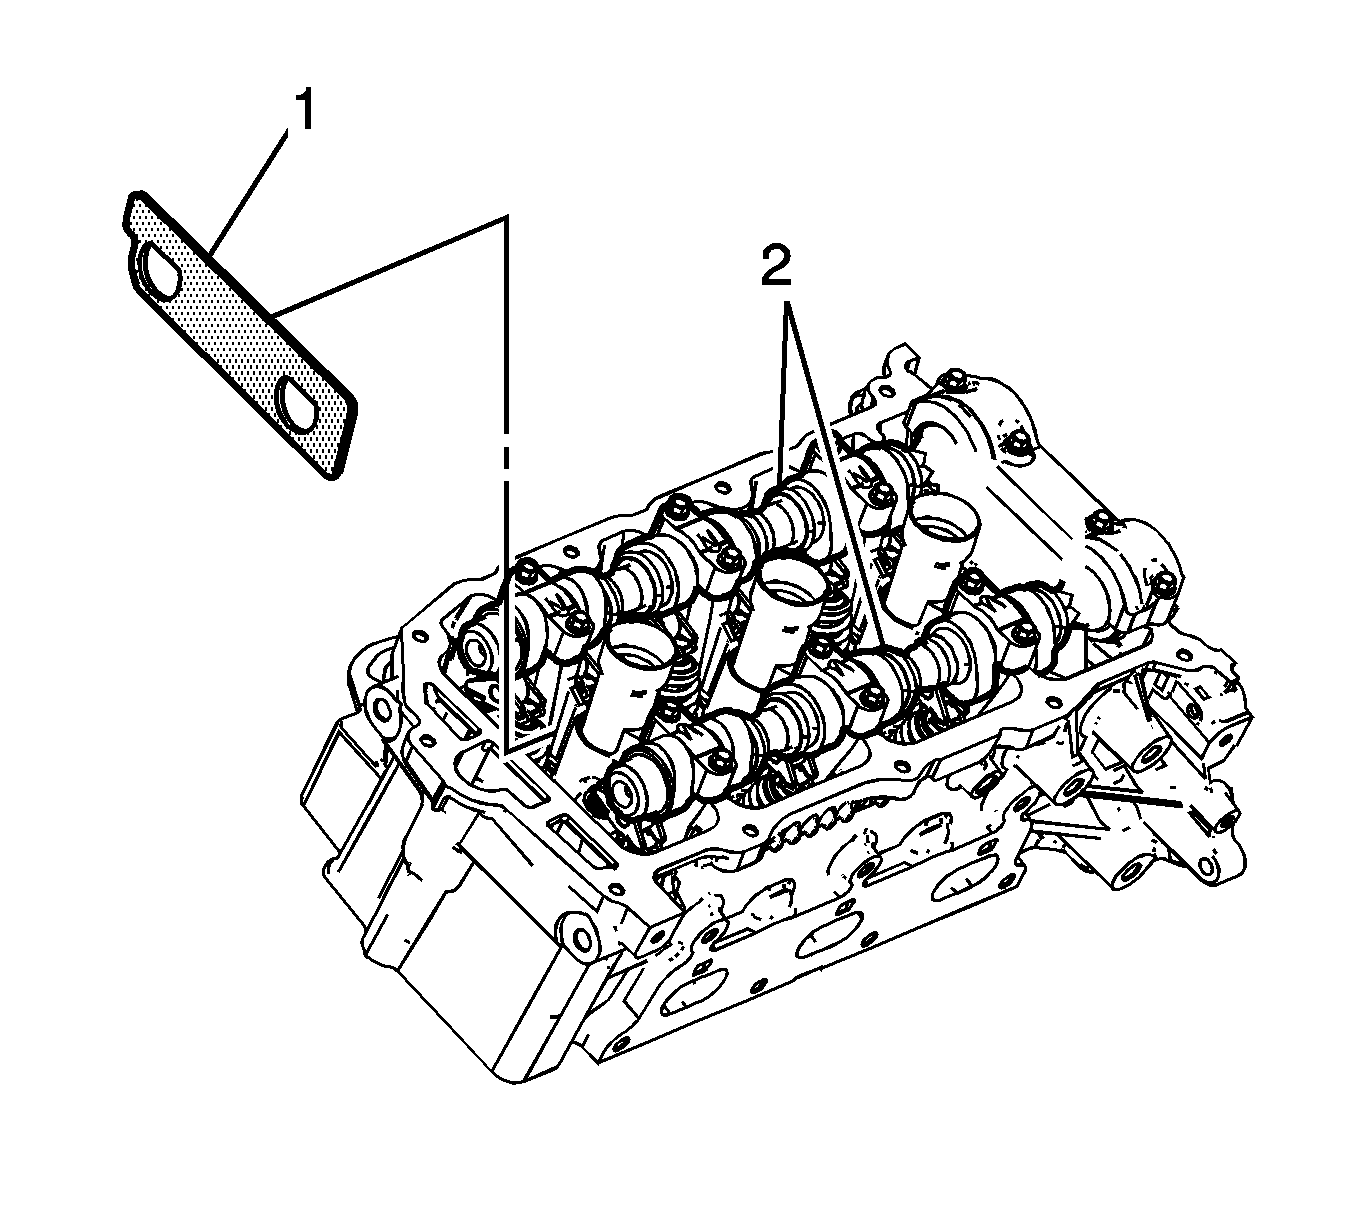
- Remove EN-46105-1 (1) from the bank 1 cylinder head camshafts (2).
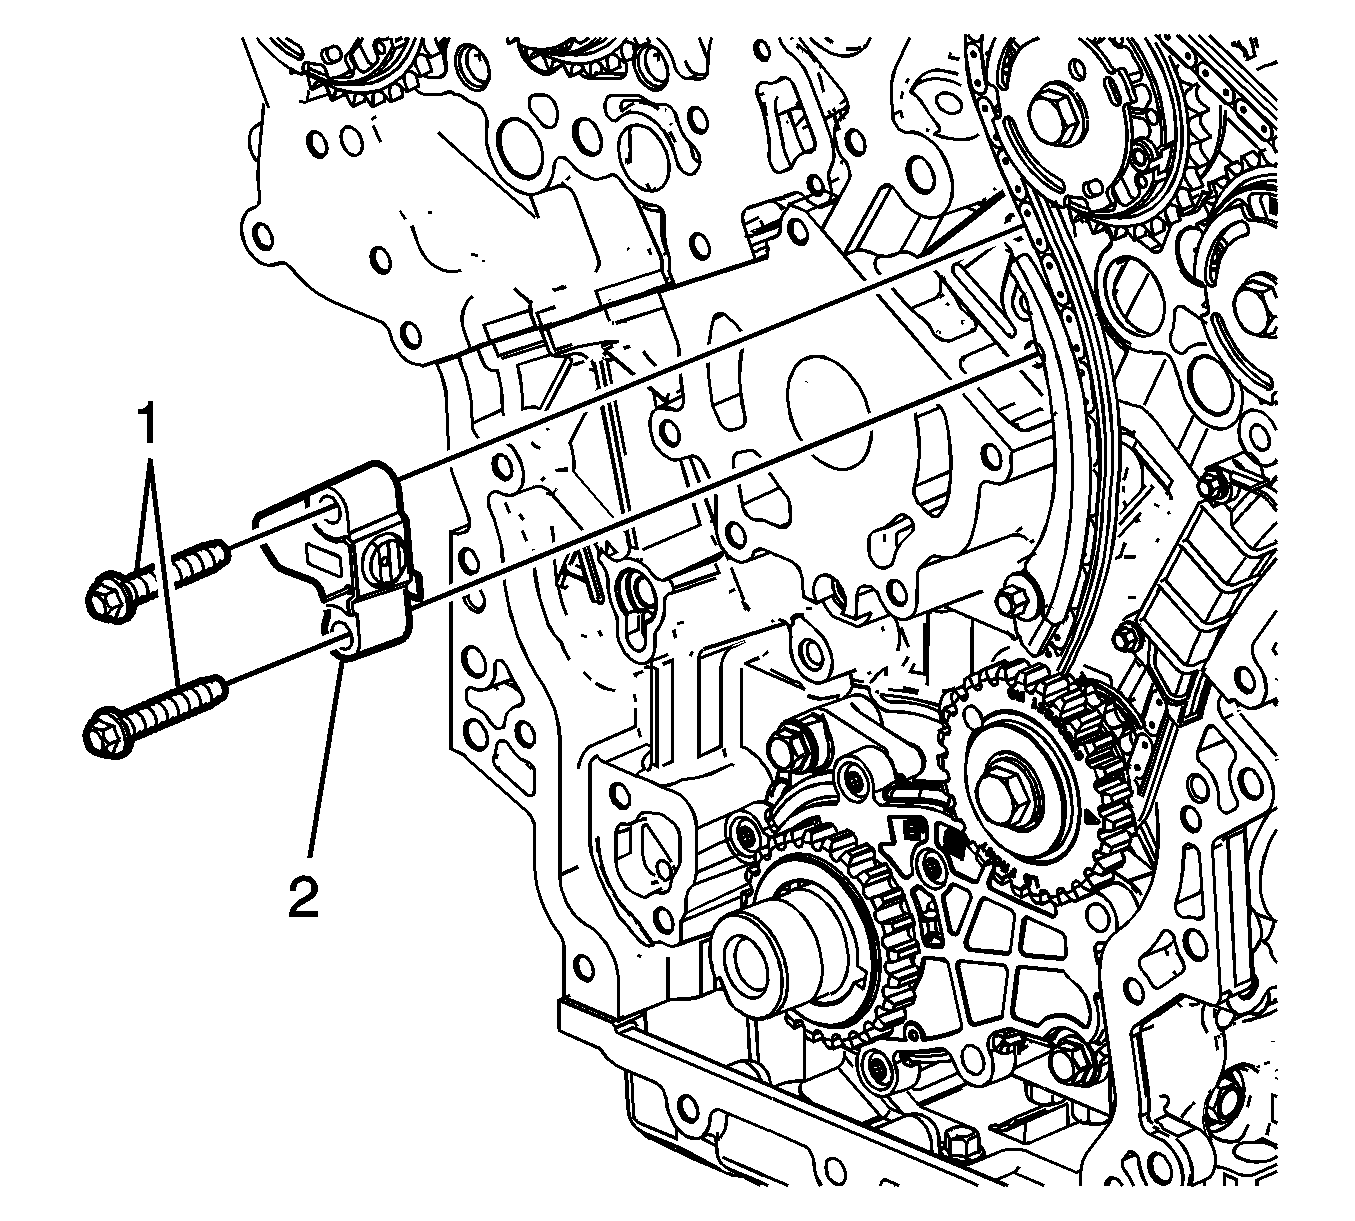
Important: Take care when removing the tensioner bolts. The tensioner plunger is subjected to spring tension and may spring apart during tensioner removal.
Installation Procedure
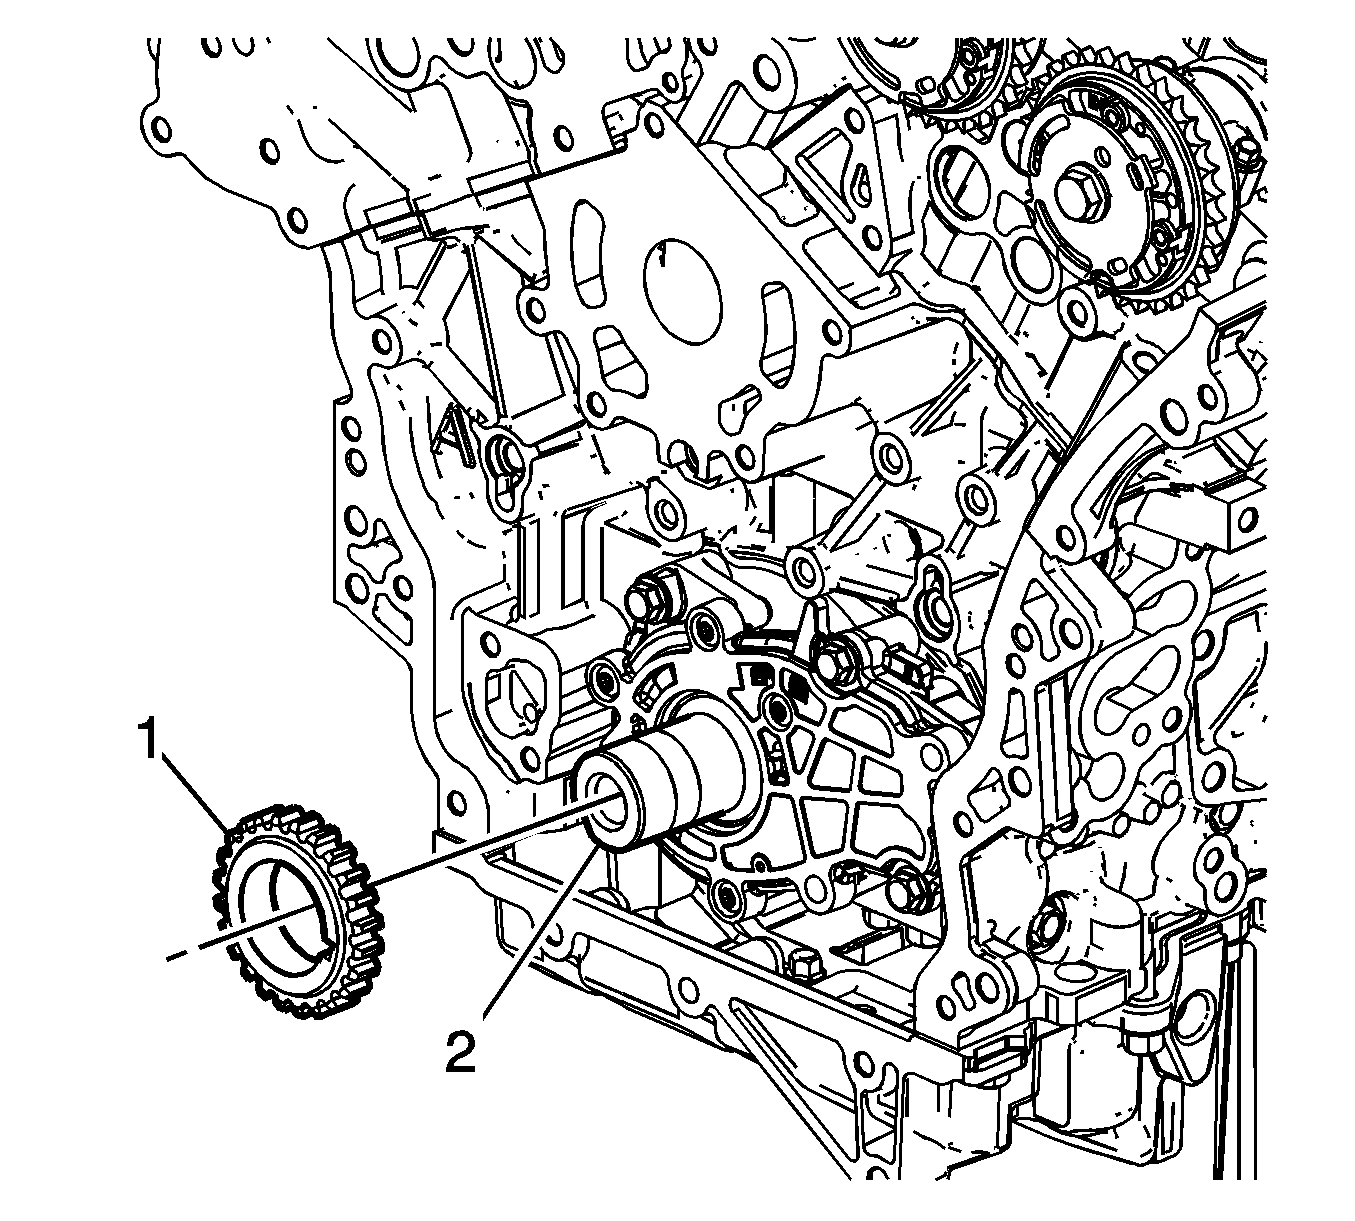
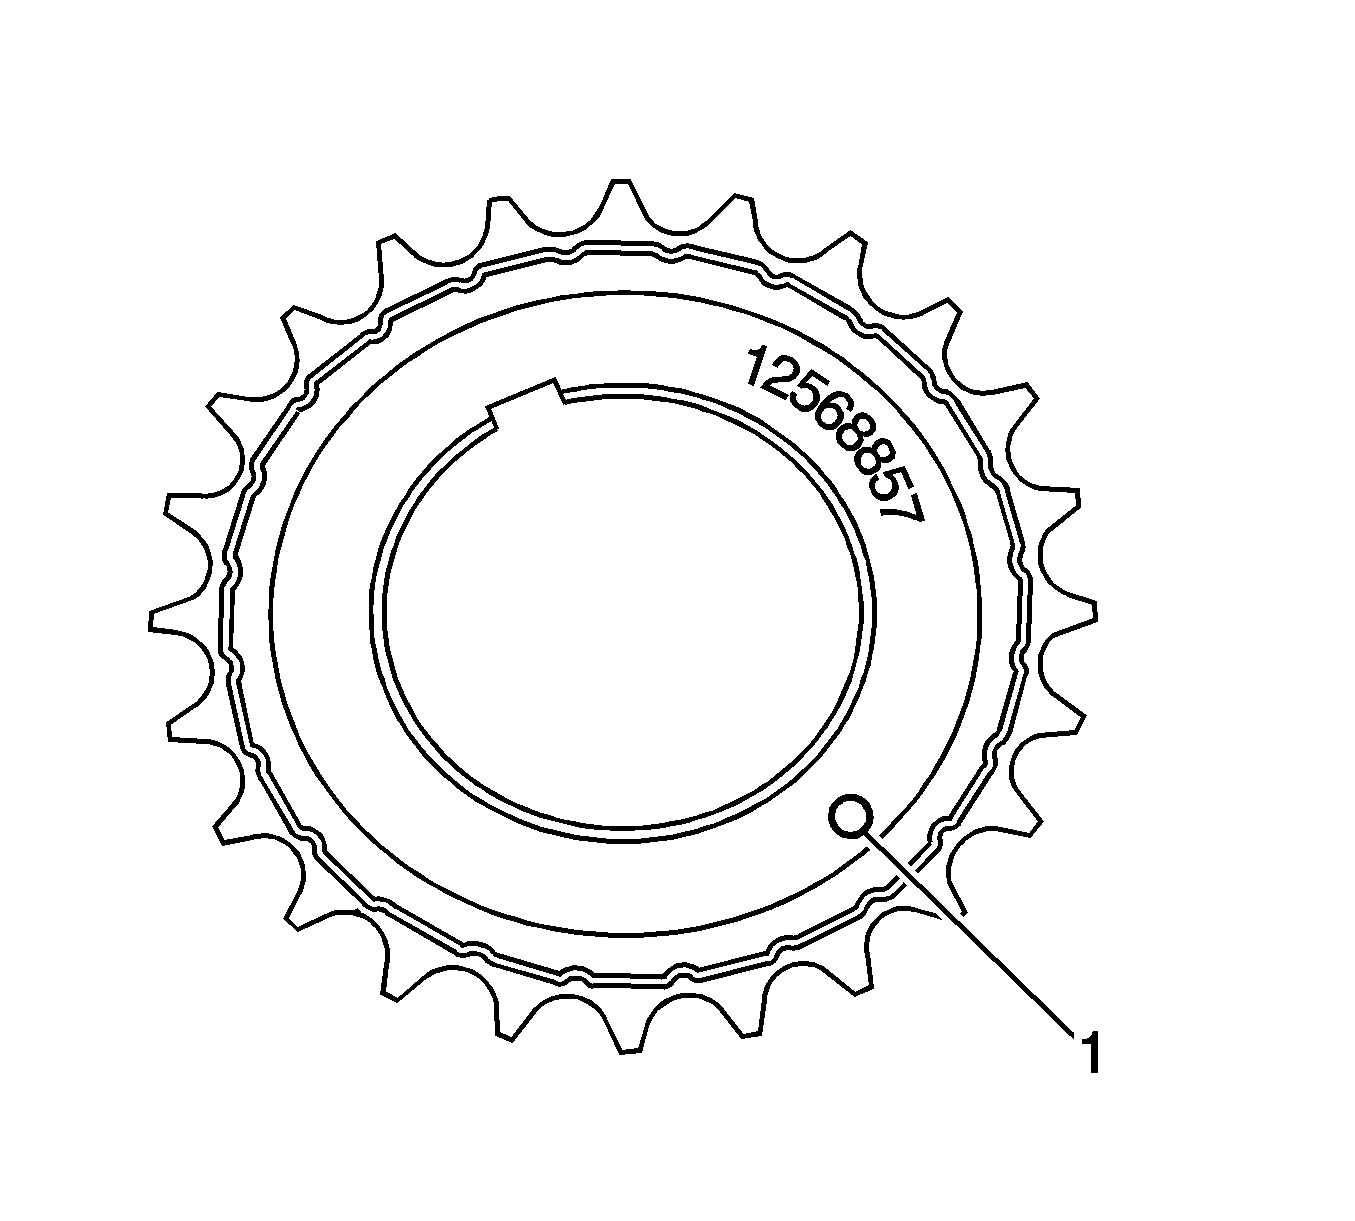
- Install the crankshaft sprocket (1) onto the crankshaft (2) by aligning the keyway to the key on the crankshaft.
- Slide the crankshaft sprocket on the crankshaft until the crankshaft sprocket contacts the step in the crankshaft.
- Ensure that the crankshaft sprocket is installed with the timing mark (1) visible.
- In order to install EN 46105 onto the camshafts, rotate the camshafts in an counterclockwise direction. There should be no need to rotate the camshaft more than 45 degrees.
- Install EN-46105-1 (1) onto the rear of the bank 2 cylinder head camshafts (2), and EN-46105-2 onto the rear of the bank 1 cylinder head camshafts.
- Ensure that EN 46105 is fully seated onto the camshafts.
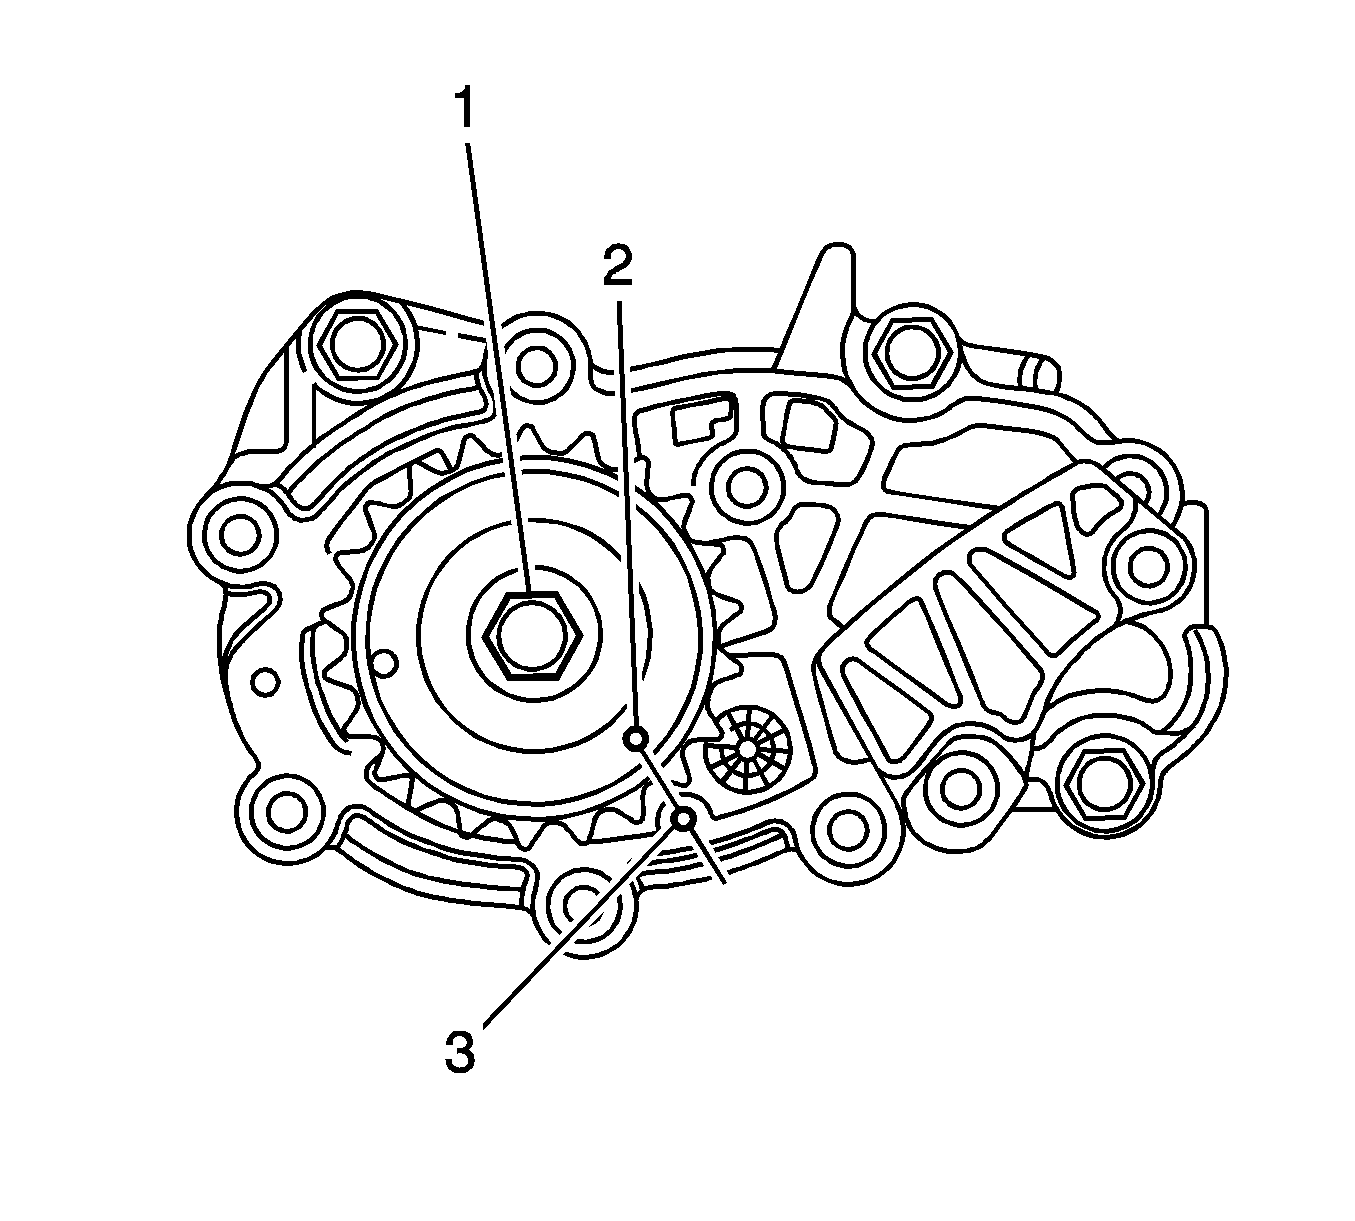
- Using EN 46111 (1), rotate the crankshaft in a clockwise direction until the crankshaft sprocket timing mark (2) is aligned with the indexing mark (3) on the oil pump housing.
- Install the bank 2 secondary timing chain (1) aligning the chain.
- Wrap the secondary timing chain around both bank 2 actuator drive sprockets.
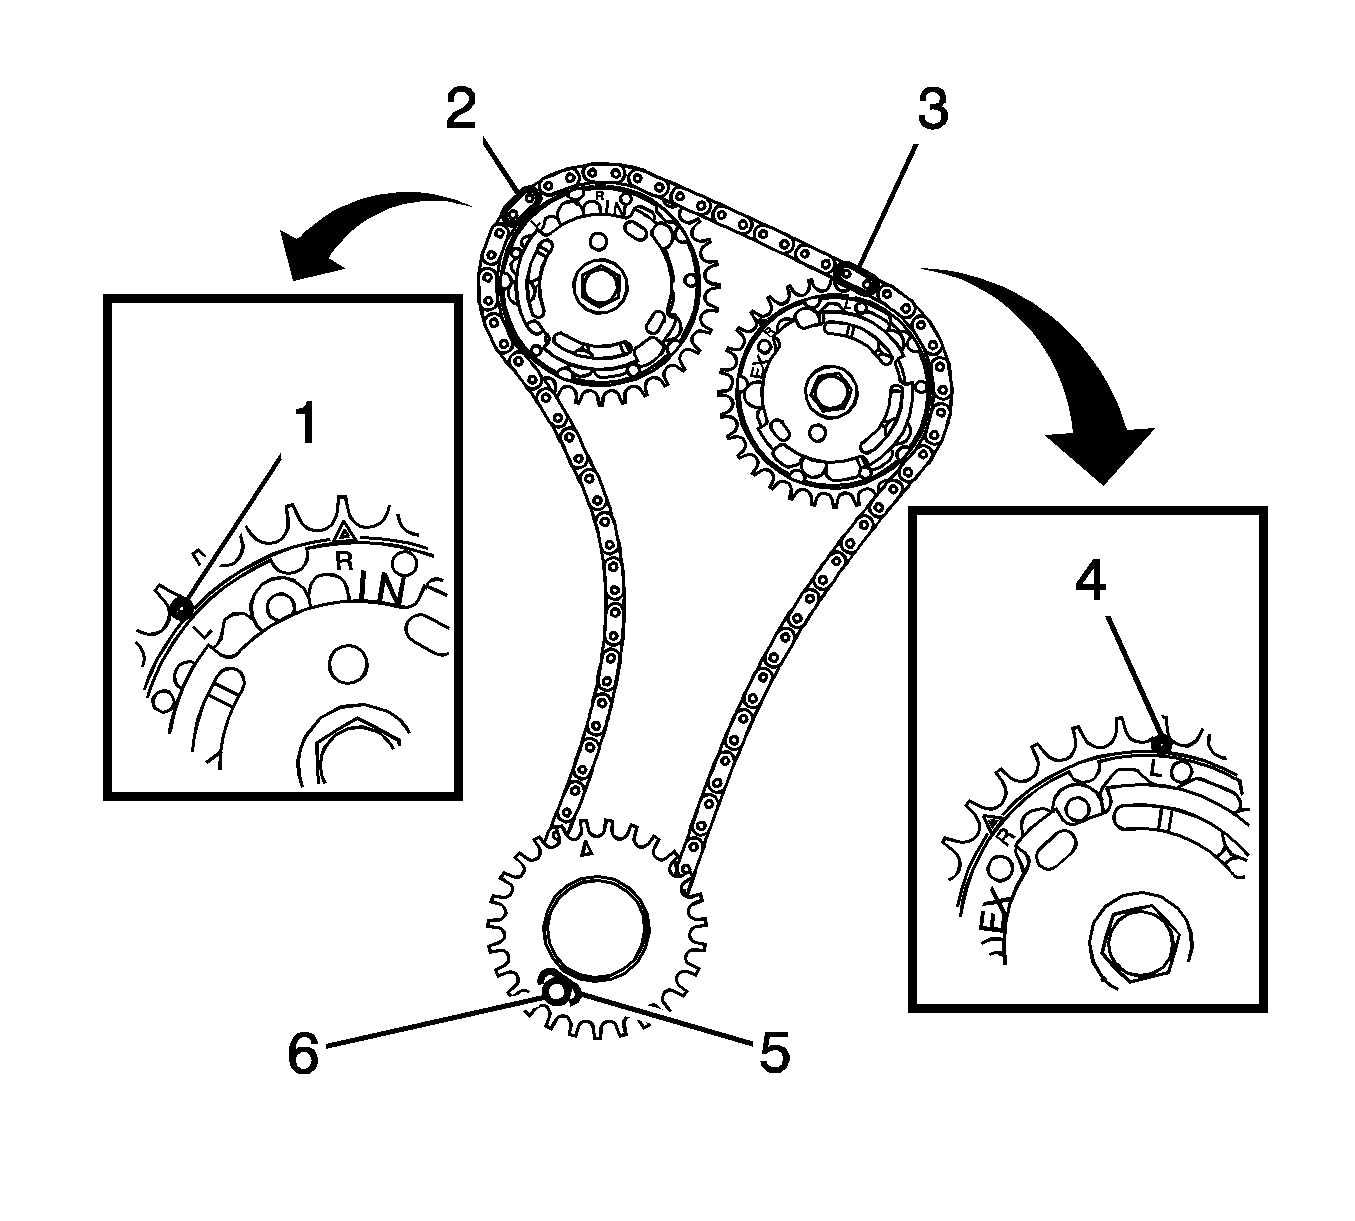
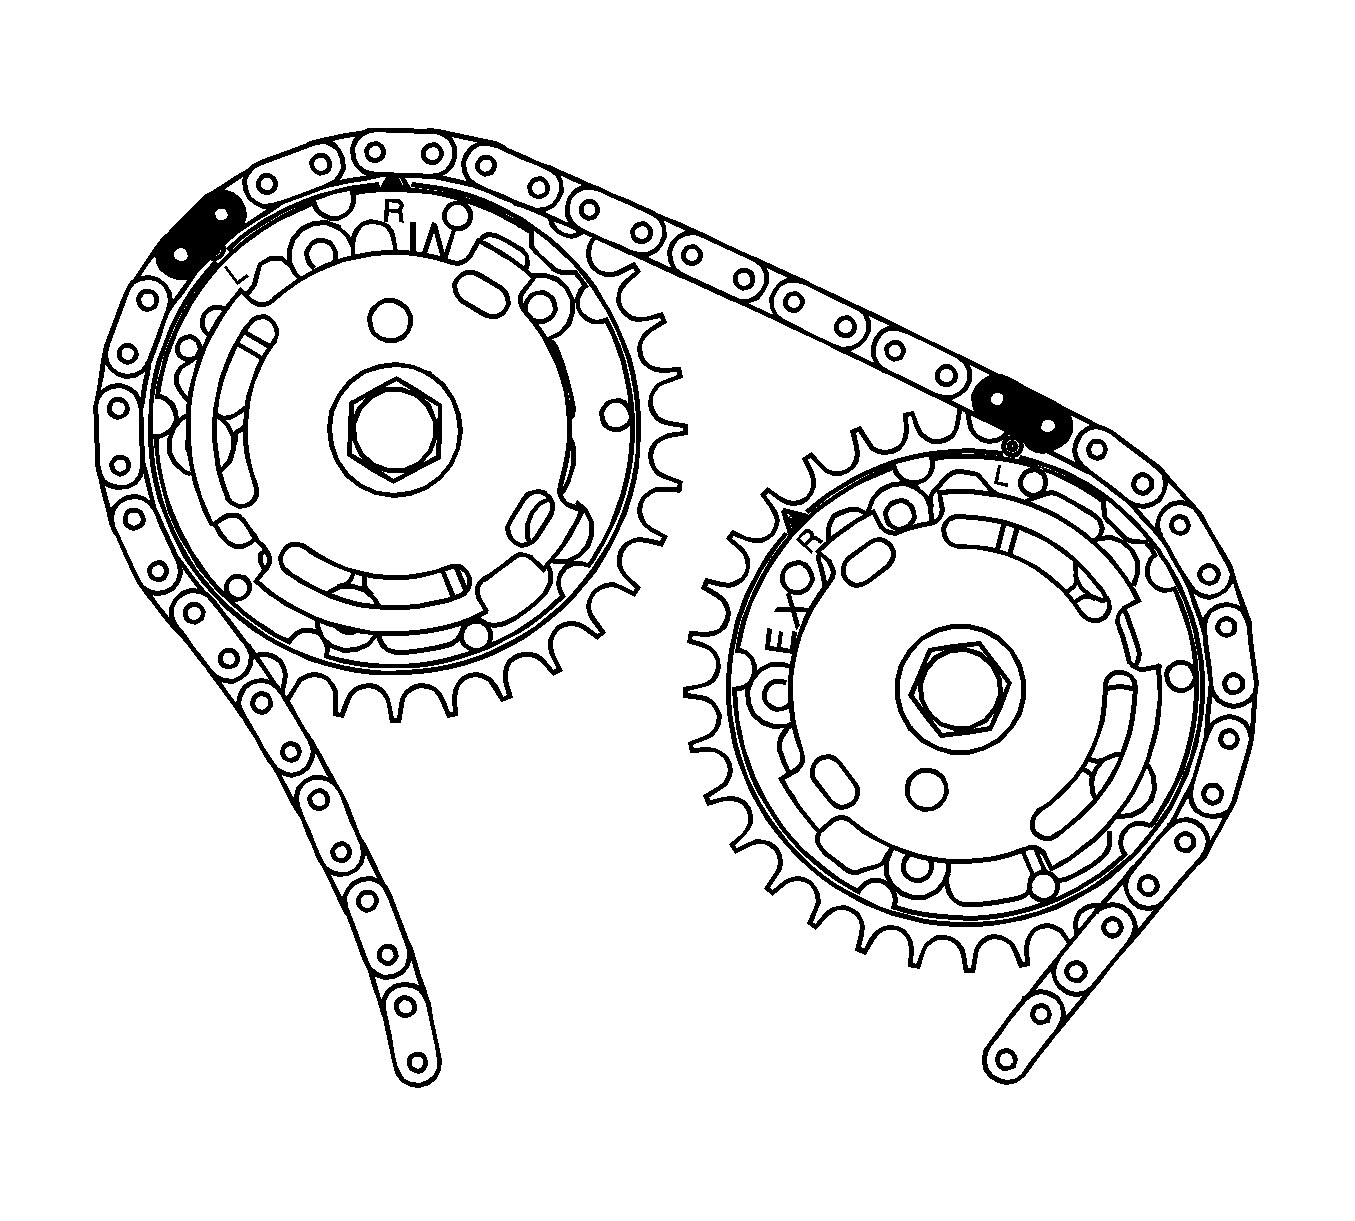
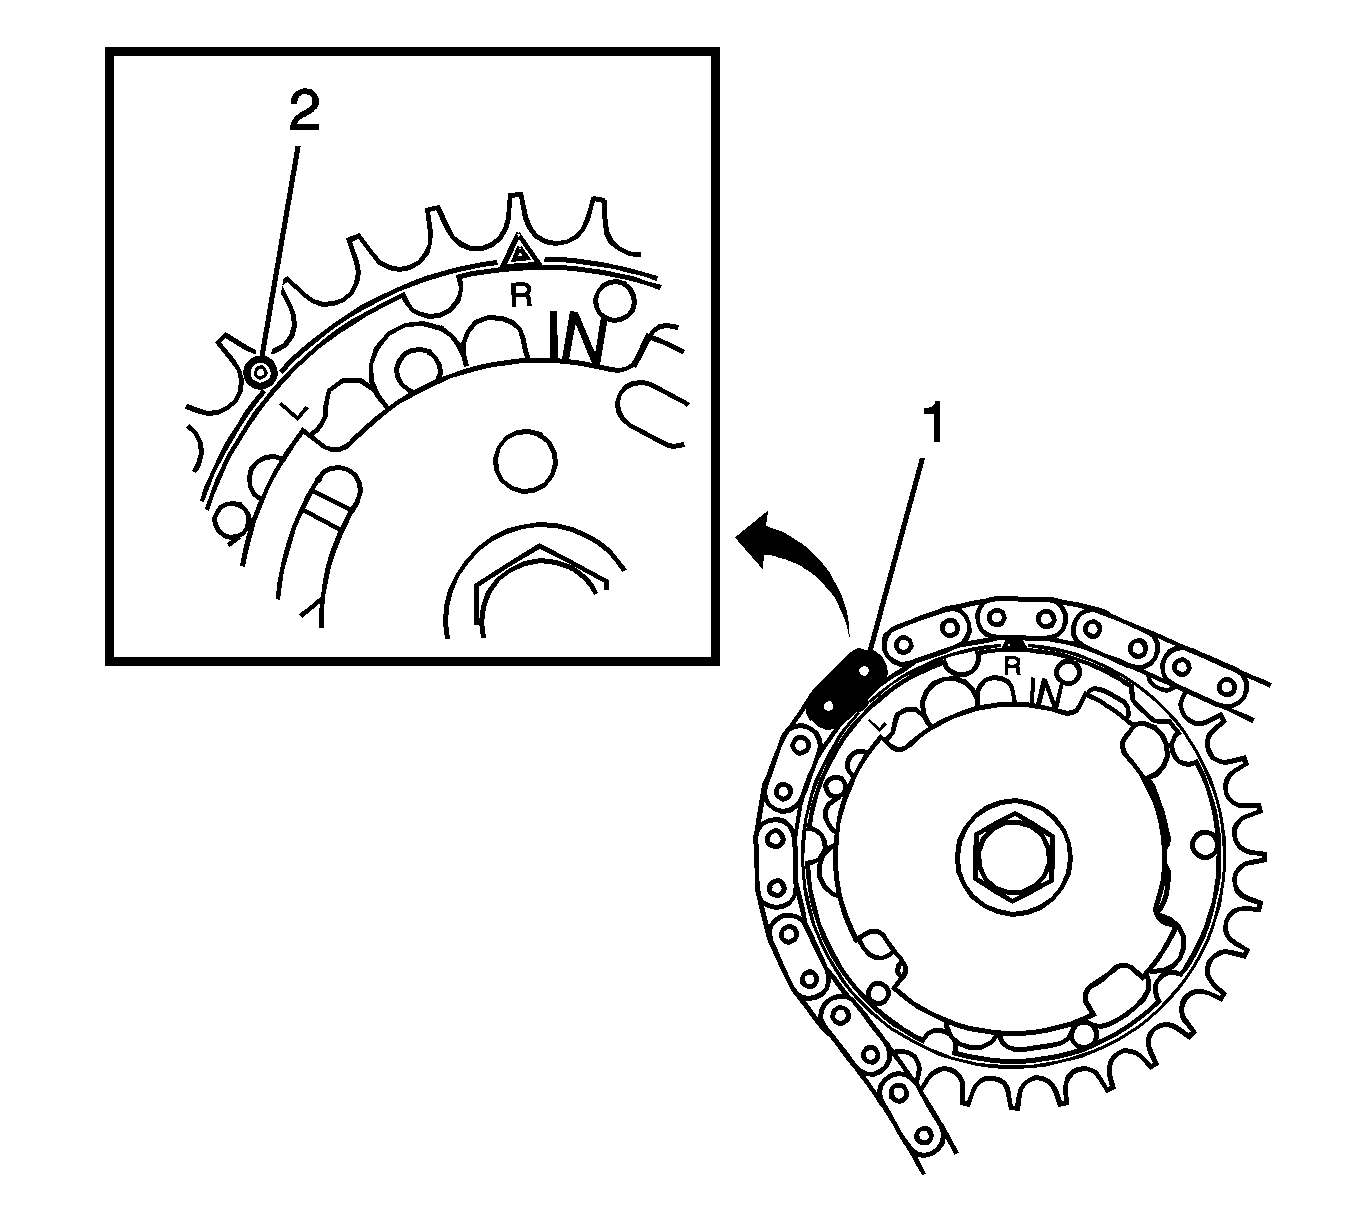
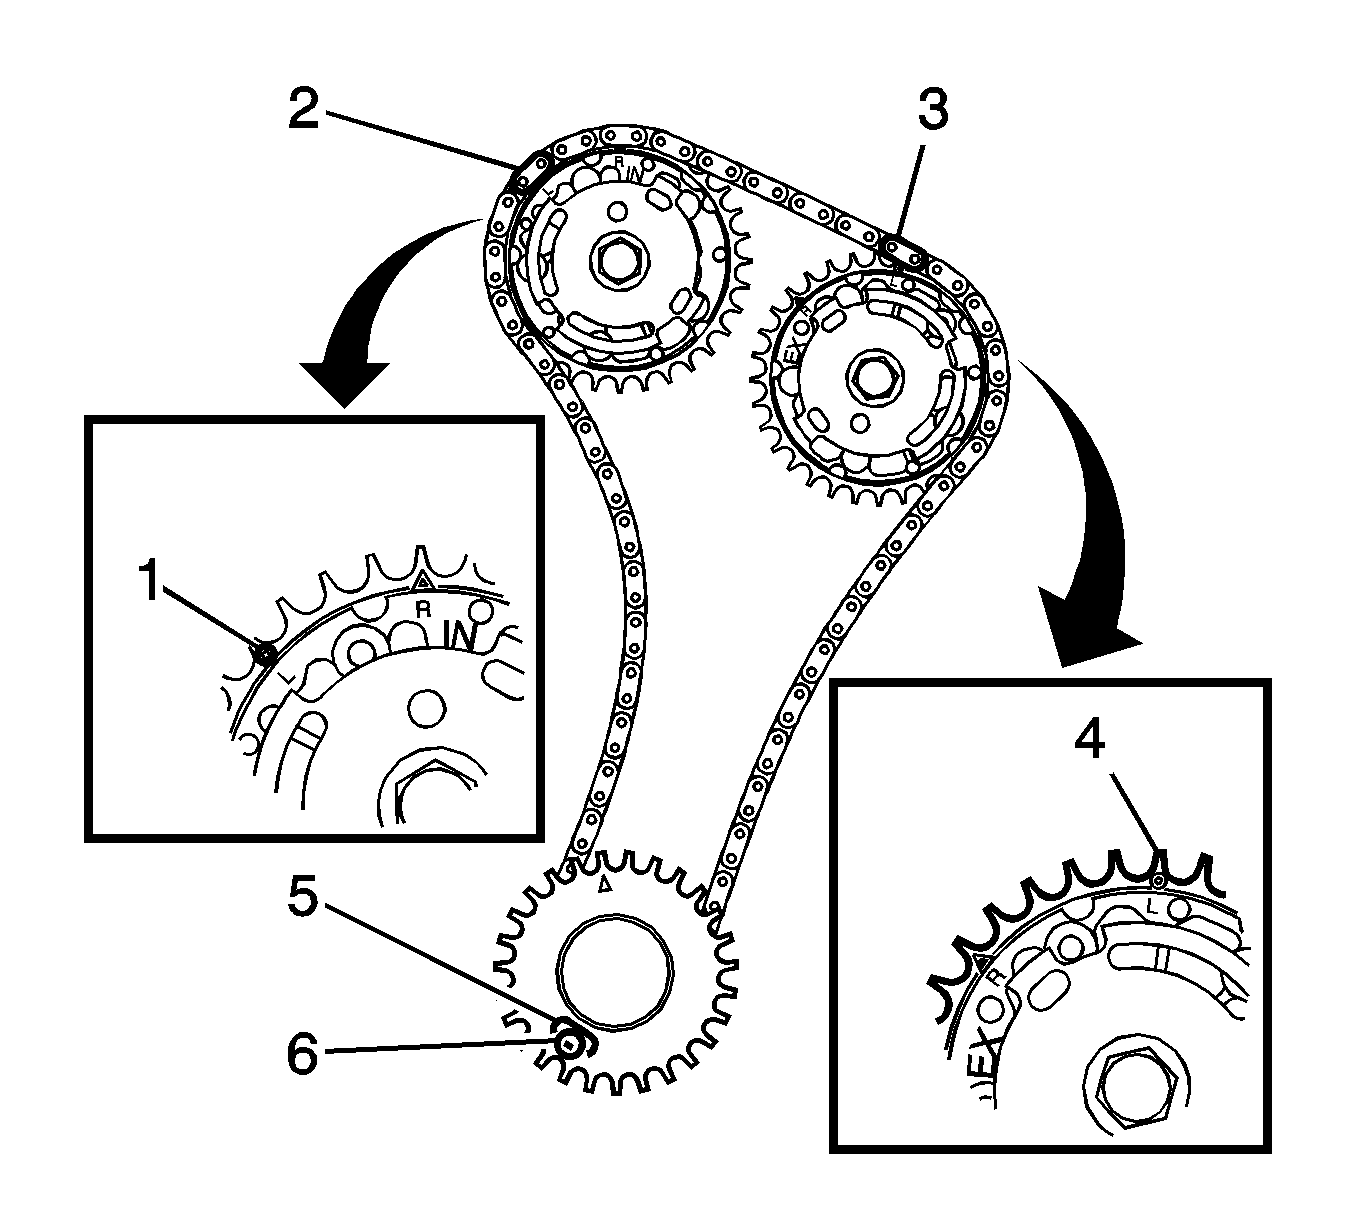
- Ensure there are two bright links located on top of each of the camshaft actuator sprockets.
- Align the bright plated timing chain link (1) with the bank 2 exhaust camshaft position actuator sprocket alignment circle mark (2).
- Align the bright plated timing chain link (1) with the intake camshaft position actuator sprocket alignment circle mark (2).
- Ensure the bank 2 camshaft intermediate driveshaft sprocket is selected and orientated correctly.
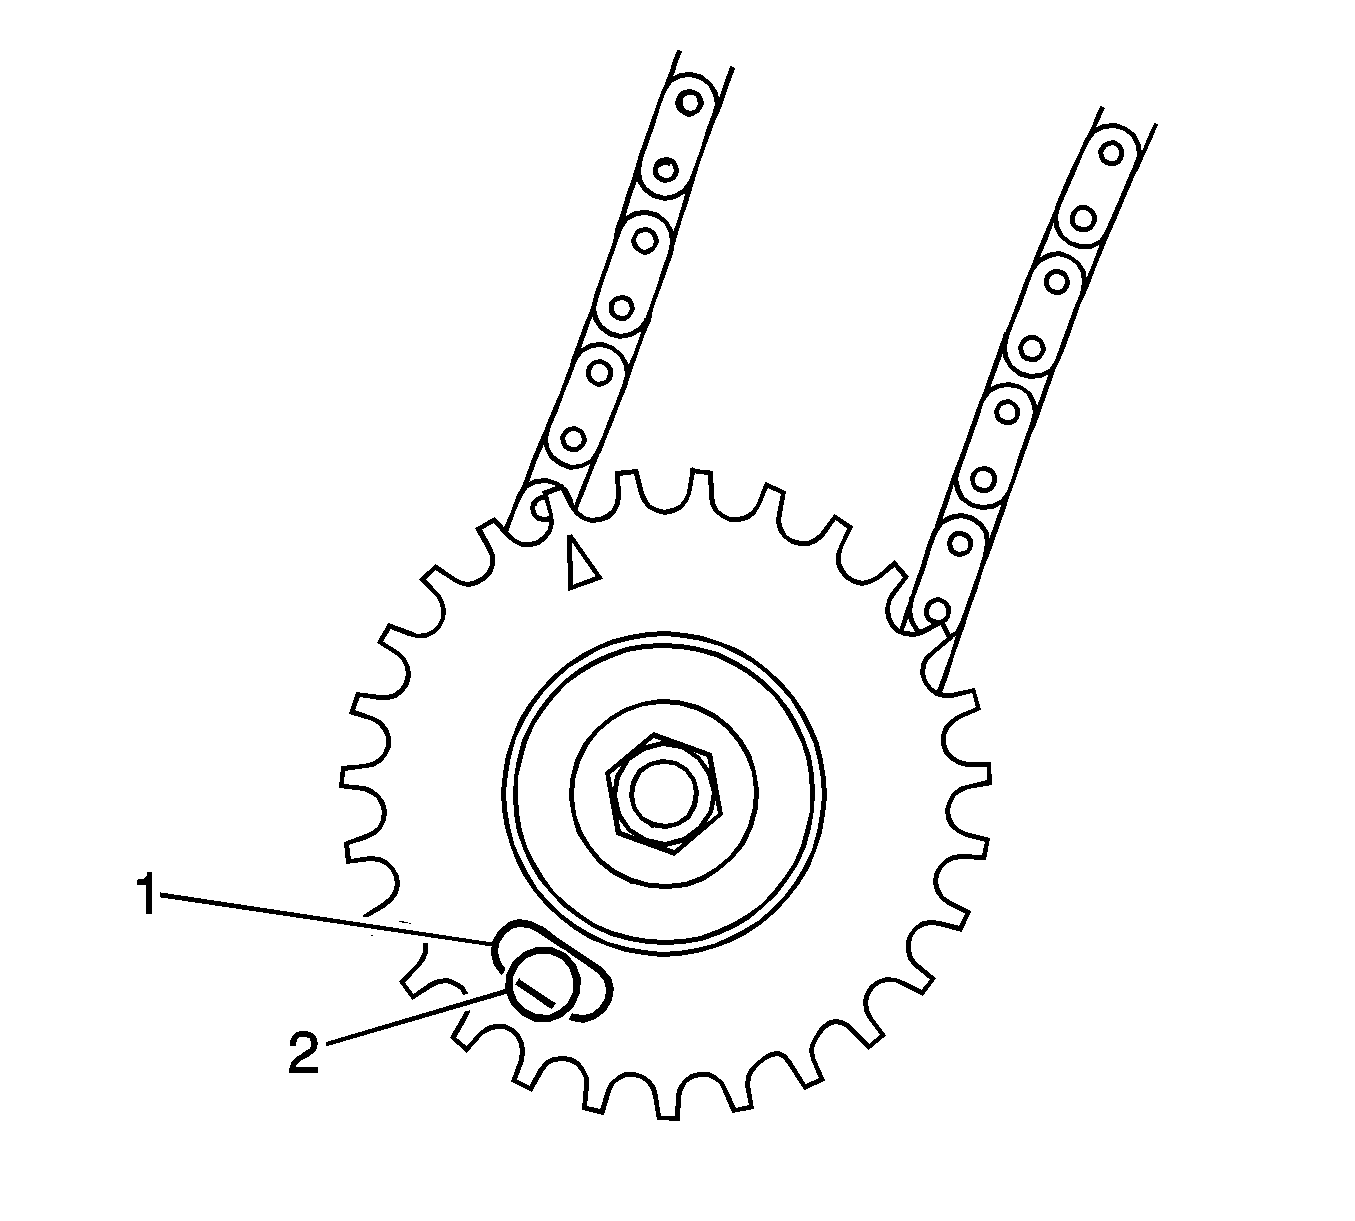
- Place the bank 2 secondary timing chain around the left-hand camshaft intermediate driveshaft inner sprocket, with the bright plated timing chain link (1) aligned with the access hole (2) in the outer sprocket.
- Install the bank 2 camshaft intermediate driveshaft sprocket to the cylinder block.
- Verify the Bank 2 secondary timing chain timing mark alignments (1-6).
- Ensure the bank 2 secondary timing chain guide is selected and orientated correctly.
- Install the bank 2 secondary timing chain guide (1).
- Ensure the bank 2 secondary timing chain shoe is selected and orientated correctly.
- Install the bank 2 secondary timing chain shoe (1).
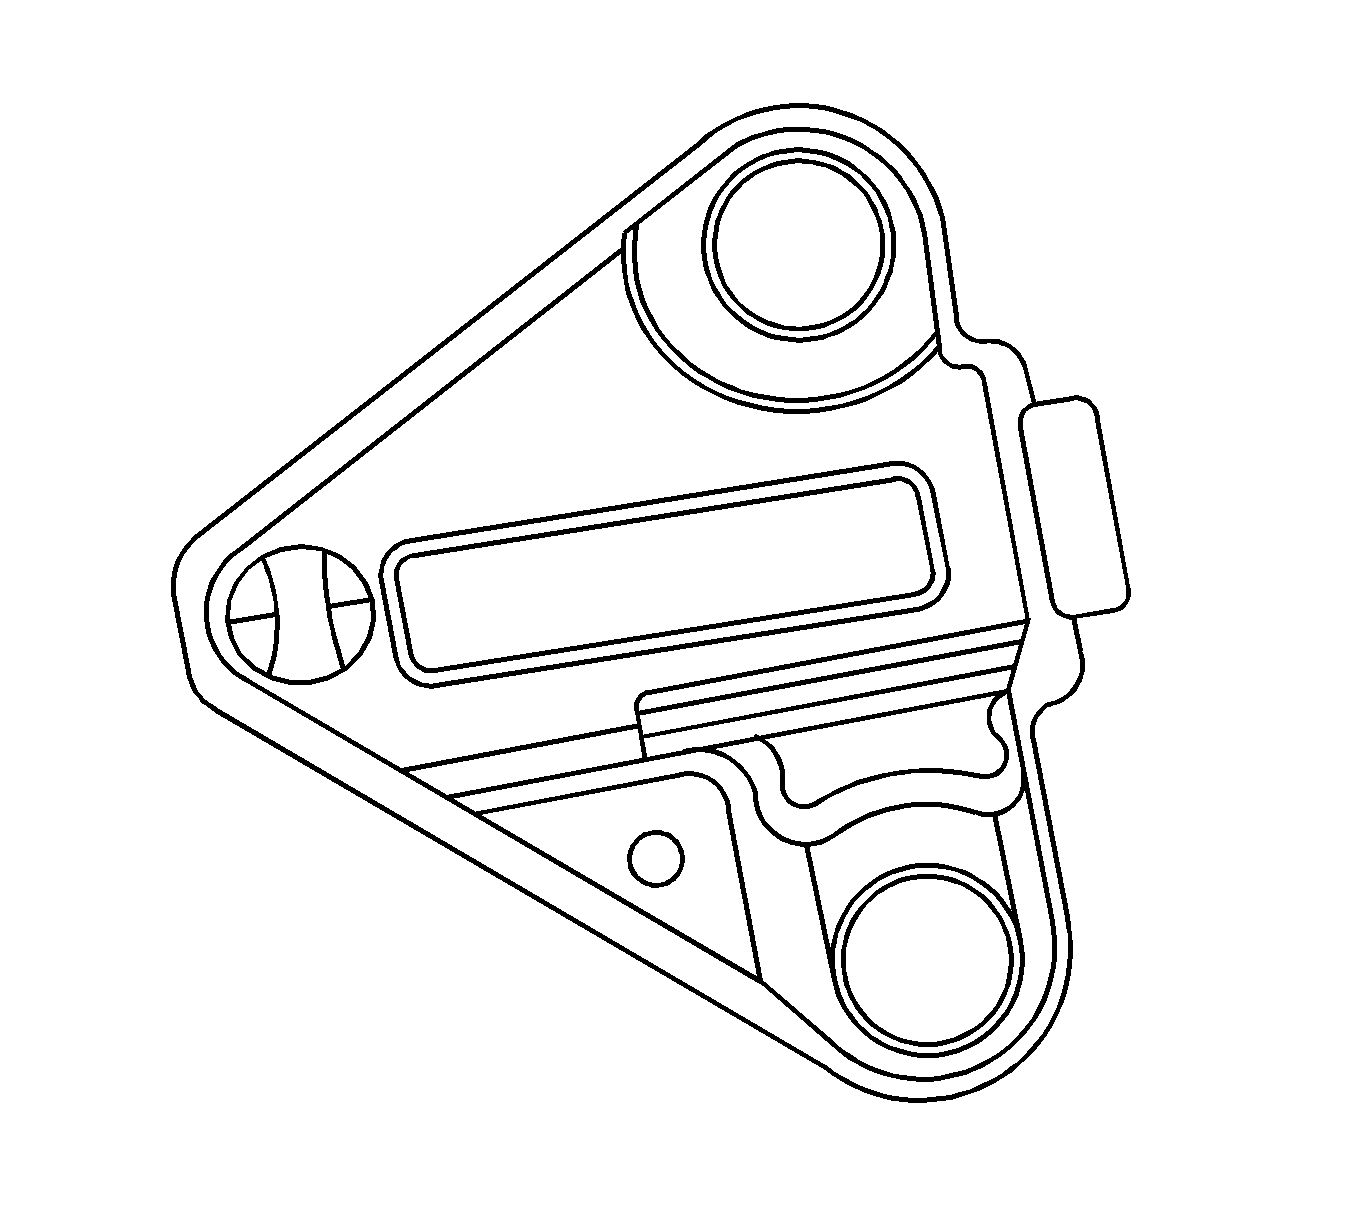
- Ensure the bank 2 secondary timing chain tensioner is selected and orientated correctly.
- Reset the bank 2 secondary timing chain tensioner.
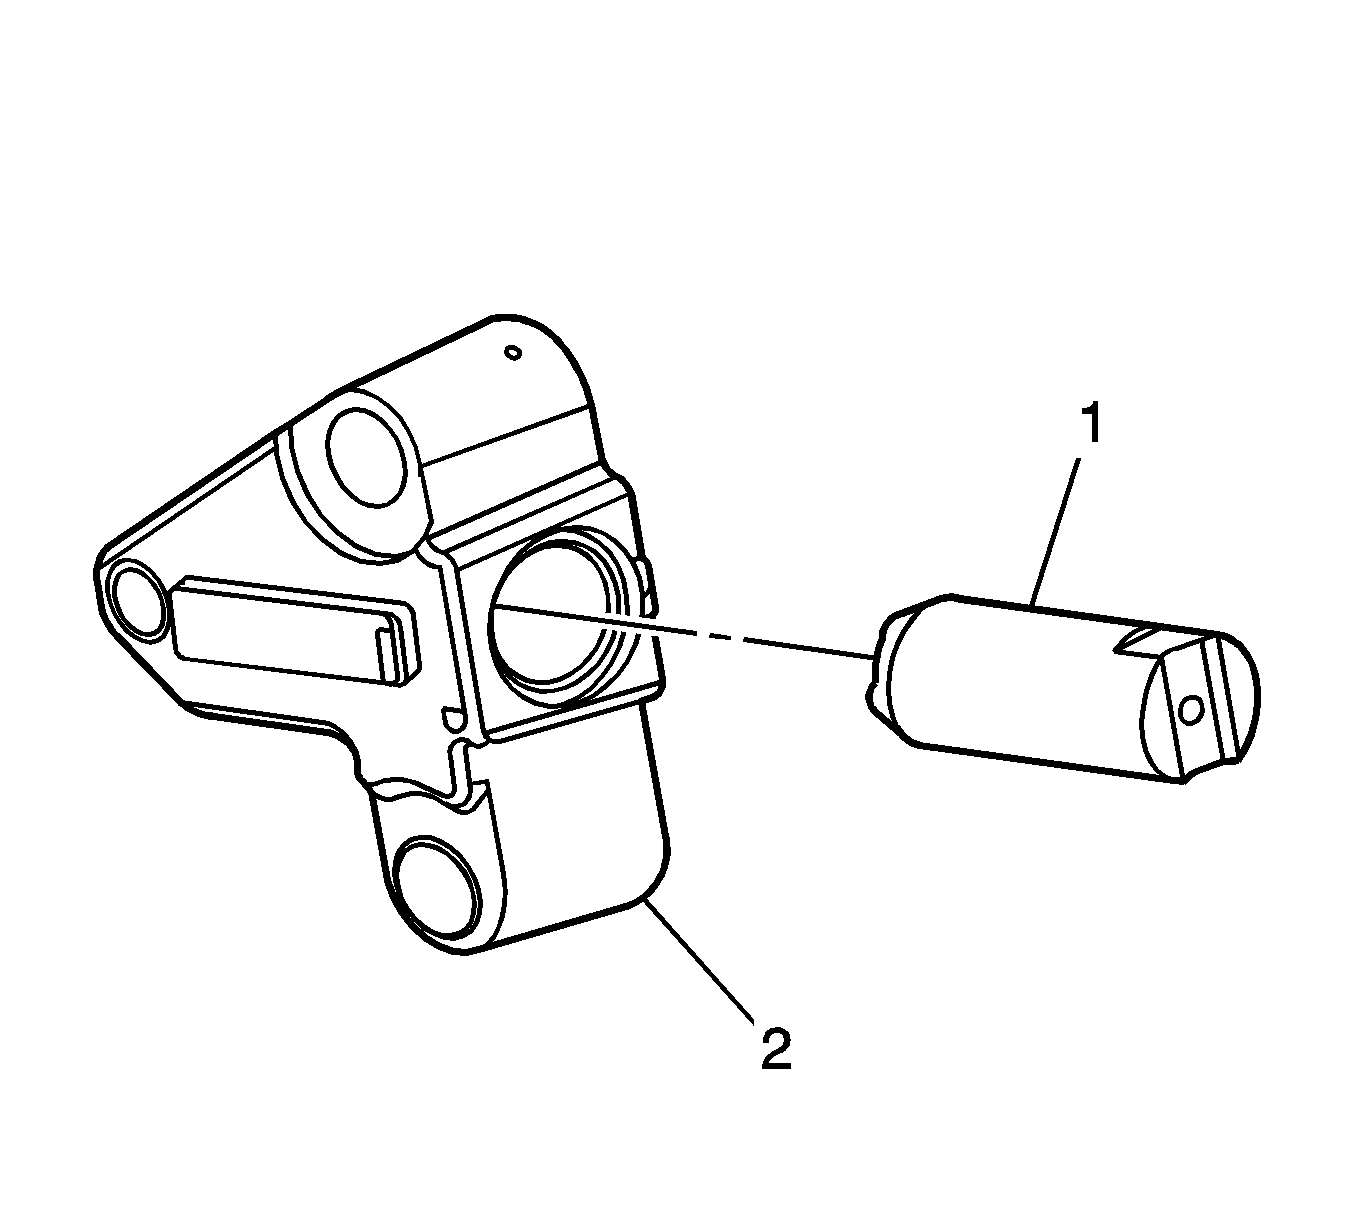
- Install the tensioner shaft (1) into the bank 2 secondary timing chain tensioner body (2).
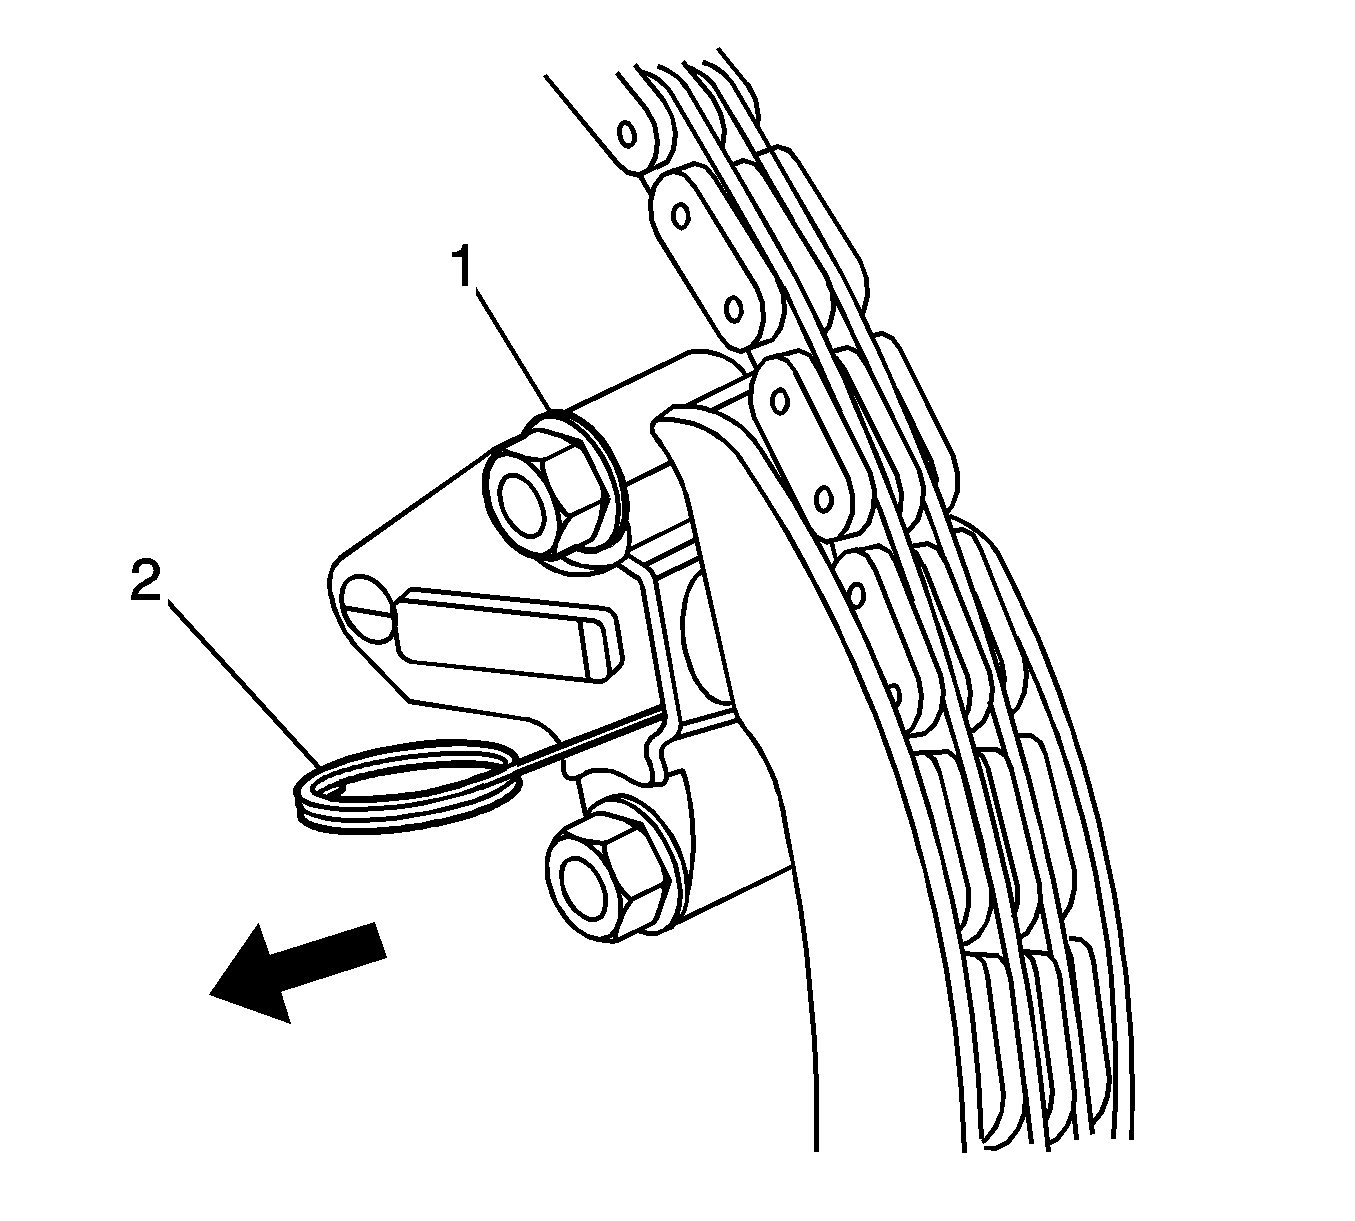
- Compress the tensioner shaft into the body and lock the bank 2 secondary timing chain tensioner by inserting EN 46112 into the access hole in the side of the tensioner body.
- Slowly release pressure on the bank 2 secondary timing chain tensioner. The tensioner should remain compressed.
- Install a new bank 2 secondary timing chain tensioner gasket (1) to the tensioner (2).
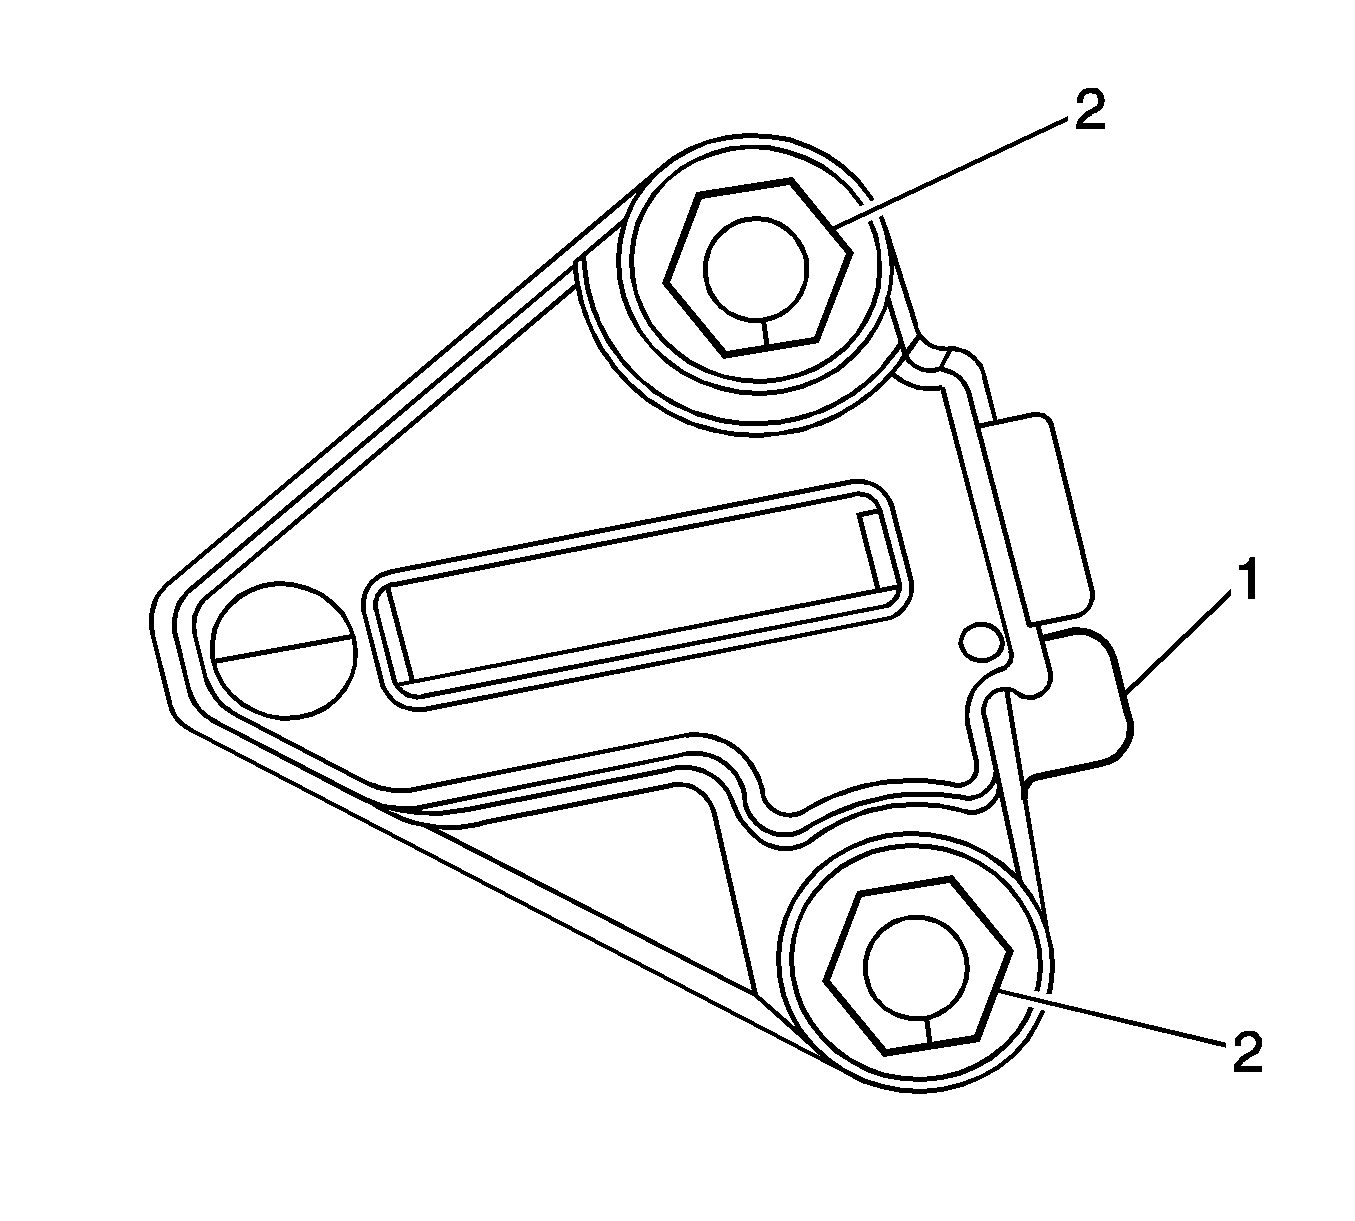
- Install the bank 2 secondary timing chain tensioner bolts through tensioner and gasket.
- Ensure the bank 2 secondary timing chain tensioner mounting surface on the Bank 2 cylinder head does not have any burrs or defects that would affect the sealing of the new gasket.
- Place the bank 2 secondary timing chain tensioner (2) into position and loosely install the bolts (1) to the cylinder head.
- Verify the proper placement of the bank 2 secondary timing chain tensioner gasket tab (1).
- Tighten the bank 2 secondary timing chain tensioner bolts (2).
- Release the bank 2 secondary timing chain tensioner (1) by pulling out EN 46112 (2) and unlocking the tensioner shaft.
- Verify the bank 2 secondary timing chain timing mark alignments (1-6).

Important: All camshafts must be locked in place before installation of any timing chains.
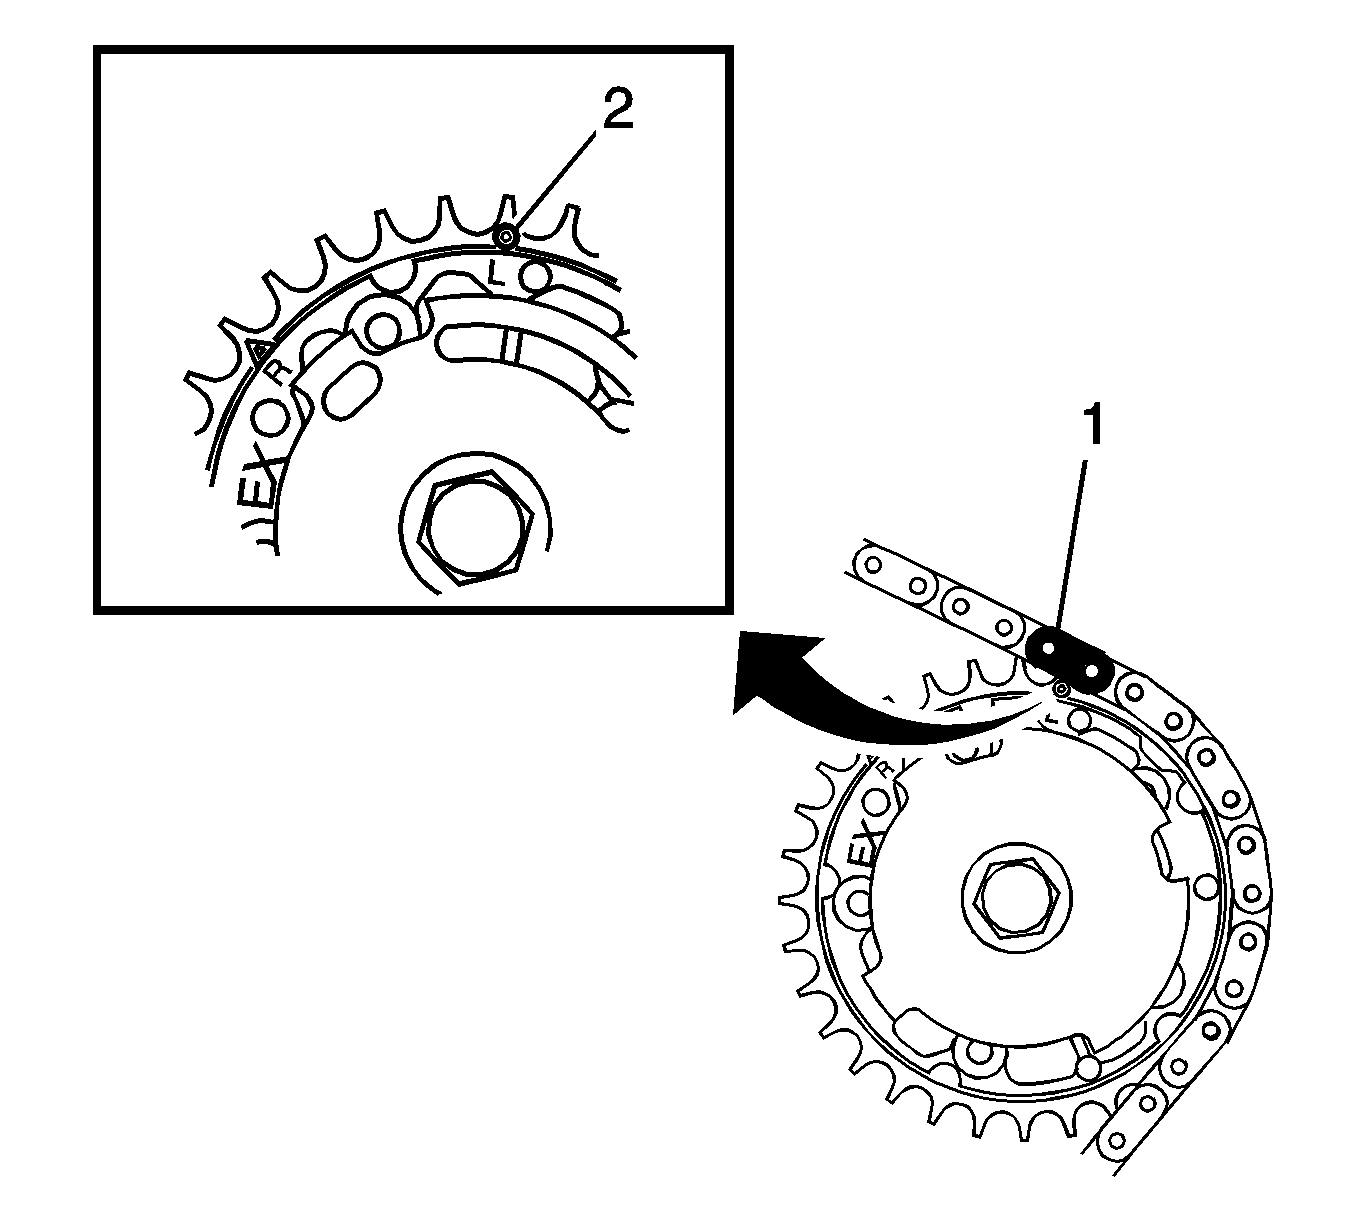
Important: When aligning the bank 2 secondary timing chain to the camshaft actuator sprockets, ensure the circular timing marks on the sprocket are used, NOT the triangular mark.
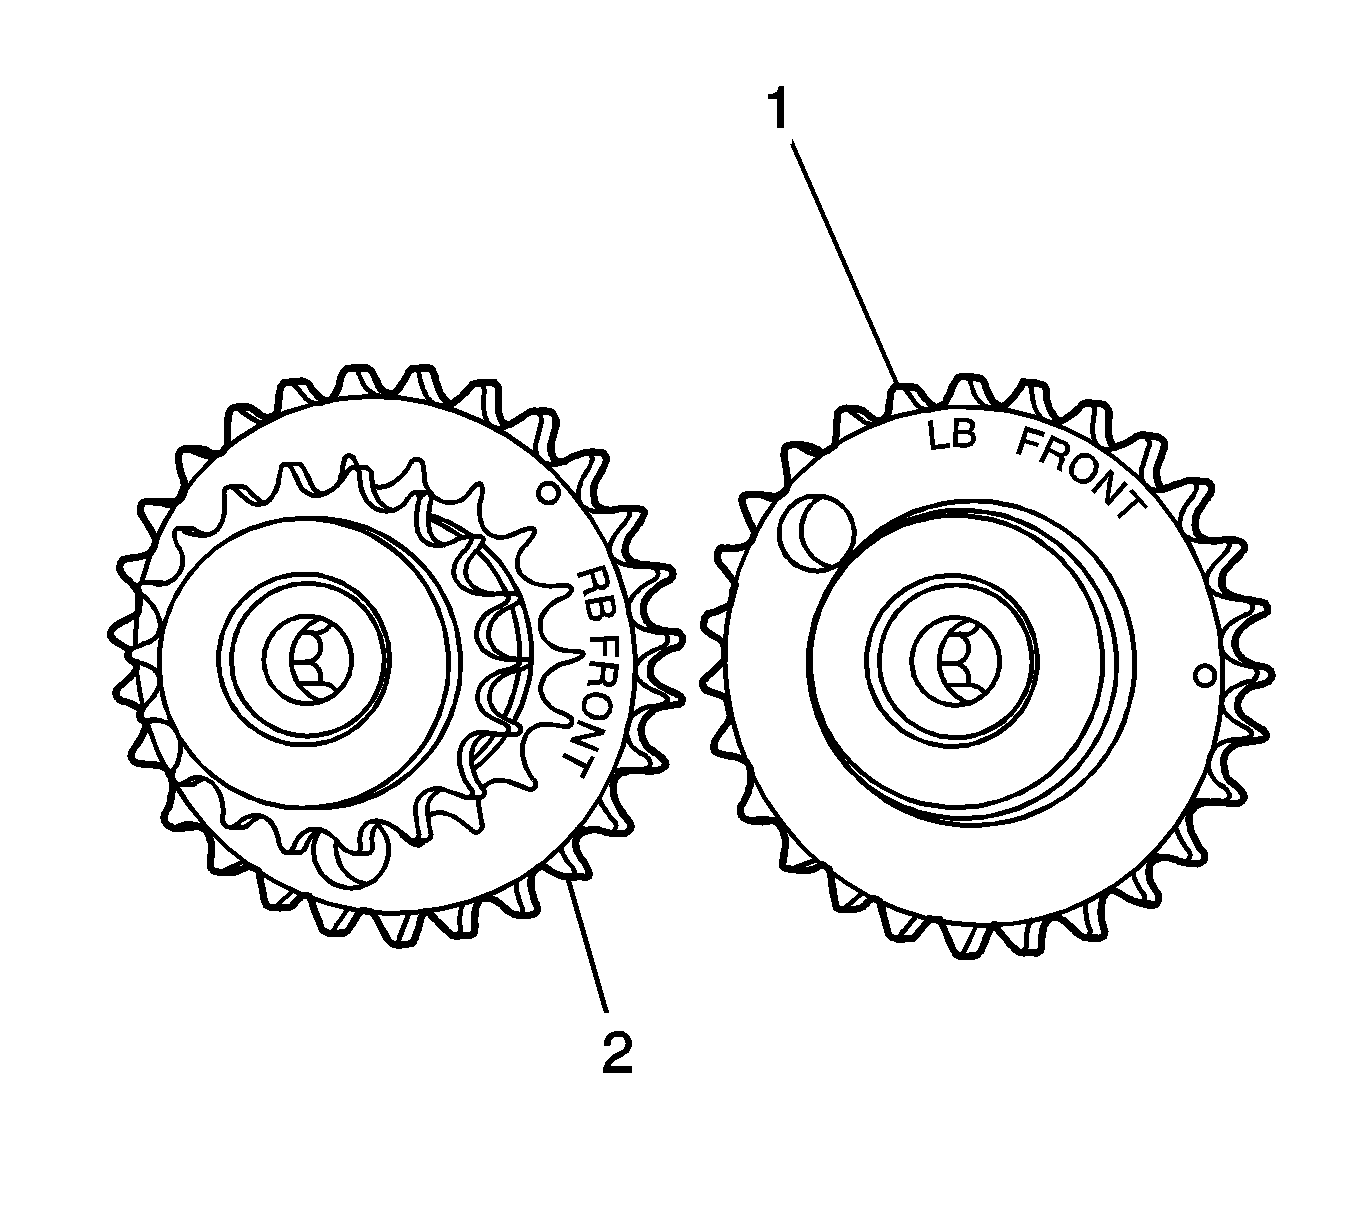
Important: The bank 2 camshaft intermediate driveshaft sprocket (1) is marked with the letters LB and ’FRONT’, and the bank 1 sprocket (2) is marked with the letters RB and ’FRONT’ Ensure the correct sprocket is used and the ’FRONT’ text is facing forwards when installed.
Notice: Refer to Fastener Notice in the Preface section.
Tighten
Tighten the camshaft intermediate driveshaft sprocket attaching bolt (1) to 66 N·m (49 lb ft).
Important: The bank 2 secondary timing chain guide is marked with the letters LH. Ensure the correct shoe is used when installing to the bank 2 side in this procedure and that the letters ’LH" are facing the front of the vehicle when installed.

Tighten
Tighten the secondary timing chain guide attaching bolt to 23 N·m (17 lb ft).
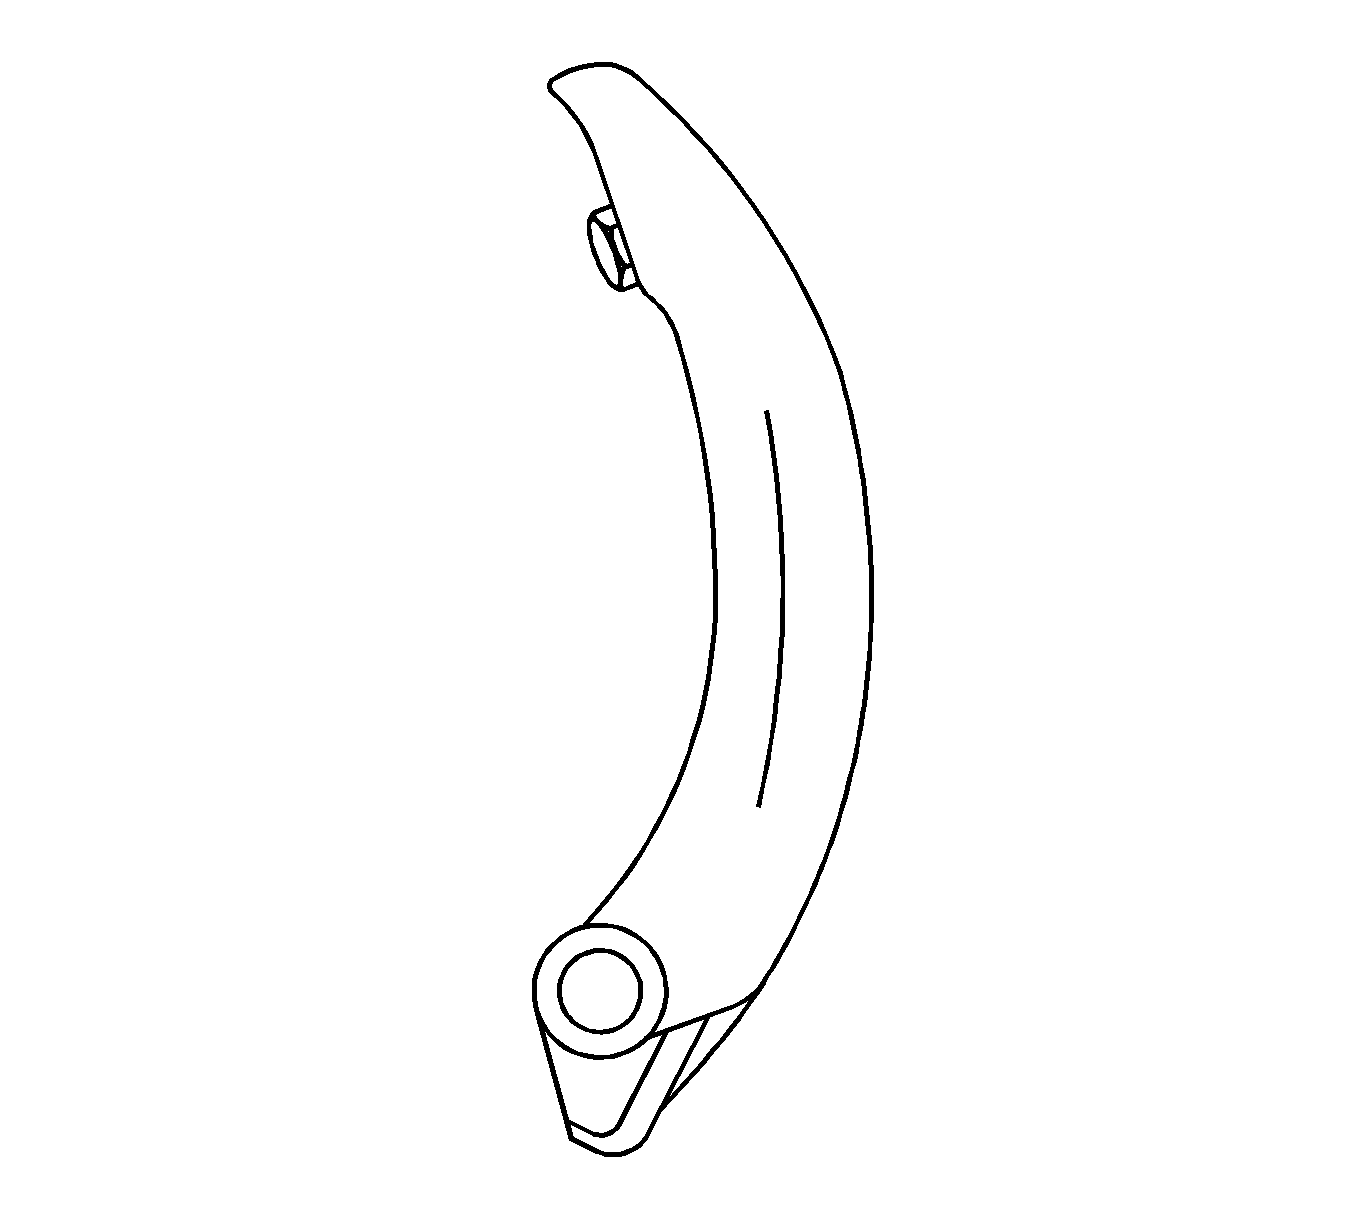
Important: The bank 2 secondary timing chain shoe (2) is marked with the letters LH on the back face of the timing chain shoe. Ensure the correct shoe is used when installing to the bank 2 side.
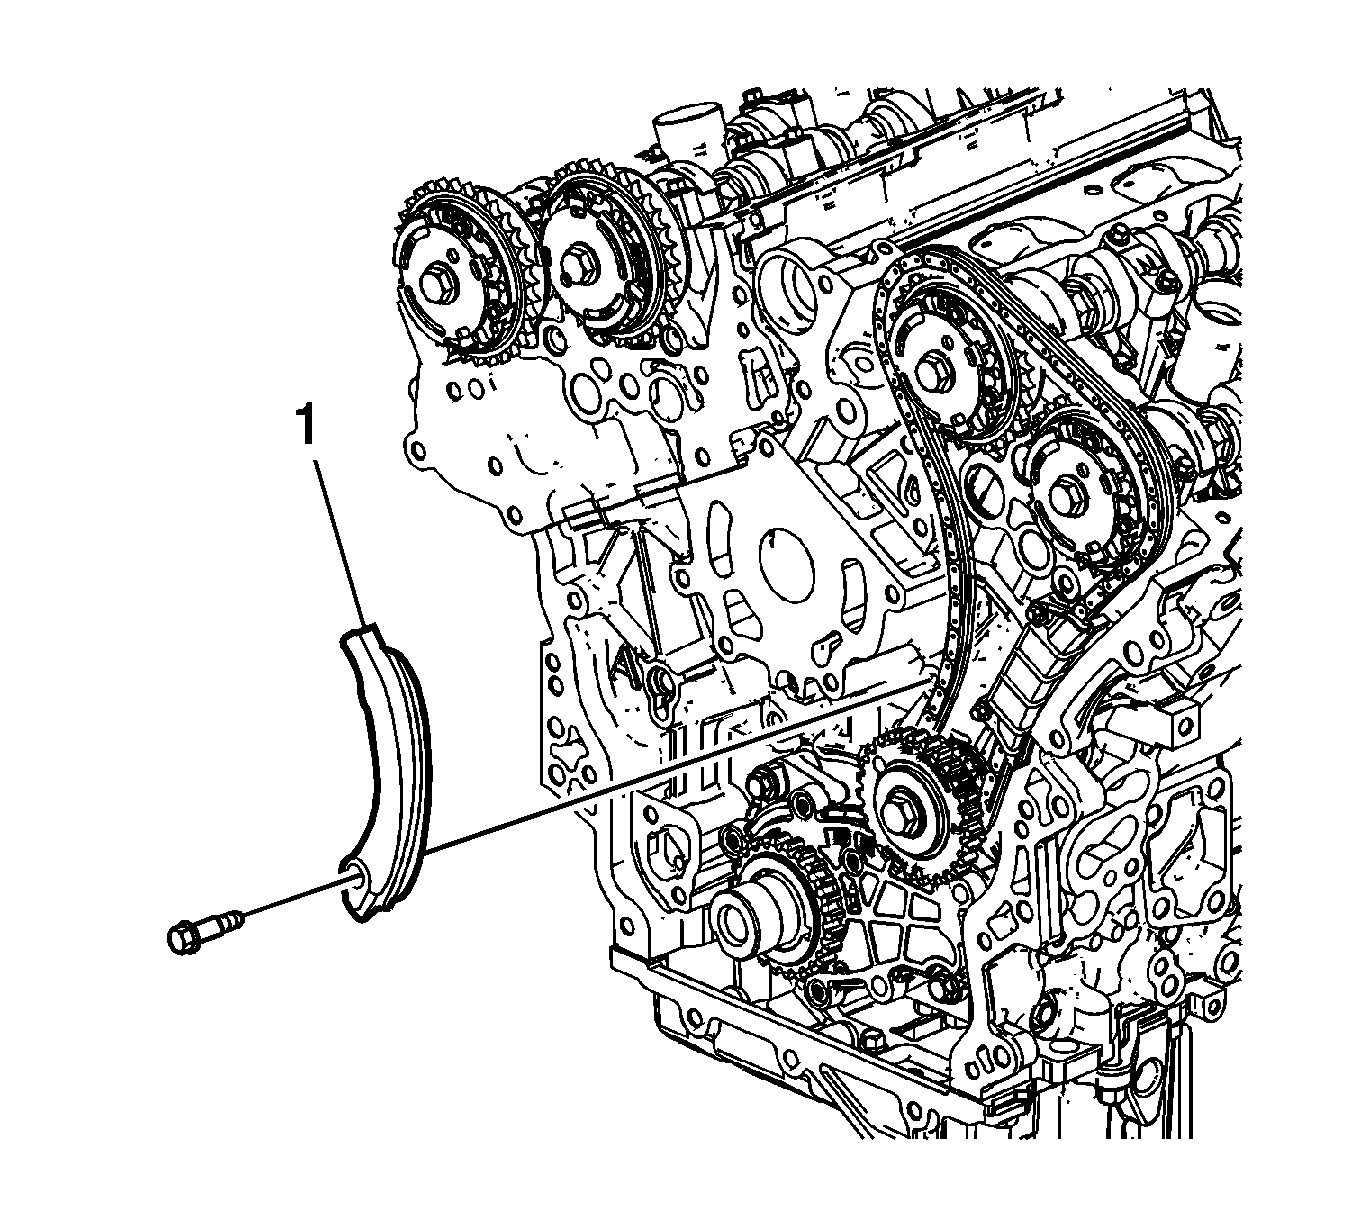
Important: Ensure secondary timing chain shoe is clear of the Bank 2 secondary timing chain tensioner mounting pad, before tightening the attaching bolt.
Tighten
Tighten the bank 2 secondary timing chain shoe bolt to 23 N·m (17 lb ft).
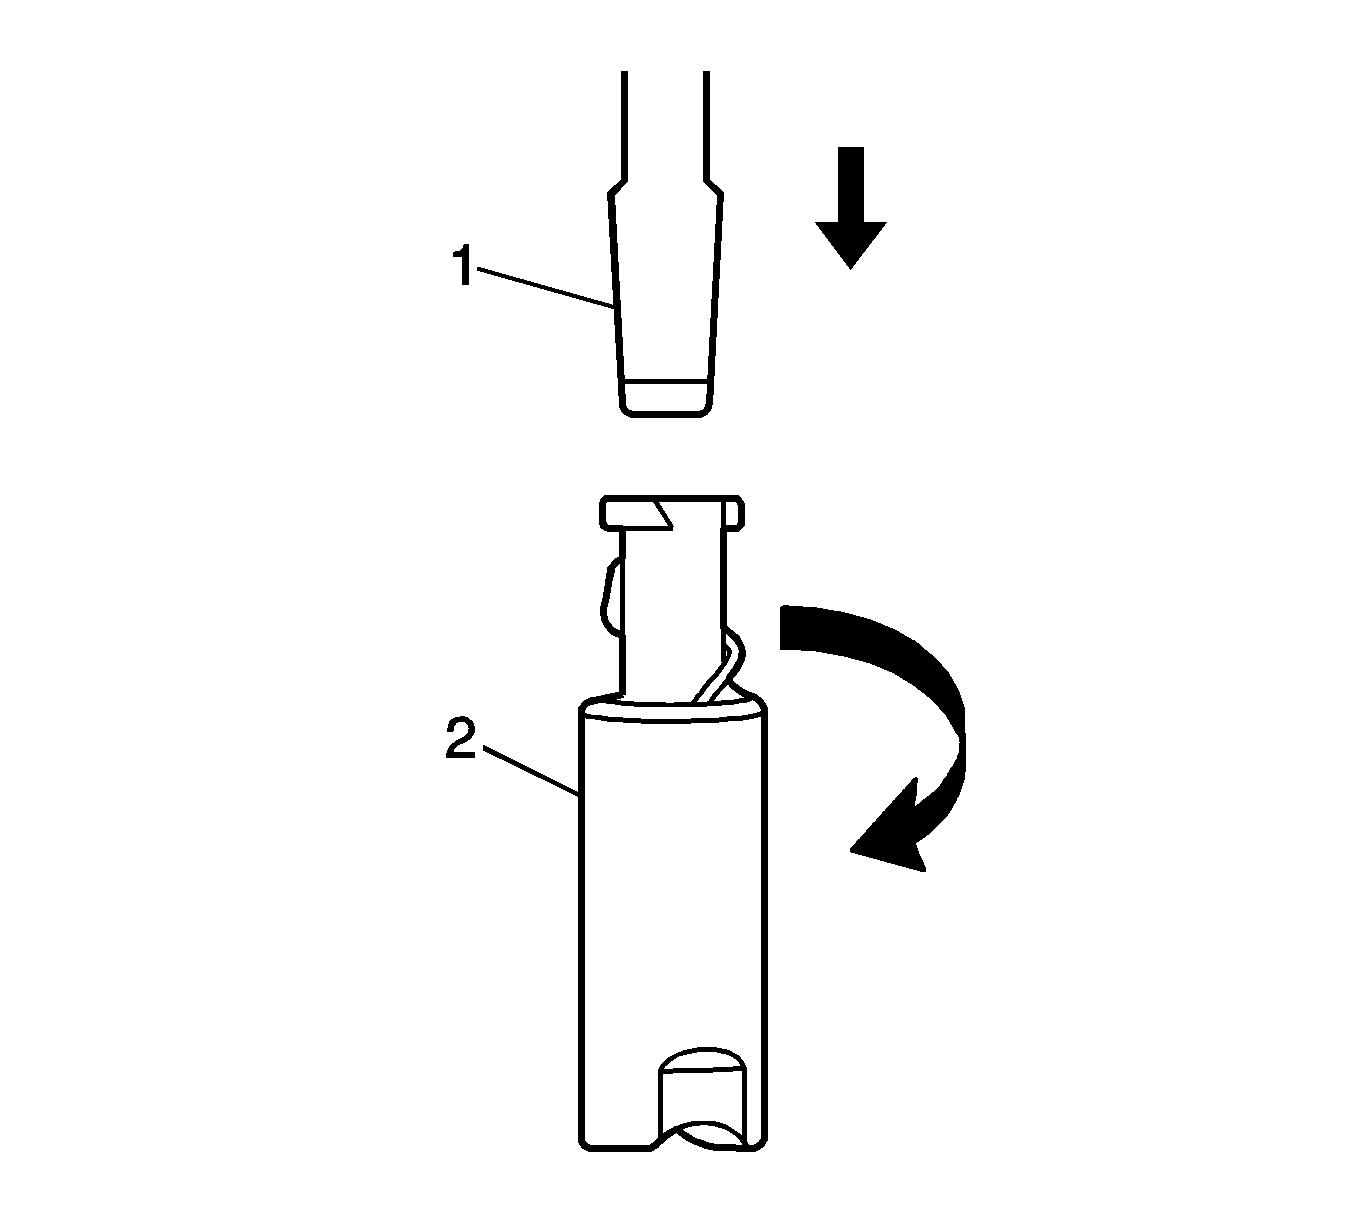
Important: To reset the tensioner, use a suitably sized flat-bladed screwdriver (1) to wind the plunger in a clockwise direction, into the tensioner shaft (2).
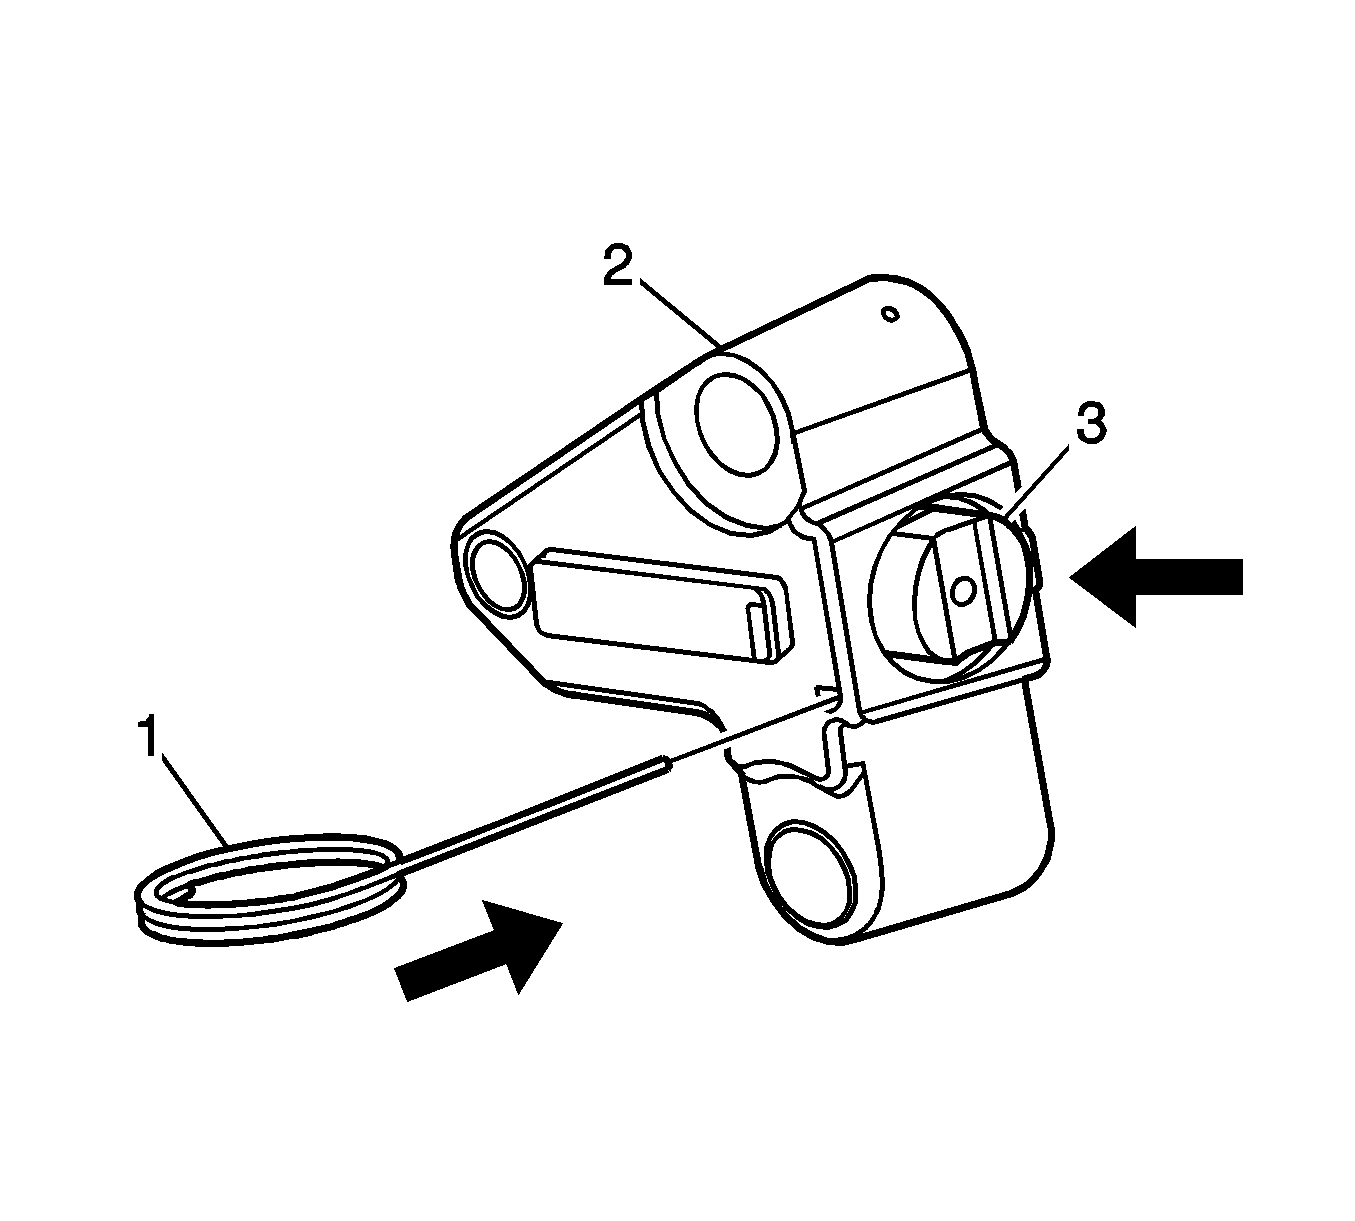
Important: If EN 46112 (1) is not inserted into the tensioner body (2), the tensioner shaft (3) will remain in the locked position and no tension will be placed on the timing chain, this will cause damage to the engine.

Tighten
Tighten the bank 2 secondary timing chain tensioner bolts to 23 N·m (17 lb ft).
