For 1990-2009 cars only
Special Tools
| • | EN 46106 Flywheel Holding Tool |
| • | J-41816 Three Legged Puller |
| • | J 41998-B Crankshaft Balancer Installer |
| • | KM-470-B Angular Torque Gage |
Removal Procedure
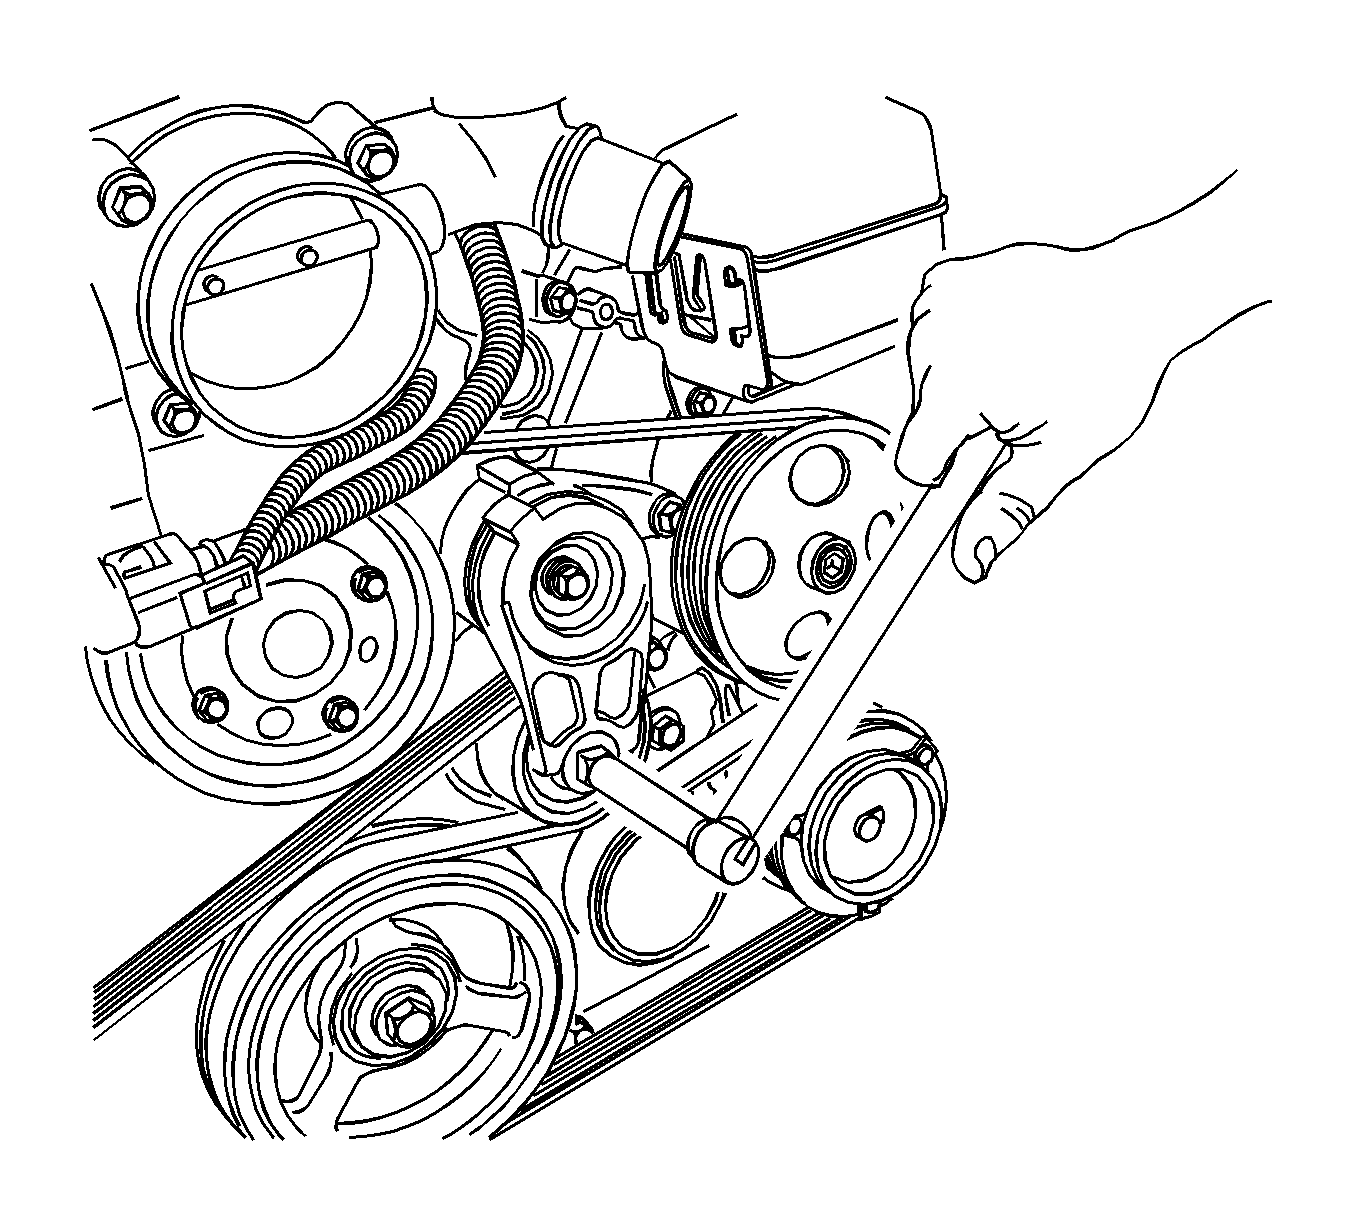
- Rotate the accessory drive belt tensioner clockwise to reduce the belt tension.
- While holding the tensioner in the reduced tension position, disconnect the belt.
- Remove the starter. Refer to Starter Motor Replacement .
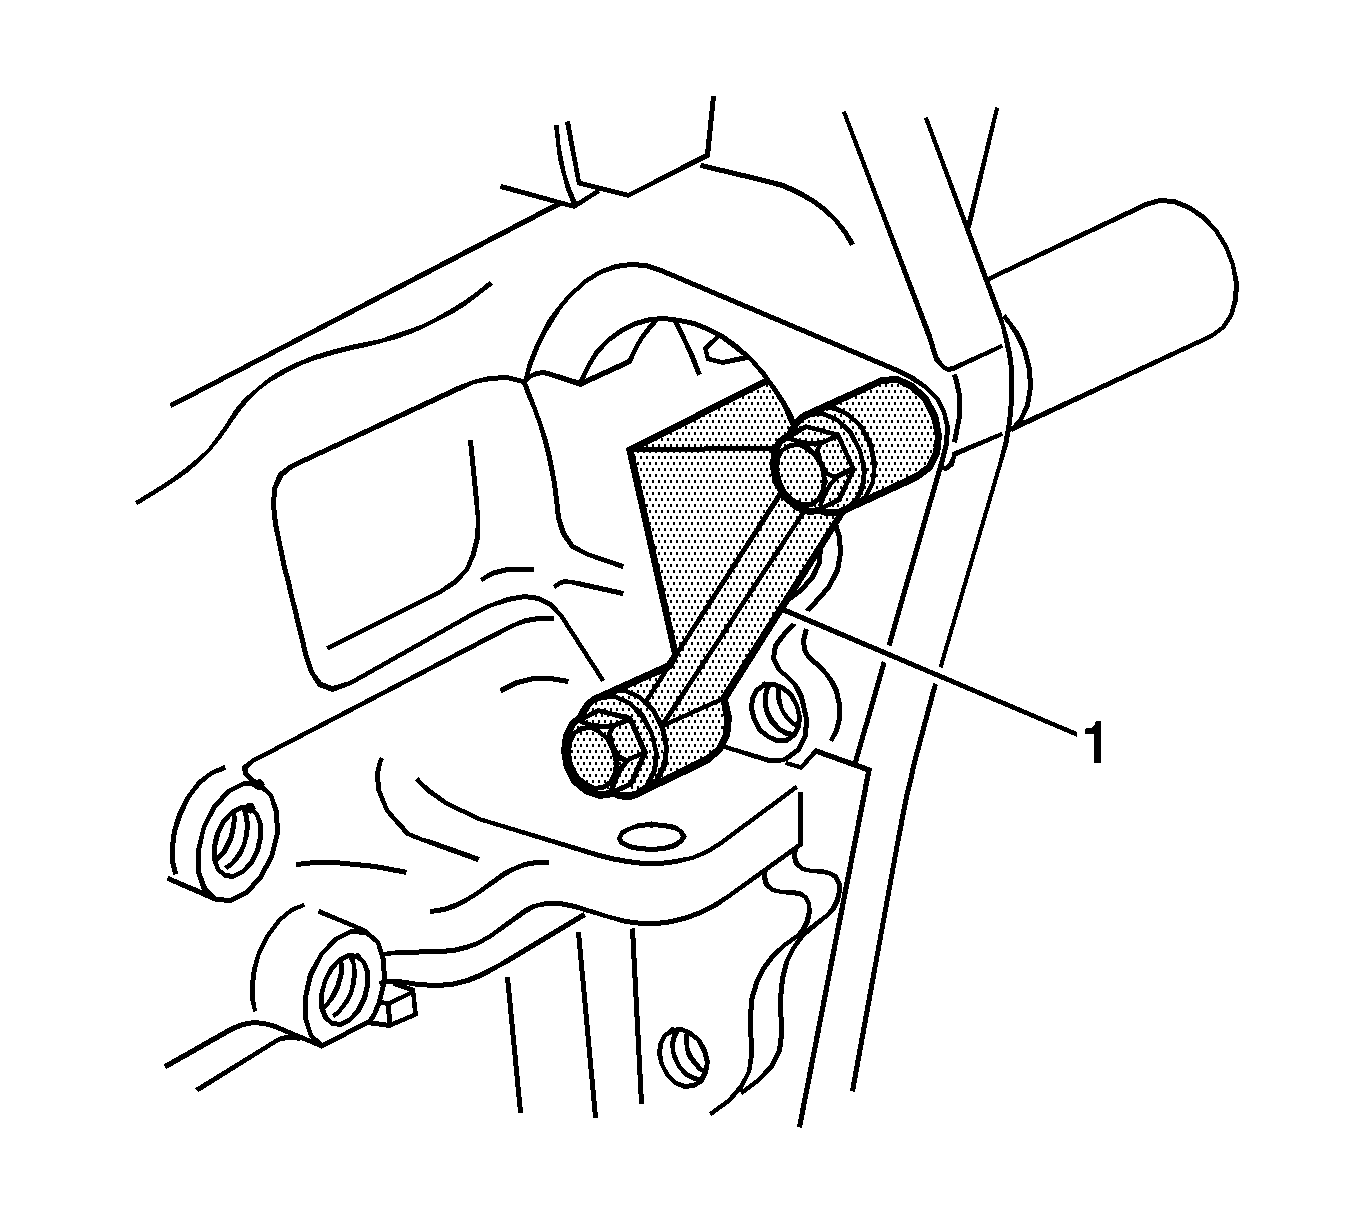
- Install EN 46106 (1) into the starter motor opening to stop the camshaft from rotating.
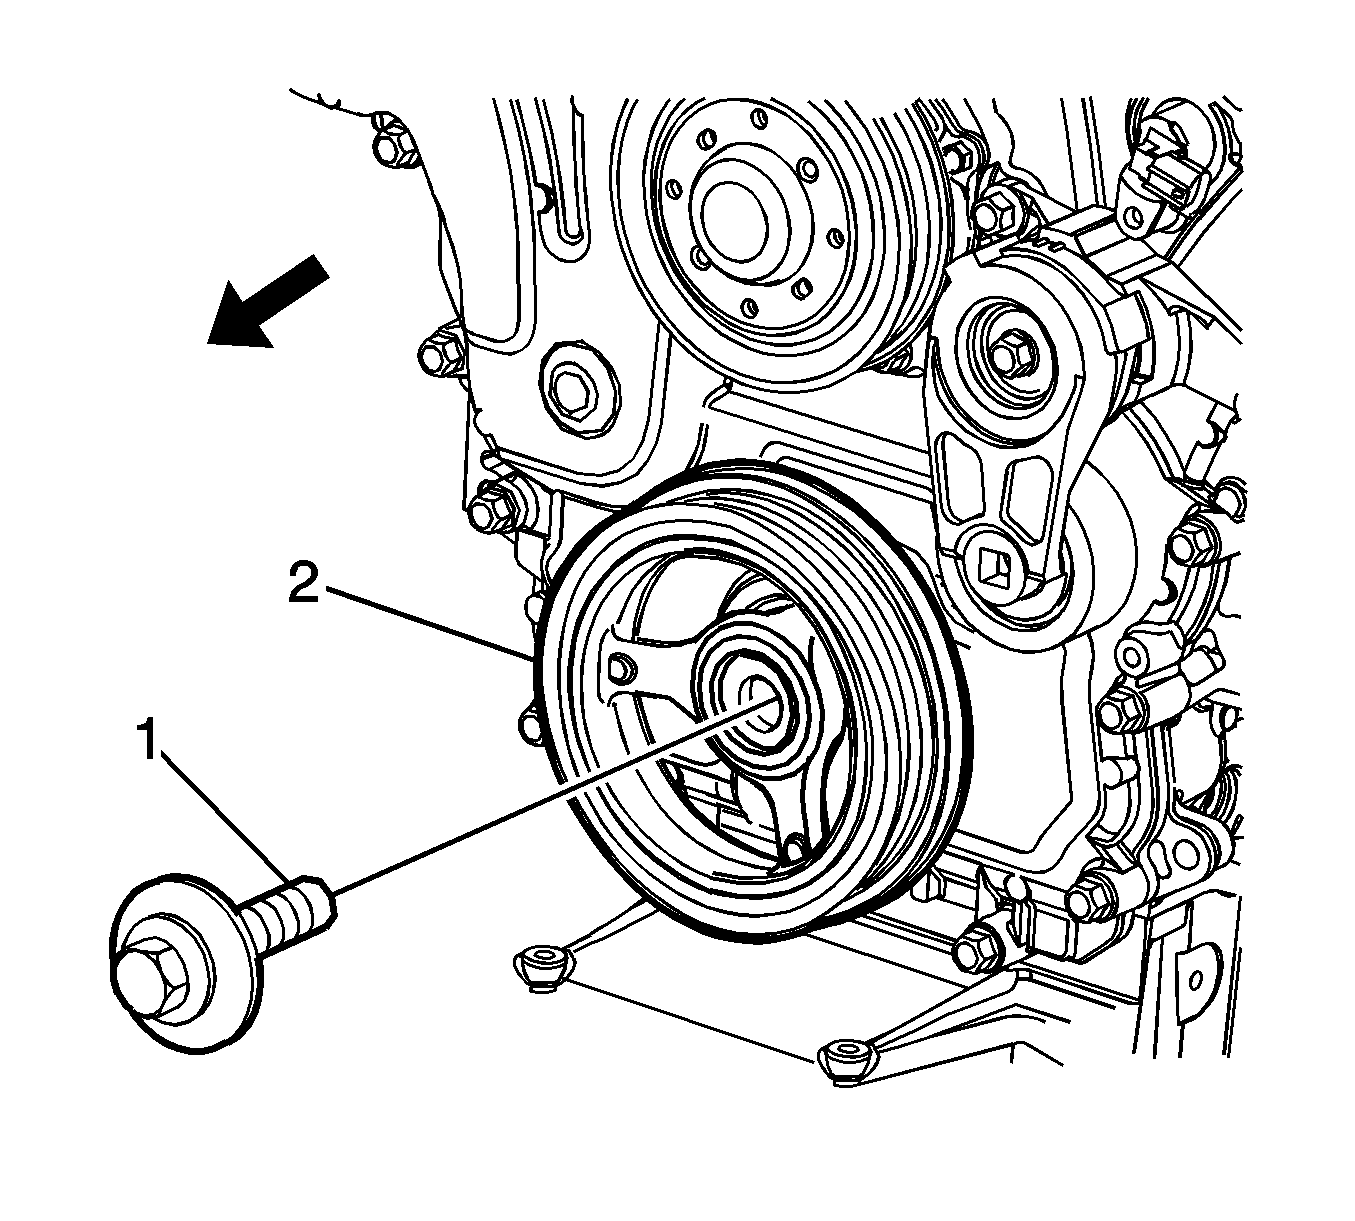
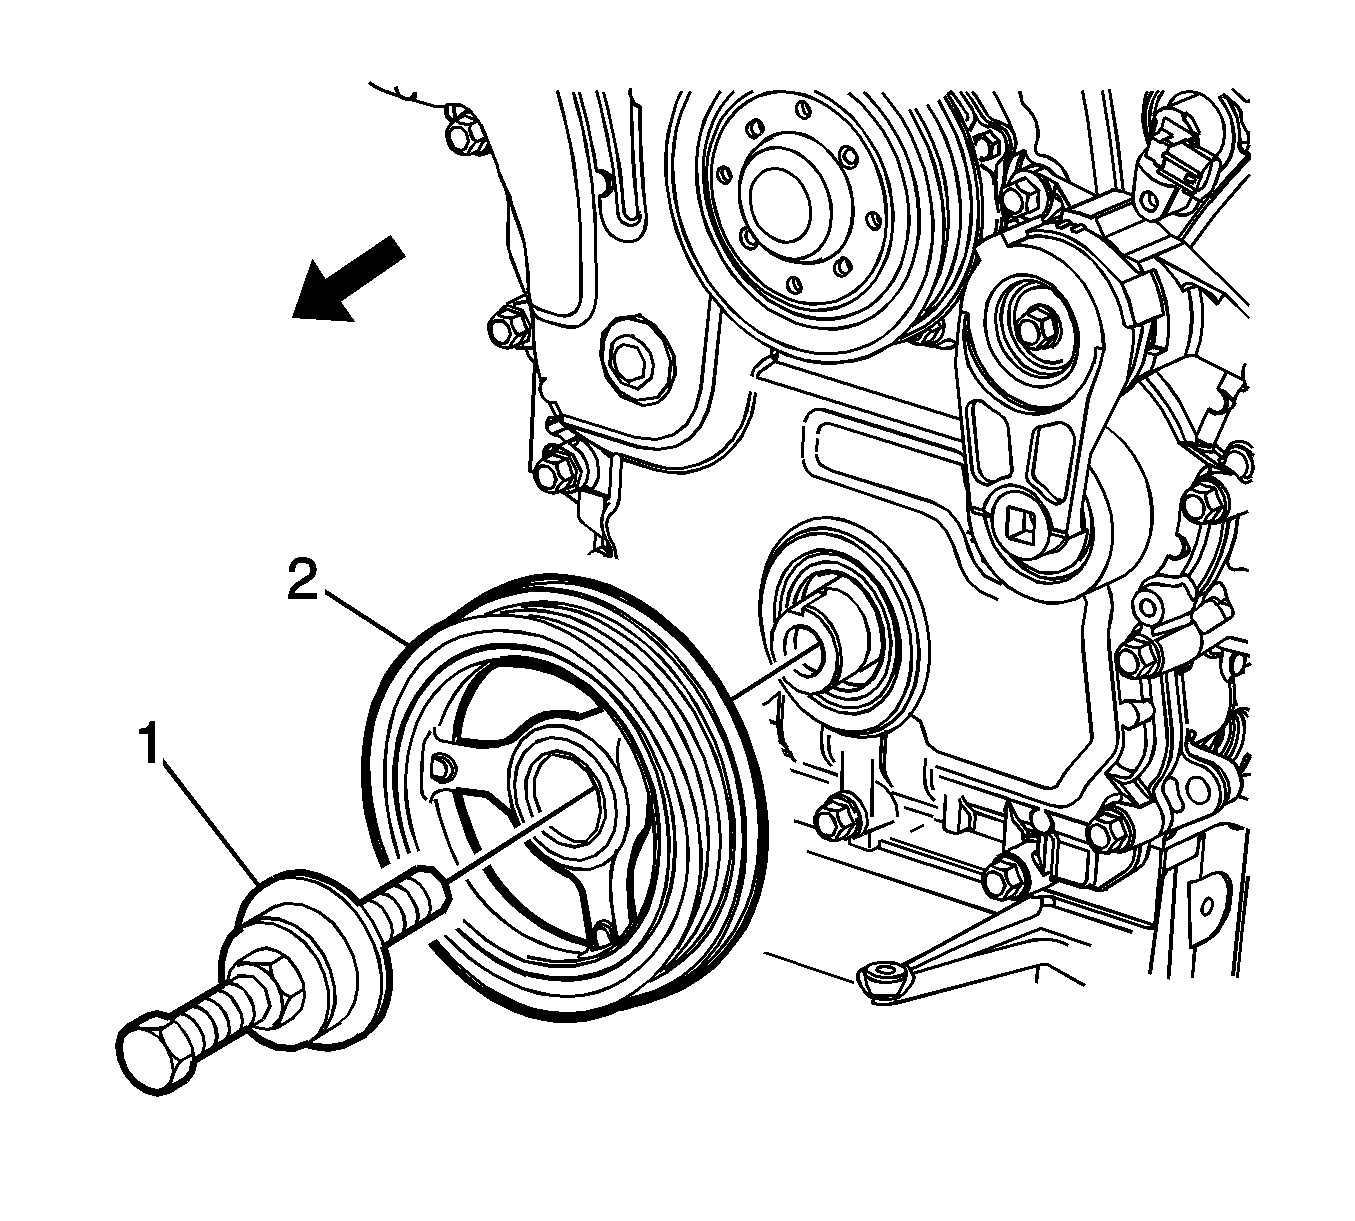
- Remove the bolt (1) attaching the crankshaft pulley assembly (2) to the crankshaft.
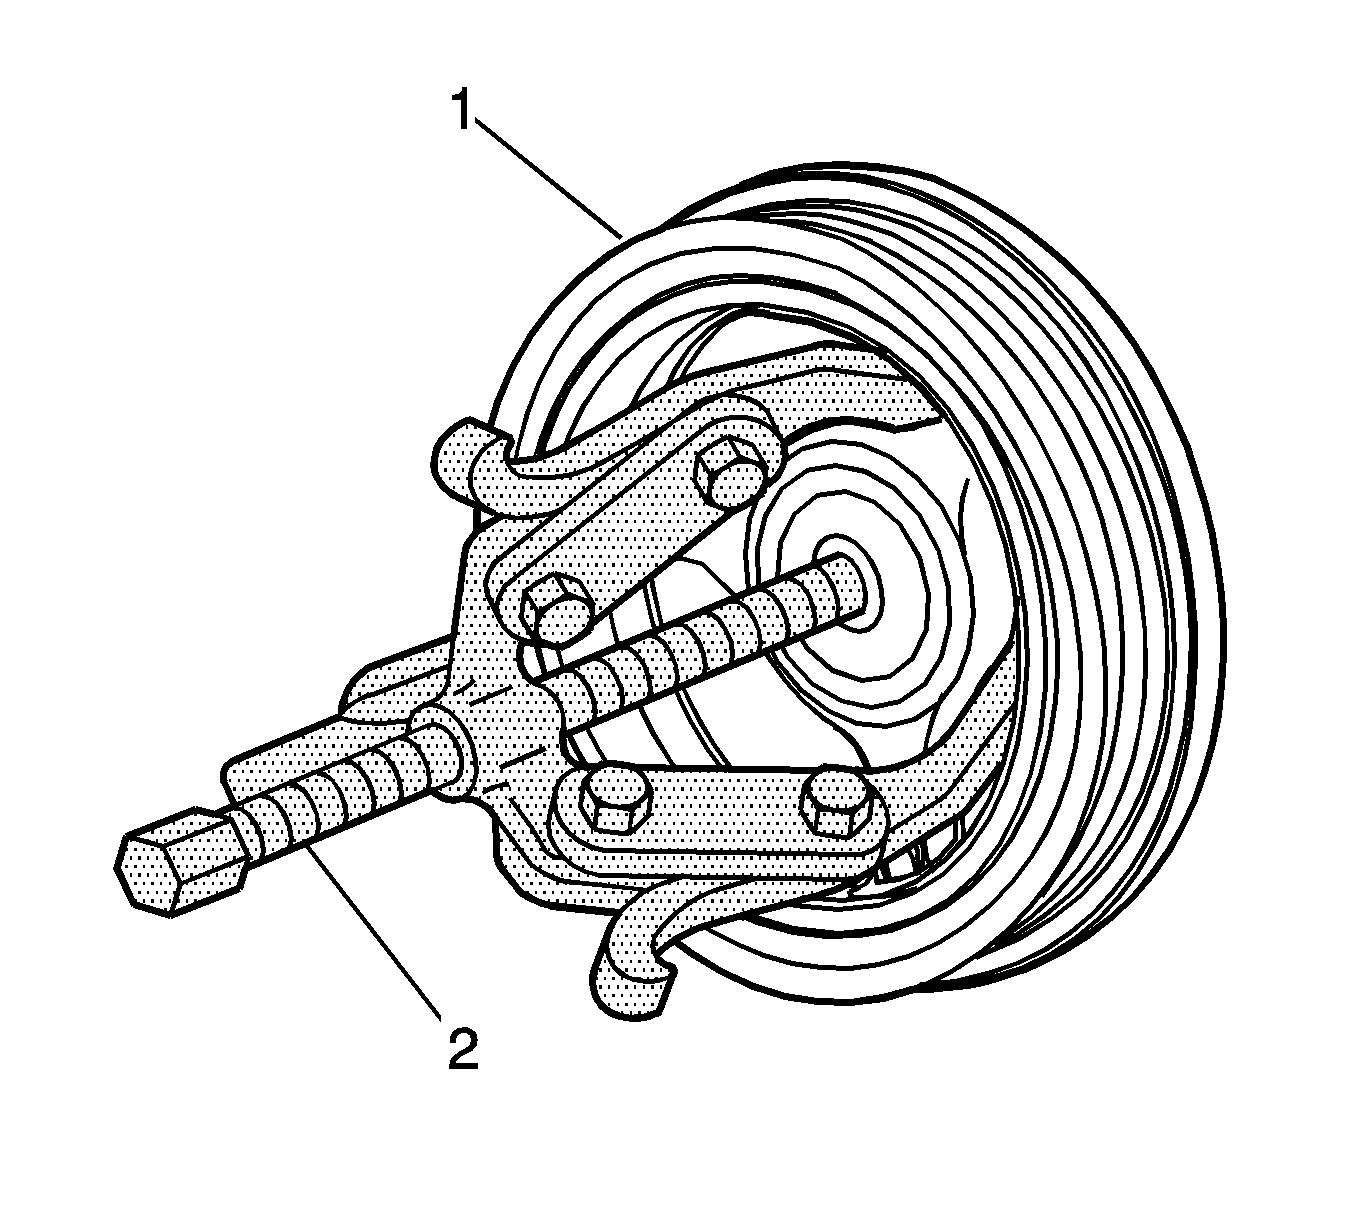
- Remove the crankshaft pulley assembly (1) from the crankshaft using three legged puller, J-41816 (2) or equivalent.
Cleaning and Inspection
- Using a suitable non-corrosive cleaning solvent and a soft bristled parts cleaning brush, clean the crankshaft pulley assembly.
- Dry the crankshaft pulley assembly using compressed air.
- Inspect the crankshaft pulley assembly for the following fault conditions:
| • | Hub to crankshaft inner surface for wear or damage |
| • | Sealing surface for wear, grooving or scoring |
| • | Rubber ring between the hub and the pulley for wear, chunking and general deterioration |
| • | Drive belt ribs of the pulley for damage |
Installation Procedure
- Lubricate the crankshaft pulley assembly hub bore.
- Partially install the crankshaft pulley assembly onto the crankshaft.
- Using the crankshaft pulley installer, J 41998-B (1), fully install the crankshaft pulley assembly into the crankshaft.
- Apply Loctite 272 or equivalent to the thread of a new crankshaft pulley assembly retaining bolt (1).
- Install the crankshaft pulley assembly retaining bolt.
- Install the starter. Refer to Starter Motor Replacement .
- Install the accessory drive belt.
Important: To prevent damage to the crankshaft threads, fully install J 41998-B (1) into the crankshaft before pressing the pulley and balancer assembly.

Notice: Refer to Fastener Notice in the Preface section.
Tighten
Tighten the crankshaft pulley assembly retaining bolt to 100 N·m (74 lb ft) and turns the bolt another 150 degrees using the angular torque gage
KM-470-B
.
