For 1990-2009 cars only
Removal Procedure
- Disconnect the negative battery cable. Refer to Battery Negative Cable Disconnection and Connection .
- Remove the instrument compartment lower. Refer to Instrument Panel Lower Compartment Replacement .
- Remove the radio. Refer to Radio Replacement .
- Remove the front seats. Refer to Bucket Seat Replacement
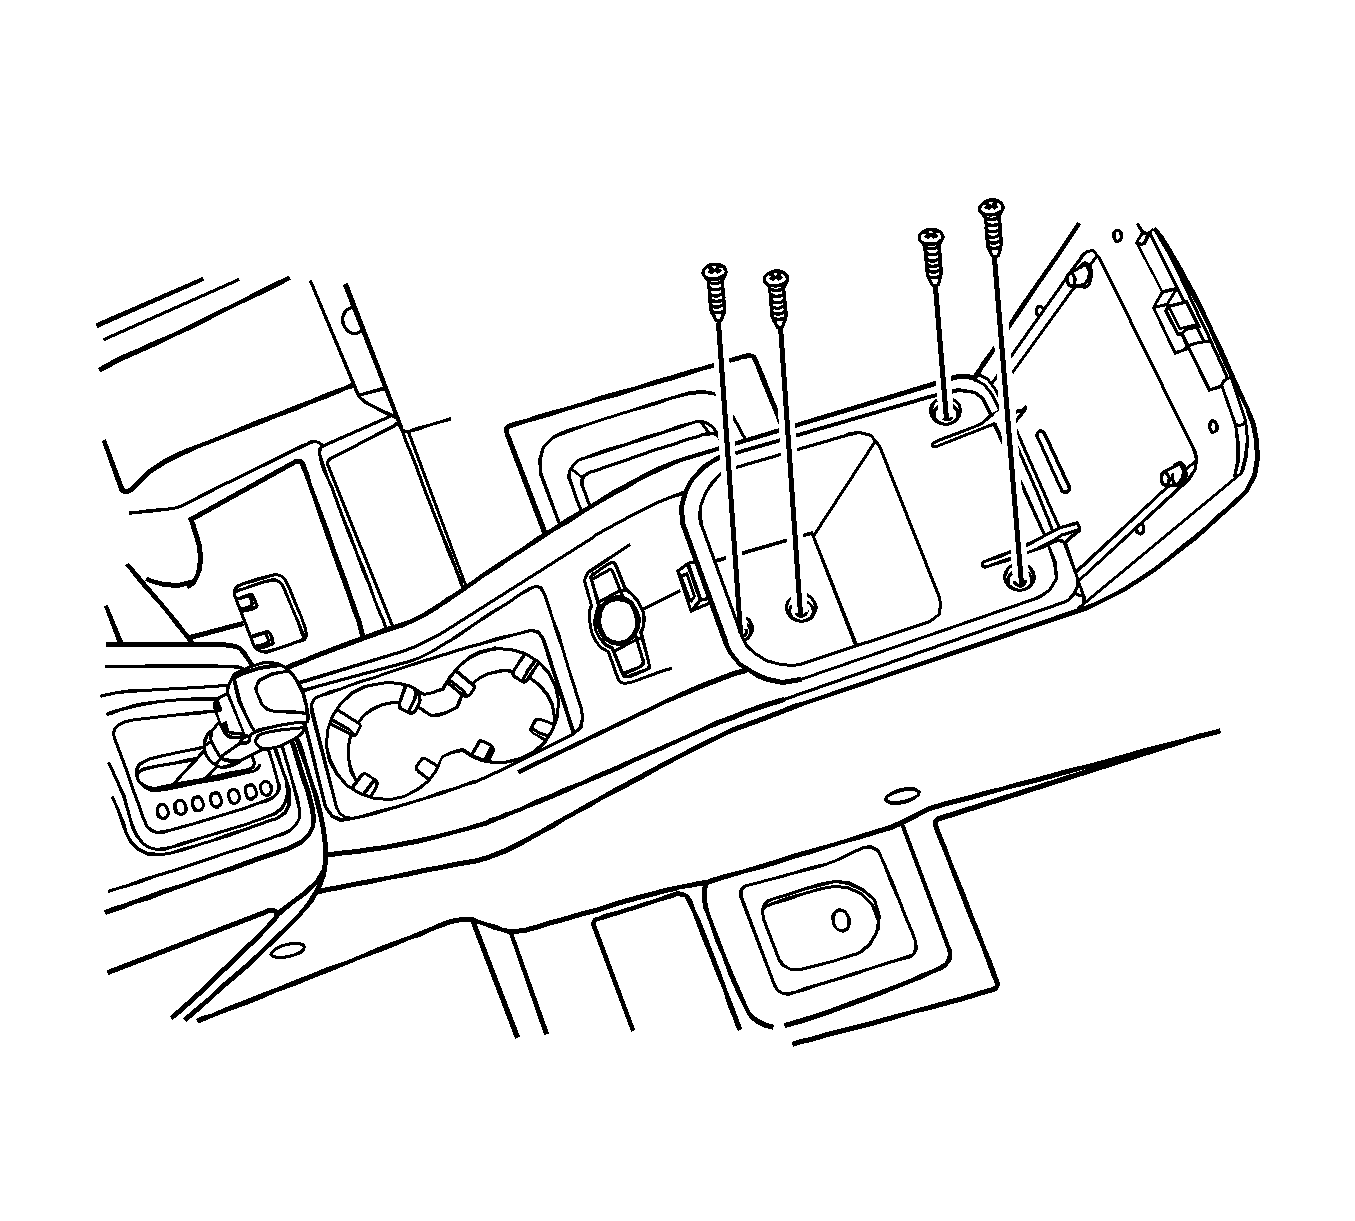
- Remove the screws and cup holder, console cover.
- Disconnect the electrical connector.
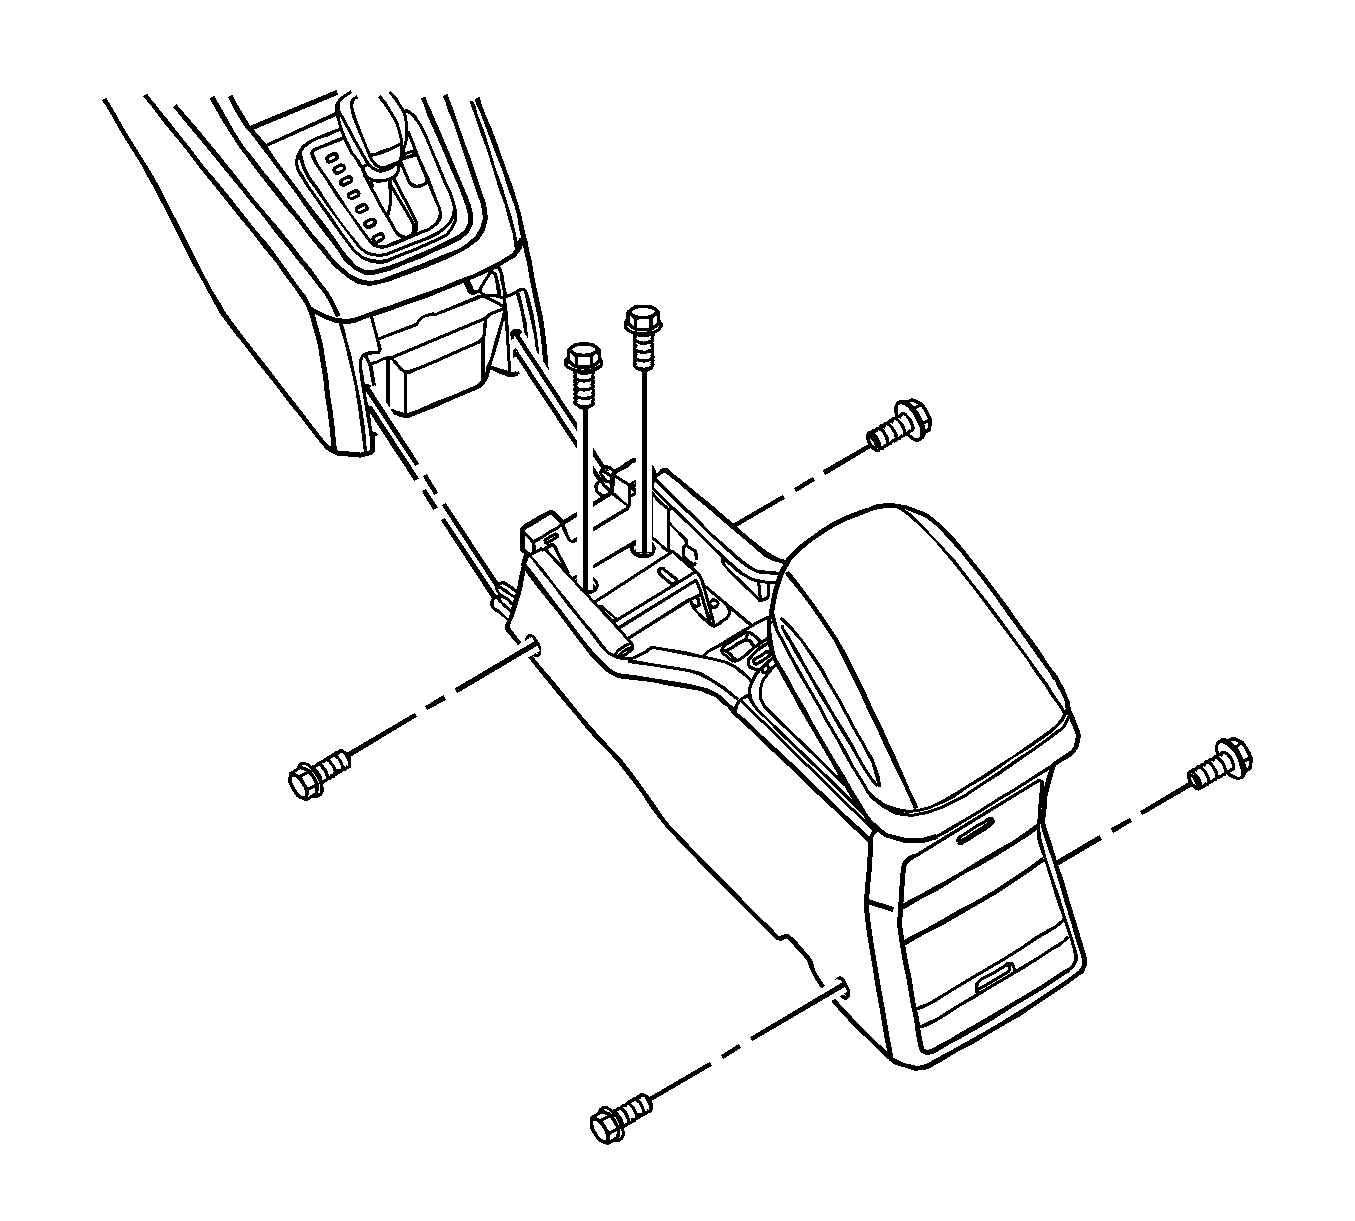
- Remove the bolts from the floor console.
- Remove the instrument panel storage compartment. Refer to Instrument Panel Storage Compartment Replacement .
- Remove the floor console.
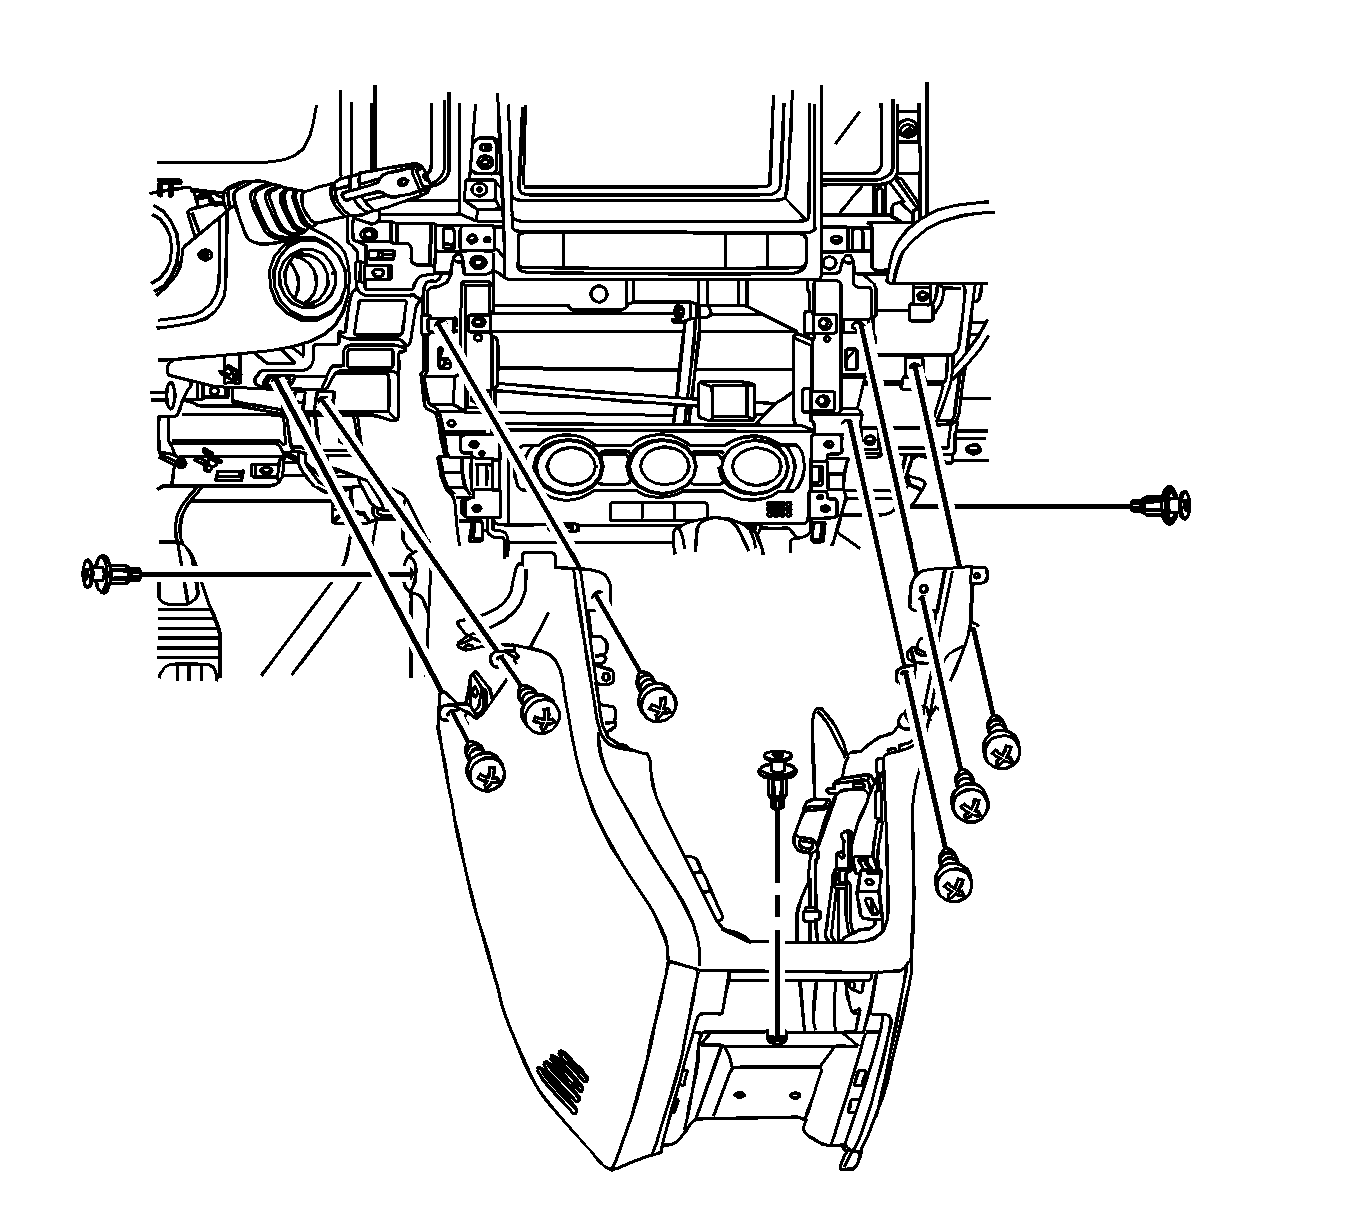
- Remove the screws from the front console retainer.
Caution: Refer to Battery Disconnect Caution in the Preface section.


Installation Procedure
- Connect the electrical connectors.
- Install the front console retainer with screws.
- Install the floor console with the bolts.
- Install the instrument panel storage compartment. Refer to Instrument Panel Storage Compartment Replacement .
- Connect the electrical connectors.
- Install the cupholder and console cover.
- Install the instrument compartment lower . Refer to Instrument Panel Lower Compartment Replacement .
- Install the front seats. Refer to Bucket Seat Replacement .
- Install the radio. Refer to Radio Replacement .
- Connect the negative battery cable. Refer to Battery Negative Cable Disconnection and Connection .

Notice: Refer to Fastener Notice in the Preface section.
Tighten
Tighten the front console retainer screws to 8 N·m (71 lb in).
Tighten
Tighten the front console screw to 8 N·m (71 lb in).


