For 1990-2009 cars only
Removal Procedure
- Disconnect the negative battery cable. Refer to Battery Negative Cable Disconnection and Connection.
- Remove the air cleaner assembly. Refer to Air Cleaner Assembly Replacement.
- Remove the engine mount support bracket. Refer to Engine Mount Replacement - Right Side.
- Remove the accessory drive belt. Refer to Drive Belt Replacement.
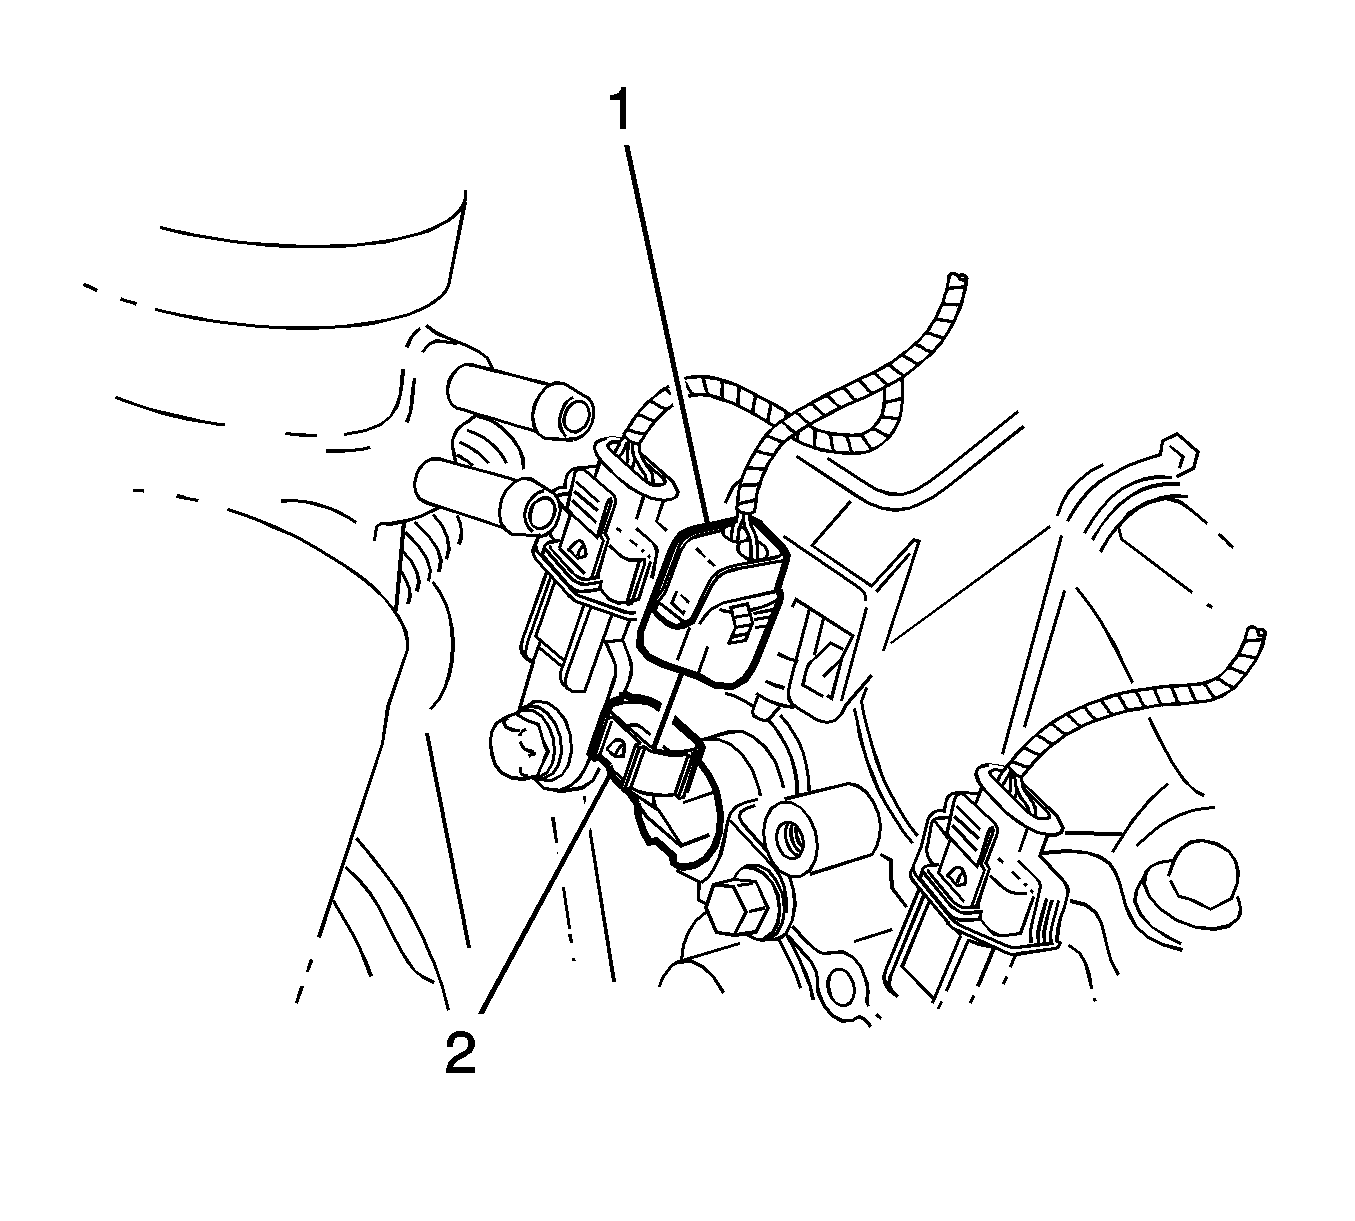
- Disconnect the electrical connector (1) from the camshaft position actuator solenoid (2).
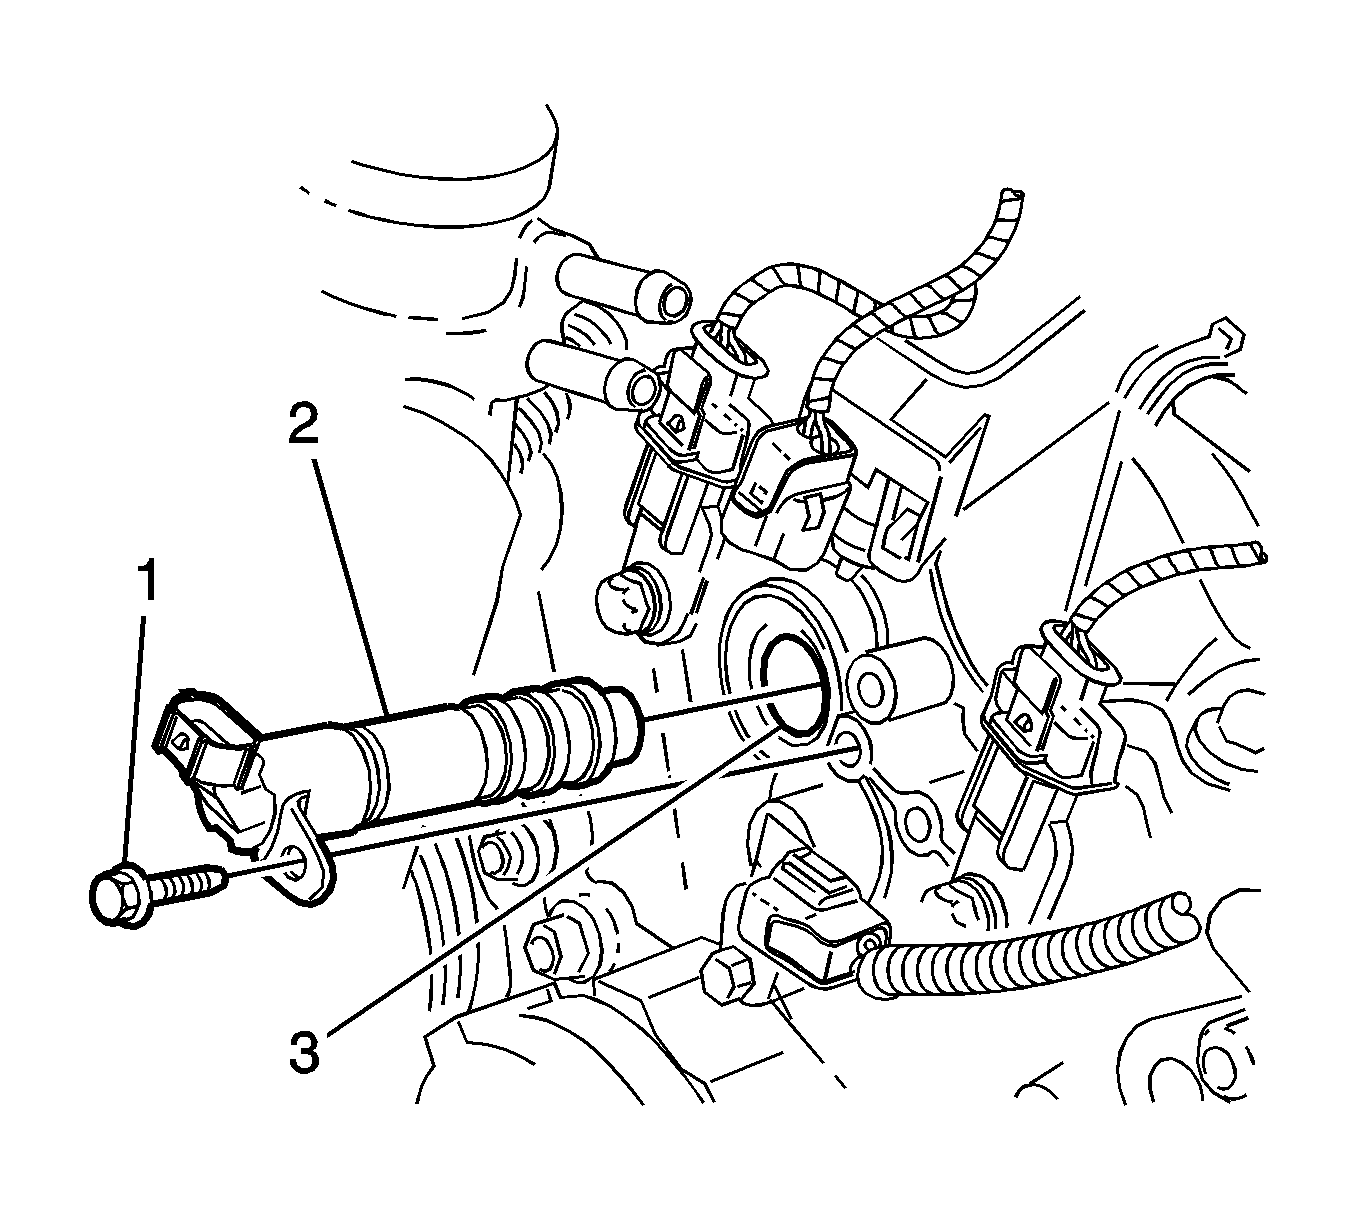
- Remove the bolt (1) attaching the camshaft position actuator solenoid (2).
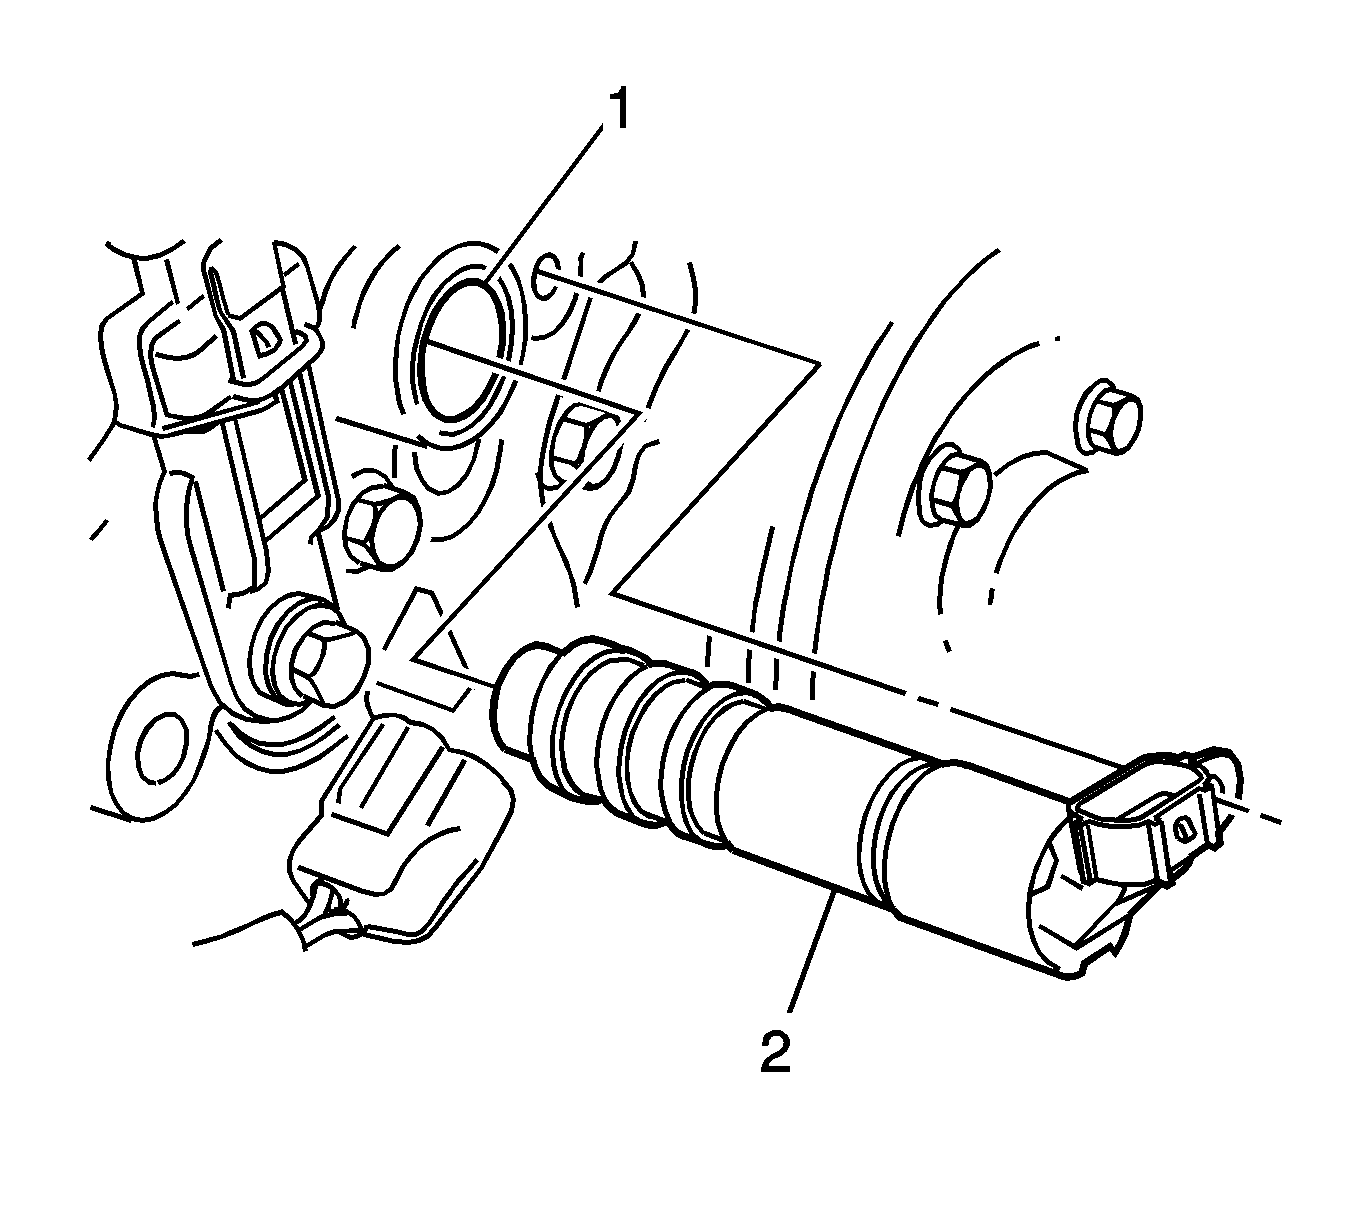
- Remove the camshaft position actuator solenoid by twisting the actuator to release it, then pulling it away from the front of the engine cover.

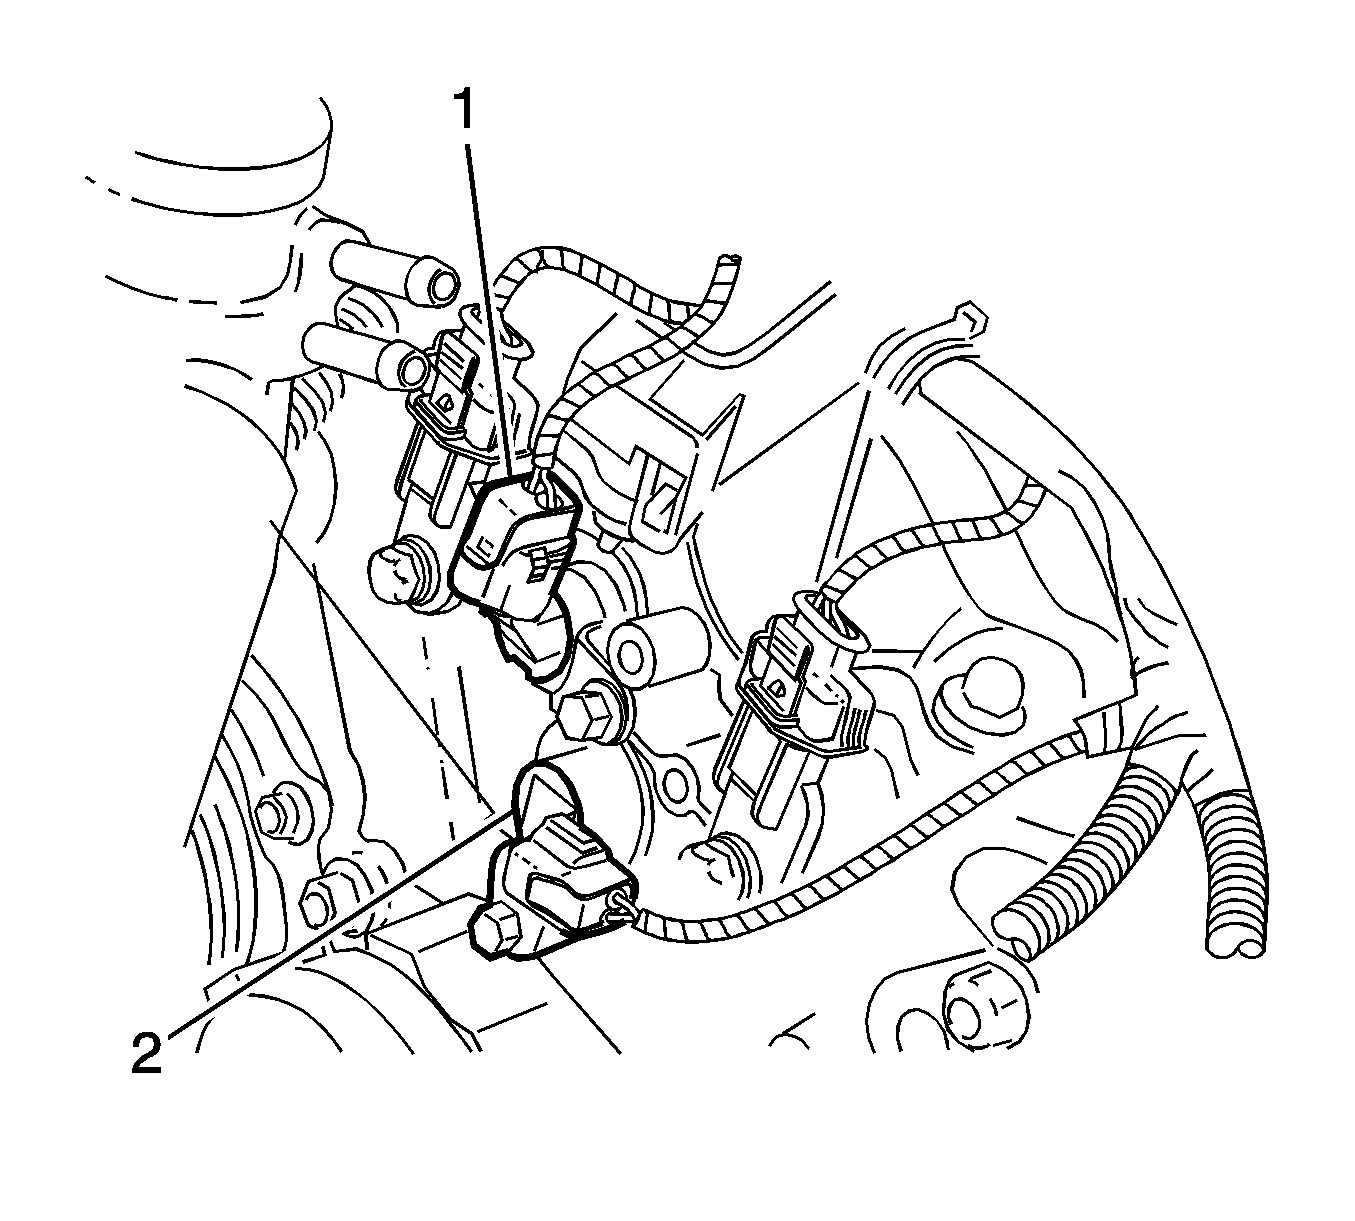
Note: The replacement procedure for the intake (1) and exhaust (2) camshaft position actuator solenoids are typically the same. The following procedure is specific to the intake camshaft position actuator solenoid, the exhaust is similar.


Note: Clean the area around the camshaft position actuator solenoid to prevent debris from entering the engine.
Note: When removing the camshaft position actuator solenoid, use care to prevent damage to the solenoid seal.
Installation Procedure
- Inspect the camshaft position actuator seal (1) for damage and replace as necessary.
- Lubricate the lip of the camshaft position actuator solenoid seal with clean engine oil.
- Install the camshaft position actuator solenoid and tighten the attaching bolt to 10 N·m (89 lb in).
- Connect the electrical connector.
- Install the engine mount support bracket. Refer to Engine Mount Replacement - Right Side.
- Install the air cleaner assembly. Refer to Air Cleaner Assembly Replacement.
- Connect the negative battery cable.

Caution: Refer to Fastener Caution in the Preface section.
