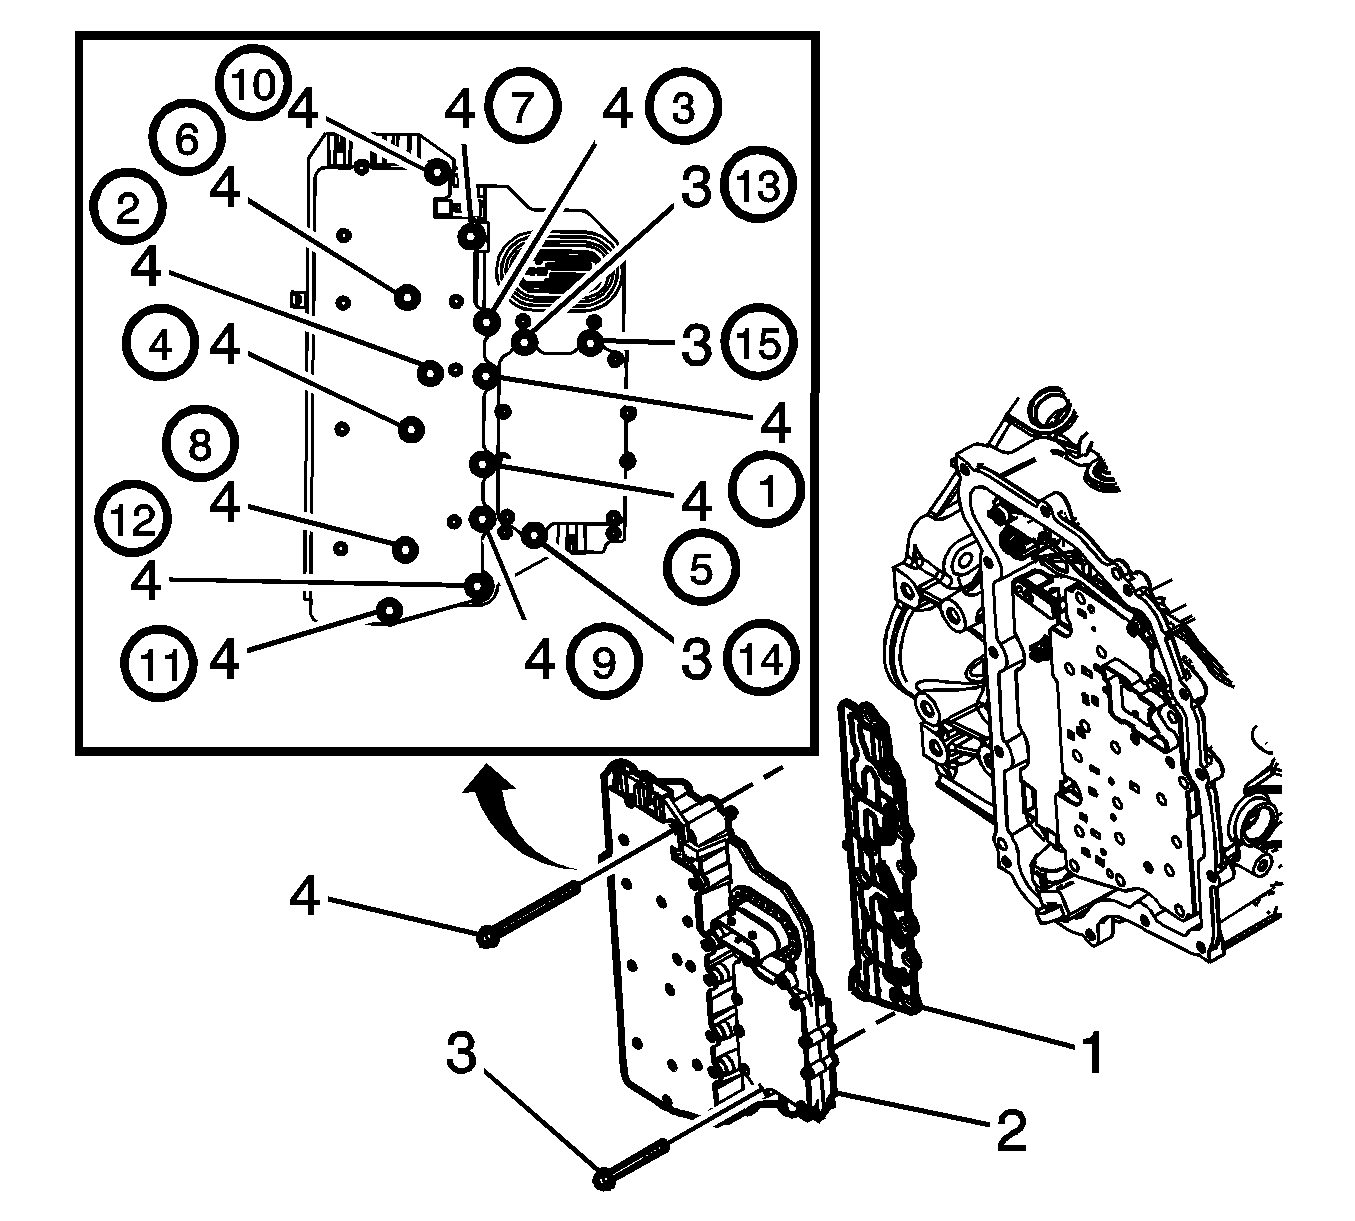
For 1990-2009 cars only
Removal Procedure
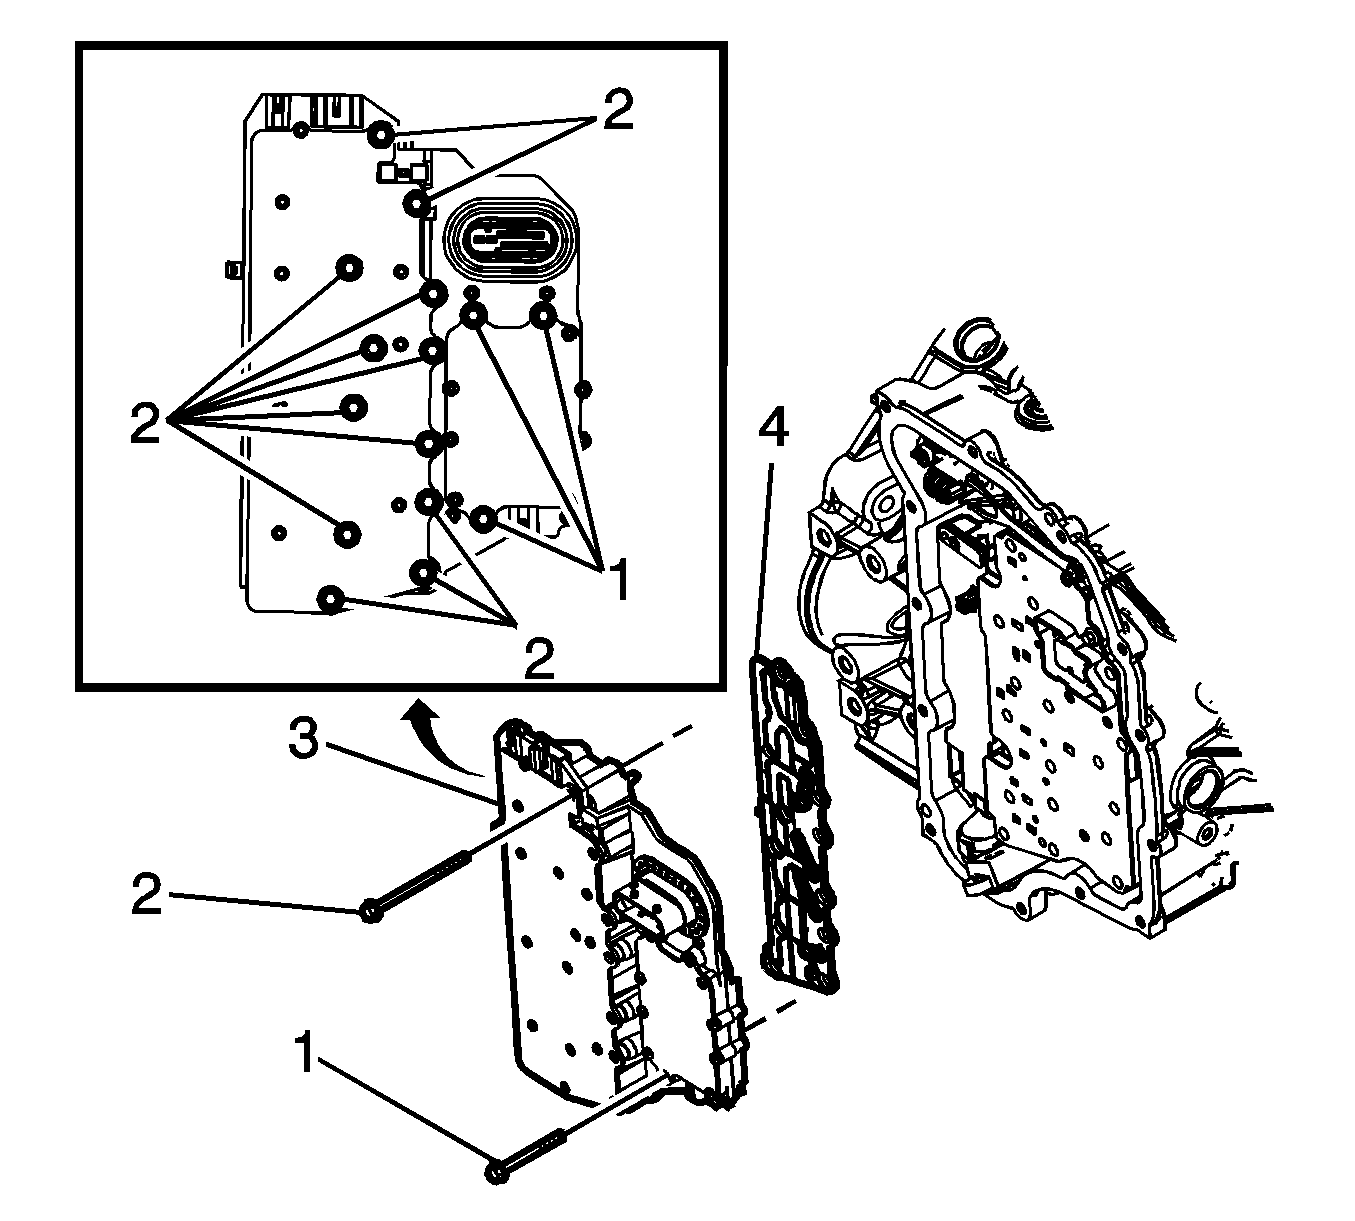
- Remove the control solenoid valve body and transmission control module (TCM) assembly. Refer to Control Solenoid Valve and Transmission Control Module Assembly Installation.
- Remove the control solenoid valve support (9).
- Remove the fluid level control valve gasket (2) and valve (1).
- Remove the control valve body bolts (3) M6 x 60.
- Remove the control valve body bolts (4) M6 x 53.
- Remove the control valve body assembly (5).
- Remove the control valve body spacer plate assembly (6).
- Remove the 1-2-3-4 clutch fluid passage seal (7) and low/reverse clutch fluid passage seal (8).
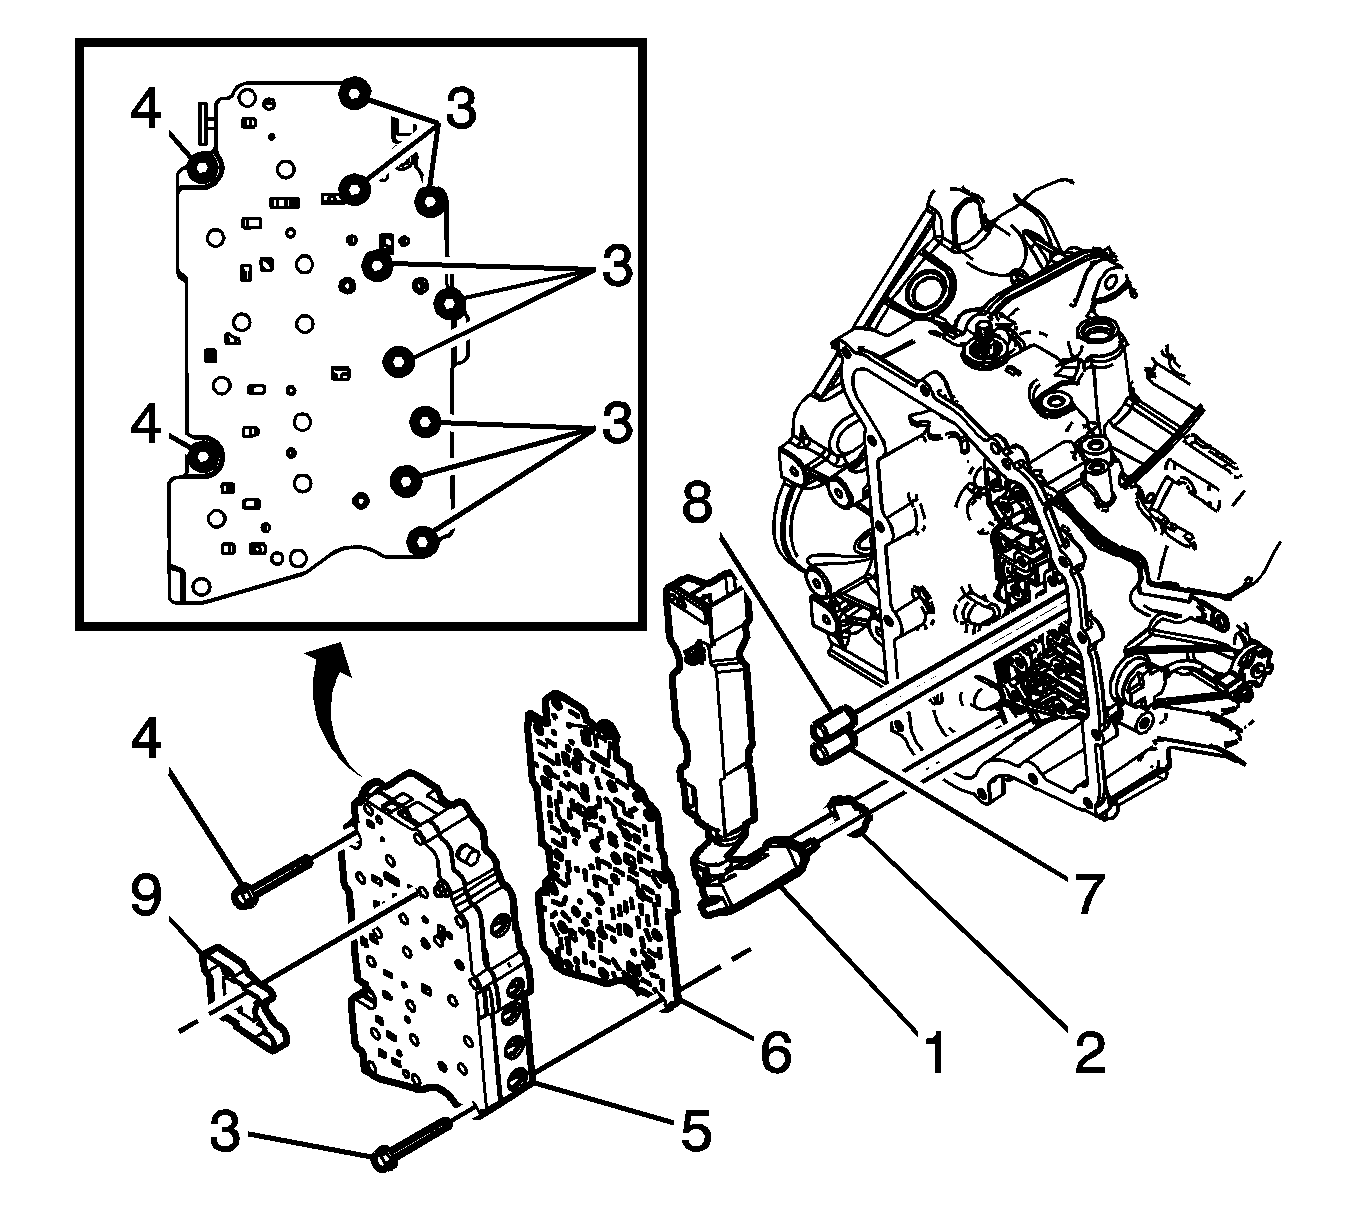
Note: The clutch fluid passage seal is not reusable.
Installation Procedure
- Install a NEW 1-2-3-4 clutch fluid passage seal (1) and a NEW low/reverse clutch fluid passage seal (2).
- Install the control valve body spacer plate assembly (3) to the valve body assembly.
- Install the control valve body assembly (4).
- Install the control valve body bolts (5) M6 x 60 and tighten to 12 N·m (106 lb in).
- Install the control valve body bolts (6) M6 x 53 and tighten to 12 N·m (106 lb in).
- Install the fluid level control valve gasket (7) and valve (8).
- Install the control solenoid valve support (9).
- Install the control solenoid valve body and transmission control module (TCM) assembly. Refer to Control Solenoid Valve and Transmission Control Module Assembly Installation.
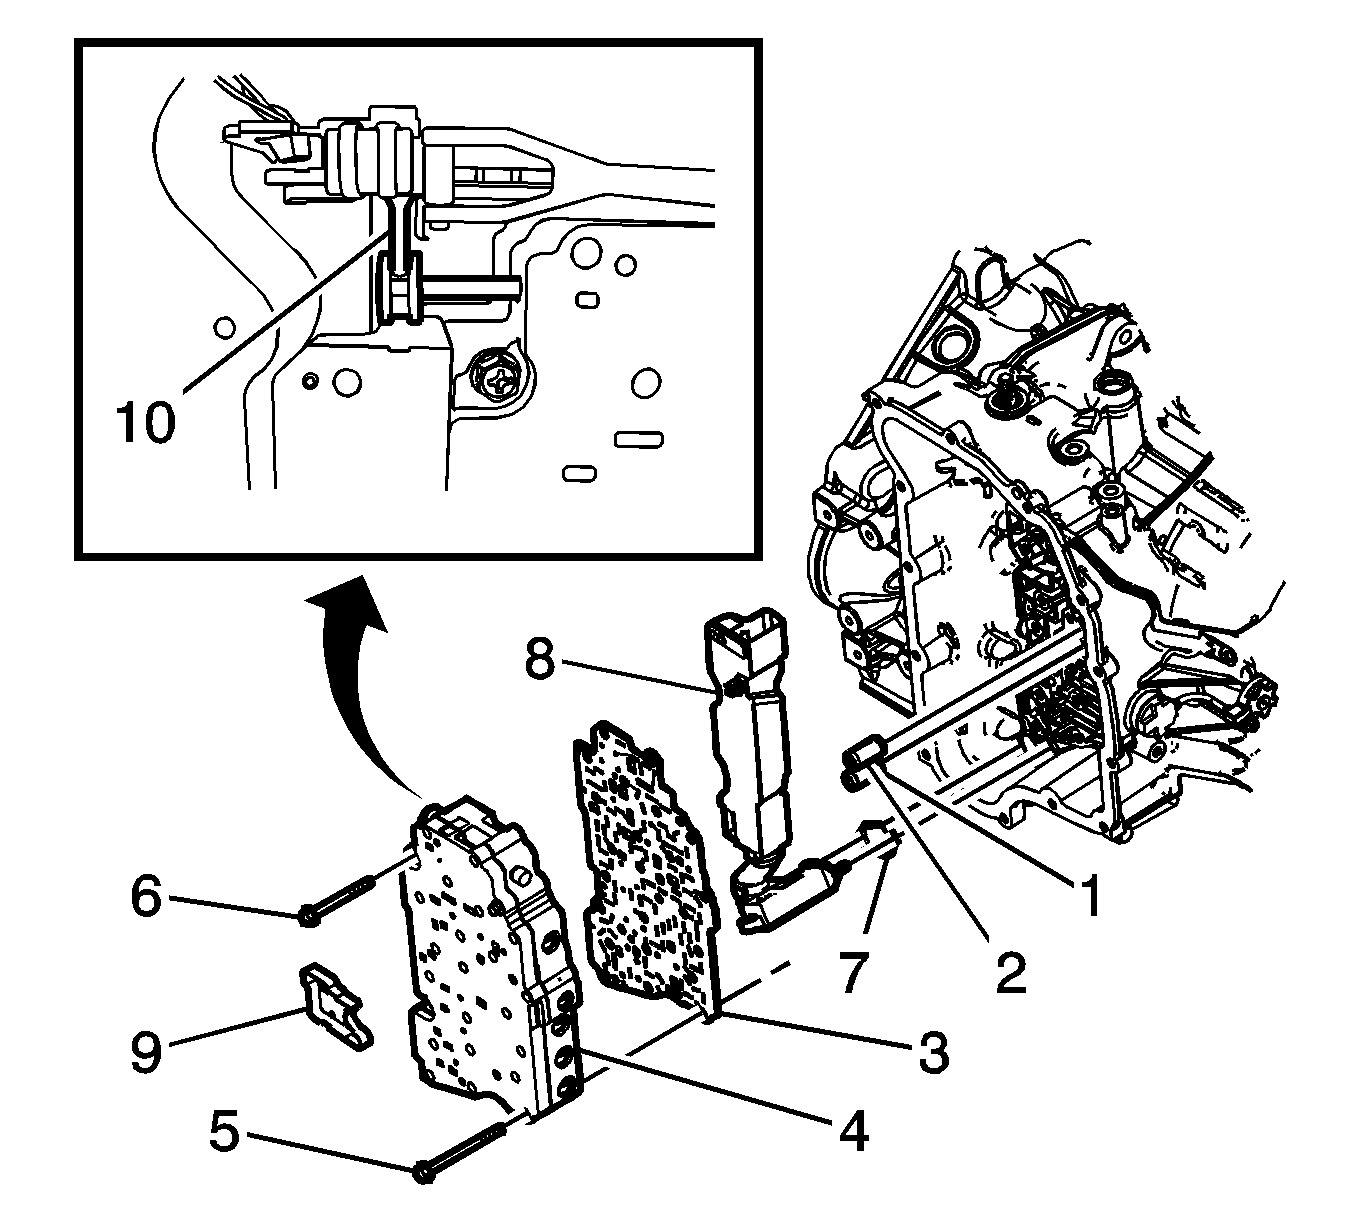
Note: The clutch fluid passage seal is not reusable.
Note: Align the manual valve (a) to the detent lever assembly while installing the control valve body assembly.
Caution: Refer to Fastener Caution in the Preface section.
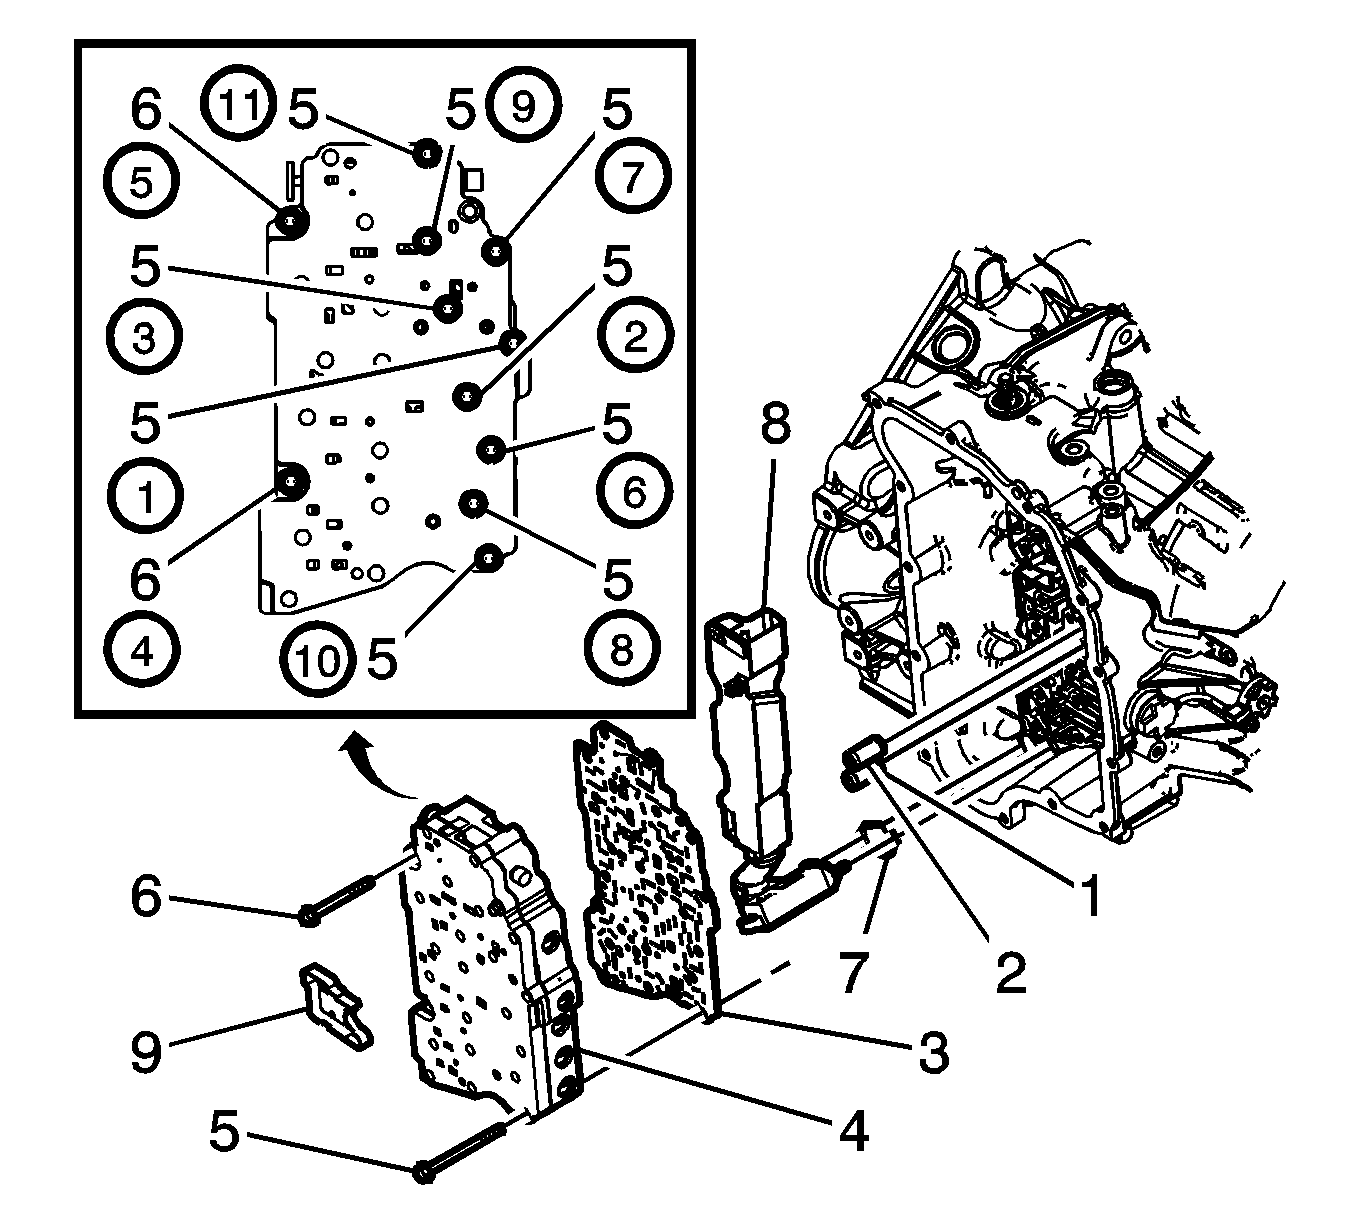
Note: Install all bolts before tightening, then tighten in the specified sequence.
