Tools Required
CH-49405 Ball Joint Release Tool.
Removal Procedure
- Raise and support the vehicle. Refer to Lifting and Jacking the Vehicle.
- Remove the front wheel. Refer to Tire and Wheel Removal and Installation.
- Remove the control arm to steering knuckle retaining nut (1).
- Separate the front control arm (1) from the steering knuckle (3) using the CH-49405 (2).
- Disconnect the front control arm (1) from the steering knuckle (3).
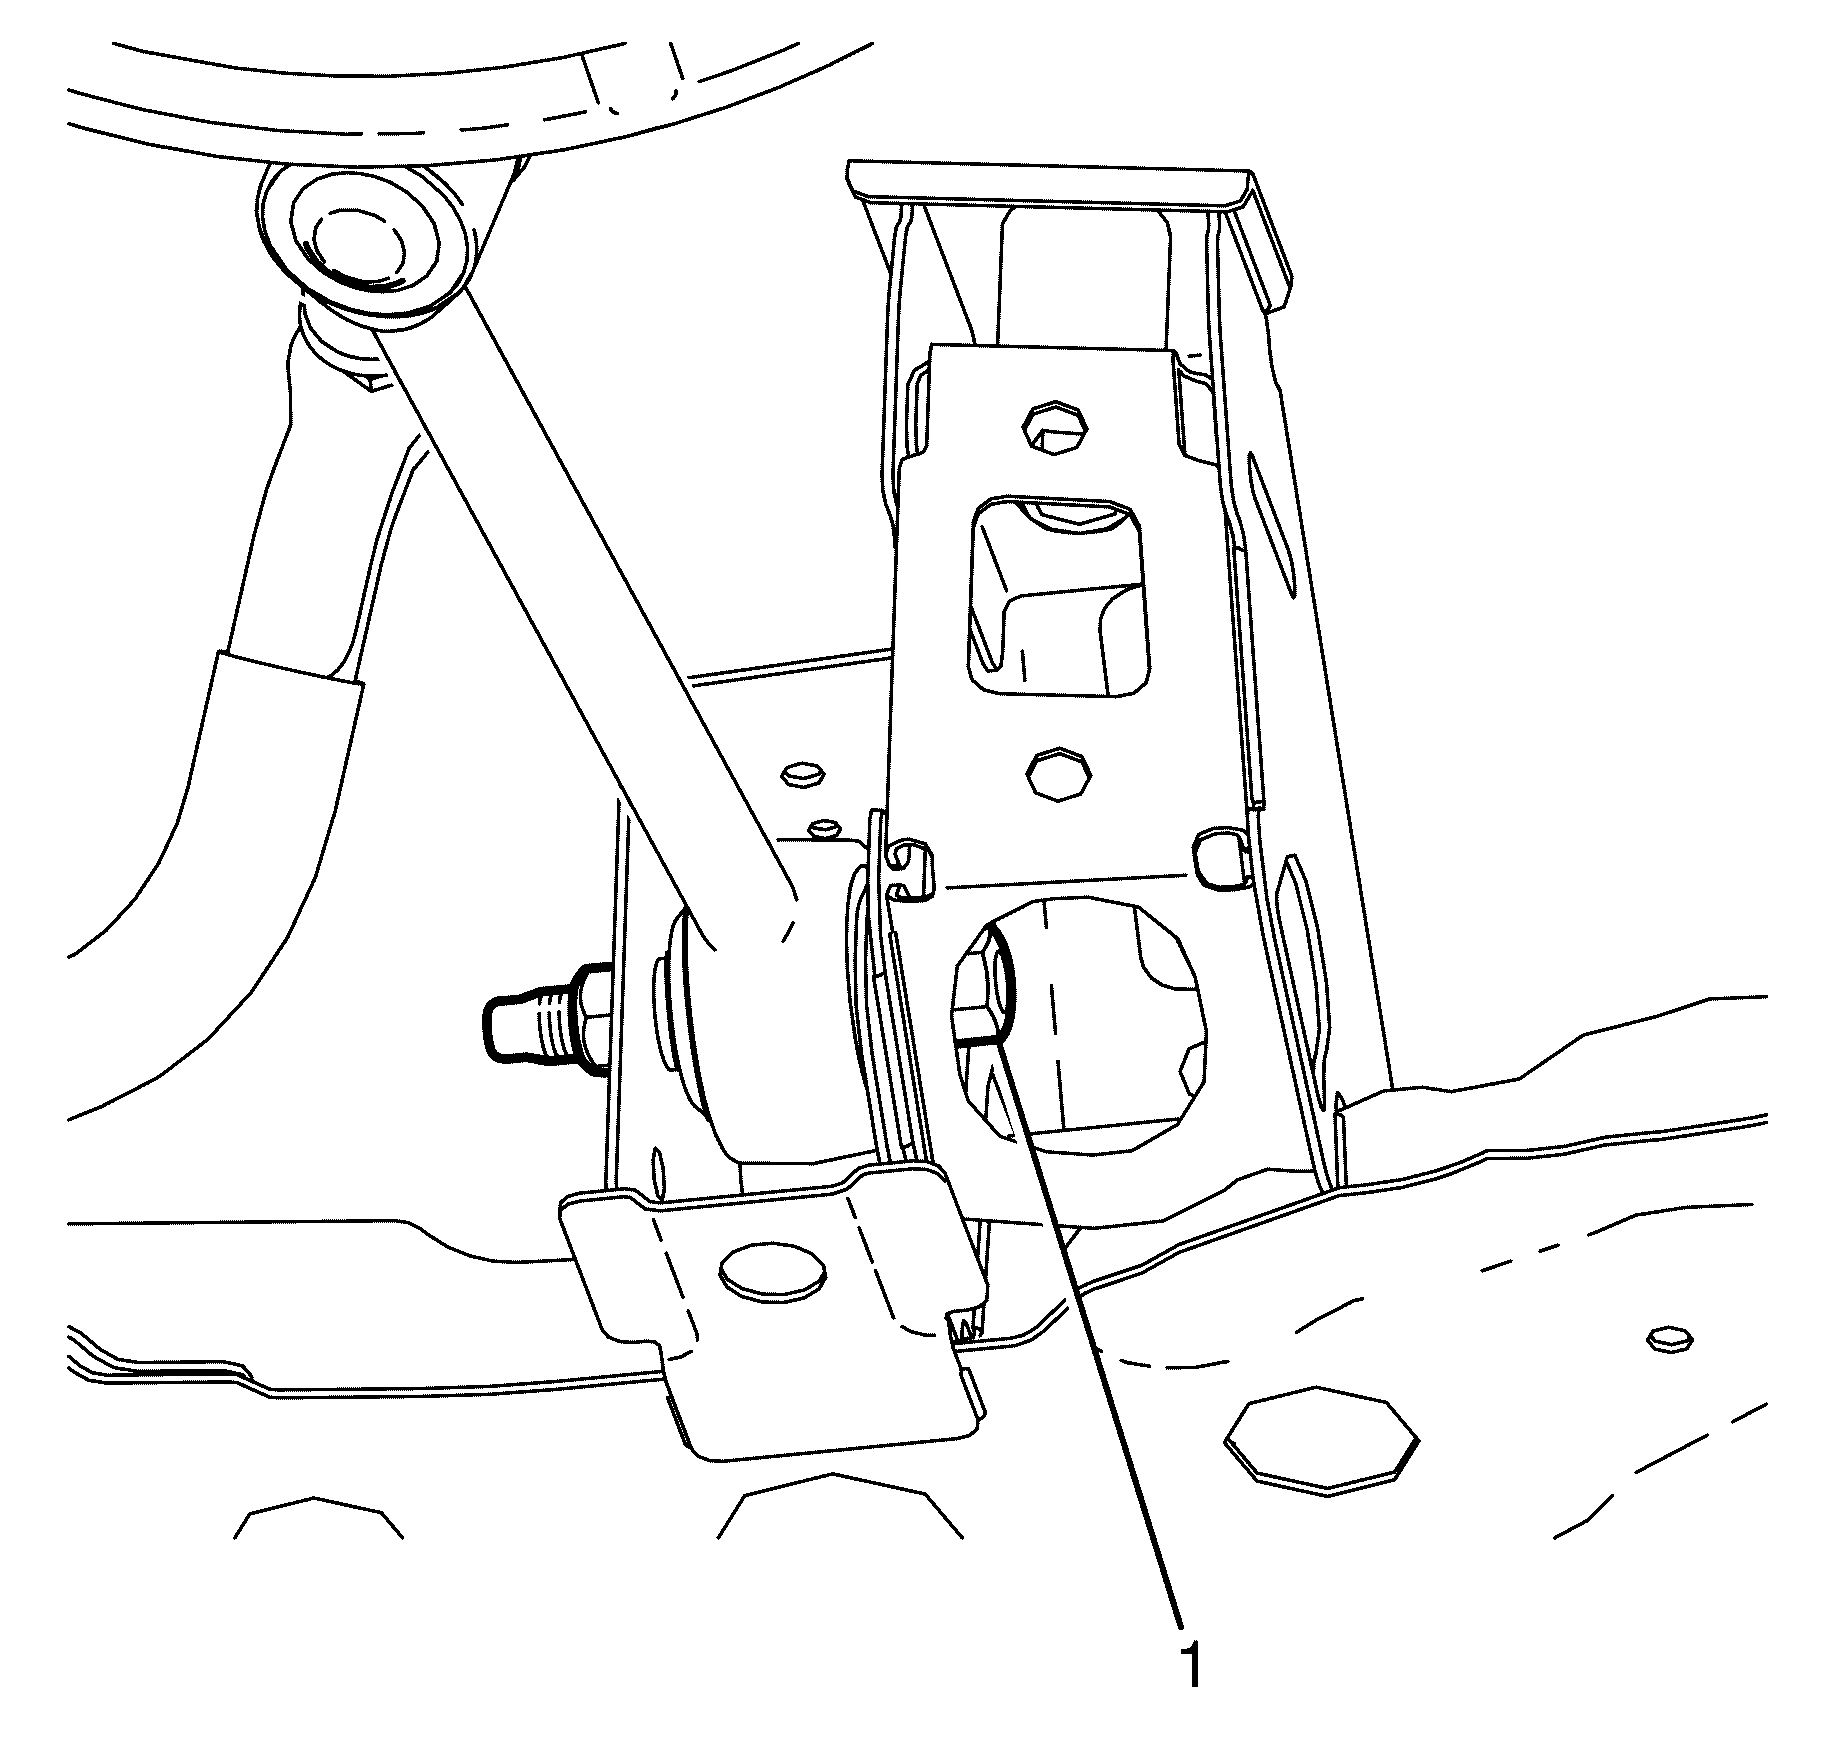
- Remove the front control arm to subframe retaining bolt (1).
- Remove the front control arm (3) from the subframe (2).
- Clean the captive nut thread.
- Inspect all parts for wear and damage.
Caution: Refer to Safety Glasses Caution in the Preface section.
Caution: Refer to Vehicle Lifting Caution in the Preface section.
Important: The front control arm ball joint is non-serviceable, if found faulty, the complete front control arm assembly must be replaced..
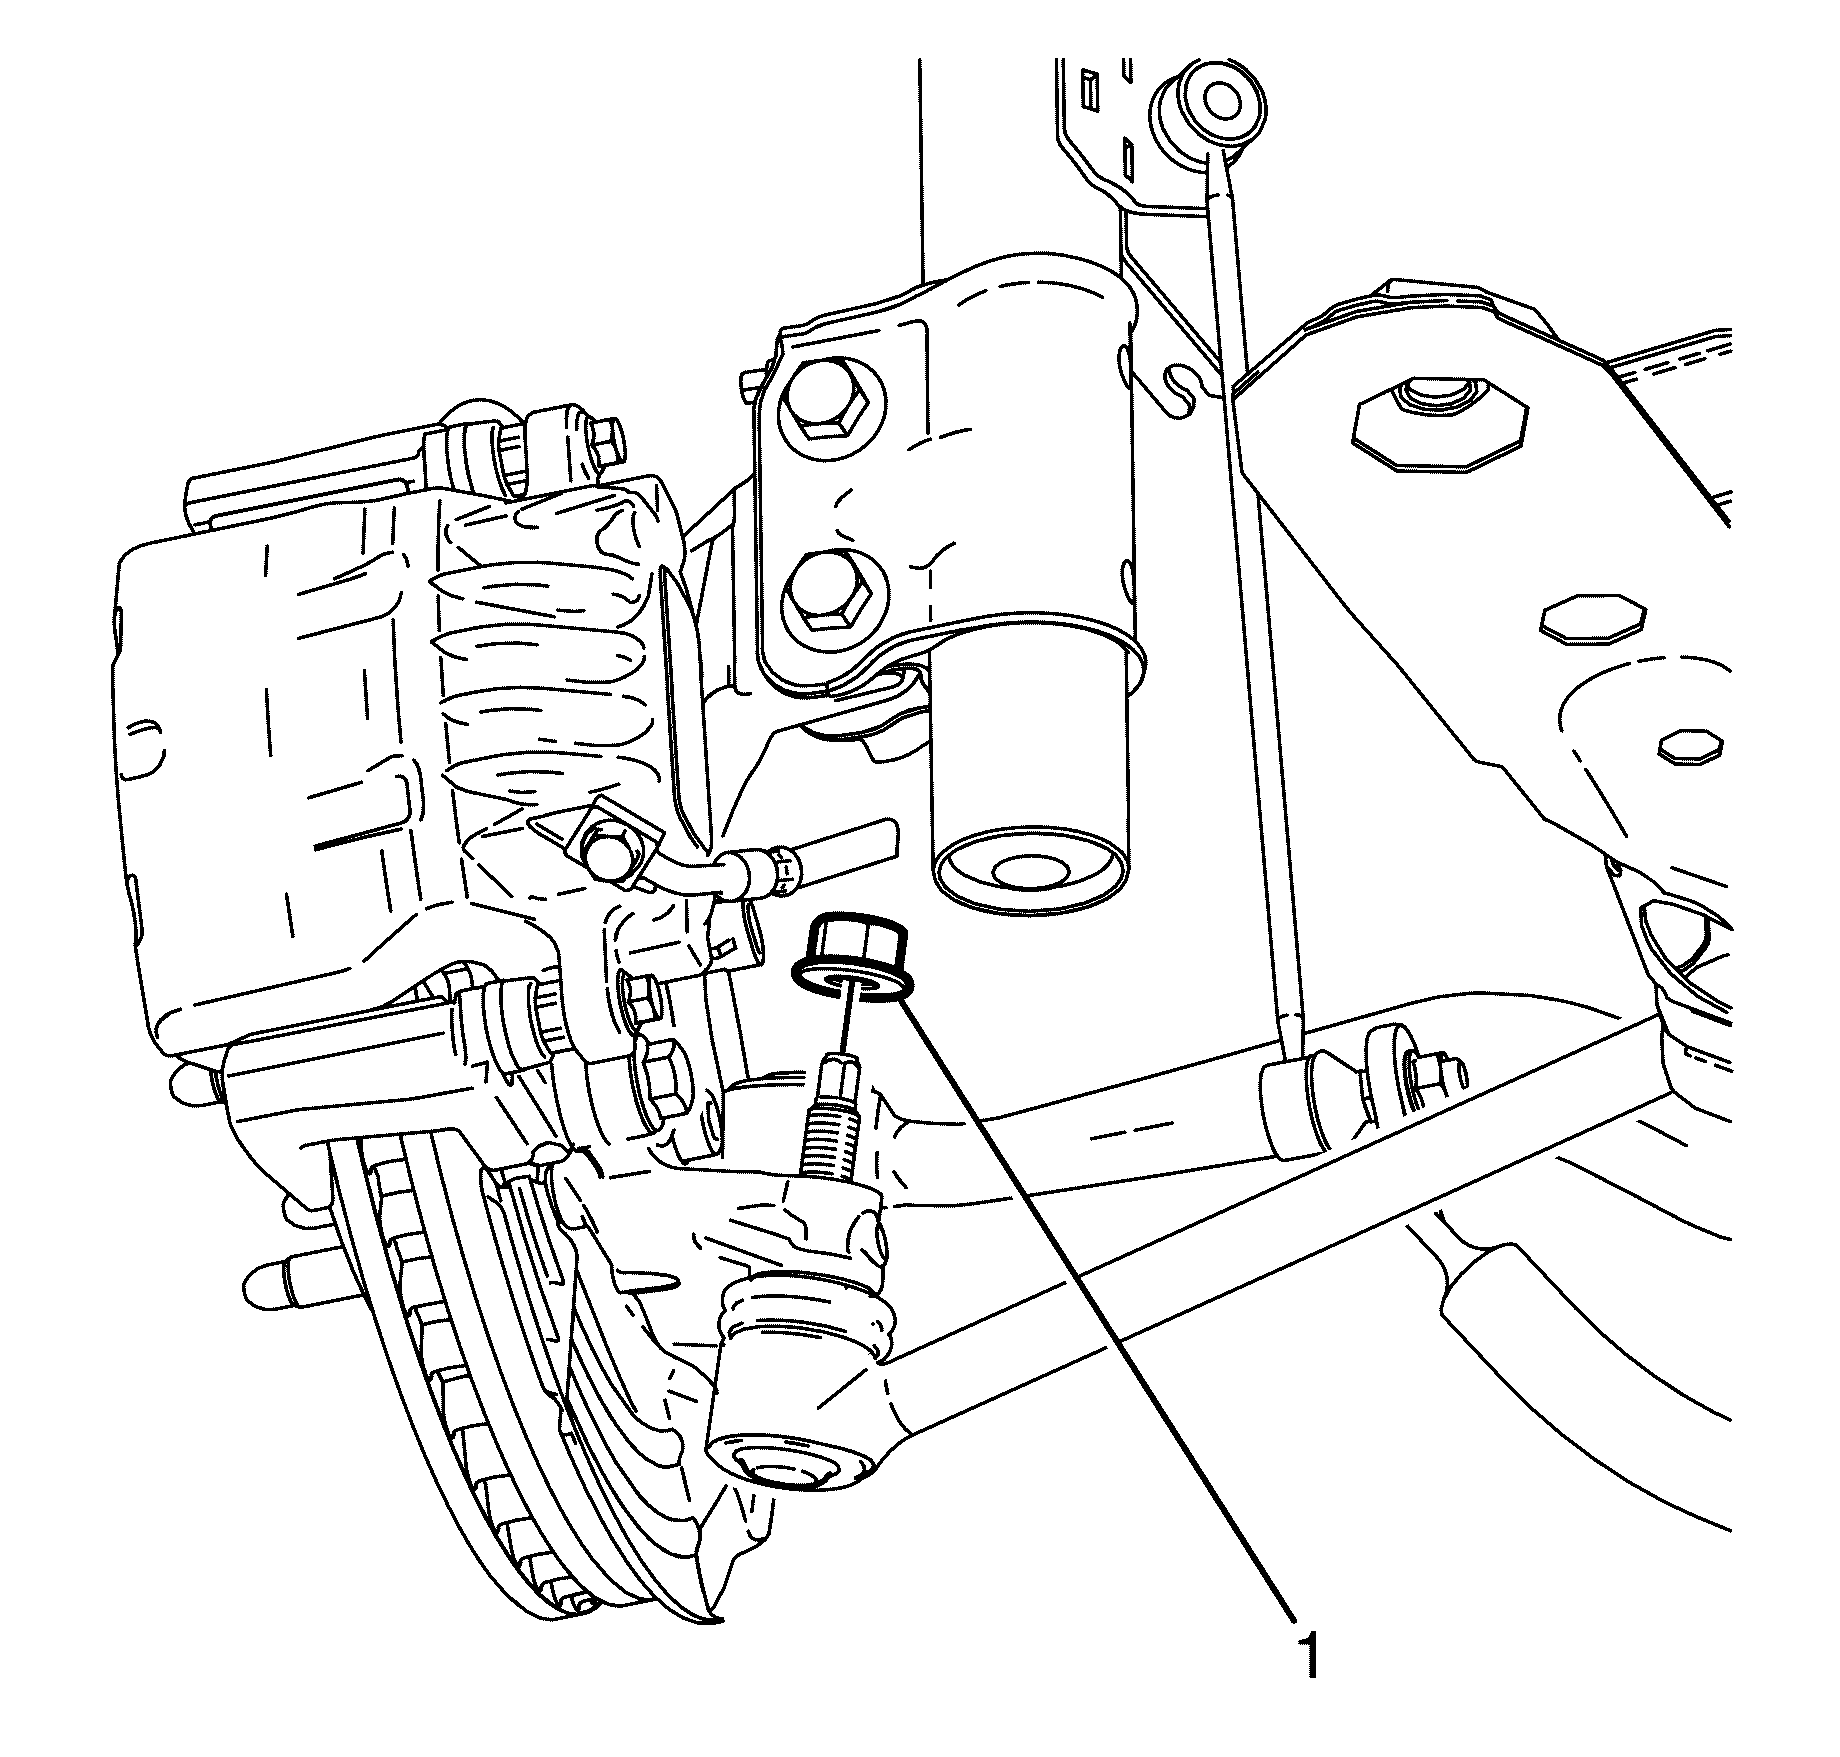
Important: Bolts and nuts with micro-encapsulated thread sealant must be discarded after removal.
Discard the nut.
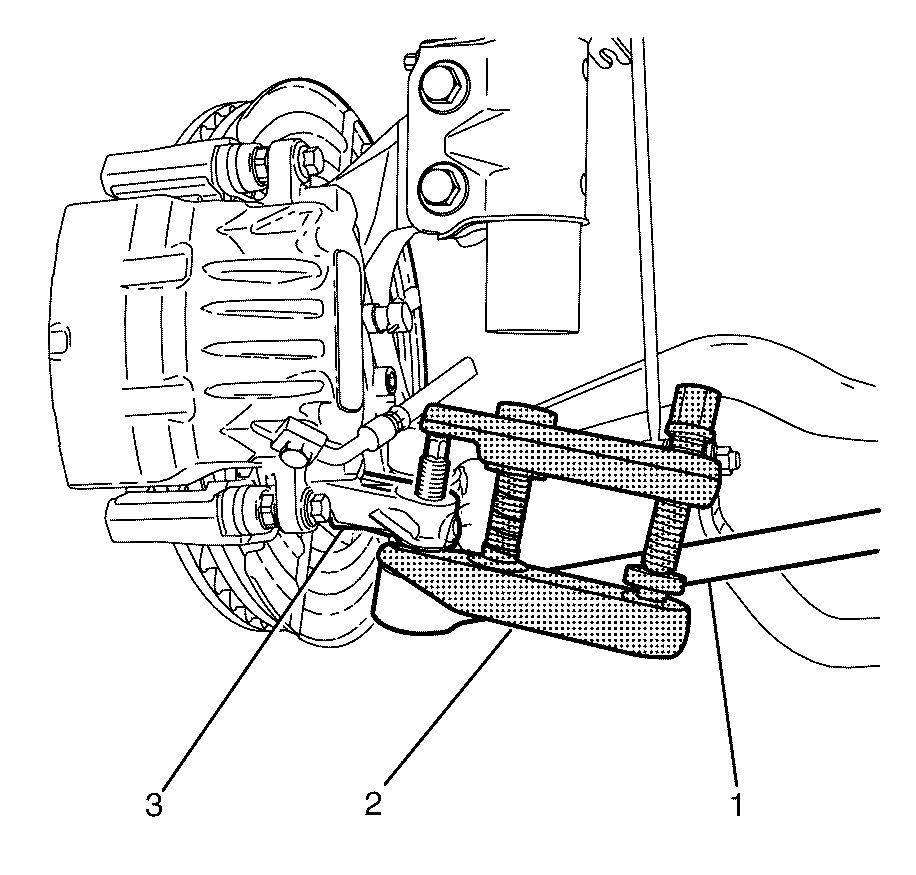
Important: Once a load is applied by the ball joint release tool loading bolt, a quick tap on the nut end of the tool will reduce the separating force required.
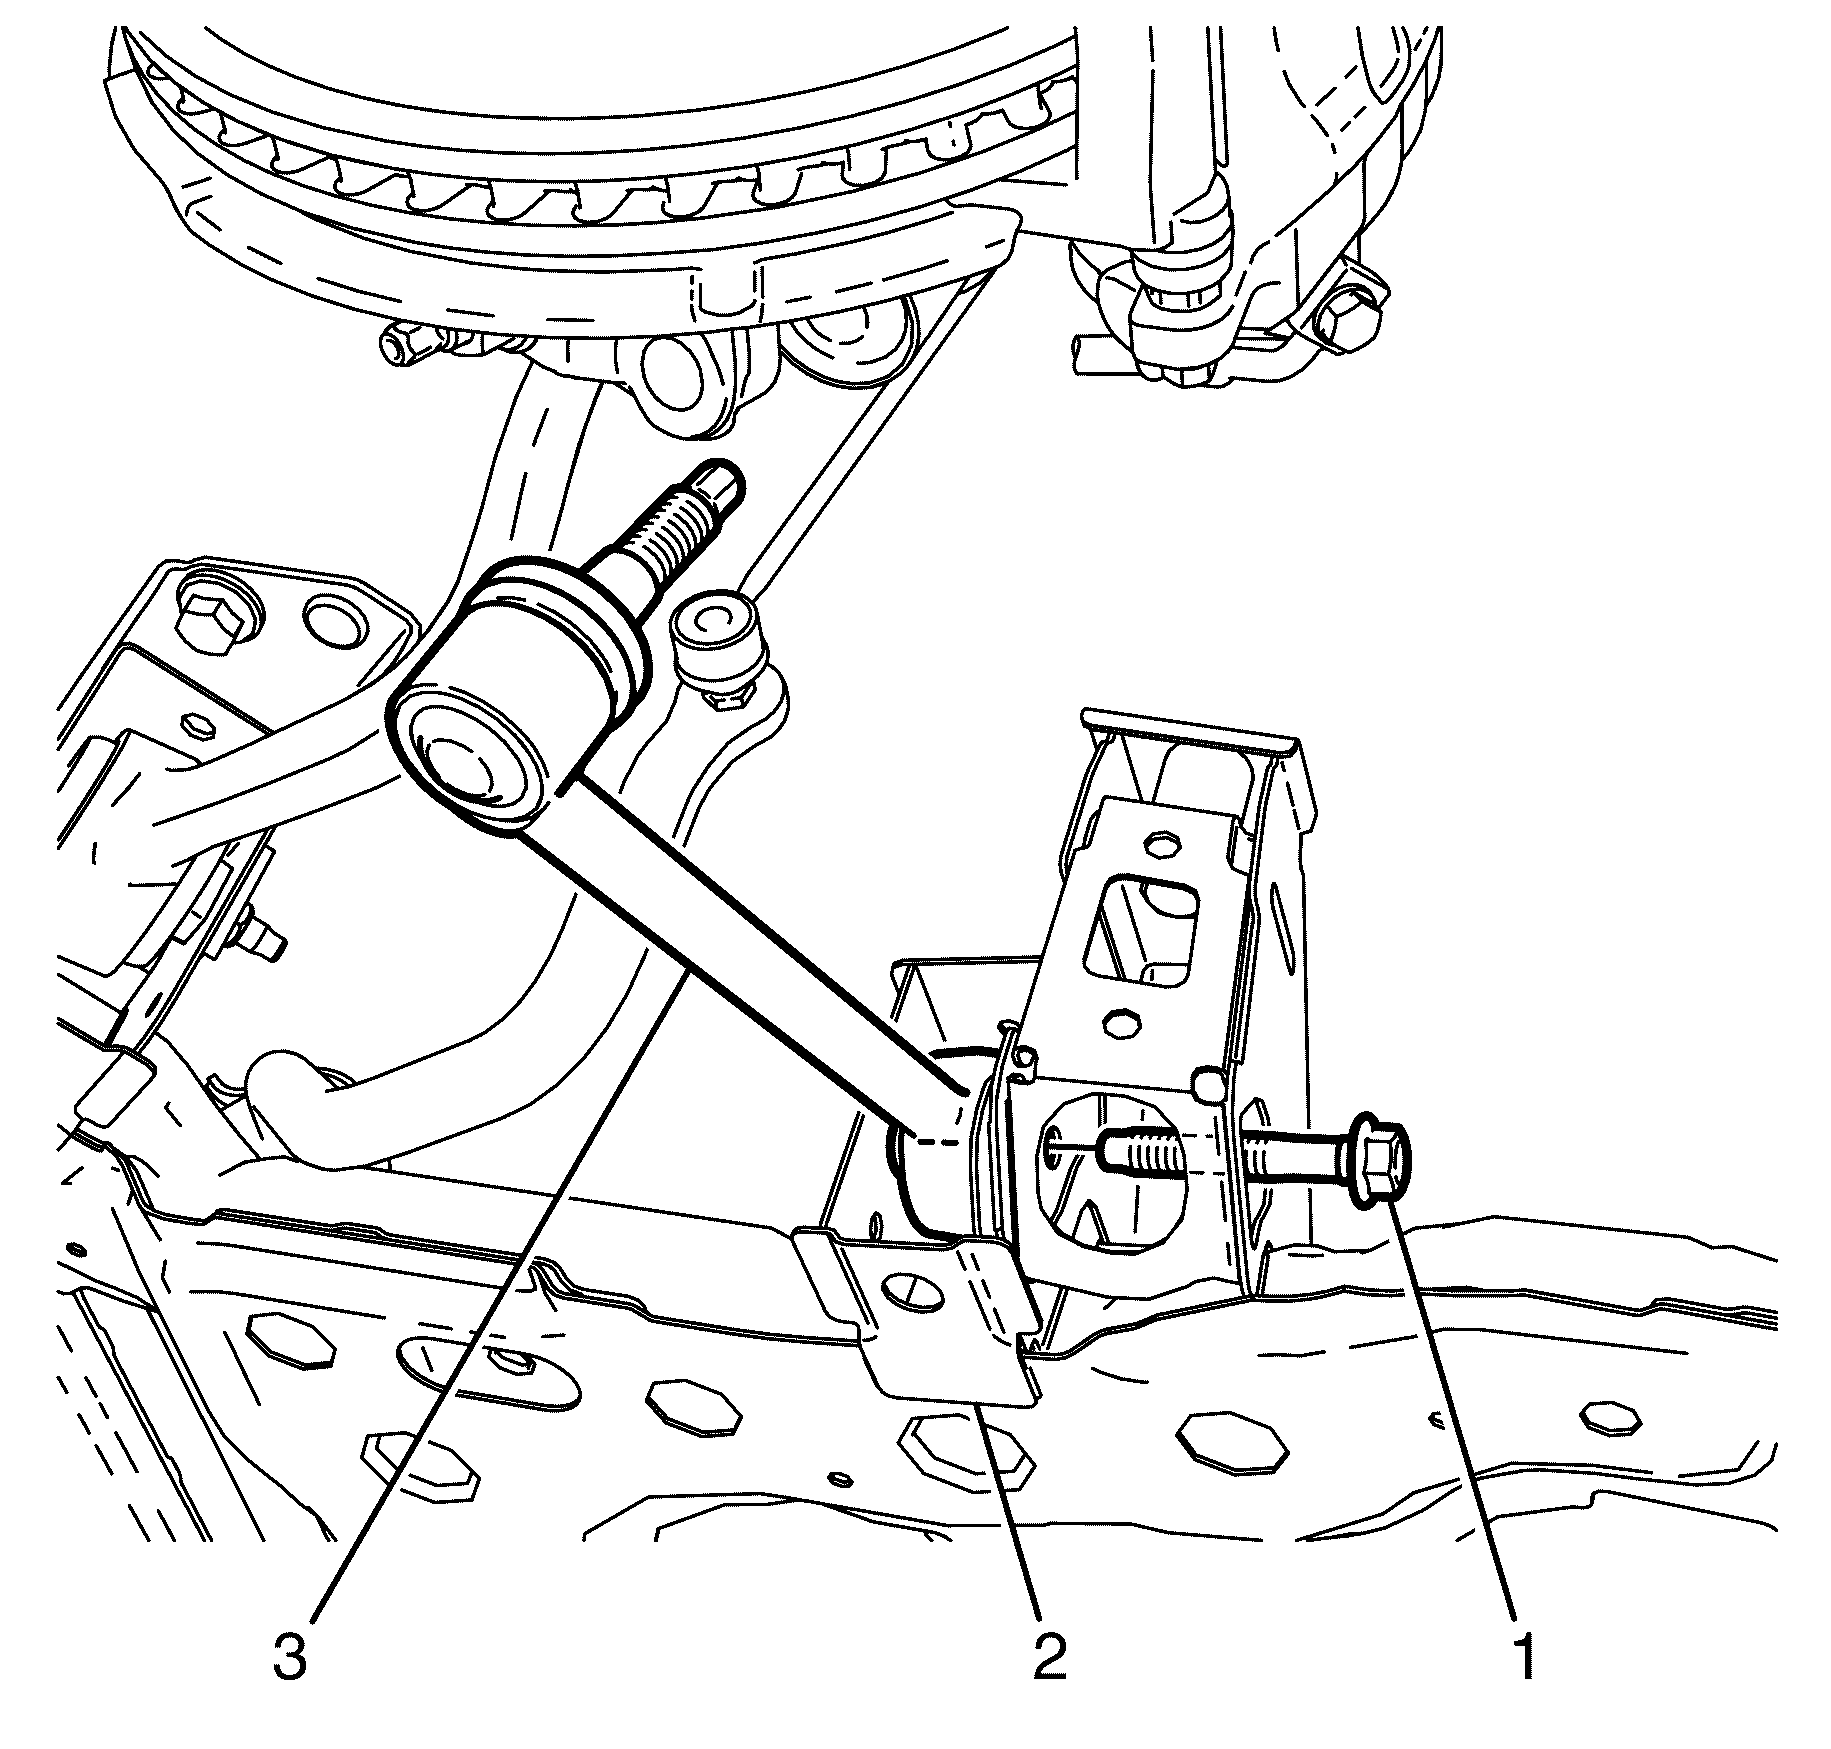
Discard the bolt.
Important: Clean the captive nut thread free of loctite with a suitable tap. This enables the correct torque value to be achieved on fitment.
Installation Procedure
- Install the front control arm (3) to the subframe (2).
- Install the NEW front control arm to subframe retaining bolt (1).
- Install the front control arm (1) to the steering knuckle (3).
- Install the NEW control arm to steering knuckle retaining nut (2).
- Install the front wheel. Refer to Tire and Wheel Removal and Installation.
- Remove the safety stands.
- Lower the vehicle to the ground.
- Bounce the vehicle several times to settle the suspension.
- Tighten the front control arm to subframe retaining bolt (1).

Important: The NEW front control arm to subframe retaining bolt (1) must not be fully tightened at this stage.
Do not fully tighten at this stage.
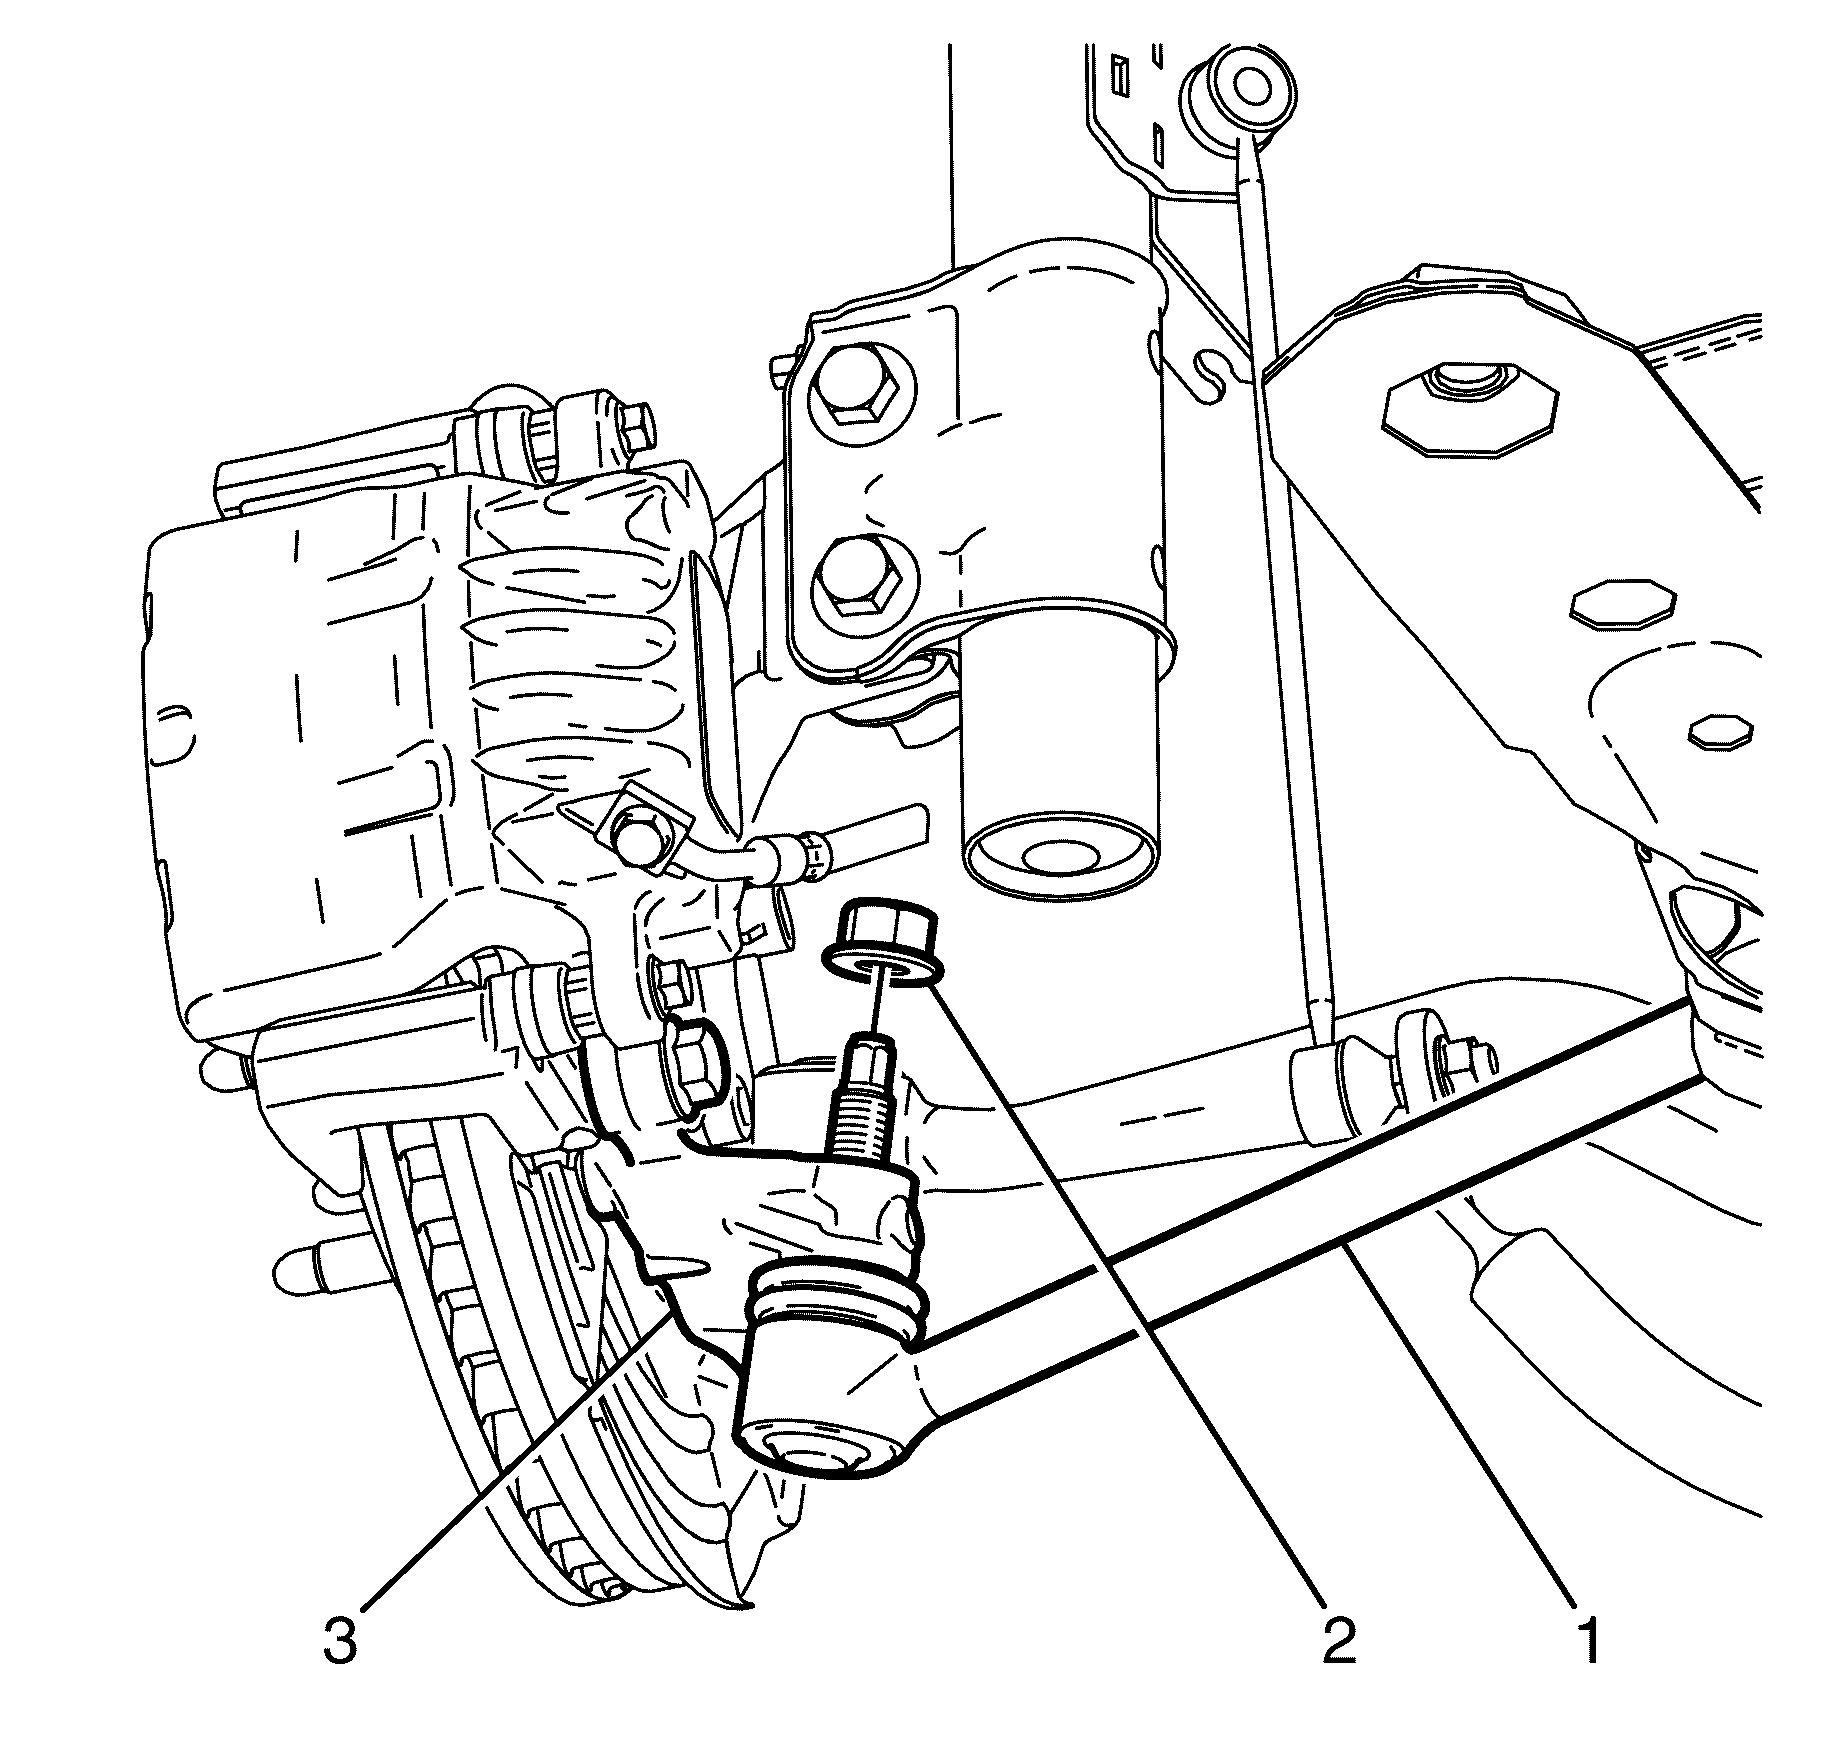
Notice: Refer to Fastener Notice in the Preface section.
Tighten
Tighten the bolts a first pass to 40 N·m
(37 lb ft).
Tighten the bolts an additional 60 degrees.
Tighten
Tighten the bolts a first pass to 50 N·m
(30 lb ft).
Tighten the bolts an additional 120 degrees.
