Shock Absorber Replacement HSV Except Clubsport
Removal Procedure - Type B
- Raise and support the vehicle. Refer to Lifting and Jacking the Vehicle .
- Remove the front wheel. Refer to Tire and Wheel Removal and Installation .
- Remove the front strut assembly. Refer to Strut Assembly Replacement .
- Remove the front strut assembly support bearing and mount. Refer to Front Suspension Strut Mount and Bearing Replacement
- Remove the coil spring. Refer to Front Coil Springs Replacement .
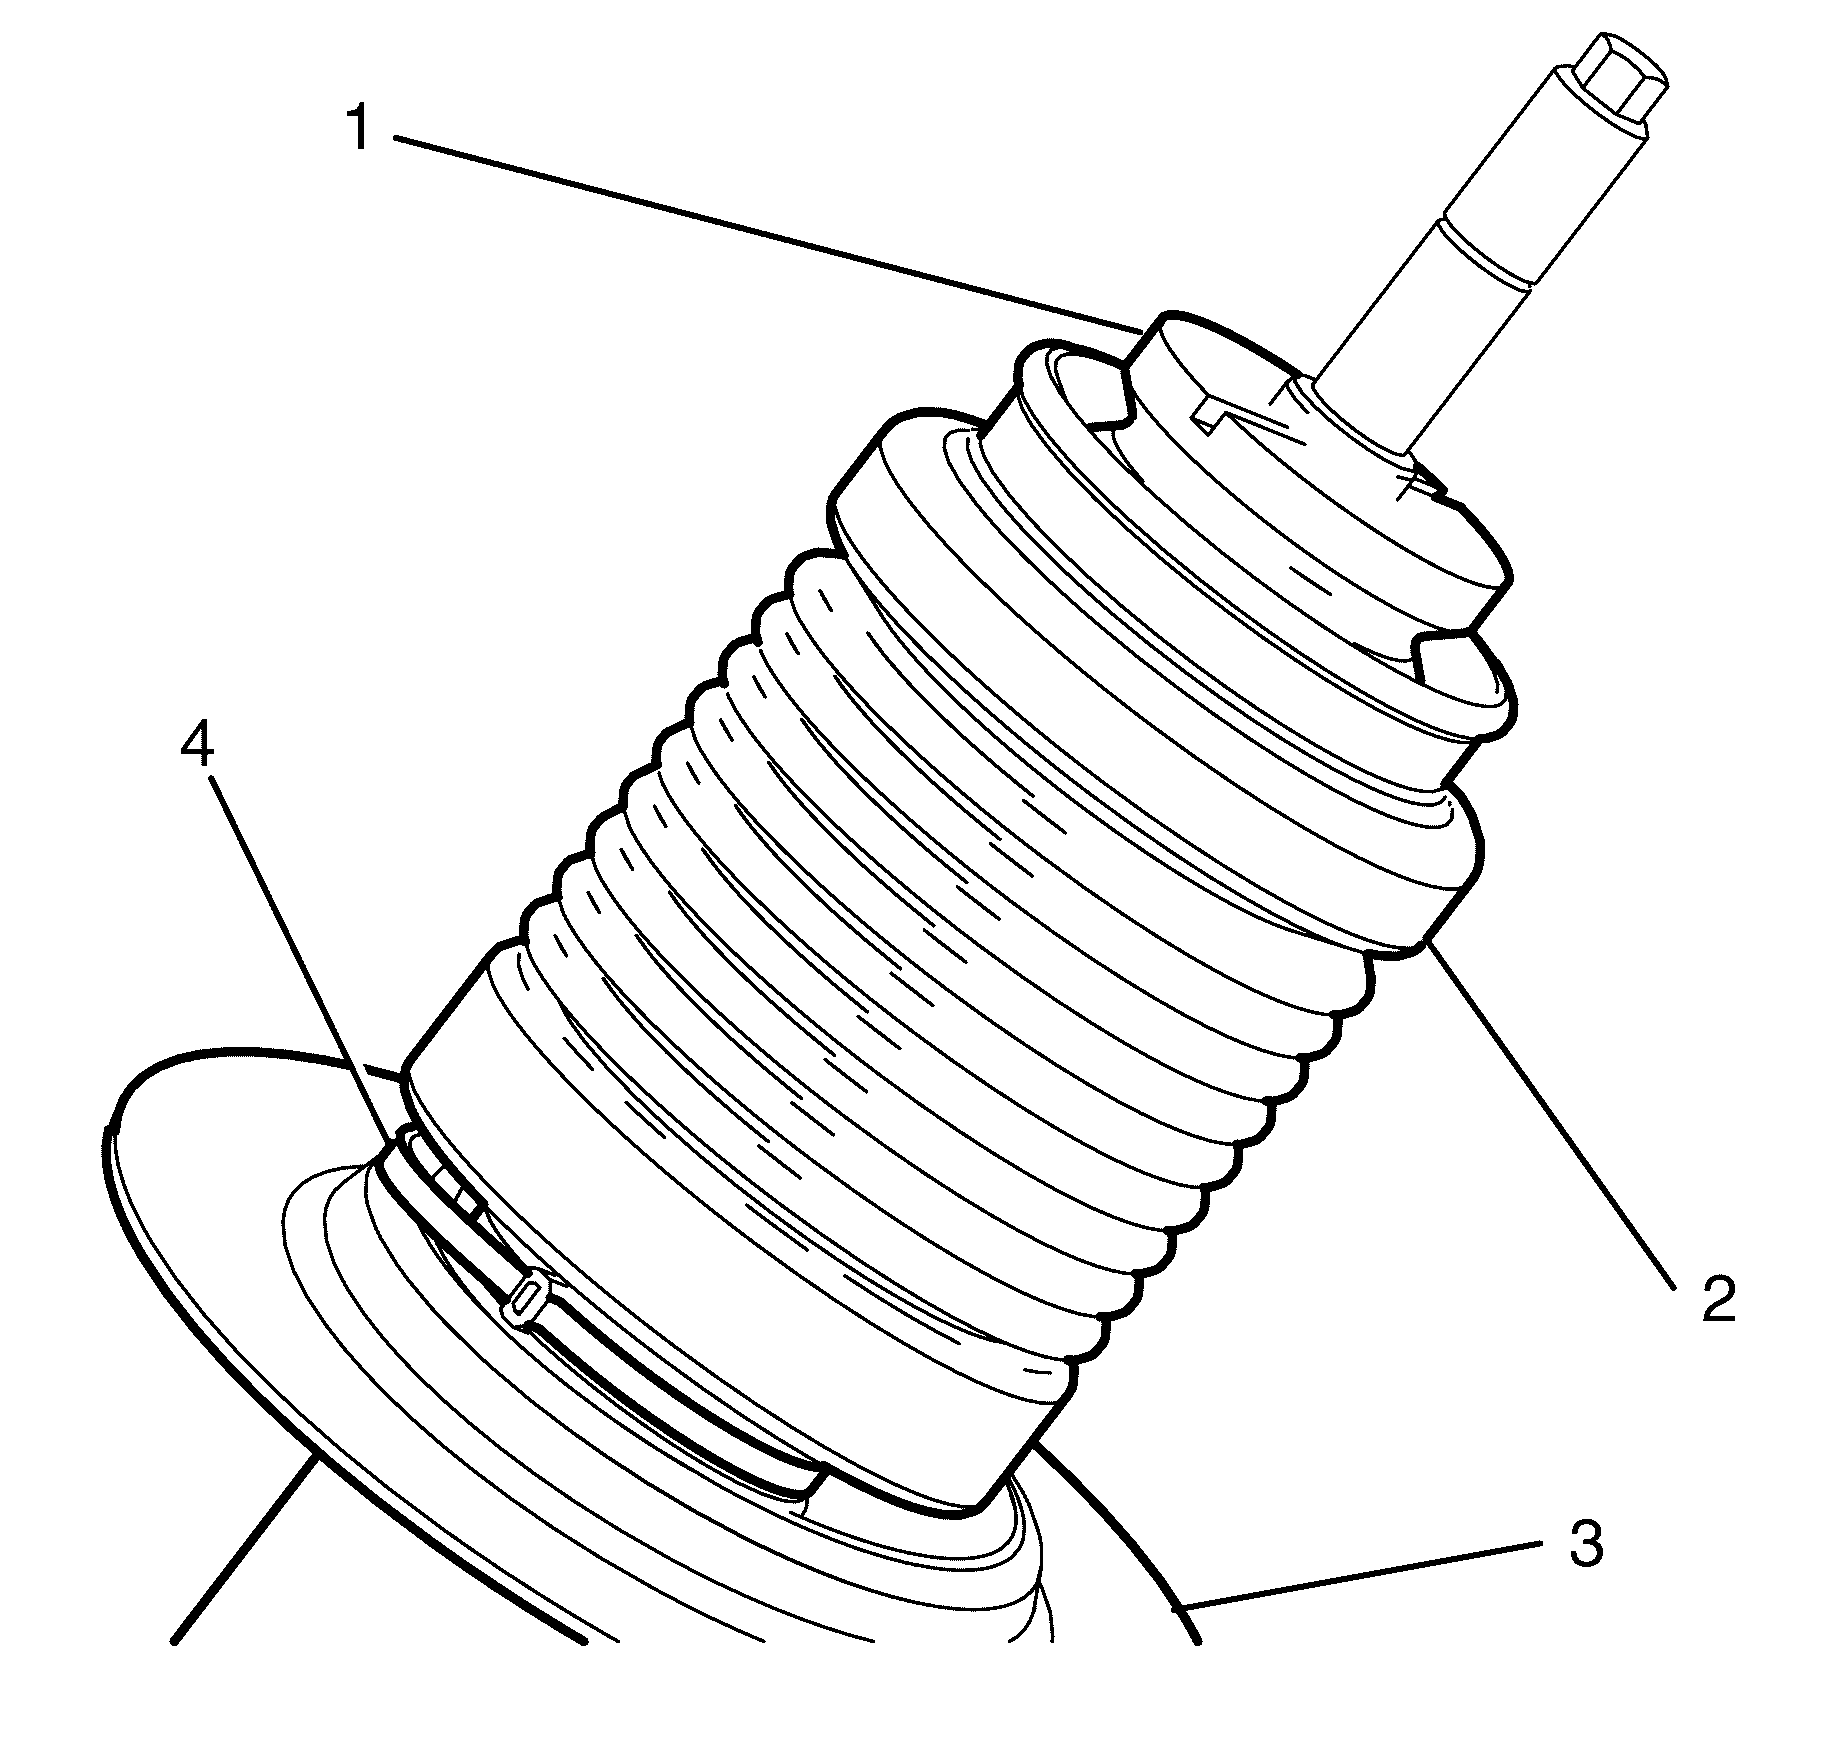
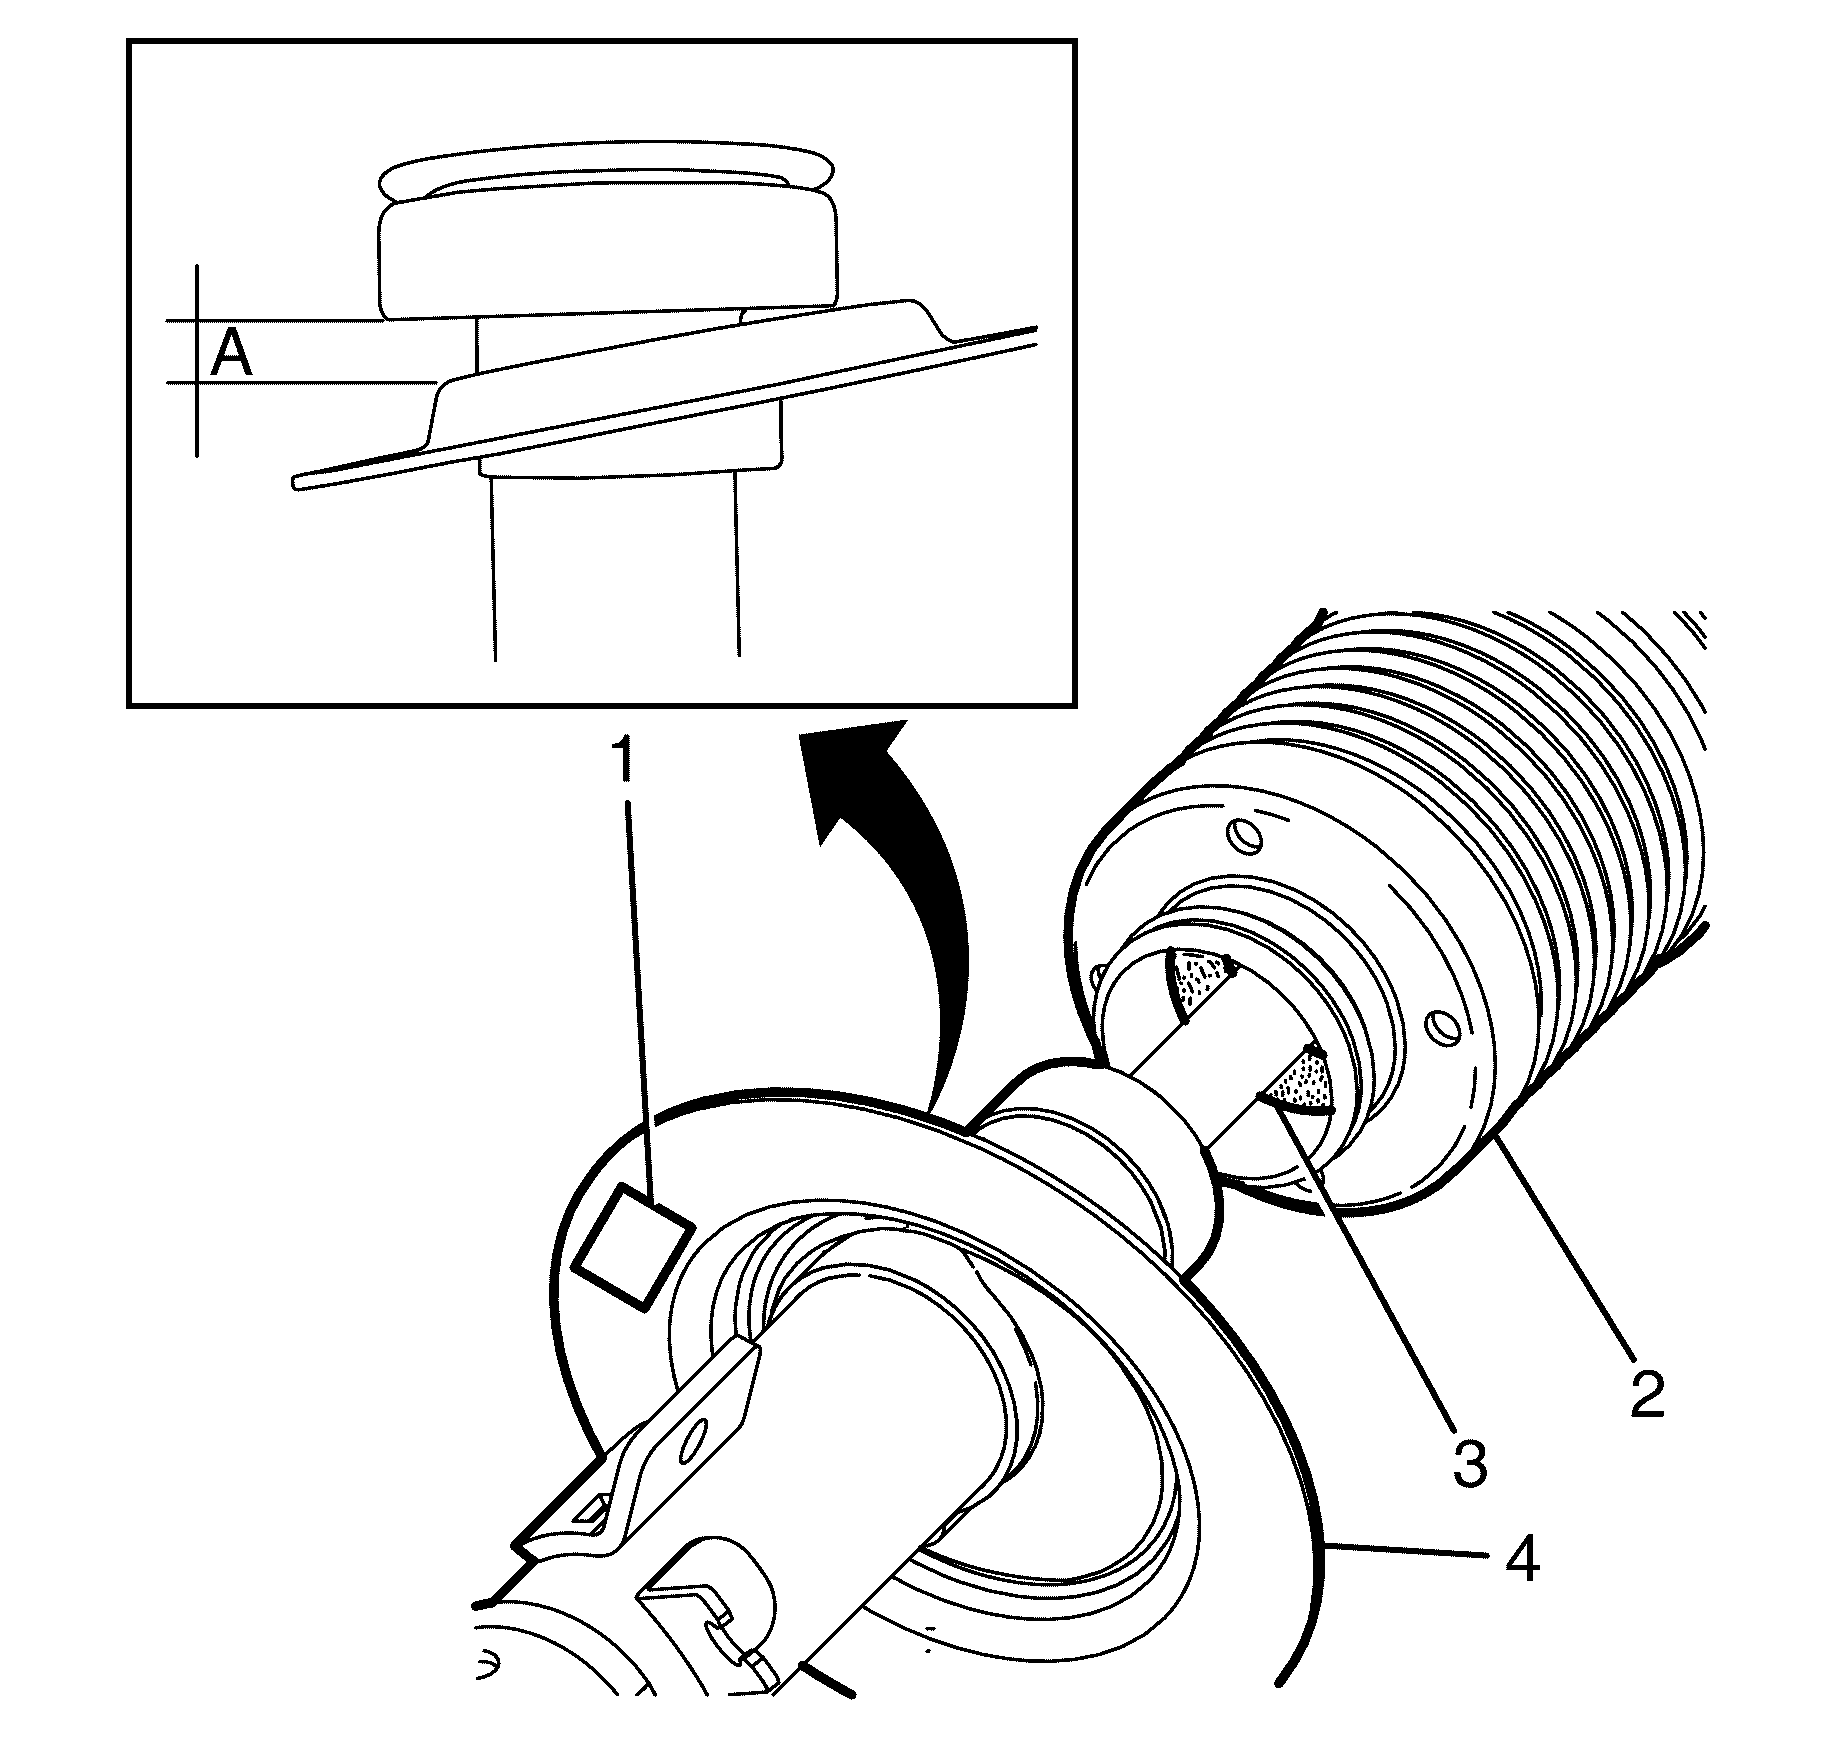
- Remove the compression bumper (1).
- Remove the dust boot lower retaining clamp (4).
- Remove the dust boot and filter assembly (2) from the strut unit (3).
- Inspect all parts for wear and damage.
Caution: Refer to Safety Glasses Caution in the Preface section.
Caution: Refer to Vehicle Lifting Caution in the Preface section.

Important: Dust boot retaining clamps are single use parts and must be discarded after removal.
Discard the clamp.
Installation Procedure - Type B
- Install the dust boot and filter assembly (2,3) over the strut unit (4).
- Install the NEW dust boot lower retaining clamp (4) securing the dust boot (2) to the strut unit (3).
- Install the compression bumper (1).
- Install the coil spring. Refer to Front Coil Springs Replacement .
- Install the strut assembly support bearing and mount. Refer to Front Suspension Strut Mount and Bearing Replacement
- Install the front strut assembly. Refer to Strut Assembly Replacement .
- Install the front wheel. Refer to Tire and Wheel Removal and Installation .
- Remove the safety stands.
- Lower the vehicle to the ground.
Notice: Refer to Fastener Tightening Specifications in the Preface section.

Important: The dust filter (3) must remain correctly seated inside the dust boot (2).
Important: The bottom of the dust boot and filter assembly (2) must be positioned so that the lower lip of the dust boot (2) completely passes over the strut body retaining ring.

Shock Absorber Replacement LWB SWB Clubsport CSV VXR8
Removal Procedure
- Raise and support the vehicle. Refer to Lifting and Jacking the Vehicle .
- Remove the front wheel. Refer to Tire and Wheel Removal and Installation .
- Remove the front strut assembly. Refer to Strut Assembly Replacement .
- Remove the front strut assembly support bearing and mount. Refer to Front Suspension Strut Mount and Bearing Replacement
- Remove the front coil spring. Refer to Coil Spring Replacement in Front Suspension.
- Remove the compression bumper (1).
- Remove the dust boot lower retaining clamp (4).
- Remove the dust boot and filter assembly (2) from the strut unit (3).
- Inspect all parts for wear and damage.
Caution: Refer to Safety Glasses Caution in the Preface section.
Caution: Refer to Vehicle Lifting Caution in the Preface section.

Discard the clamp.
Installation Procedure
- Install the dust boot and filter assembly (2) over the strut unit (3).
- Install the NEW dust boot lower retaining clamp (4) securing the dust boot (2) to the strut unit (3).
- Install the compression bumper (1).
- Install the coil spring. Refer to Coil Spring Replacement in Front Suspension.
- Install the front strut assembly support bearing and mount. Refer to Front Suspension Strut Mount and Bearing Replacement
- Install the front strut assembly. Refer to Strut Assembly Replacement .
- Install the front wheel. Refer to Tire and Wheel Removal and Installation .
- Remove the safety stands.
- Lower the vehicle to the ground.
Notice: Refer to Fastener Tightening Specifications in the Preface section.

Important: The filter (3) must remain correctly seated inside the dust boot (2).
Important: The bottom of the dust boot and filter assembly (2) must be positioned so that the lower lip of the dust boot completely passes over the strut body retaining ring.

