Roof Weld Joint Reveal Molding Replacement Sportwagon
Removal Procedure
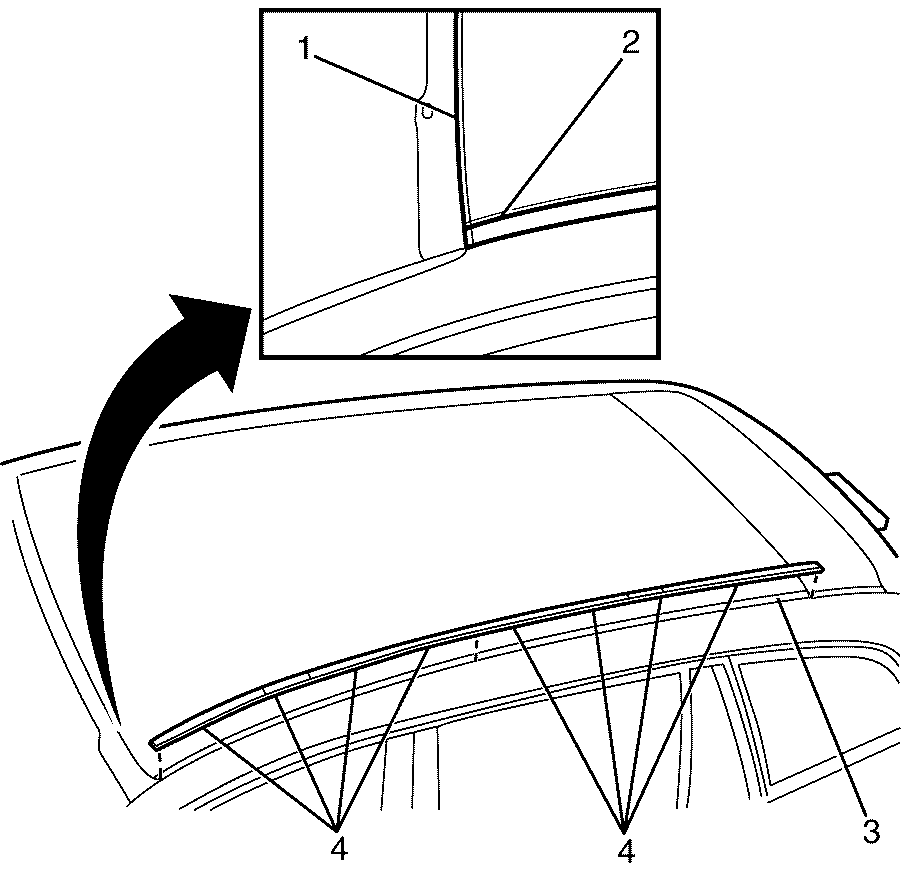
- Remove the roof weld joint reveal moulding (2) from the roof weld joint (3) by lifting the front edge of the roof weld joint reveal moulding upwards to disengage the roof weld joint reveal moulding retaining clips (4).
- Remove any dirt or debris from the roof weld joint (3).

Important: Protect the paint and body with tape or a clean cloth. Failure to do so may result in damage to the paint work.
Important: Using a suitable tool lift the roof weld joint reveal moulding (2) from the roof weld joint (3) starting at the front of the vehicle at points close to the top edge of the front windshield seal (1).
Important: Clean the surface with a suitable cleaning solution and a lint free cloth to remove any dirt or debris from the roof weld joint (3).
Installation Procedure
- Make sure the front edge of the roof weld joint reveal moulding (2) is located correctly under the top edge of the front windshield seal (1).
- Align the roof weld joint reveal moulding retaining clips (4) in the correct position and push firmly into place engaging the roof weld joint reveal moulding (2) into the body.

Important: If the roof weld joint reveal moulding or roof weld joint reveal moulding retaining clips are cracked, broken or damaged, replace the damaged components.
Removal Procedure - Rear
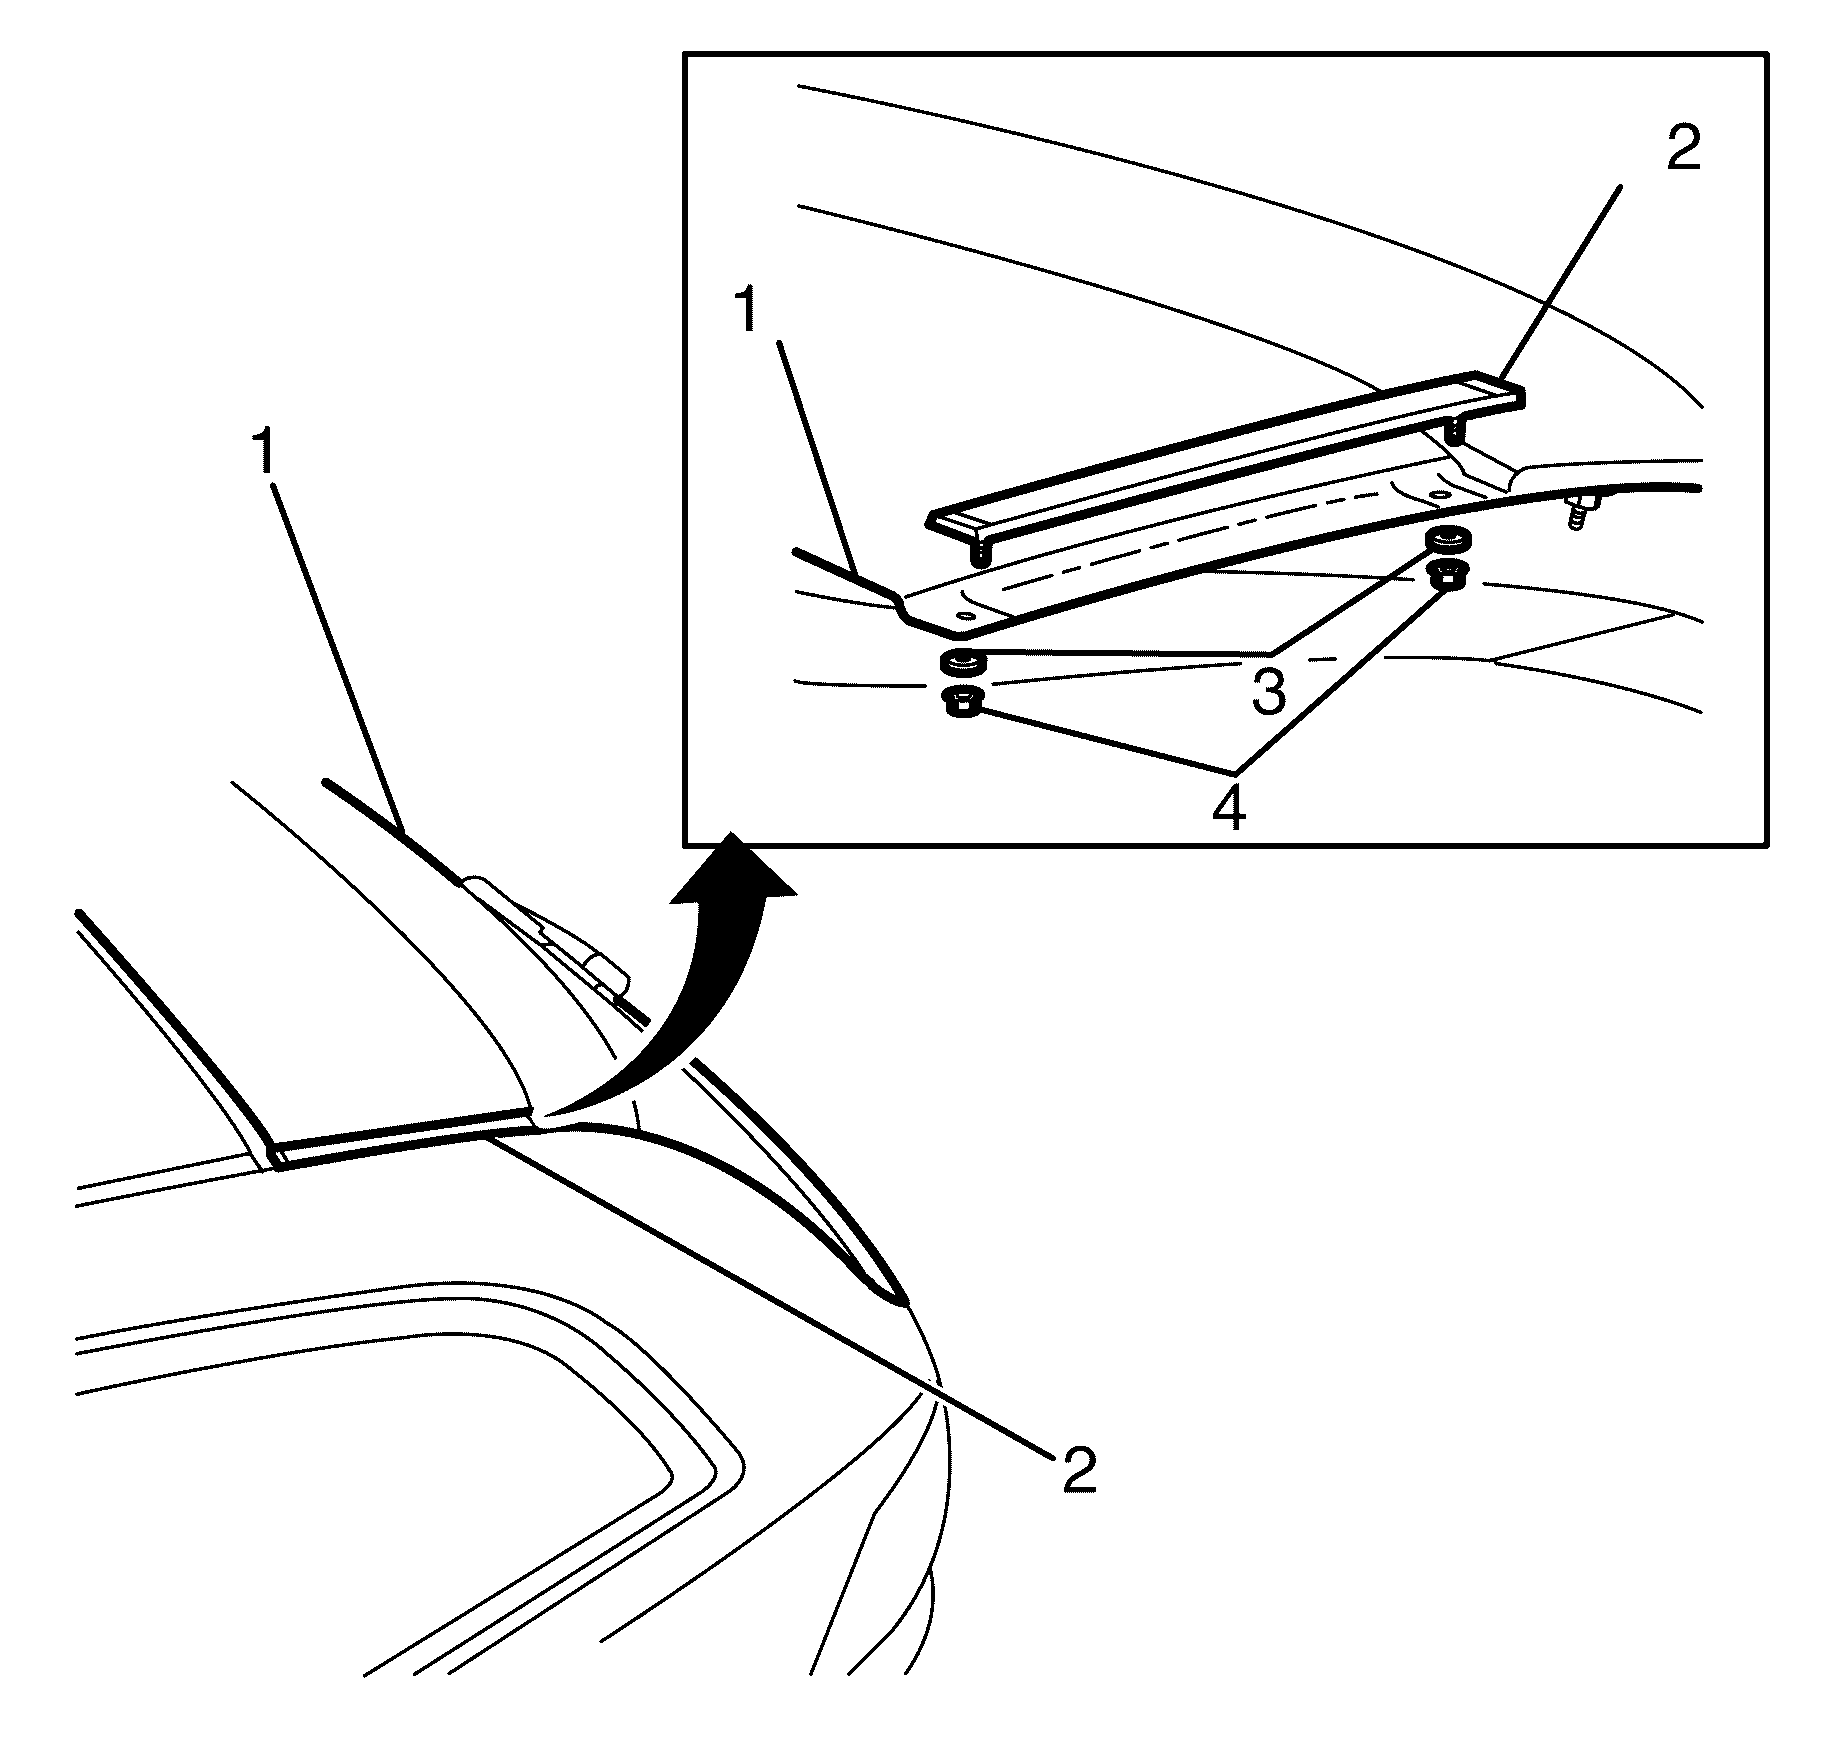
- Open the liftgate (1).
- Remove the roof weld joint rear reveal moulding nuts (4) and washers (3).
- Remove the roof weld joint rear reveal moulding (2) from the liftgate (1).
- Remove any dirt or debris from the roof weld joint rear reveal moulding mounting surface.

Important: Care must be taken when removing the roof weld joint rear reveal moulding (2) not to damage the vehicle paint.
Important: Clean the roof weld joint rear reveal moulding mounting surface with a suitable cleaning solution and a lint free cloth to remove any dirt or debris.
Installation Procedure - Rear
- Install the roof weld joint rear reveal moulding (2) to the liftgate (1).
- Install the roof weld joint rear reveal moulding nuts (4) and washers (3).
- Tighten the roof weld joint rear reveal moulding nuts (4).

Important: NEW sealing washers (3) must be used with the roof weld joint rear reveal moulding nuts (4) when installing the roof weld joint rear reveal moulding (2).
Notice: Refer to Fastener Notice in the Preface section.
Tighten
Tighten the nuts to 3 N·m (27 lb in).
Roof Weld Joint Reveal Molding Replacement Sedan
Removal Procedure
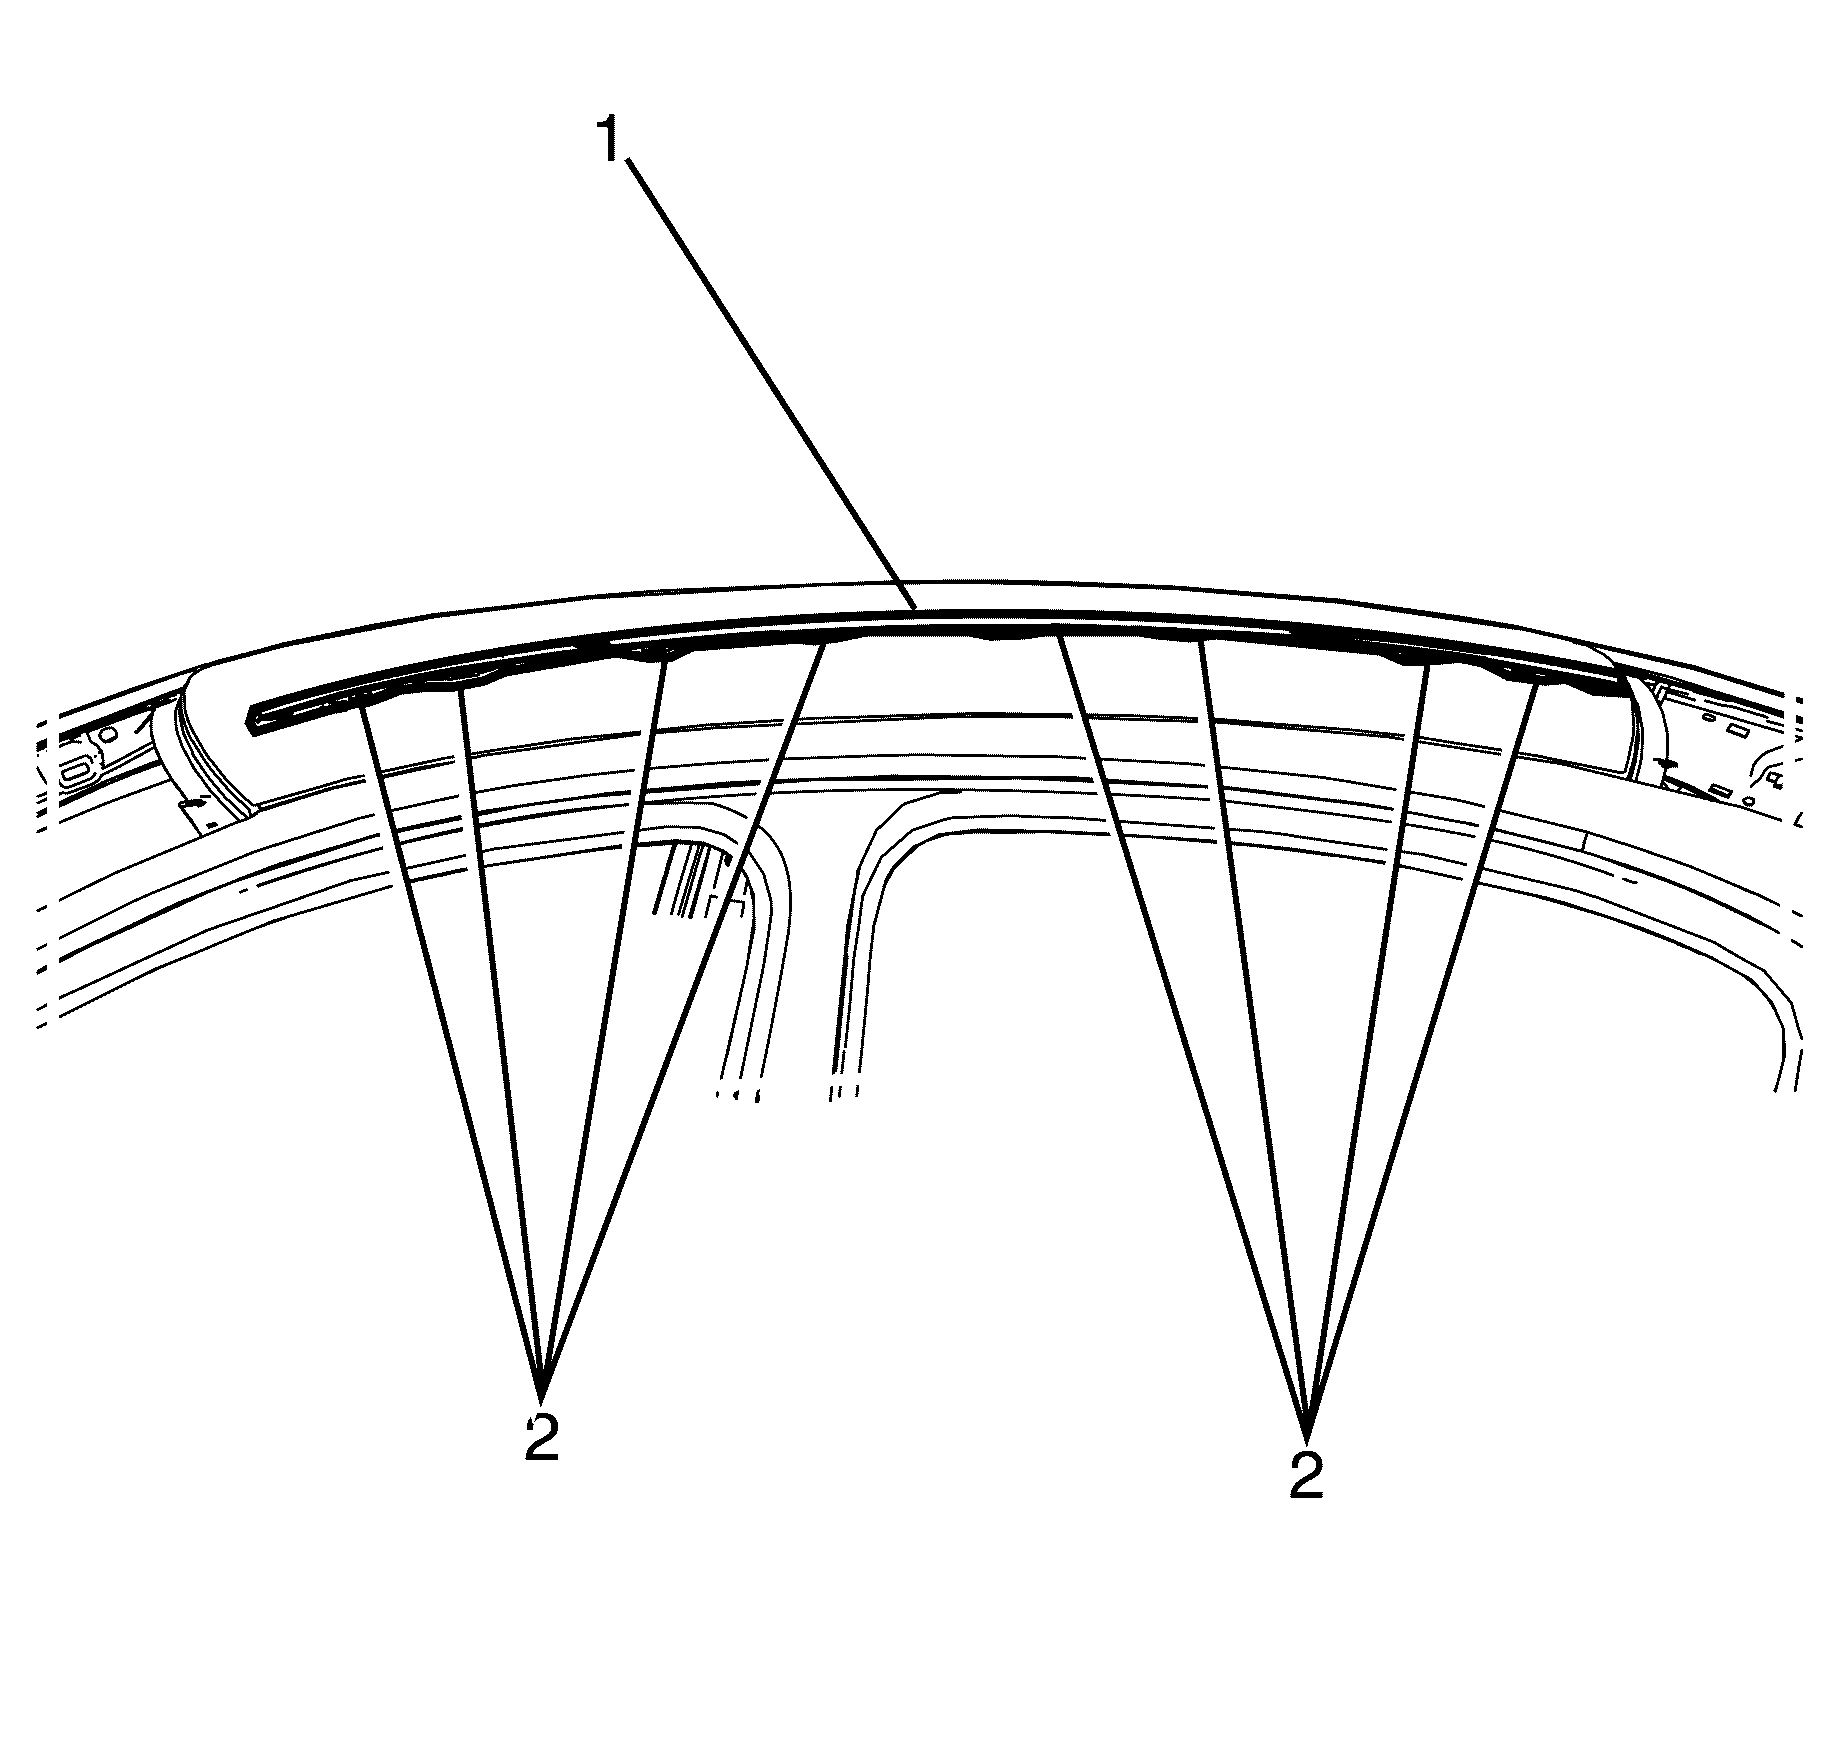
- Starting at the windshield pillar rear, carefully pry off the roof weld joint reveal moulding from the roof weld joint, taking care not to break the roof weld joint reveal moulding retaining clips (2).
- Remove the roof weld joint reveal moulding (1).
- Clean the accessible roof weld joint with a suitable cleaning solution, using a lint free cloth.
Important: If the roof weld joint reveal moulding cracks, breaks or is damaged in any way, replace the moulding.
Important: Take care not to damage the paint on the vehicle when prying the roof weld joint reveal moulding from the roof.

Installation Procedure
- Position the roof weld joint reveal moulding on the vehicle and slide the rear end of the moulding into the rear moulding retainer.
- Seat the roof weld joint reveal moulding in the roof weld joint and starting at the rear, carefully engage the roof weld joint reveal moulding retaining clips (2) into position.

Important: Make sure that the rear datum pin is positioned correctly.
