For 1990-2009 cars only
Radiator Flush
- Drain the cooling system. Refer to Cooling System Draining and Filling .
- Remove the lower radiator outlet hose at the coolant inlet pipe connection.
- Remove the upper radiator inlet hose at the coolant outlet housing connection.
- Attach a lead away hose to the open end of the upper radiator hose.
- Attach a suitable piece of hose or adaptor between the flushing gun and the open end of the lower radiator hose.
- Connect and operate the flushing equipment as recommended by the manufacturer.
- Continue flushing until water from the lead away hose runs clean and clear.
- Install all disconnected hoses, ensuring that they are correctly position and securely clamped.
- Fill the cooling system. Refer to Cooling System Draining and Filling .
- Pressure test the cooling system. Refer to Cooling System Leak Testing .
Caution: Refer to Safety Glasses Caution in the Preface section.
Notice: Refer to General Repair Instructions in the Preface section.
Caution: Refer to General Repair Instructions in the Preface section.
Heater Hoses and Core
- Drain the cooling system. Refer to Cooling System Draining and Filling .
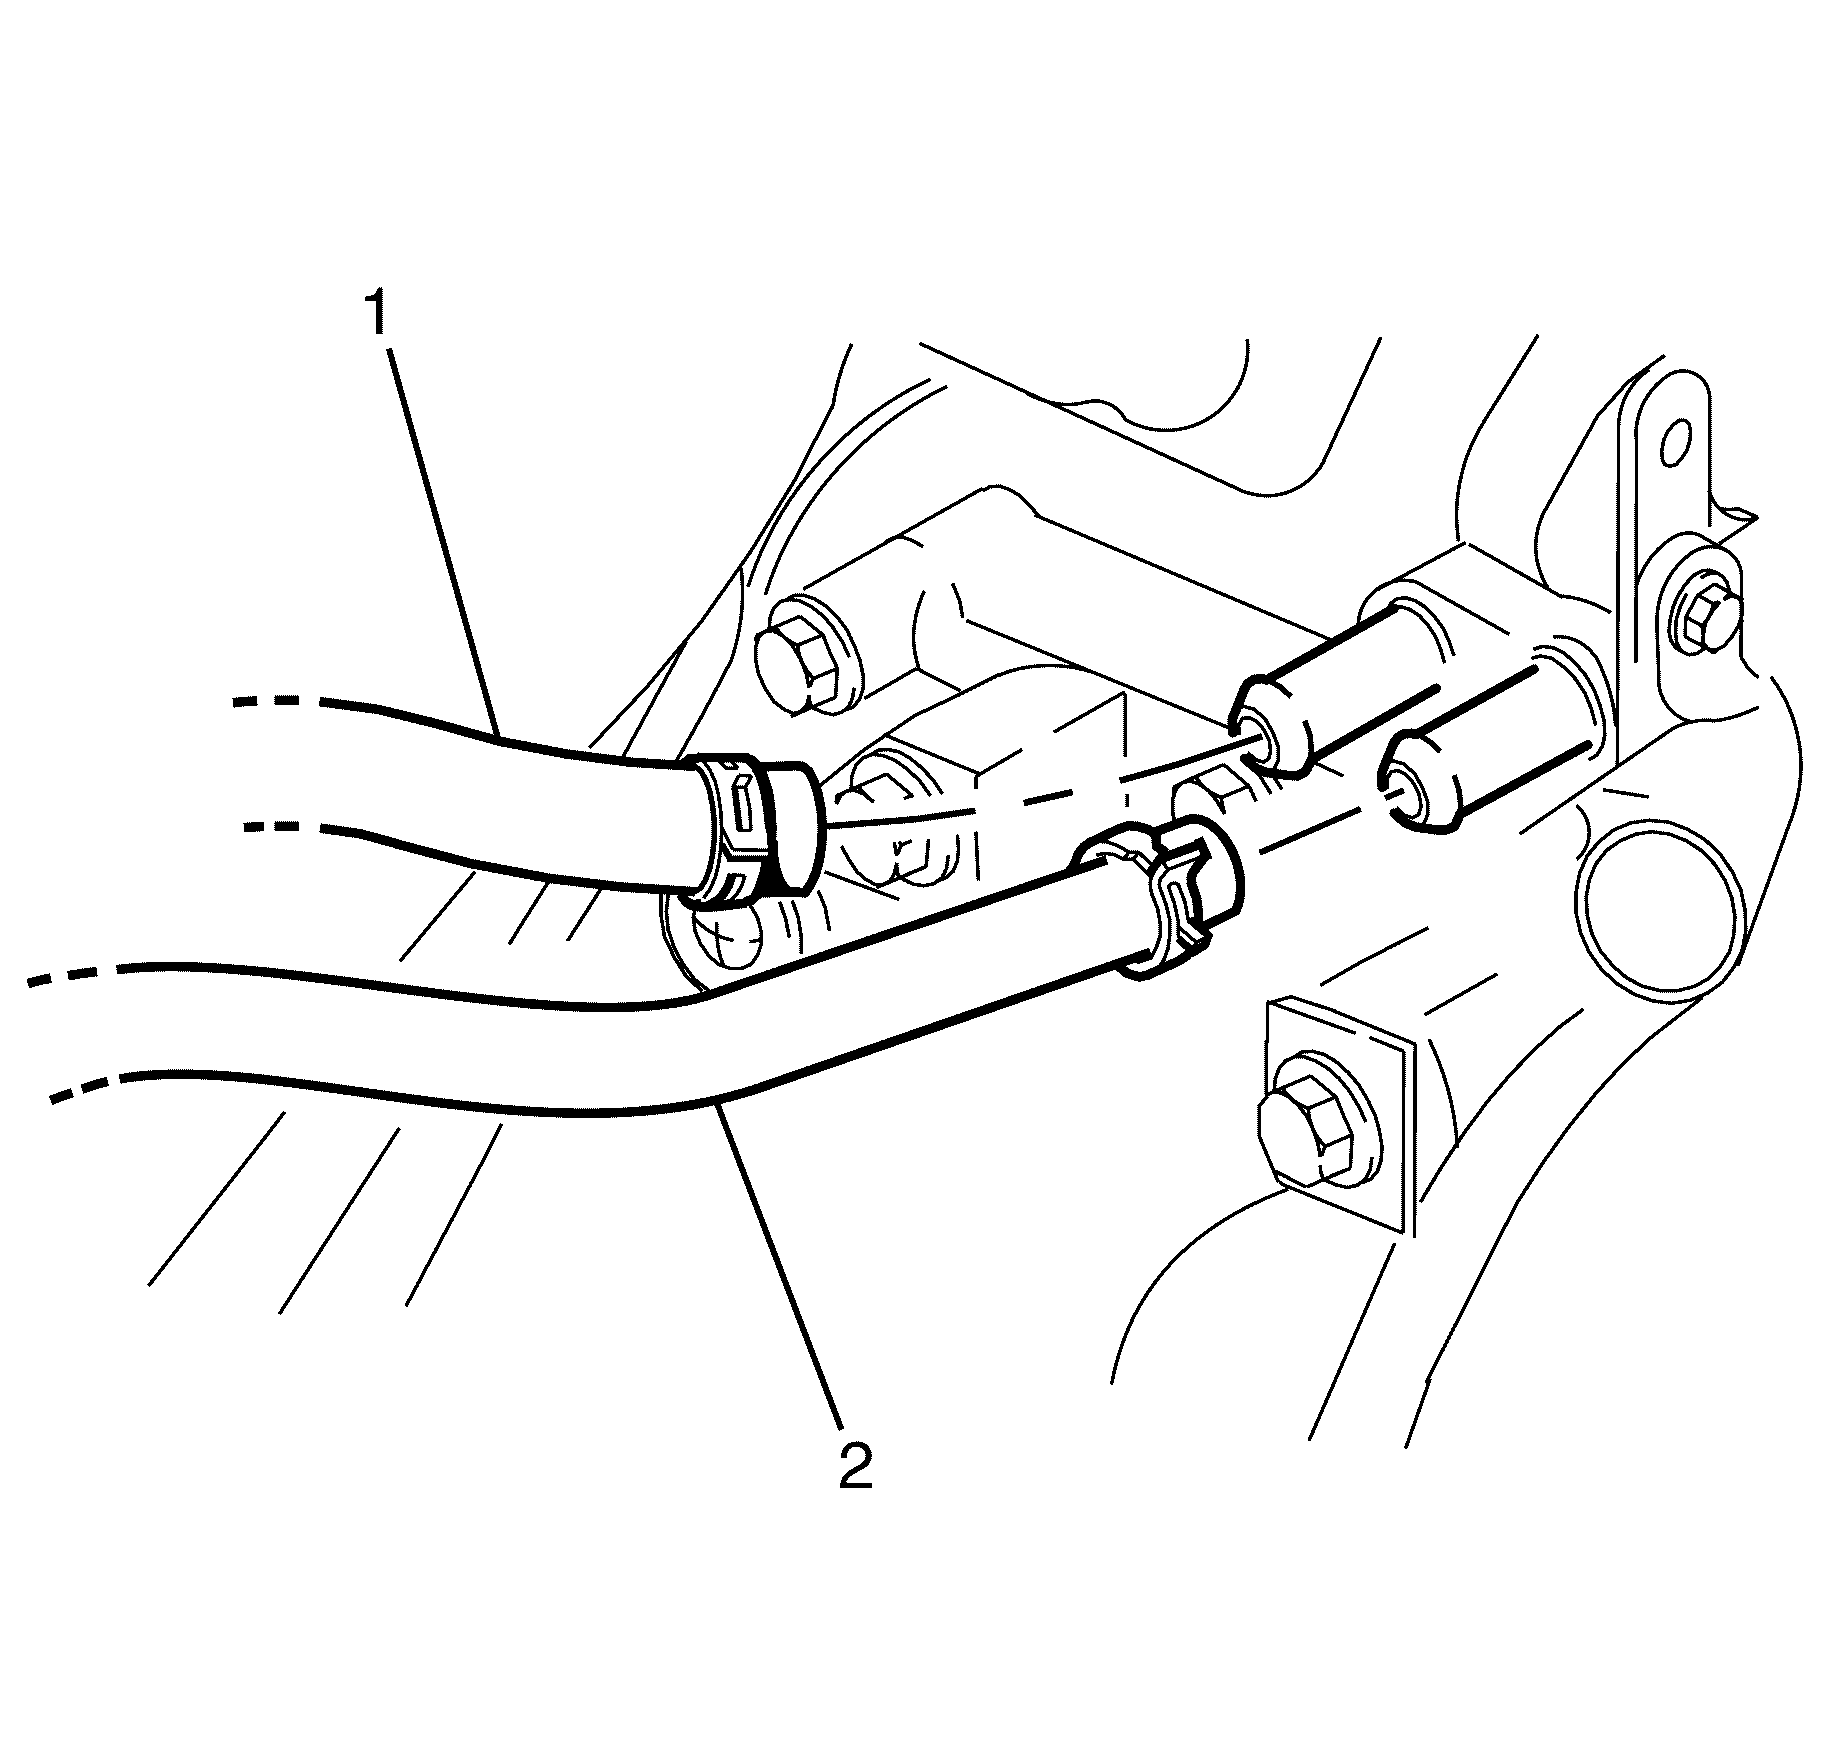
- Remove both heater hoses (1) and (2) from their connections at the water pump.
- Direct the hose (1) that was connected to the water pump's rear-most connection into a suitable container.
- Attach the hose (2) from the front connection to the flushing gun.
- Connect and operate the flushing gun.
- Install the heater hoses (1) and (2), ensuring they are installed in the correct positions.
- Fill the cooling system. Refer to Cooling System Draining and Filling .
- Pressure test the cooling system. Refer to Cooling System Leak Testing .
Important: Do not use a chemical flush.
Store used coolant in the correct manner, such as in a used engine coolant holding tank. Do not pour used coolant down a drain. Ethylene glycol antifreeze is a very toxic chemical. Do not dispose of coolant into the sewer system or ground water. This is illegal and ecologically unsound.
Important: Make a note of how the inlet and outlet hoses were removed for correct installation.
Caution: Refer to General Repair Instructions in the Preface section.

Engine
- Drain the cooling system. Refer to Cooling System Draining and Filling .
- Detach the inlet hose. Refer to Radiator Inlet Hose Replacement .
- Detach the outlet hose. Refer to Radiator Outlet Hose Replacement .
- Remove the thermostat housing. Refer to Engine Coolant Thermostat Housing Replacement .
- Remove the thermostat. Refer to Engine Coolant Thermostat Replacement .
- Install the thermostat housing. Refer to Engine Coolant Thermostat Housing Replacement .
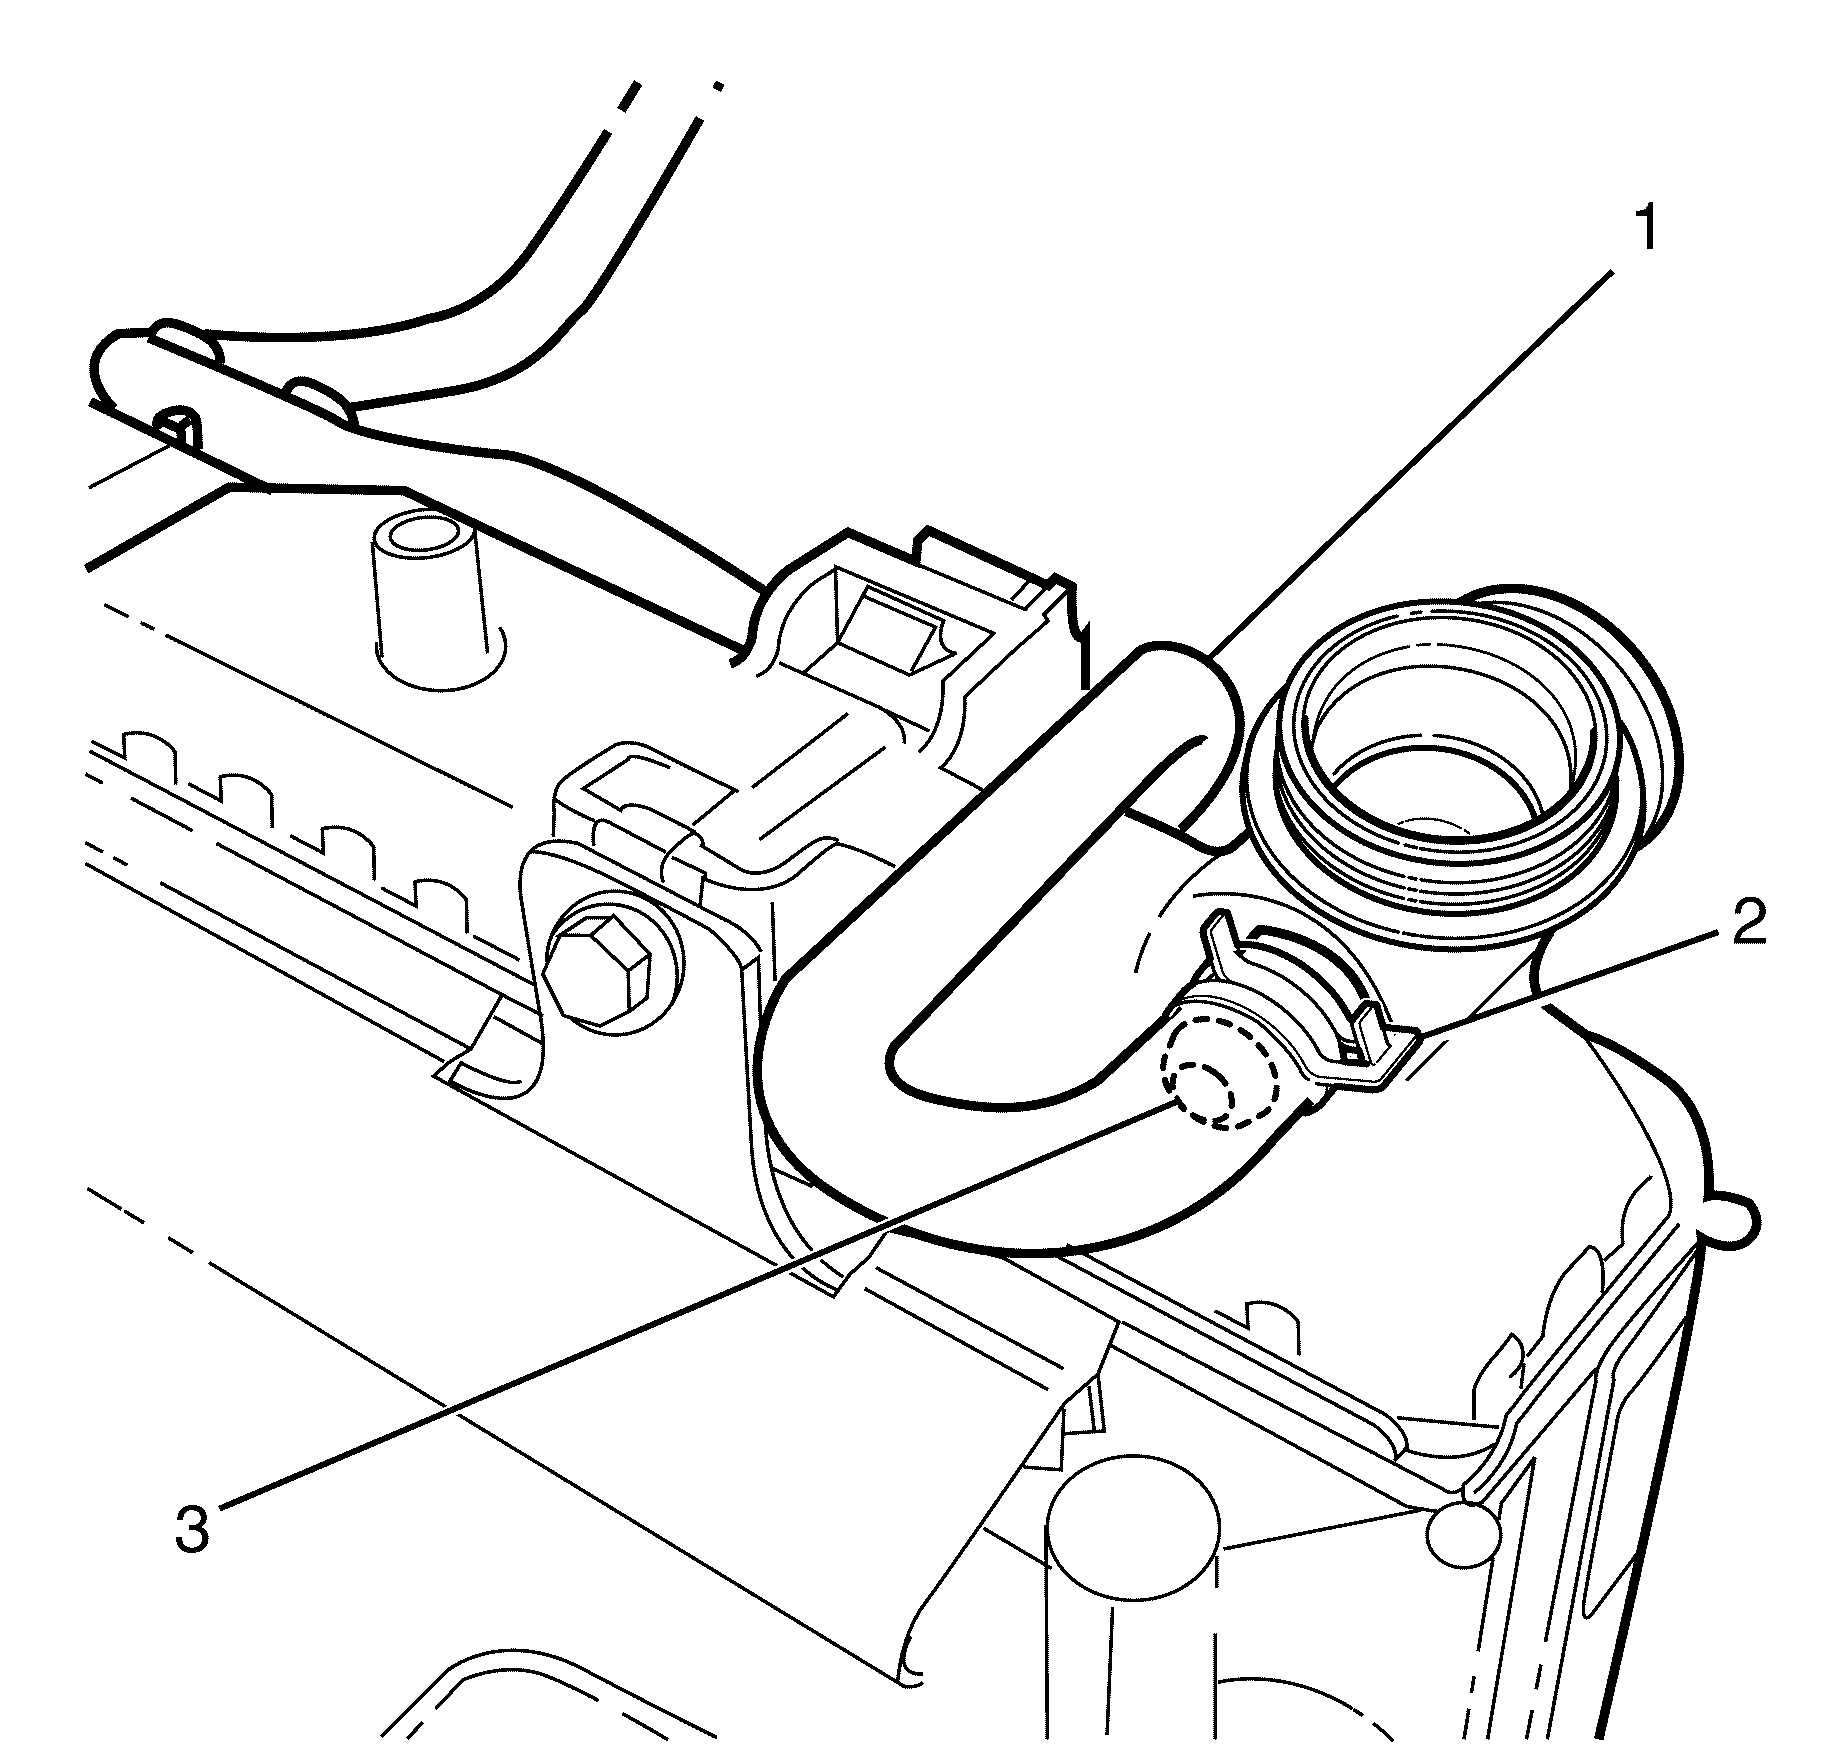
- Remove the engine coolant air bleed hose (1) by releasing retaining hose clamp (2) and remove it from the radiator spigot (3) and temporarily plug the end of the hose.
- Remove the heater hoses (1) and (2) from their connections at the water pump. Seal the pump connections by looping the water pump heater inlet connection tothe outlet connection using a suitable piece of hose and two retaining clamps.
- Install a lead-away hose to the thermostat housing and a length of suitable hose between the water pump outlet fitting and the flushing gun.
- Connect and operate the flushing gun.
- Unplug the air bleed hose and continue flushing until the water runs clear.
- Install the heater hoses (1) and (2), ensuring they are installed in the correct positions.
- Install the thermostat. Refer to Engine Coolant Thermostat Replacement .
- Install the thermostat housing. Refer to Engine Coolant Thermostat Housing Replacement .
- Attach the coolant air bleed hose (1) to the radiator spigot (3).
- Secure the coolant air bleed hose (1) with the retaining hose clamp (2)
- Attach the outlet hose. Refer to Radiator Outlet Hose Replacement .
- Attach the inlet hose. Refer to Radiator Inlet Hose Replacement .
- Fill the cooling system. Refer to Cooling System Draining and Filling .
- Pressure test the cooling system. Refer to Cooling System Leak Testing .
Important: Do not use a chemical flush.
Store used coolant in the correct manner, such as in a used engine coolant holding tank. Do not pour used coolant down a drain. Ethylene glycol antifreeze is a very toxic chemical. Do not dispose of coolant into the sewer system or ground water. This is illegal and ecologically unsound.

Important: Make a note of how the inlet and outlet hoses were removed for correct installation.


