For 1990-2009 cars only
Video Disc Player Control Replacement SWB
Removal Procedure
- Remove the RSE assembly. Refer to Video Disc Player Bracket Replacement .
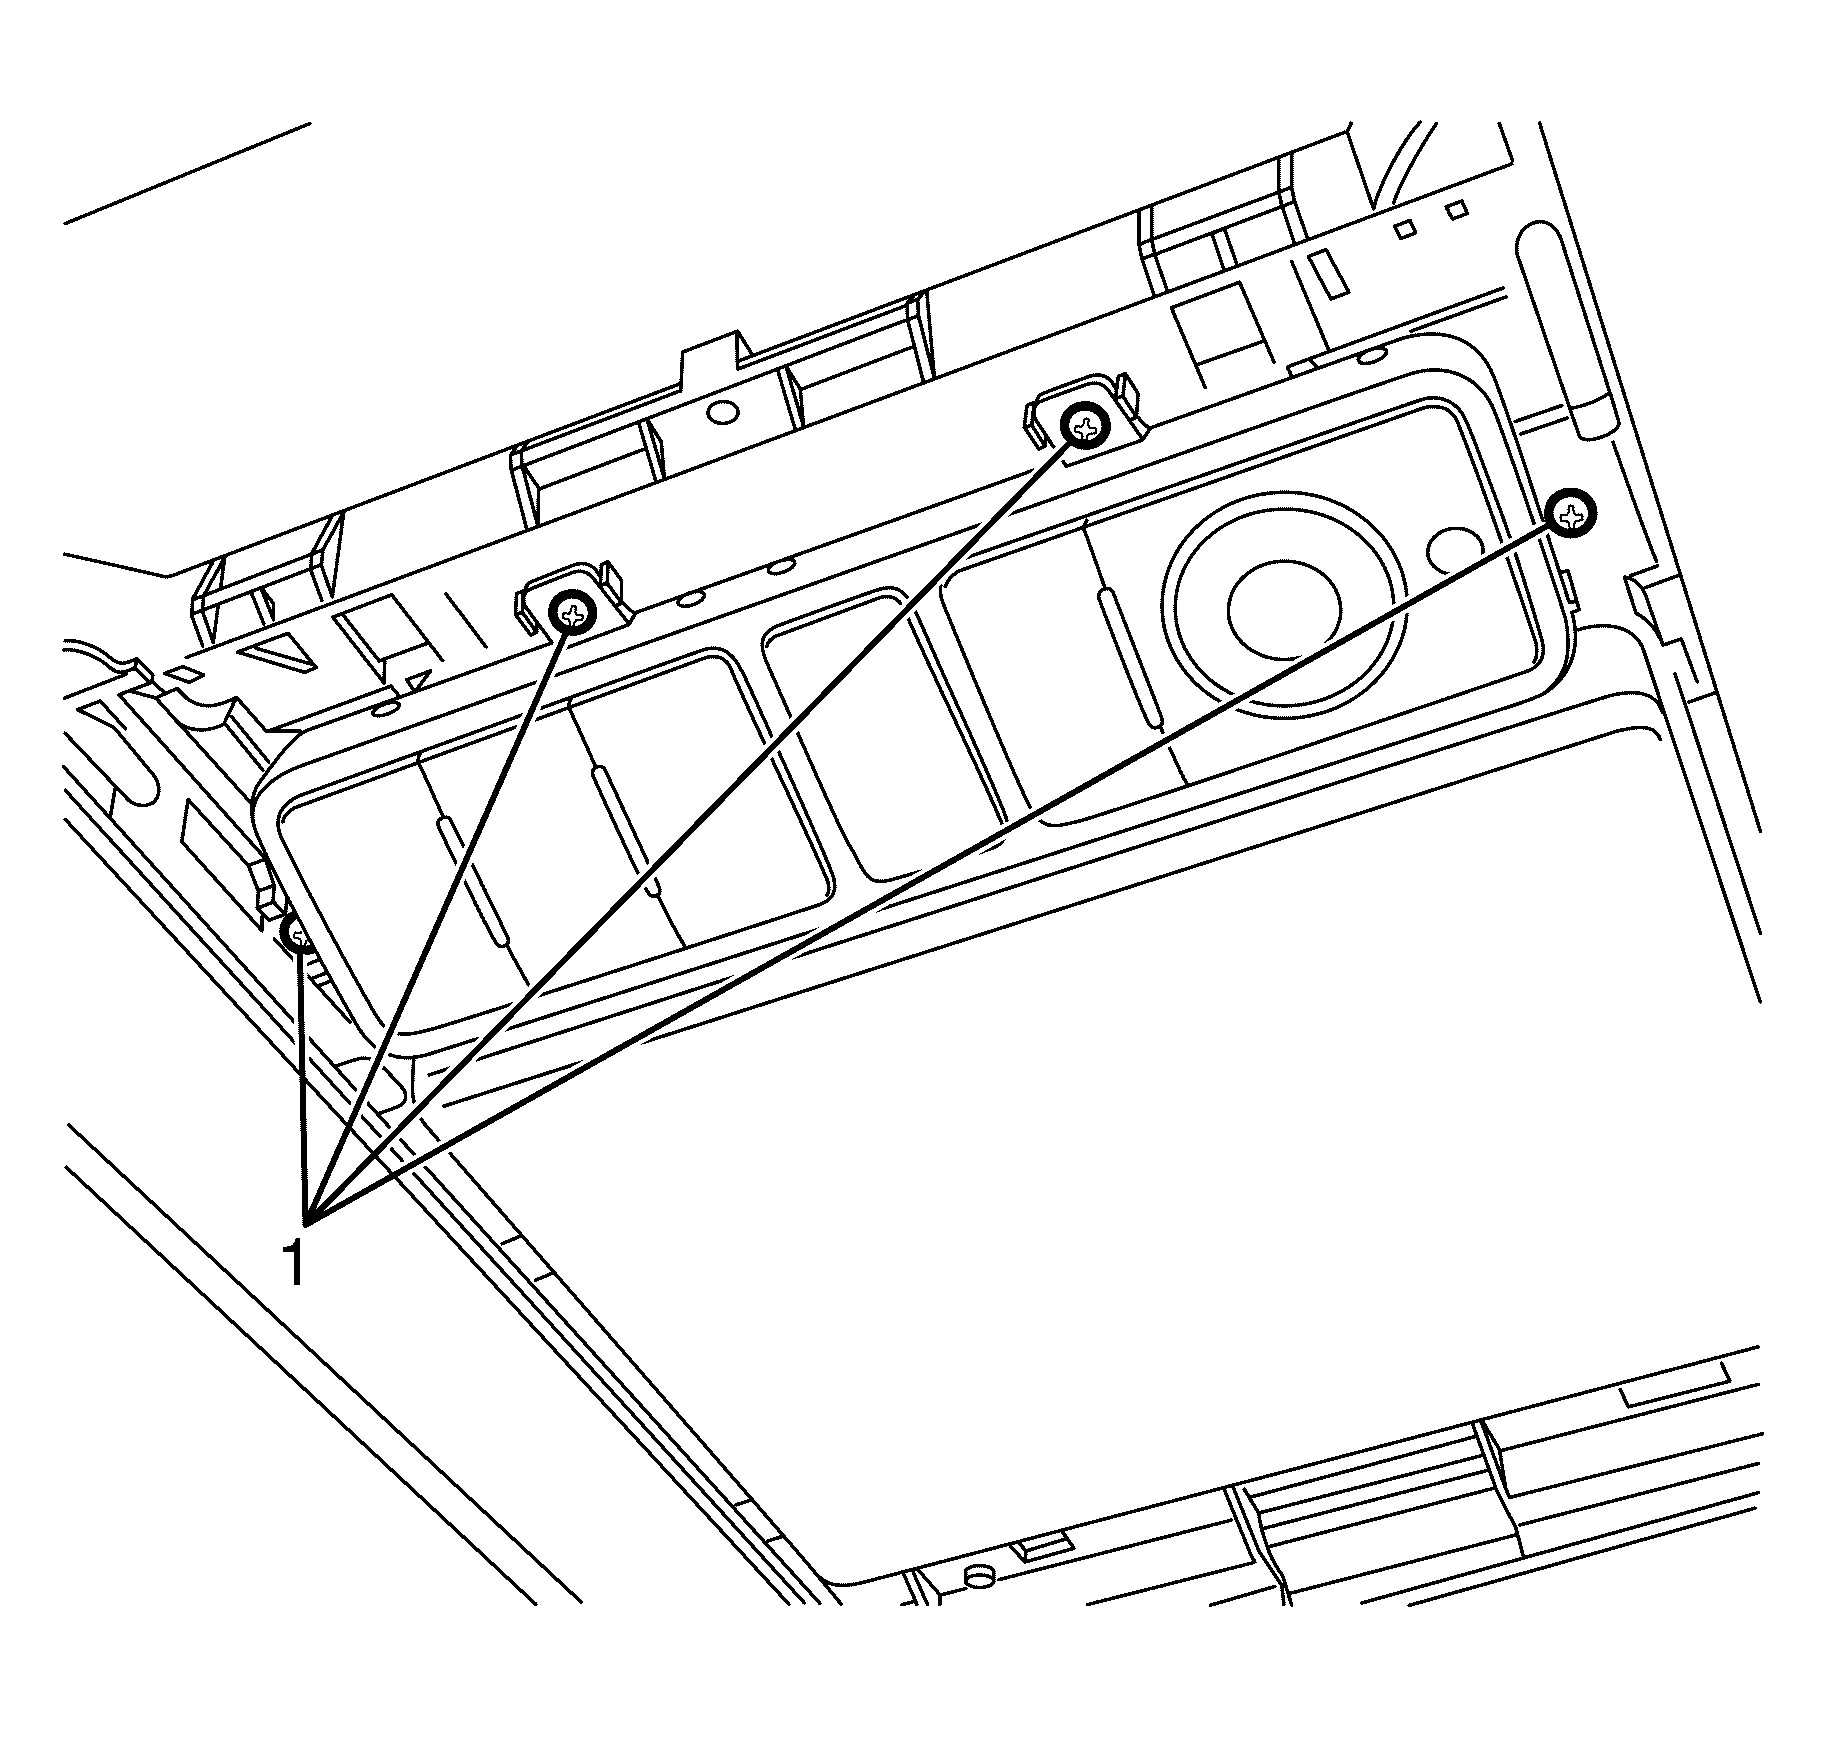
- Remove the audio control to RSE assembly bracket screws (1).
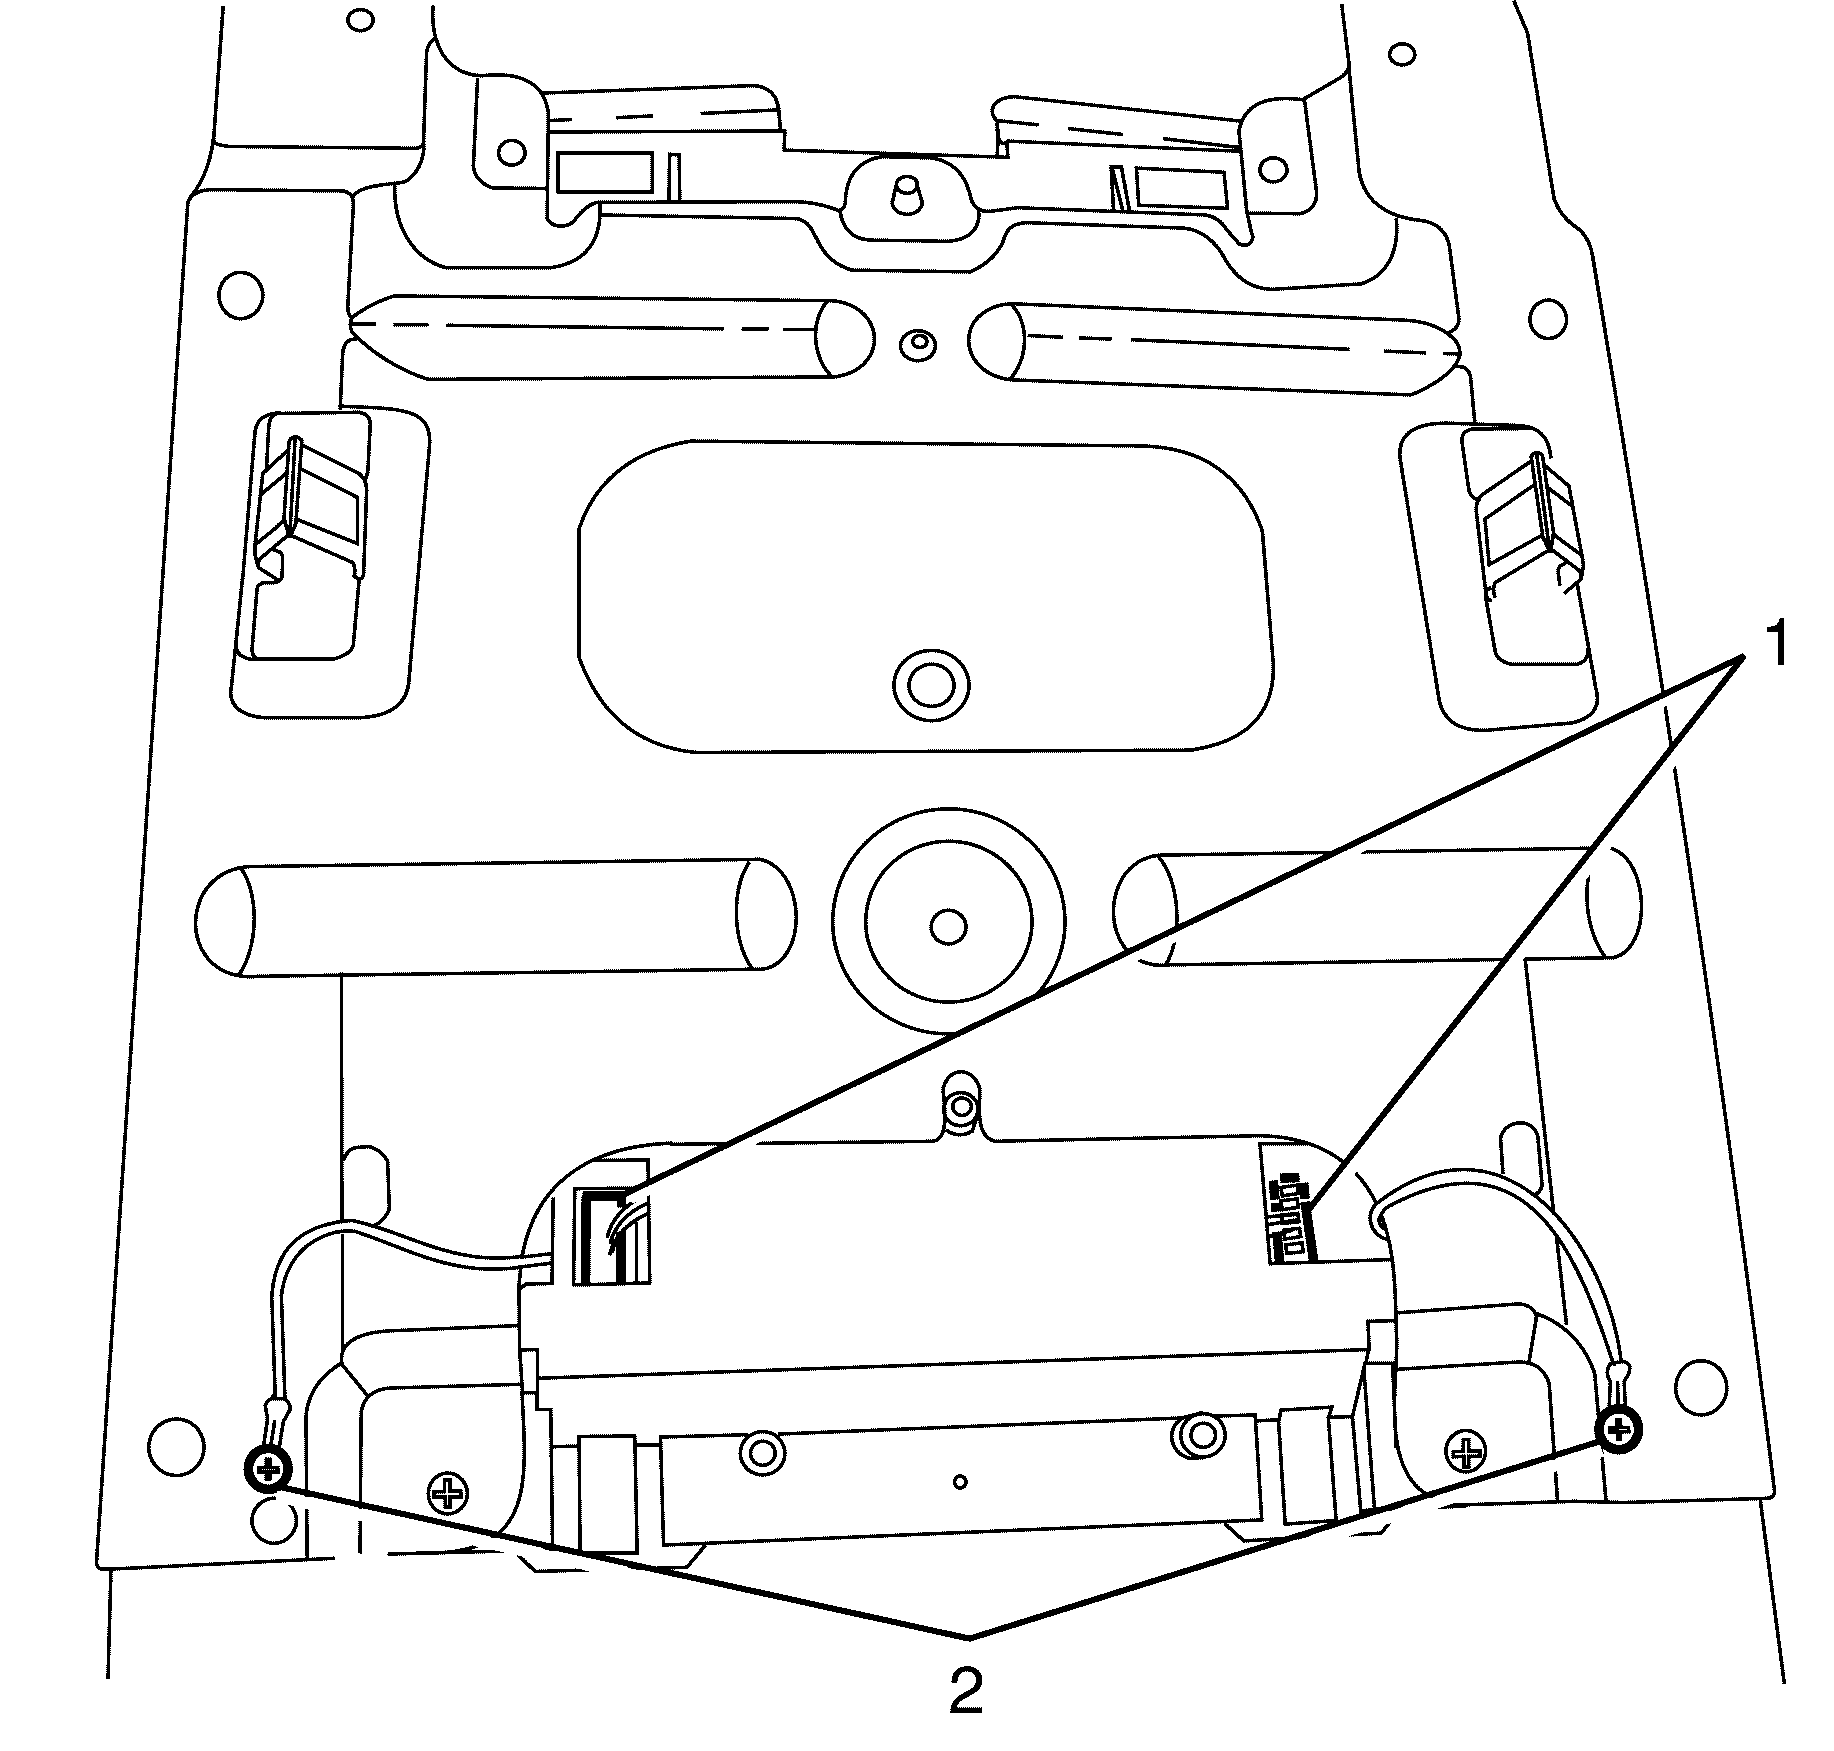
- Disconnect the headliner audio control connectors (1).
- Remove the grounding point to RSE assembly bracket screws (2).
- Remove the headliner audio controls from the RSE assembly bracket.


Installation Procedure
- Install the headliner audio controls to the headliner.
- Connect the headliner audio controls electrical connectors (1).
- Install the grounding point to RSE assembly bracket retaining screws (2).
- Install the headliner audio controls to RSE assembly bracket retaining screws (1).
- Install the rear seat entertainment assembly. Refer to Video Disc Player Bracket Replacement .

Notice: Refer to Fastener Notice in the Preface section.
Tighten
Tighten the screws to 1 N·m (9 lb in).
Notice: Refer to Fastener Notice in the Preface section.

Tighten
Tighten the screws to 1 N·m (9 lb in).
Video Disc Player Control Replacement LWB
Removal Procedure
- Remove the rear seat entertainment assembly (RSE). Refer to Video Disc Player Bracket Replacement .
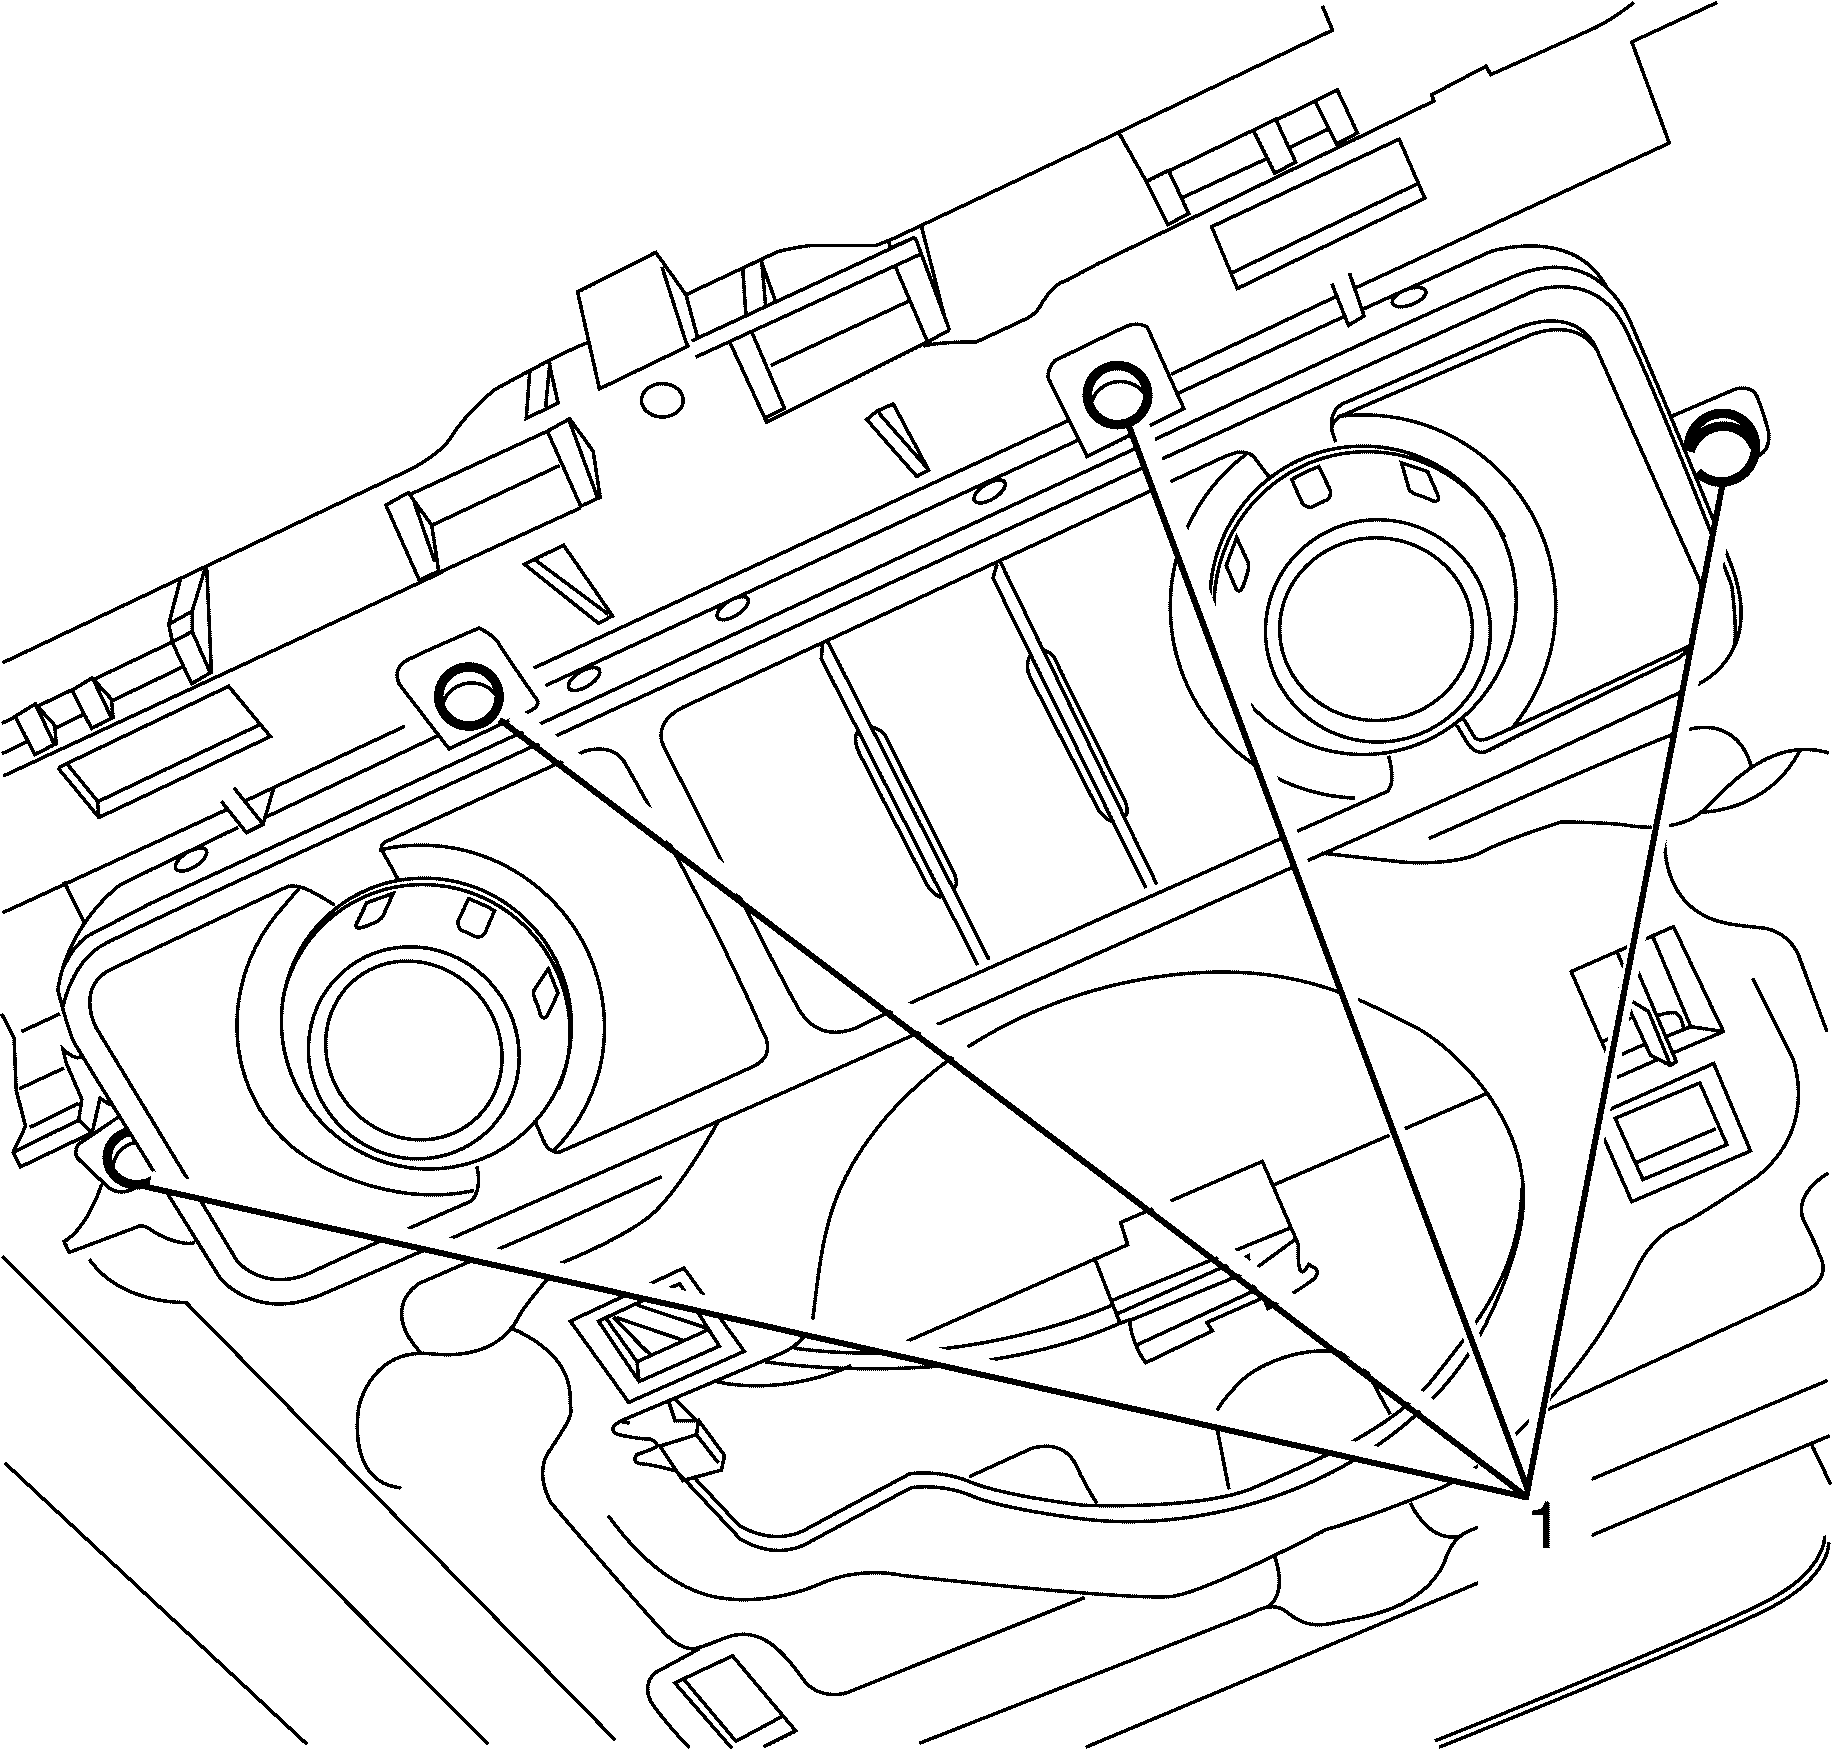
- Remove the audio control to RSE assembly bracket screws (1).
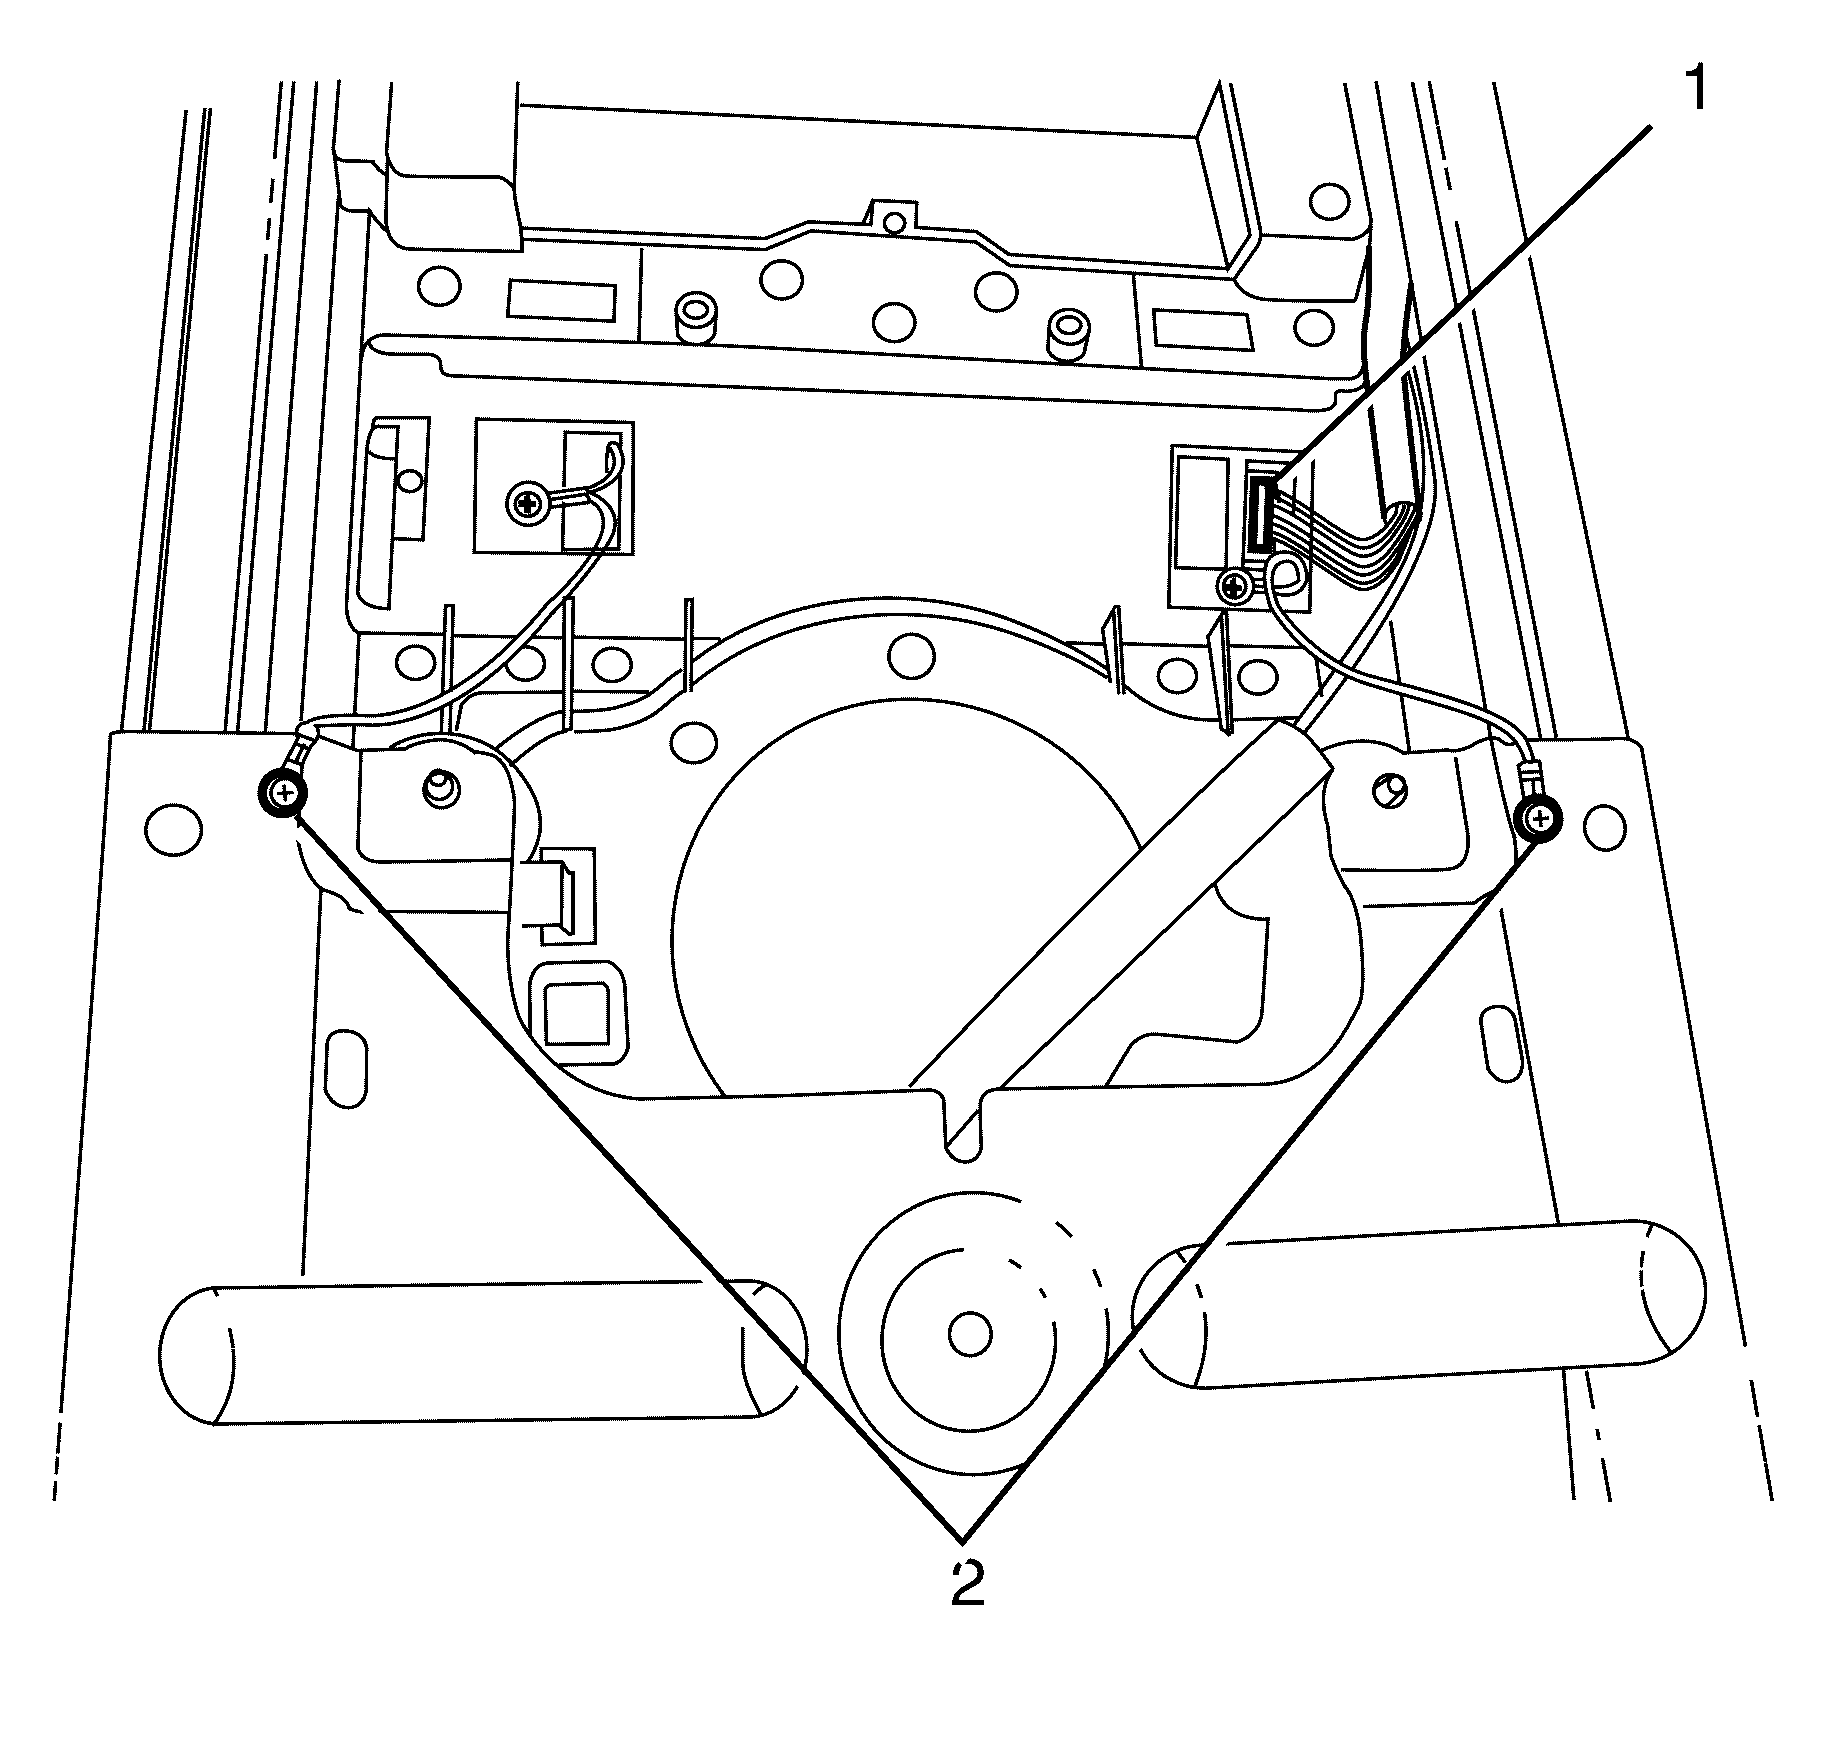
- Disconnect the headliner audio control connector (1).
- Remove the grounding point to RSE assembly bracket screws (2).
- Remove the headliner audio controls from the RSE assembly bracket.


Installation Procedure
- Install the headliner audio controls to the headliner.
- Connect the headliner audio controls electrical connector (1).
- Install the grounding point to RSE assembly bracket retaining screws (2).
- Install the headliner audio controls to RSE assembly bracket retaining screws (1).
- Install the RSE assembly. Refer to Video Disc Player Bracket Replacement .

Notice: Refer to Fastener Notice in the Preface section.
Tighten
Tighten the screws to 1 N·m (9 lb in).
Notice: Refer to Fastener Notice in the Preface section.

Tighten
Tighten the screws to 1 N·m (9 lb in).
