Radio Speaker Amplifier Replacement LWB
Removal Procedure
- Remove the left-hand side carpet trim. Refer to Rear Compartment Side Trim Panel Replacement.
- Remove the battery. Refer to Battery Replacement.
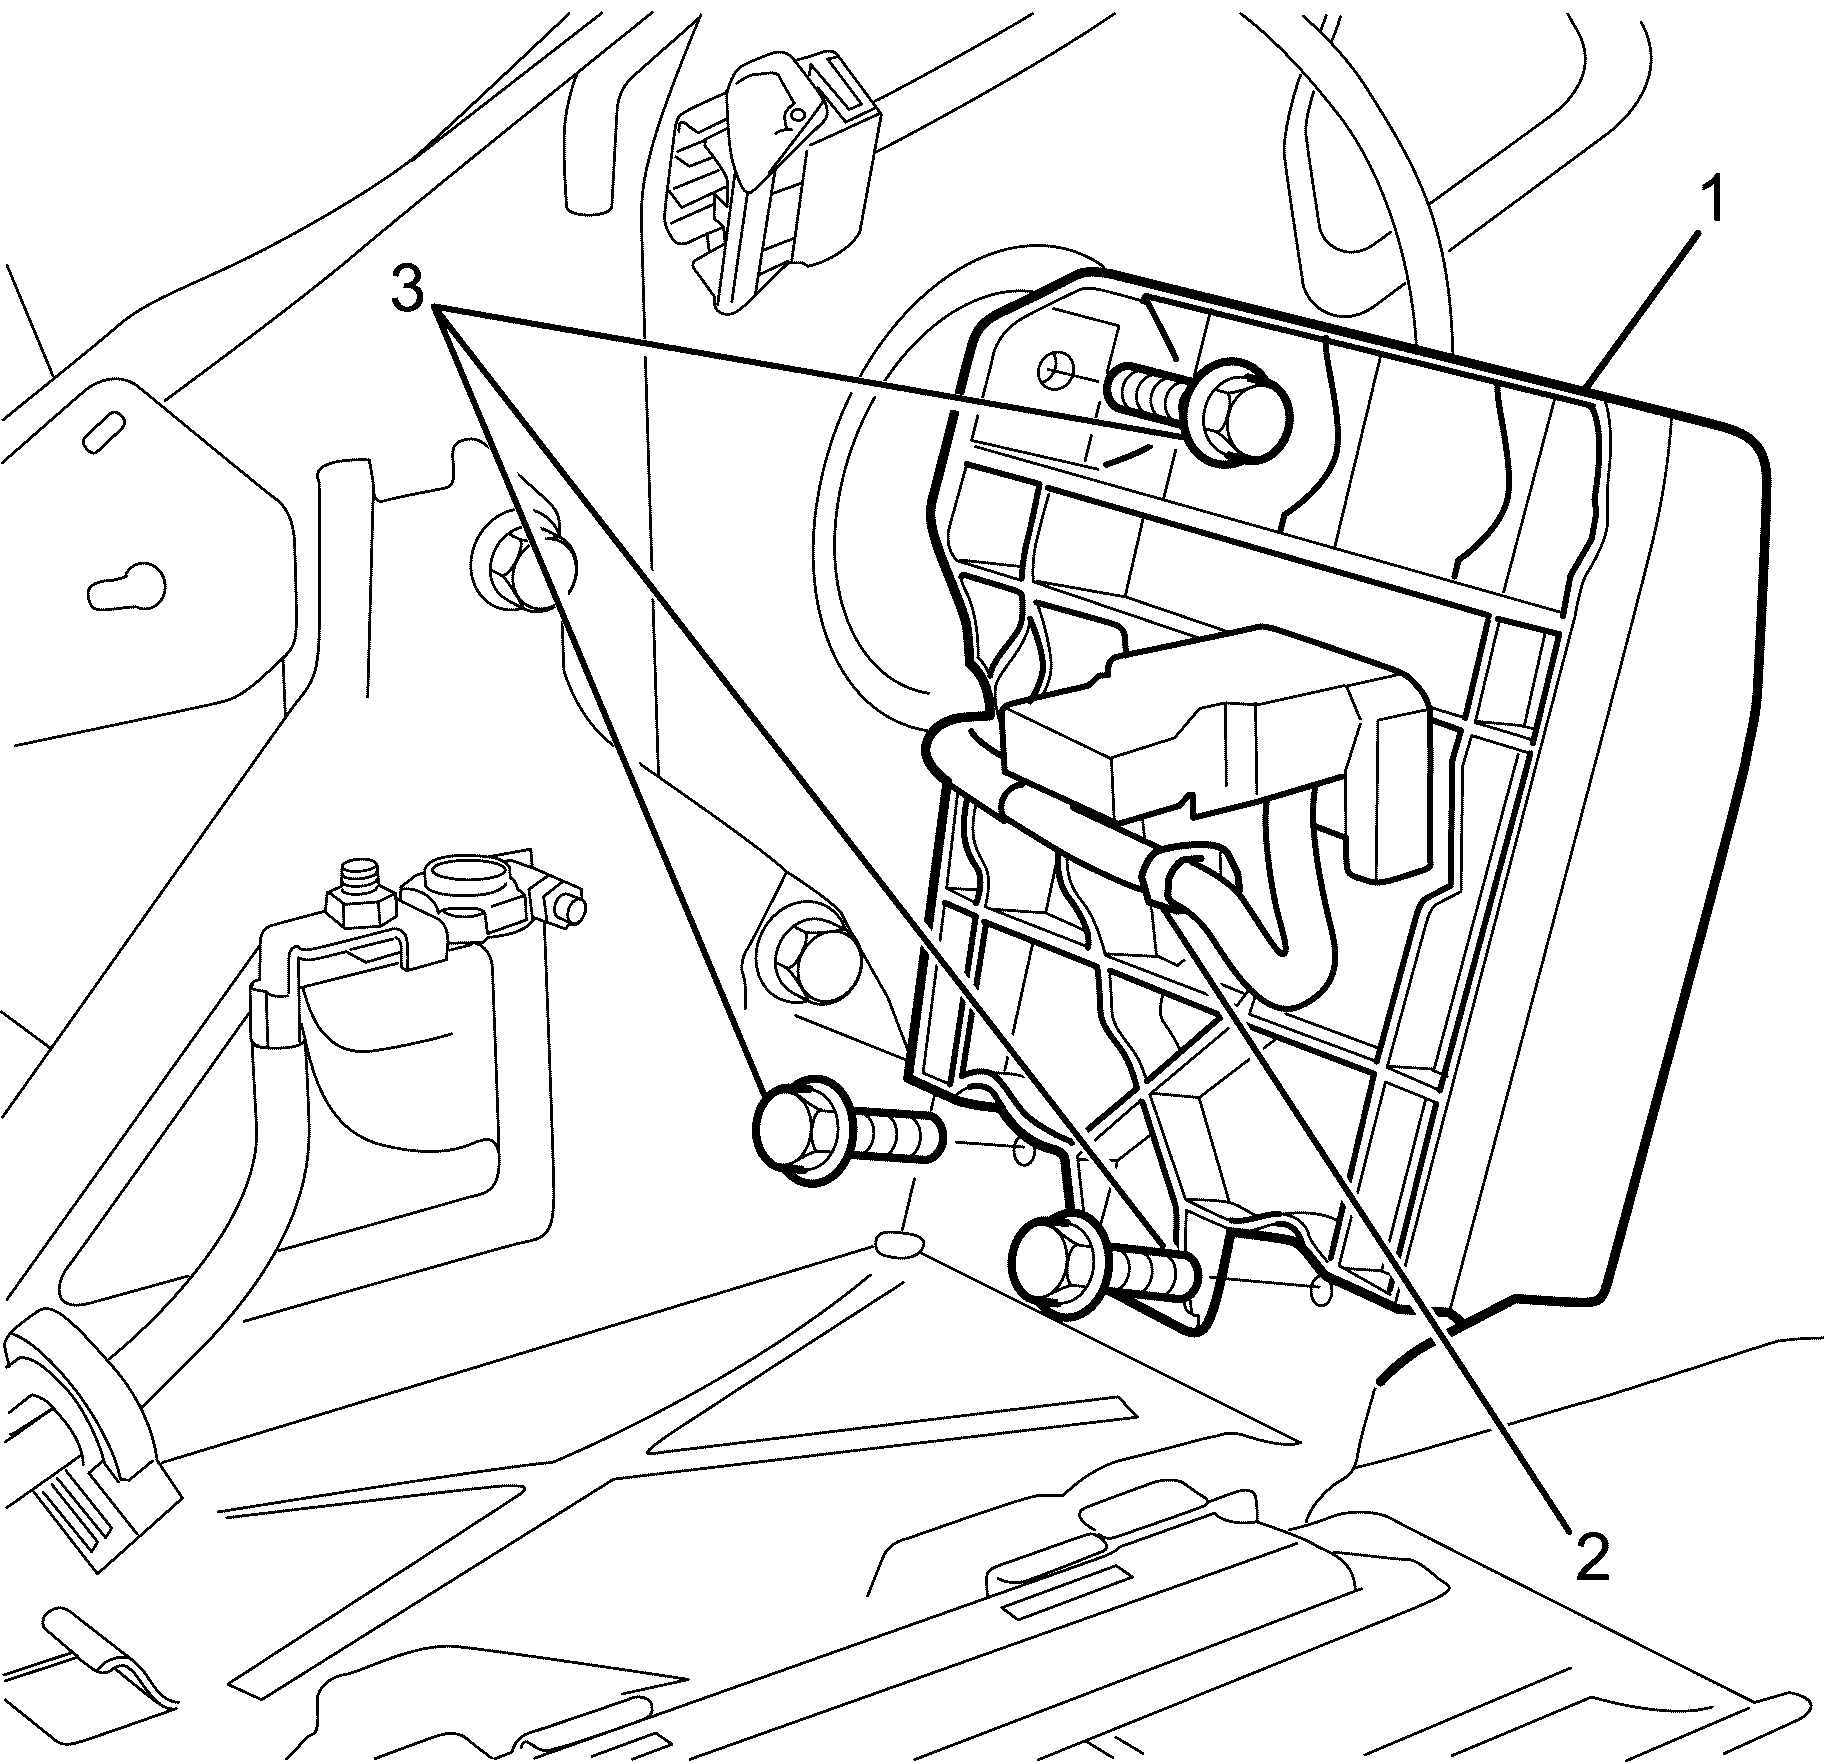
- Disengage the battery harness retainer (2) securing the harness to the amplifier mounting bracket (1).
- Remove the bolts (3) securing the amplifier mounting bracket to the vehicle.
- Disconnect the electrical connector from the amplifier.
- Remove the amplifier and bracket assembly.
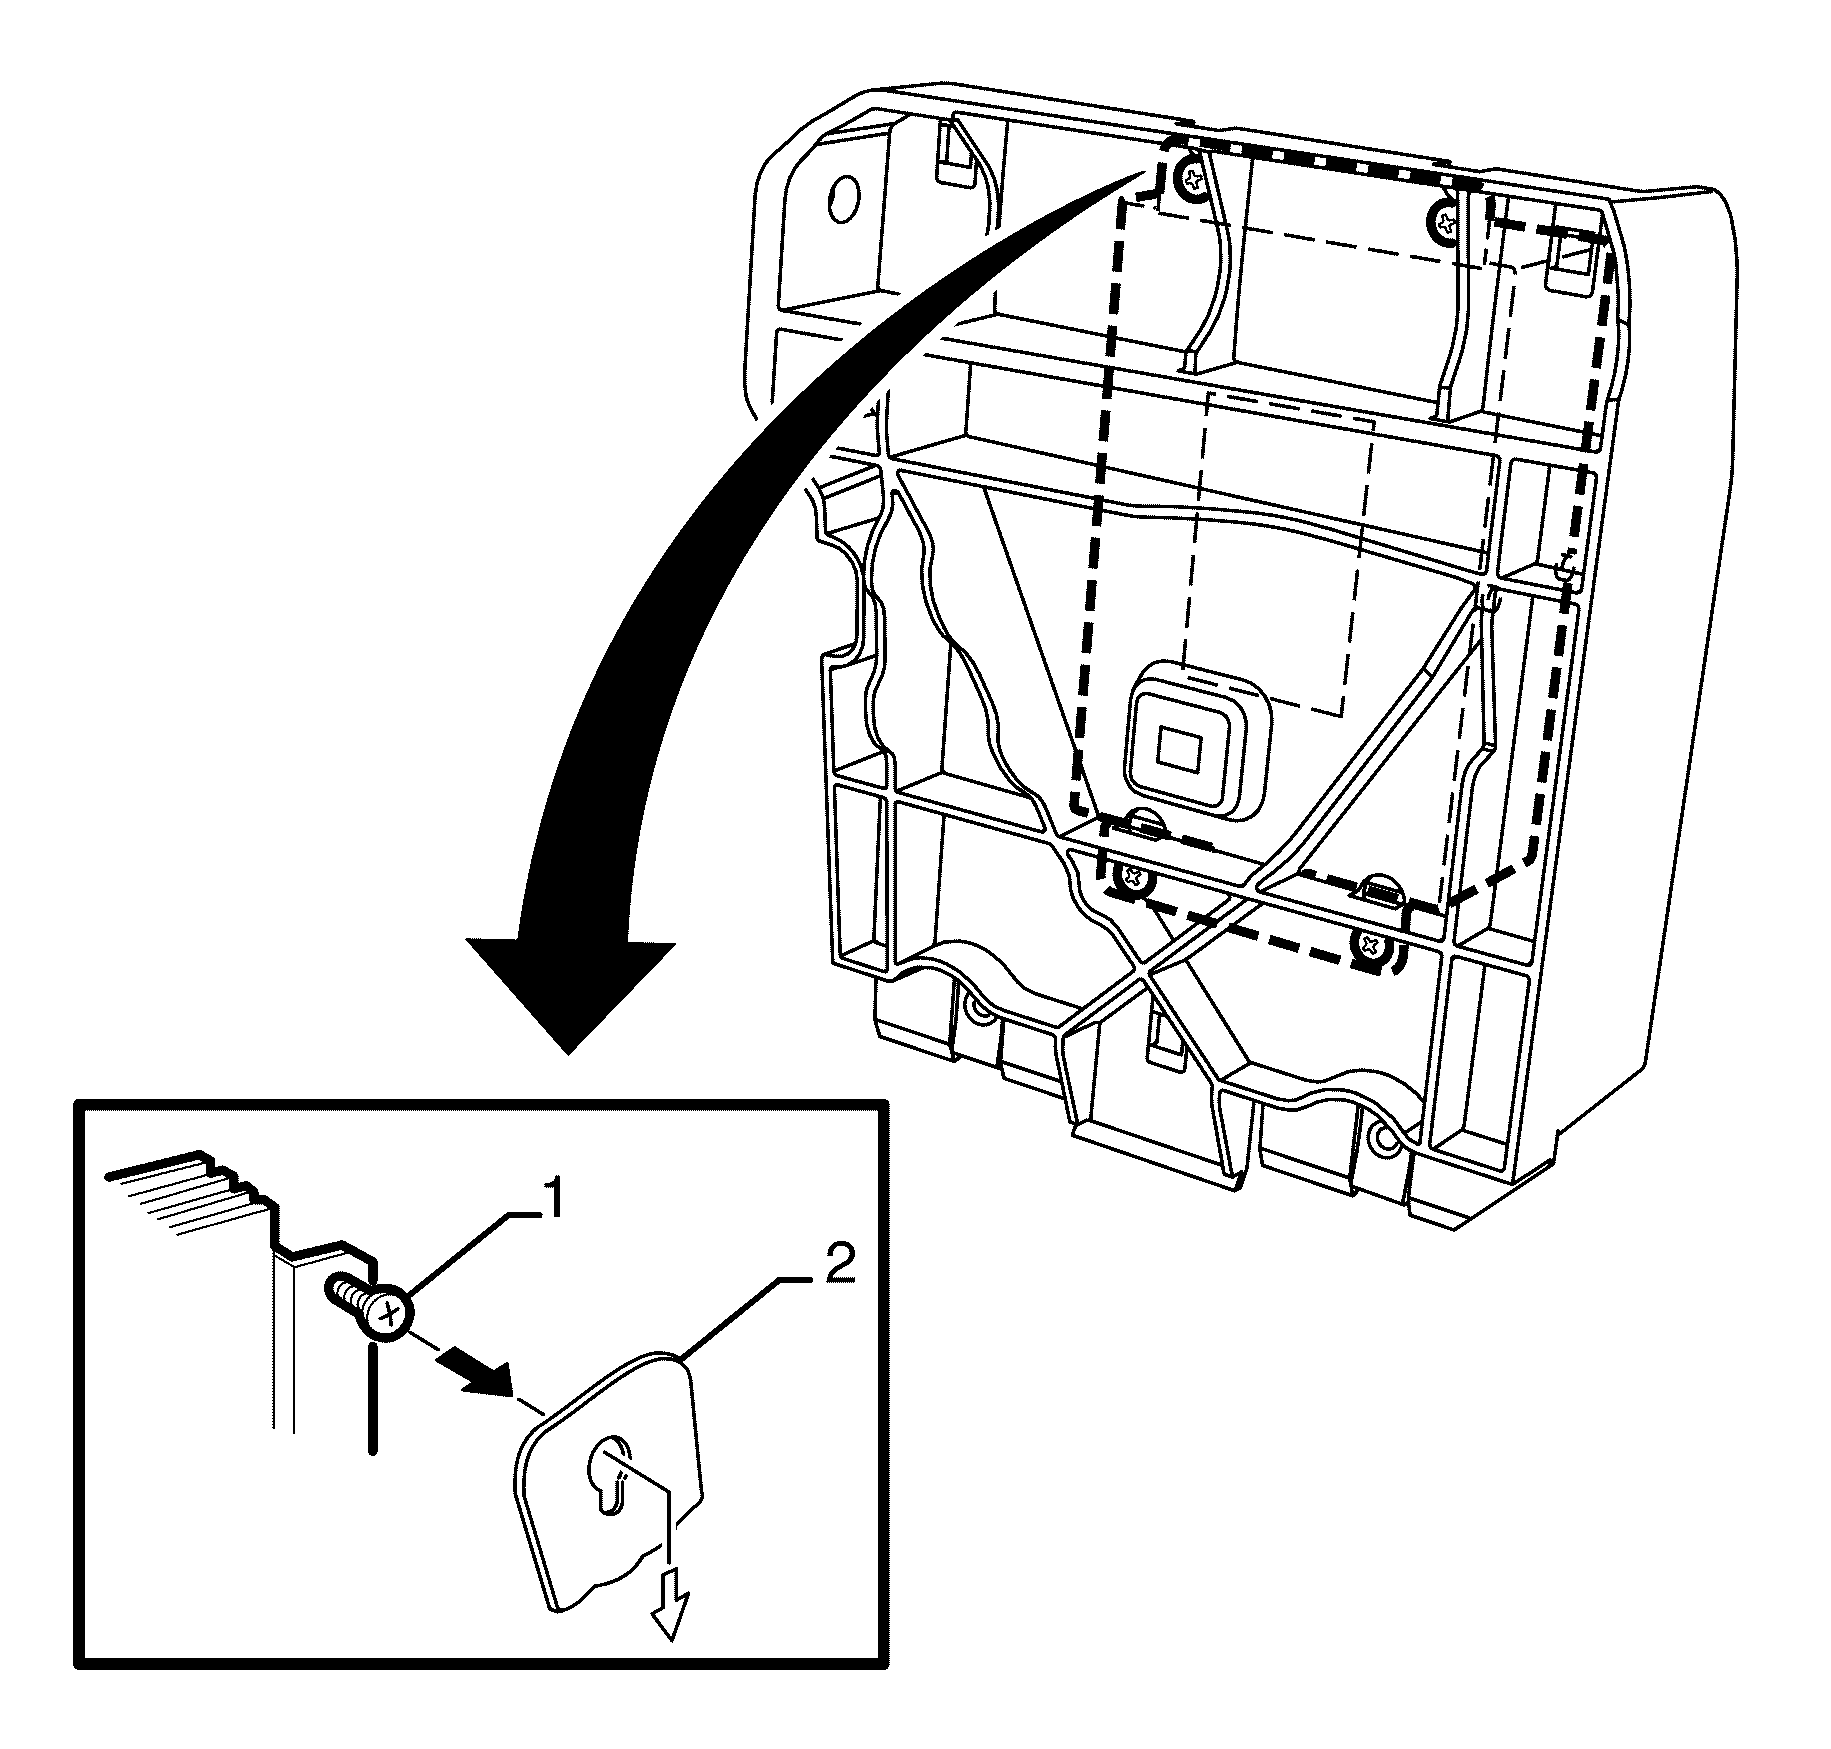
- Loosen the screws (1) holding the amplifier to the mounting bracket.
- Remove the amplifier from the mounting bracket.


Important: Slide the amplifier upward to release the screw heads from the slots in the mounting bracket.
Installation Procedure
- Install the amplifier to the mounting bracket.
- Tighten the amplifier to mounting bracket retaining screws (1).
- Install the amplifier and bracket assembly (1).
- Connect the electrical connector to the amplifier.
- Install the amplifier mounting bracket to vehicle retaining bolts (3).
- Connect the battery harness to the amplifier bracket assembly.
- Install the battery. Refer to Battery Replacement.
- Install the left-hand side carpet trim. Refer to Rear Compartment Side Trim Panel Replacement.
- Refer to Control Module References.

Important: Insert the amplifier screw heads (1) into the mounting bracket slots and slide the amplifier downward to secure the screw heads into the slots in the mounting bracket.
Notice: Refer to Fastener Notice in the Preface section.
Tighten
Tighten the screws to 2.5 N·m (22 lb in).

Notice: Refer to Fastener Notice in the Preface section.
Tighten
Tighten the bolts to 22 N·m (16 lb ft).
Important: Ensure the retainer (2) securing the harness to the amplifier mounting bracket (1) engages correctly.
Radio Speaker Amplifier Replacement SWB
Removal Procedure
- Remove the left-hand side carpet trim. Refer to Rear Corner Trim Panel Carpet Replacement
- Remove the battery. Refer to Battery Replacement .
- Disengage the battery harness retainer (2) securing the harness to the amplifier mounting bracket (1).
- Remove the bolts (3) securing the amplifier mounting bracket to the vehicle.
- Disconnect the electrical connector from the amplifier.
- Remove the amplifier and bracket assembly.
- Loosen the screws (1) holding the amplifier to the mounting bracket.
- Remove the amplifier from the mounting bracket.


Important: Slide the amplifier upward to release the screw heads from the slots in the mounting bracket.
Installation Procedure
- Install the amplifier to the mounting bracket.
- Tighten the amplifier to mounting bracket retaining screws (1).
- Install the amplifier and bracket assembly (1).
- Connect the electrical connector to the amplifier.
- Install the amplifier mounting bracket to vehicle retaining bolts (3).
- Connect the battery harness to the amplifier bracket assembly.
- Install the battery. Refer to Battery Replacement .
- Install the left-hand side carpet trim. Refer to Rear Corner Trim Panel Carpet Replacement
- Refer to Control Module References .

Important: Insert the amplifier screw heads (1) into the mounting bracket slots and slide the amplifier downward to secure the screw heads into the slots in the mounting bracket.
Notice: Refer to Fastener Notice in the Preface section.
Tighten
Tighten the screws to 2.5 N·m (22 lb in).

Notice: Refer to Fastener Notice in the Preface section.
Tighten
Tighten the bolts to 22 N·m (16 lb ft).
Important: Make sure the retainer (2) securing the harness to the amplifier mounting bracket (1) engages correctly.
