Obtaining TIS Approval RHD
General Information
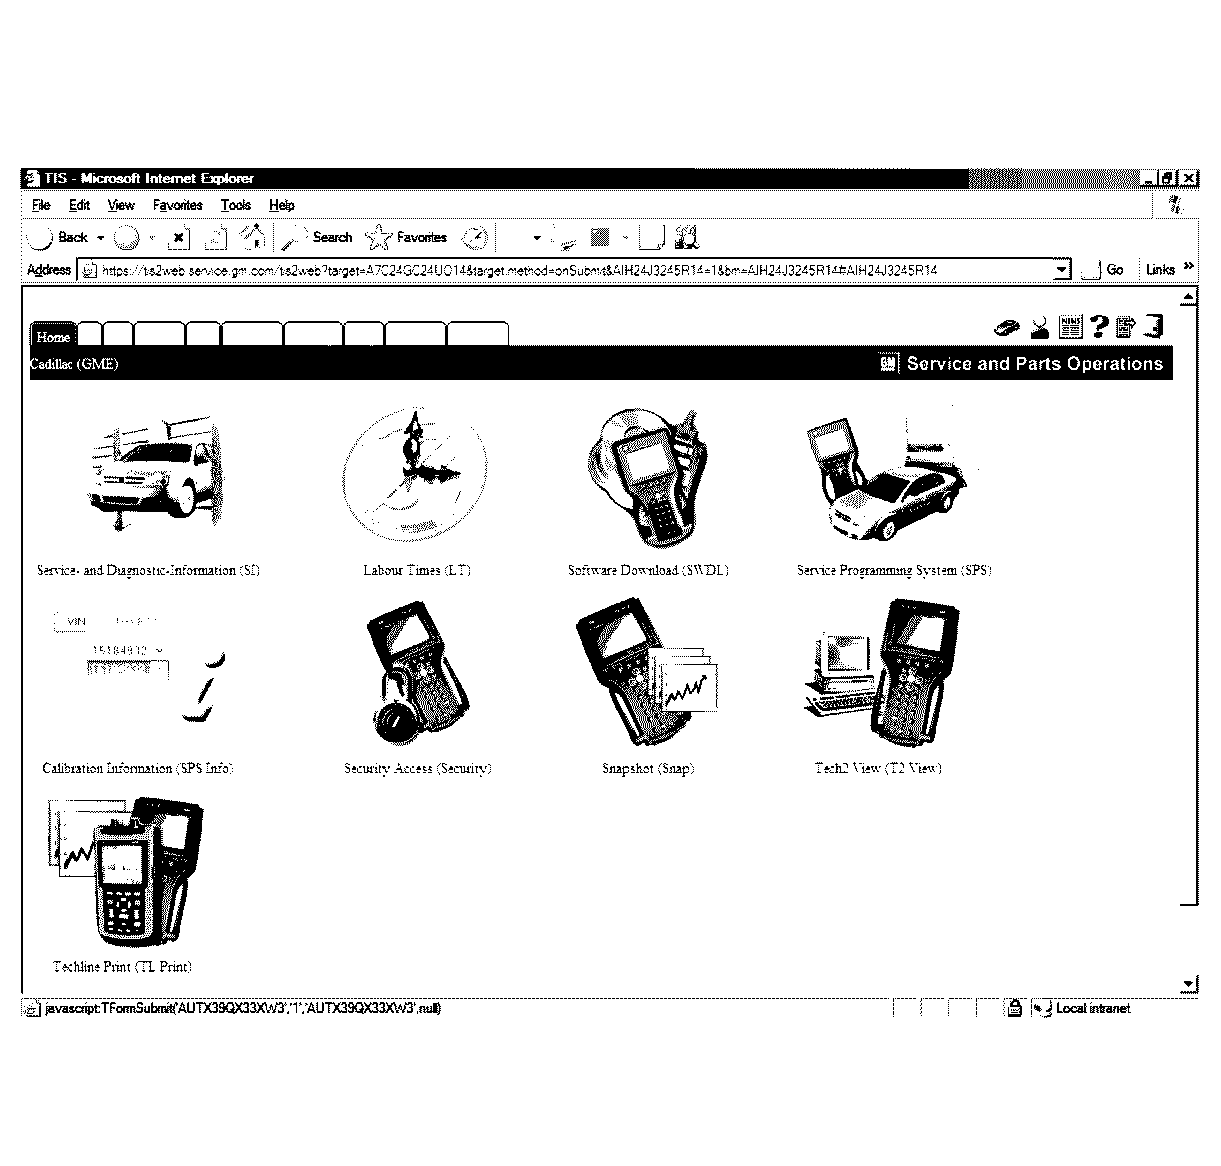
Certain programming functions performed with the scan tool are prohibited without TIS approval. TIS approval can be obtained by clicking on the Security Access icon on the TIS 2000 Application Selection Screen
Security Access
Security Access is used in order to prevent unauthorised persons from programming certain security functions.
After a scan tool security programming function has been selected, the scan tool will display: Please get programming approval from TIS!
To enable these programming procedures they must be approved by the TIS 2000 Security Access function and scan tool must be connected to TIS 2000 using the RS232 interface and a registered security hardware key. Without this security hardware key, an error message is given by TIS 2000.
Security Access Procedure
- If your security hardware key is the serial type, go to step 2. If your hardware key is the parallel type, go to step 7. If your hardware key is the USB type, go to step 12.
- Connect the RS-232 cable (7) to the scan tool (6) RS-232 communication port.
- Connect the other end of the RS-232 cable to the DB-9 adapter (3) and then connect the DB-9 adapter to the 25/9 pin adapter (2).
- Connect the 25/9 pin adapter to the Serial Security Hardware Key (1) and then connect the Serial Security Hardware Key to the serial port of a Personal Computer (PC) with TIS 2000 installed.
- Connect the power supply (4) to the scan tool power supply jack (5). Press the PWR button to turn on the scan tool. The scan tool should now be at the title display screen.
- Now go to step 16.
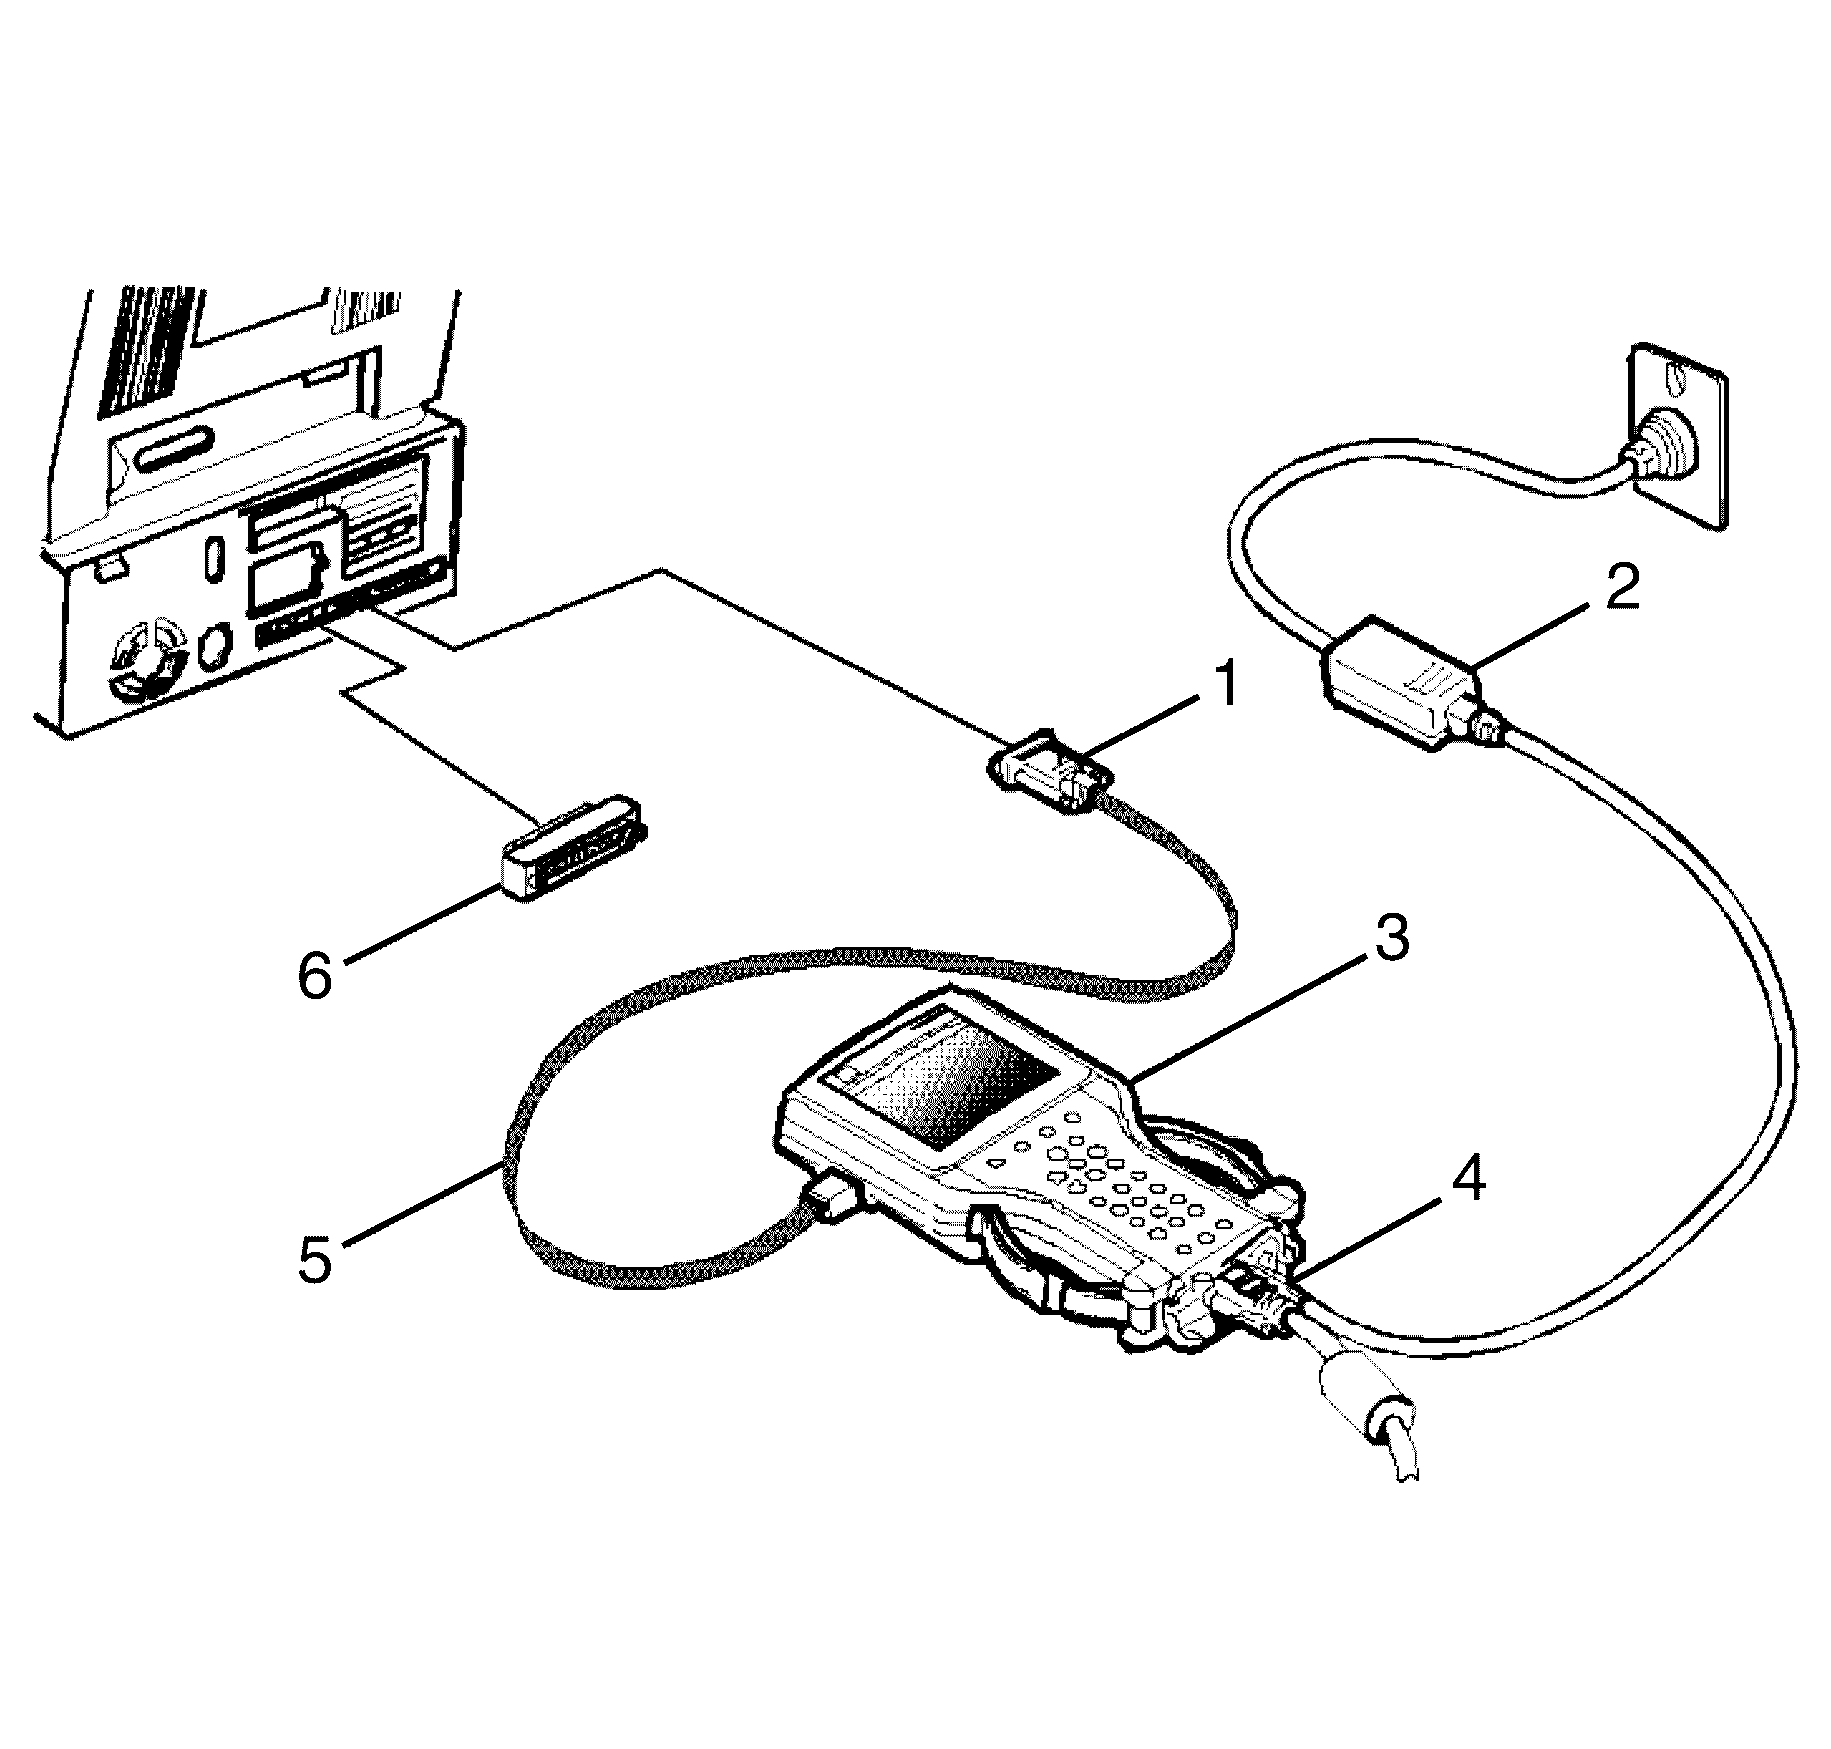
- Connect the RS-232 cable (5) to the scan tool (3) RS-232 communication port.
- Connect the other end of the RS-232 cable to the DB-9 adapter (1) and then connect the DB-9 adapter to the Comms port of the Personal Computer (PC) with TIS 2000 installed.
- Connect the Parallel Security Hardware Key (6) to the serial port of the Personal Computer (PC) with TIS 2000 installed.
- Connect the power supply (2) to the scan tool power supply jack (4). Press the PWR button to turn on the scan tool. The scan tool should now be at the title display screen.
- Now go to step 16.
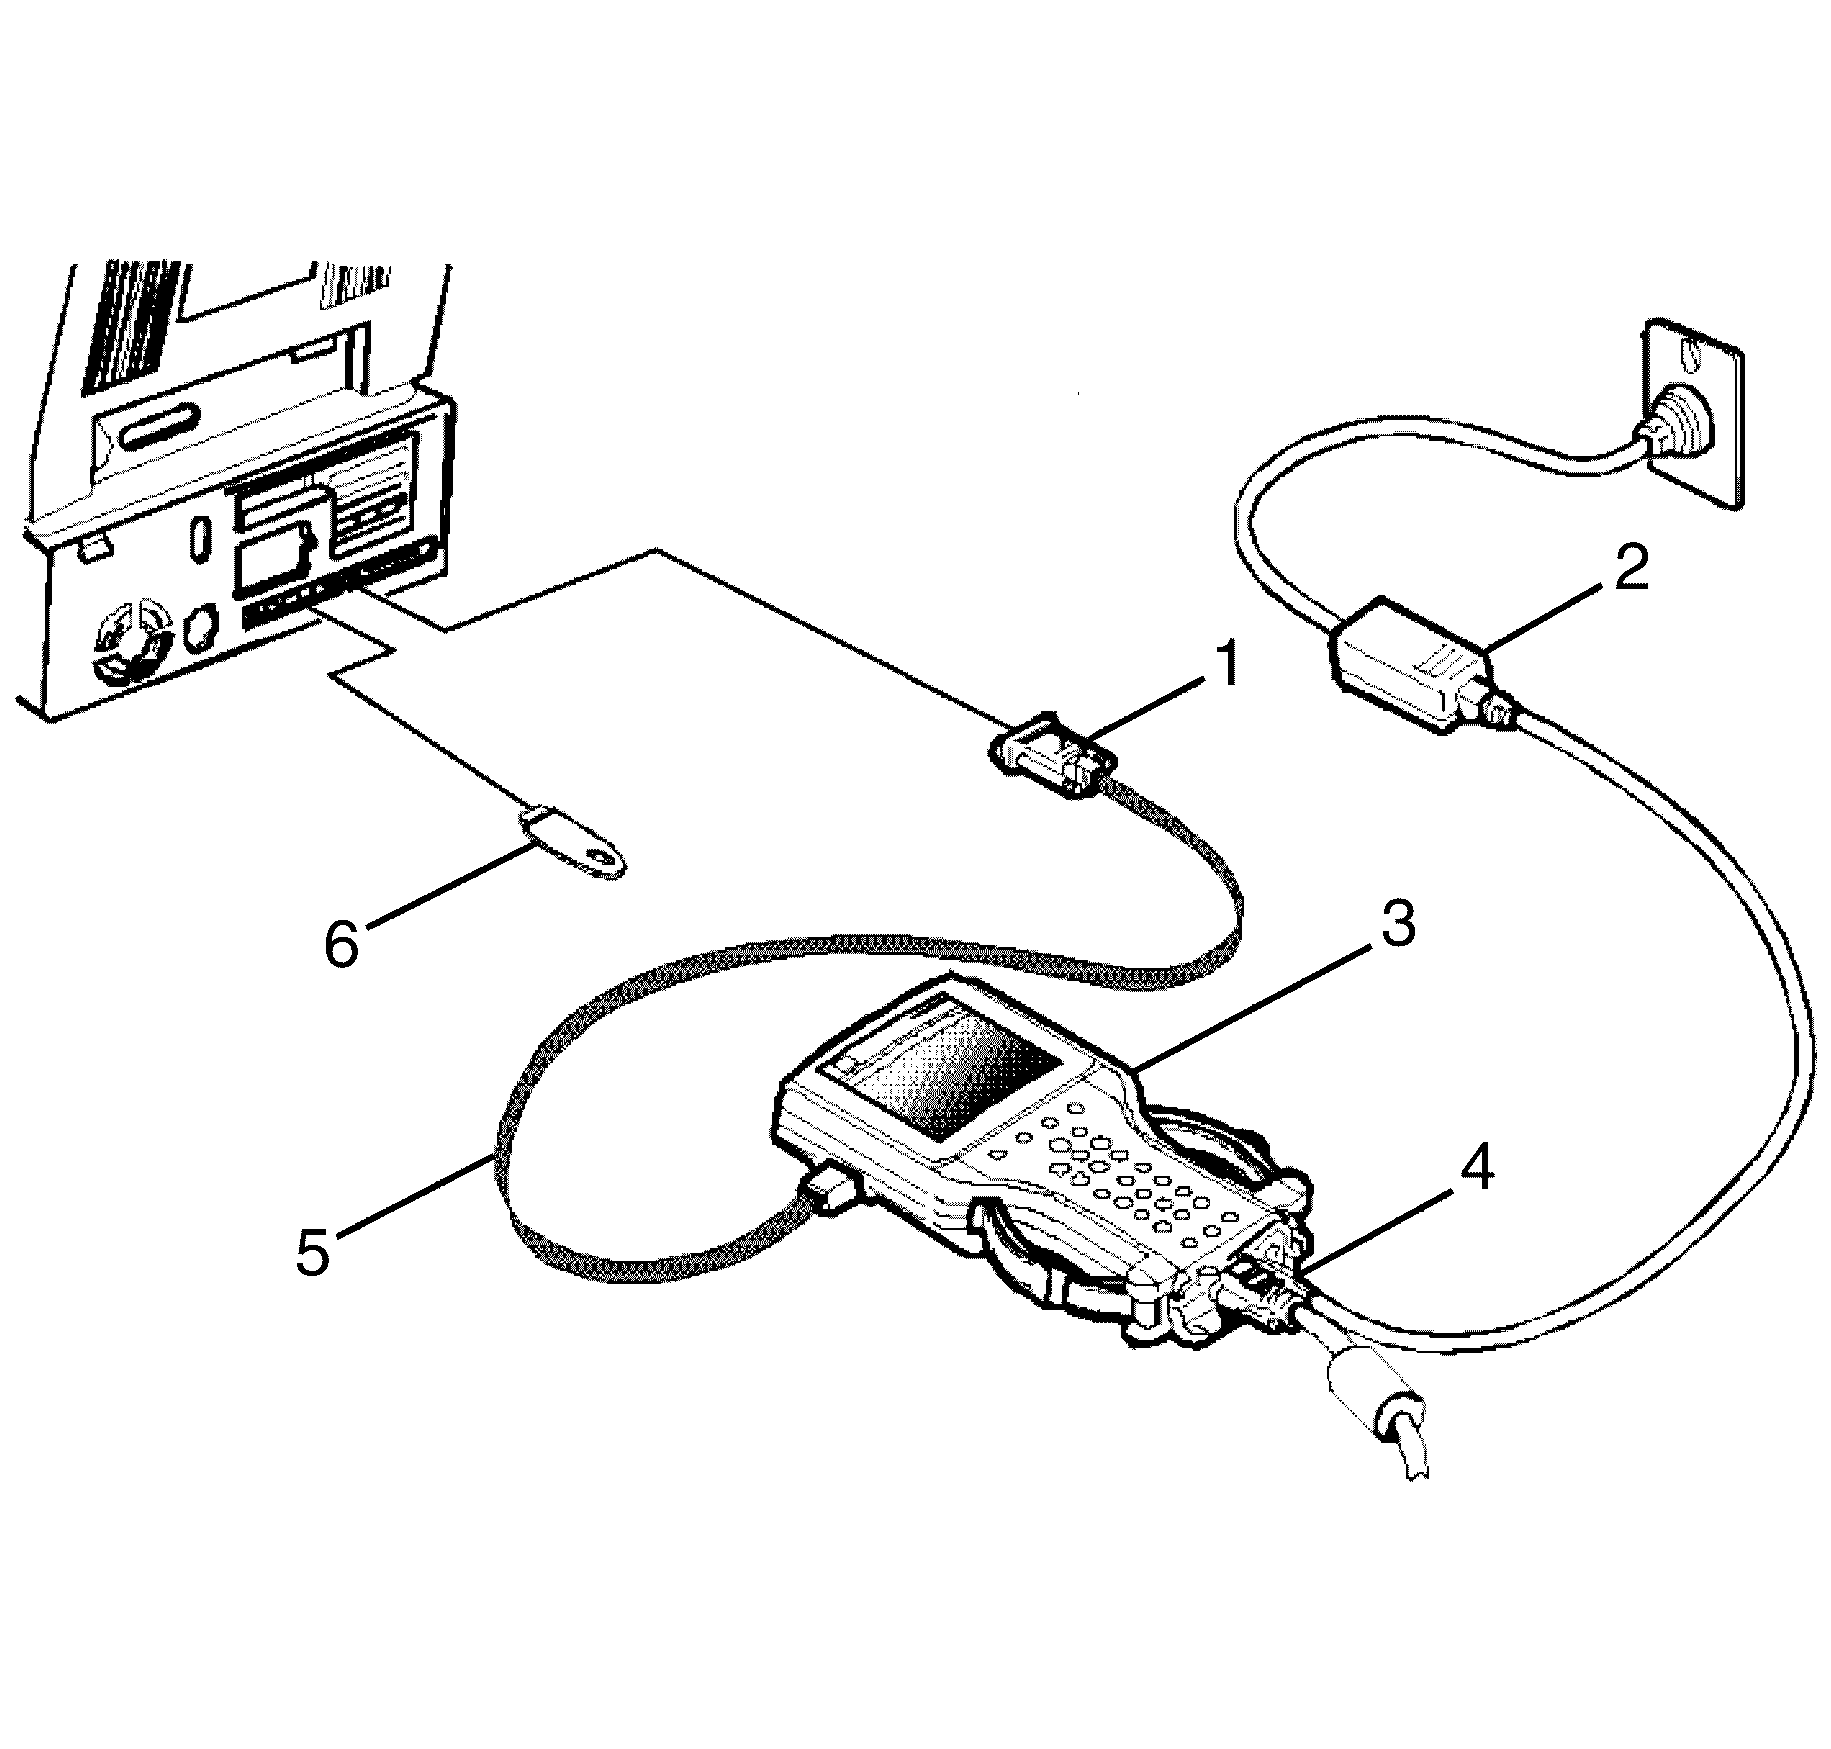
- Connect the RS-232 cable (5) to the scan tool (3) RS-232 communication port.
- Connect the other end of the RS-232 cable to the DB-9 adapter (1) and then connect the DB-9 adapter to the Comms port of the Personal Computer (PC) with TIS 2000 installed.
- Connect the USB Security Hardware Key (6) to the USB port of the Personal Computer (PC) with TIS 2000 installed.
- Connect the power supply (2) to the scan tool power supply jack (4). Press the PWR button to turn on the scan tool. The scan tool should now be at the title display screen.
- From the TIS 2000 main menu, click on the Security Access icon to start the application.
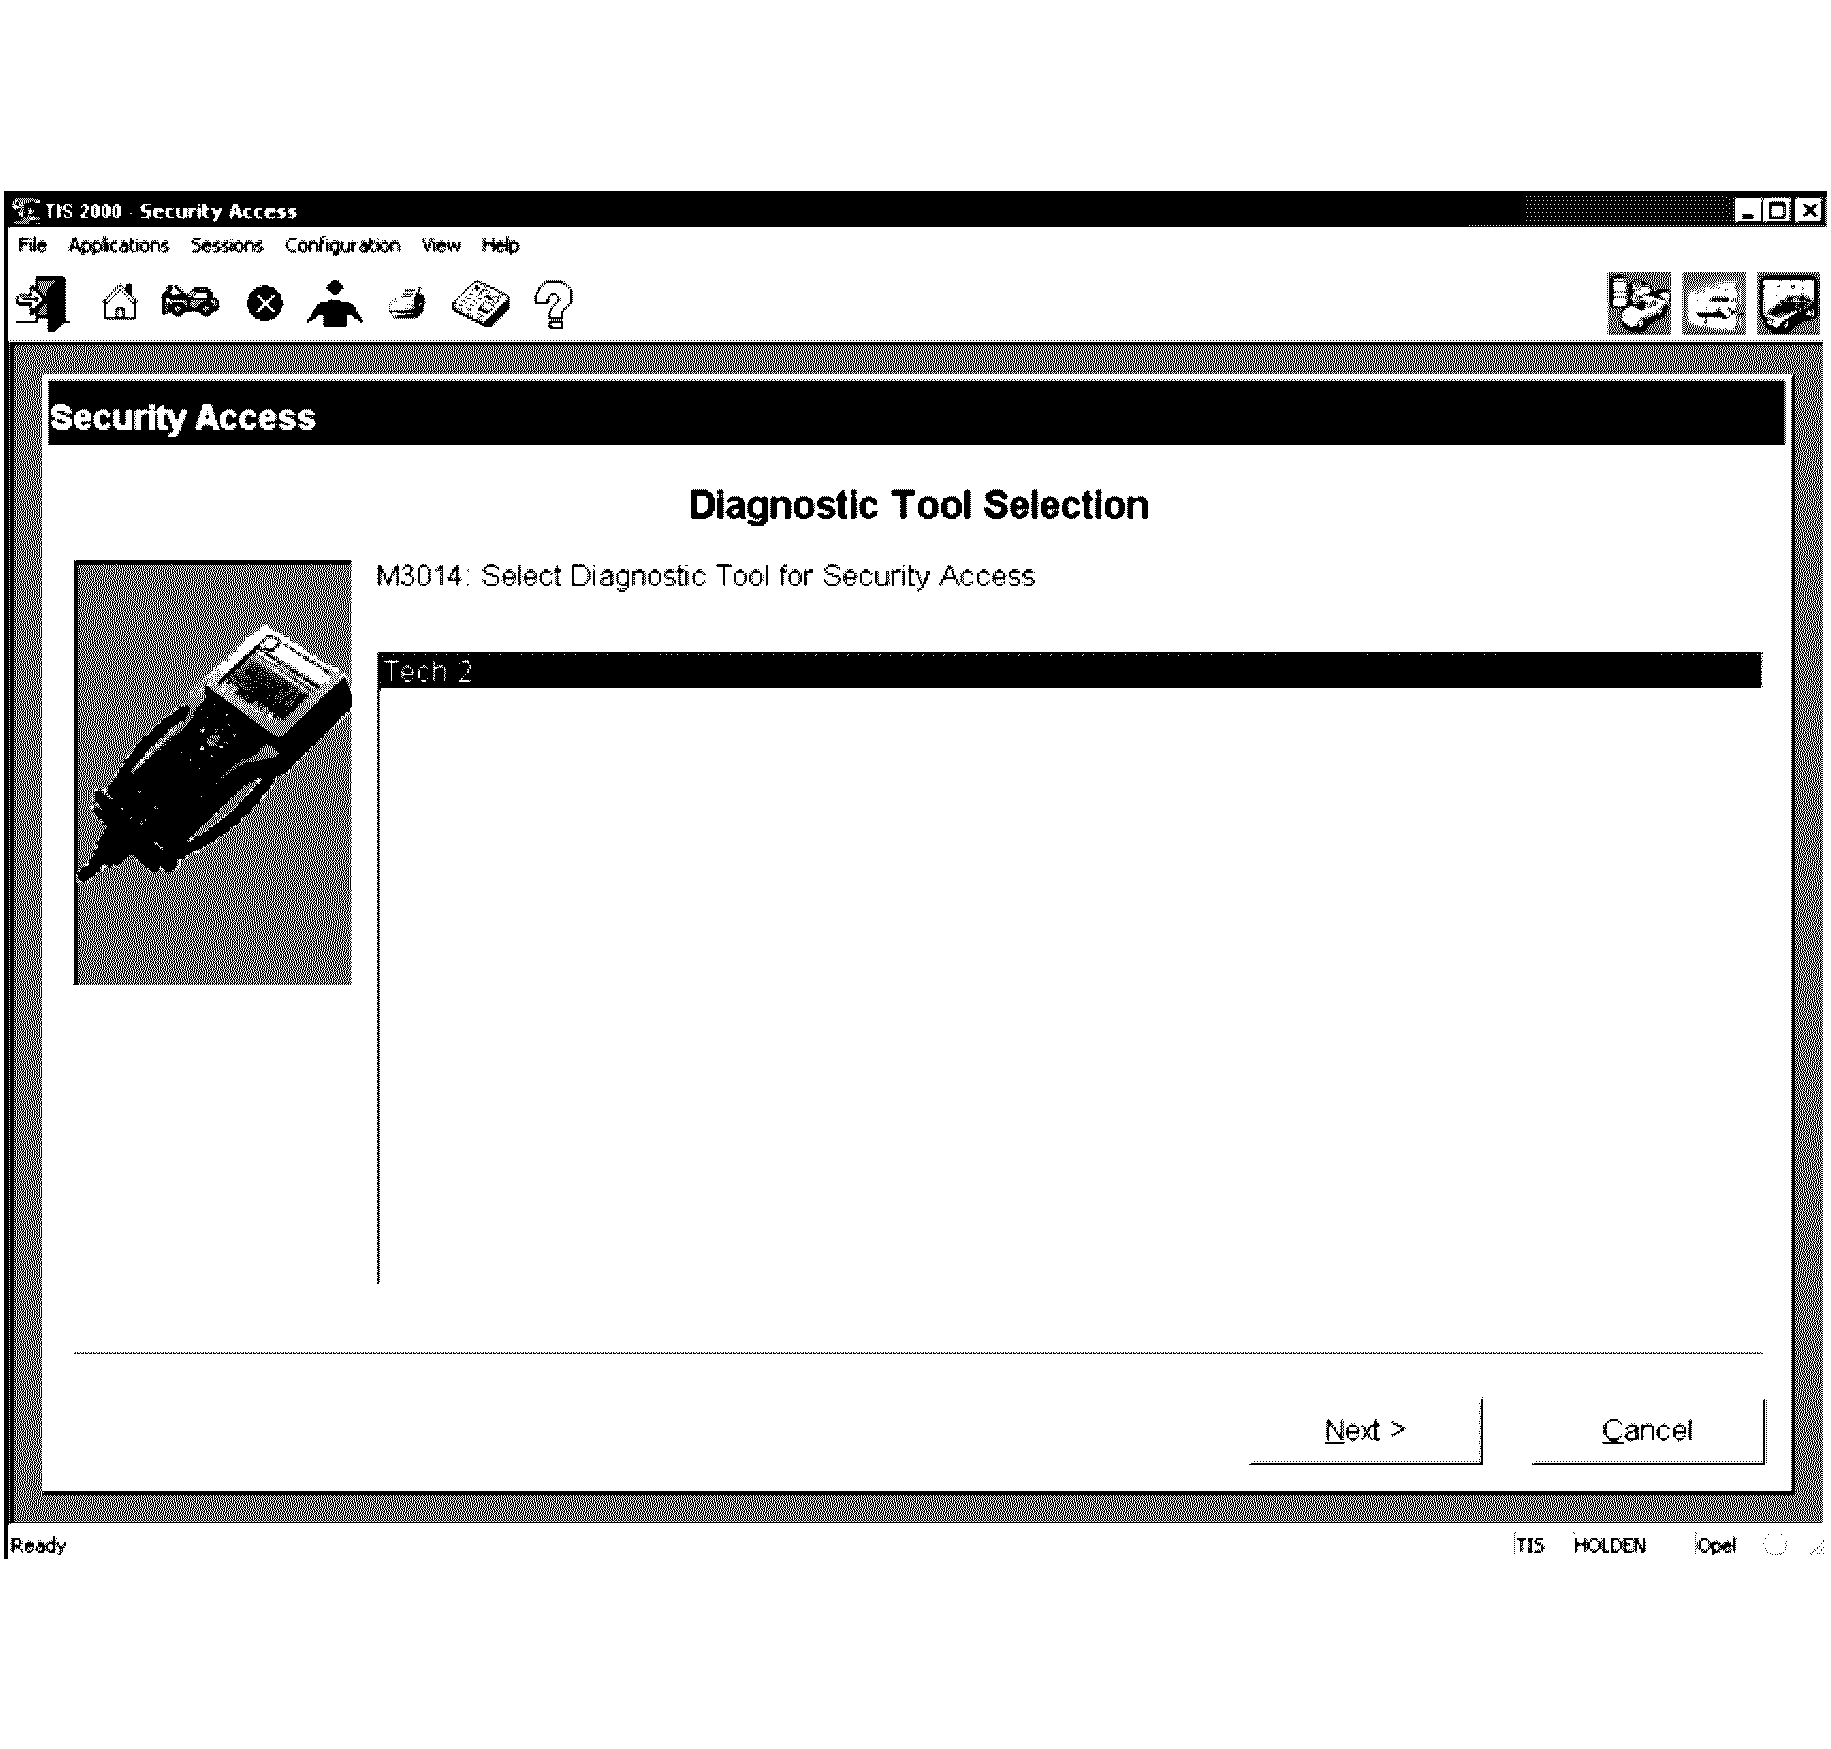
- Select diagnostic tool (Tech 2) for Security Access.
- Select Next> to continue.
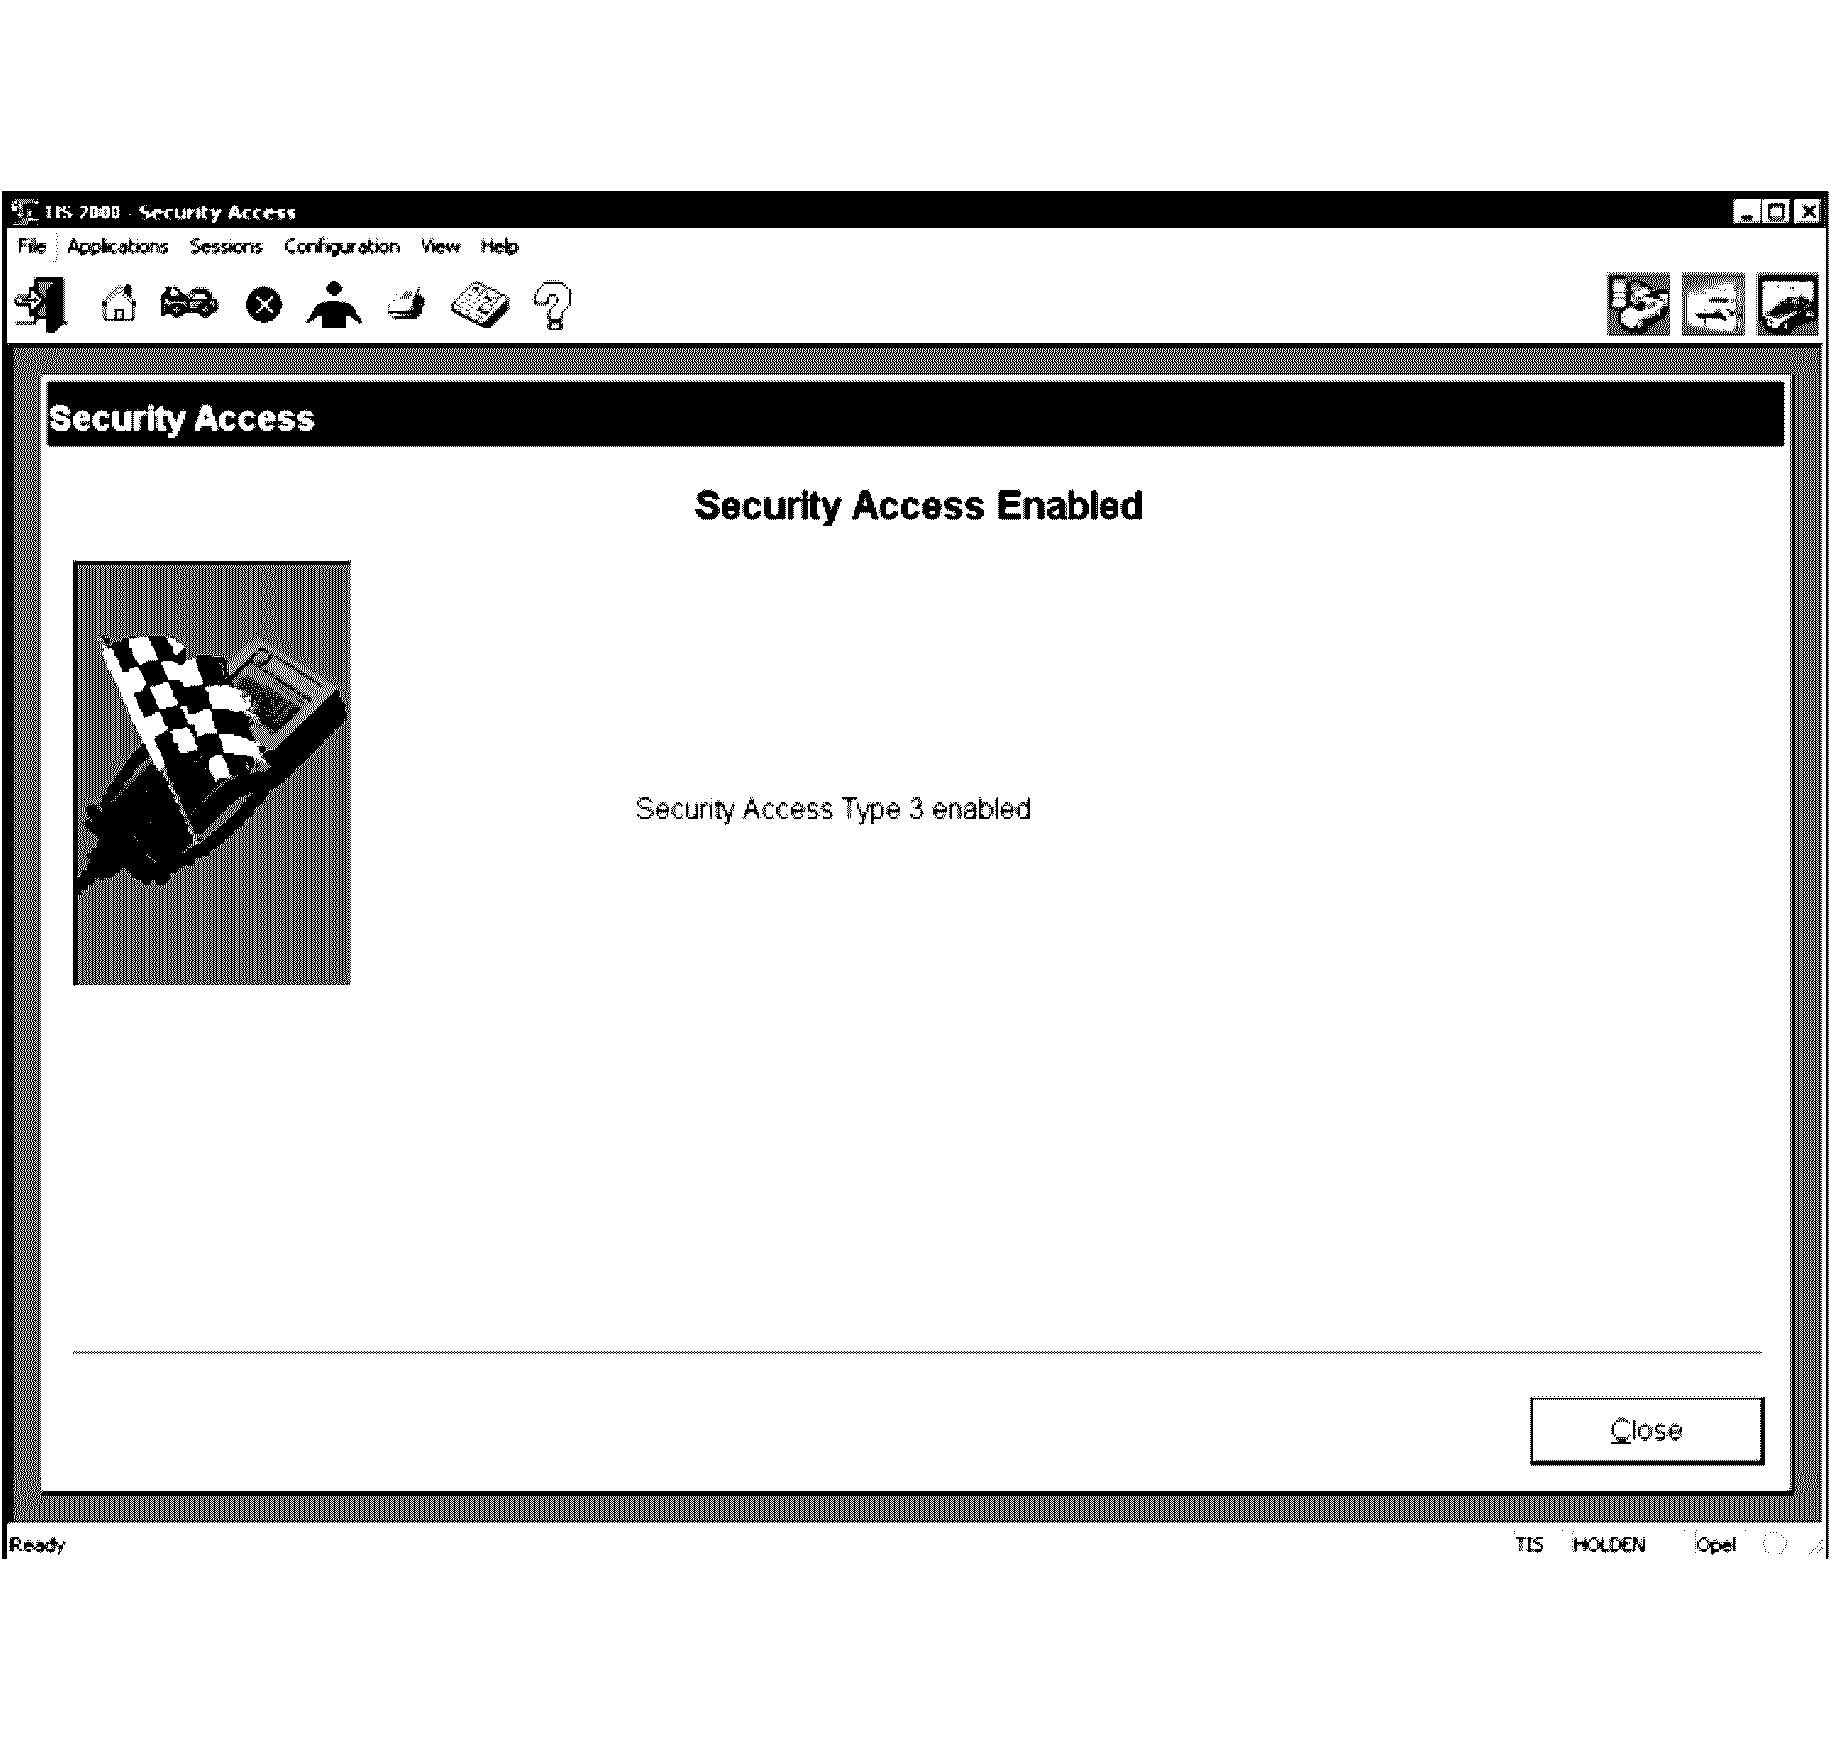
- When the process is complete, a Security Access Enabled, Security Access Type 2 and or 3 enabled screen appears. Click on the Close button to close the application.
- Reconnect the scan tool to the vehicle DLC and reselect the programming function, you will now be permitted to complete the programming function.
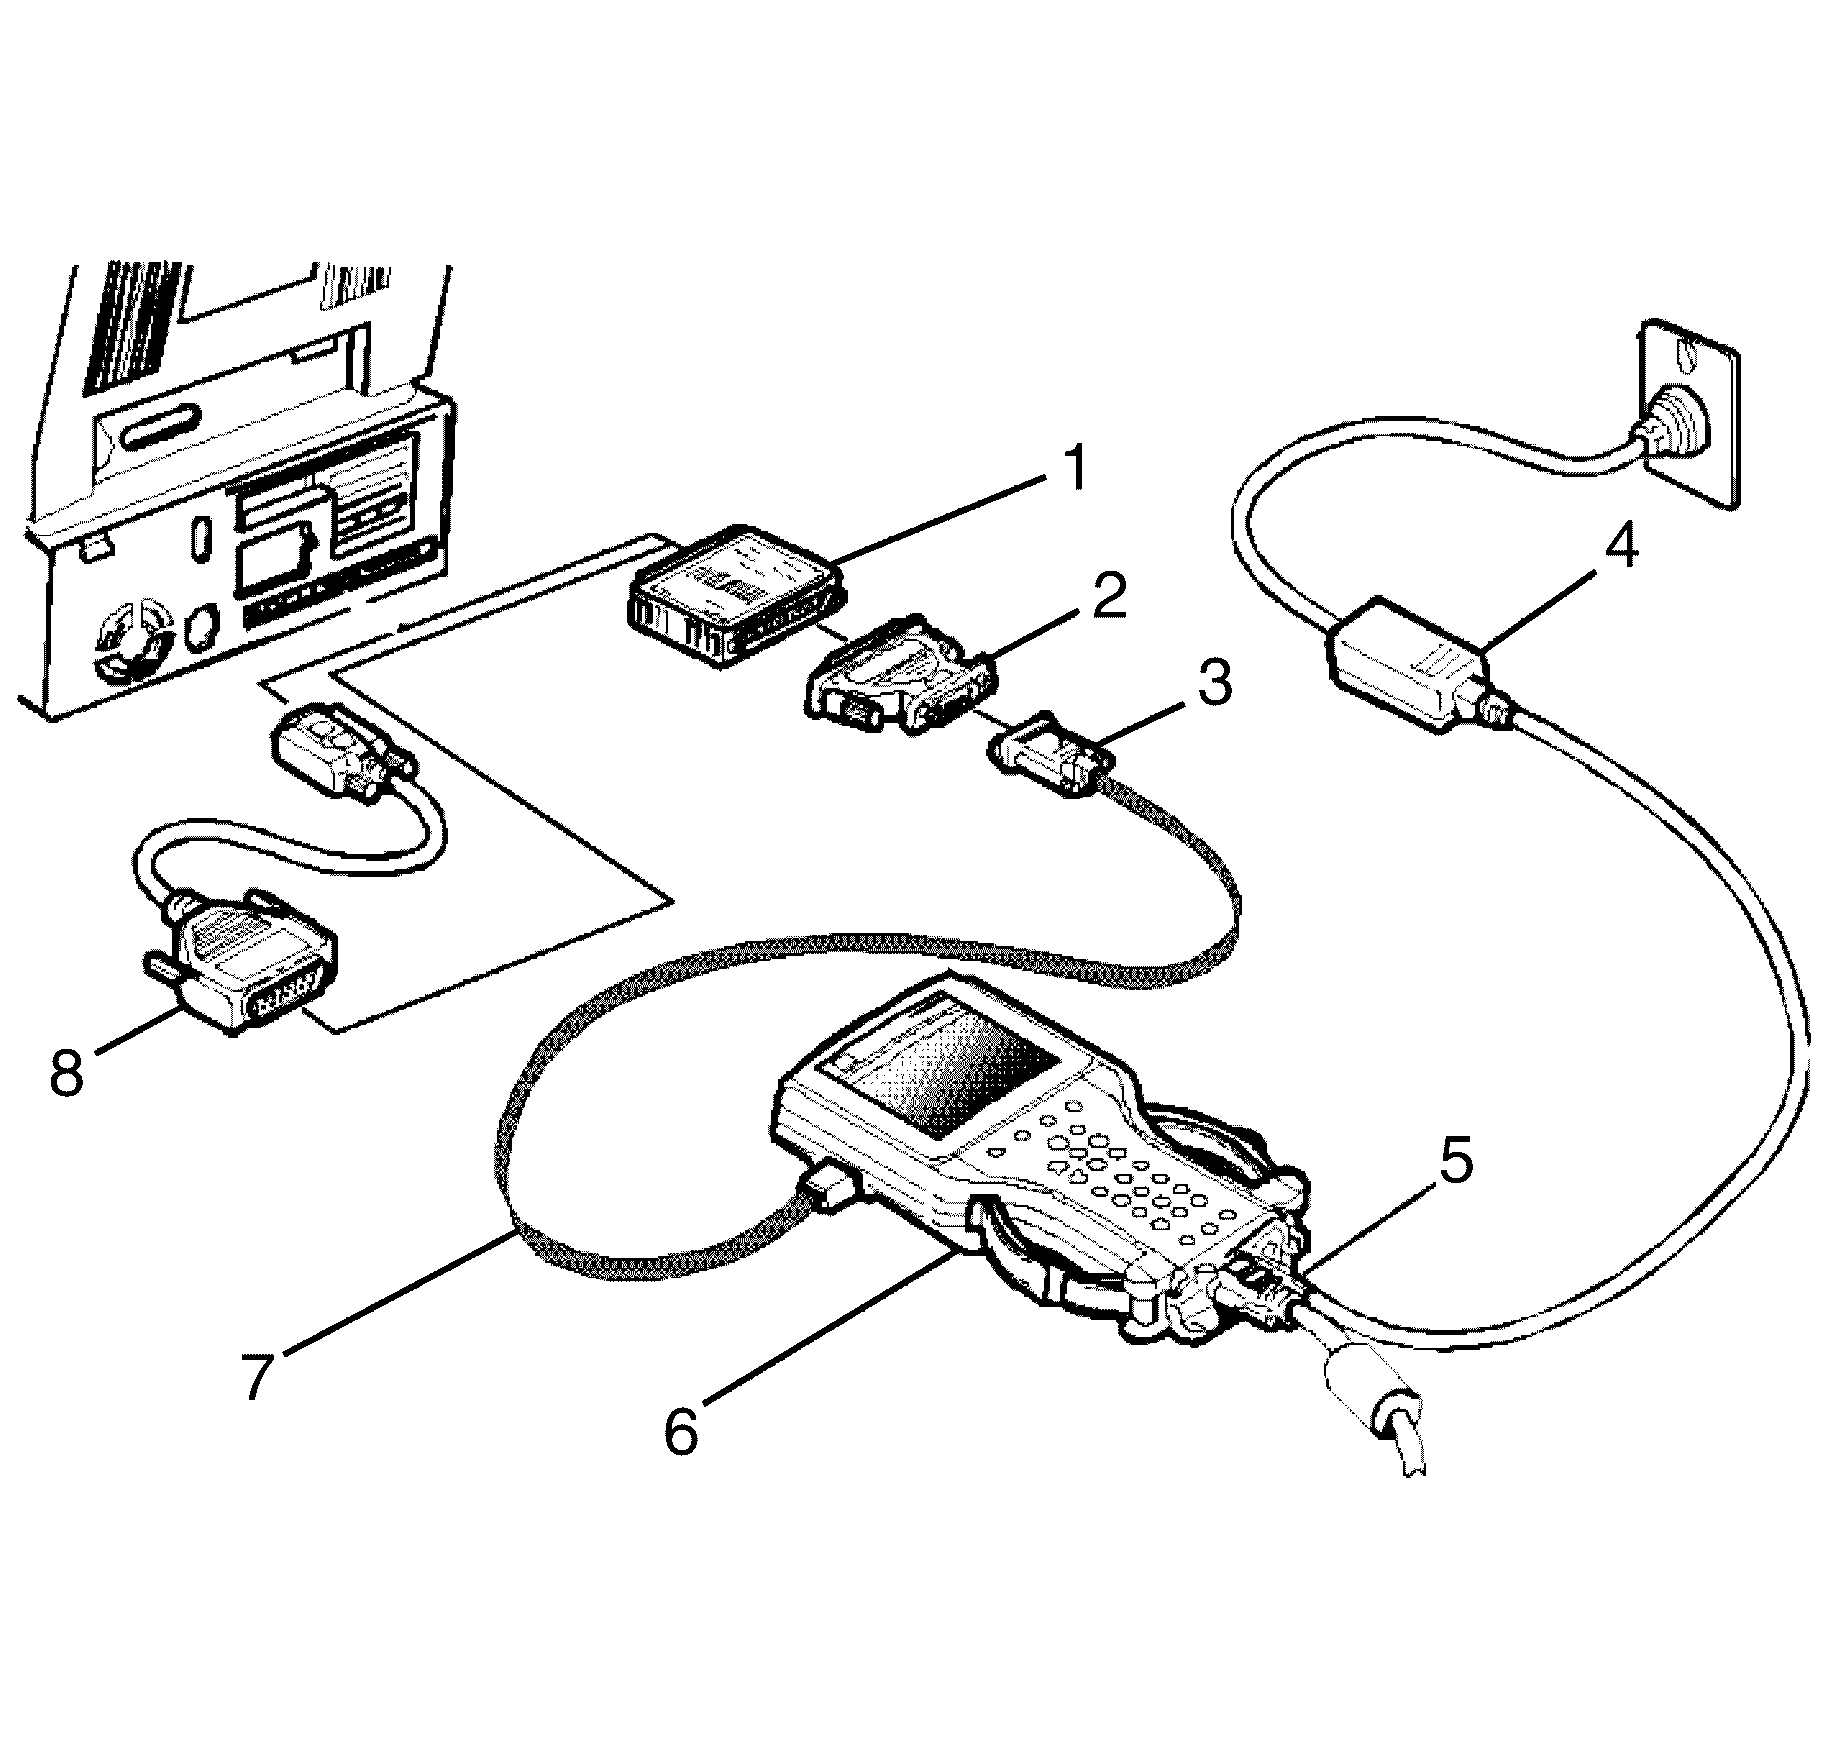
Important: If your PC has a 9 pin serial communication port you will need to fit the 9/25 pin adapter (8) between the hardware key and the serial port of the TIS 2000 PC.
Obtaining TIS Approval LHD
General Information
Certain programming functions performed with the scan tool are prohibited without TIS approval. TIS approval can be obtained by clicking on the Security Access icon on the TIS 2000 Application Selection Screen
Security Access
Security Access is used in order to prevent unauthorised persons from programming certain security functions.
After a scan tool security programming function has been selected, the scan tool will display: Please get programming approval from TIS!
To enable these programming procedures they must be approved by the TIS 2000 Security Access function and scan tool must be connected to TIS 2000 using the RS232 interface and a registered security hardware key. Without this security hardware key, an error message is given by TIS 2000.
Security Access Procedure
- If your security hardware key is the serial type, go to step 2. If your hardware key is the parallel type, go to step 7. If your hardware key is the USB type, go to step 12.
- Connect the RS-232 cable (7) to the scan tool (6) RS-232 communication port.
- Connect the other end of the RS-232 cable to the DB-9 adapter (3) and then connect the DB-9 adapter to the 25/9 pin adapter (2).
- Connect the 25/9 pin adapter to the Serial Security Hardware Key (1) and then connect the Serial Security Hardware Key to the serial port of a Personal Computer (PC) with TIS 2000 installed.
- Connect the power supply (4) to the scan tool power supply jack (5). Press the PWR button to turn on the scan tool. The scan tool should now be at the title display screen.
- Now go to step 16.
- Connect the RS-232 cable (5) to the scan tool (3) RS-232 communication port.
- Connect the other end of the RS-232 cable to the DB-9 adapter (1) and then connect the DB-9 adapter to the Comms port of the Personal Computer (PC) with TIS 2000 installed.
- Connect the Parallel Security Hardware Key (6) to the serial port of the Personal Computer (PC) with TIS 2000 installed.
- Connect the power supply (2) to the scan tool power supply jack (4). Press the PWR button to turn on the scan tool. The scan tool should now be at the title display screen.
- Now go to step 16.
- Connect the RS-232 cable (5) to the scan tool (3) RS-232 communication port.
- Connect the other end of the RS-232 cable to the DB-9 adapter (1) and then connect the DB-9 adapter to the Comms port of the Personal Computer (PC) with TIS 2000 installed.
- Connect the USB Security Hardware Key (6) to the USB port of the Personal Computer (PC) with TIS 2000 installed.
- Connect the power supply (2) to the scan tool power supply jack (4). Press the PWR button to turn on the scan tool. The scan tool should now be at the title display screen.
- Select SPS from TIS2WEB or TIS 2000.
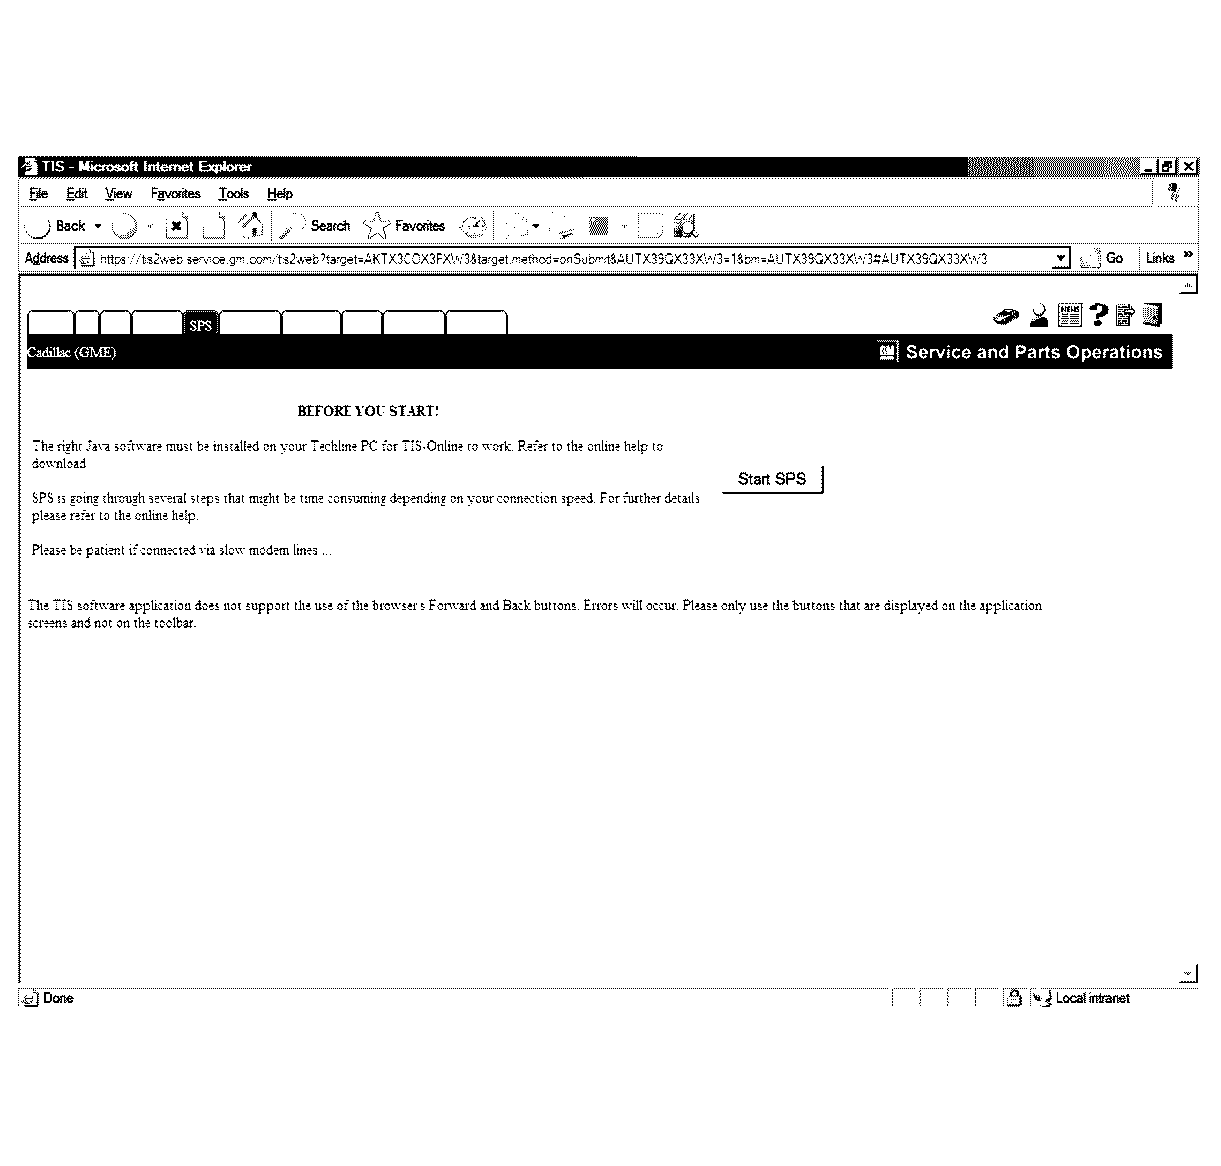
- Select Start SPS:
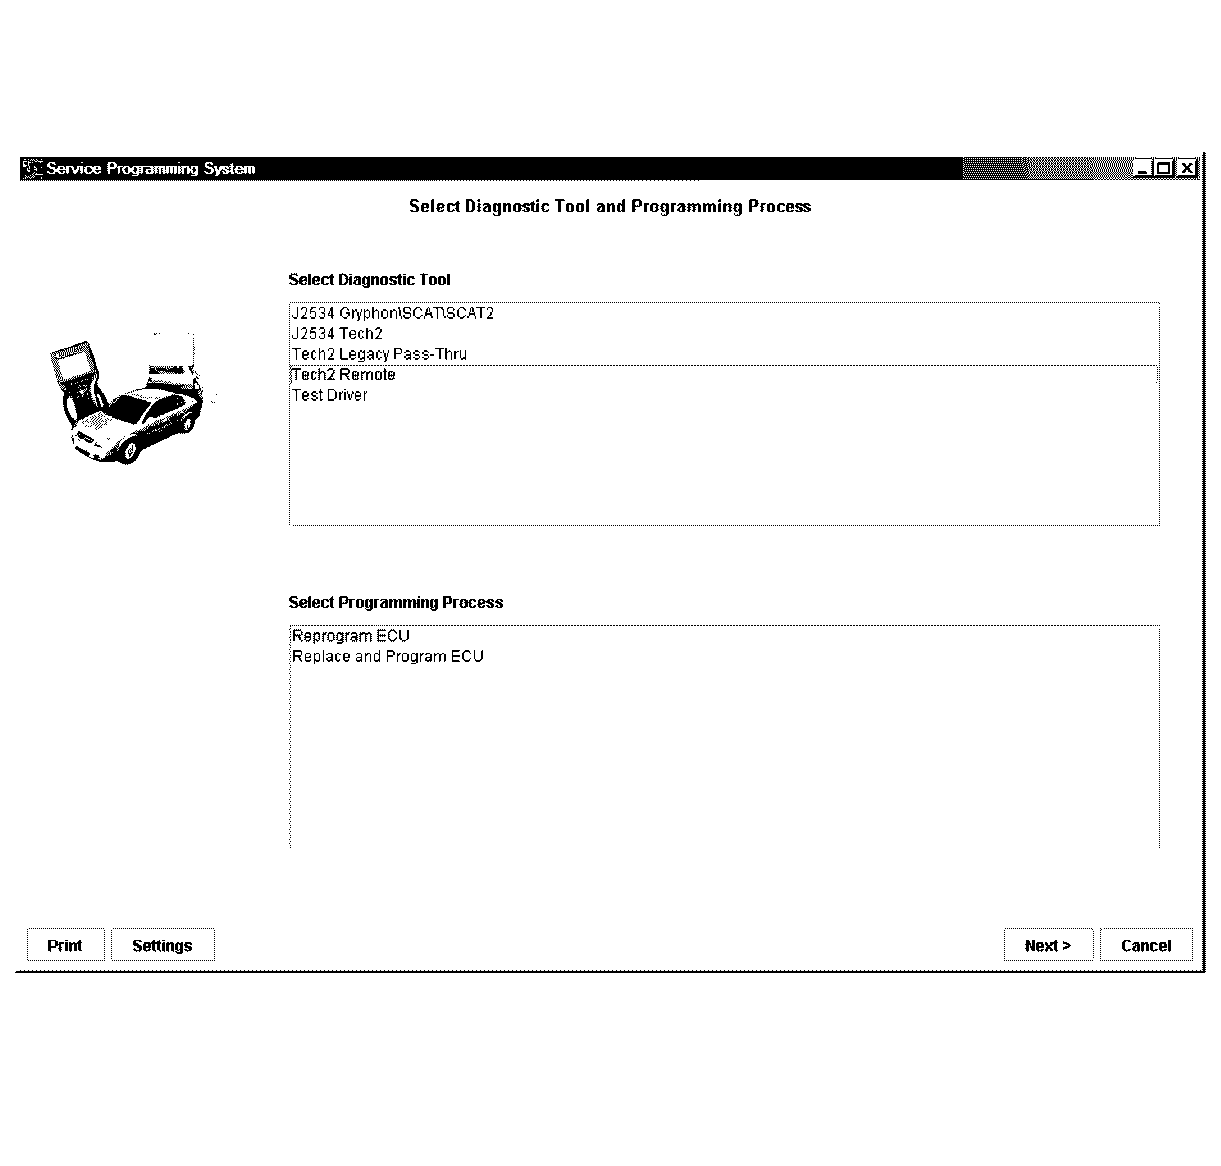
- Select Tech2 Remote and Program ECU, then select Next.
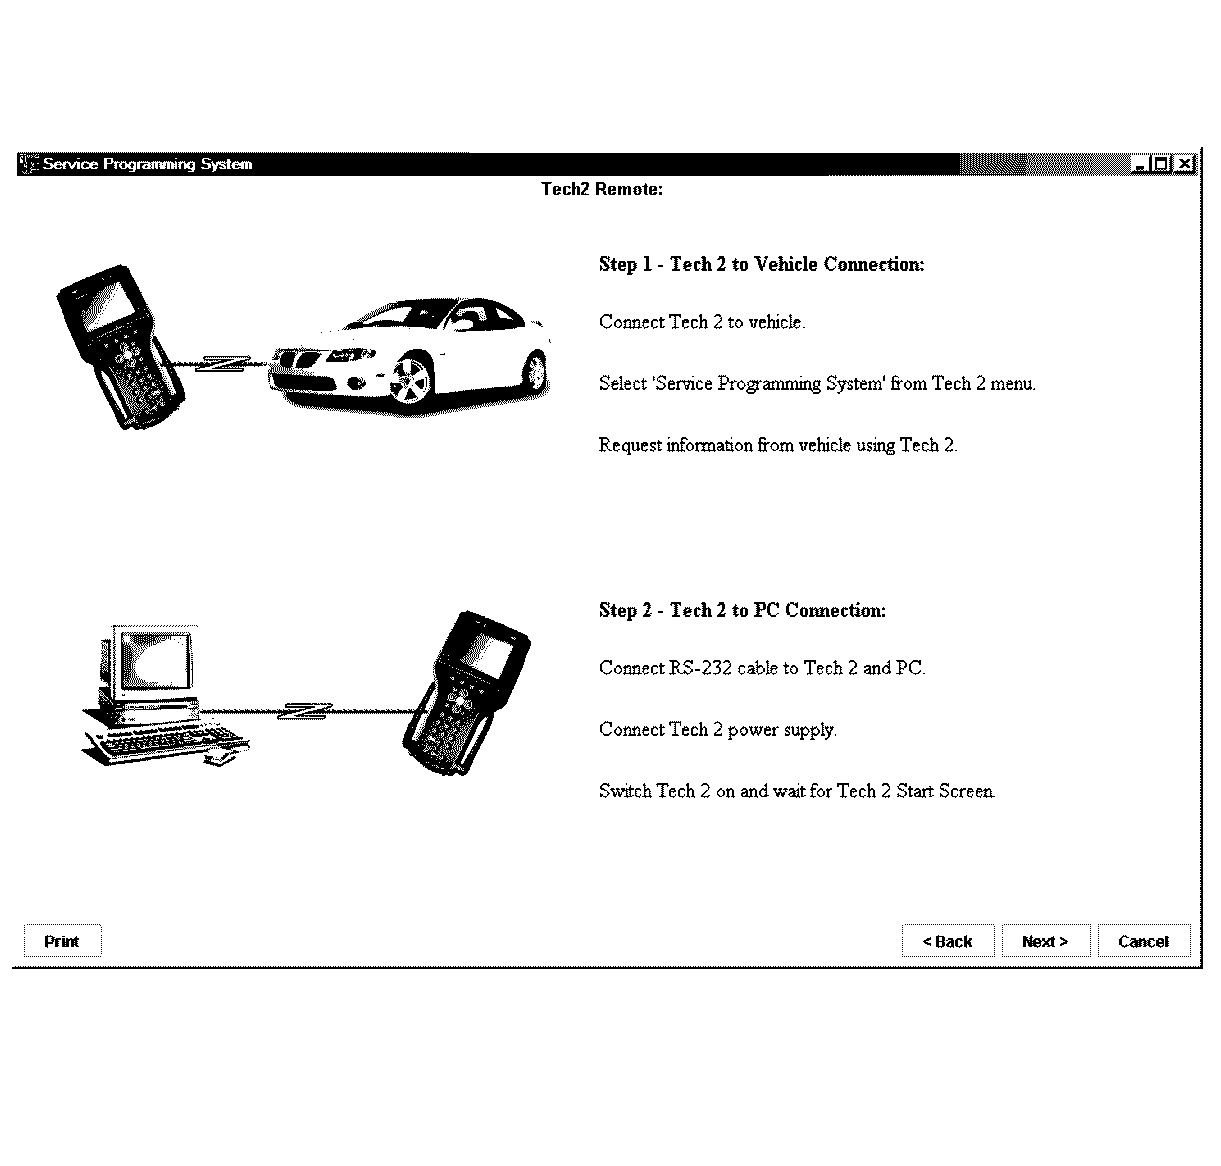
- Then select Next.
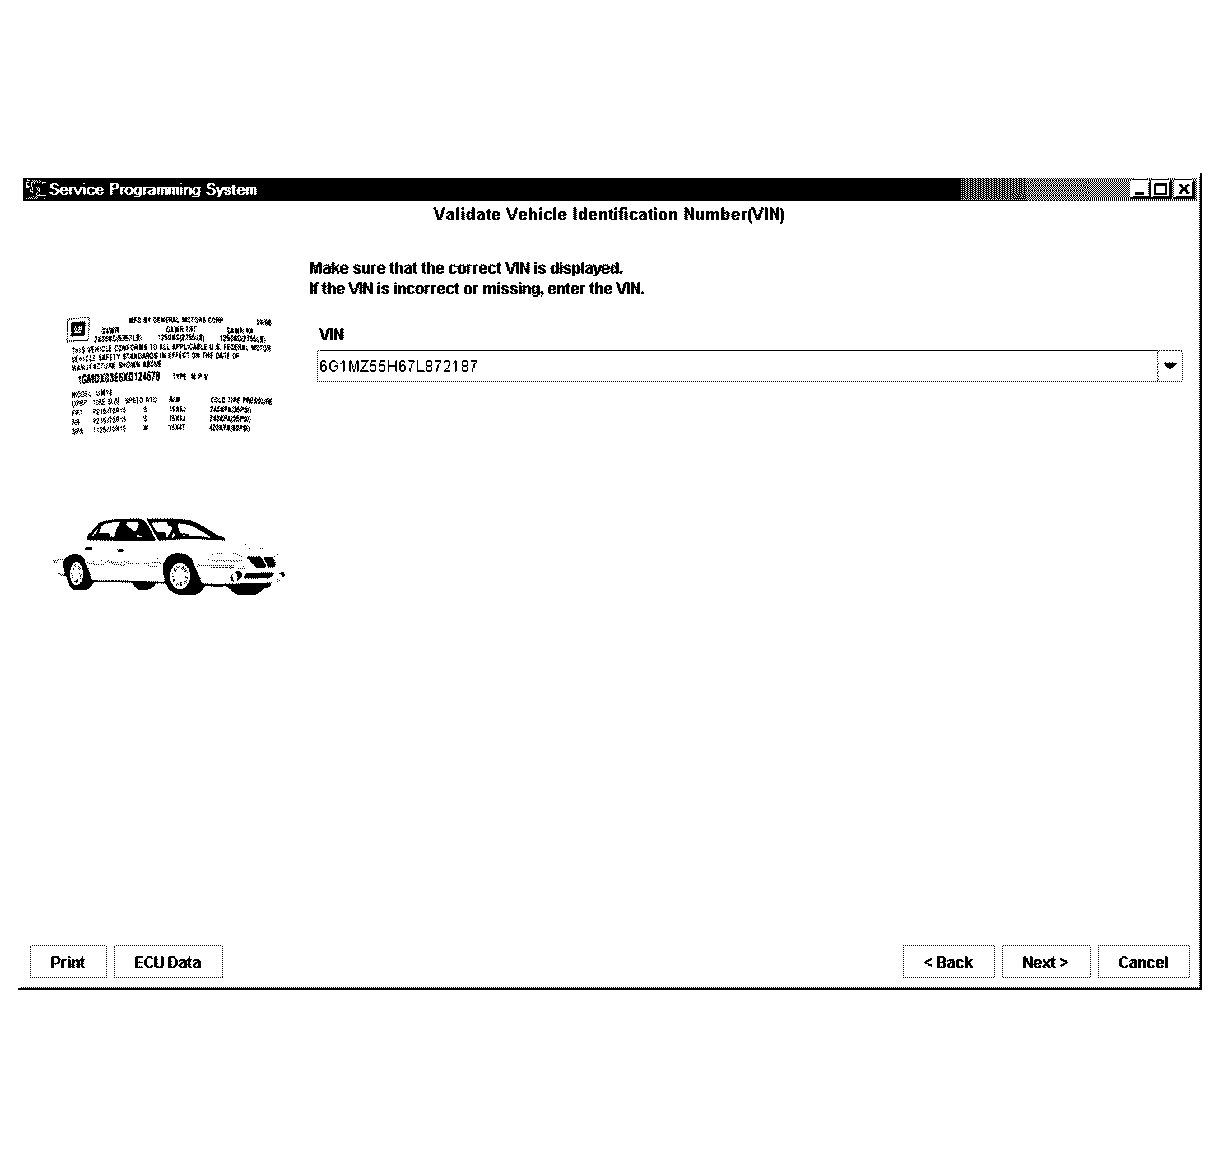
- TIS2WEB displays the vehicle VIN: Please select Next.
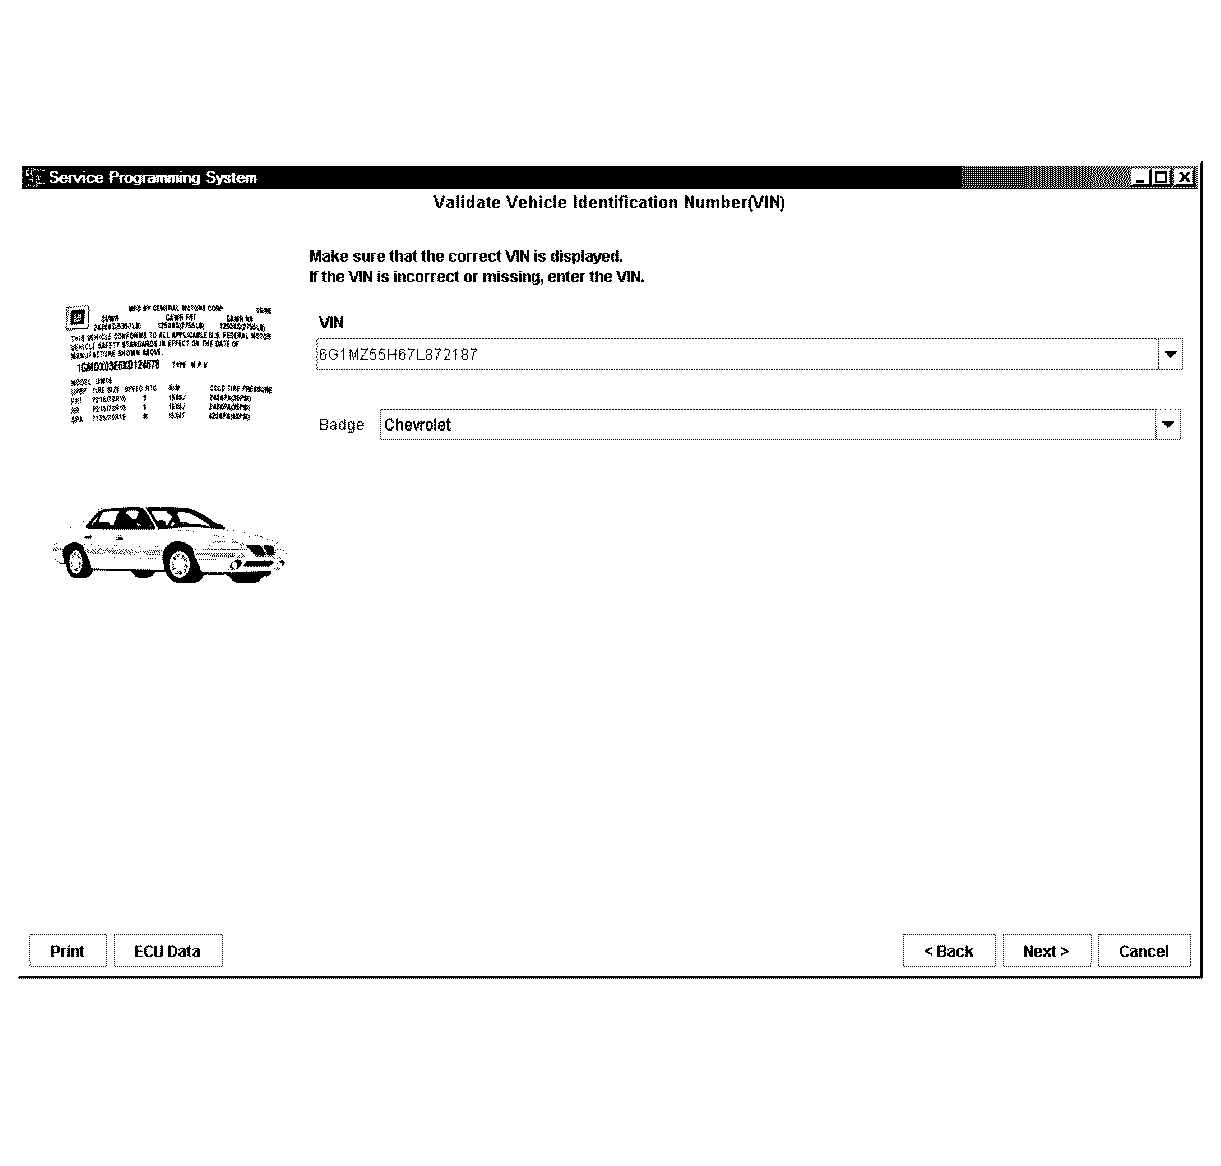
- Select Badge = Chevrolet, then select Next.
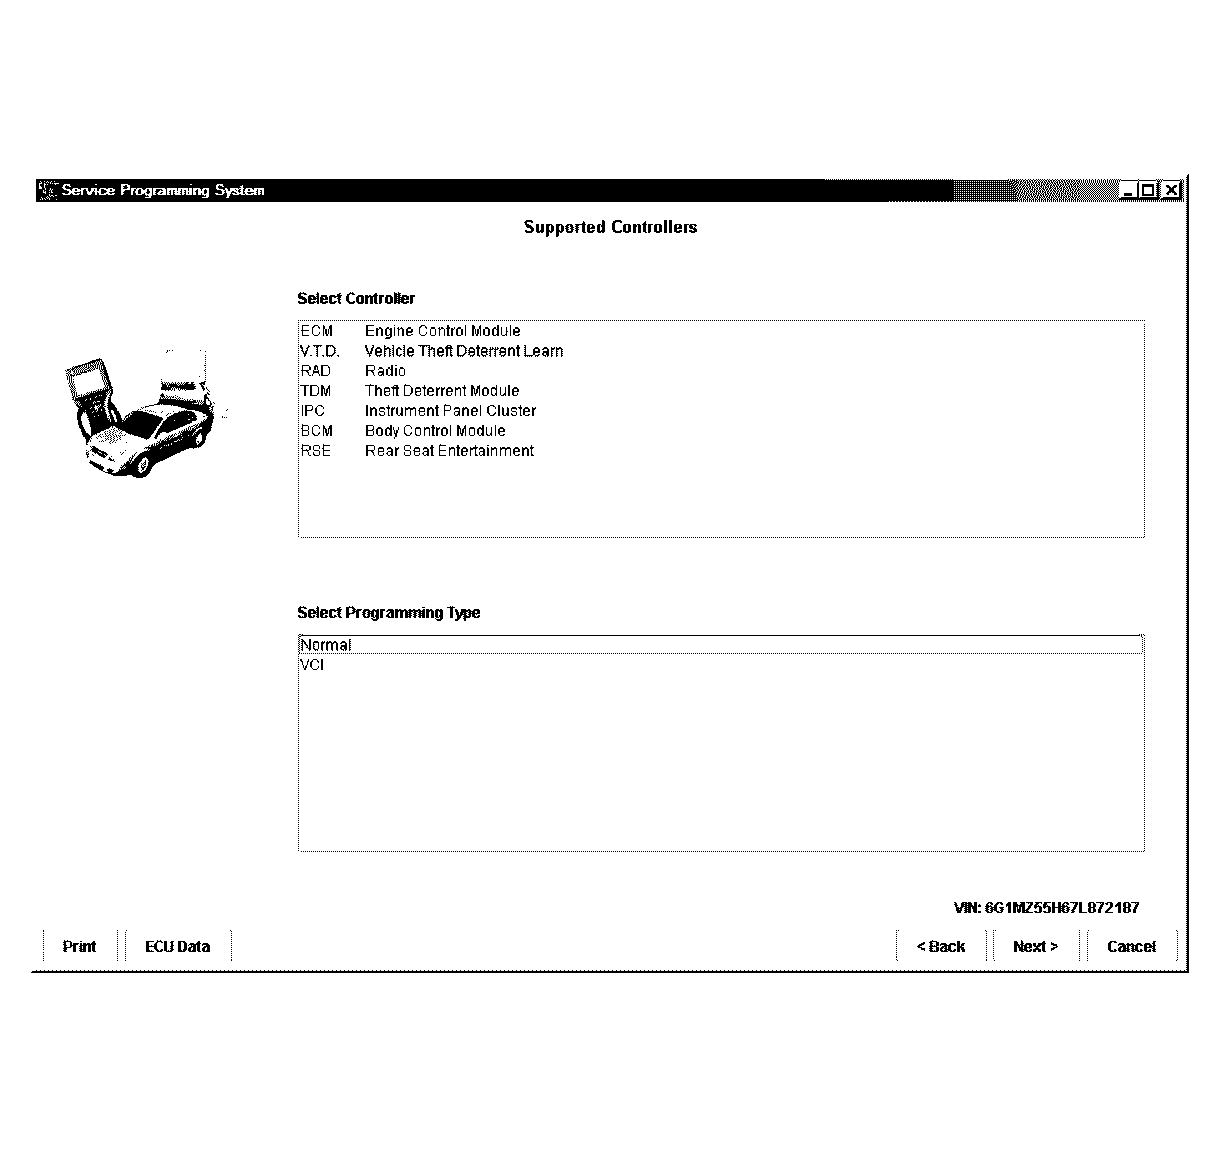
- Select V.T.D. and Normal, then select Next.
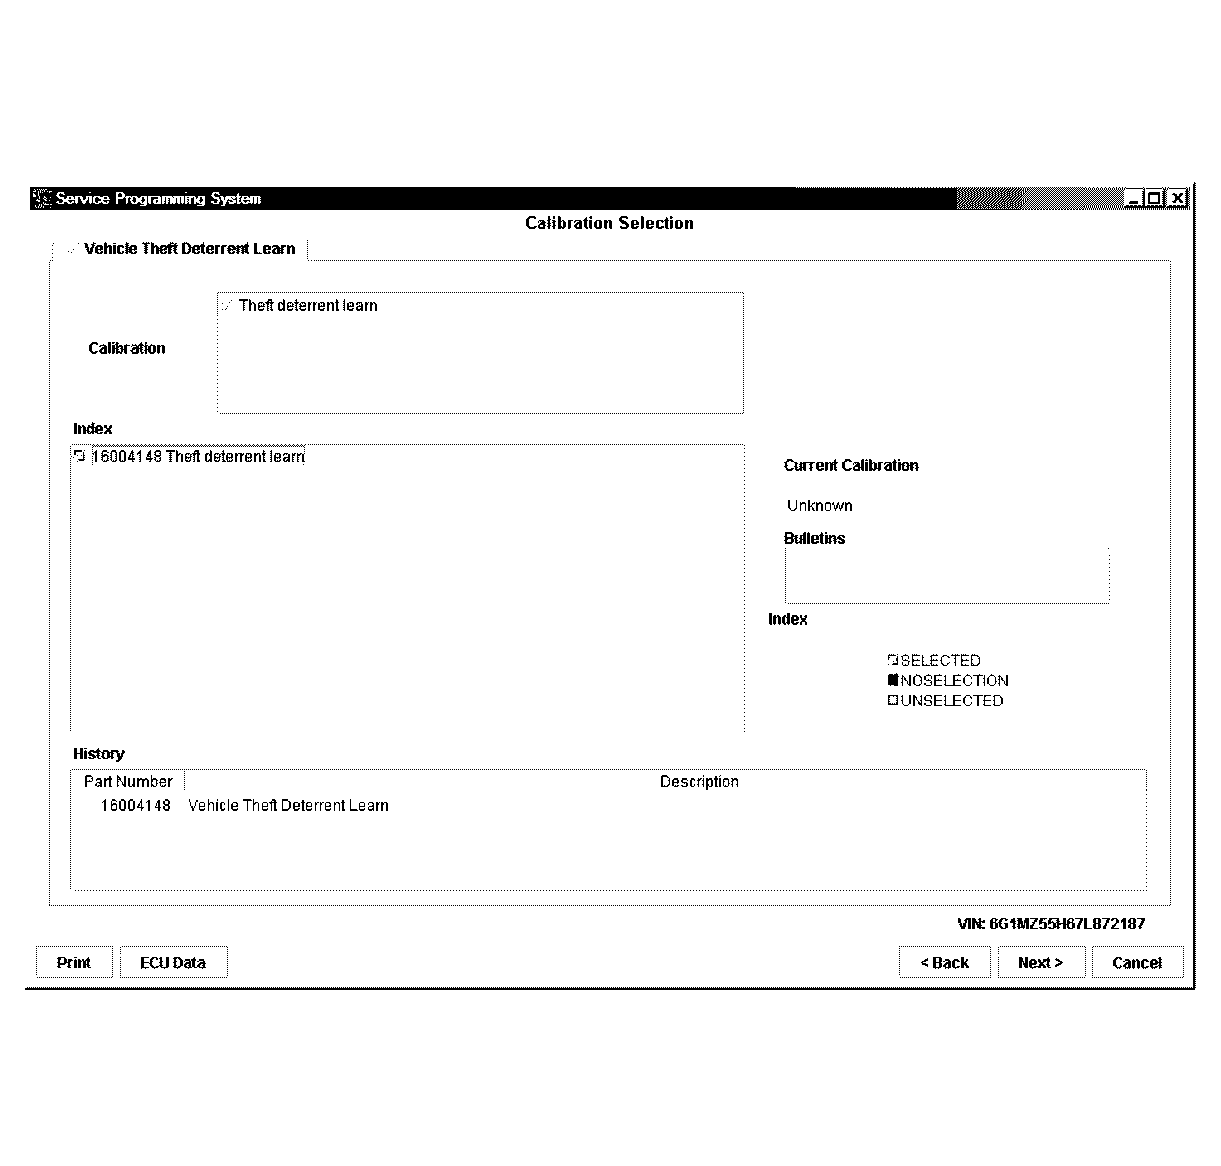
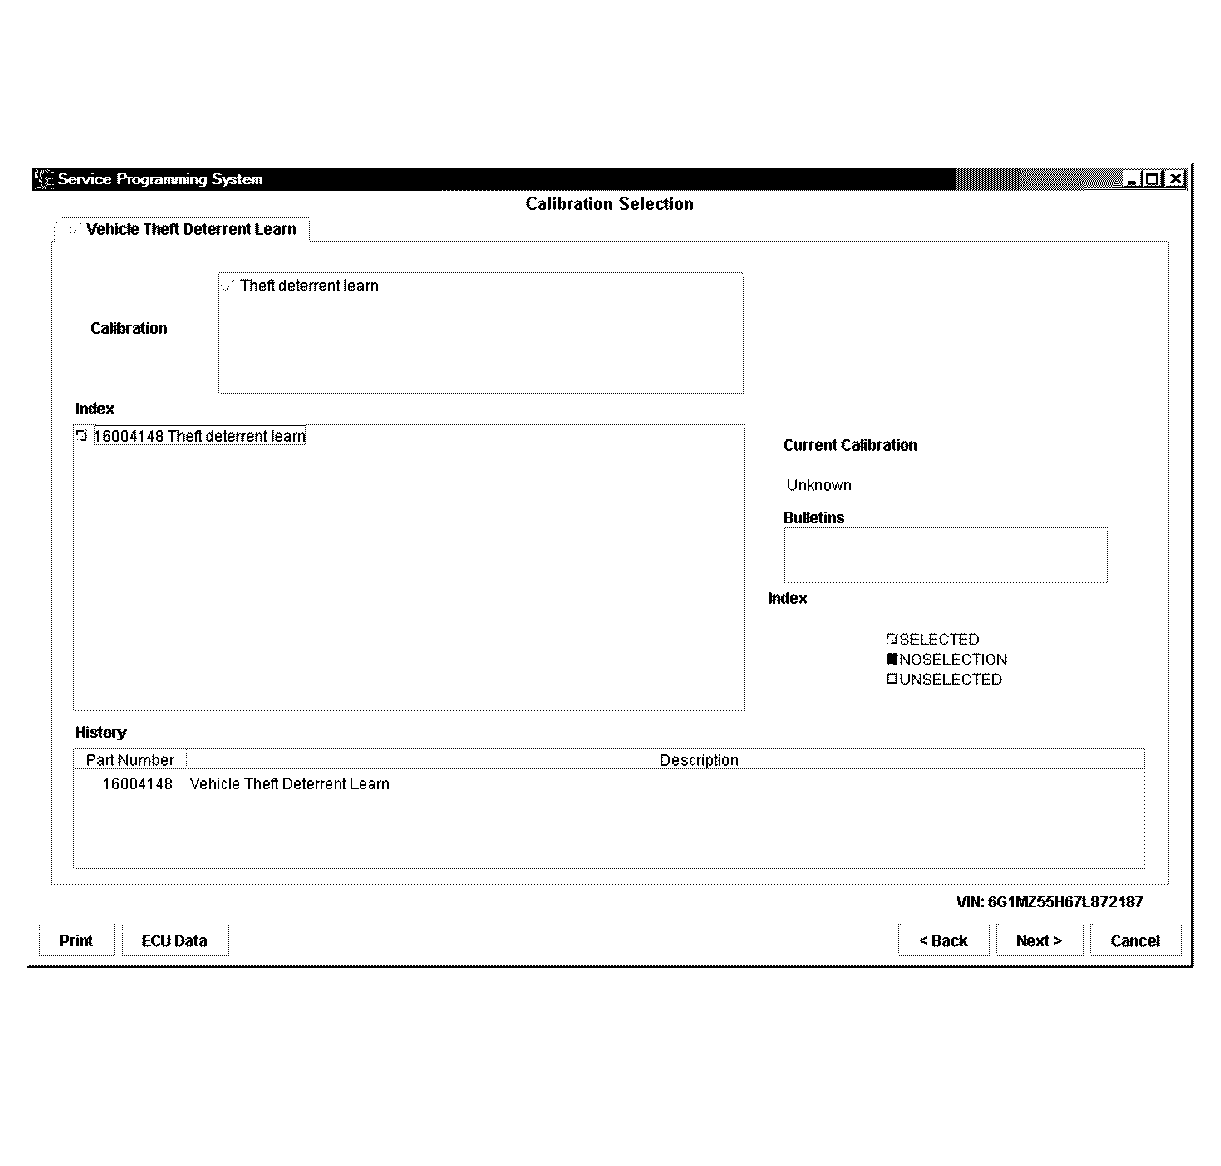
- The Vehicle Theft Deterent Learn Calibration selection screen is displayed: select Next.
- The Summary screen is the displayed: select Next.
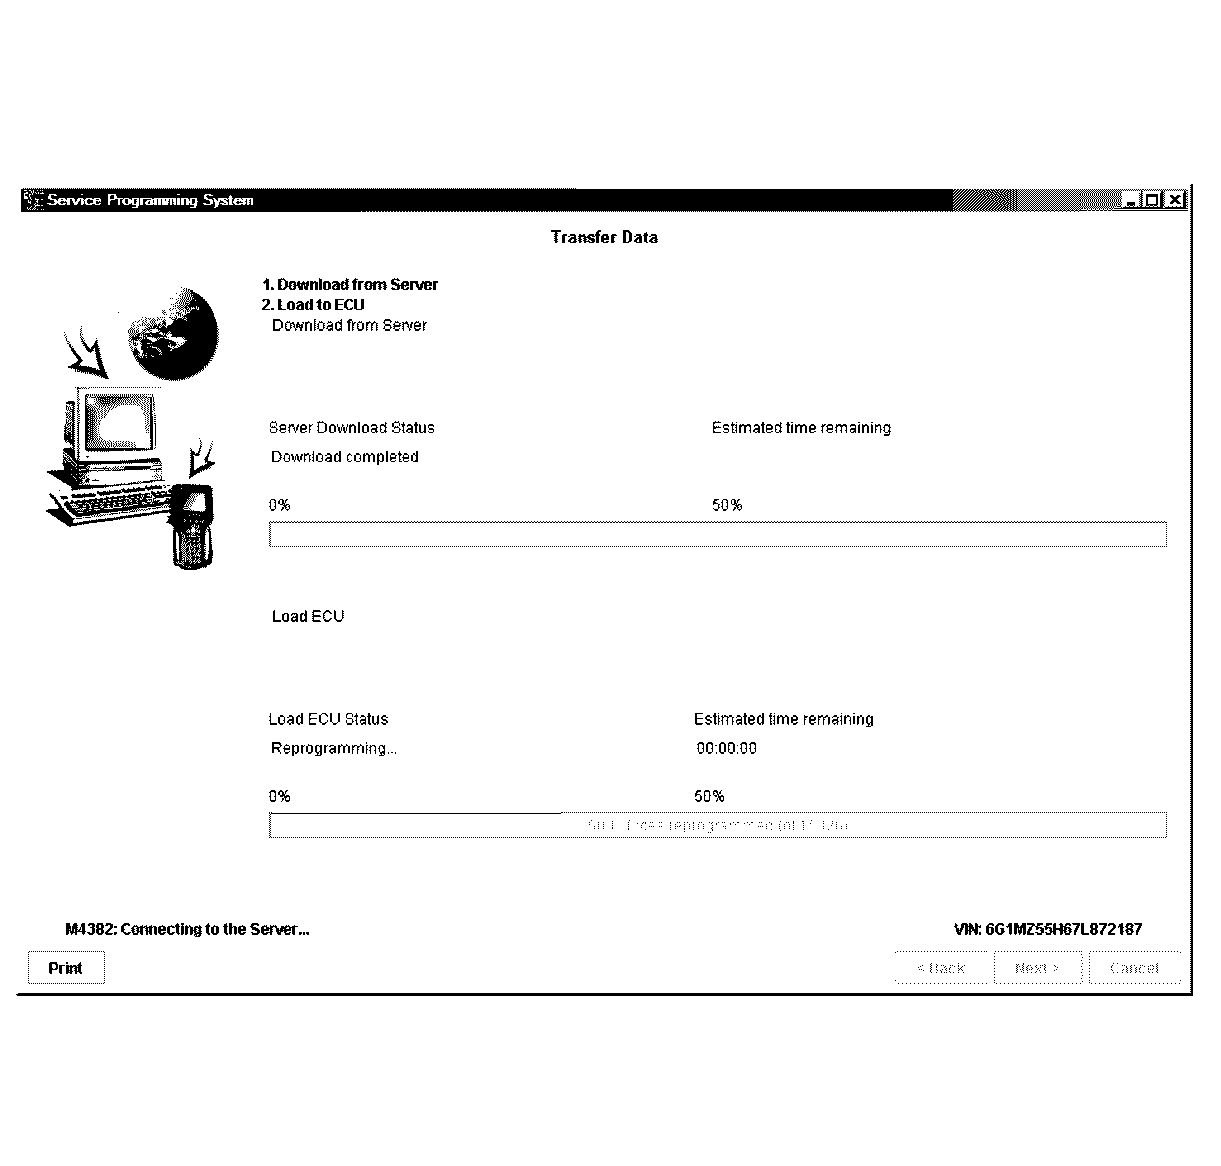
- The Transfer Data screen is then displayed.
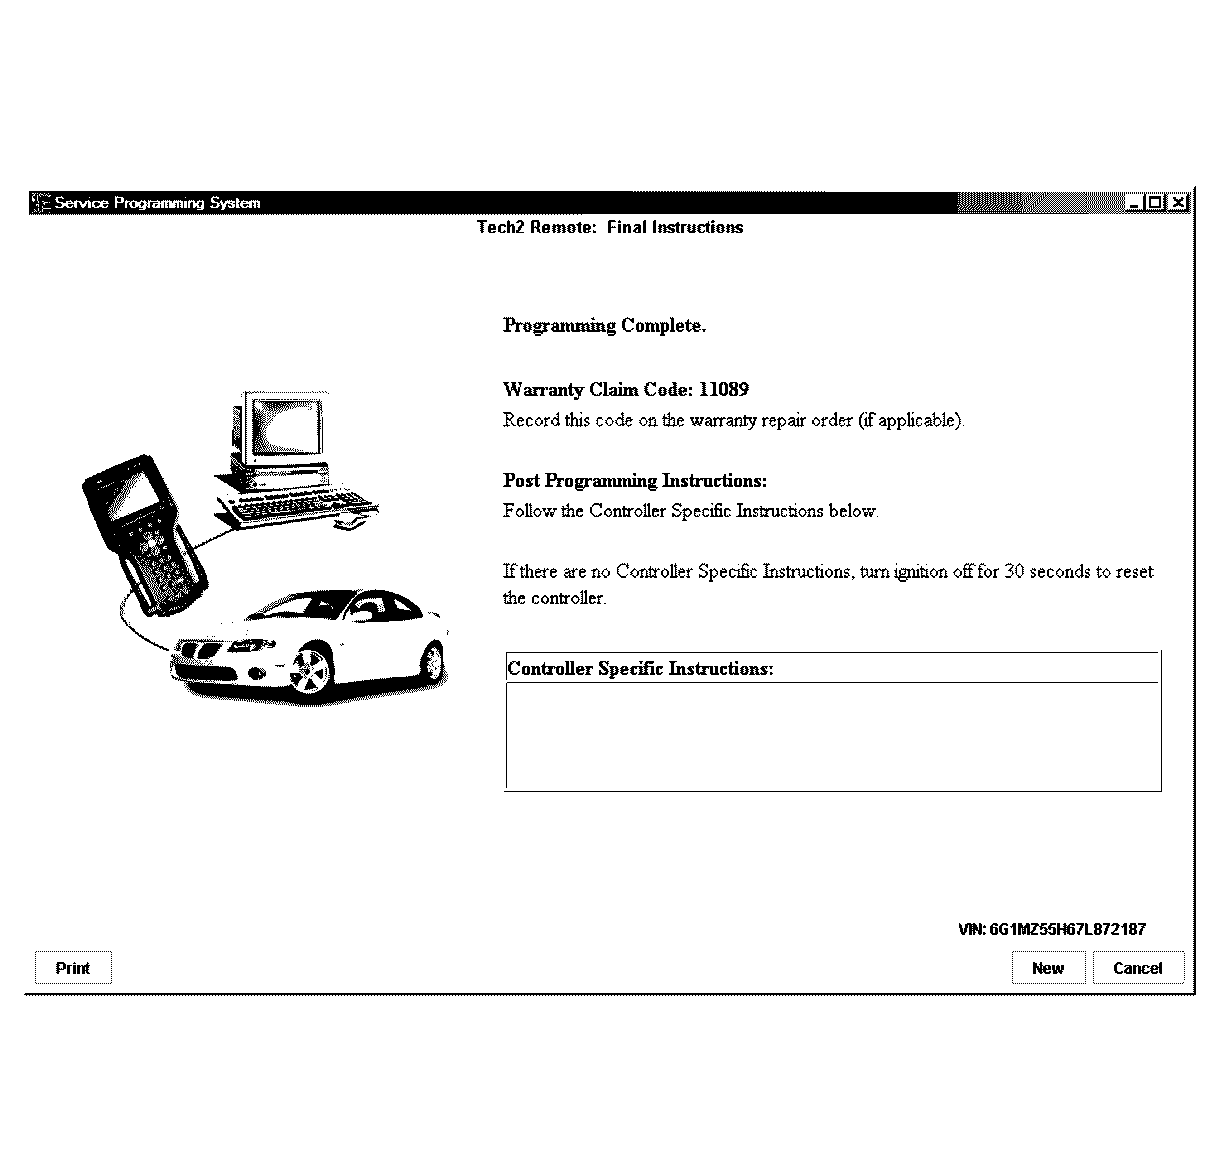
- Programming is complete, Select Cancel, return to the vehicle and complete the programming function.

Important: If your PC has a 9 pin serial communication port you will need to fit the 9/25 pin adapter (8) between the hardware key and the serial port of the TIS 2000 PC.


