For 1990-2009 cars only
Removal Procedure
- Disconnect the battery ground cable. Refer to Battery Negative Cable Disconnection and Connection .
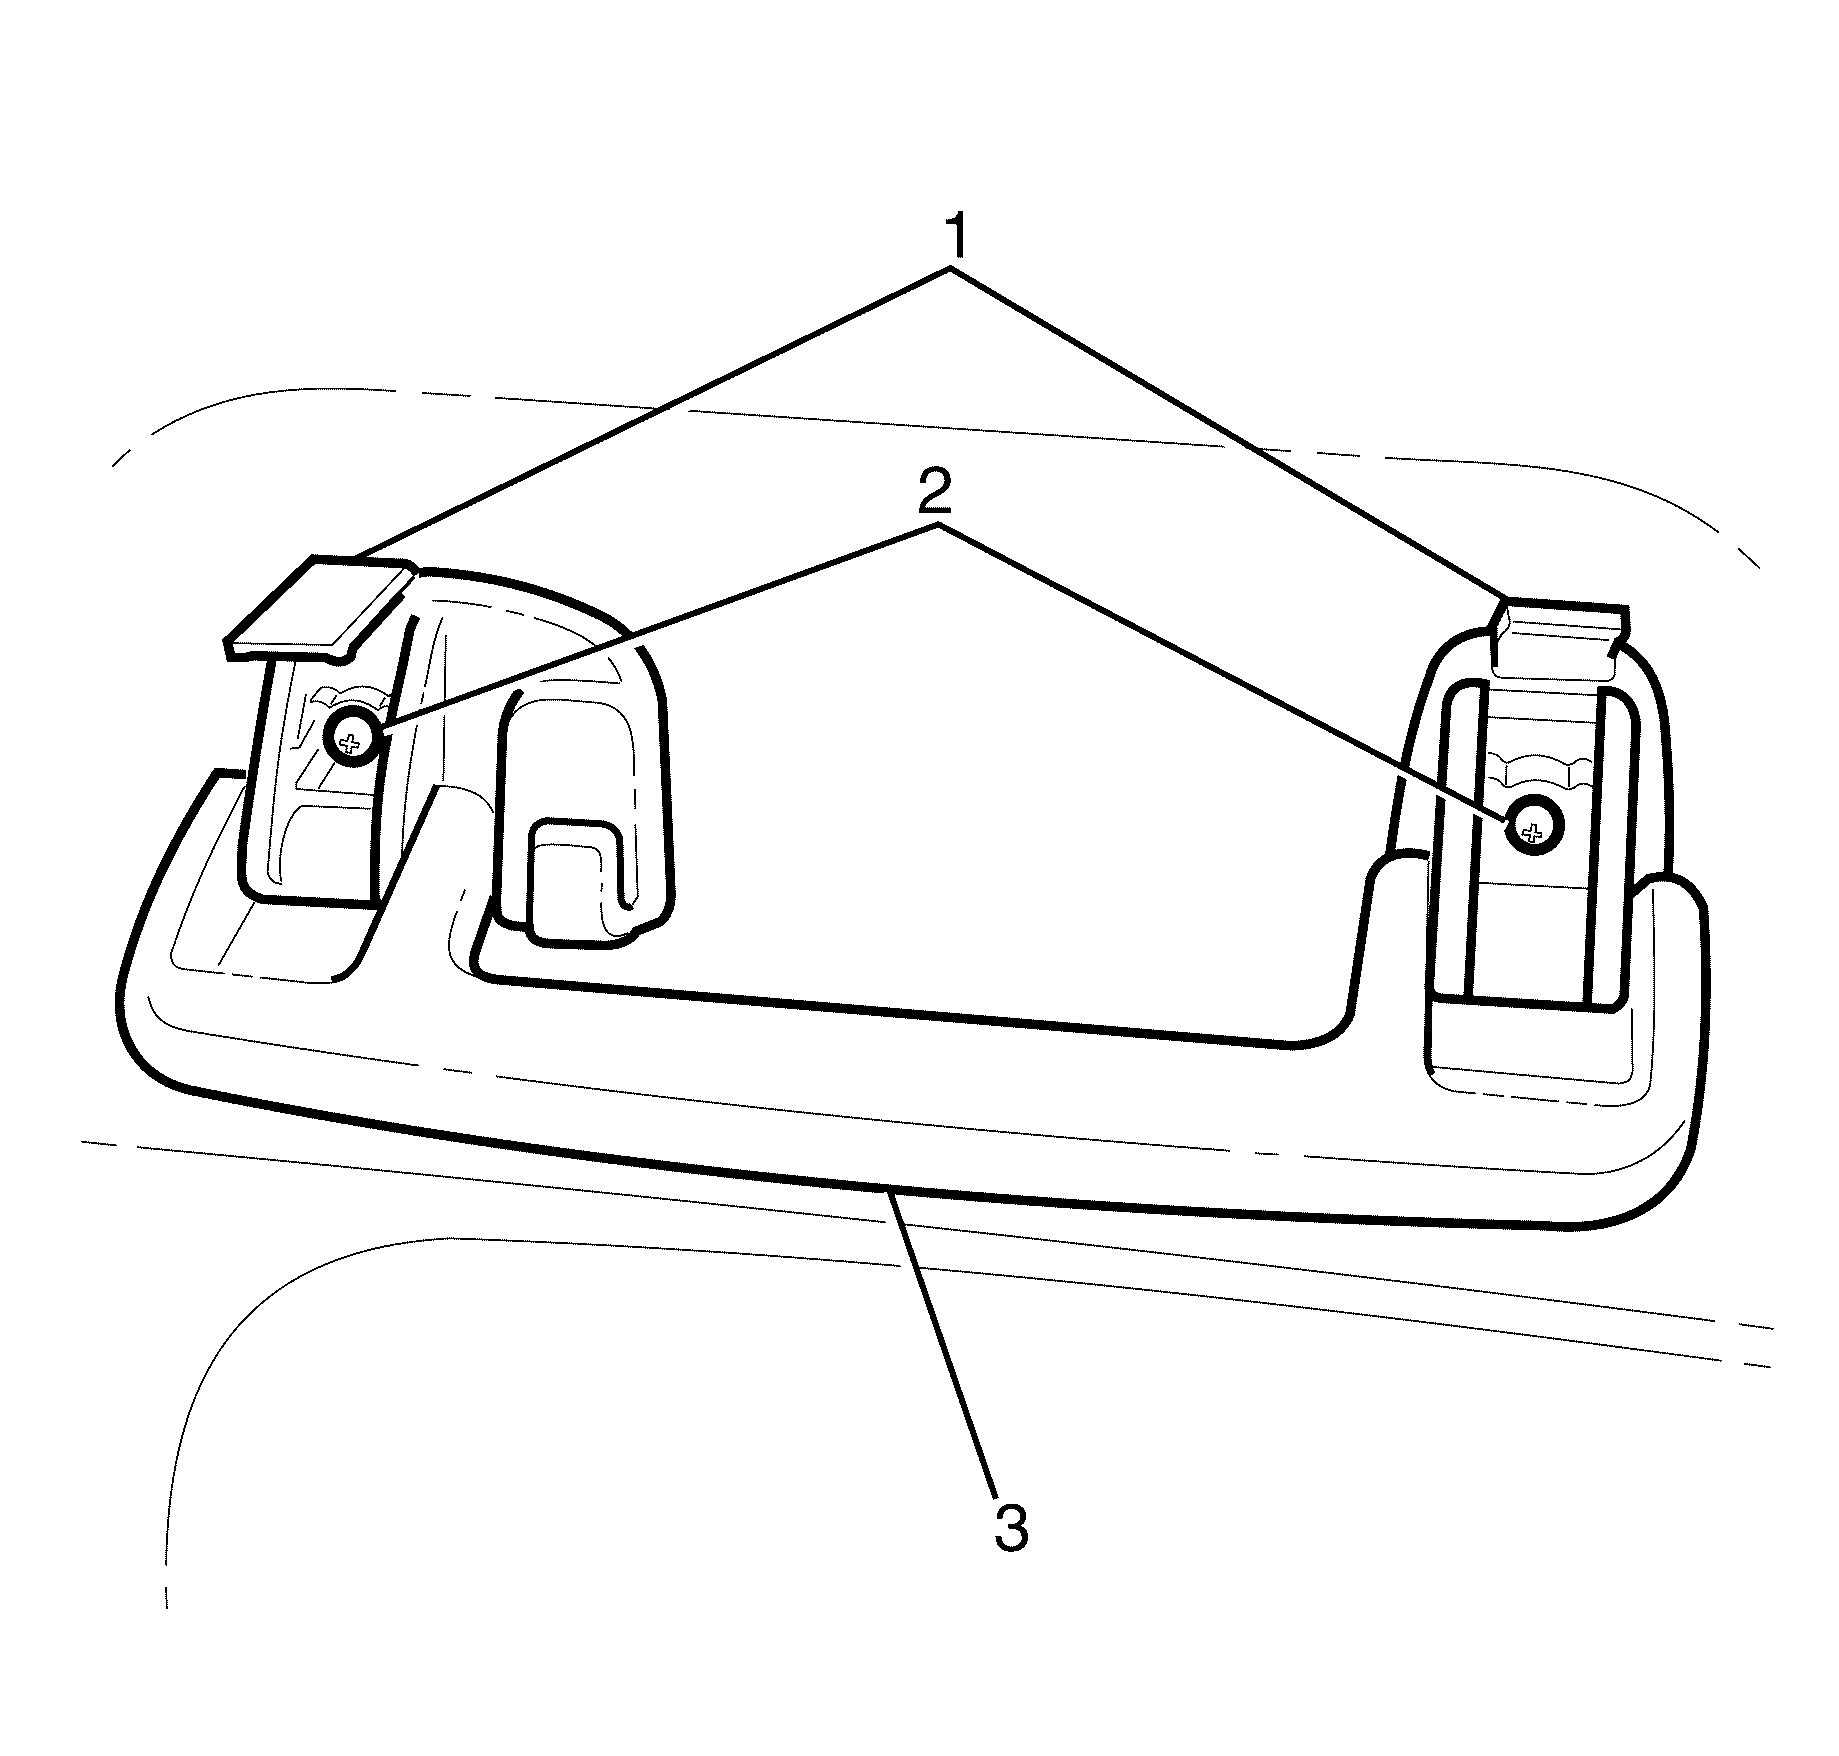
- Pry open the assist handle retaining screw covers (1).
- Remove the assist handle to headliner retaining screws (2).
- Remove the assist handles (3) from the headliner.
- Remove the high mounted stop lamp bulb. Refer to High Mount Stop Lamp Bulb Replacement
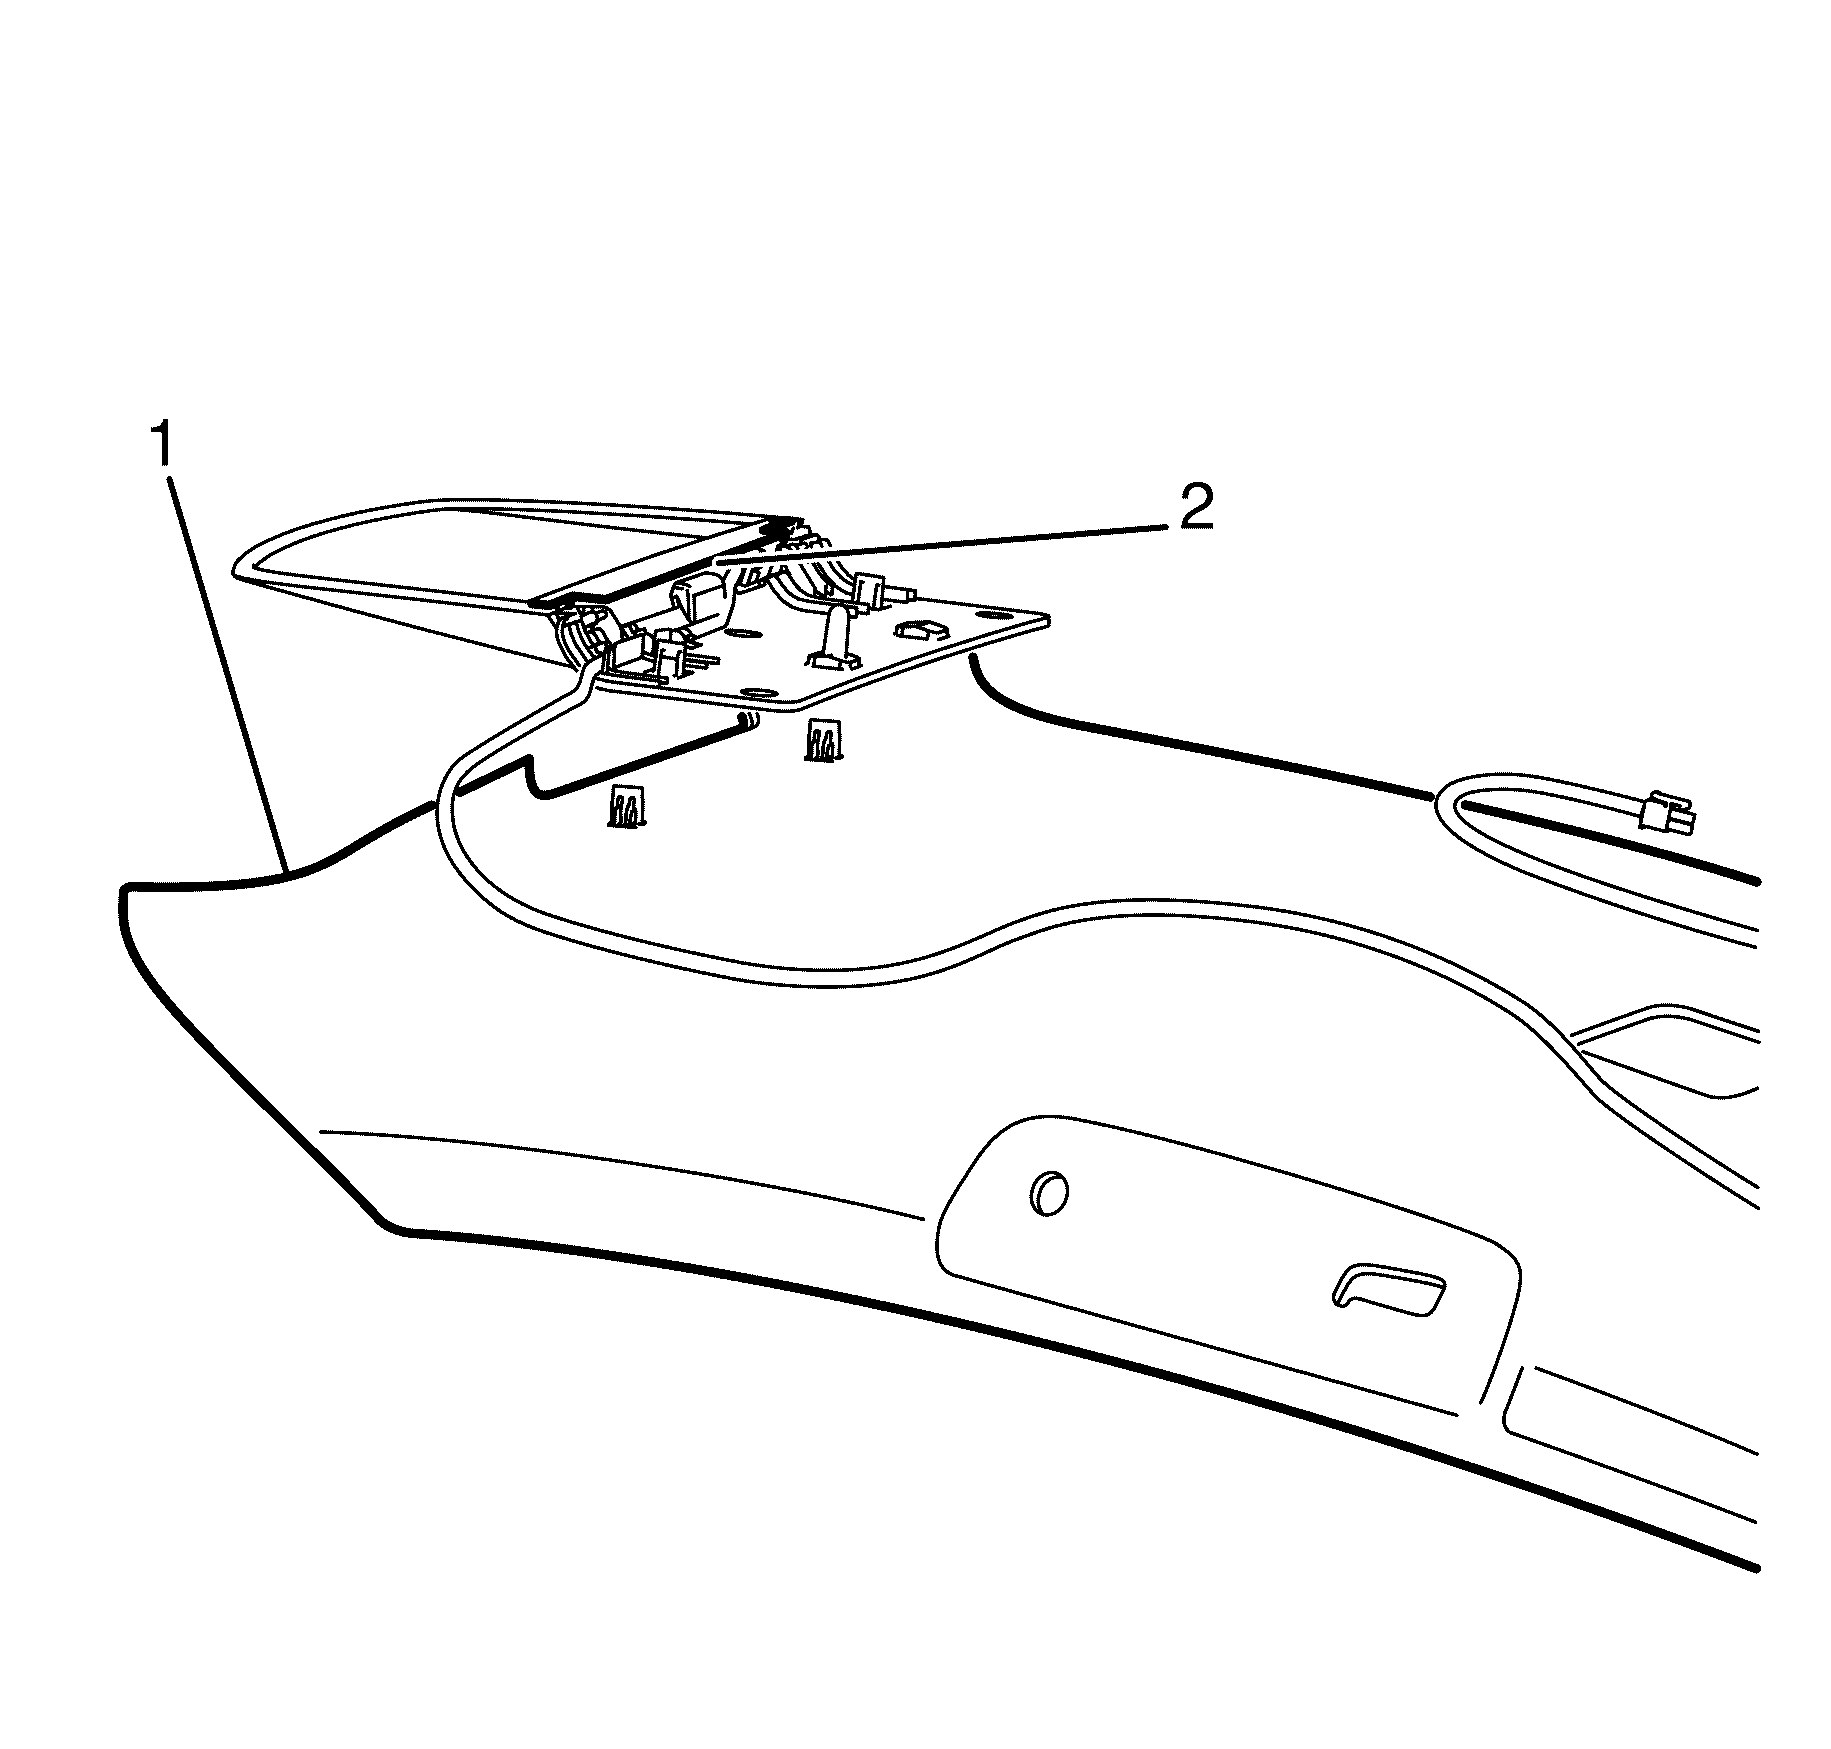
- Unclip the high mounted stop lamp assembly (2) from the headliner (1).
Caution: Refer to Battery Disconnect Caution in the Preface section.
Important: If the high mounted stop lamp LED's are faulty and do not illuminate, the high mounted stop lamp PCB assembly must be replaced.

Important: Carry out for the two rear assist handles

Installation Procedure
- Install the new high mounted stop lamp assembly (2) to the headliner (1).
- Install the high mounted stop lamp bulb. Refer to High Mount Stop Lamp Bulb Replacement
- Install the assist handles (3) to the headliner.
- Install the assist handle to headliner retaining screws (2).
- Close the assist handle retaining screw covers (1).
- Connect the battery ground cable. Refer to Battery Negative Cable Disconnection and Connection .
- Check all vehicle lights for correct operation.


Important: Carry out for the two rear assist handles
Tighten
Tighten the assist handle retaining screws to 2.0 N·m
(18 lb in).
