For 1990-2009 cars only
HVAC Control Module Replacement RHD
Removal Procedure
- Remove the glove box assembly. Refer to Instrument Panel Compartment Replacement .
- Remove left side floor duct. Refer to Floor Air Outlet Duct Replacement - Left Side .
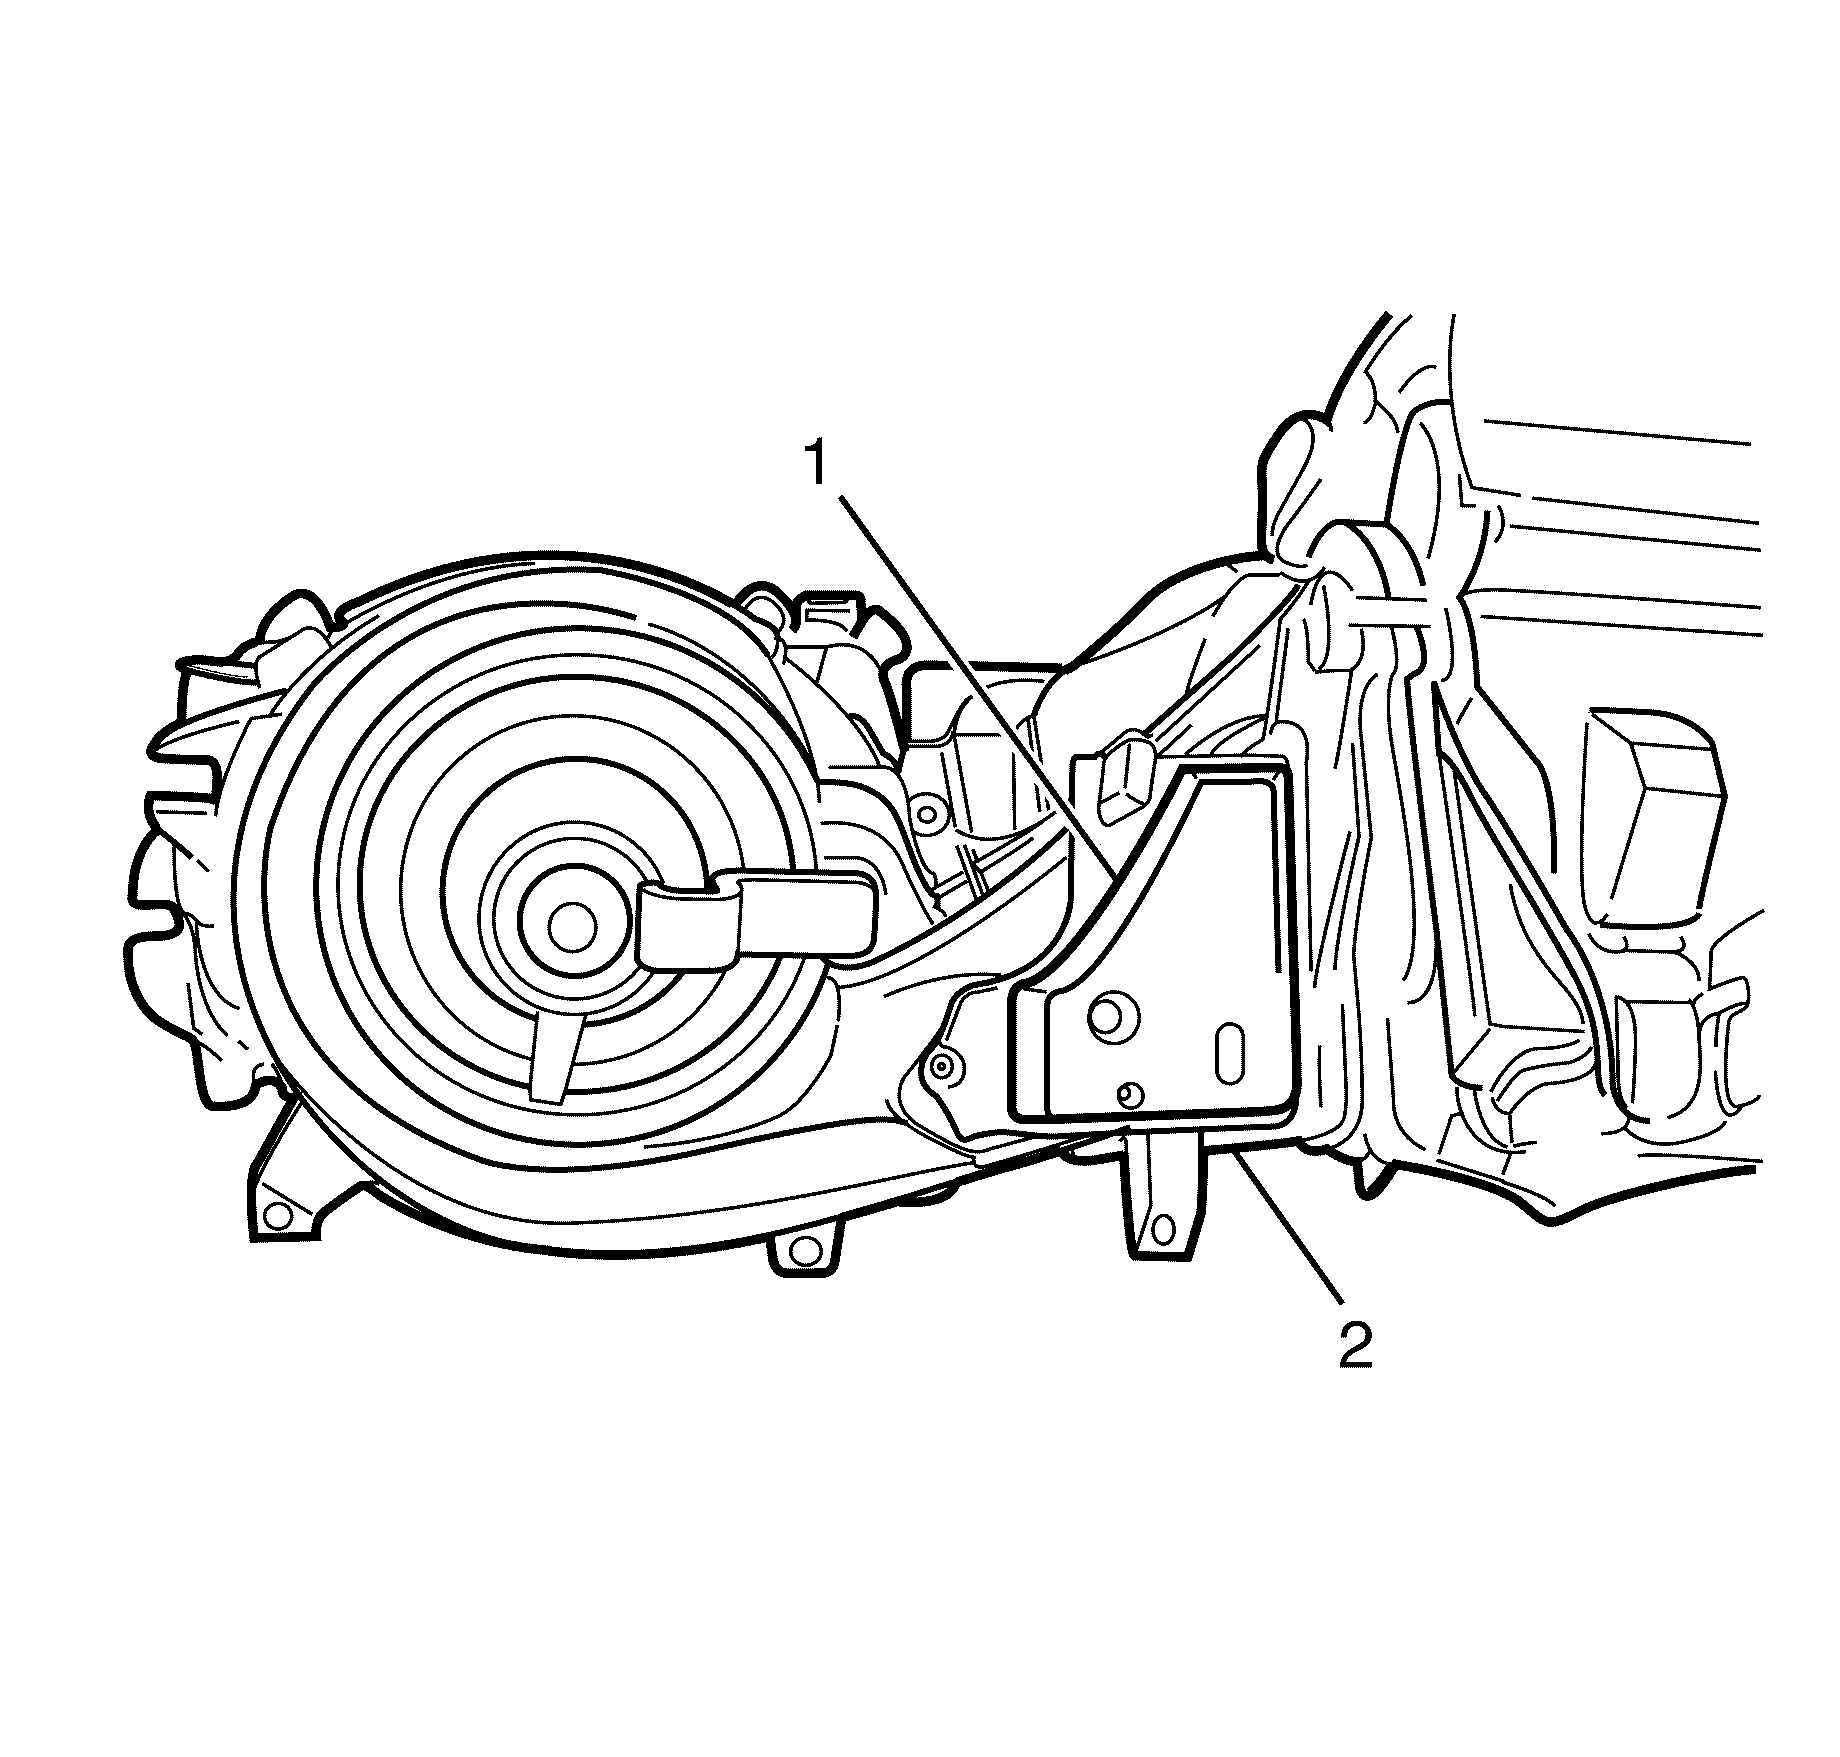
- Locate the HVAC control module (1) on the left side of the HVAC module assembly (2).
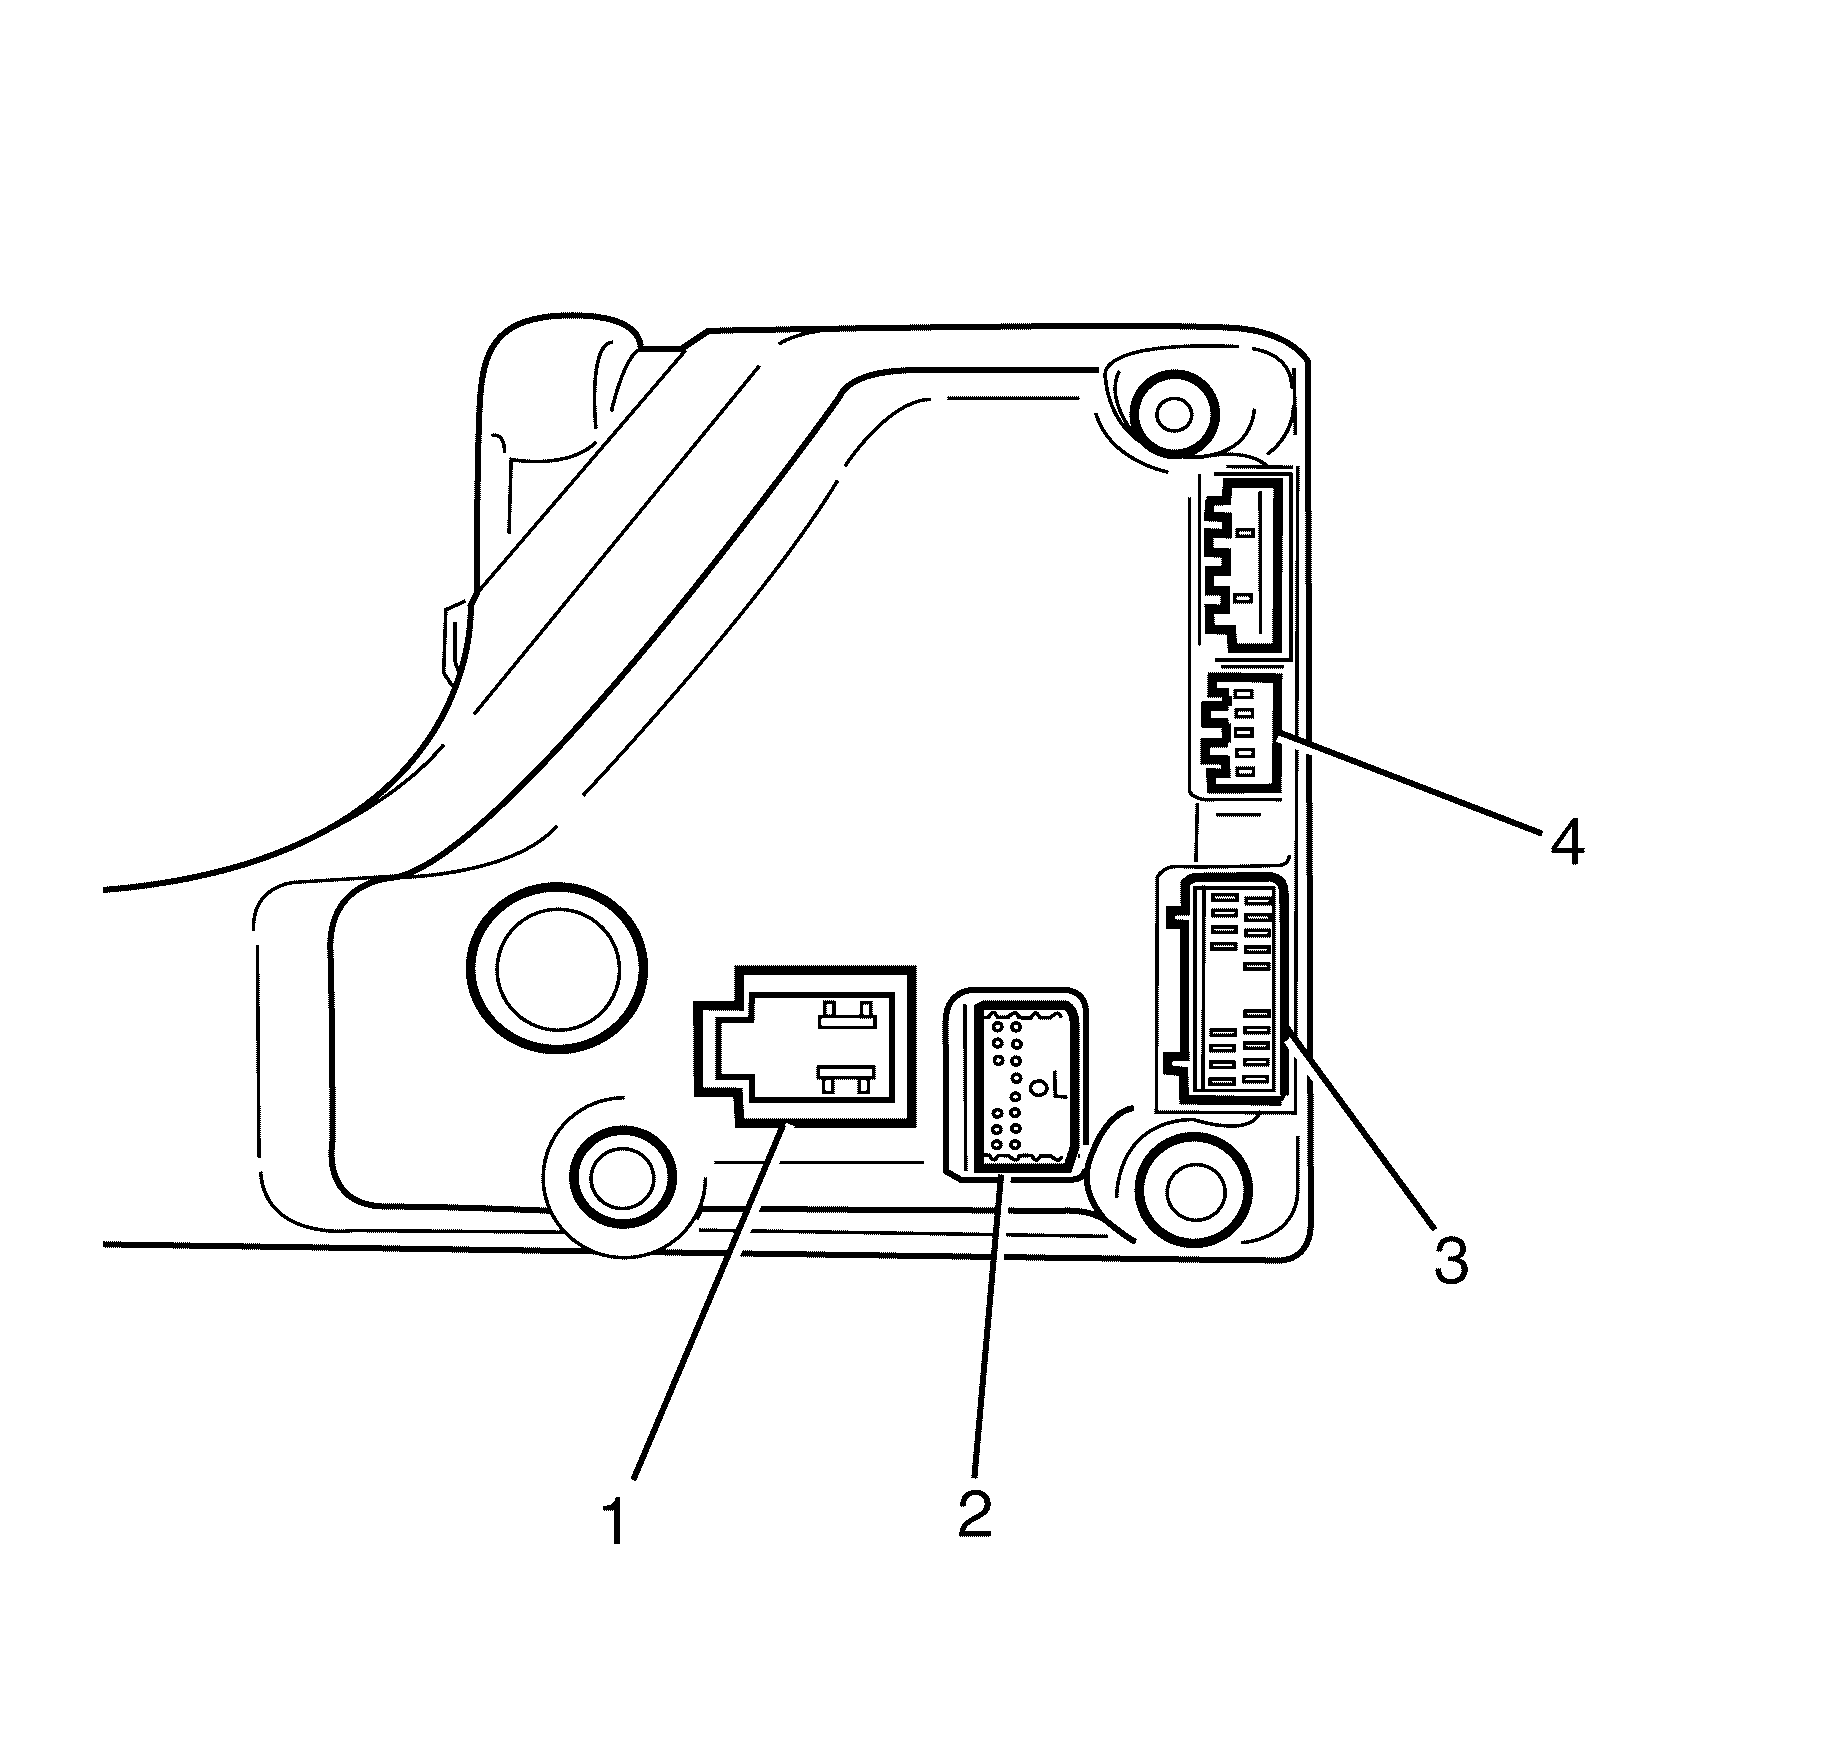
- Disconnect the HVAC control module electrical connectors (1 - 4).
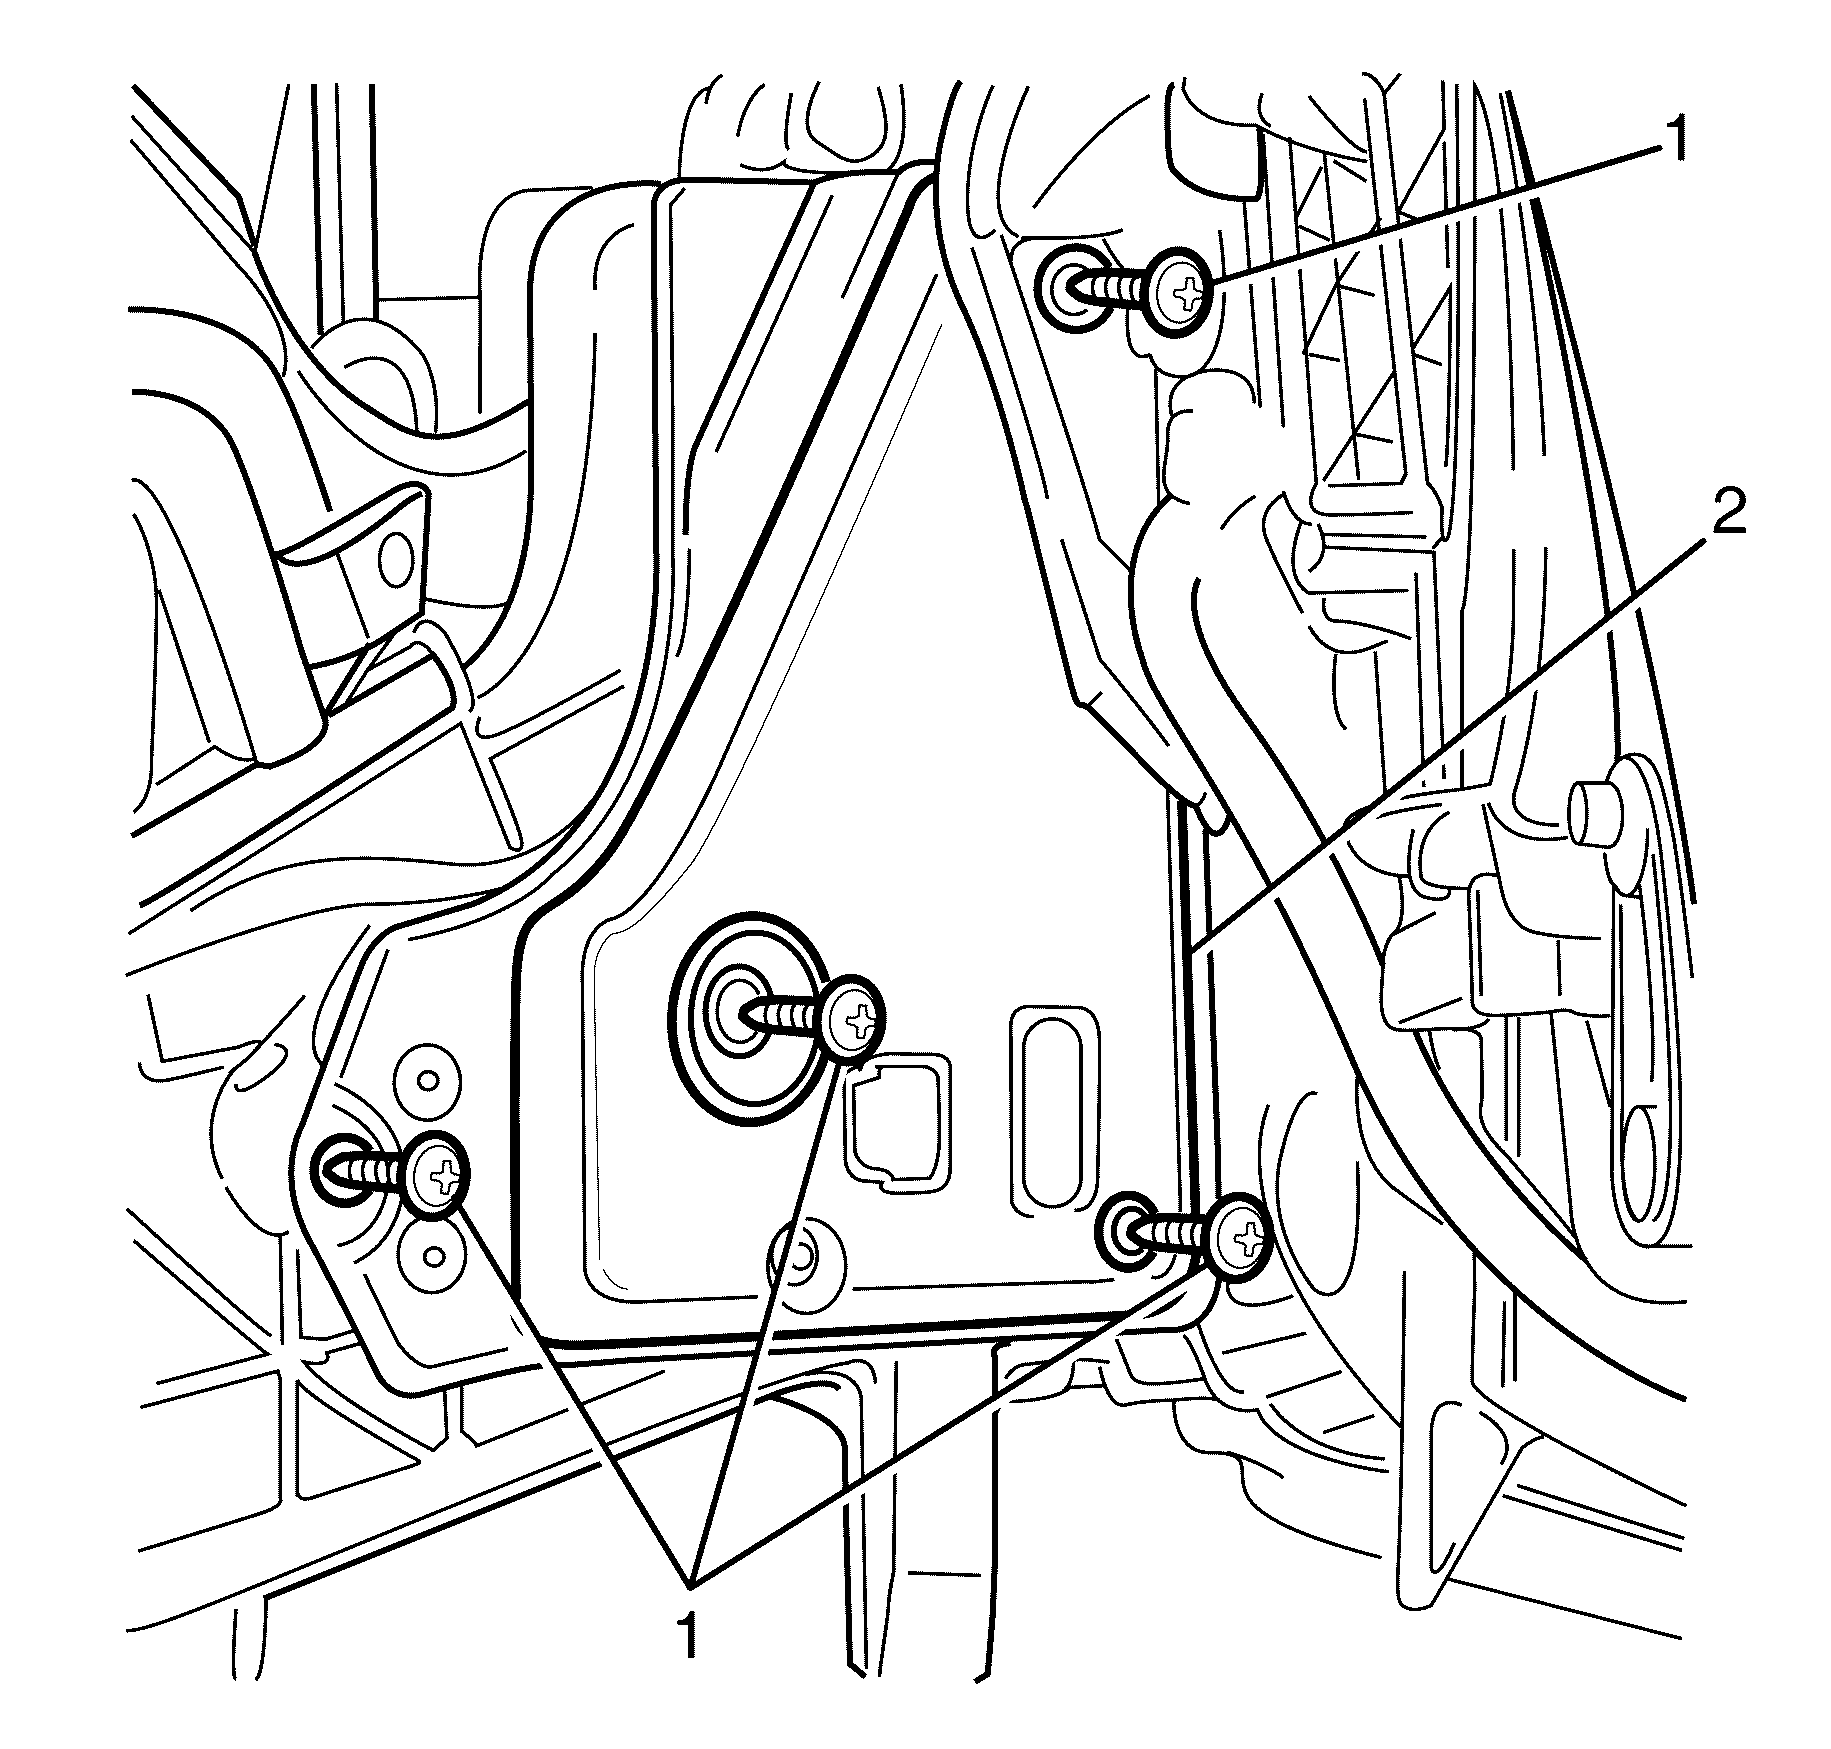
- Remove the HVAC control module to HVAC module assembly retaining screws (1).
- Remove HVAC control module (2).


Important: Make sure the HVAC control module electrical connectors are disconnected before removing the HVAC control module to HVAC module assembly retaining screws (1). The HVAC control module to HVAC module assembly retaining screws (1) contact the HVAC control module (2) circuit board and can short on removal.
Installation Procedure
- Install the HVAC control module (1) to the HVAC module assembly (2).
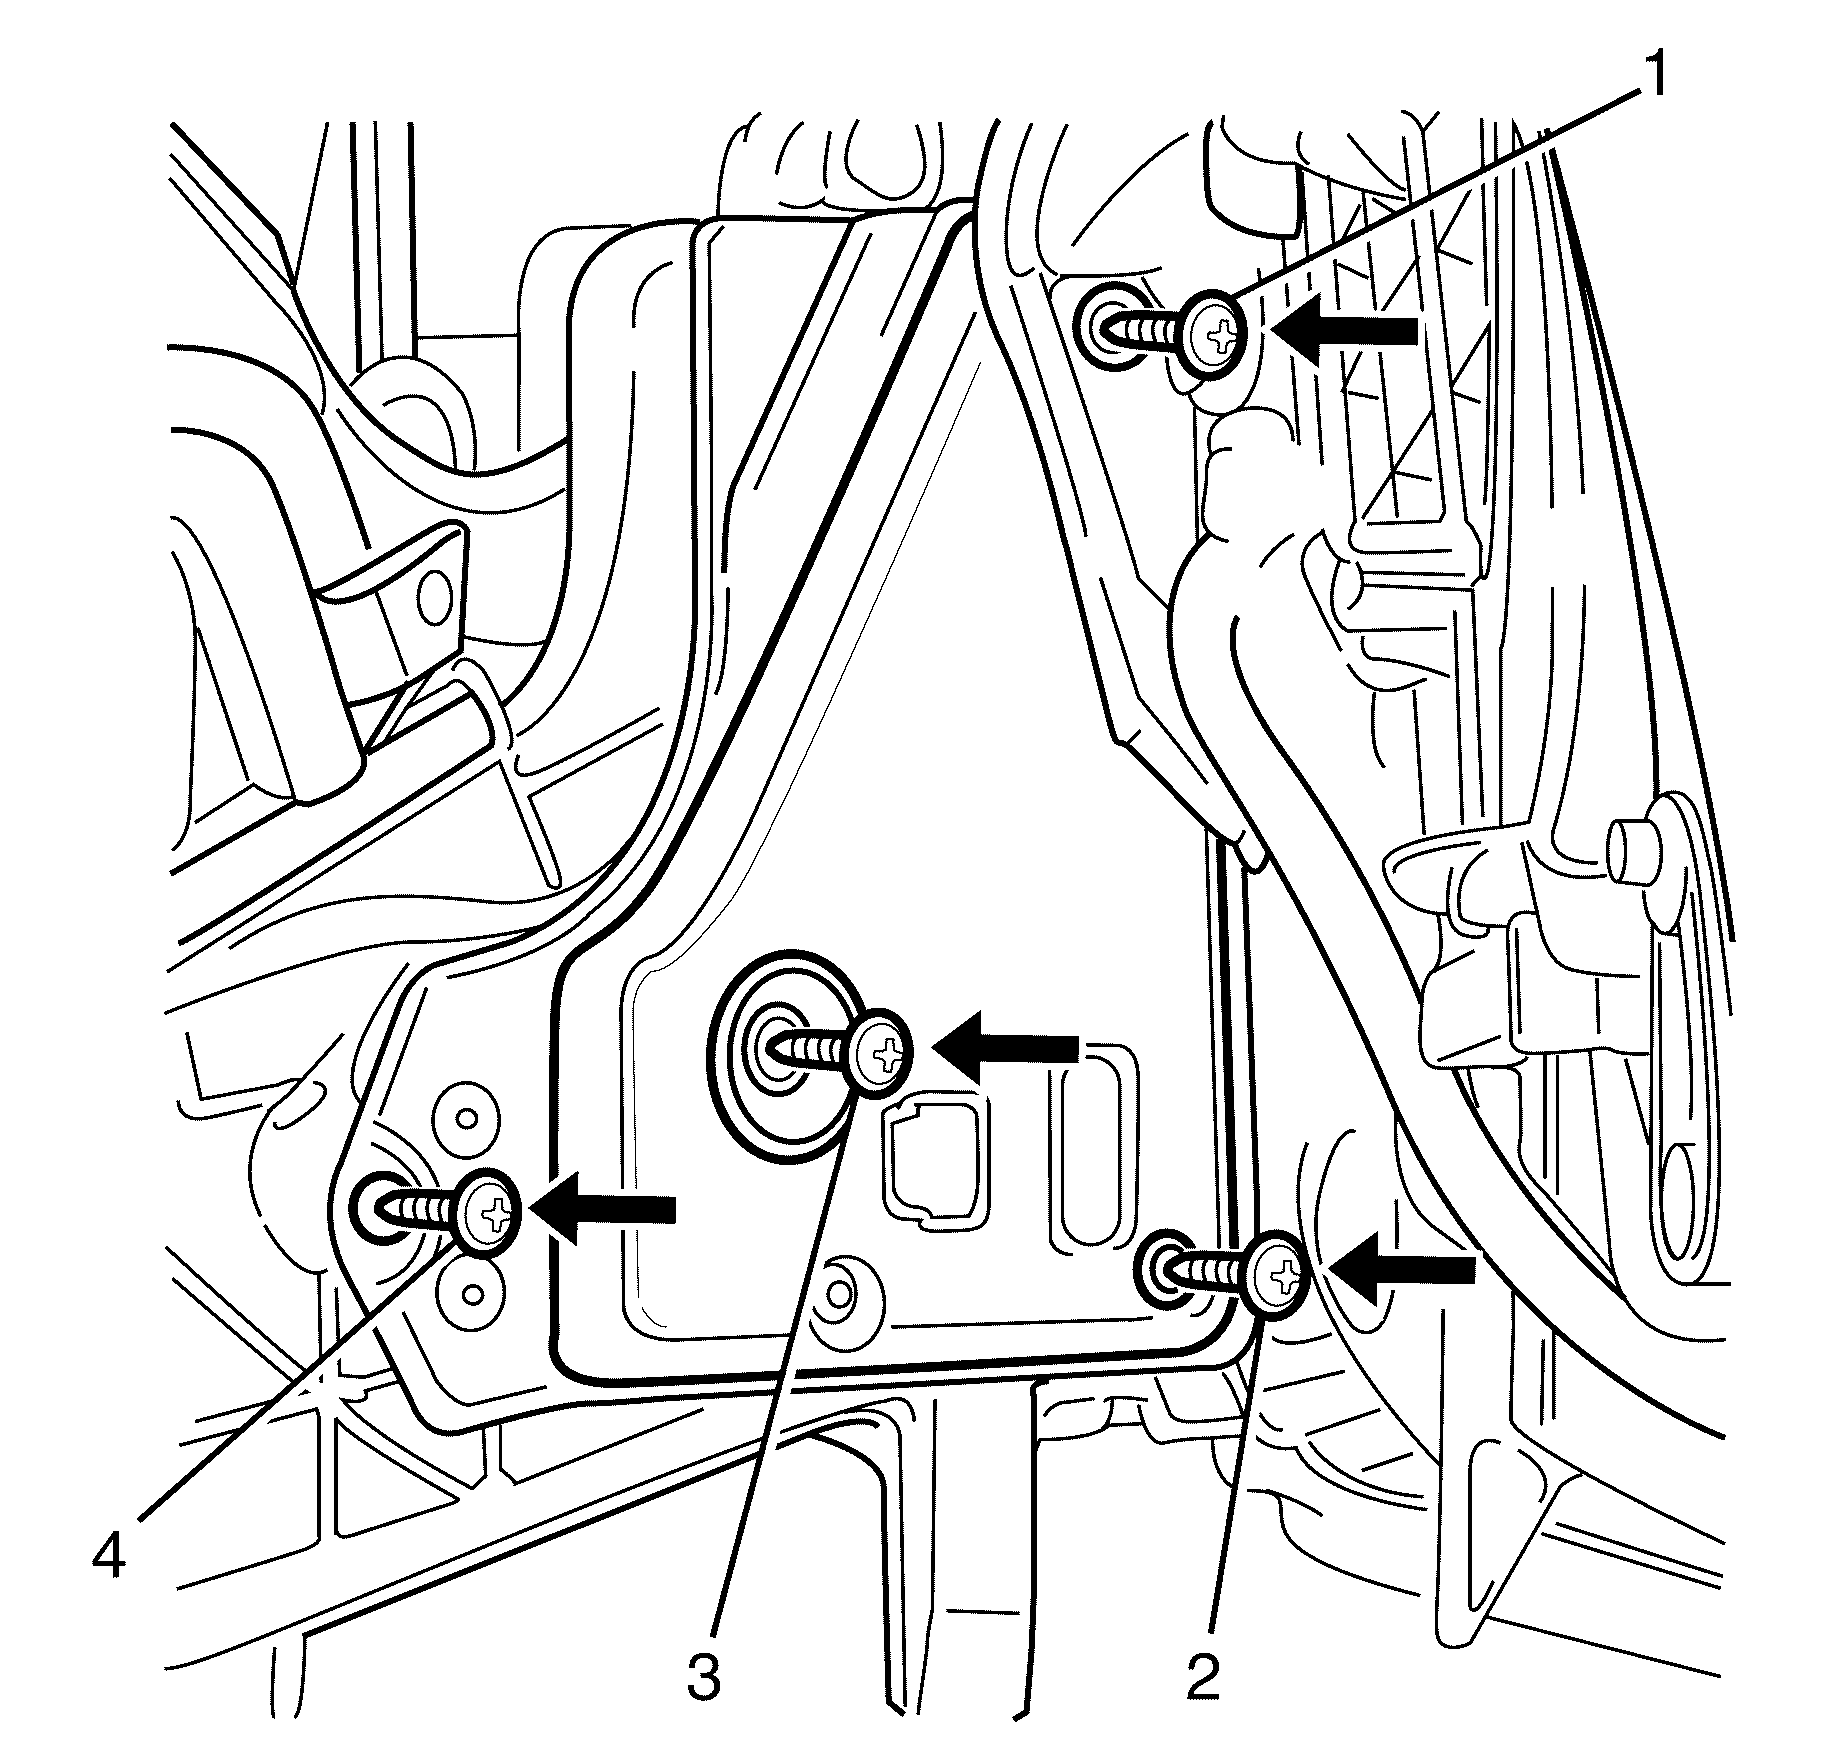
- Install the HVAC control module to HVAC module assembly retaining screws (1 - 4).
- Connect the electrical connectors (1 - 4) to the HVAC control module.
- Install Left side floor duct. Refer to Floor Air Outlet Duct Replacement - Left Side .
- Install the glove box assembly. Refer to Instrument Panel Compartment Replacement .
- If re-programming is required. Refer to Control Module References .
- Perform HVAC system relearn. Refer to HVAC Control Module Programming and Setup .

Notice: Refer to Fastener Notice in the Preface section.

Important: The HVAC control module to HVAC module assembly retaining screws (1 - 4) should be tightened in the sequence shown to prevent damage to HVAC control module circuit board.
Tighten
Tighten the screws to 2 N·m (18 lb in).

