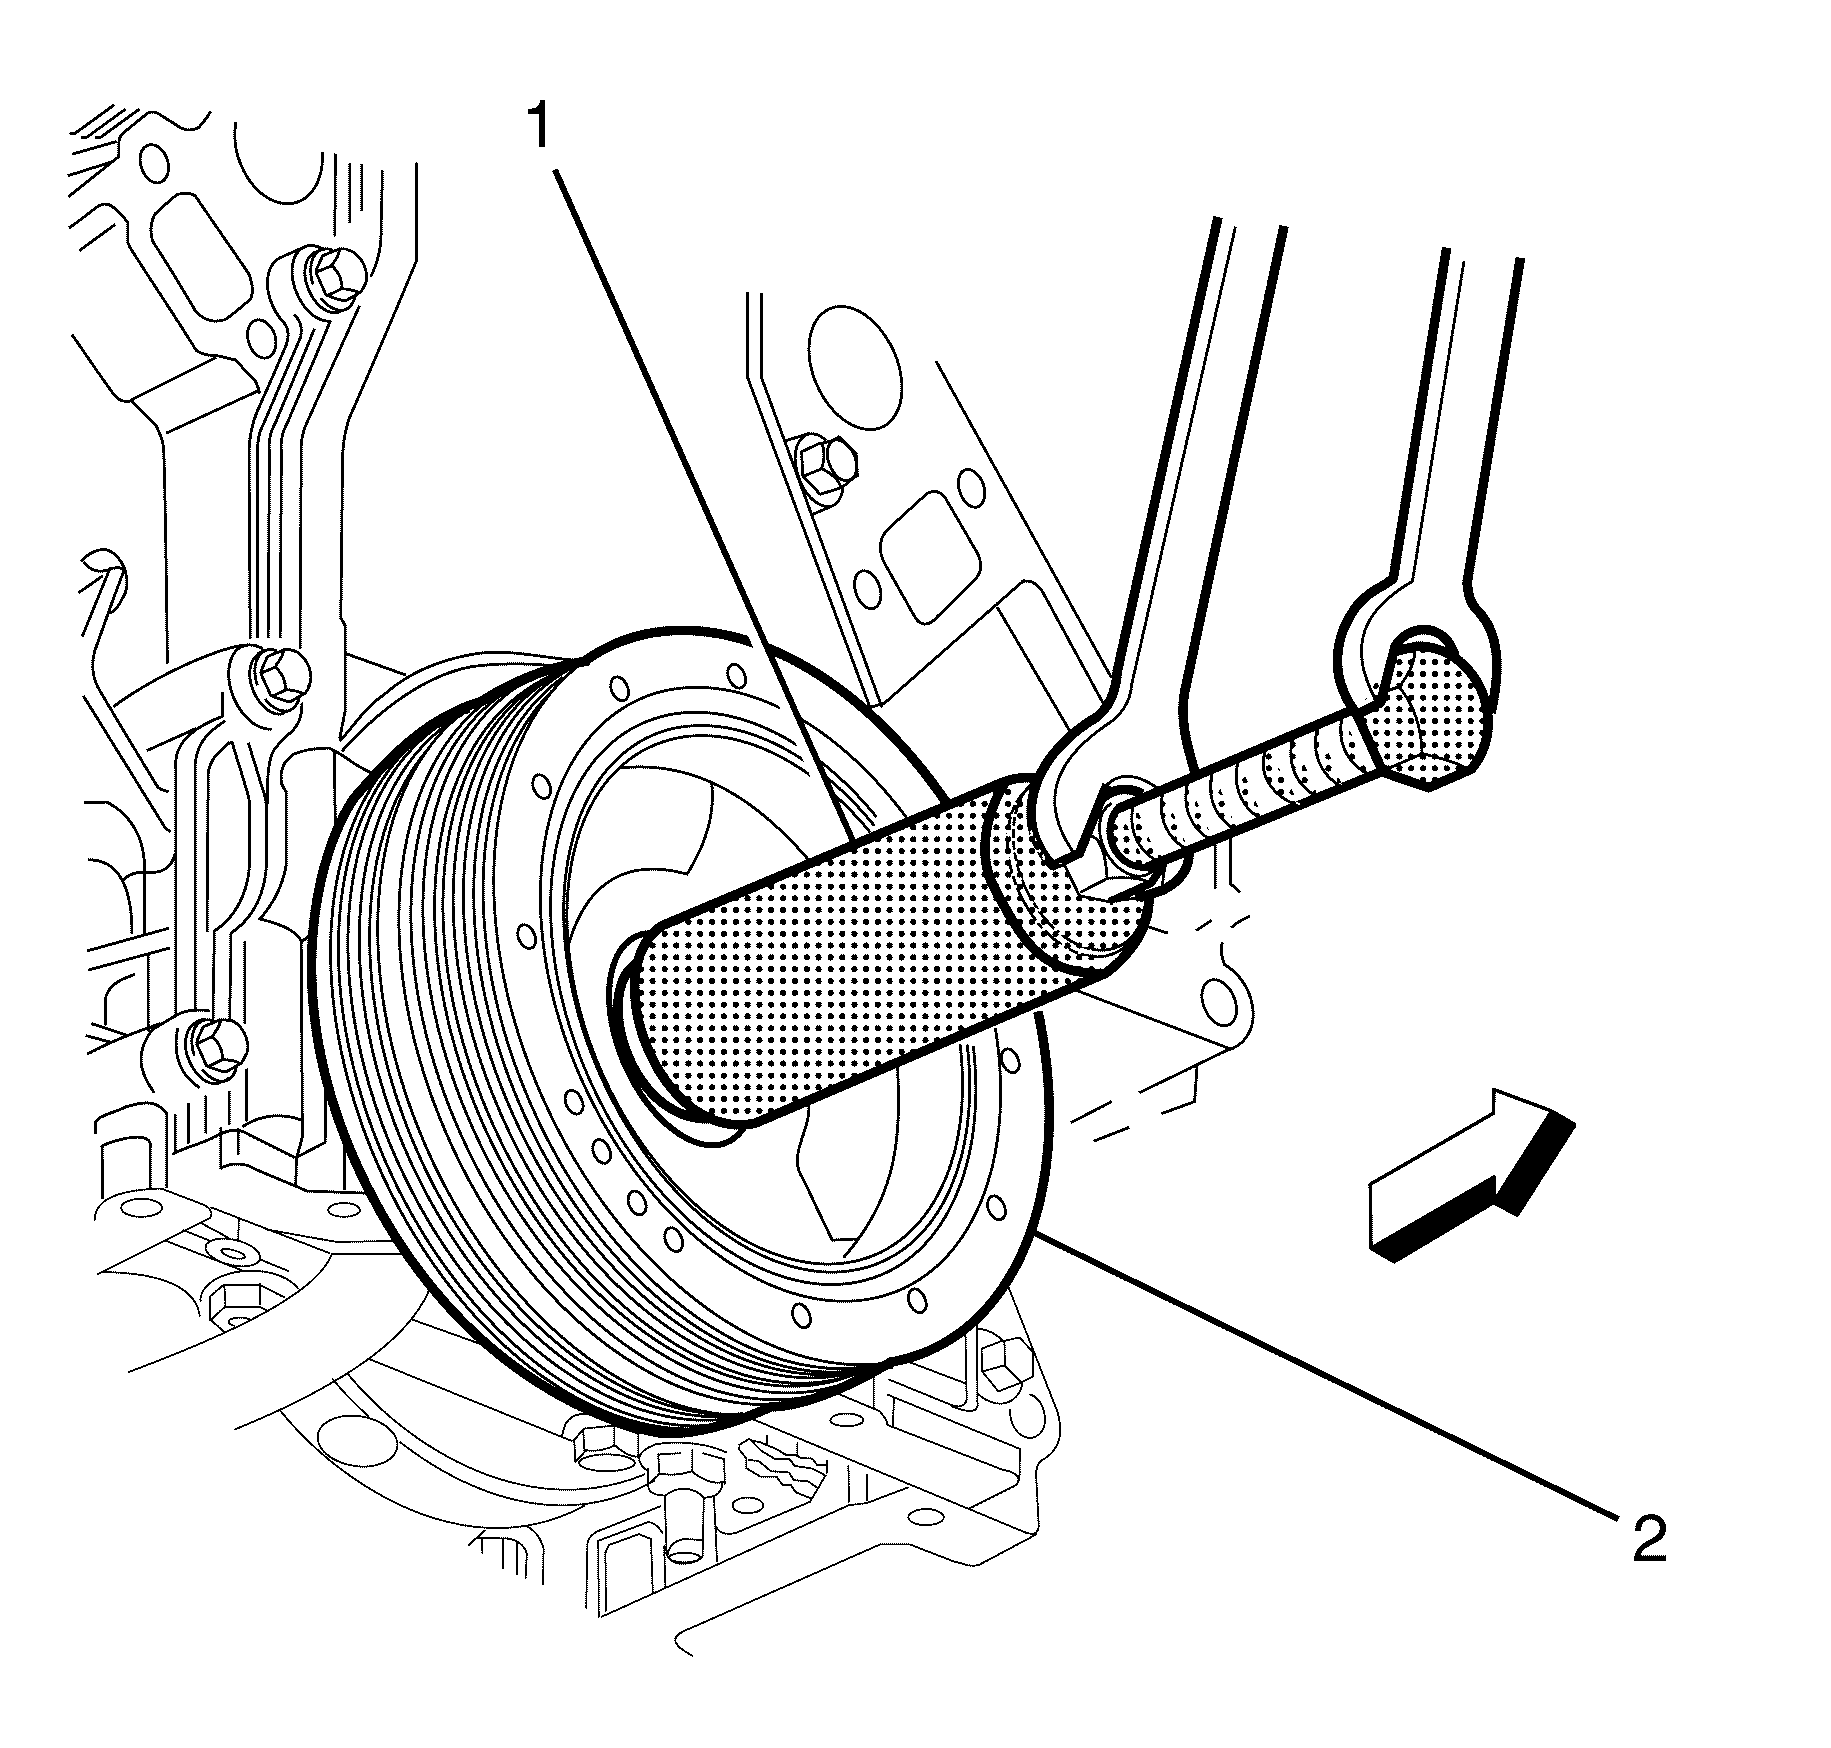
- Use
J 41665
(1) to install the crankshaft balancer (2).
| 1.1. | Assemble the threaded rod, nut, washer and installer. |
Insert
the smaller end of the installer into the front of the crankshaft balancer (2).
| 1.2. | Use a wrench and hold the hex end of the threaded rod. |
| 1.3. | Use a second wrench and rotate the installation tool nut clockwise, until
the crankshaft balancer (2) is started onto the crankshaft. |
| 1.4. | Remove the tool and reverse the installation tool. |
Position
the larger end of the installer against the front of the crankshaft balancer (2).
| 1.5. | Use a wrench and hold the hex end of the threaded rod. |
| 1.6. | Use a second wrench and rotate the installation tool nut clockwise, until
the crankshaft balancer (2) is installed onto the crankshaft. |
Notice: Refer to Fastener Notice in the Preface section.
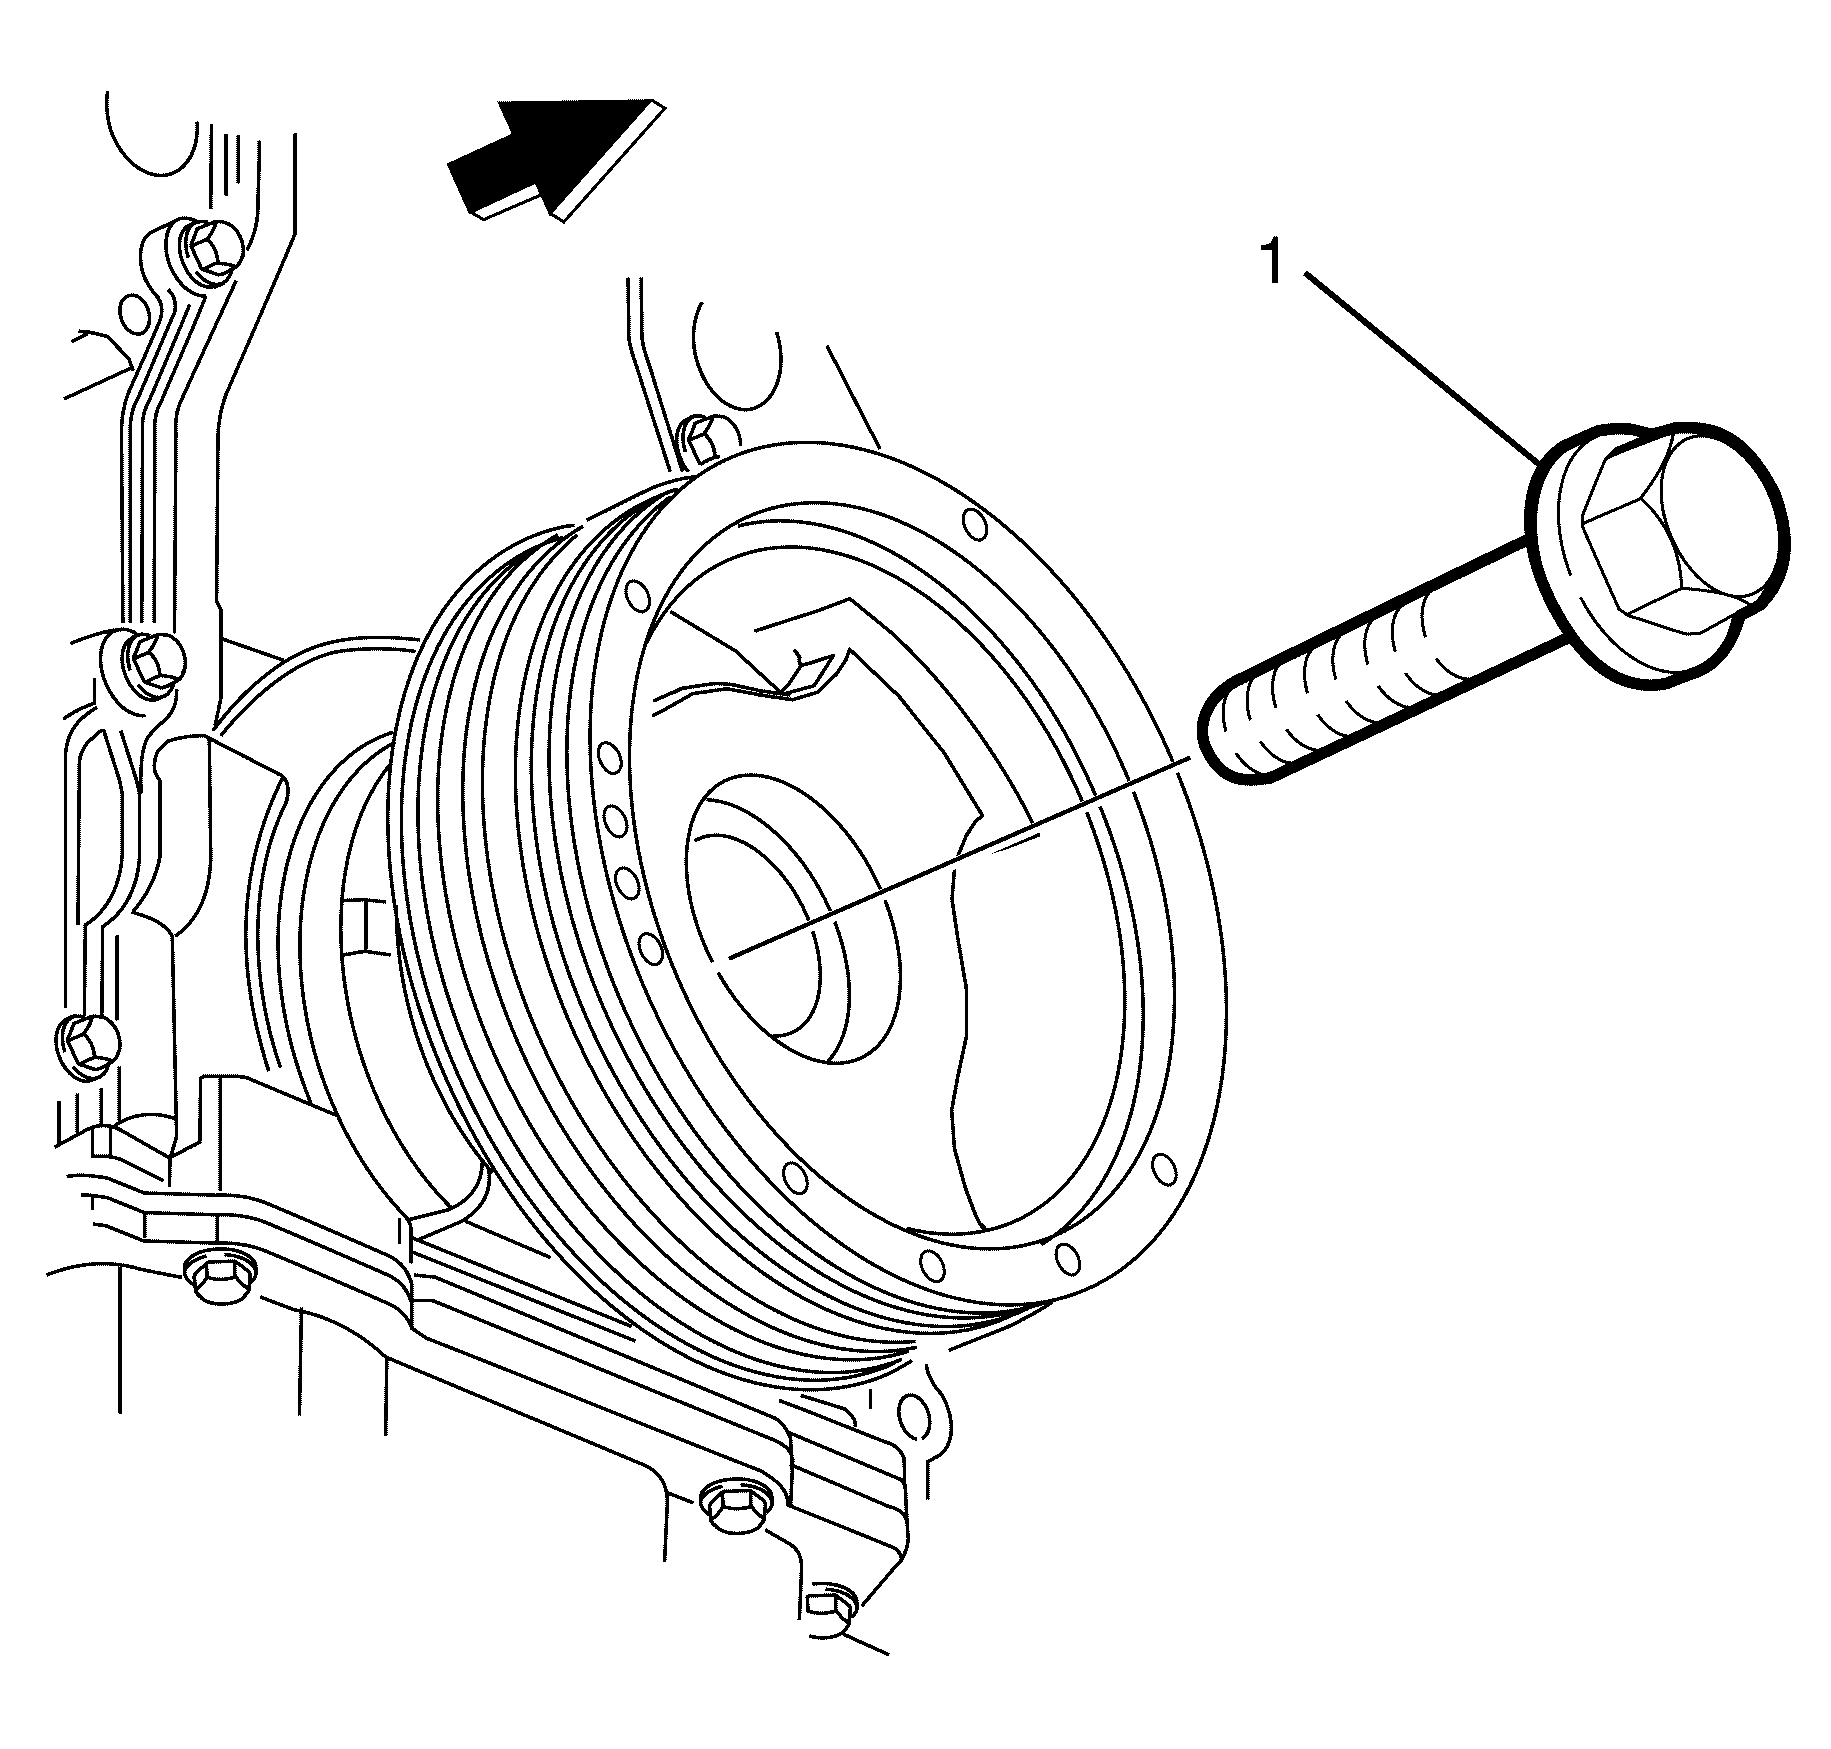
- Install the used crankshaft balancer retaining bolt (1).
Tighten
Tighten the bolt to 330 N·m (240 lb ft).
- Remove the used crankshaft balancer retaining bolt (1).
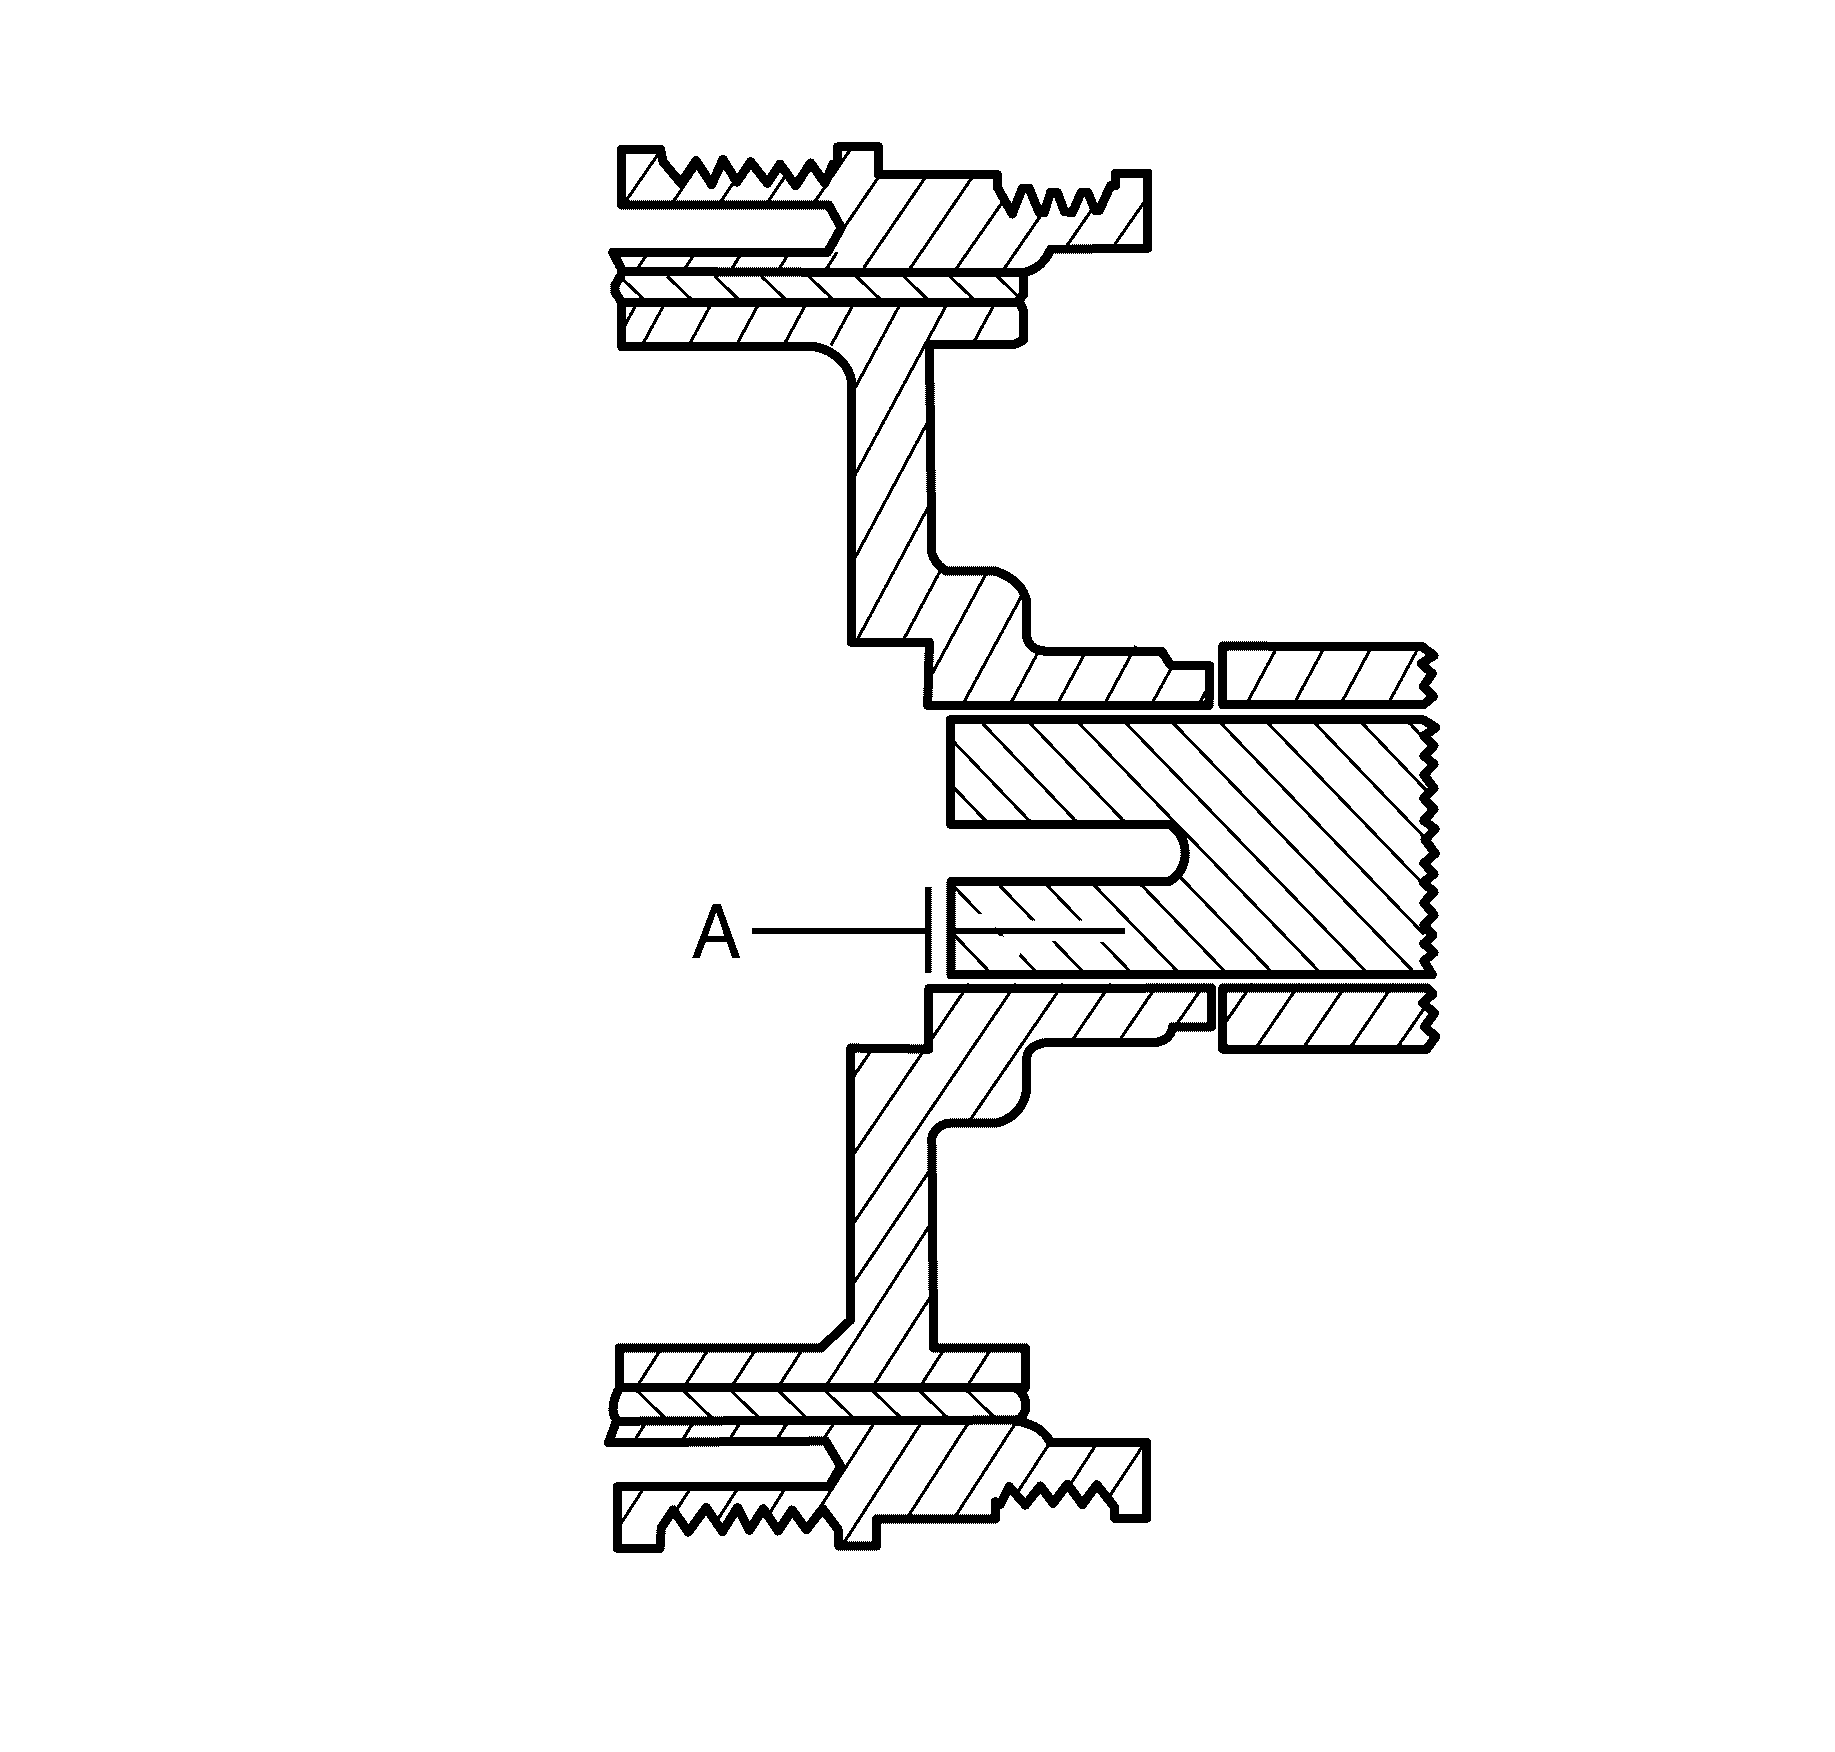
- Measure the distance the balancer protrudes
from the crankshaft nose and ensure dimension (A) is to specification
Specification
Dimension (A): 2.4-4.48 mm (0.094-0.176 in)
If the balancer is not installed to the correct dimensions, install the
J 41665
and repeat the installation procedure.
Notice: Refer to Fastener Notice in the Preface section.

- Install the NEW crankshaft balancer retaining bolt (1).
Tighten
| • | First Pass: Tighten the bolts to 50 N·m (37 lb ft). |
| • | Final Pass: Tighten an additional 140 degrees using the
J 45059
. |
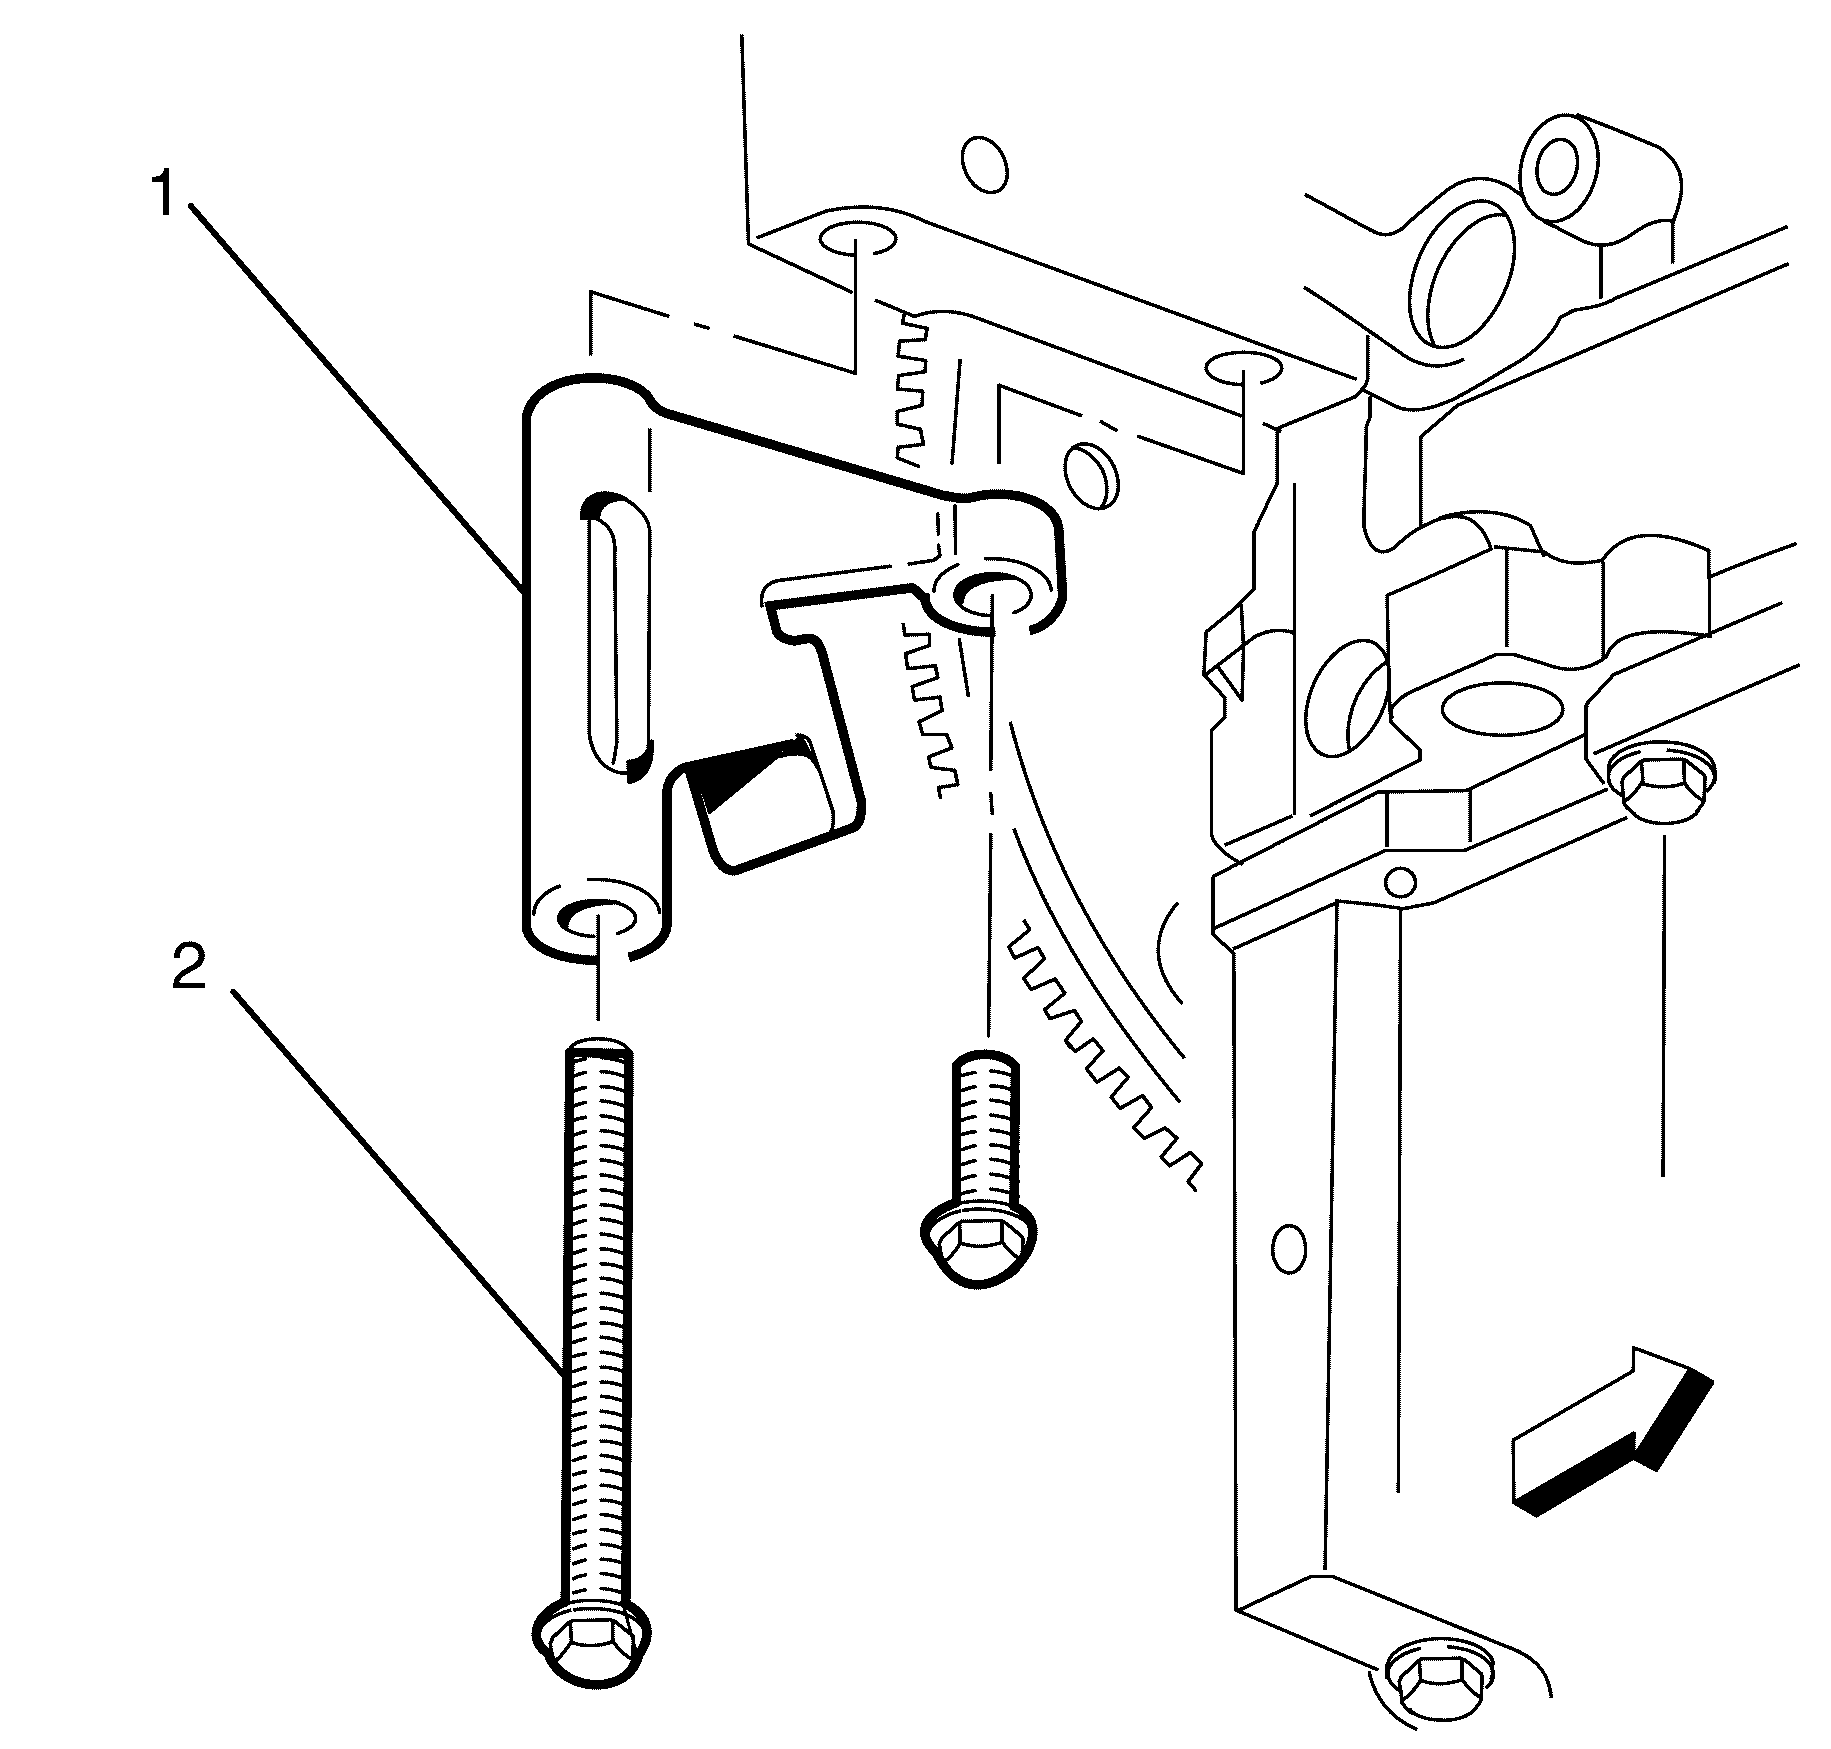
- Remove the
J 42386-A
to cylinder block retaining bolts (2).
- Remove the
J 42386-A
(1).
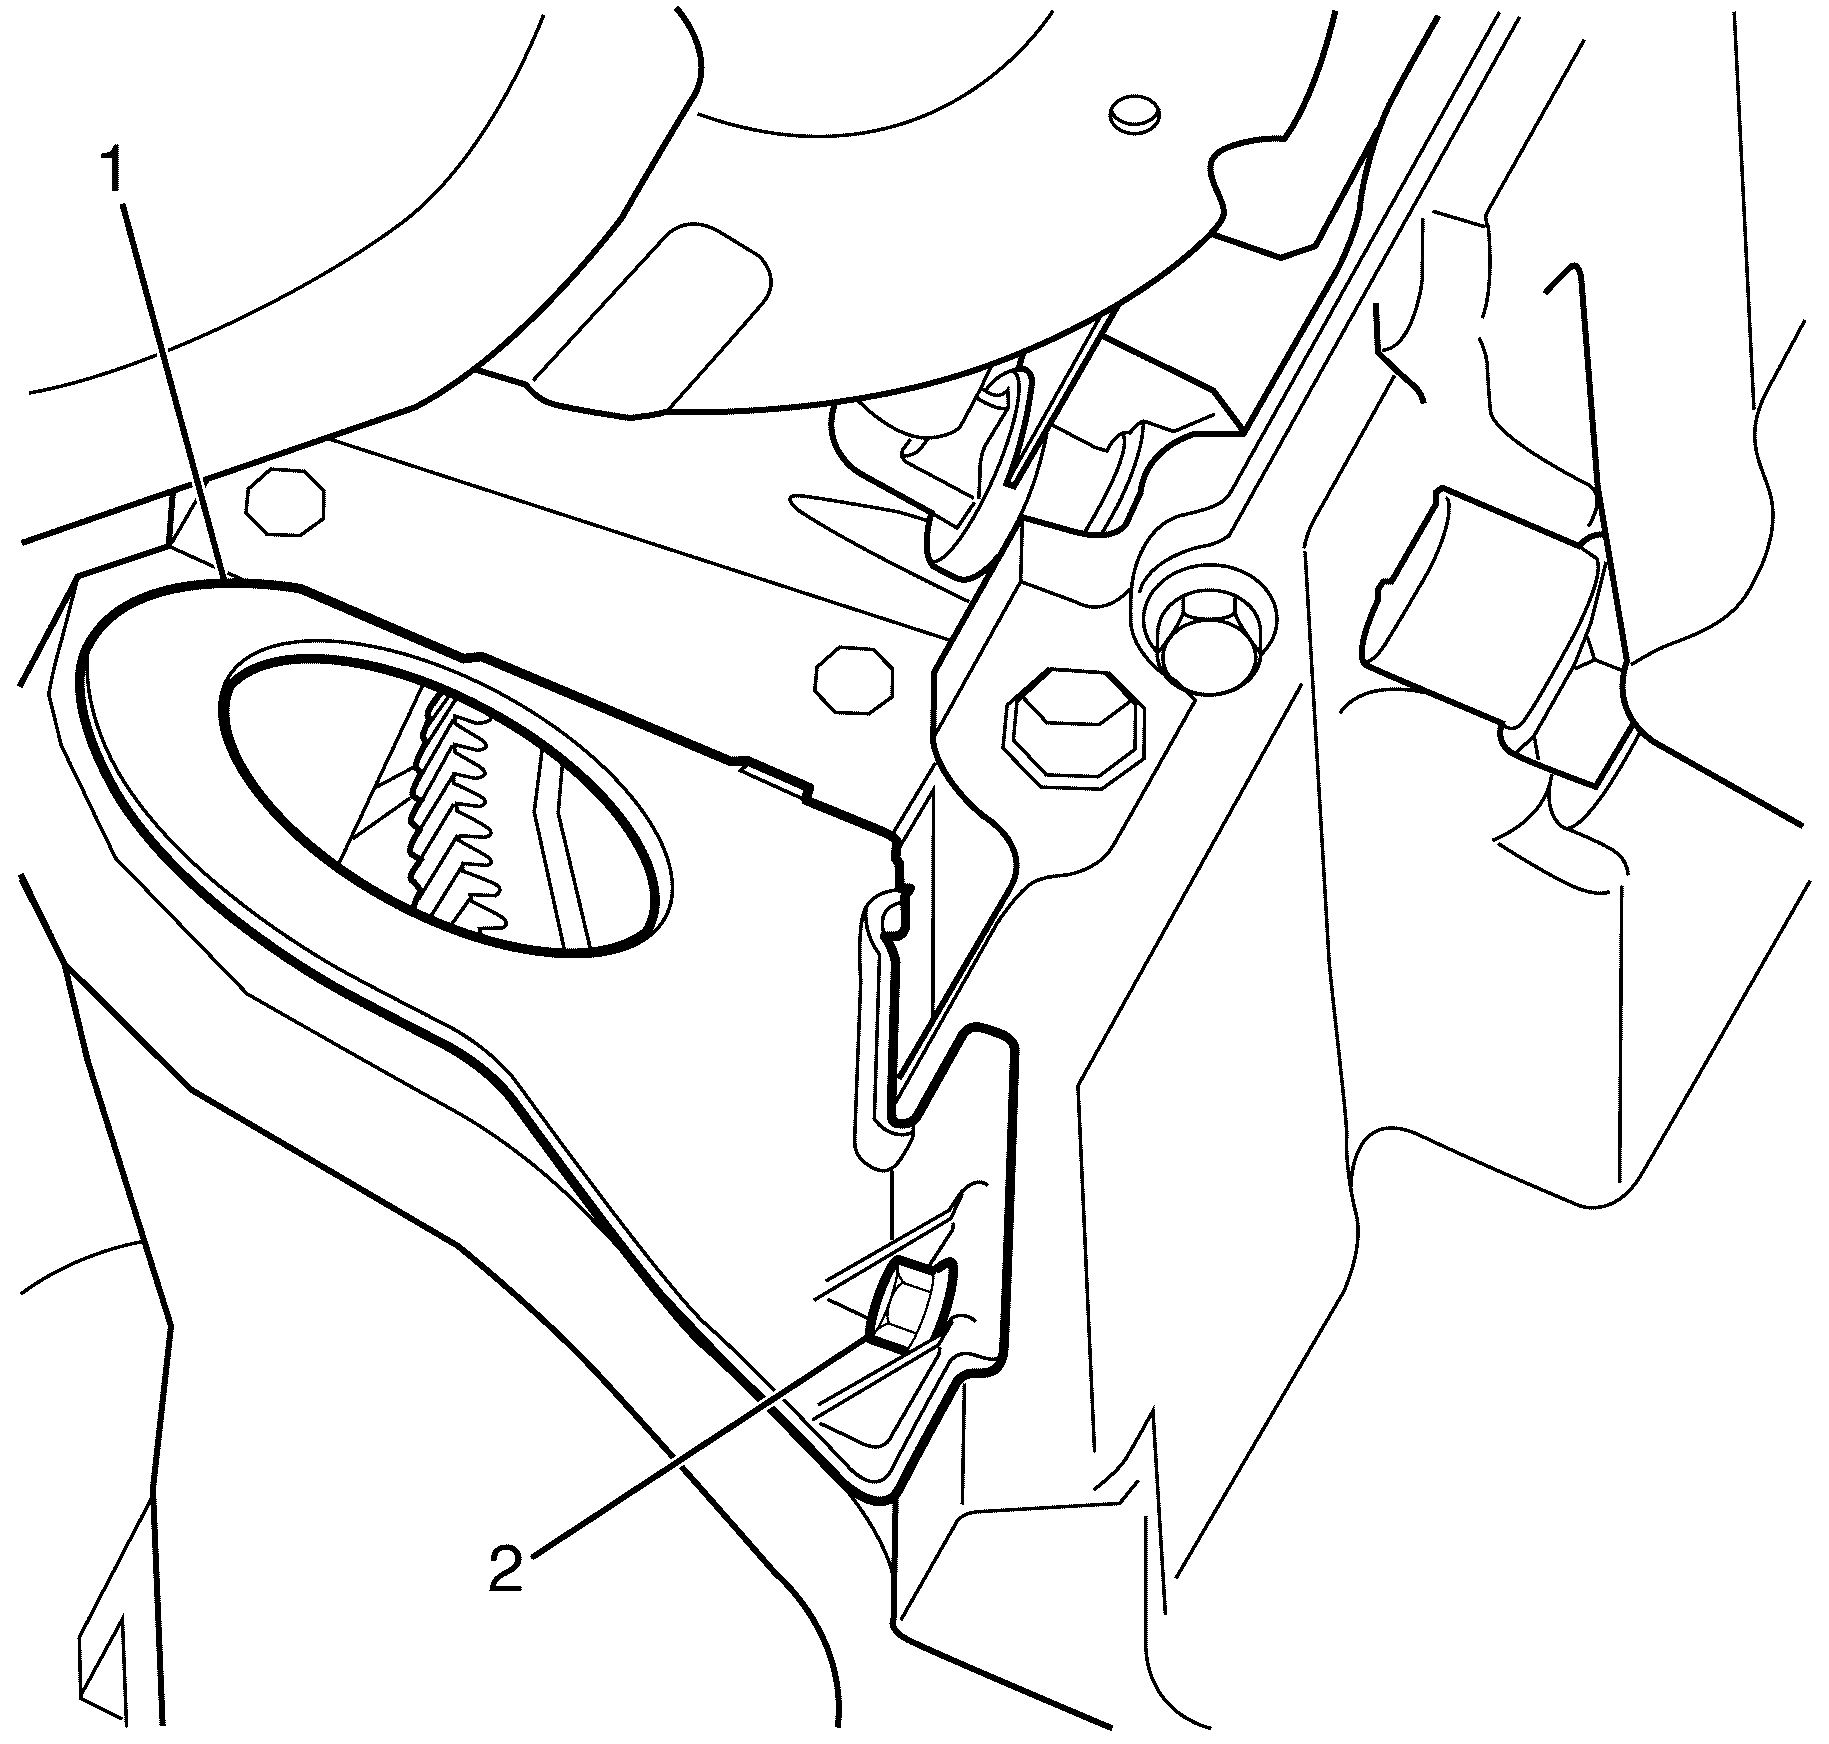
- Install the right transmission cover (1).
Notice: Refer to Fastener Notice in the Preface section.
- Install the right transmission cover (1) to engine oil pan retaining
bolt (2).
Tighten
Tighten the bolt to 12 N·m(106 lb in).


