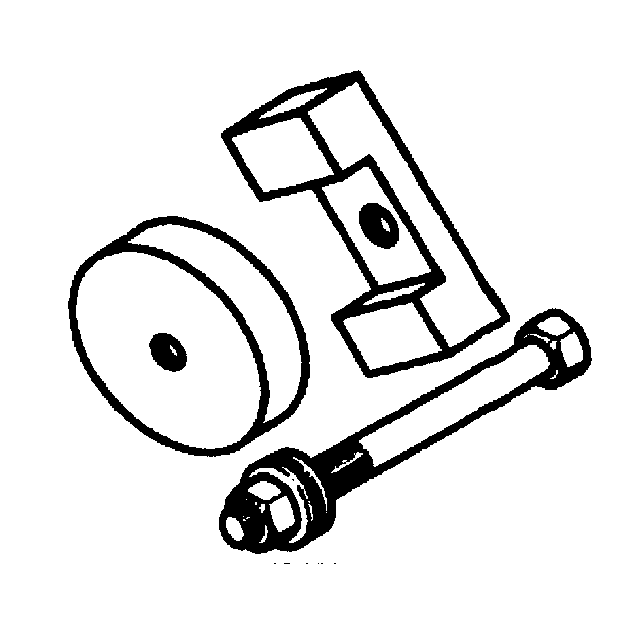
Tools Required
AU-592 Bushing Remover/Installer.
Important: All three bushings of the differential are different although they appear the same. Make sure that the correct part number is used. Mount orientation is critical for noise and vibration performance.
Removal Procedure-Rear Differential Carrier Assembly Bushing
- Raise and support the vehicle. Refer to Lifting and Jacking the Vehicle .
- Remove both rear wheel assemblies. Refer to Tire and Wheel Removal and Installation .
- Disconnect the propeller shaft and rubber coupling from the differential flange. Refer to Propeller Shaft Replacement .
- Remove the intermediate exhaust assembly. Refer to Exhaust Crossover Pipe Replacement .
- Remove both wheel drive shaft assemblies. Refer to Wheel Drive Shaft Replacement .
- Remove the differential assembly. Refer to Differential Replacement .
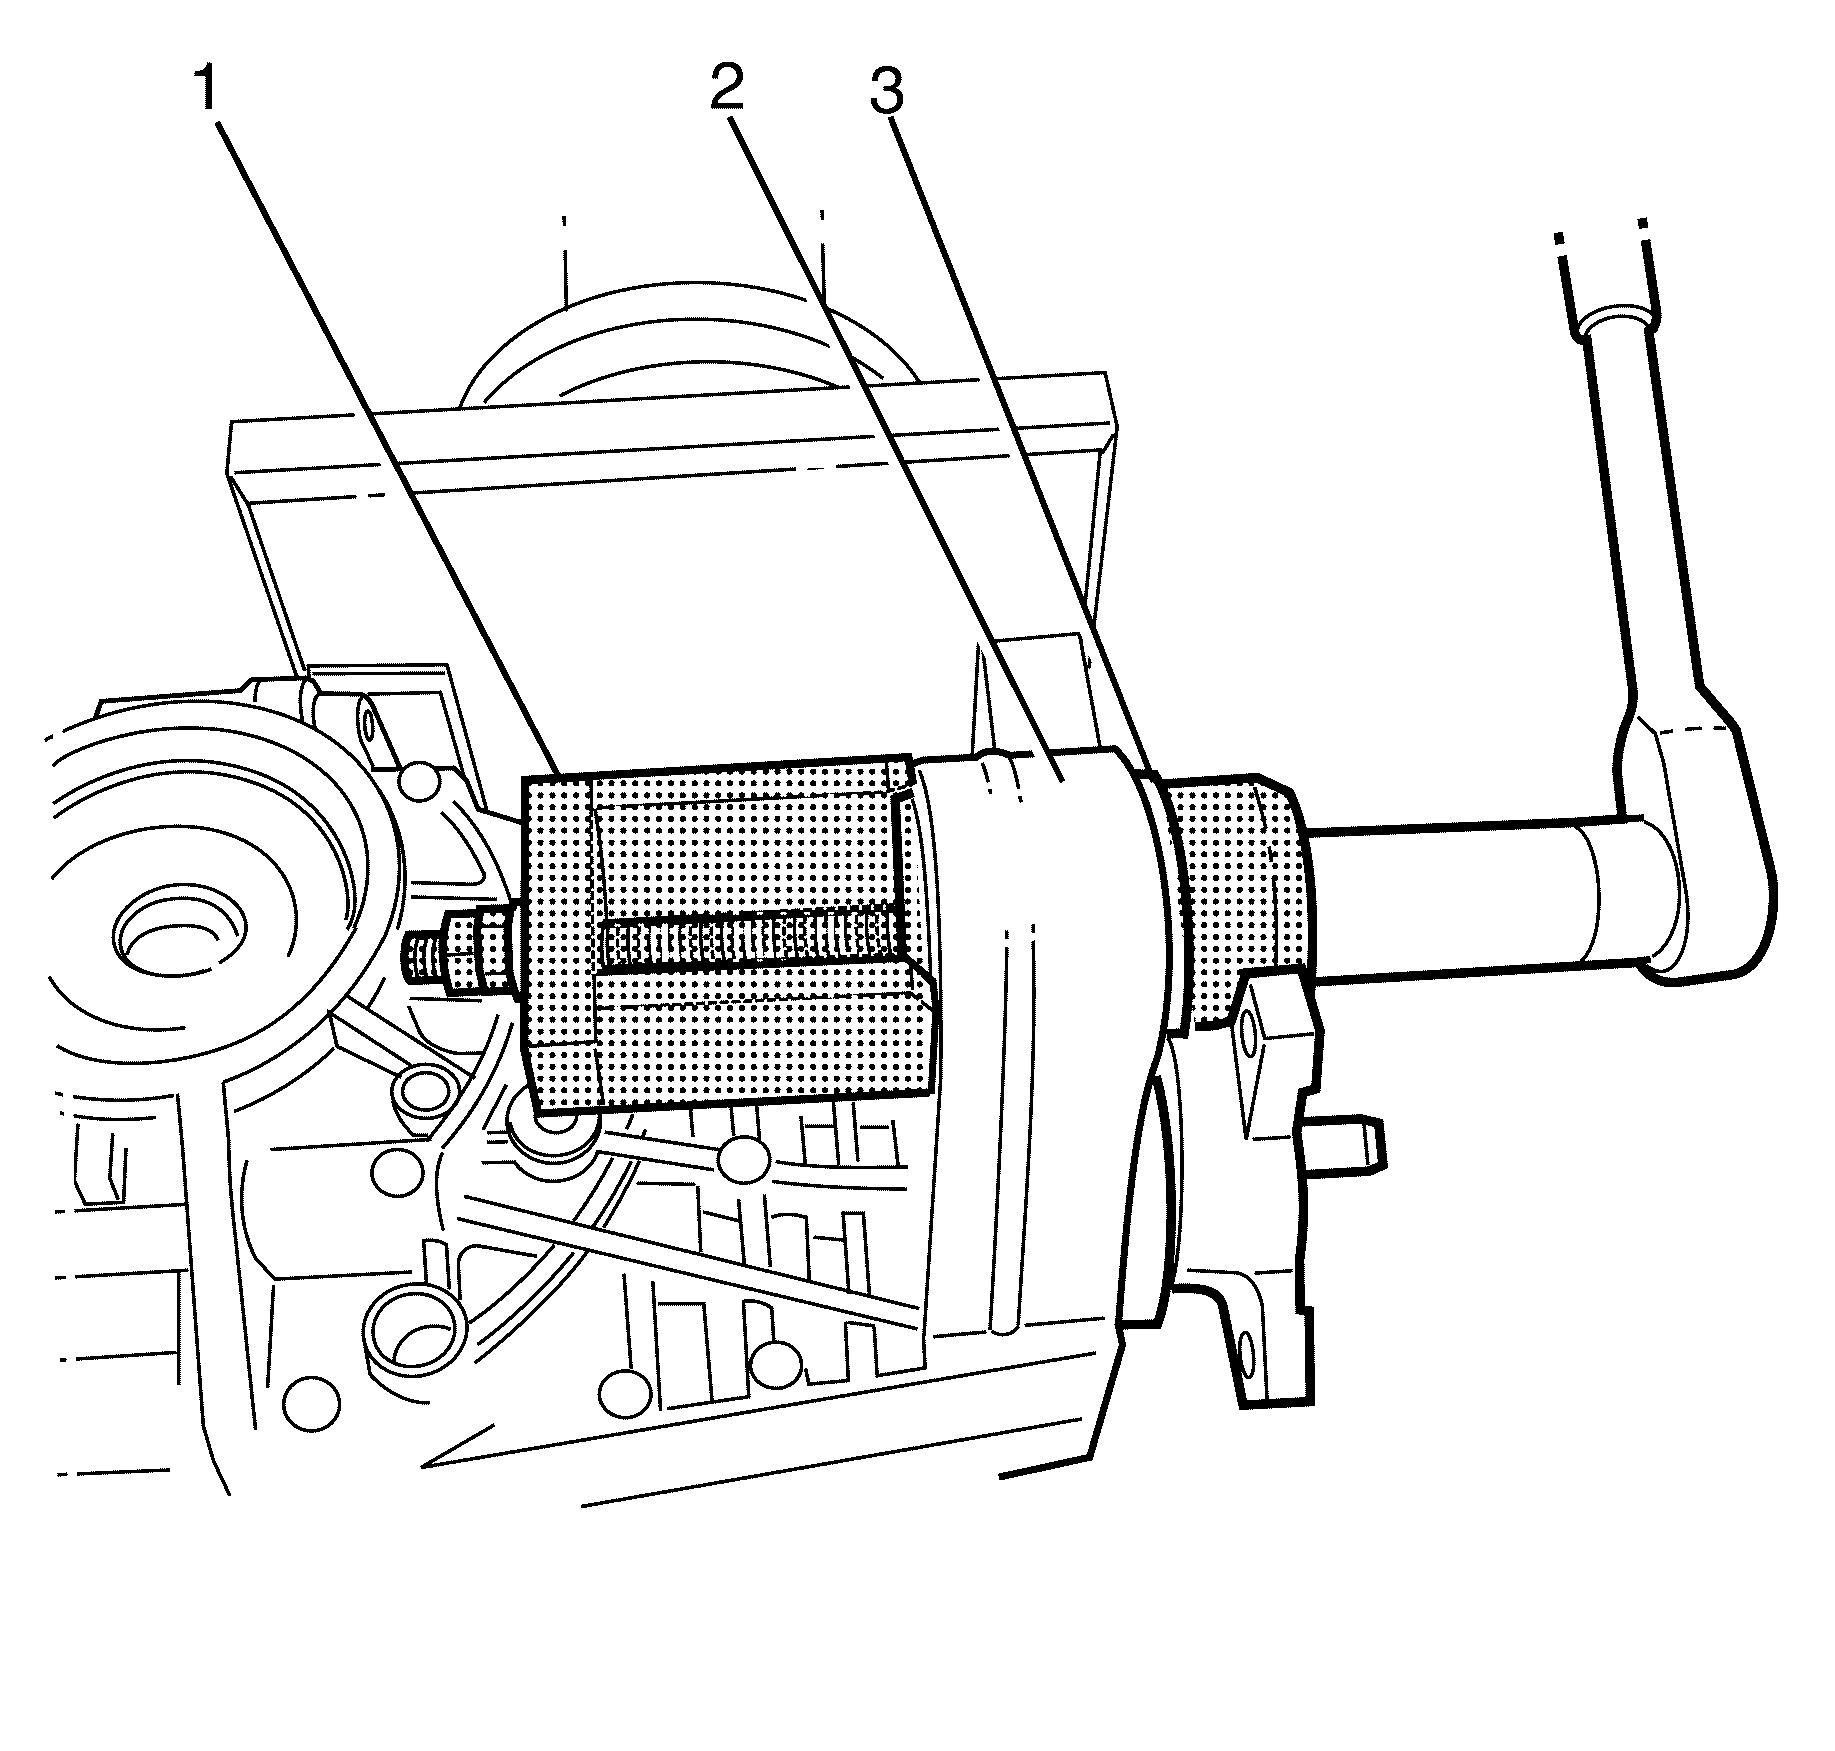
- Measure the installation depth of the rear bushing (2) in relation to the differential (1).
- Remove the rear bushing (1) from the differential using AU-592 (2).
Caution: Refer to Vehicle Lifting Caution in the Preface section.
Caution: Refer to Safety Glasses Caution in the Preface section.
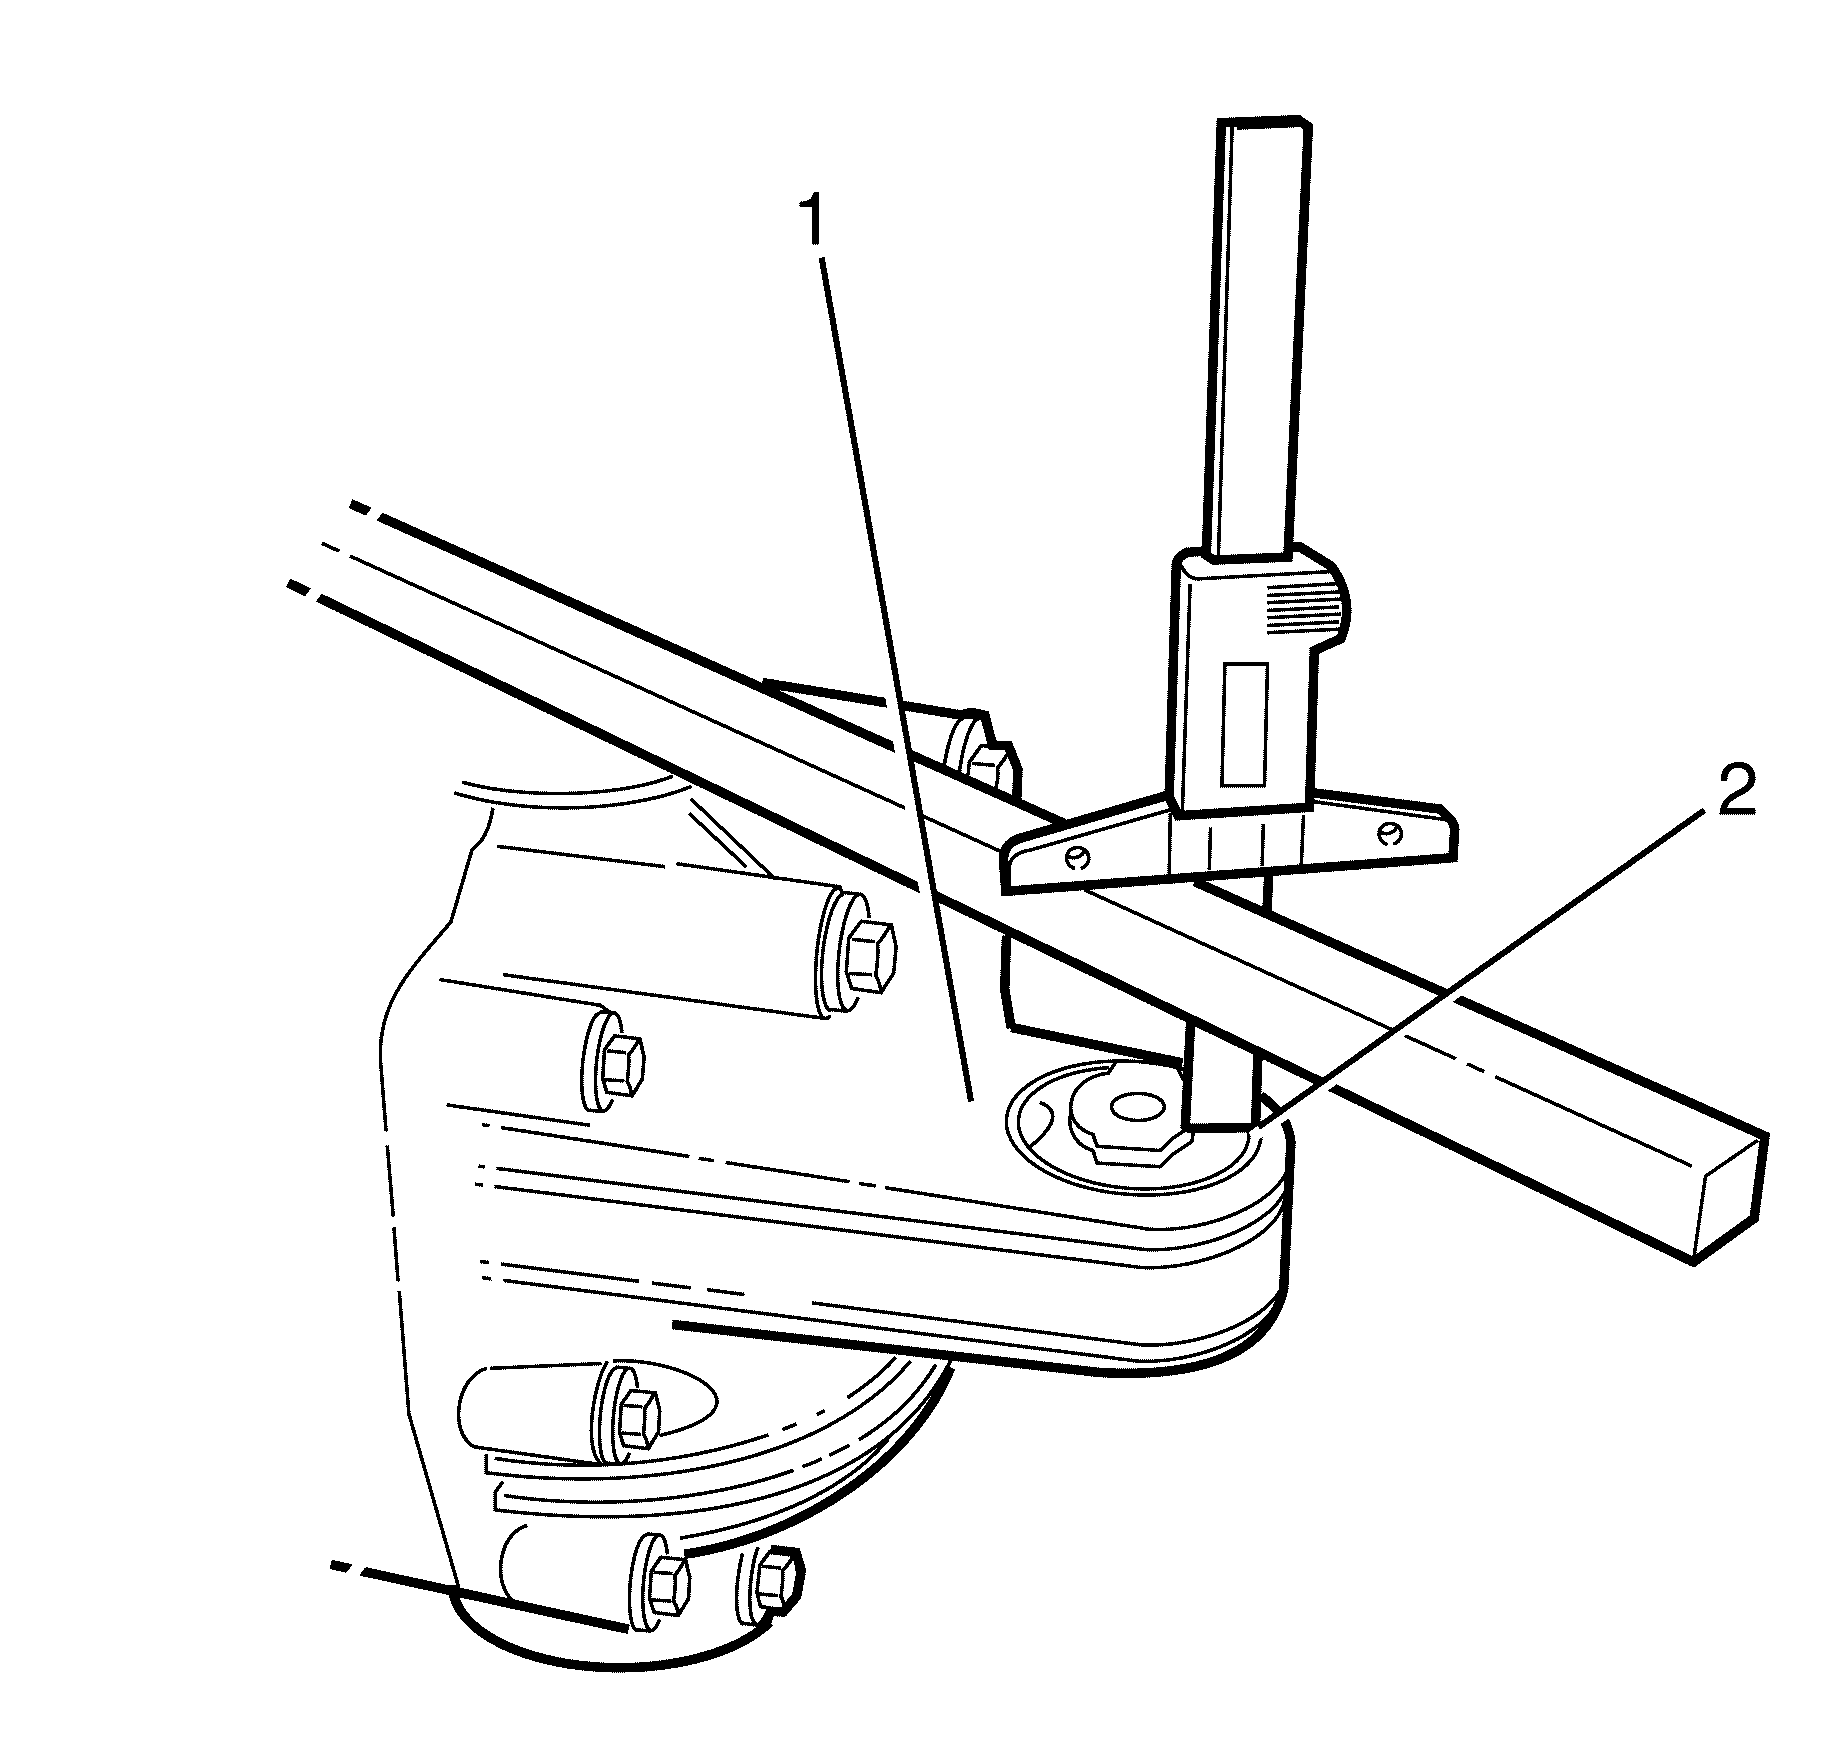
Important: Observe and mark the orientation of the rear bushing (1) with reference to the original position. This recommendation will minimise the potential of incorrect rear bushing installation.
Important: The rear bushing (1) is a single use part and must be discarded after use.
Discard the rear bushing.
Installation Procedure-Rear Differential Carrier Assembly Bushing
- Pull the rear bushing (1) into the differential using the AU-592 (2).
- Pull the rear bushing (2) into the differential (1) until the measured installation depth is reached.
- Install the differential assembly. Refer to Differential Replacement .
- Connect the propeller shaft and rubber coupling to the differential flange. Refer to Propeller Shaft Replacement .
- Install the intermediate exhaust assembly. Refer to Exhaust Crossover Pipe Replacement .
- Install both wheel drive shaft assemblies. Refer to Wheel Drive Shaft Replacement .
- Install both rear wheel assemblies. Refer to Tire and Wheel Removal and Installation .
- Remove the safety stands.
- Lower the vehicle to the ground.
Important: Before installing, the rear bushing (1) must be correctly aligned and oriented. Mount orientation is critical for noise and vibration performance. The depth to which the bushing is going to travel must also be maintained.
Removal Procedure-Front Right Differential Carrier Assembly Bushing
- Raise and support the vehicle. Refer to Lifting and Jacking the Vehicle .
- Remove both rear wheel assemblies. Refer to Tire and Wheel Removal and Installation .
- Disconnect the propeller shaft and rubber coupling from the differential flange. Refer to Propeller Shaft Replacement .
- Remove the intermediate exhaust assembly. Refer to Exhaust Crossover Pipe Replacement .
- Remove both wheel drive shaft assemblies. Refer to Wheel Drive Shaft Replacement .
- Remove the differential assembly. Refer to Differential Replacement .
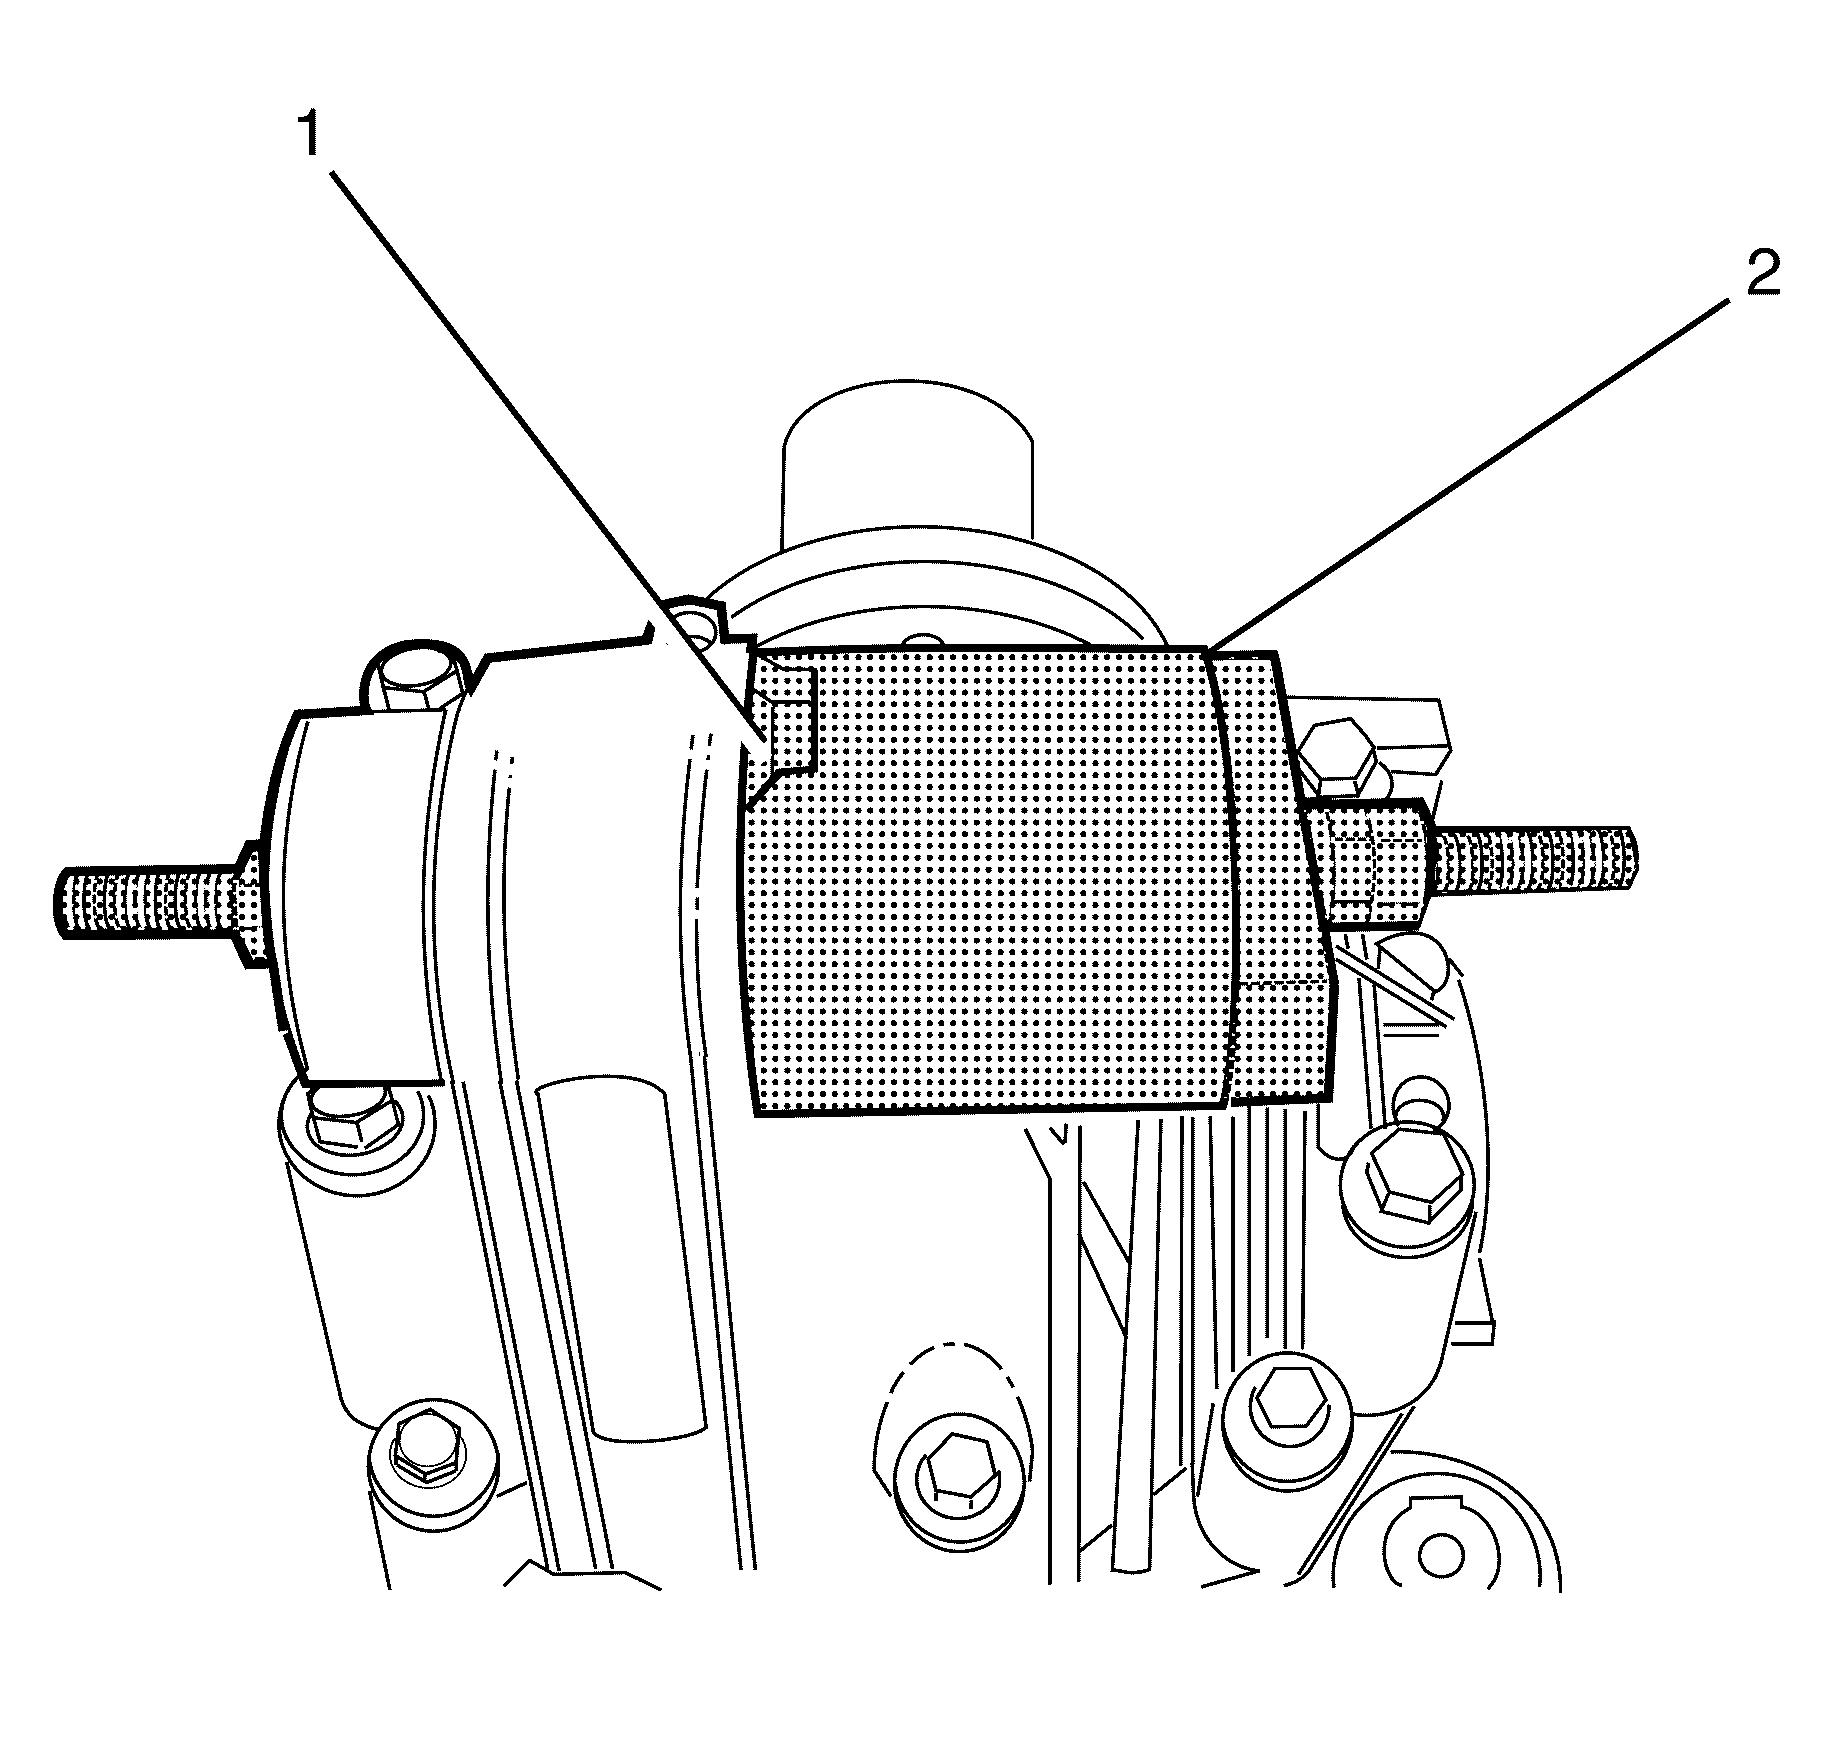
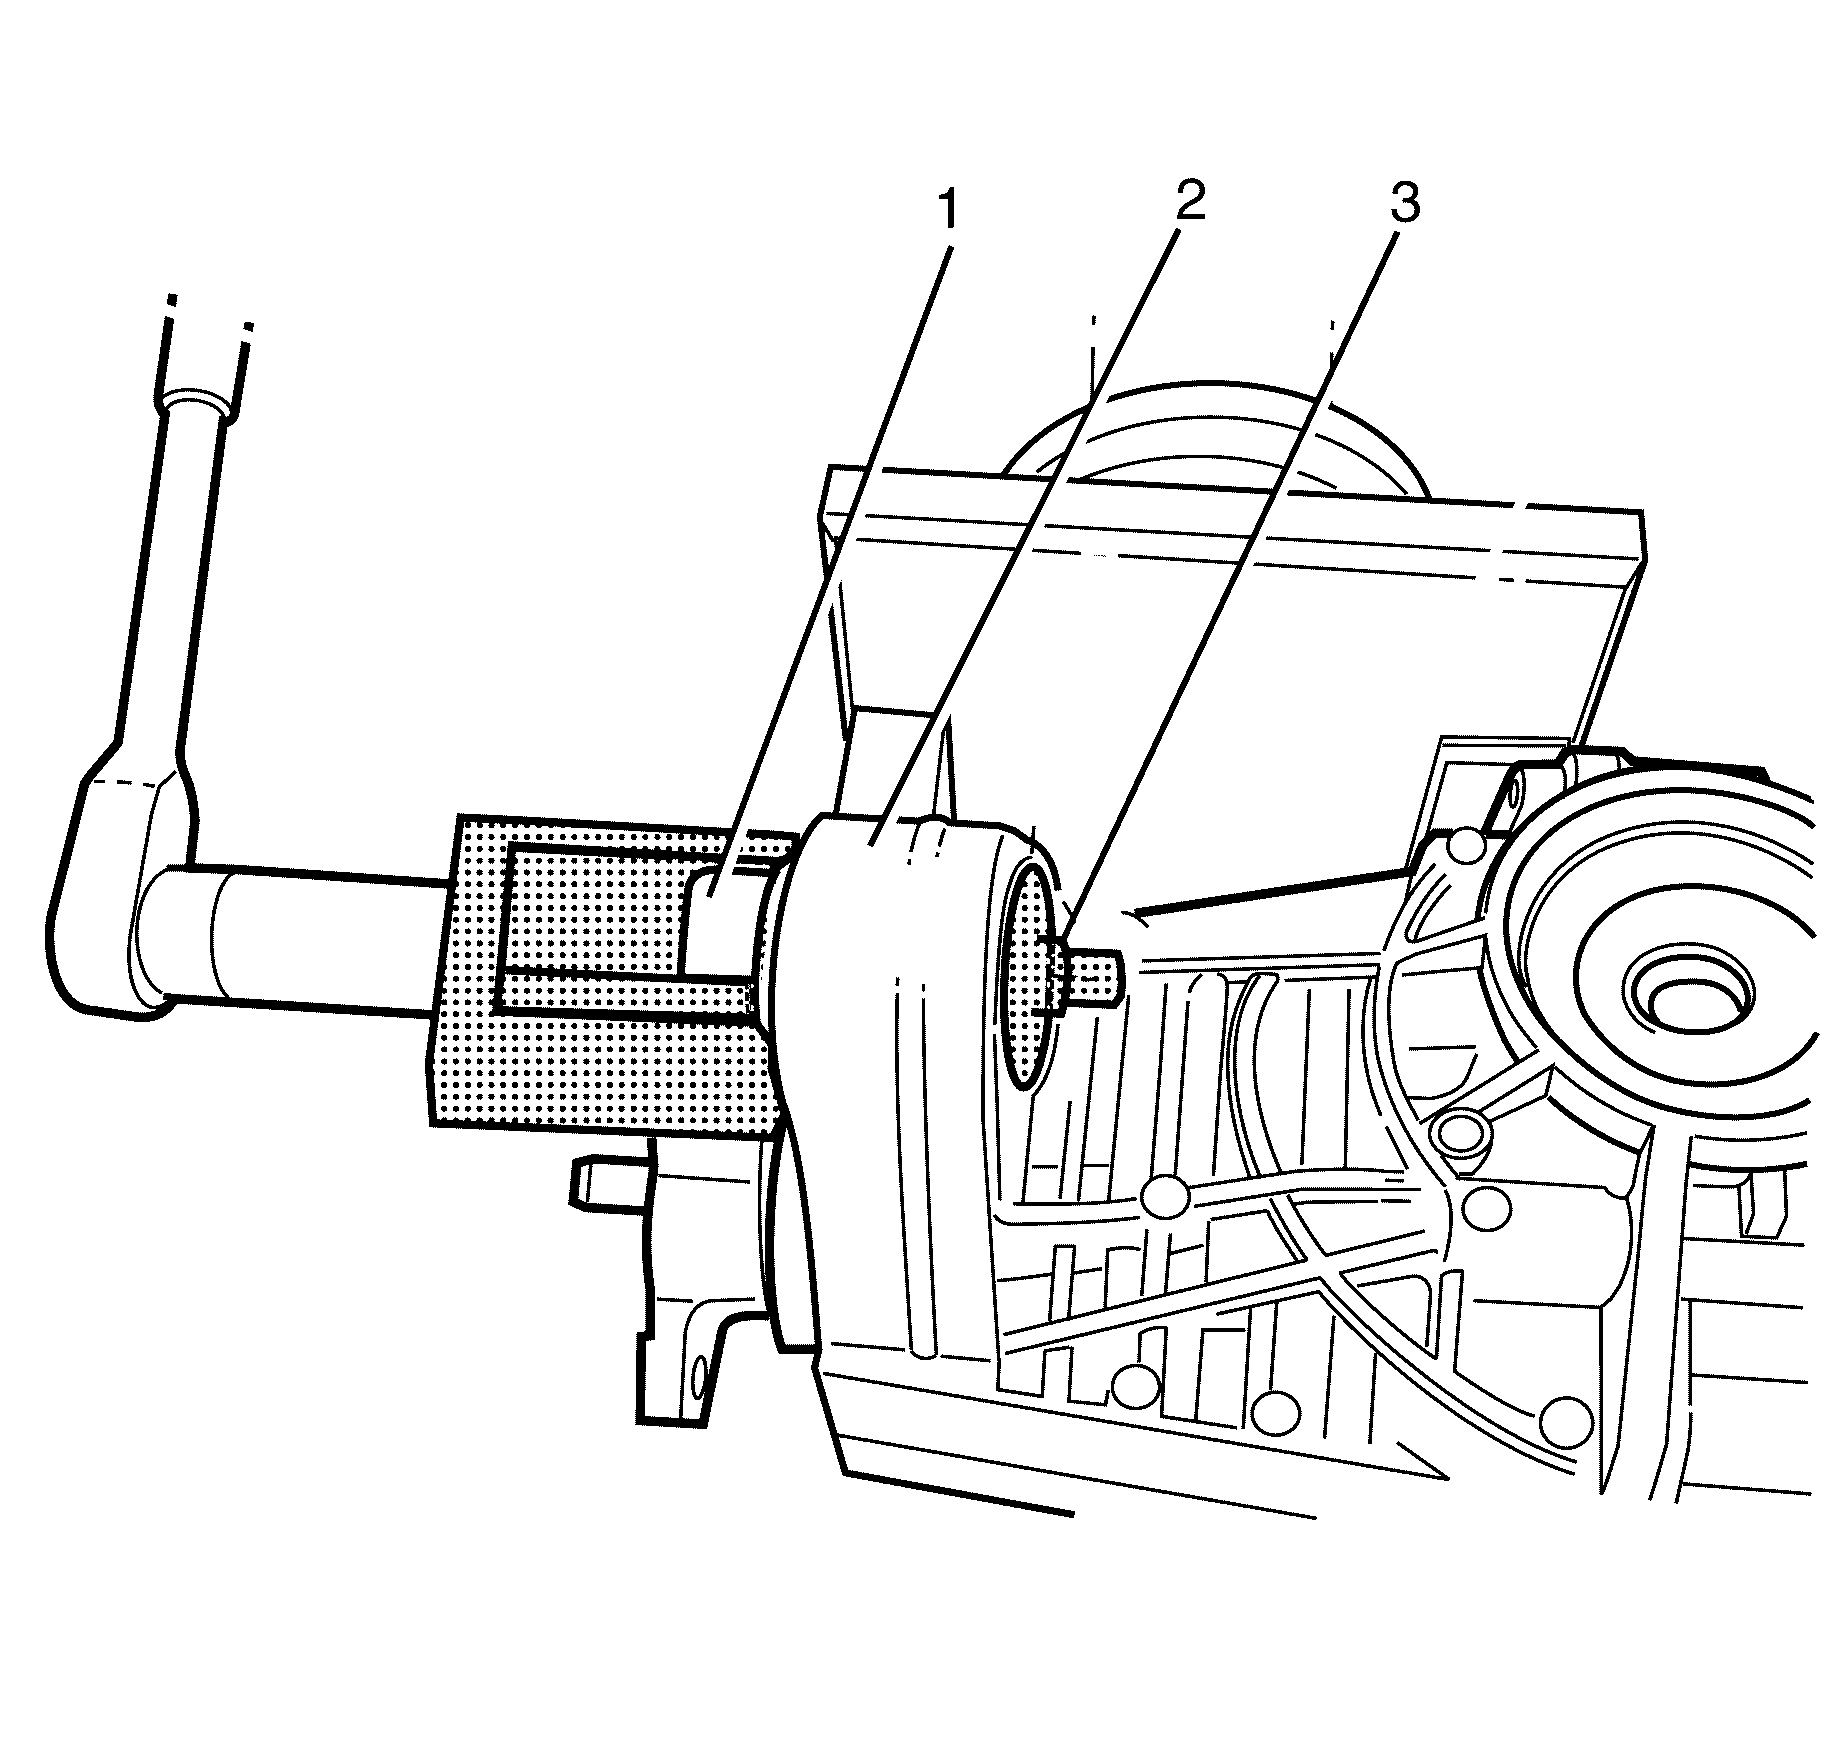
- Remove the front right bushing (2) from the differential (3) using AU-592 (1).
Caution: Refer to Vehicle Lifting Caution in the Preface section.
Caution: Refer to Safety Glasses Caution in the Preface section.
Important: Observe and mark the orientation of the bushing with reference to the original position. This will minimise the potential of incorrect bushing installation.
Important: The front right bushing (2) is a single use part and must be discarded after use.
Discard the bushing.
Installation Procedure-Front Right Differential Carrier Assembly Bushing
- Pull the front right bushing (3) to the differential (2) using AU-592 (1).
- Pull the front right bushing (3) until it is flush fitted.
- Install the differential assembly. Refer to Differential Replacement .
- Connect the propeller shaft and rubber coupling to the differential flange. Refer to Propeller Shaft Replacement .
- Install the intermediate exhaust assembly. Refer to Exhaust Crossover Pipe Replacement .
- Install the wheel drive shaft assemblies. Refer to Wheel Drive Shaft Replacement .
- Install the rear wheel assemblies. Refer to Tire and Wheel Removal and Installation .
- Remove the safety stands.
- Lower the vehicle to the ground.
Important: Before installing, the front right bushing (3) must be correctly aligned and oriented. Mount orientation is critical for noise and vibration performance.
Removal Procedure-Front Left Differential Carrier Assembly Bushing
- Raise and support the vehicle. Refer to Lifting and Jacking the Vehicle .
- Remove the rear wheel assemblies. Refer to Tire and Wheel Removal and Installation .
- Disconnect the propeller shaft and rubber coupling from the differential flange. Refer to Propeller Shaft Replacement .
- Remove the intermediate exhaust assembly. Refer to Exhaust Crossover Pipe Replacement .
- Remove the wheel drive shaft assemblies. Refer to Wheel Drive Shaft Replacement .
- Remove the differential assembly. Refer to Differential Replacement .
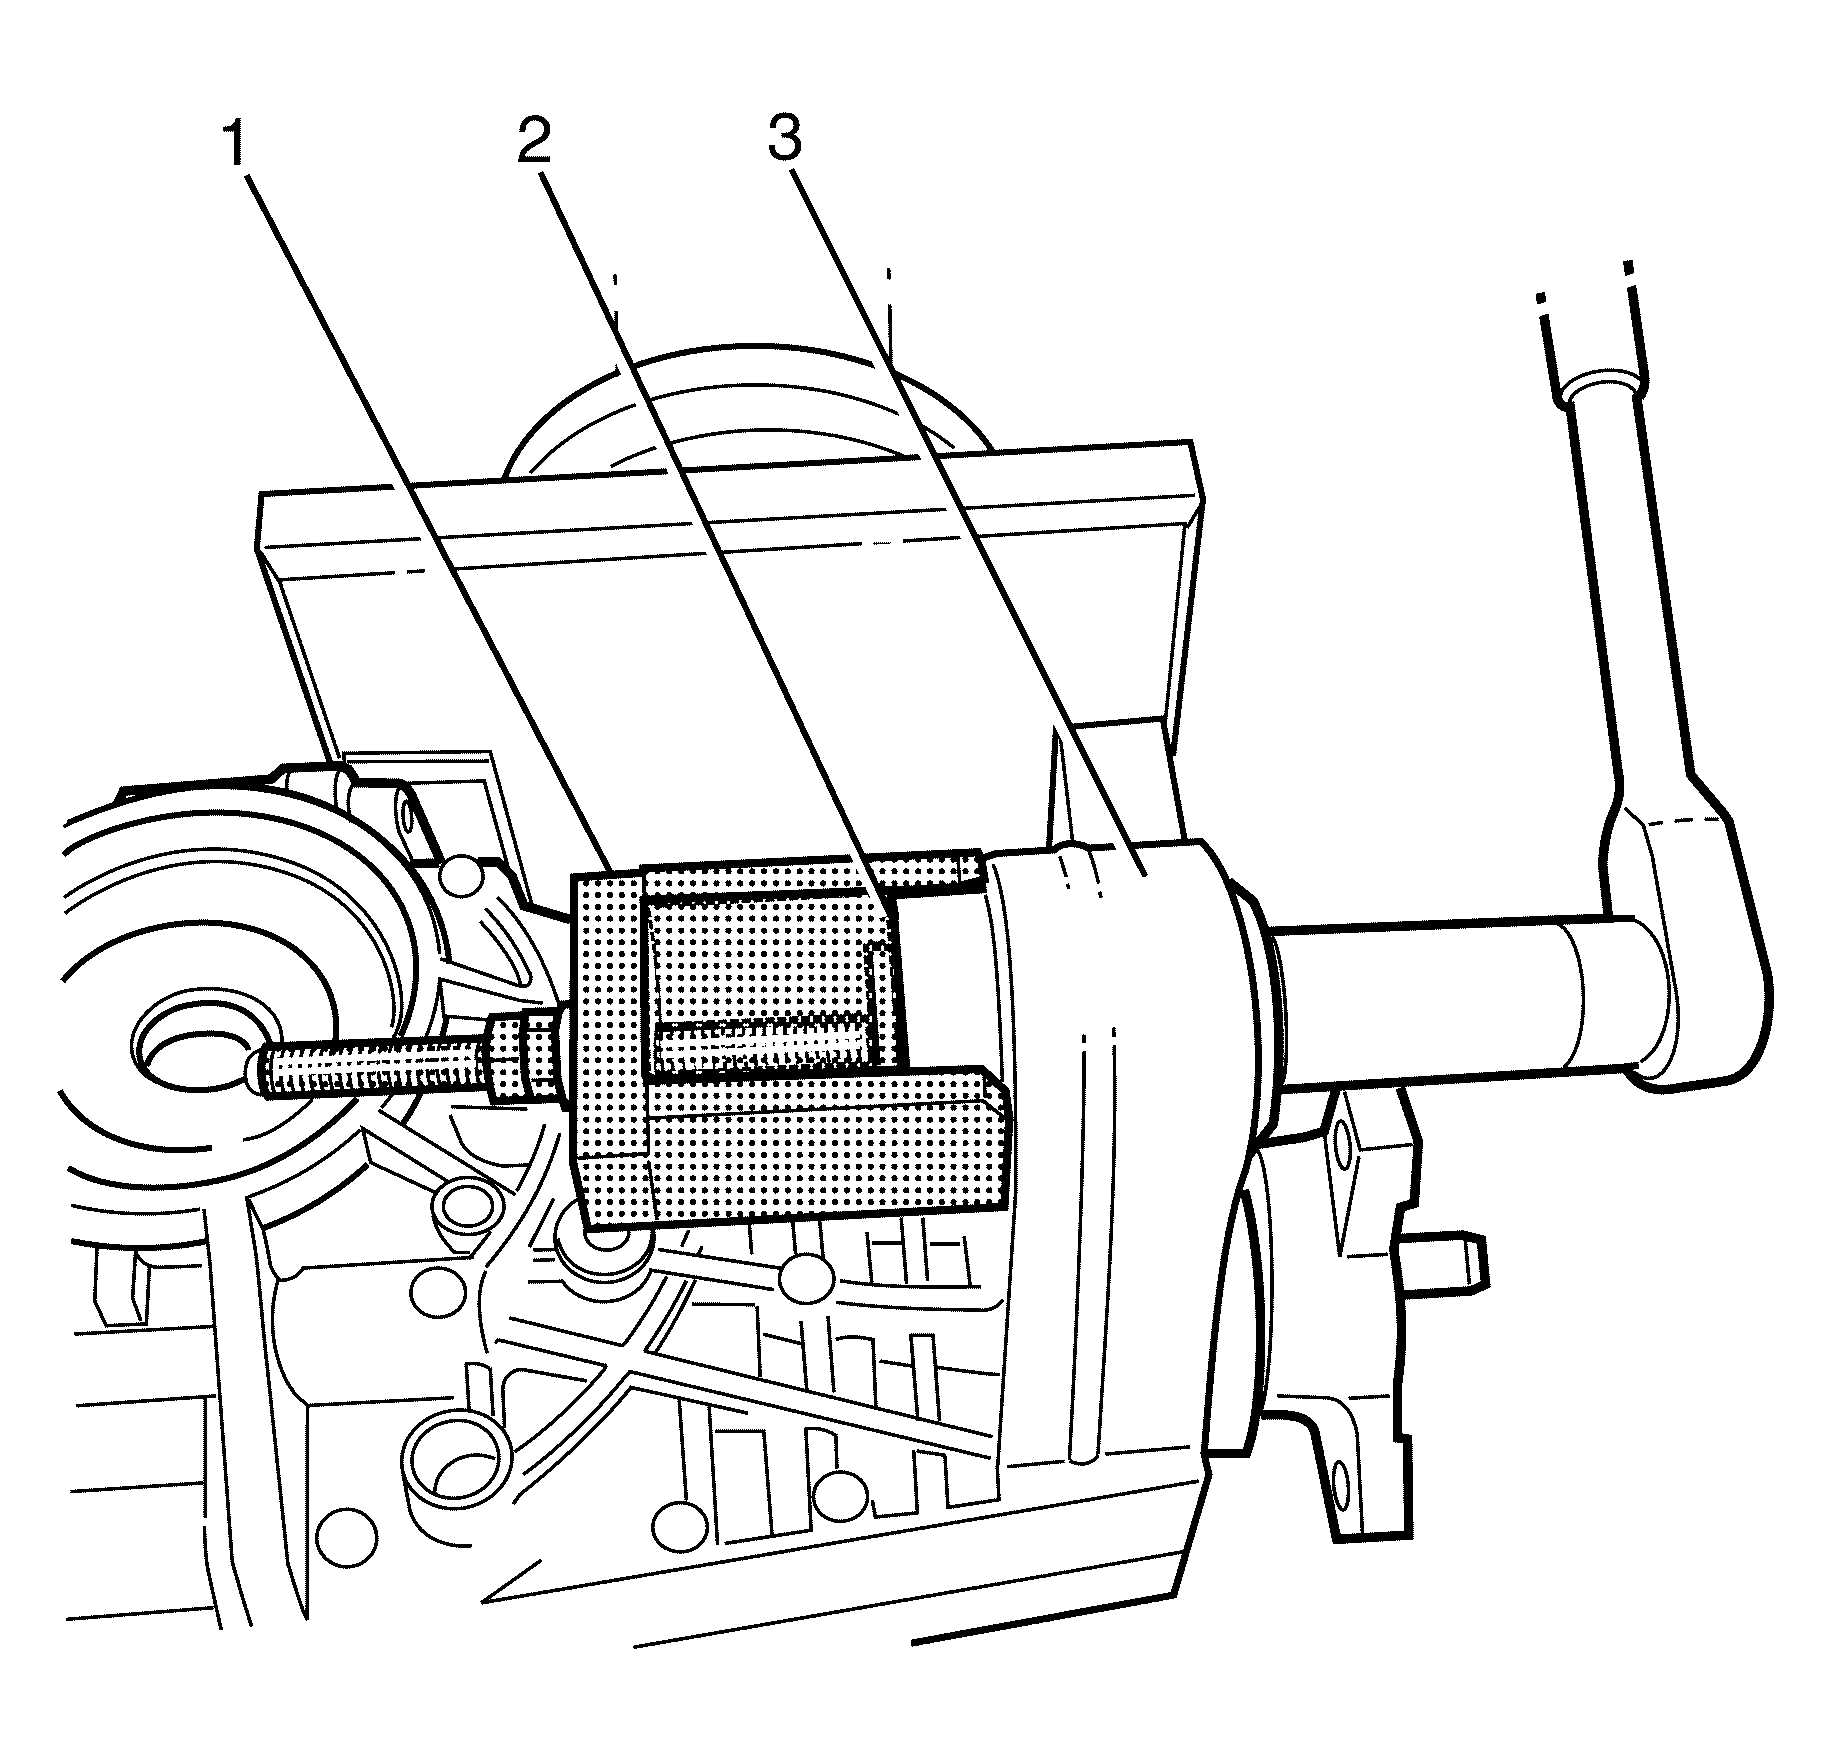
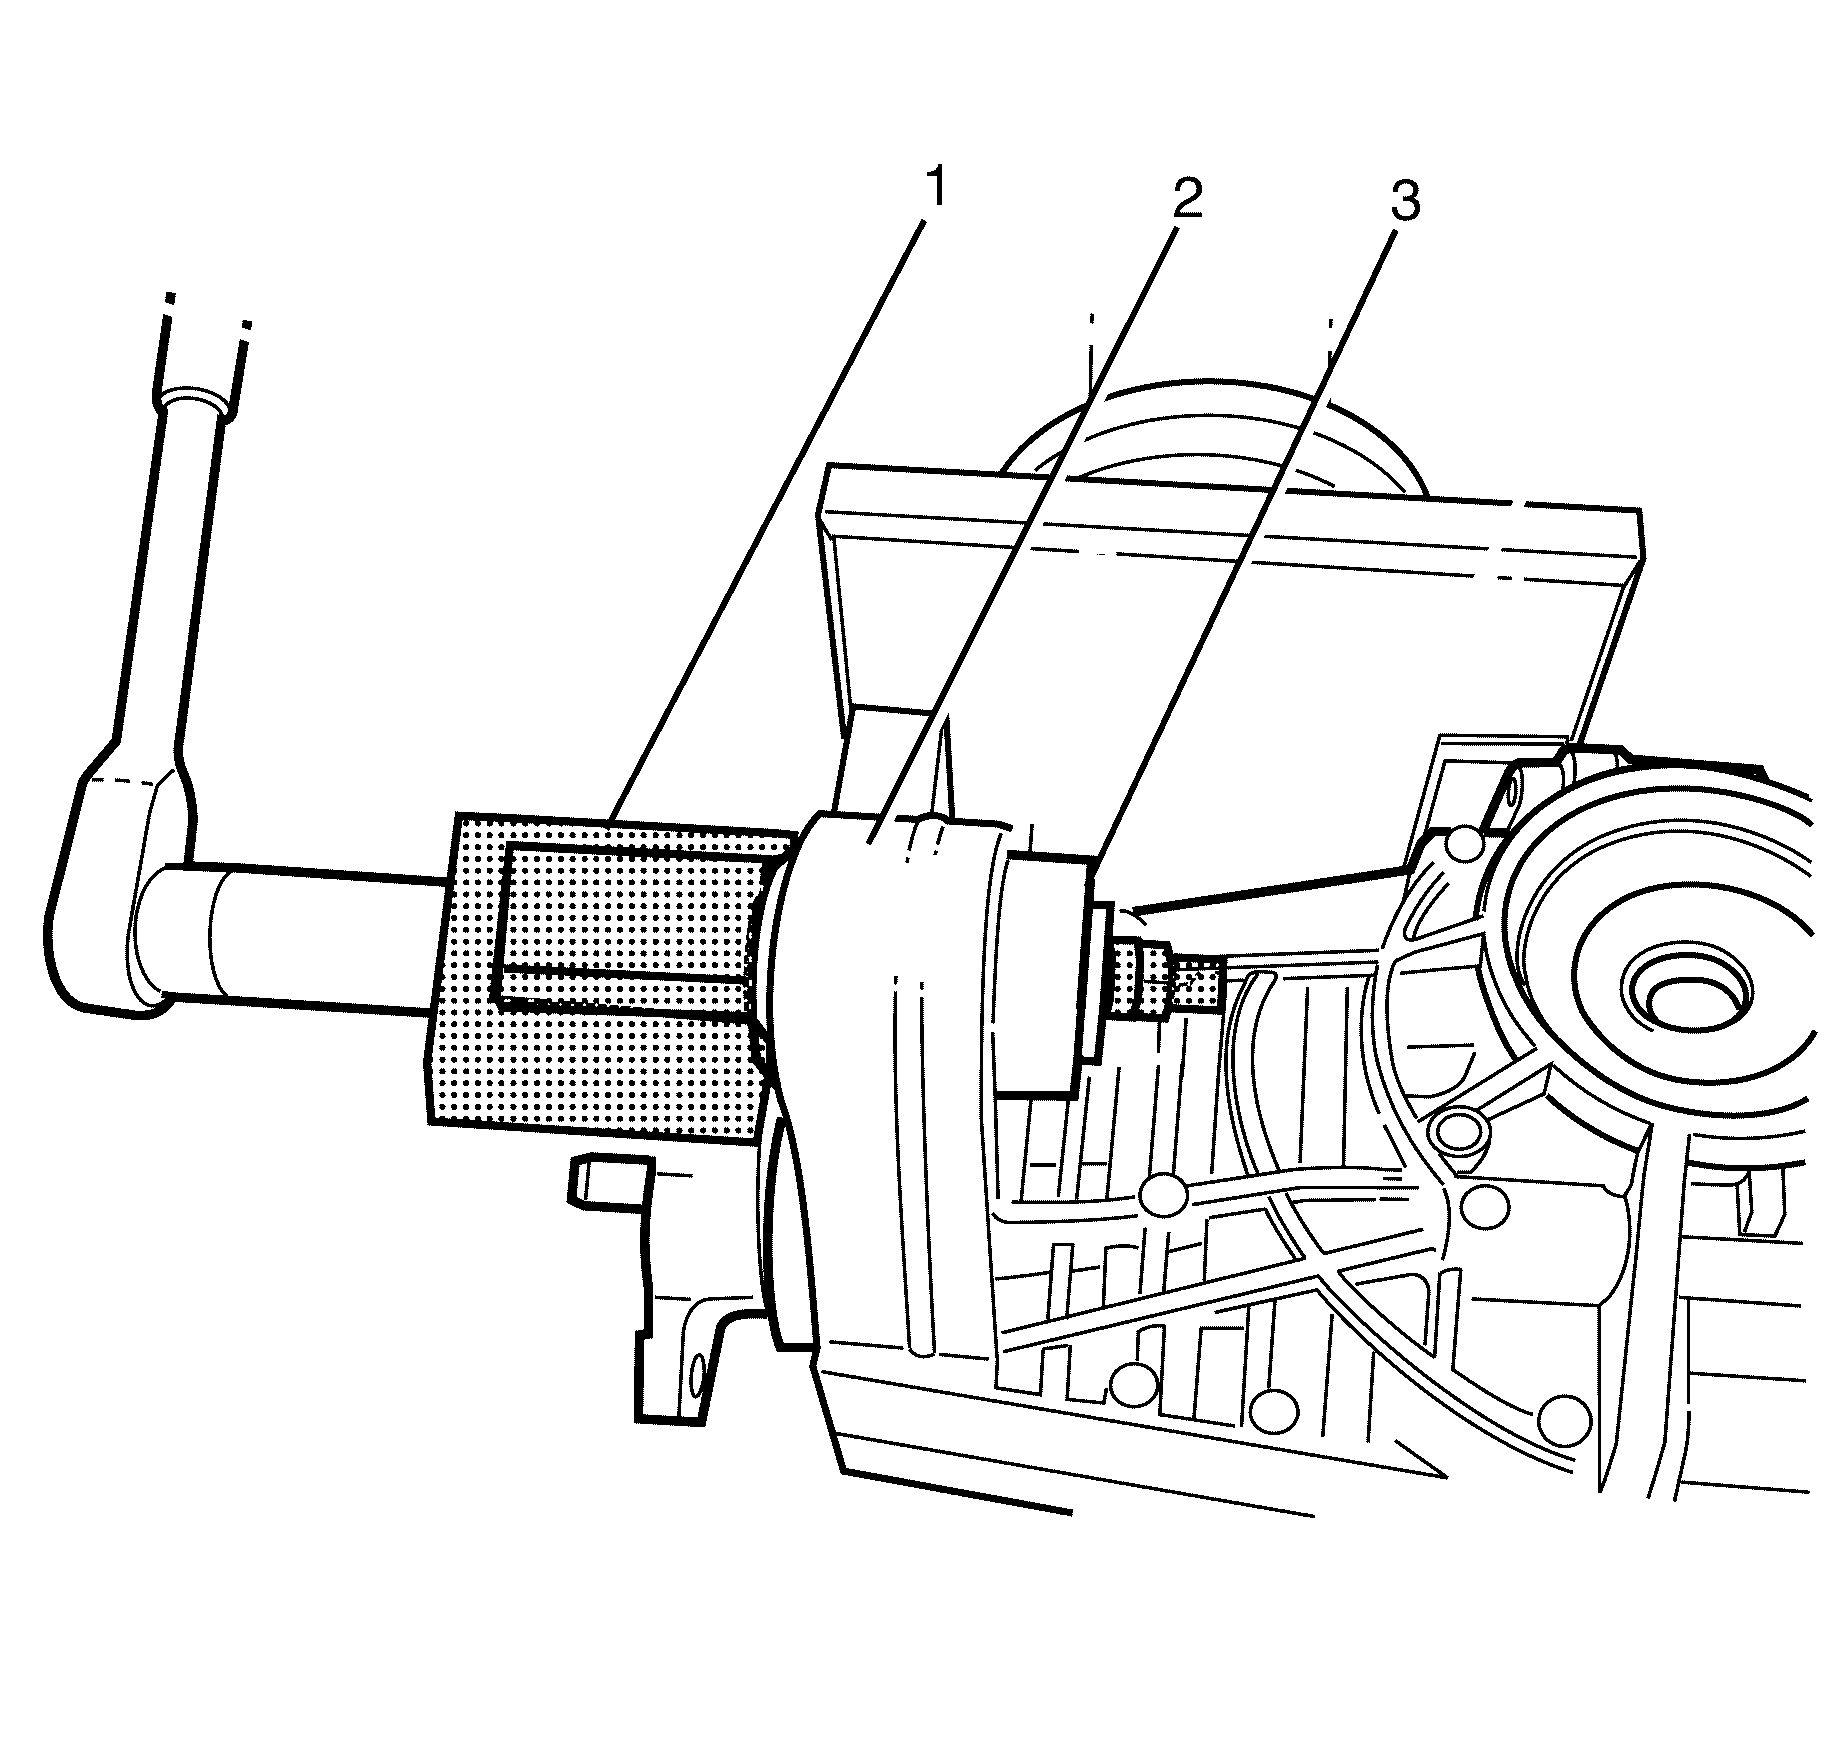
- Remove the front left bushing (1) from the differential (2) using AU-592 (3).
Caution: Refer to Vehicle Lifting Caution in the Preface section.
Caution: Refer to Safety Glasses Caution in the Preface section.
Important: The left differential carrier bushing has to be pressed in the opposite direction to the right due to clearance.
Important: Observe and mark the orientation of the bushing with reference to the original position. This will minimise the potential of incorrect bushing installation.
Important: The front left front bushing (1) is a single use part and must be discarded after use.
Discard the bushing.
Installation Procedure-Front Left Differential Carrier Assembly Bushing
- Pull the front left bushing (3) to the differential (2) using AU-592 (1).
- Pull the front left bushing (3) until it is flush fitted.
- Install the differential assembly. Refer to Differential Replacement .
- Connect the propeller shaft and rubber coupling to the differential flange. Refer to Propeller Shaft Replacement .
- Install the intermediate exhaust assembly. Refer to Exhaust Crossover Pipe Replacement .
- Install the wheel drive shaft assemblies. Refer to Wheel Drive Shaft Replacement .
- Install the rear wheel assemblies. Refer to Tire and Wheel Removal and Installation .
- Remove the safety stands.
- Lower the vehicle to the ground.
Important: Before installing, the bushing (1) must be correctly aligned and oriented. Mount orientation is critical for noise and vibration performance.
