Removal Procedure
- Remove the park brake cable adjustment bolt cover trim (1) from the centre console (3).
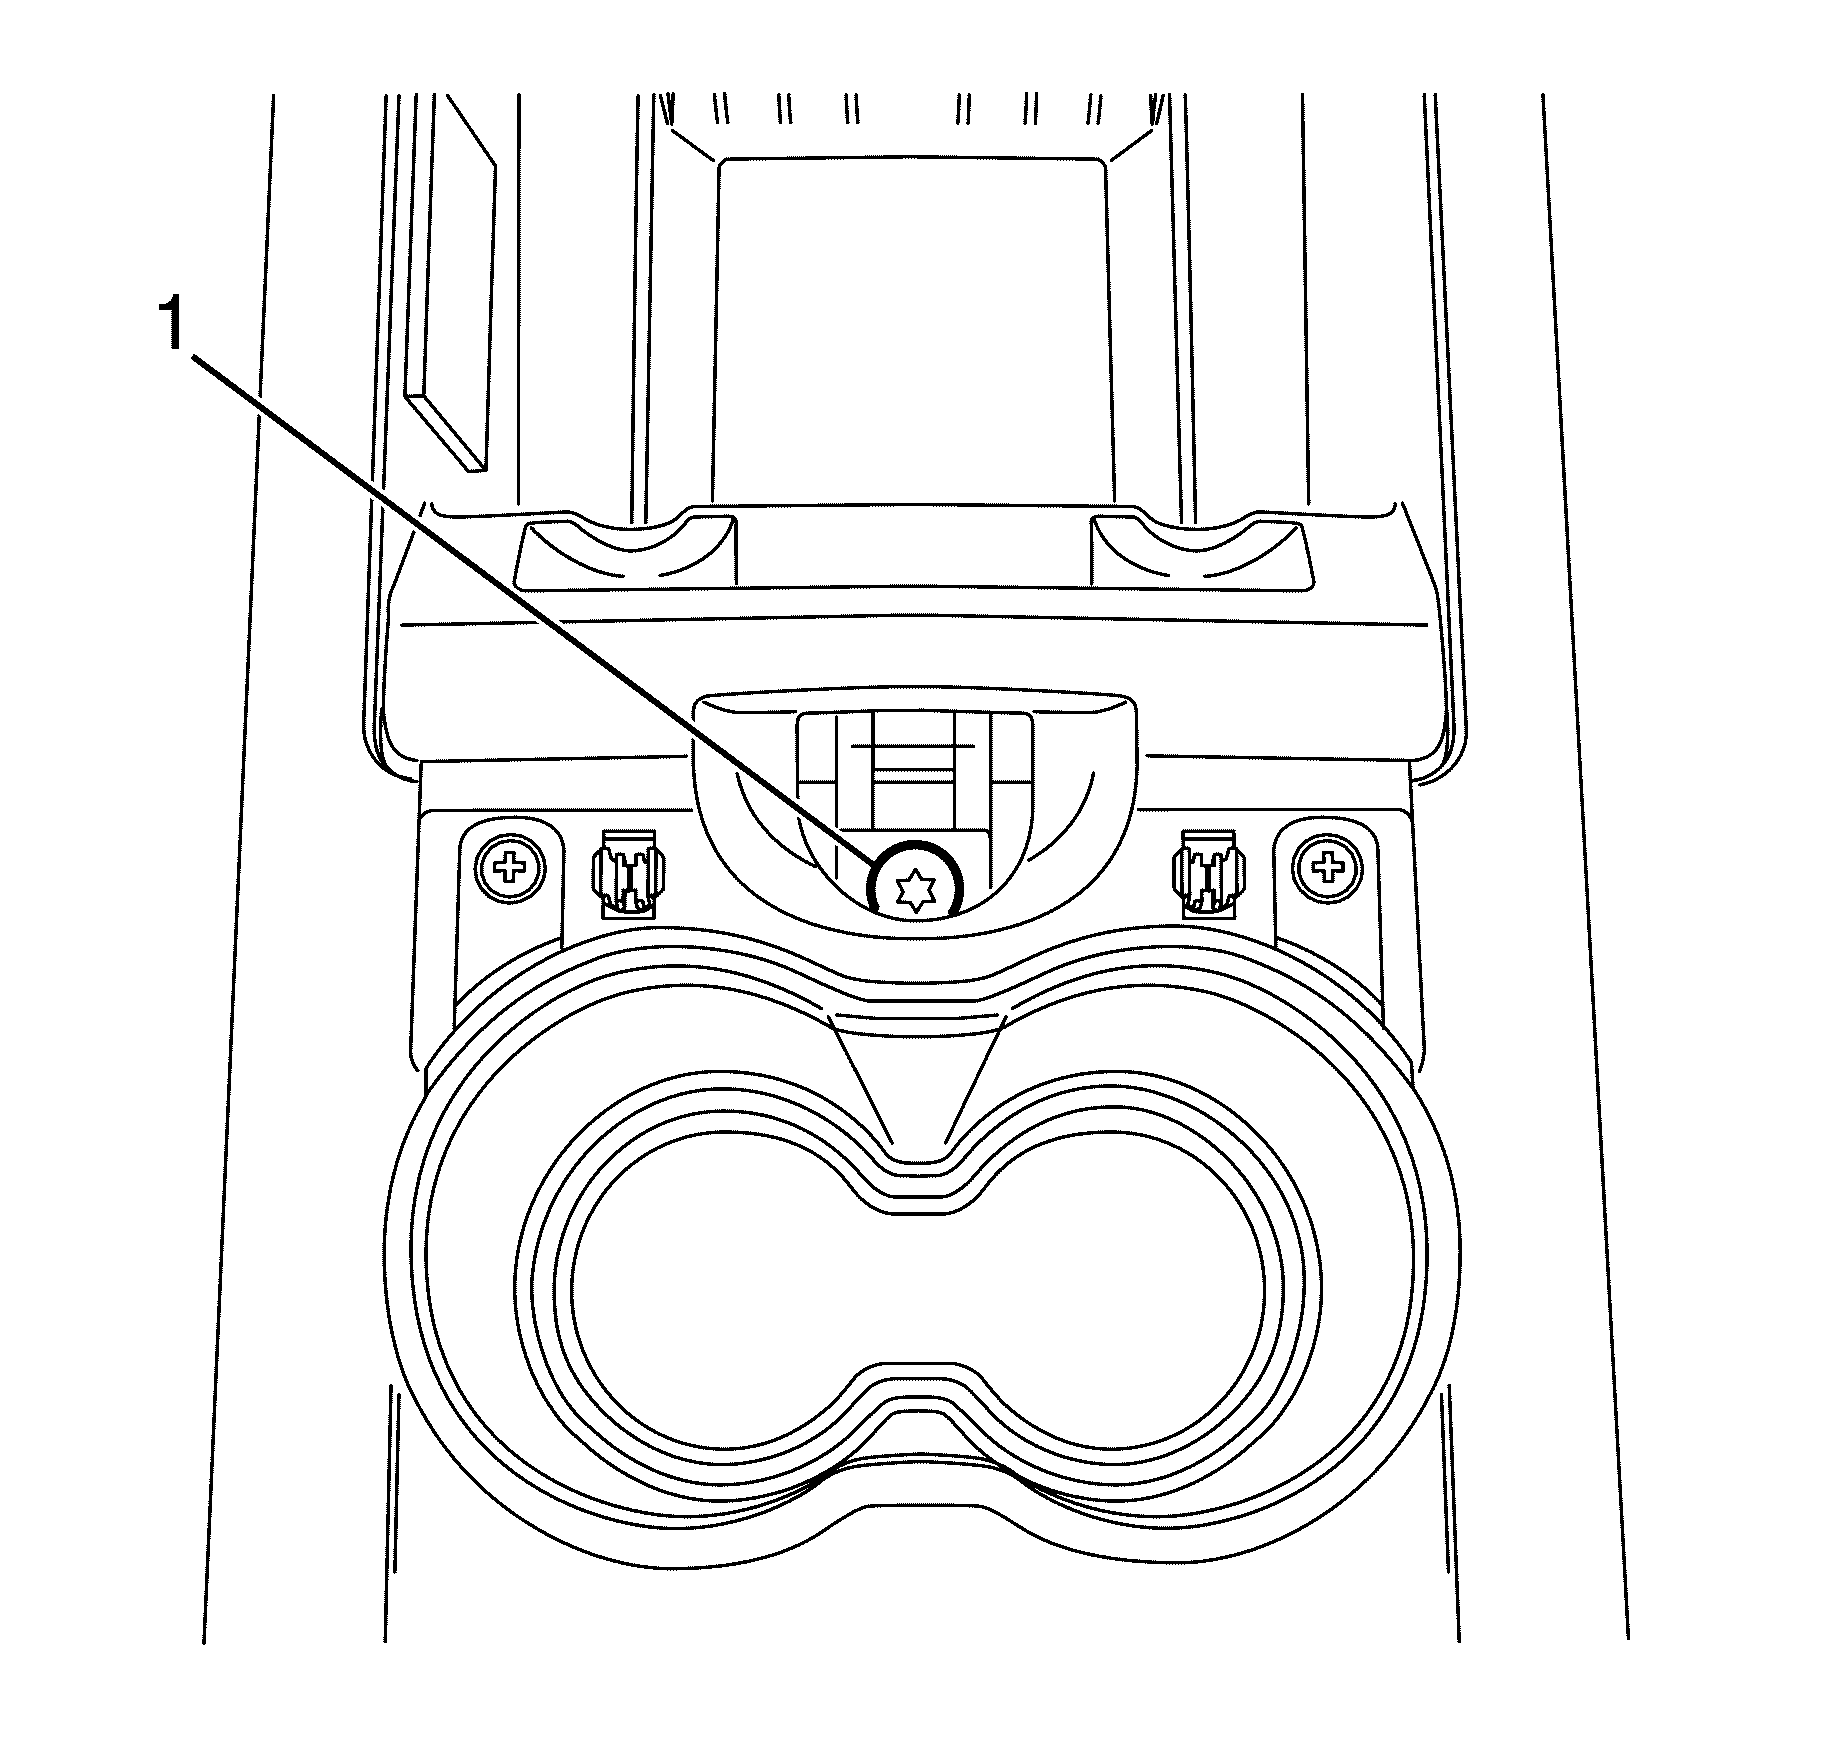
- Loosen the park brake cable adjustment bolt (1) all the way to ensure maximum slack in the rear park brake cables.
- Raise and support the vehicle. Refer to Lifting and Jacking the Vehicle .
- Remove the rear wheels. Refer to Tire and Wheel Removal and Installation .
- Remove the exhaust system. Refer to Exhaust System Replacement .
- Remove the propeller shaft. Refer to Propeller Shaft Replacement .
- Remove the wheel drive shafts. Refer to Wheel Drive Shaft Replacement .
- Remove the differential. Refer to Differential Replacement .
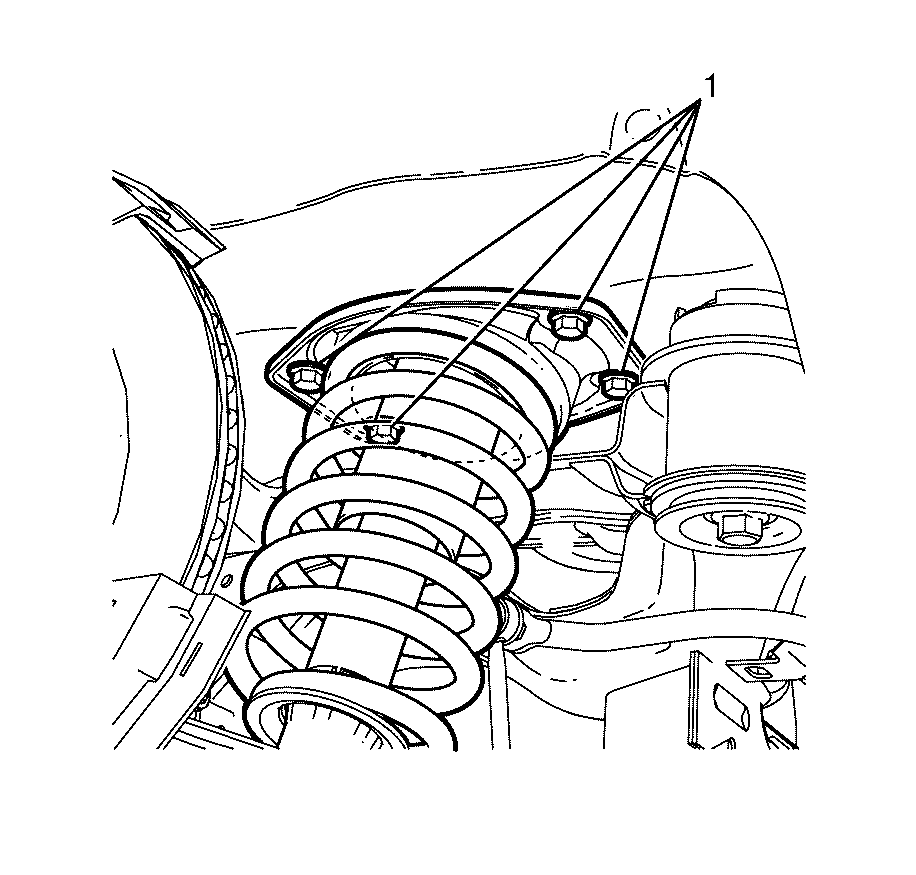
- Remove the top strut assembly to body retaining bolts (1).
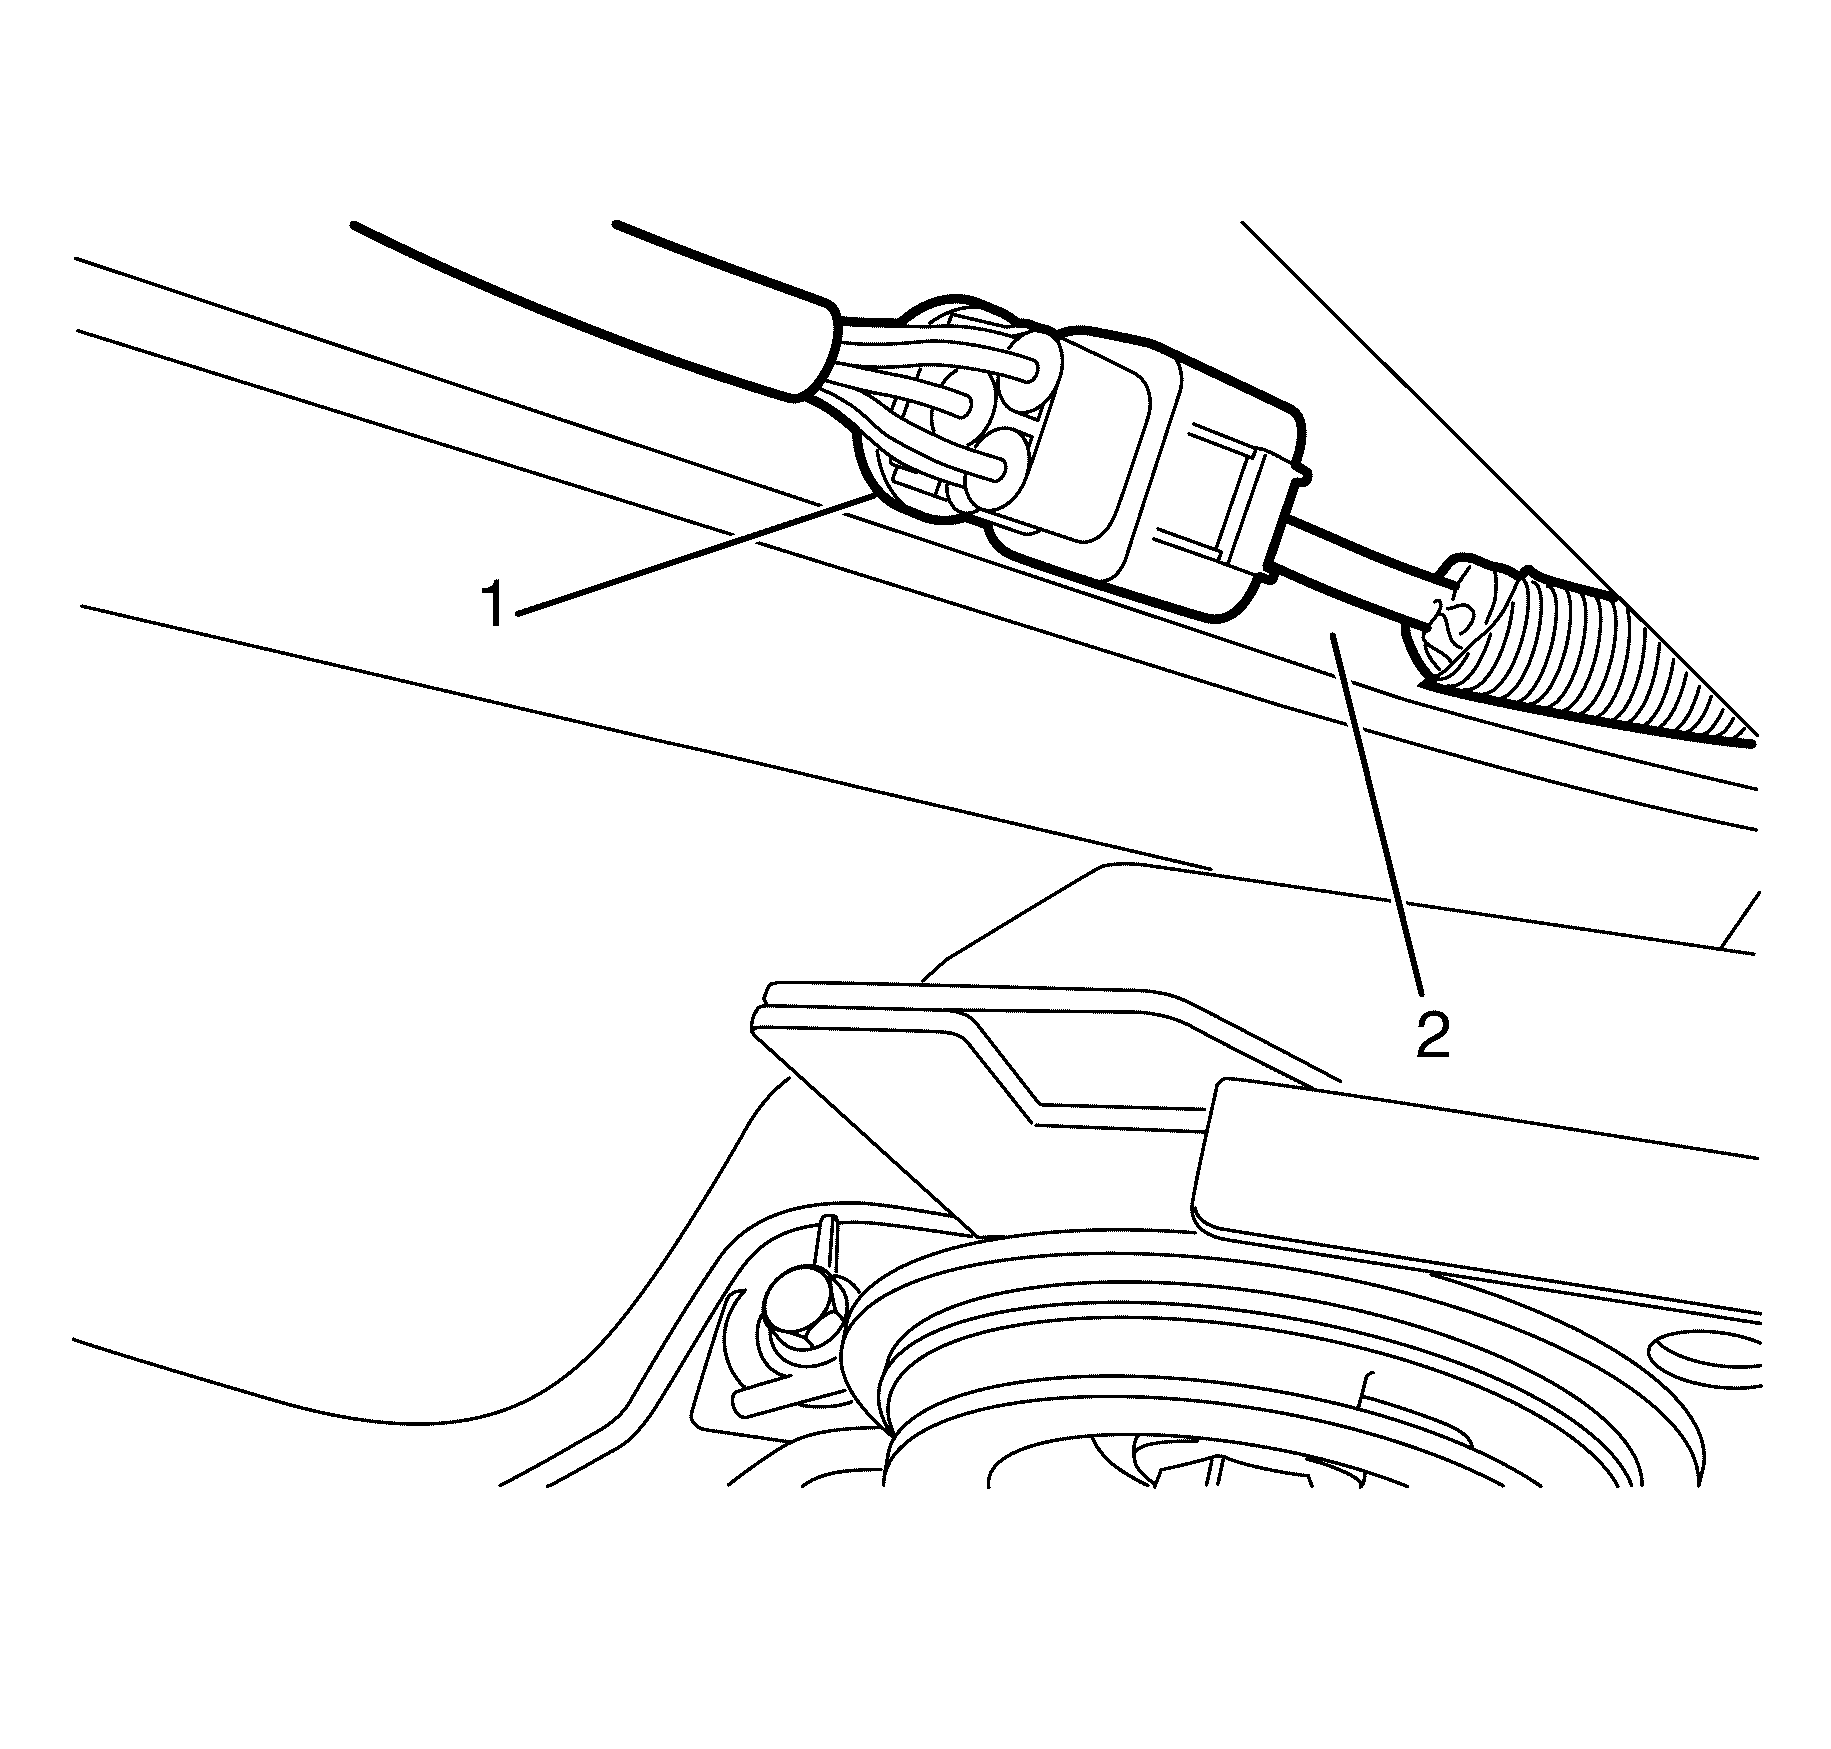
- Detach the electrical connector (1) from the right hand rail (2).
- Disconnect the wheel speed sensor jumper harness electrical connector (1).
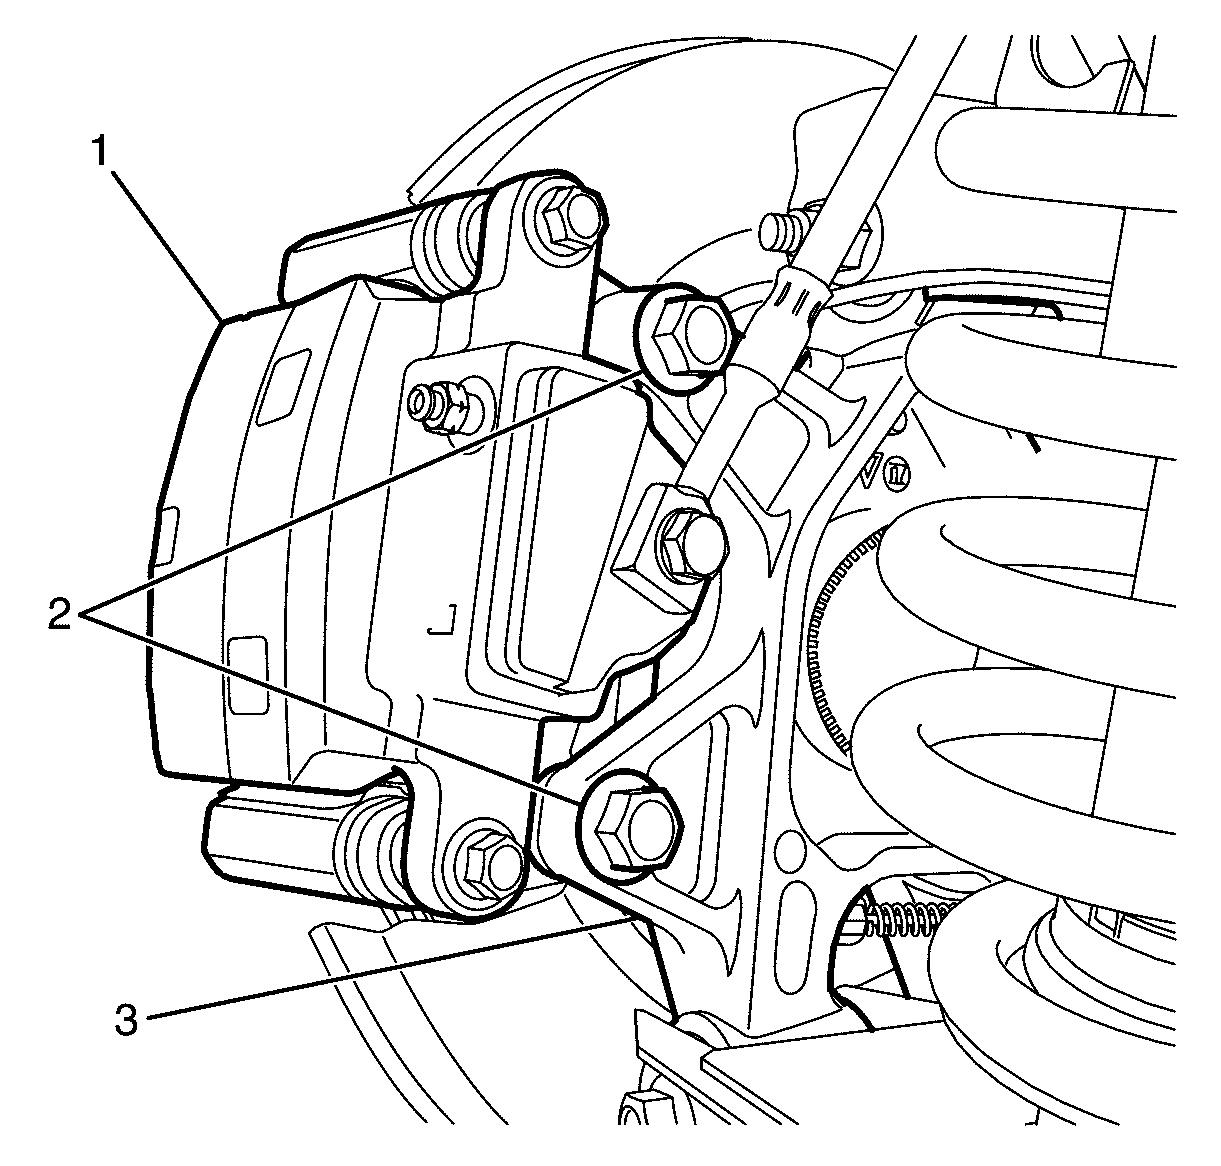
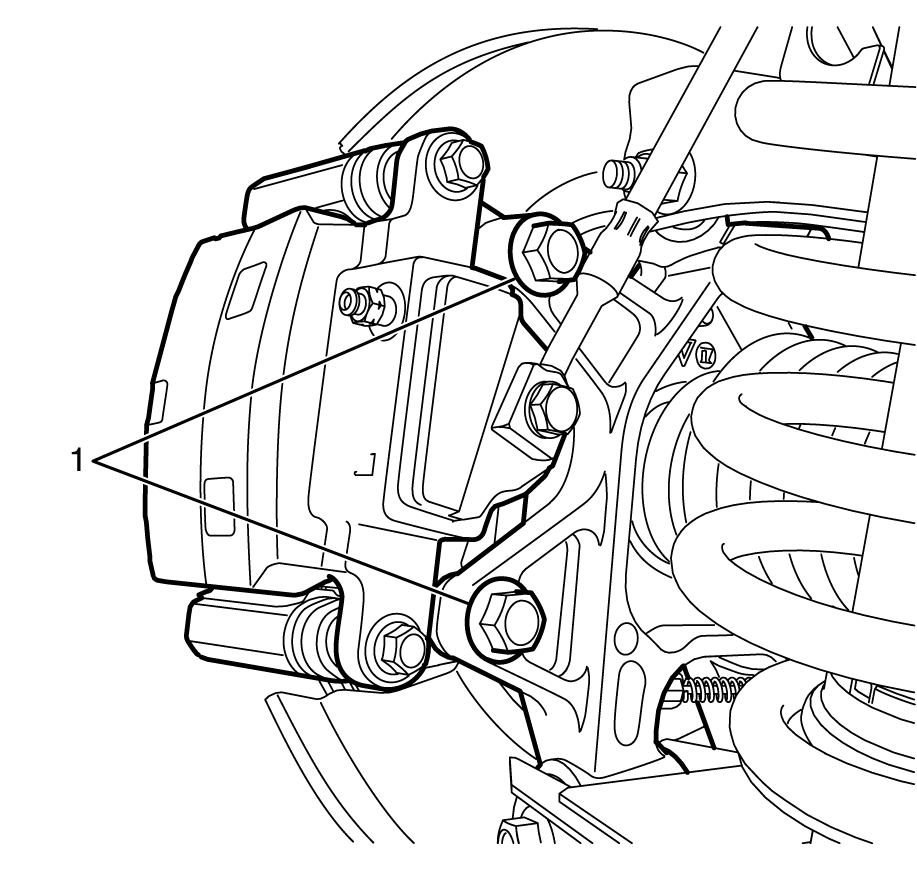
- Remove the brake caliper anchor plate to knuckle retaining bolts (2).
- Remove the brake caliper (1) from the knuckle (3).
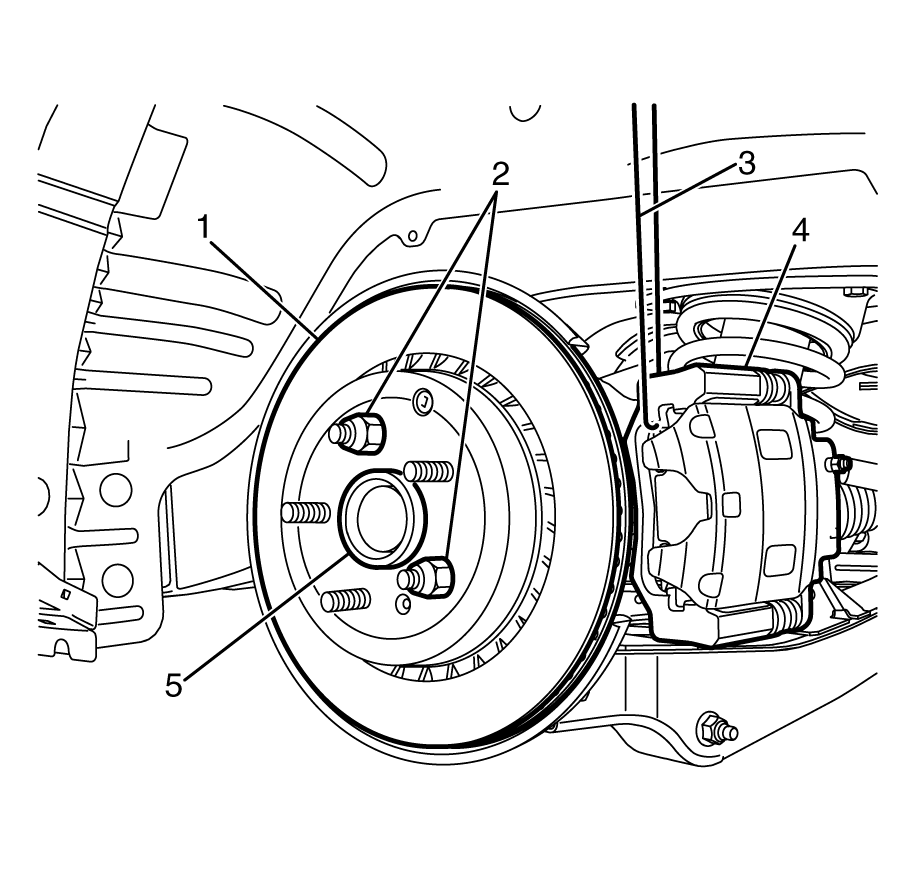
- Support the brake caliper (4) with heavy mechanic's wire, or equivalent (3).
- Install 2 wheel nuts (2) retaining the brake disc (1) to the hub (5).
- Clean all dirt and foreign material from the brake hose and the brake pipe fittings.
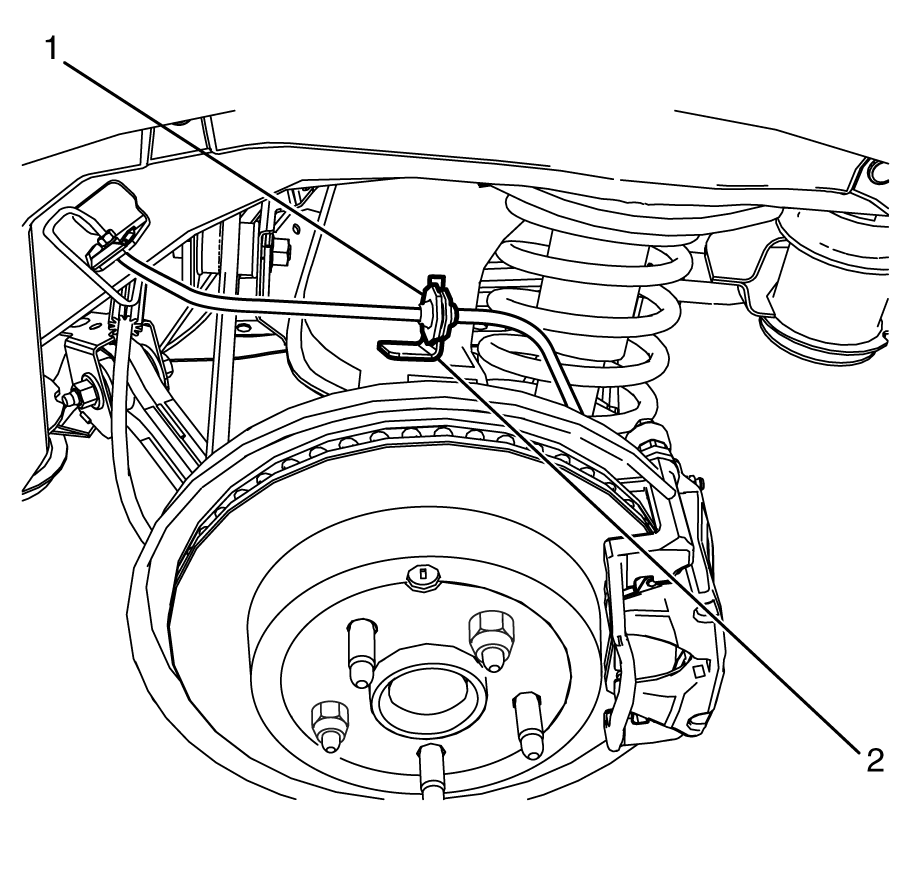
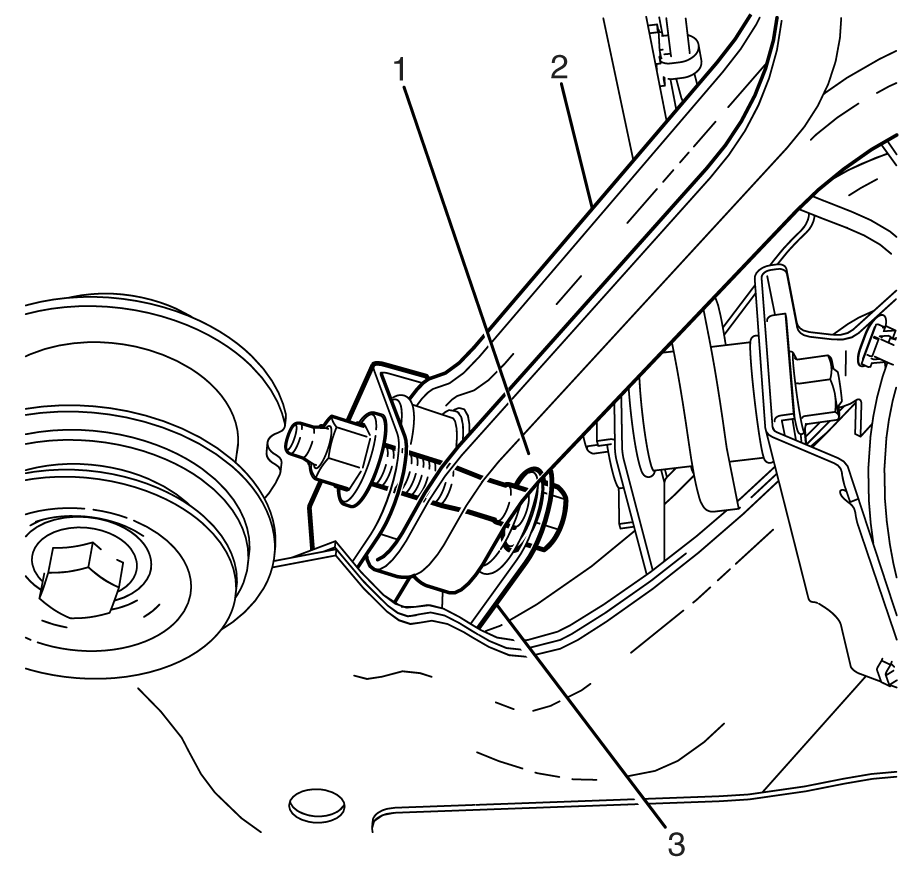
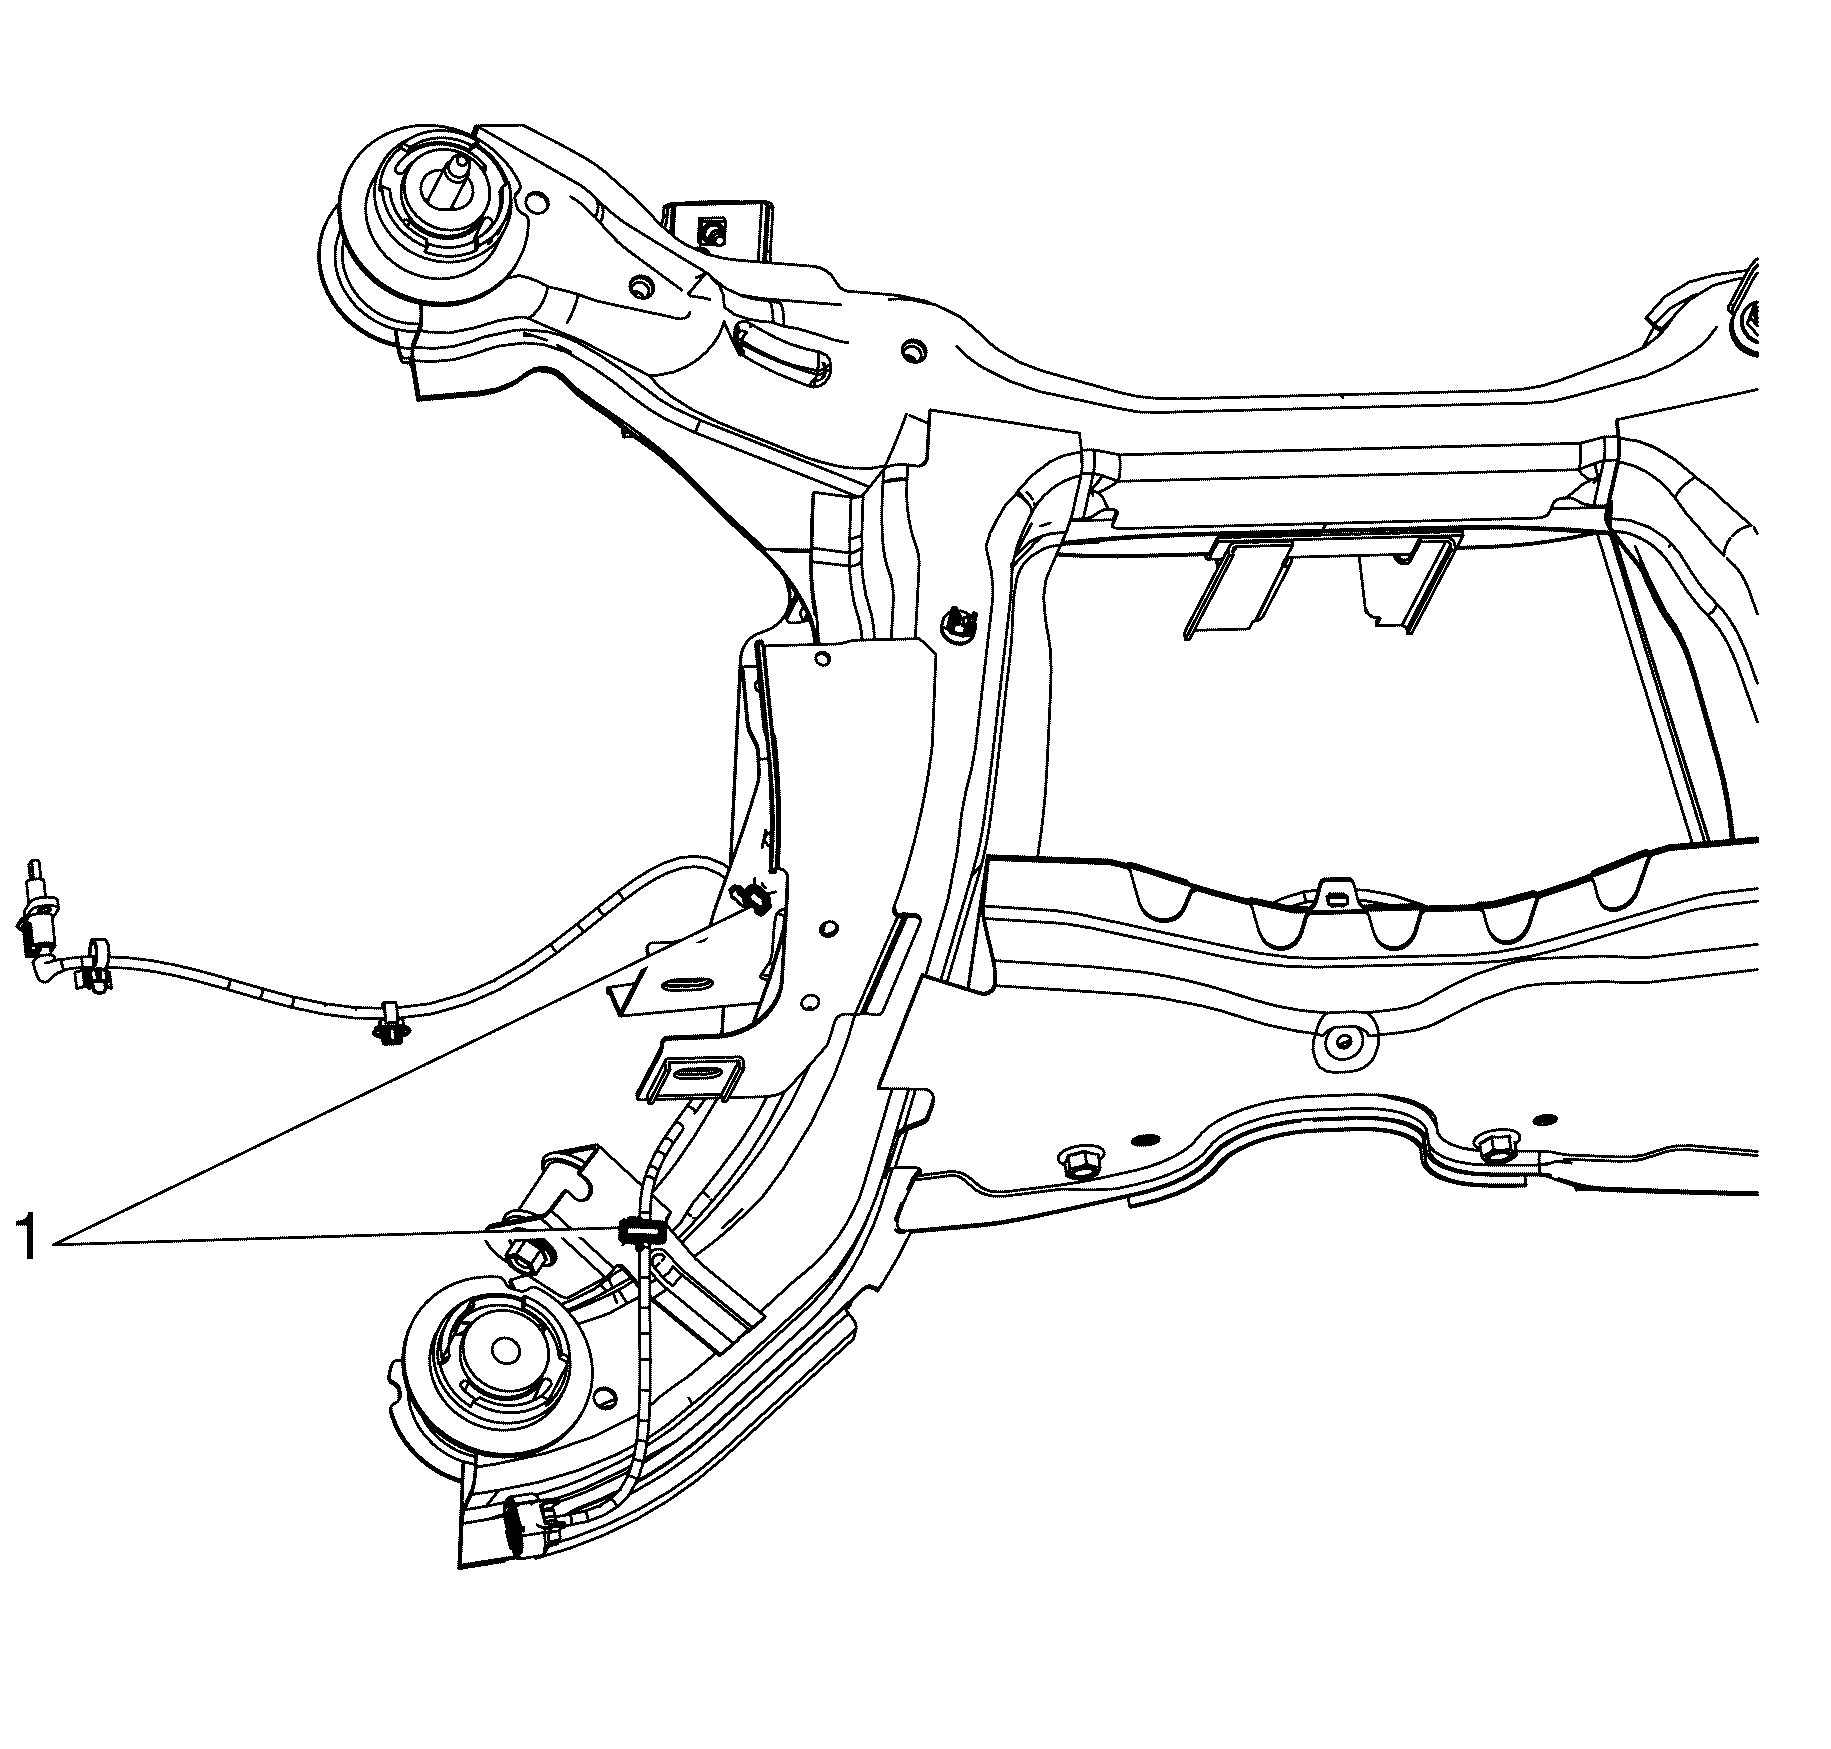
- Detach the brake hose (1) from the upper control arm mounted brake hose retaining bracket (2).
- Position the suitable frame support table under the vehicle.
- Lower the vehicle to the frame support table.
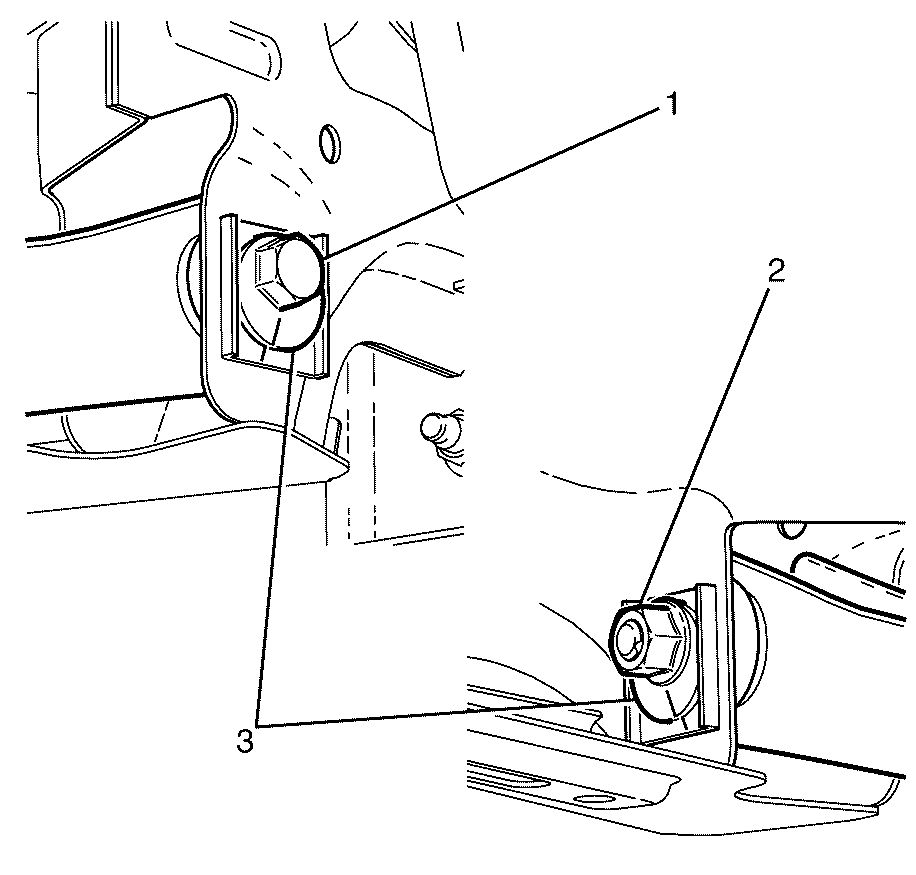
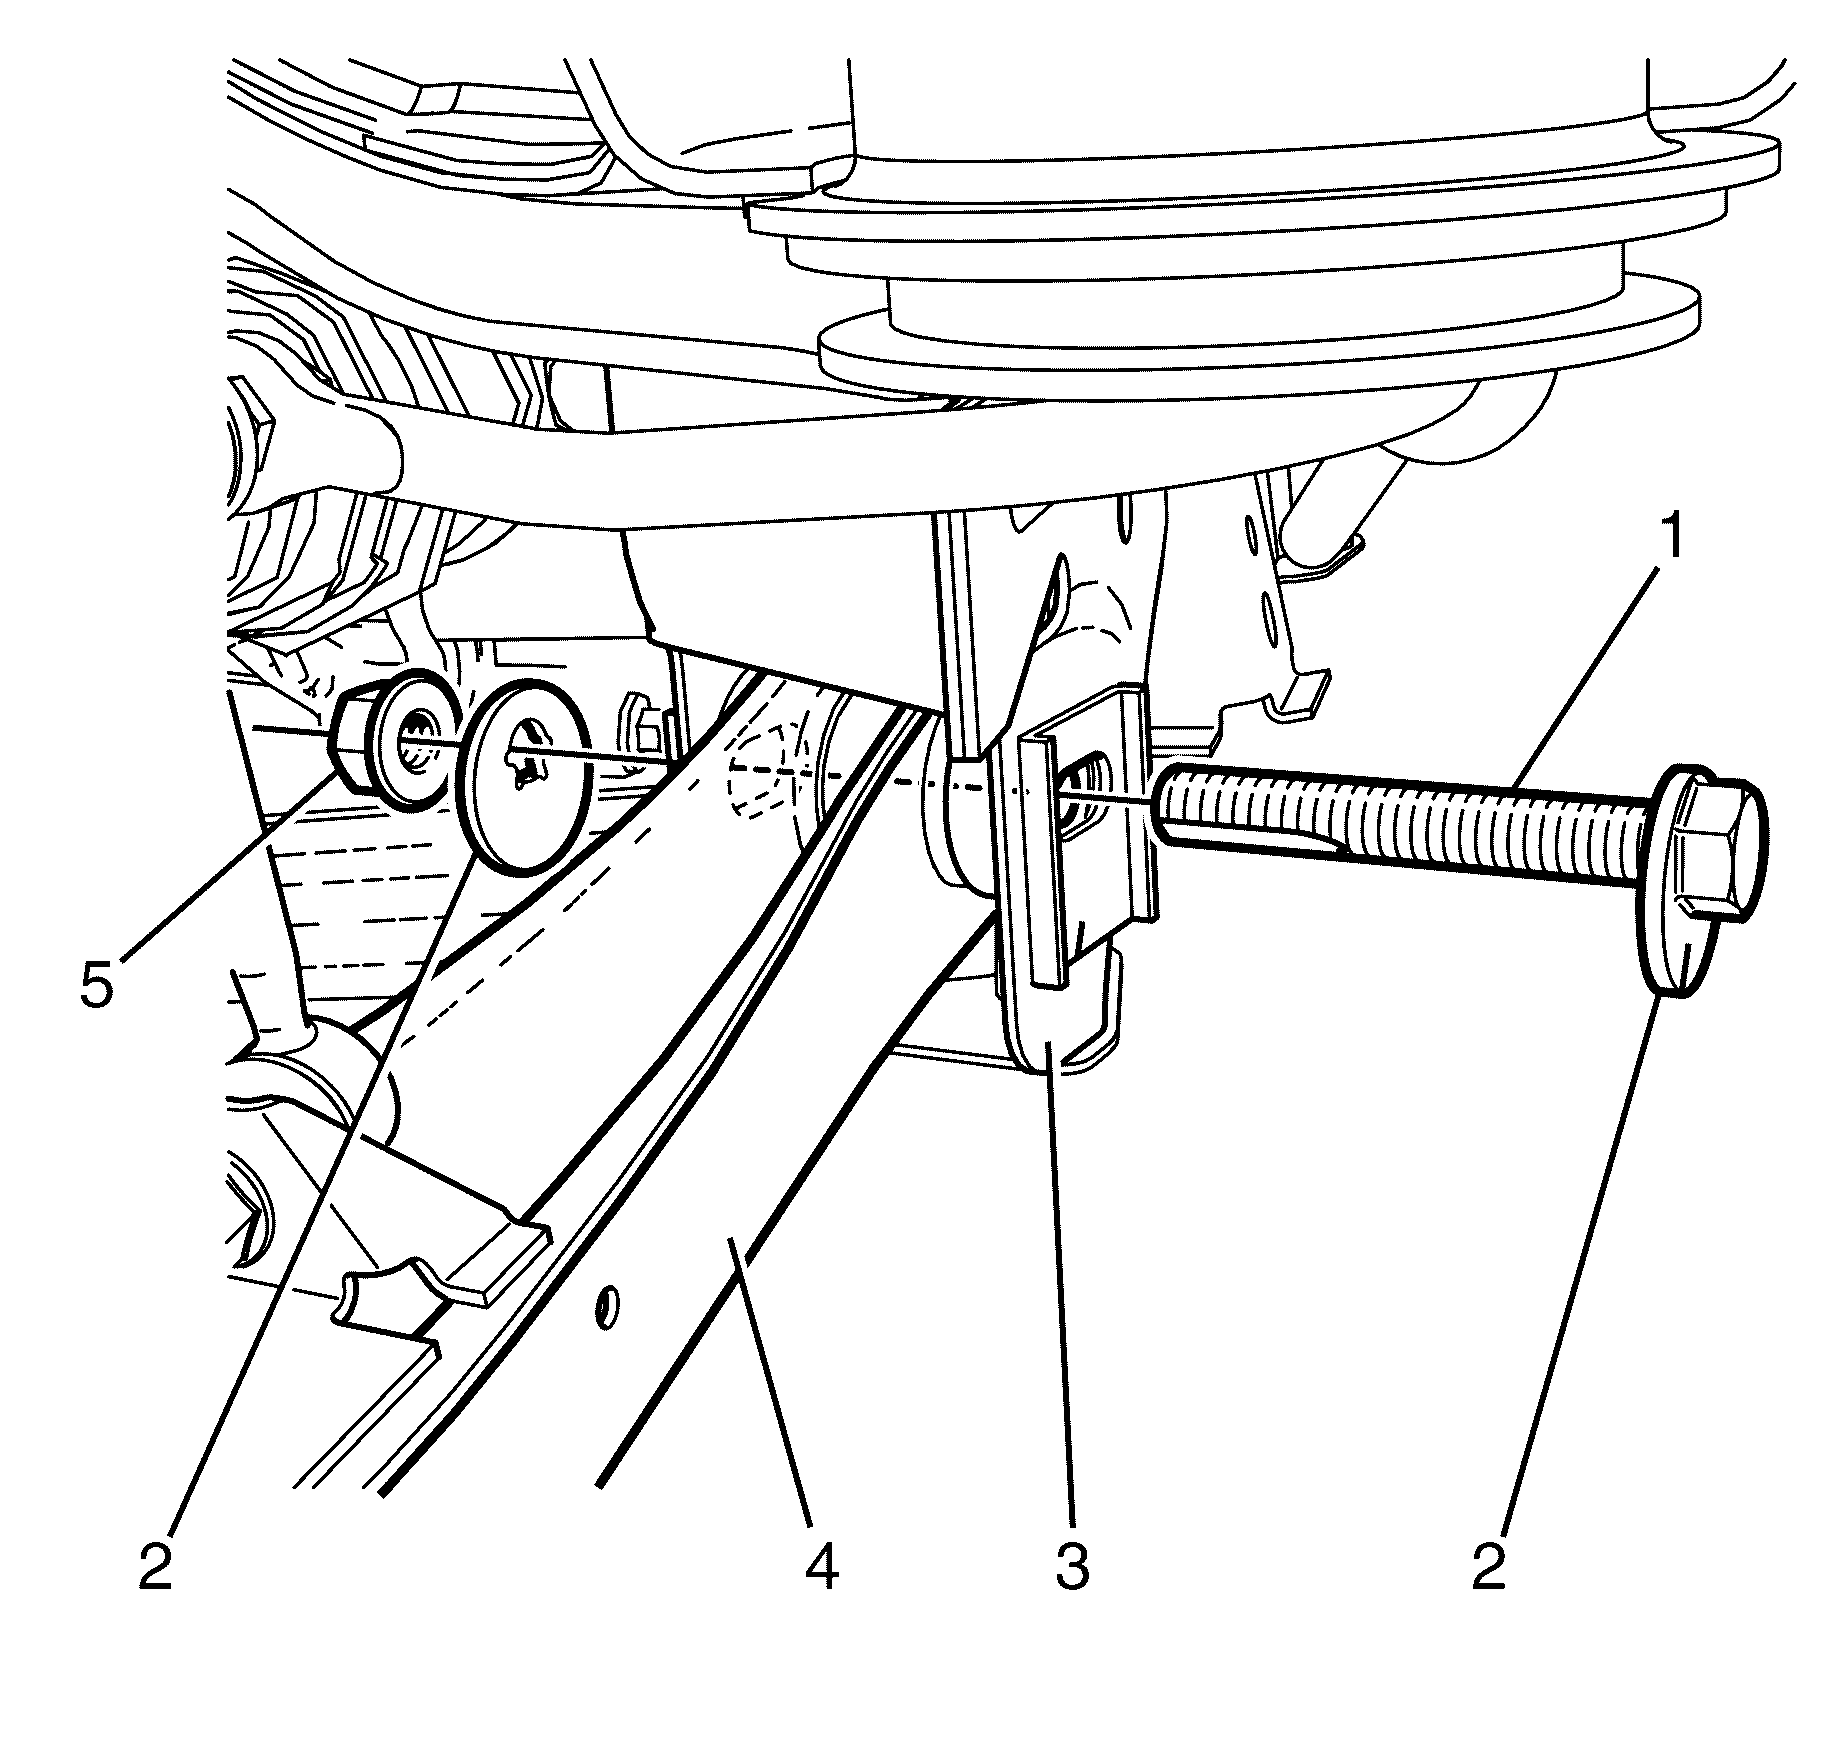
- Remove the rear sub frame to rear chassis rail retaining bolts (1).
- Carefully raise the vehicle from the rear frame assembly.
- Remove the stabiliser shaft link. Refer to Stabilizer Shaft Link Replacement .
- Remove the stabiliser shaft. Refer to Stabilizer Shaft Replacement .
- Remove the rear wheel hub and knuckle assembly. Refer to Knuckle Replacement .
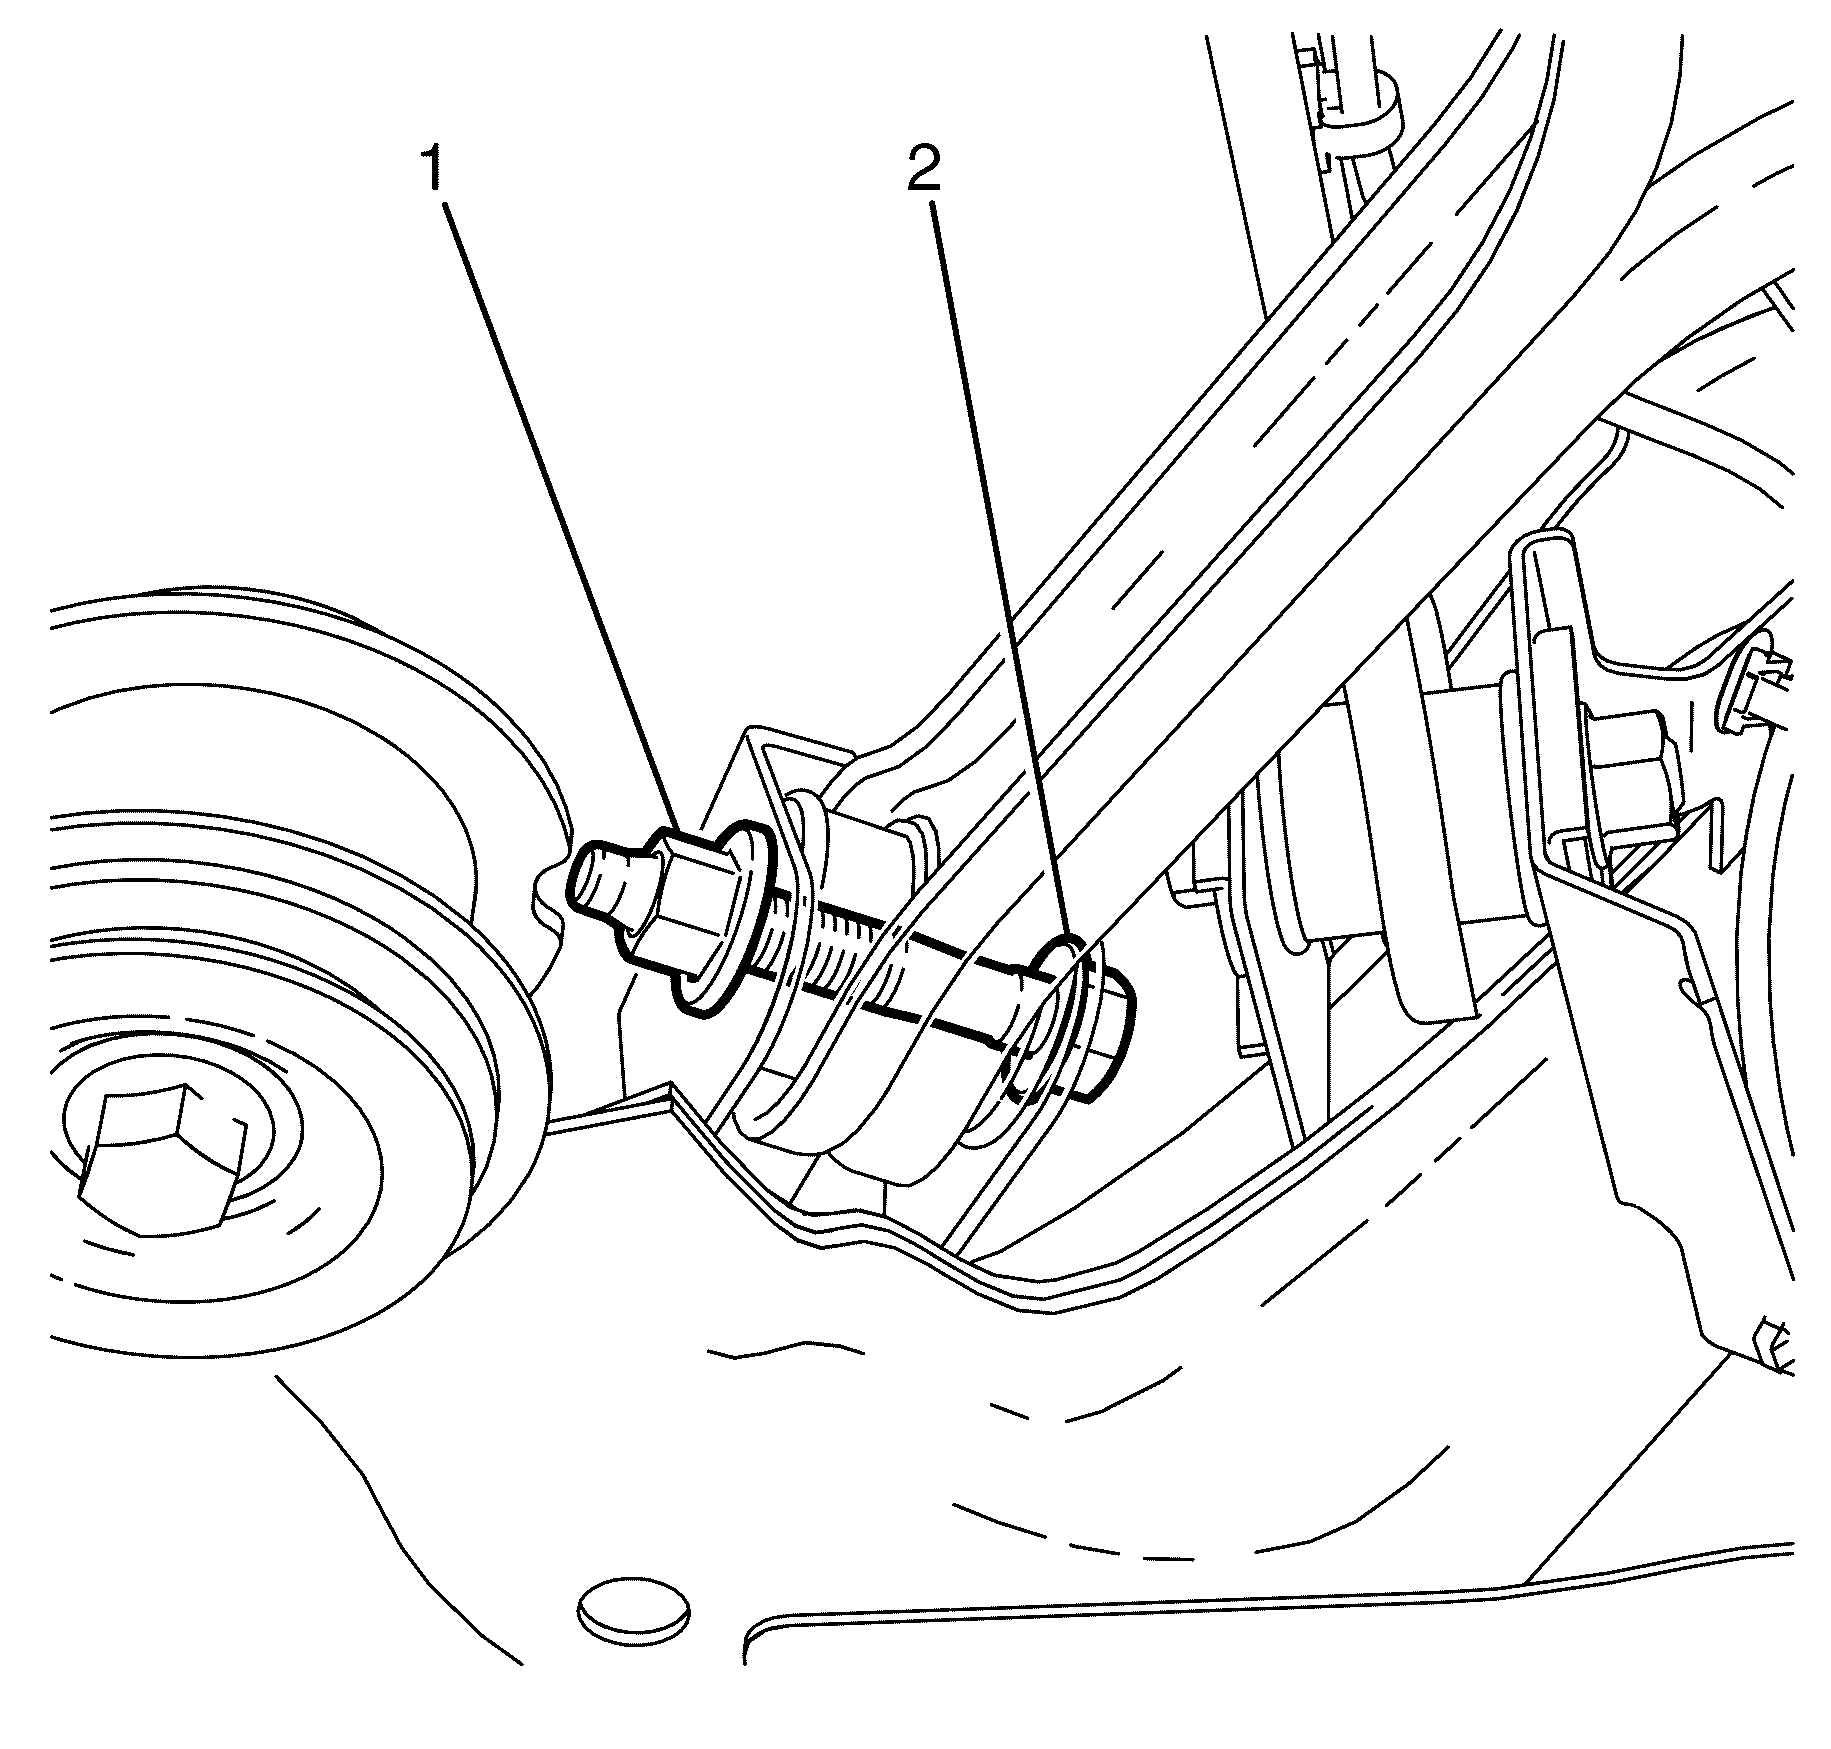
- Scribe the eccentric washers (3) with reference to their seating position relative to the rear subframe.
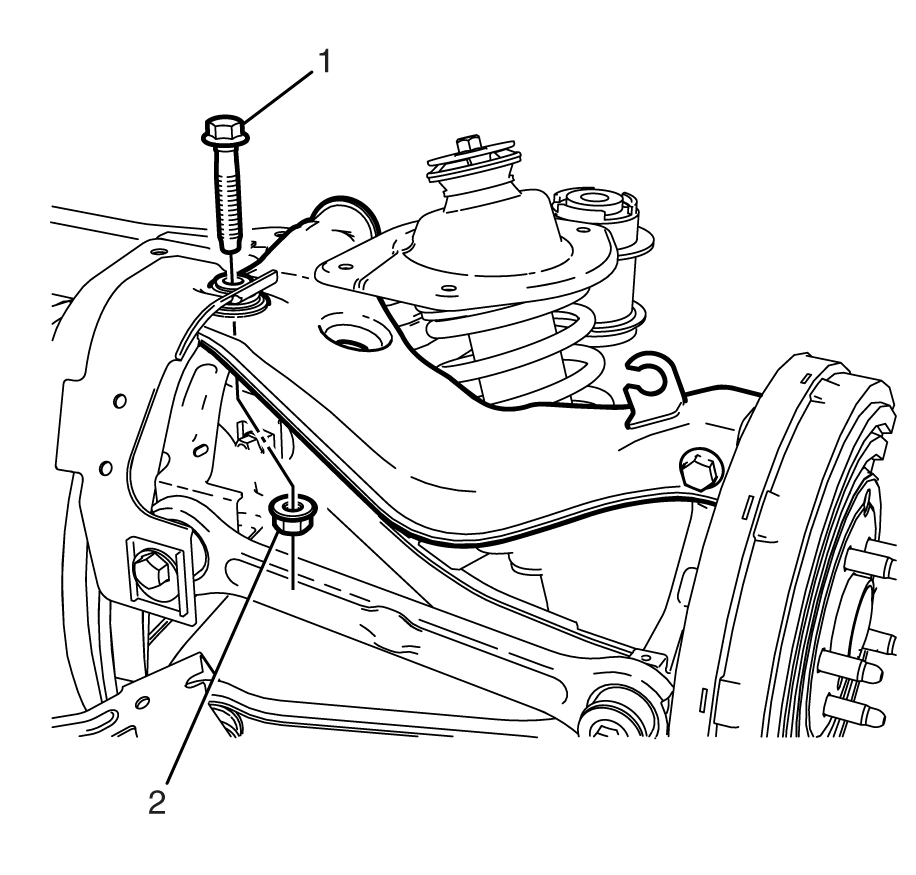
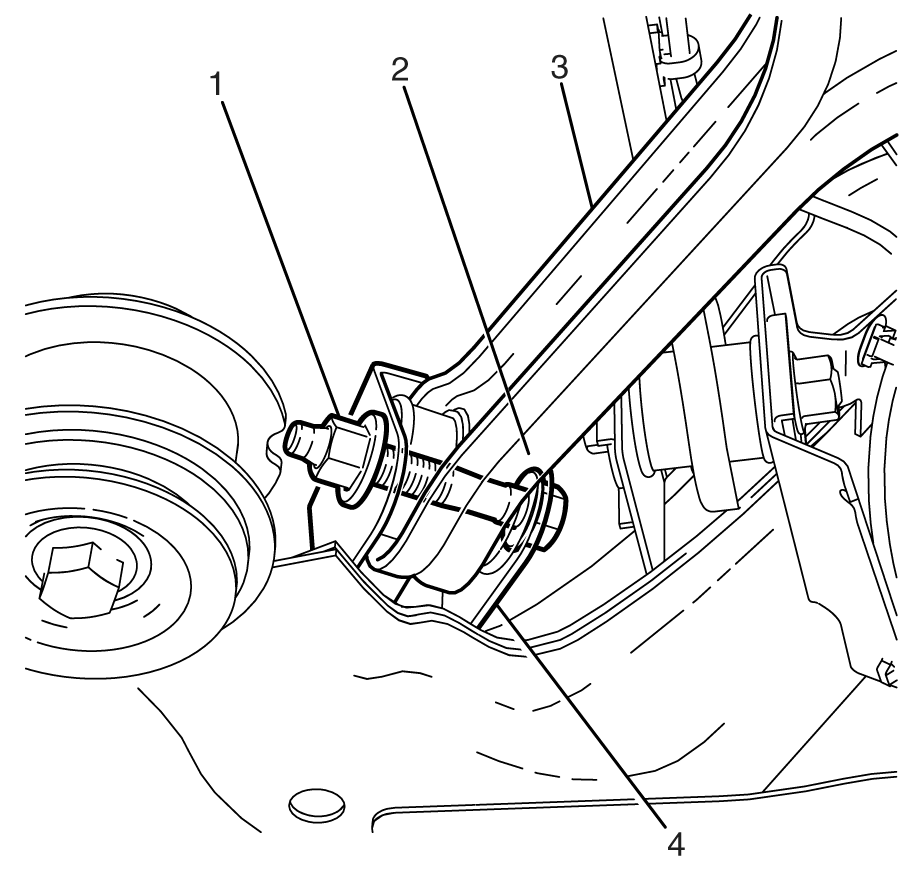
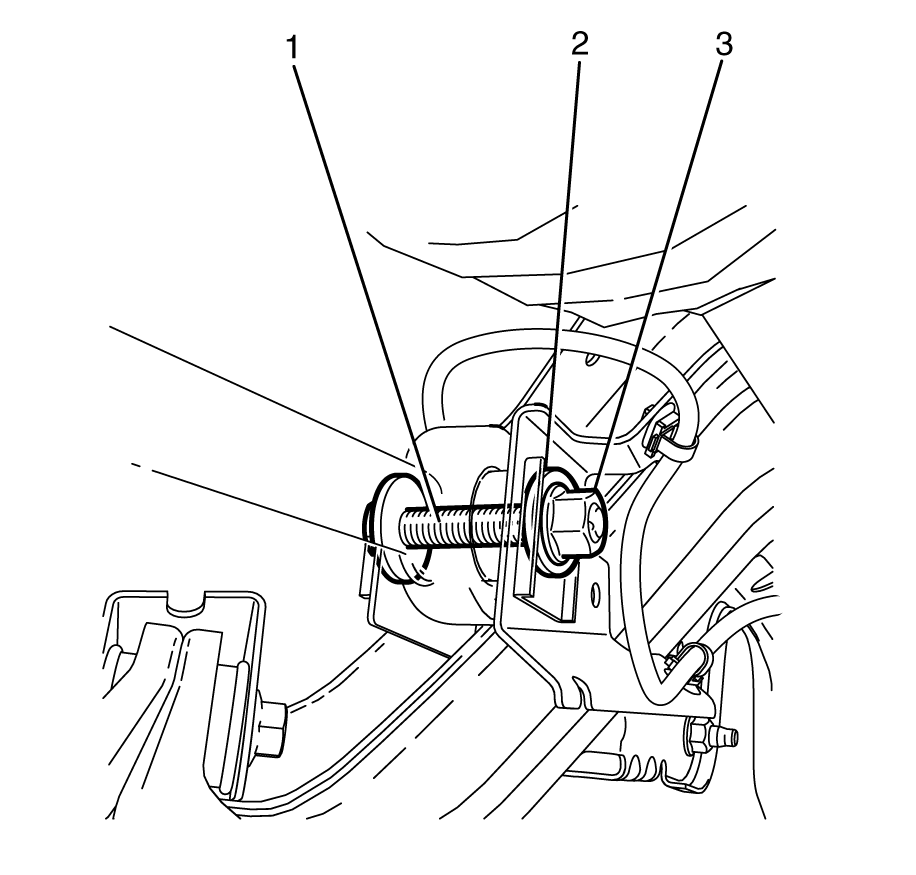
- Remove the lower control arm to rear subframe retaining bolt (1), nut (5) and washers (2).
- Remove the lower control arm (4) from the rear subframe (3).
- Remove the upper control arm pivot bushing. Refer to Control Arm Bushing Replacement .
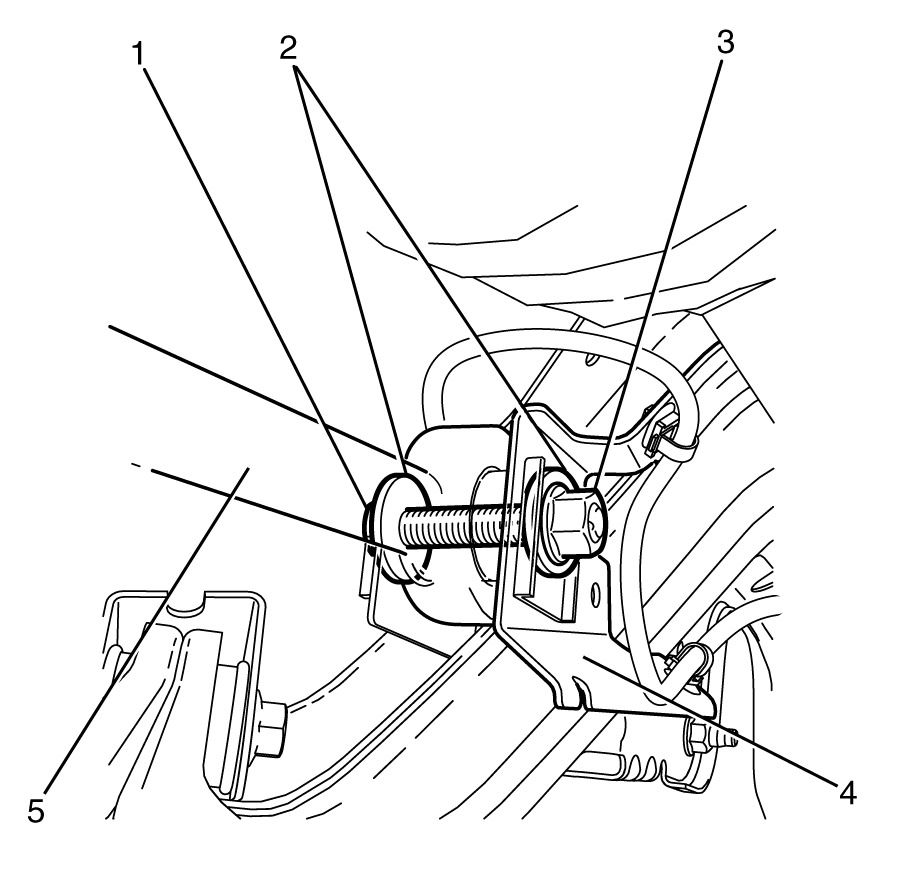
- Remove the upper control arm ball joint bushing to rear subframe retaining bolt (1) and nut (2).
- Remove the Y-Link to rear subframe retaining bolt (1).
- Remove the Y-Link (2) from the rear subframe (3).
- Remove the I-Link to rear subframe retaining bolt (1), nut (3) and washers (2).
- Remove the I-Link (5) from the rear subframe (4).
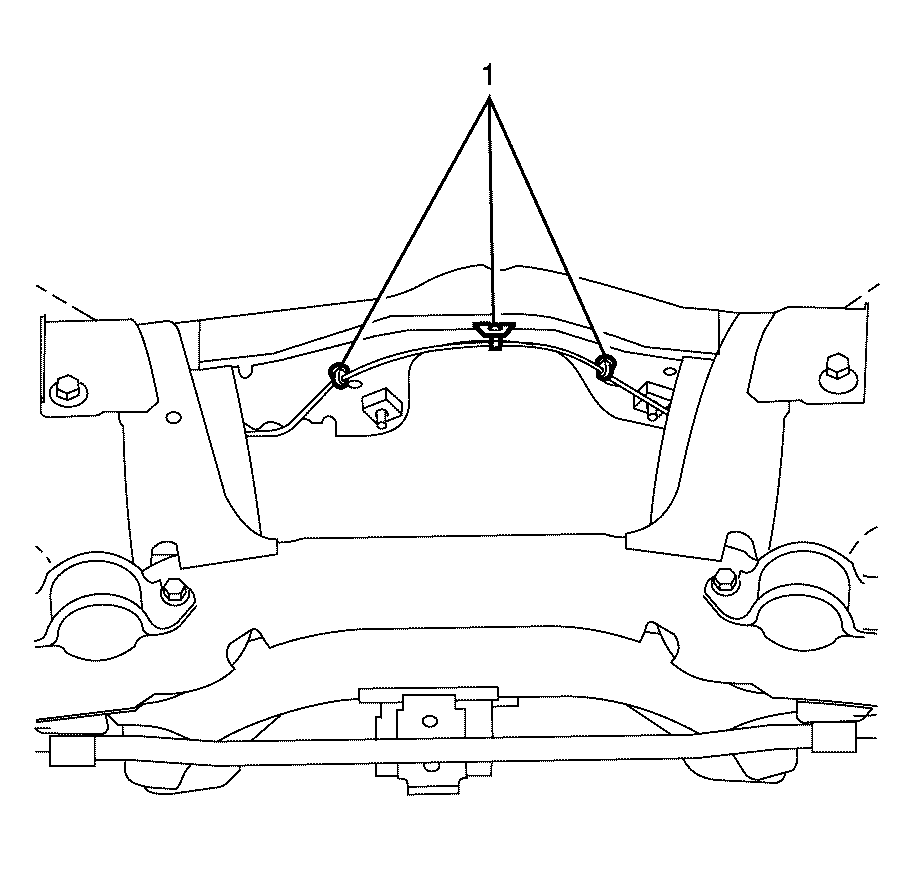
- Disconnect the rear subframe wiring harness to rear subframe centre retaining clips (1).
- Disconnect the rear subframe wiring harness to rear subframe side retaining clips (1).
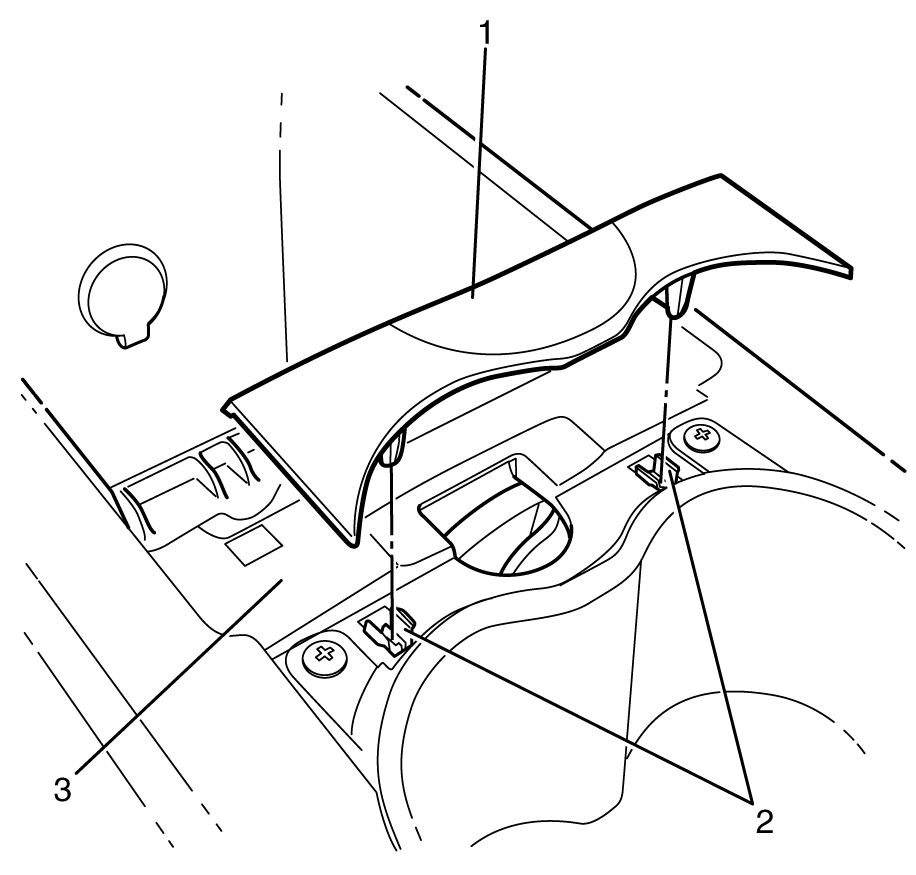
Important: The park brake cable adjustment bolt cover trim (1) is retained by two clips (2). Gently pry upwards with fingers at the front floor console armrest latch to remove.
Important: Bolts with micro-encapsulated thread sealant must be discarded after removal.
Discard the bolts.
Important: DO NOT disconnect the hydraulic brake flexible hose from the brake caliper otherwise complete bleeding of the braking system will be necessary.
Notice: Refer to Brake Caliper Notice in the Preface section.

Important: The lower control arm to rear subframe retaining bolt (1) and nut (2) eccentric washers (3) are used to adjust the rear suspension camber. One eccentric washer (3) is mounted directly to the head of the lower control arm to rear subframe retaining bolt (1).
Important: Prevailing torque nuts must be discarded after removal.
Discard the nut.
Important: Prevailing torque nuts must be discarded after removal.
Discard the nut.
Important: Bolts with micro-encapsulated thread sealant must be discarded after removal.
Discard the bolt.
Important: Bolts with micro-encapsulated thread sealant must be discarded after removal.
Discard the nut.
Installation Procedure
- Connect the rear subframe wiring harness to rear subframe side retaining clips (1).
- Connect the rear subframe wiring harness to rear subframe center retaining clips (1).
- Install the I-Link (5) to the rear subframe (4).
- Install the I-Link to rear subframe NEW retaining bolt (1) and washers (2).
- Install the Y-Link (2) to the rear subframe (3).
- Install the Y-Link to rear subframe retaining bolt (1)
- Install the upper control arm ball joint bushing to rear subframe retaining bolt (1) and NEW nut (2).
- Install the upper control arm pivot bushing. Refer to Control Arm Bushing Replacement .
- Install the lower control arm (4) into the rear subframe (3).
- Install the lower control arm to rear subframe retaining bolt (1).
- Install the eccentric washer (2) and the NEW nut (5).
- Install the rear wheel hub and knuckle assembly. Refer to Knuckle Replacement .
- Install the stabiliser shaft. Refer to Stabilizer Shaft Replacement .
- Install the stabiliser shaft link. Refer to Stabilizer Shaft Link Replacement .
- Lower the vehicle to the subframe.
- Index the rear side subframe mounts to the rear locator sleeves located on the body.
- Lower the vehicle until the rear subframe mounts contact the body rail.
- Install the rear subframe to rear chassis rail retaining bolts and washers (1).
- Raise the vehicle.
- Remove the suitable rear subframe support table from under the vehicle.
- Attach the brake hose (1) to the upper control arm mounted brake hose retaining bracket (2).
- Remove the heavy mechanic's wire, or equivalent support (3) from the brake caliper (4).
- Position the brake caliper (4) to the brake disc (1) and hub (5).
- Install the NEW brake caliper anchor plate to knuckle retaining bolts.
- Remove the 2 wheel nuts (2) from the brake disc (1).
- Tighten the NEW brake caliper anchor plate to knuckle retaining bolts (1).
- Install the top strut assembly to body retaining bolts (1).
- Connect the wheel speed sensor jumper harness electrical connector (1).
- Attach the electrical connector (1) to the right hand rail (2).
- Install the differential. Refer to Differential Replacement .
- Install the wheel drive shafts. Refer to Wheel Drive Shaft Replacement .
- Install the propeller shaft. Refer to Propeller Shaft Replacement .
- Install the exhaust system. Refer to Exhaust System Replacement .
- Install the rear wheel. Refer to Tire and Wheel Removal and Installation .
- Lower the vehicle to the ground.
- Bounce the vehicle several times to settle the suspension.
- Align the marks on the eccentric washers (3) with the marks on the rear subframe.
- Tighten the lower control arm to rear subframe retaining bolt (1) and NEW nut (2).
- Tighten the Y-Link to rear subframe retaining bolt (2) and NEW nut (1).
- Tighten the I-Link to rear subframe retaining bolt (1), washer (2) and NEW nut (3).
- Adjust the park brake. Refer to Park Brake Adjustment .
- Install the park brake cable adjustment bolt cover trim (1) to the centre console (3).
- Check the wheel alignment of the vehicle. Refer to Wheel Alignment Measurement .
- Correct the wheel alignment of the vehicle, if necessary. Refer to Rear Camber Adjustment and Rear Toe Adjustment .
Important: The I-Link to rear subframe retaining bolt and nut must not to be fully tightened at this stage.
Do not fully tighten at this stage.
Important: The Y-Link to rear subframe retaining bolt (2) and NEW nut (1) must not to be fully tightened at this stage.
Do not fully tighten at this stage.
Notice: Refer to Fastener Notice in the Preface section.
| • | Tighten the bolt and nut first pass to 80 N·m(60 lb ft). |
| • | Tighten the bolt and nut final pass another 120 Degrees. |
Important: The eccentric washers (2) must be fitted correctly in terms of their orientation and alignment marks.
Important: Do not fully tighten the lower control arm to rear subframe retaining bolt (1) and NEW nut (5) at this stage.
Do not fully tighten at this stage.
Important: Make sure the intermediate brake cable is clear of the rear frame to body mount prior to securing the rear subframe retaining bolts.
| • | Tighten the bolt and nut first pass to 65 N·m(48 lb ft). |
| • | Tighten the bolt and nut final pass another 125 Degrees. |
Important: Support the brake caliper (4) when the heavy mechanic's wire, or equivalent support (3) is removed.
Notice: Make sure the brake hose is not twisted or kinked after installation. Damage to the hose could result.
Do not fully tighten at this stage.
Tighten
Tighten the bolts to 110 N·m (81 lb ft).
Tighten
Tighten the bolts to 58 N·m (43 lb ft).
Important: The lower control arm to the rear subframe retaining bolt (1) and eccentric washers (3) are used to adjust rear suspension camber.
Tighten
Tighten the bolt 175 N·m (129 lb ft).
Tighten
Tighten the bolt and nut to 170 N·m
(126 lb ft).
Tighten
Tighten the bolt and nut to 170 N·m
(126 lb ft).
Important: The park brake cable adjustment bolt cover trim (1) is retained by two clips (2).
