Rear Bumper Fascia Replacement Except HSV Maloo
Removal Procedure
- Raise and support the vehicle. Refer to Lifting and Jacking the Vehicle.
- Remove the rear wheels. Refer to Tire and Wheel Removal and Installation.
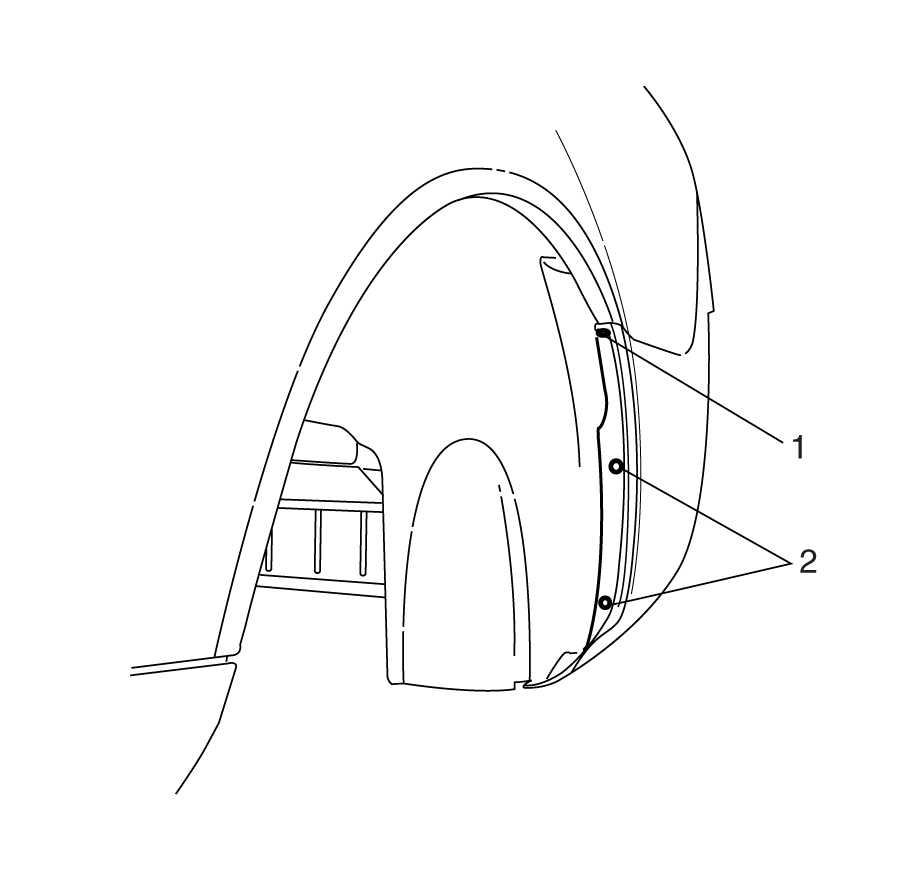
- Remove the rear wheelhouse liner to rear bumper fascia retaining scrivets (2). Repeat for the opposite side.
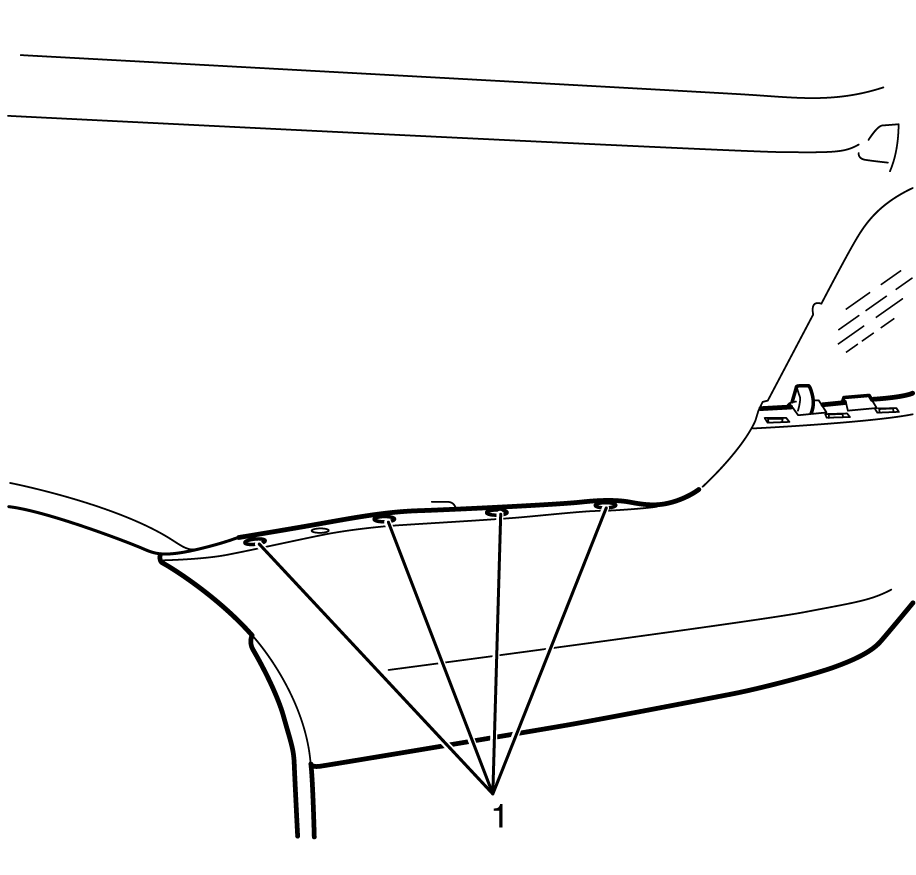
- Remove the rear bumper fascia to rear quarter panel retaining screw (1). Repeat for the opposite side.
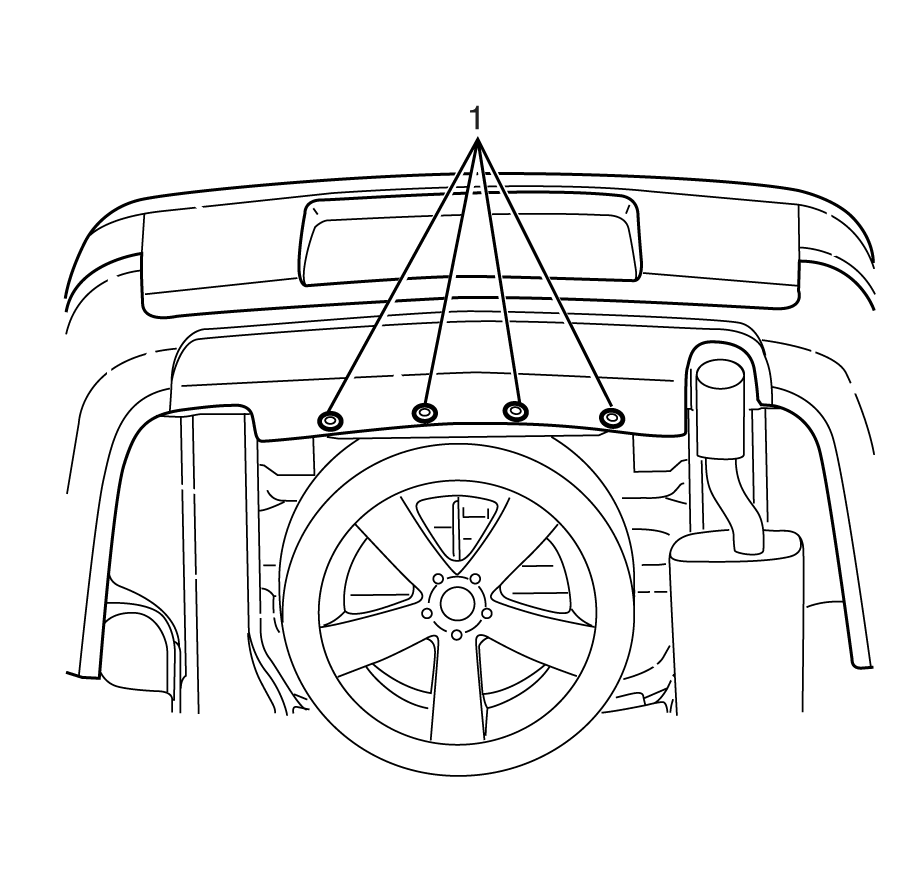
- Remove the rear bumper fascia to rear end panel retaining scrivets (1).
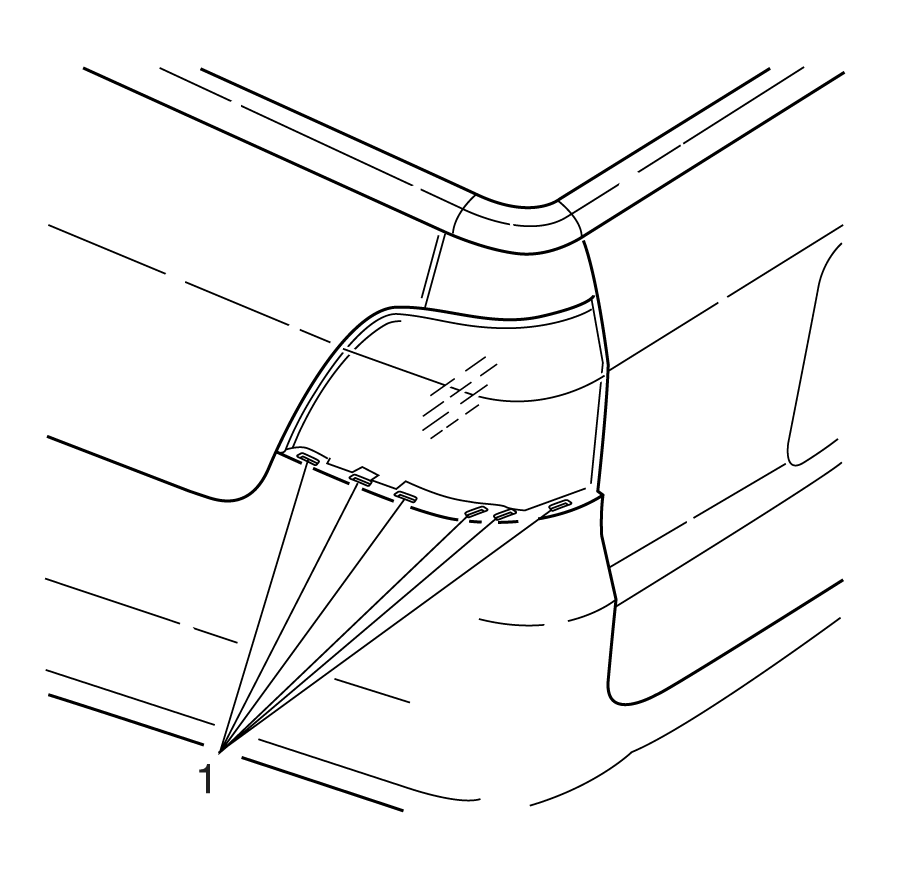
- Disengage the rear bumper fascia to rear bumper fascia guide rail retaining tabs (1). Repeat for the opposite side.
- Disengage the rear bumper fascia to rear bumper fascia outer support retaining tabs (1). Repeat for the opposite side.
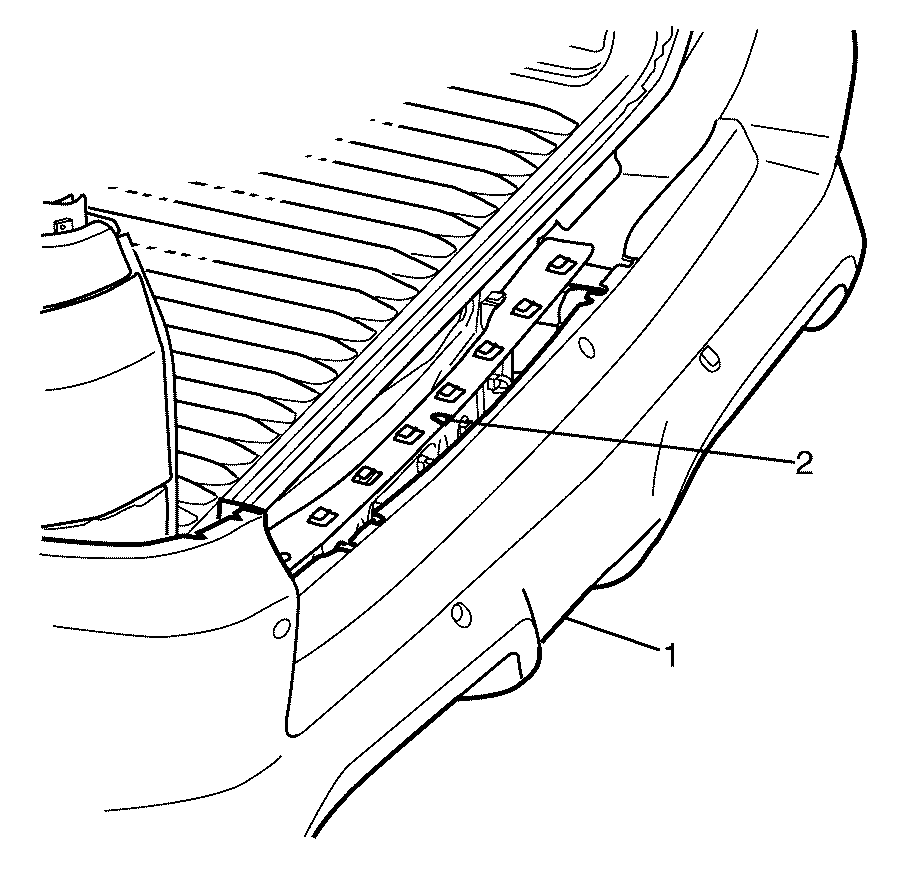
- Remove the rear bumper fascia (1) from the rear bumper fascia centre support (2).
Caution: Refer to Safety Glasses Caution in the Preface section.
Caution: Refer to Vehicle Lifting Caution in the Preface section.
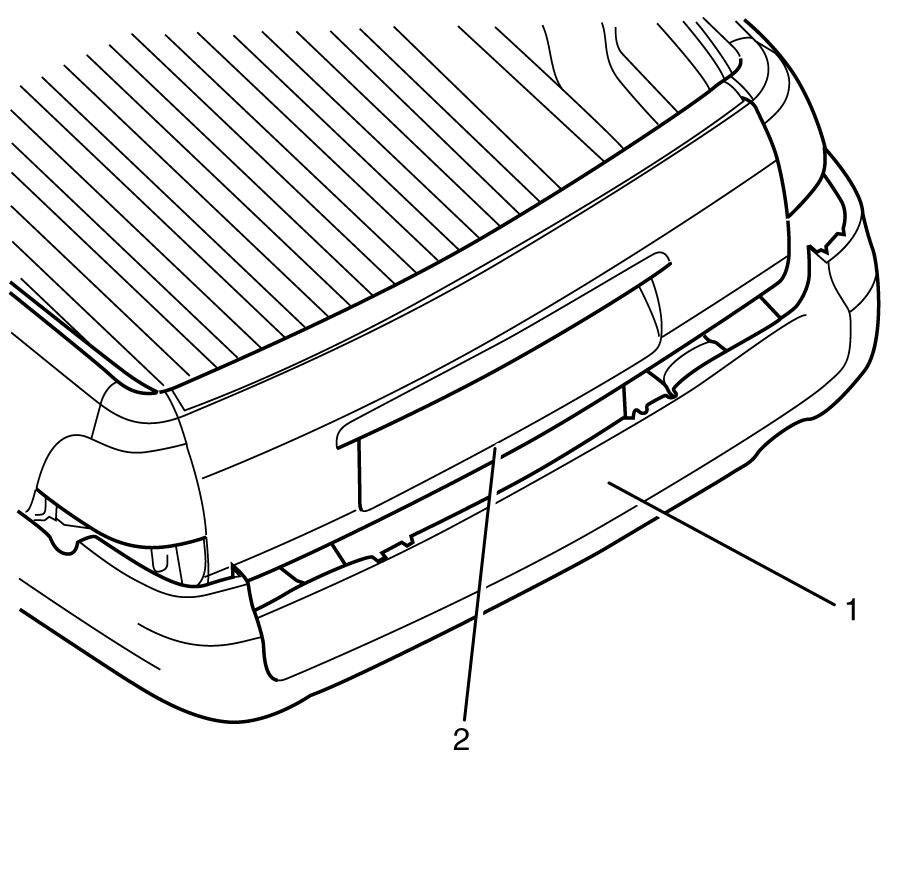
Important: With the aid of an assistant, remove the rear bumper fascia by sliding rearward to disengage the rear bumper fascia (1) from the rear bumper fascia centre support (2).
Installation Procedure
- Install the rear bumper fascia (1) to the rear bumper fascia centre support (2).
- Engage the rear bumper fascia to rear bumper fascia outer support retaining tabs (1). Repeat for the opposite side.
- Engage the rear bumper fascia to rear bumper fascia guide rail retaining tabs (1). Repeat for the opposite side.
- Install the rear bumper fascia to rear end panel retaining scrivets (1).
- Install the rear bumper fascia to rear quarter panel retaining screws (1). Repeat for the opposite side.
- Install the rear wheelhouse liner to rear bumper fascia retaining scrivets (2). Repeat for the opposite side.
- Install the rear wheels. Refer to Tire and Wheel Removal and Installation.
- Lower the vehicle.

Important: Listen for an audible click when attaching the rear bumper fascia to the rear bumper fascia centre support to confirm correct fitment.
Important: With the aid of an assistant, install the rear bumper fascia (1) by sliding forward to correctly attach the rear bumper fascia (1) to the rear bumper fascia centre support (2).

Important: Listen for an audible click from the rear bumper fascia to rear bumper fascia outer support retaining tabs (1) to confirm correct fitment.

Important: Listen for an audible click from the rear bumper fascia to rear bumper fascia guide rail retaining tabs (1) to confirm correct fitment.

Notice: Refer to Fastener Notice in the Preface section.

Tighten
Tighten the screw to 2 N·m (18 lb in).
Rear Bumper Fascia Replacement HSV Maloo
Removal Procedure
- Raise and support the vehicle. Refer to Lifting and Jacking the Vehicle .
- Remove the rear wheels. Refer to Tire and Wheel Removal and Installation .
- Remove the rear bumper fascia to rear quarter panel retaining screw (1) and scrivets (2).
- Remove the rear bumper fascia to rear end panel retaining scrivets (1).
- Disengage the rear bumper fascia to rear bumper fascia guide rail retaining tabs (1).
- Disengage the rear bumper fascia to rear bumper fascia outer support retaining tabs (1).
- Disconnect the rear object detection electrical connector (1).
- Remove the rear bumper fascia (1) from, the rear bumper fascia centre support (2).
- Remove the bumper fascia (1).
Caution: Refer to Safety Glasses Caution in the Preface section.

Repeat for opposite side.
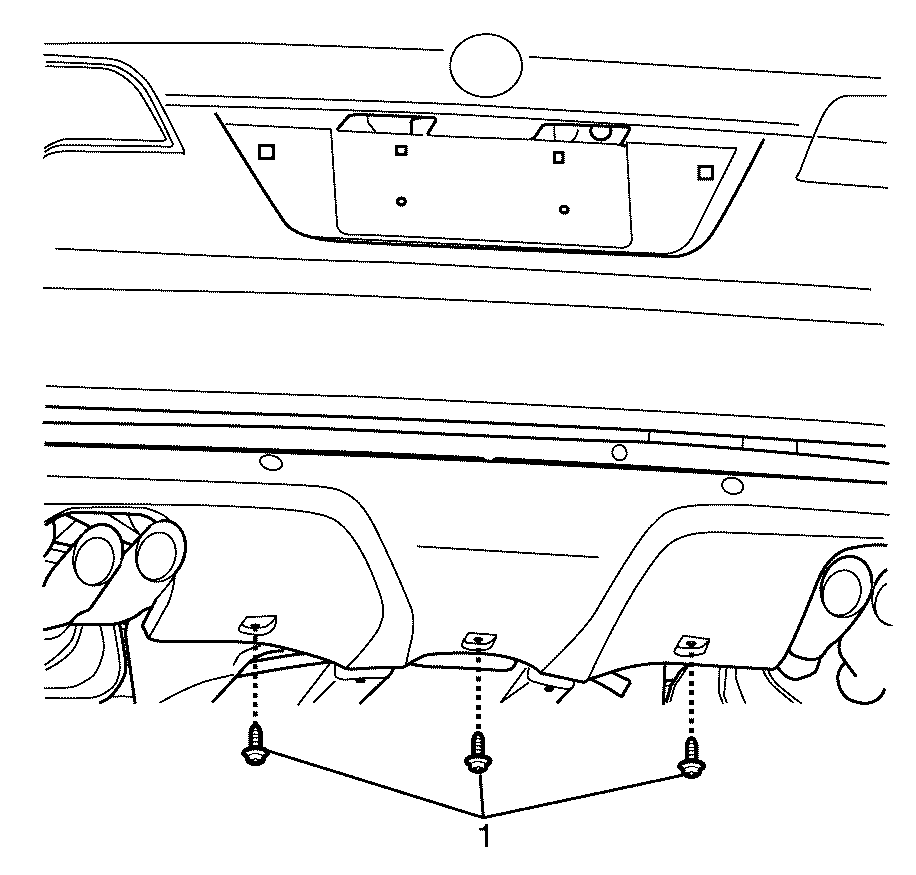

Repeat for opposite side.
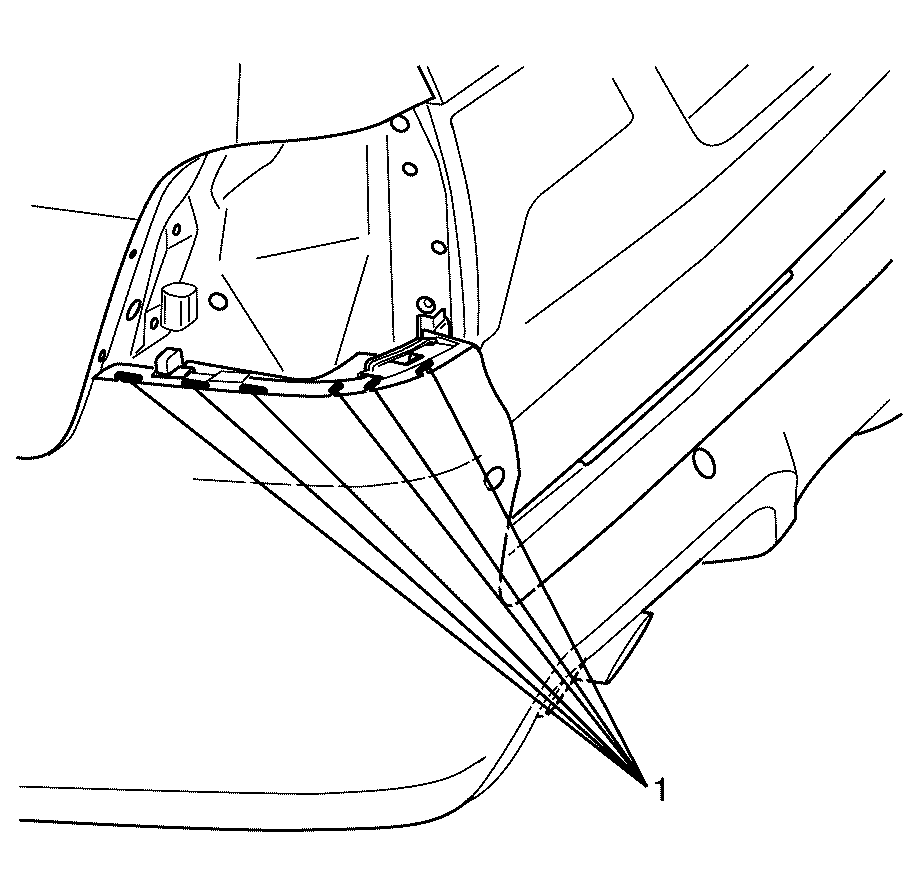
Repeat for opposite side.
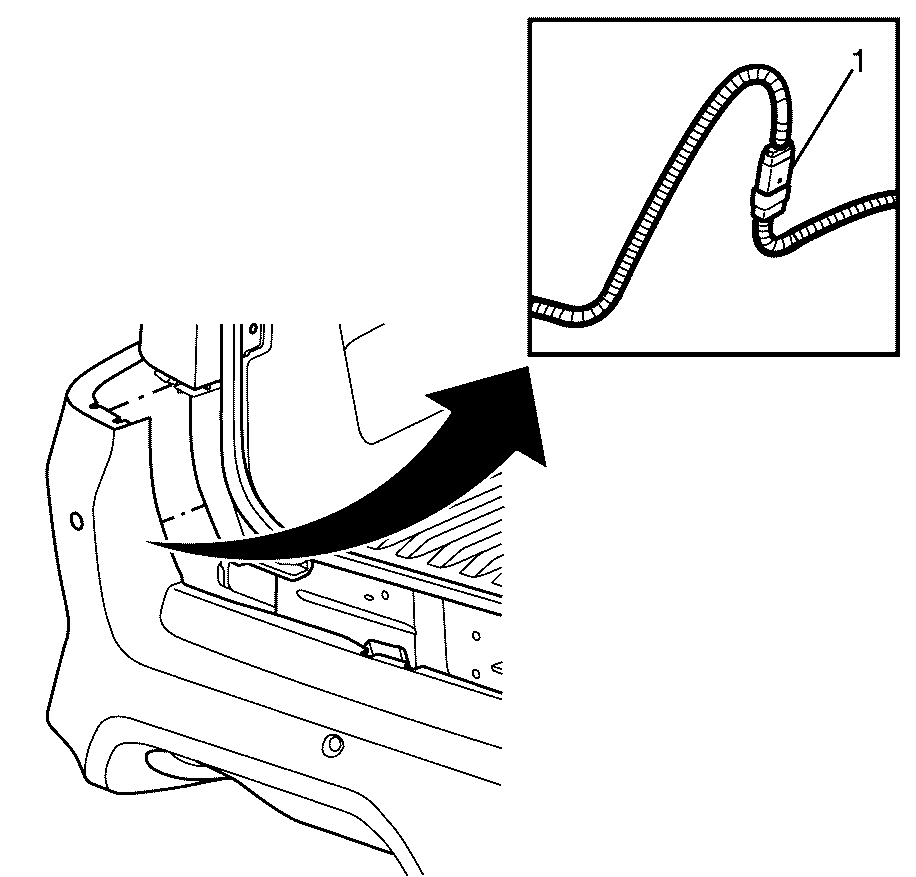
Important: The rear object detection electrical connector must be disconnected before removing the rear bumper fascia.
Important: With the aid of an assistant, remove the rear bumper fascia by sliding rearward to disengage the rear bumper fascia from the rear bumper fascia centre support.
Installation Procedure
- Connect the rear object detection electrical connector (1).
- Install the rear bumper fascia (1) to the rear bumper fascia centre support (2).
- Engage the rear bumper fascia to rear bumper fascia outer support retaining tabs (1).
- Engage the rear bumper fascia to rear bumper fascia guide rail retaining tabs (1).
- Install the rear bumper fascia to rear end panel retaining scrivets (1).
- Install the rear bumper fascia to rear quarter panel retaining screw (1).
- Install the rear wheelhouse liner to rear bumper fascia retaining scrivets (2).
- Install the rear wheels. Refer to Tire and Wheel Removal and Installation .
- Lower the vehicle.

Important: The rear object detection electrical connector must be connected before installing the rear bumper fascia.

Important: The rear bumper fascia is secured to the rear bumper fascia centre support with audible engagement.
Important: With the aid of an assistant, install the rear bumper fascia by sliding forward to engage it on the rear bumper fascia centre support.

Important: Make sure the rear bumper fascia outer support retaining tabs (1) are correctly engaged by hearing an audible click.
Repeat for opposite side.

Important: Make sure the to the rear bumper fascia lower support retaining tabs (1) by are correctly engaged hearing an audible click.
Repeat for opposite side.

Notice: Refer to Fastener Notice in the Preface section.

Tighten
Tighten the rear bumper fascia retaining screw to
2 N·m (18 lb in).
Repeat for opposite side.
