Rocker Panel Molding Replacement Except HSV Maloo
Removal Procedure
- Raise and support the vehicle. Refer to Lifting and Jacking the Vehicle .
- Remove the front and rear wheels. Refer to Tire and Wheel Removal and Installation .
- Open the relevant door of the vehicle on the side the rocker panel molding is to be replaced.
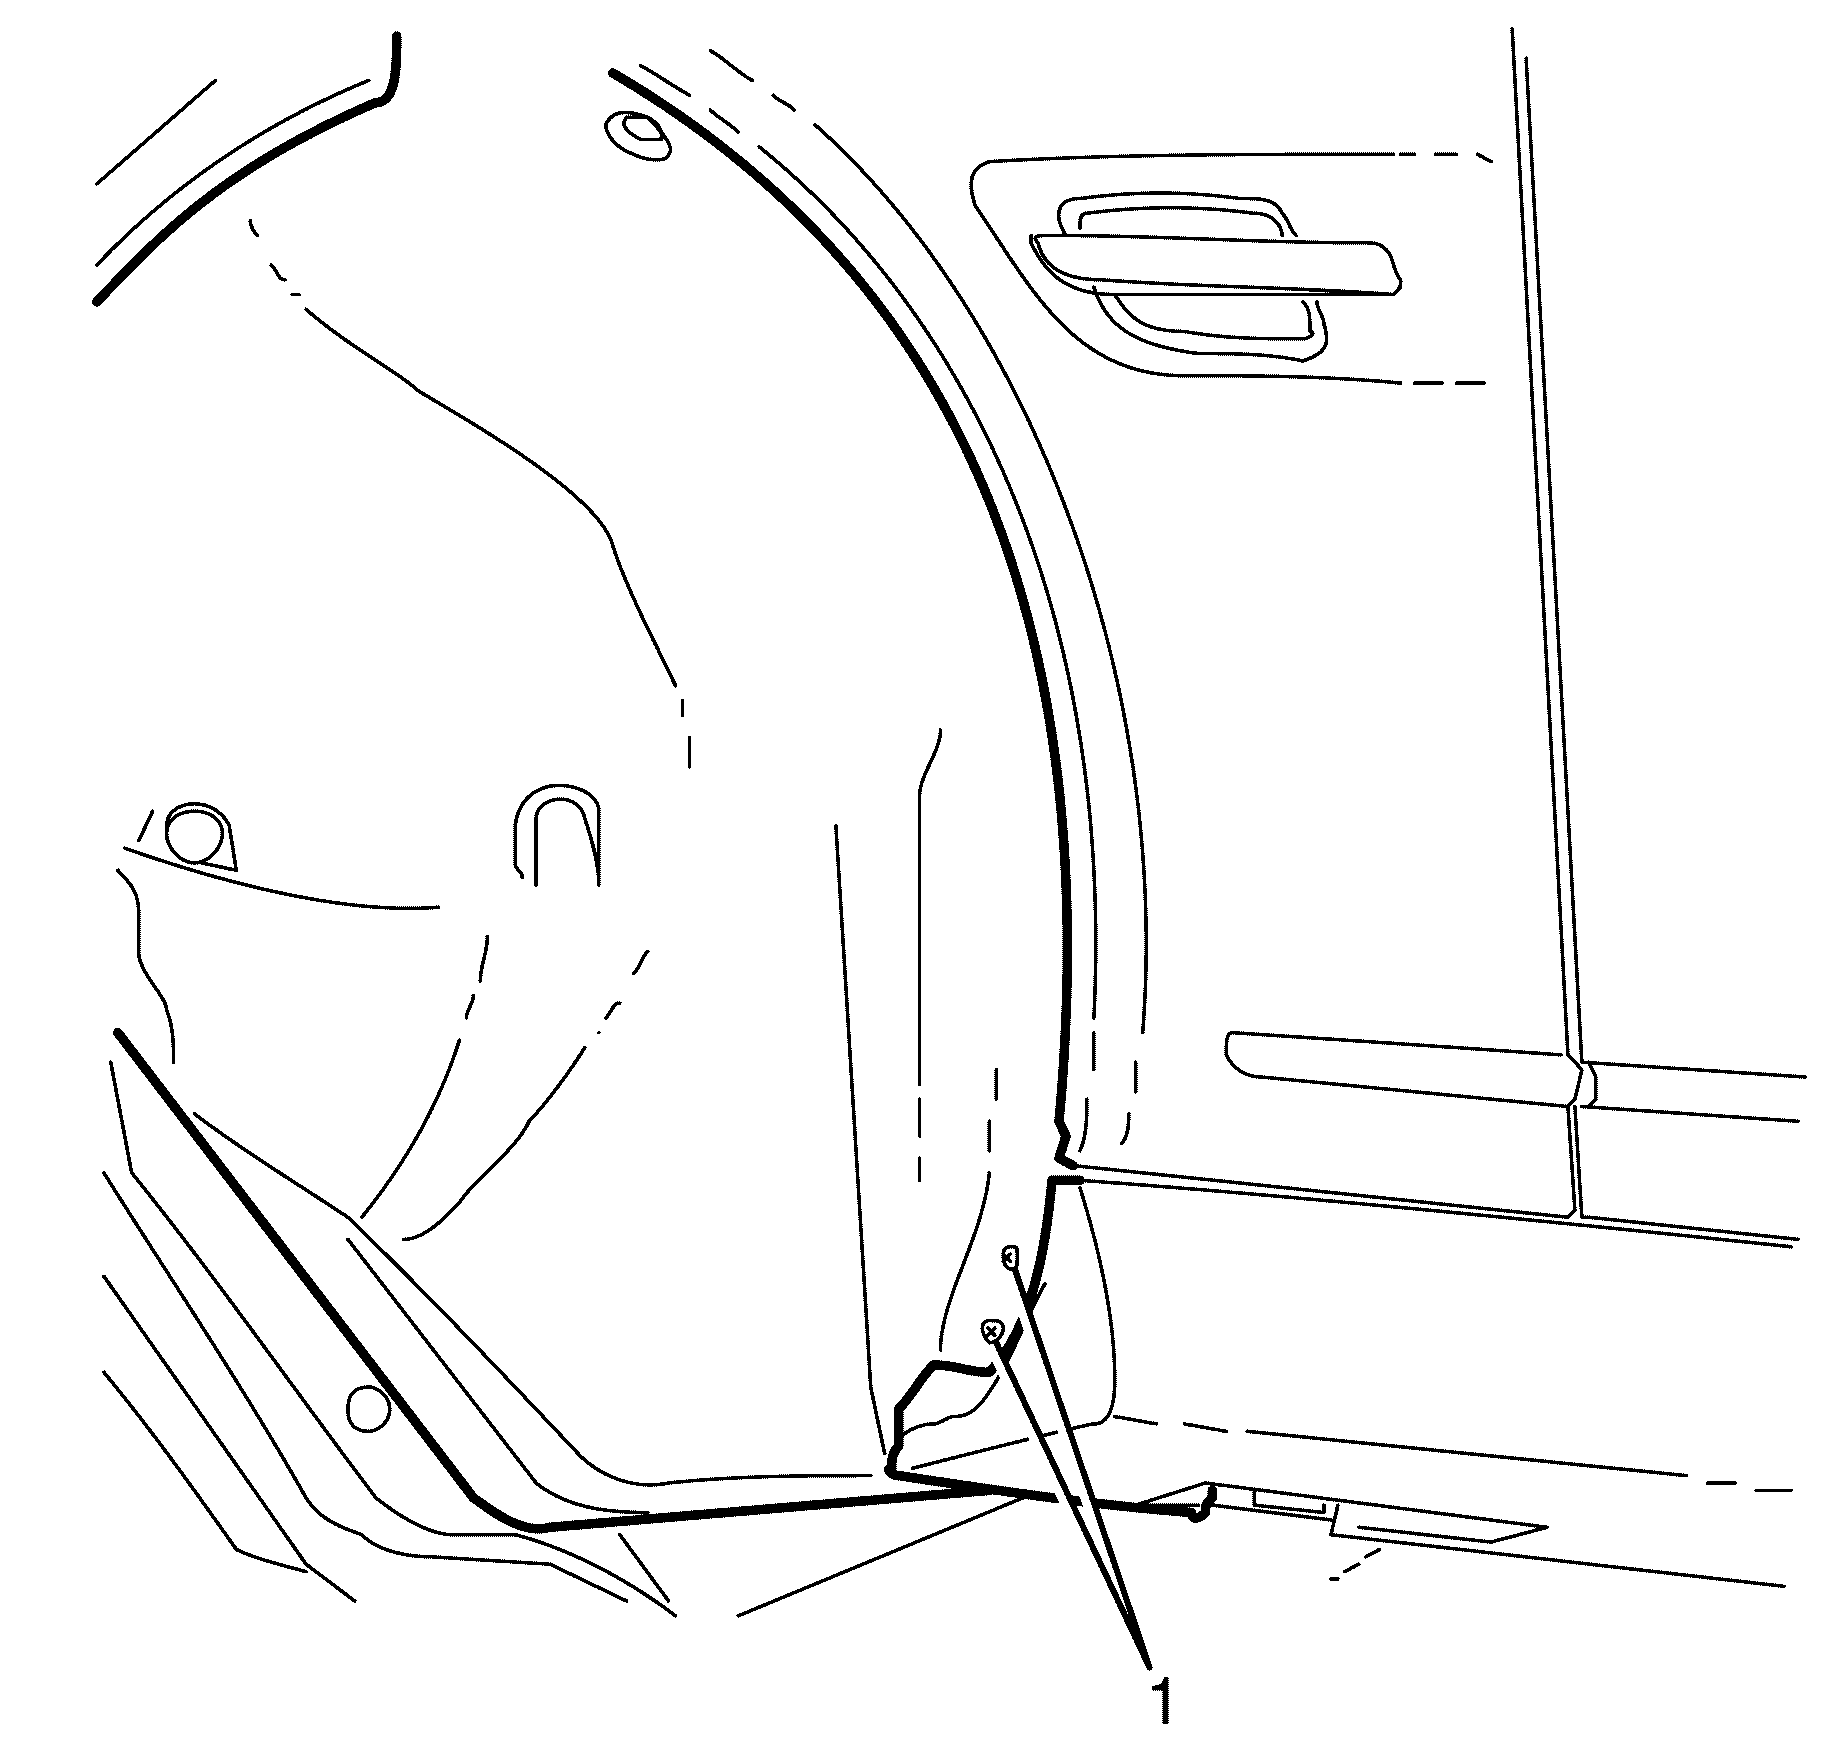
- Remove the front wheelhouse liner to rocker panel retaining screws (1).
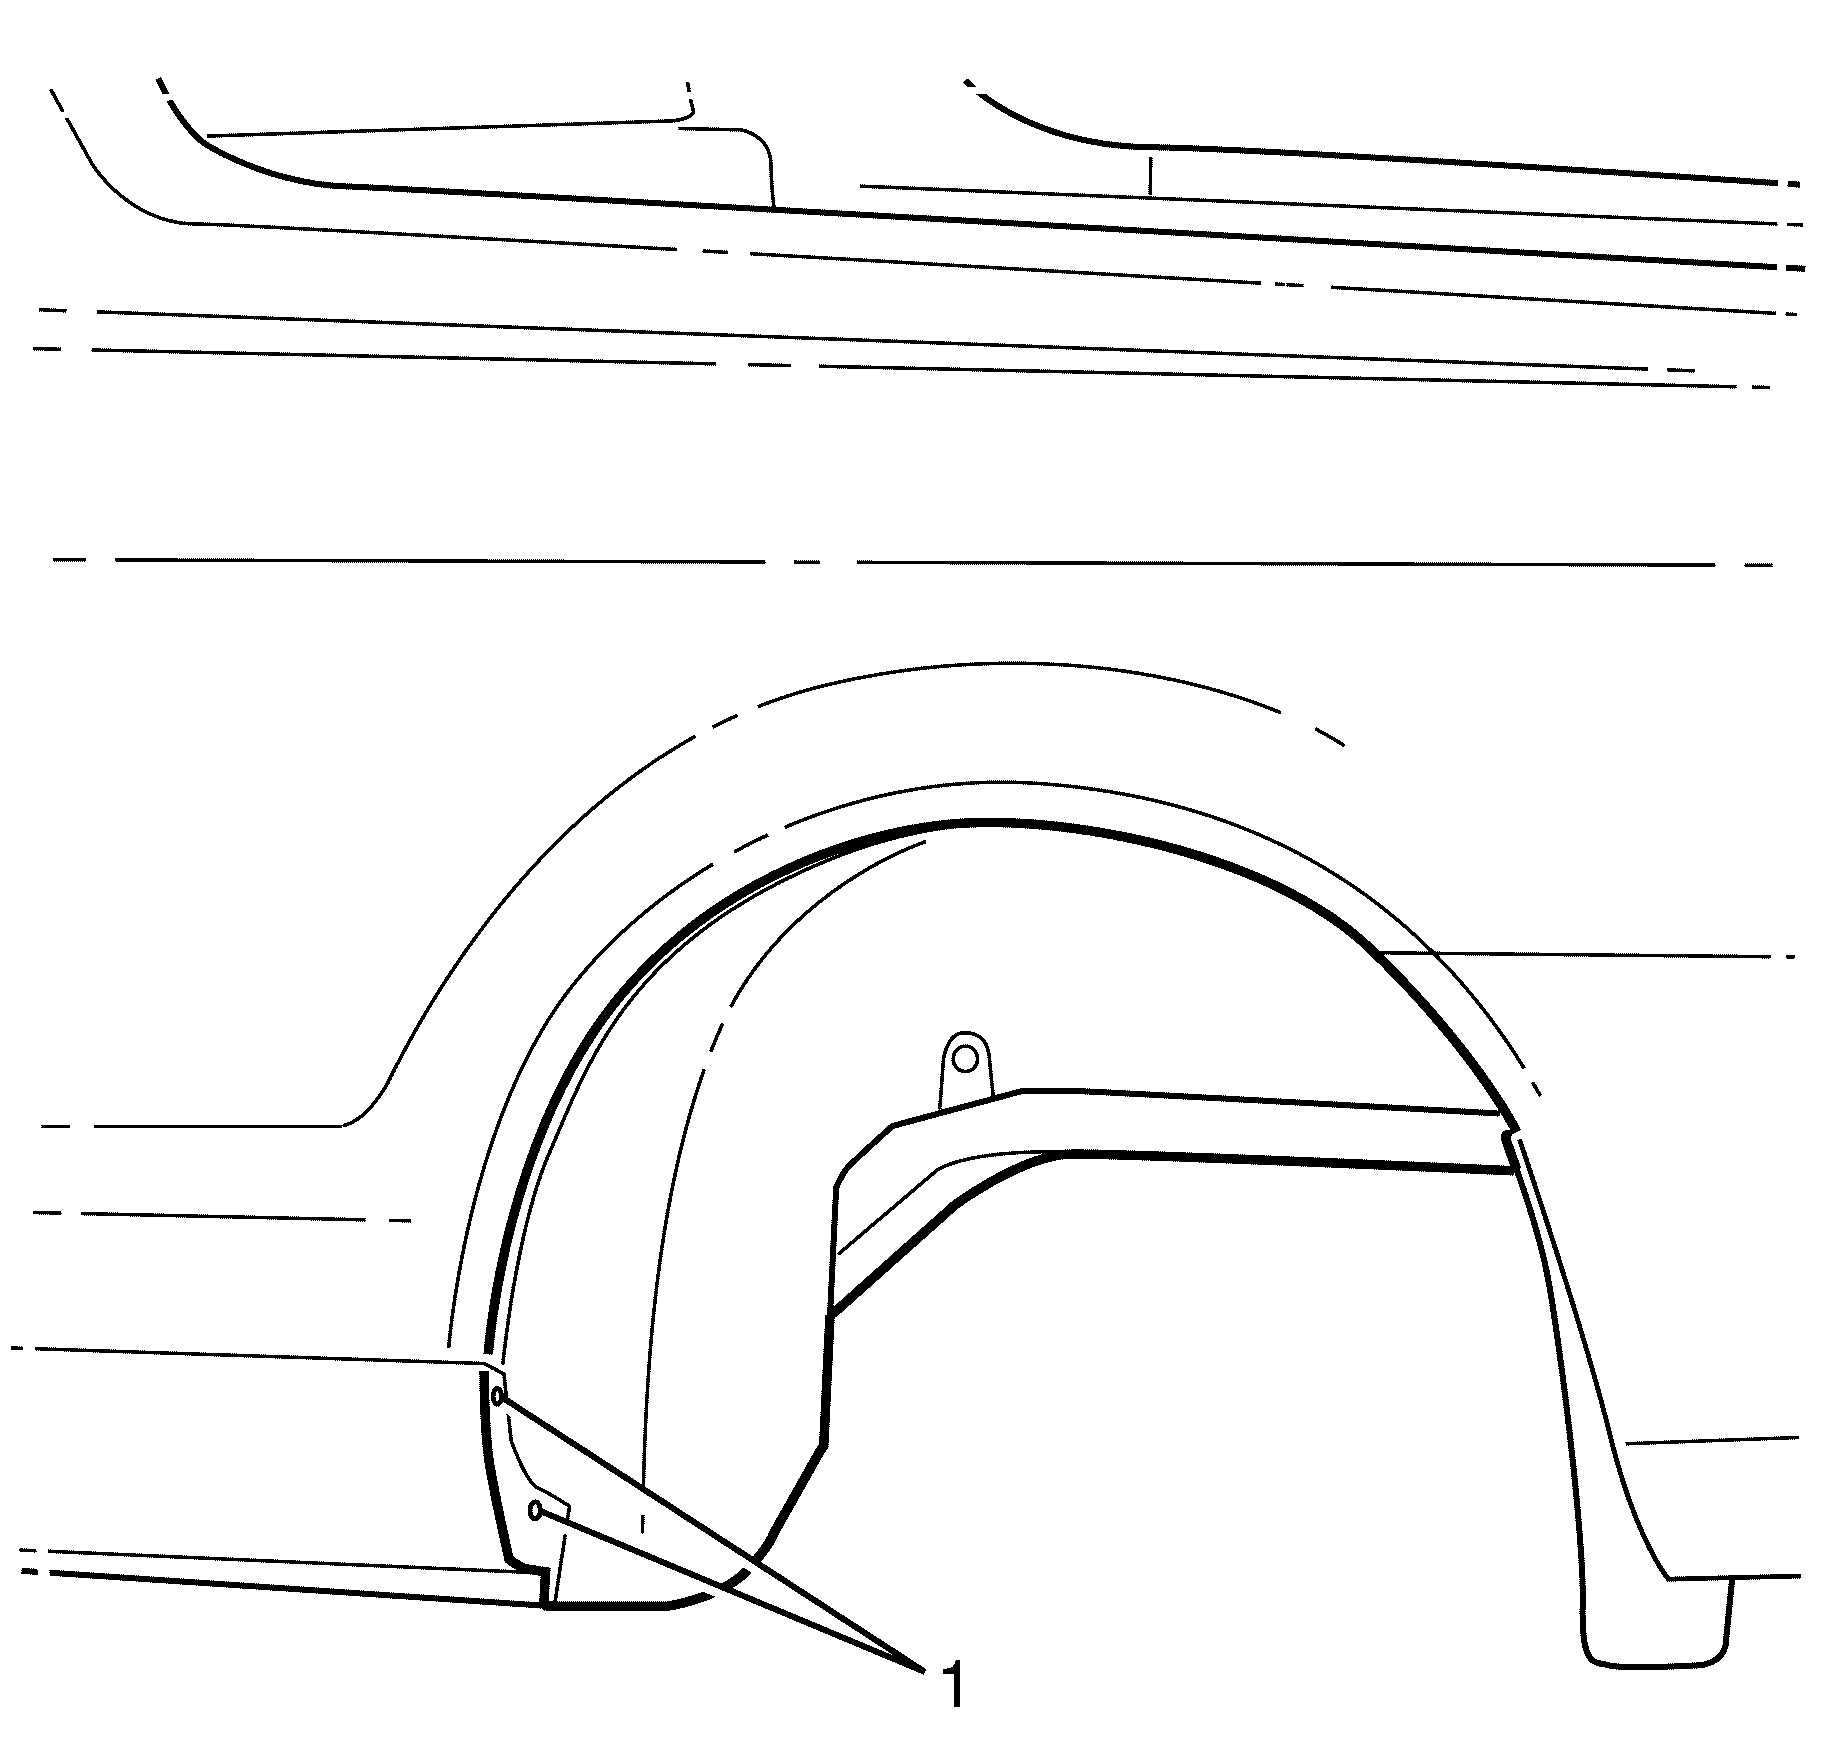
- Remove the rear wheelhouse liner to rocker panel retaining screws (1).
- Pull the bottom edge of the rocker panel molding (1) away from the rocker panel (2) to disengage the retaining clips (4).
- Disengage the top rocker panel molding retaining clips (3) from the rocker panel (2).
- With the aid of an assistant, carefully remove the rocker panel molding (1).
- Remove the rocker panel molding retaining clips (1) and (2) from the rocker panel molding (3).
Caution: Refer to Safety Glasses Caution in the Preface section.
Caution: Refer to Vehicle Lifting Caution in the Preface section.
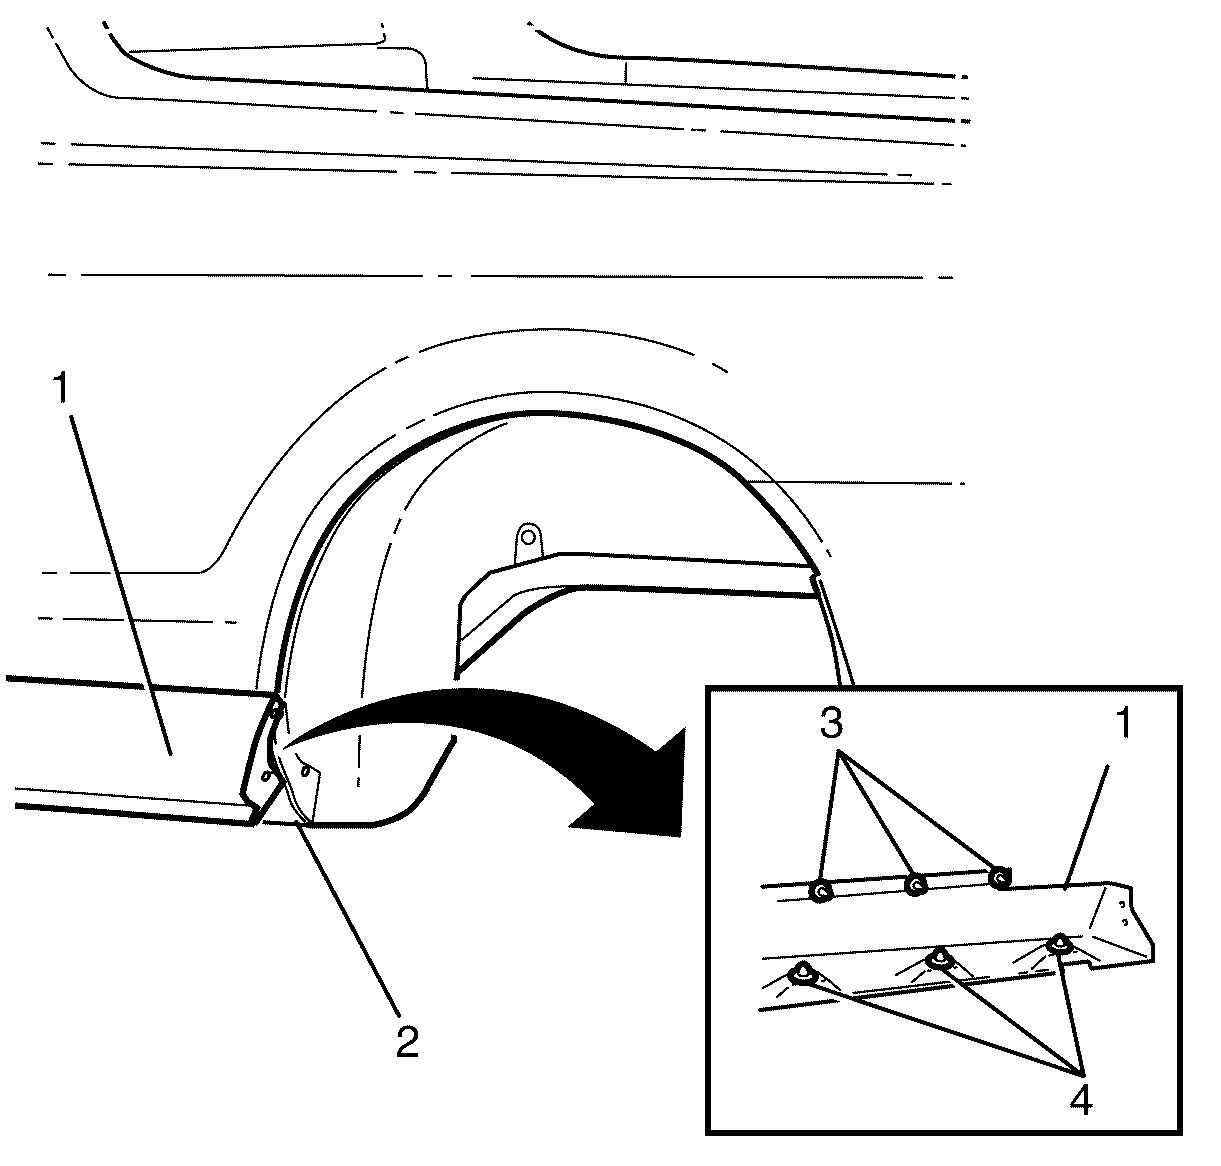
Important: Use a suitable tool to disengage the top rocker panel molding retainers (3).
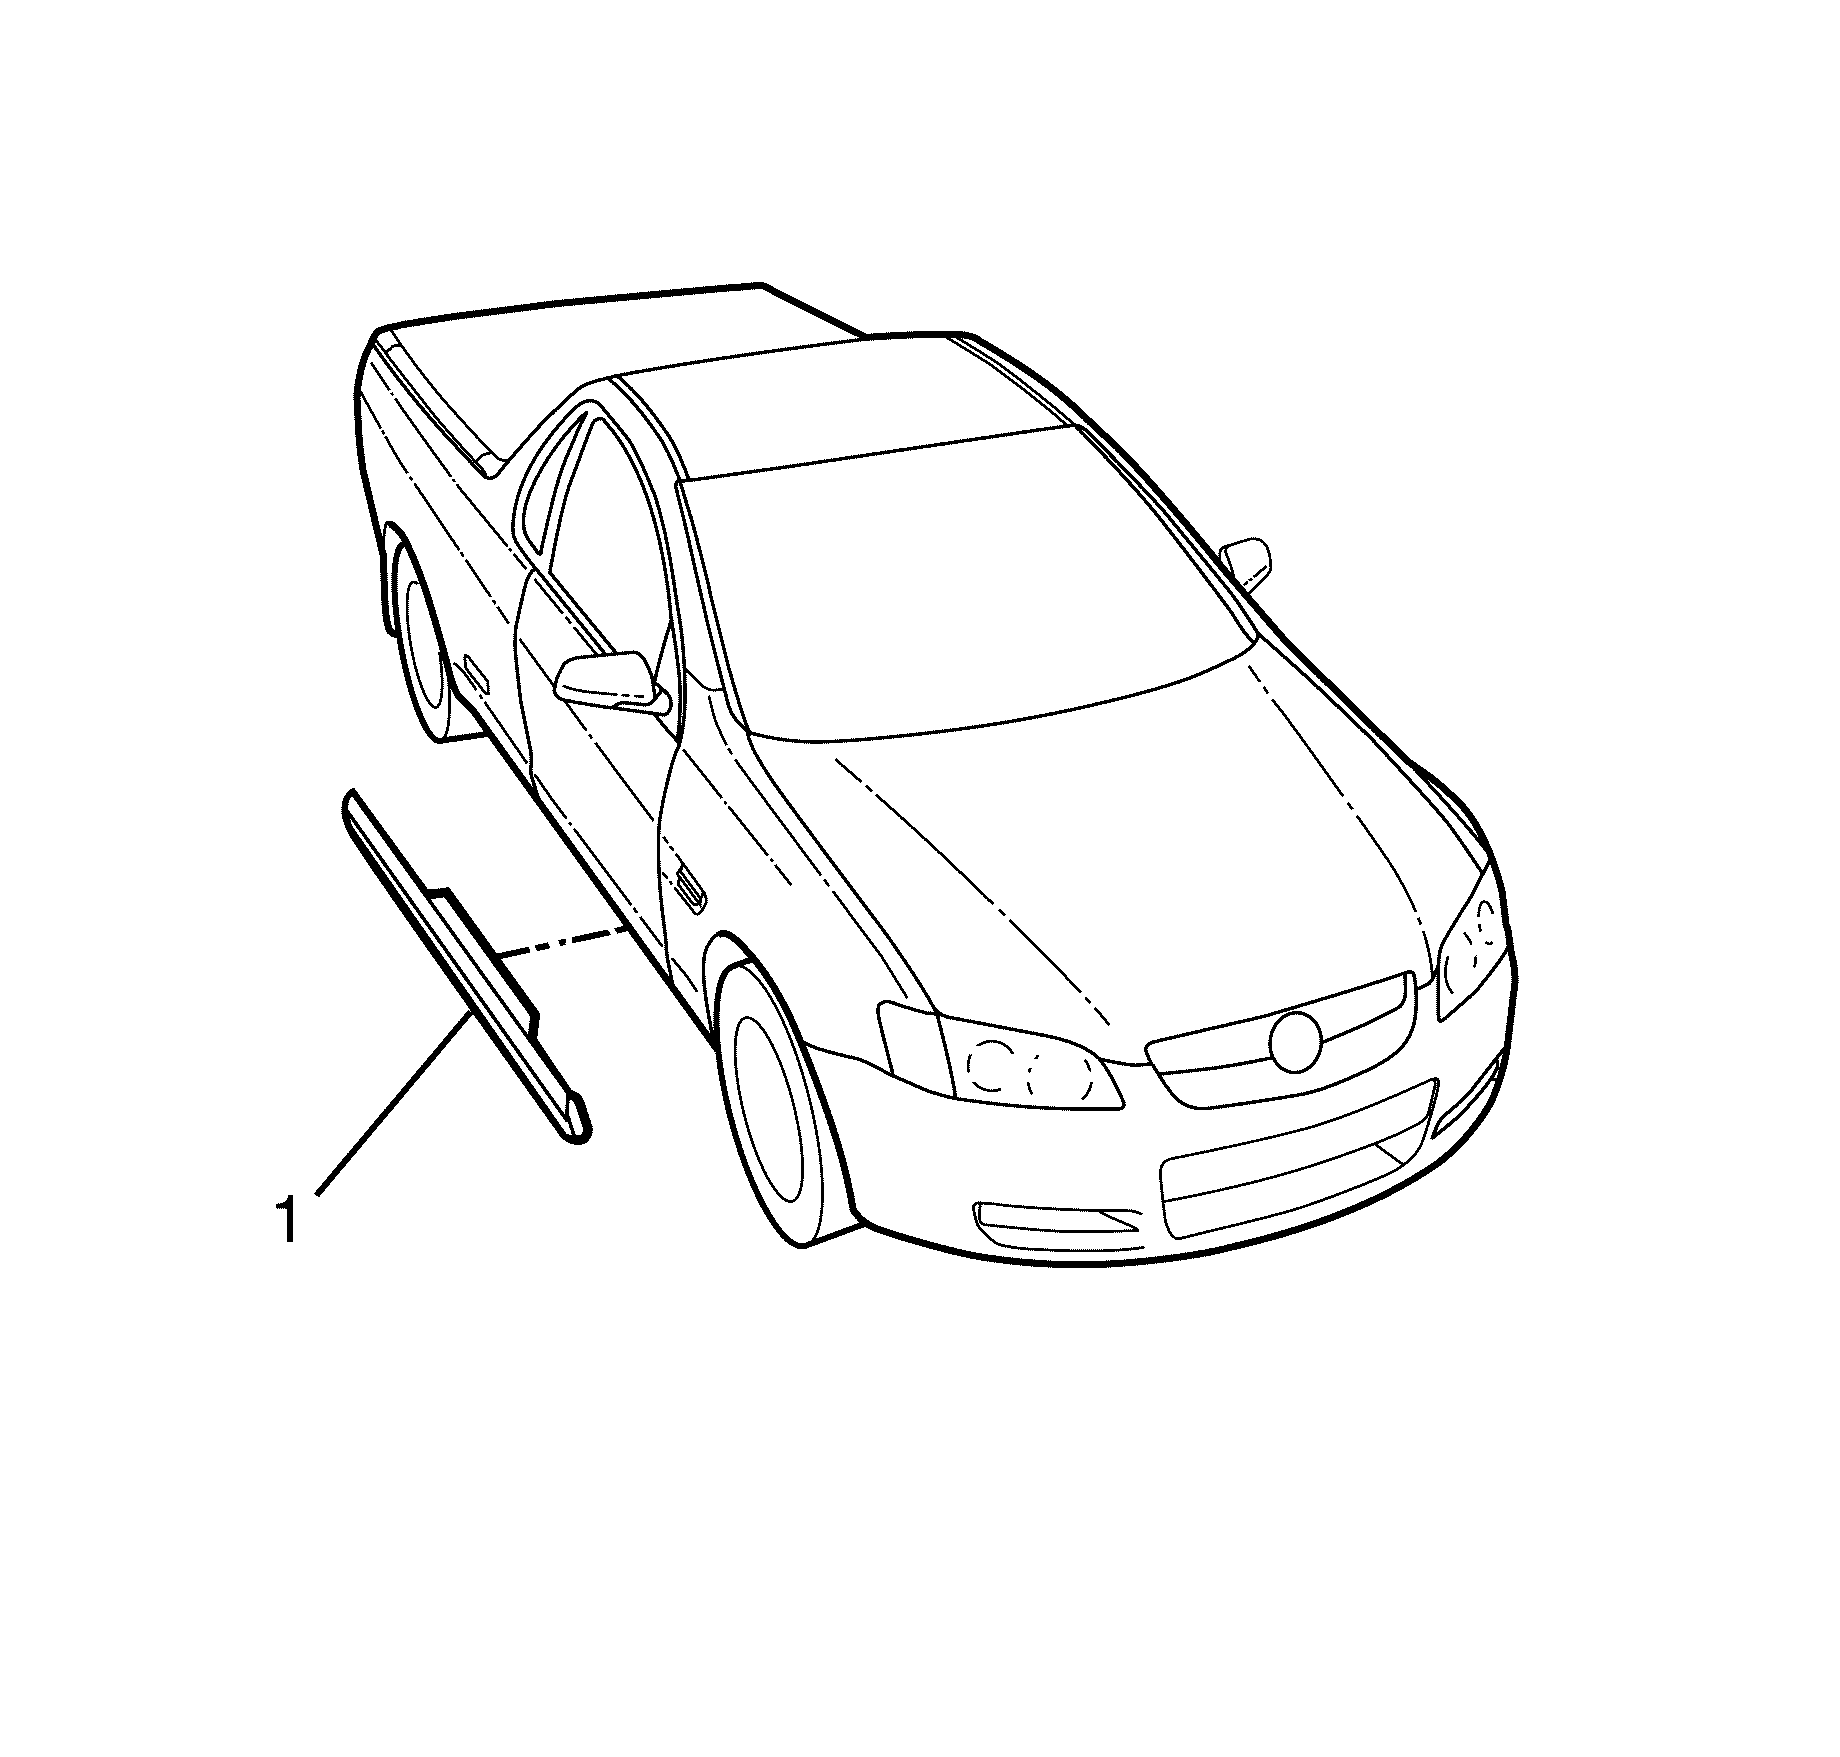
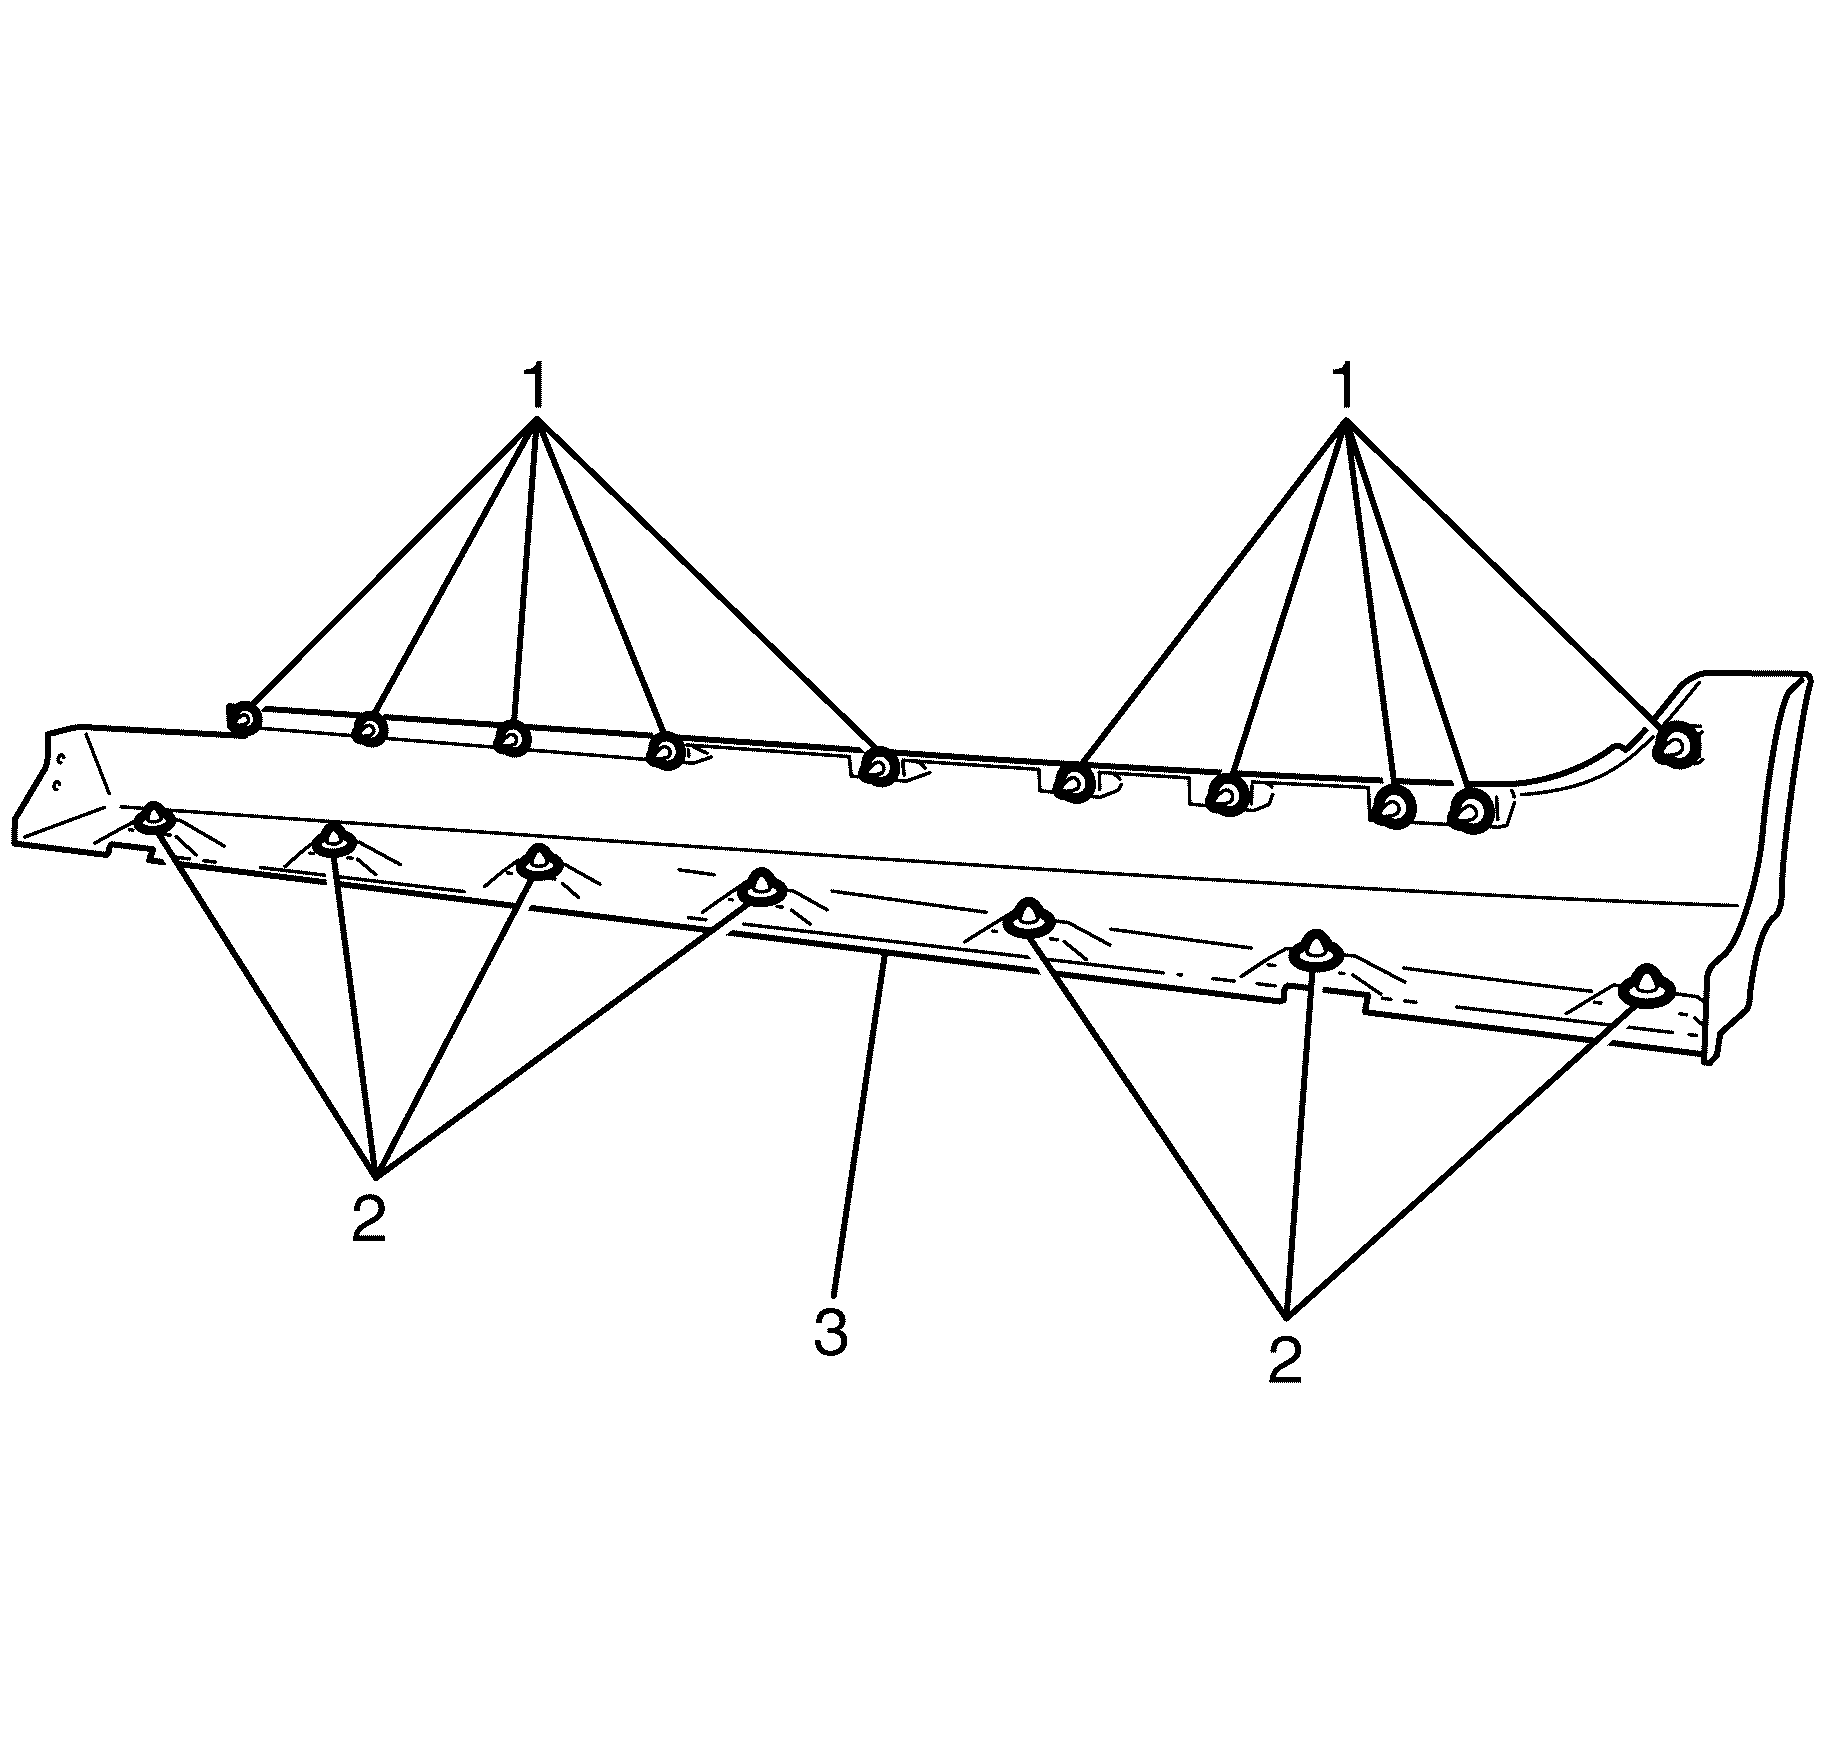
Important: The rocker panel molding retaining clips are single use parts and must be replaced whenever the rocker panel molding is removed.
Discard the retaining clips.
Installation Procedure
- Install NEW rocker panel retaining clips (1) and (2) into the rocker panel molding (3).
- With the aid of an assistant, install the rocker panel molding (1).
- Install the rear wheelhouse liner to rocker panel retaining screws (1).
- Install the front wheelhouse liner to rocker panel retaining screws (1).
- Install the front and rear wheels. Refer to Tire and Wheel Removal and Installation .
- Lower the vehicle.
- Close the door.


Important: Starting from the centre of the rocker panel molding (1), apply pressure to secure the rocker panel molding retaining clips to the upper part of the rocker panel. Then from the centre of the rocker panel molding (1), apply pressure to secure the rocker panel molding retaining clips to the lower part of the rocker panel.
Notice: Refer to Fastener Notice in the Preface section.

Tighten
Tighten the screws to 2 N·m (18 lb in).

Tighten
Tighten the screws to 2 N·m (18 lb in).
Rocker Panel Molding Replacement HSV Maloo
Removal Procedure
- Raise and support the vehicle. Refer to Lifting and Jacking the Vehicle.
- Remove the front and rear wheels. Refer to Tire and Wheel Removal and Installation.
- Open the vehicle doors on the relevant side.
- Remove the front wheelhouse liner to rocker panel retaining screws (1).
- Remove the rear wheelhouse liner to rocker panel retaining screws (1).
- Pull the bottom edge of the rocker panel moulding away from the rocker panel to disengage the retainers.
- Use a suitable tool to gently separate the front of the rocker panel moulding from the rocker panel.
- With the aid of an assistant, carefully remove the rocker panel moulding from the body.
- Remove the rocker panel vent. Refer to Customer Concern Verification Sheets.
- Remove the rocker panel moulding retainer clips (1) from the rocker panel moulding (2).
Caution: Refer to Safety Glasses Caution in the Preface section.
Caution: Refer to Vehicle Lifting Caution in the Preface section.
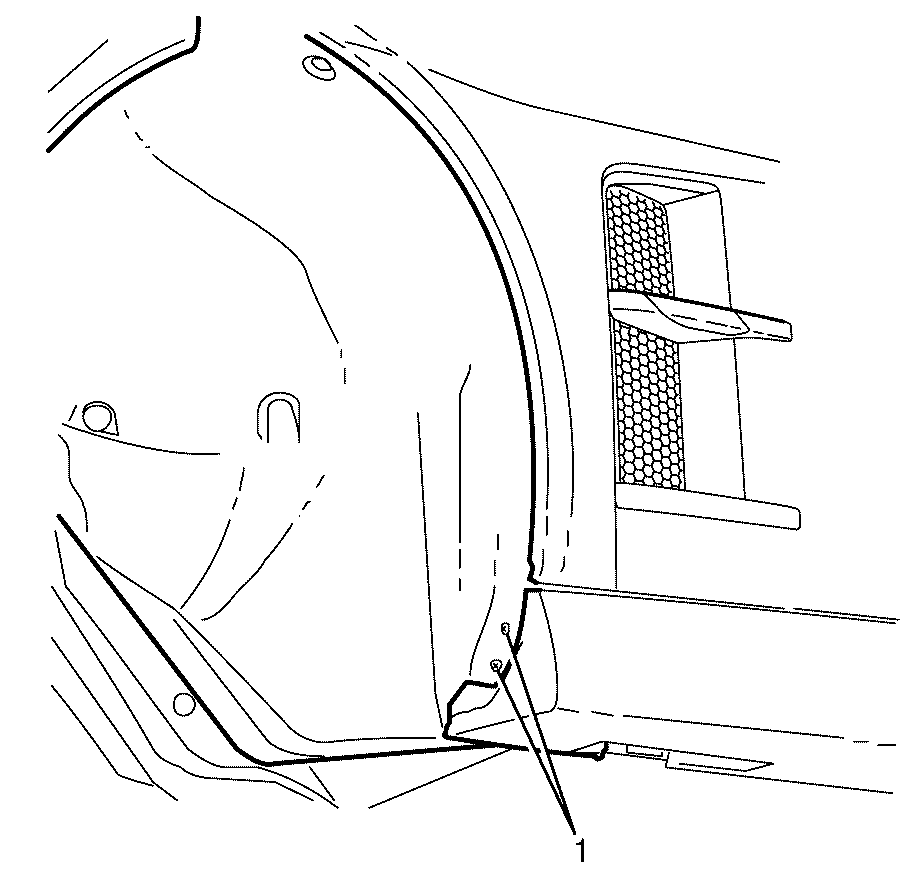
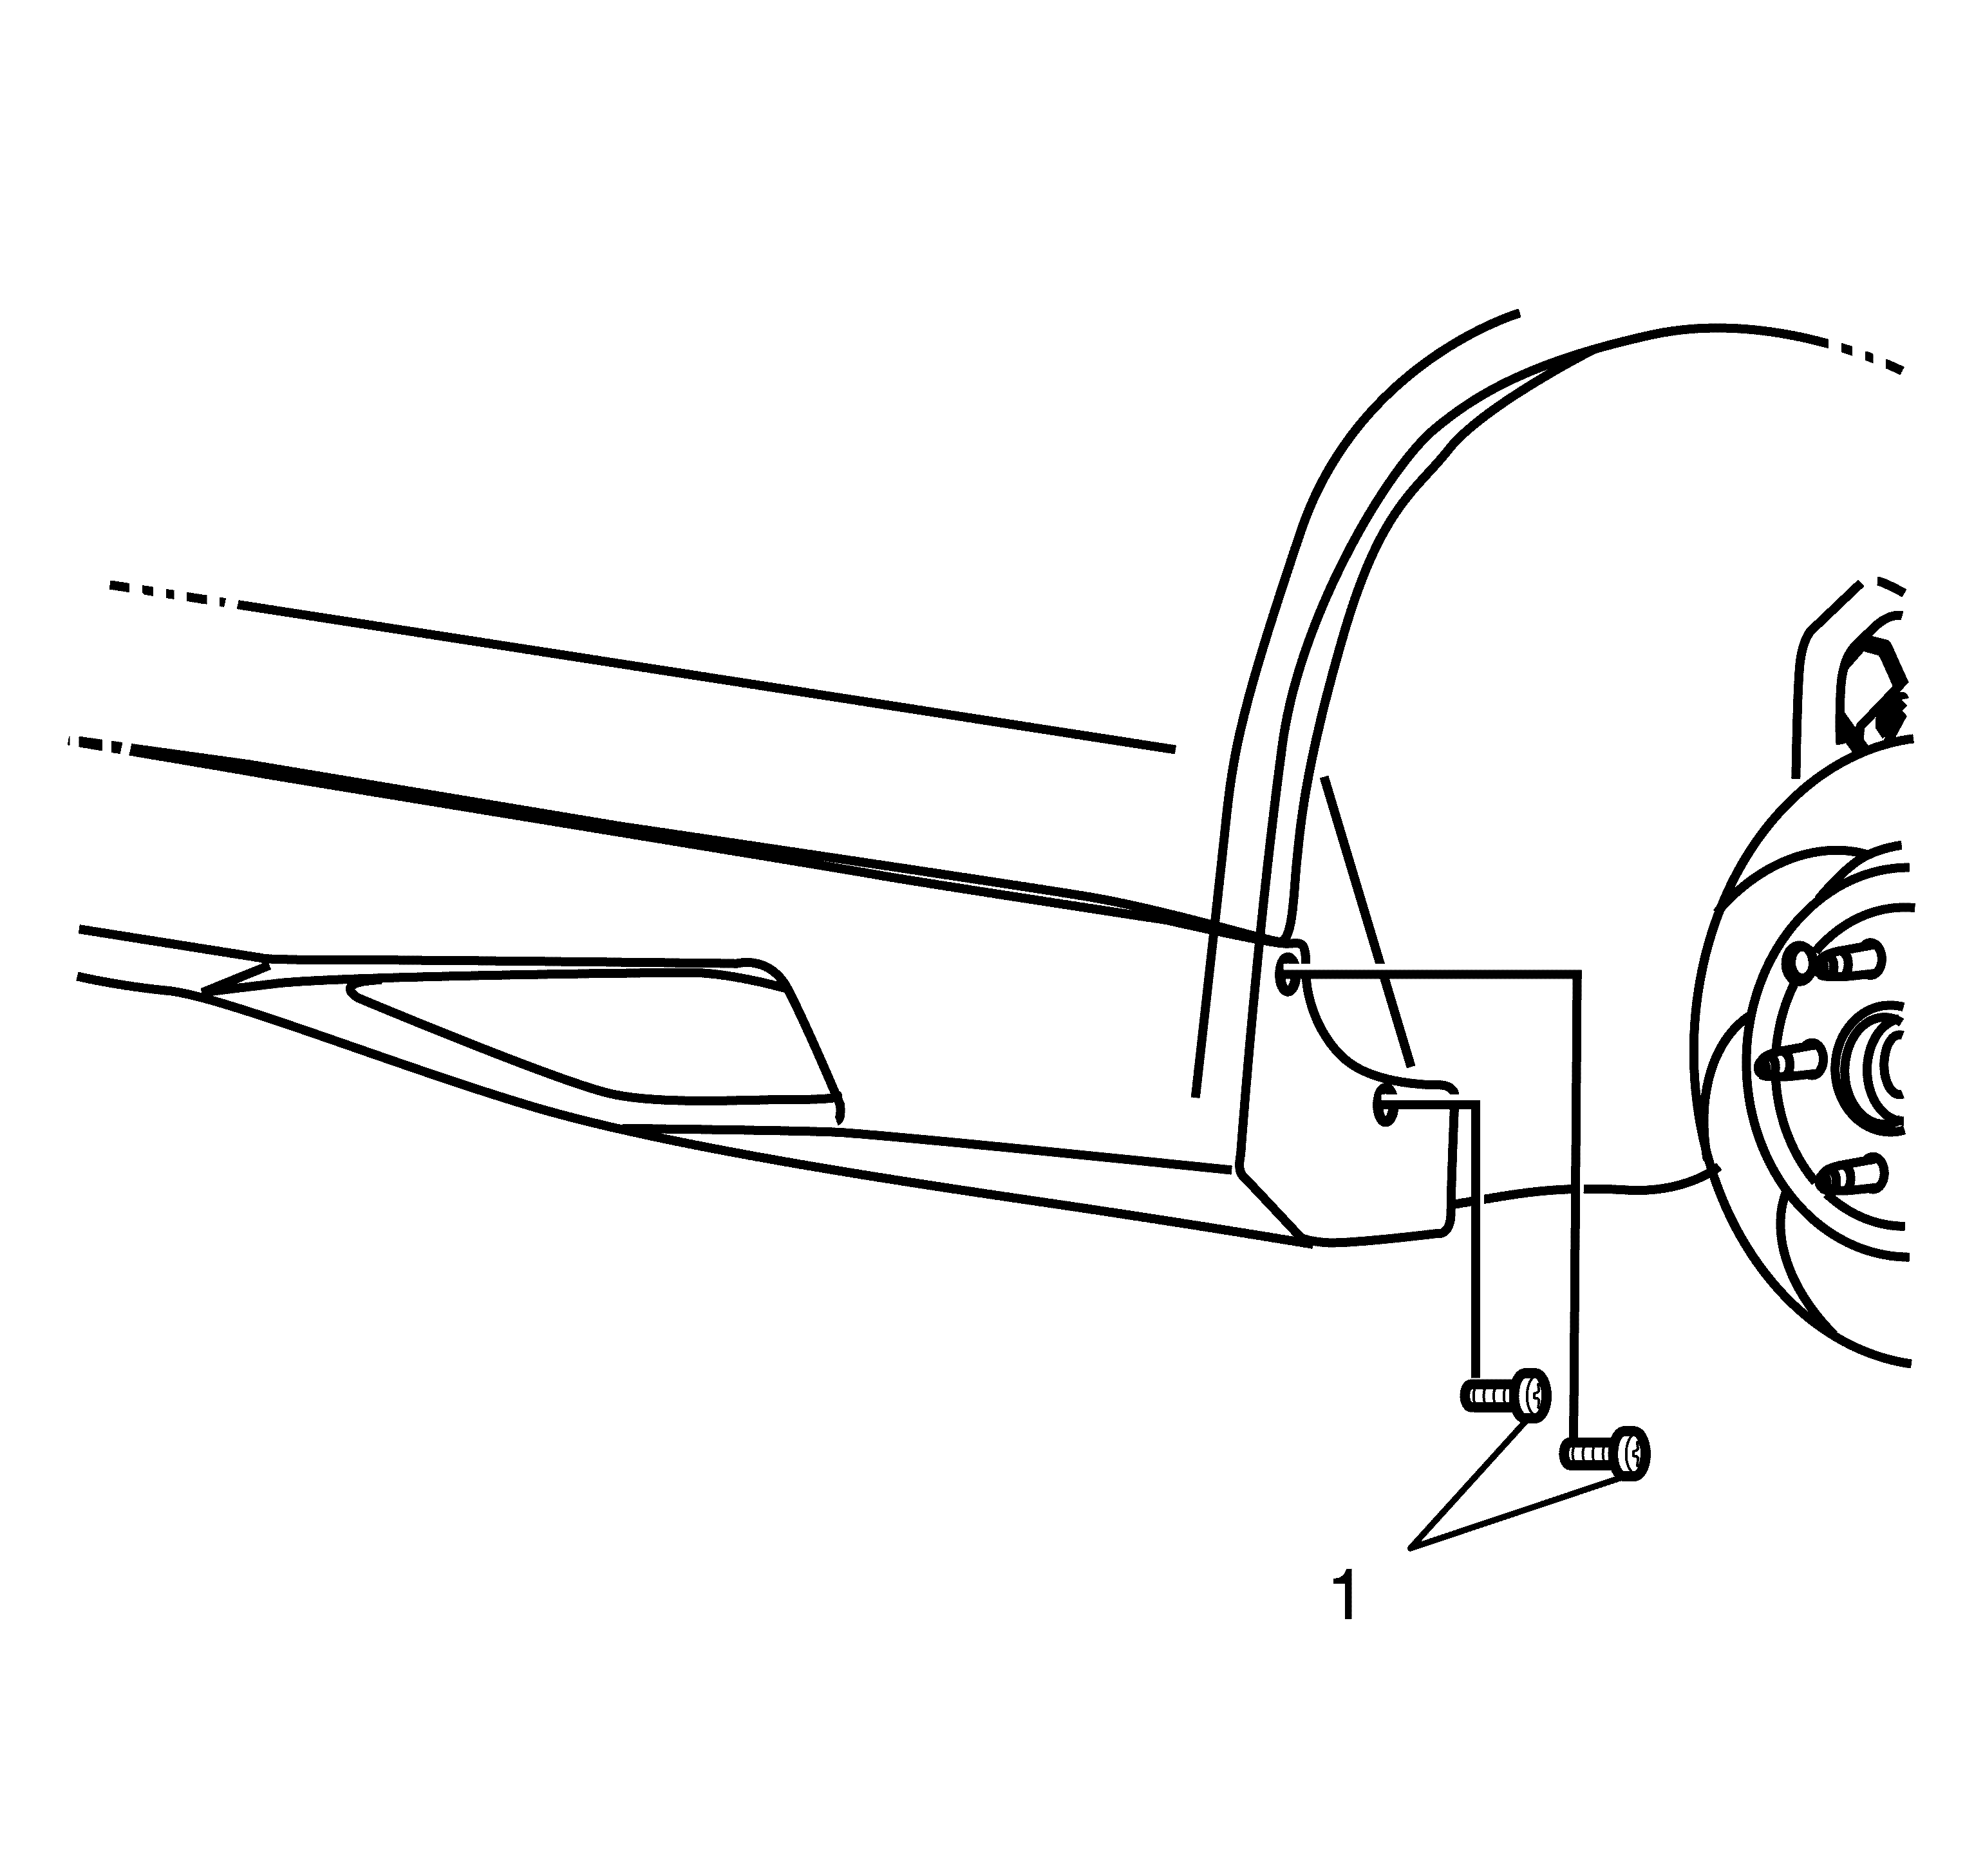
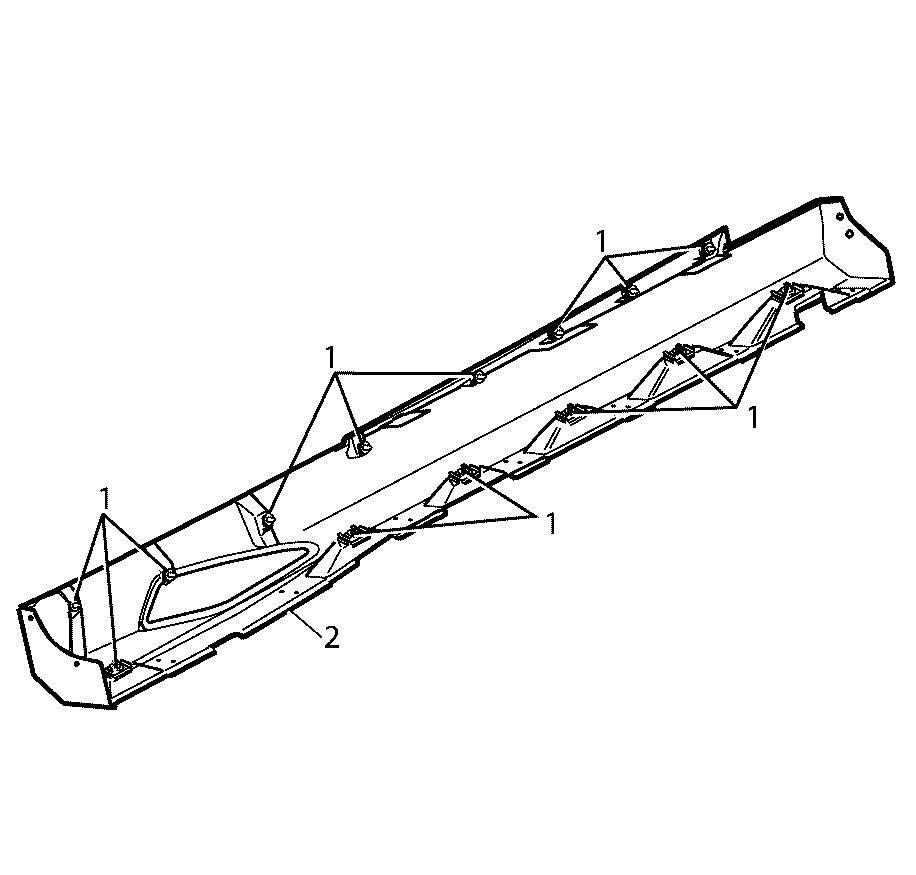
Important: The rocker panel moulding retaining clips are single use parts. They must be discarded after removal.
Discard the retaining clips.
Installation Procedure
- Install all new upper rocker panel retaining clips (1) and lower rocker panel retaining clips (2) onto the rocker panel.
- Install the rocker panel vent. Refer to Customer Concern Verification Sheets.
- Install new paint protectors (1) onto the rocker panel moulding (2) at both the front, and rear ends.
- With the aid of an assistant, position the rocker panel moulding (1) to the body (2).
- Starting from the centre of the rocker panel moulding, apply pressure to secure the rocker panel moulding retaining clips to the upper part of the rocker panel.
- Starting from the centre of the rocker panel moulding, apply pressure to secure the rocker panel moulding retaining clips to the lower part of the rocker panel.
- Install the rocker panel retaining screws (1).
- Install the rocker panel retaining screws (1).
- Install the front and rear wheels. Refer to Tire and Wheel Removal and Installation.
- Lower the vehicle. Refer to Lifting and Jacking the Vehicle.
- Close the vehicle doors.
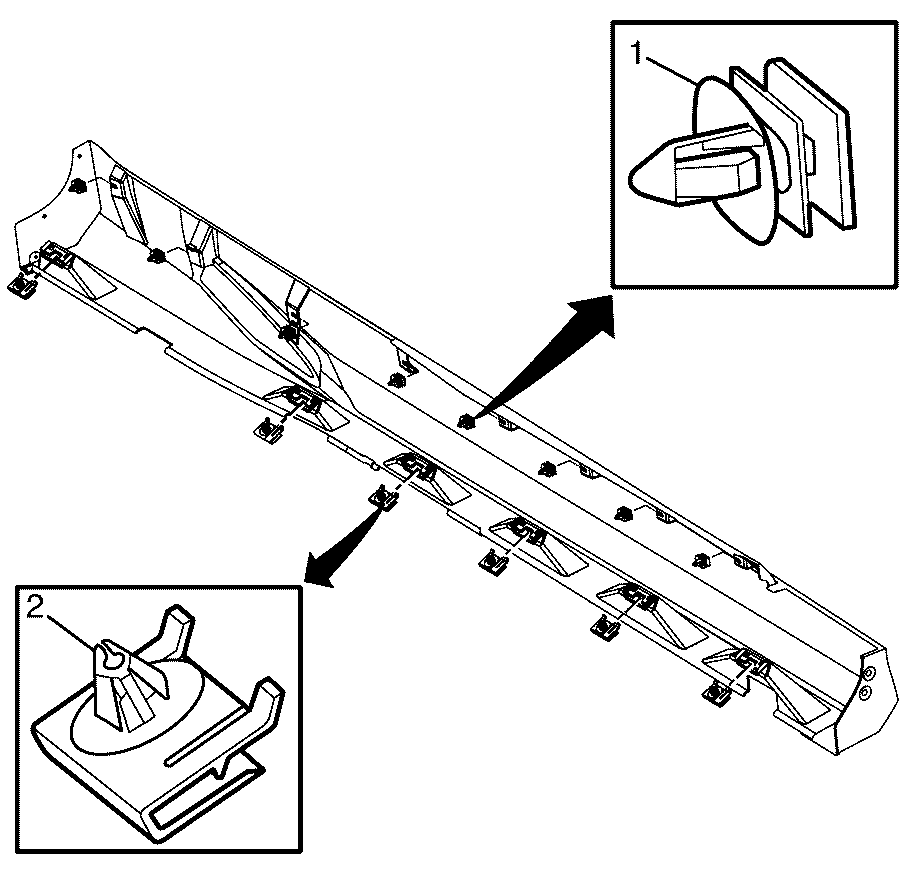
Important: New retaining clips are required for the installation of the rocker panel moulding.
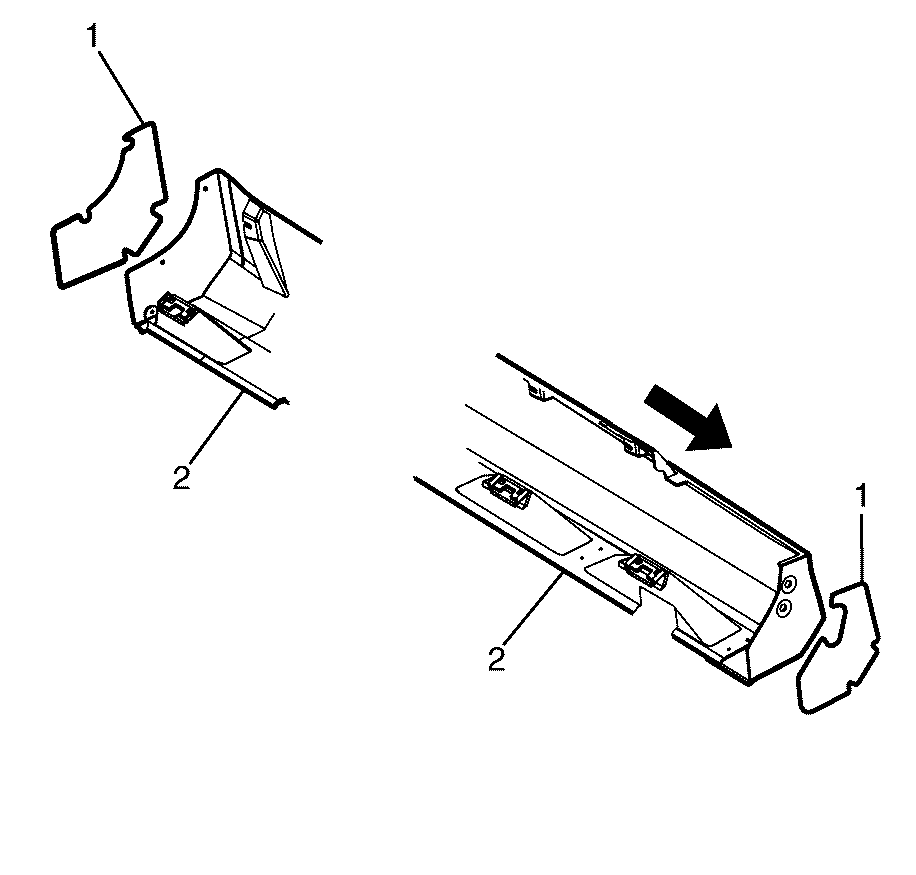
Important: All surfaces that are to have paint protection applied must be cleaned with a suitable alcoholic solution and be free of dust and imperfections, prior to applying paint protective decals.
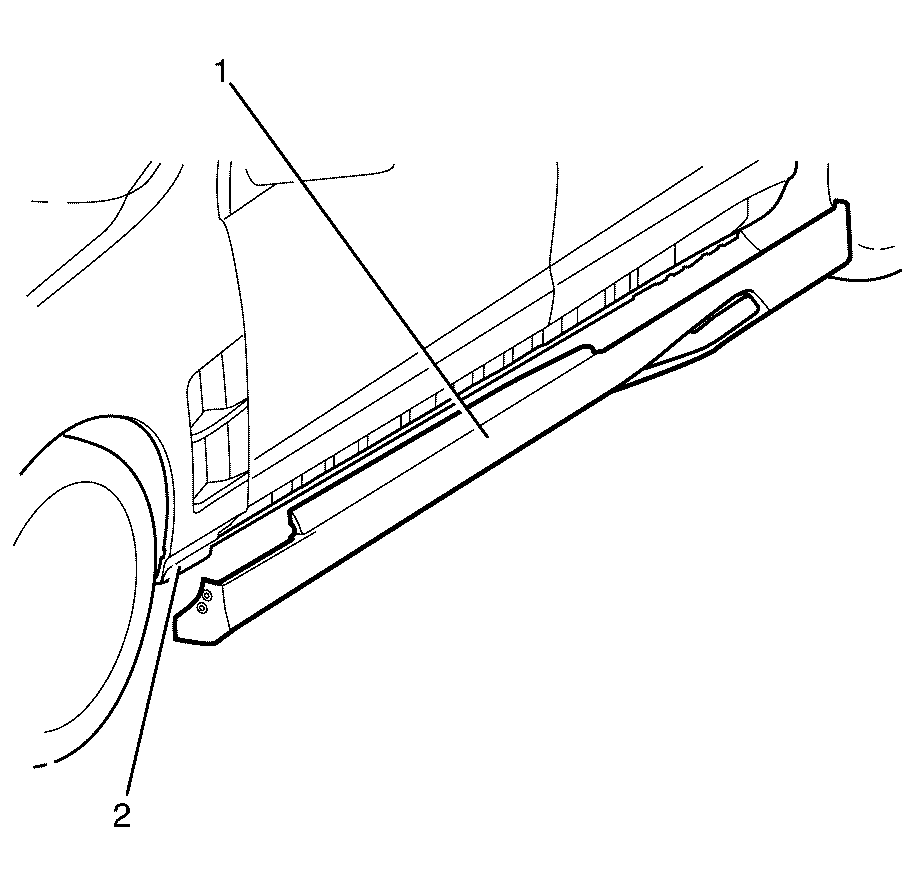
Notice: Refer to Fastener Notice in the Preface section.

Tighten
Tighten the rocker panel retaining screws to 2 N·m
(18 lb in).

Tighten
Tighten the rocker panel retaining screws to 2 N·m
(18 lb in).
