For 1990-2009 cars only
Removal Procedure
- Remove the camshaft cover. Refer to Valve Rocker Arm Cover Replacement .
- Remove the timing belt. Refer to Timing Belt Replacement .
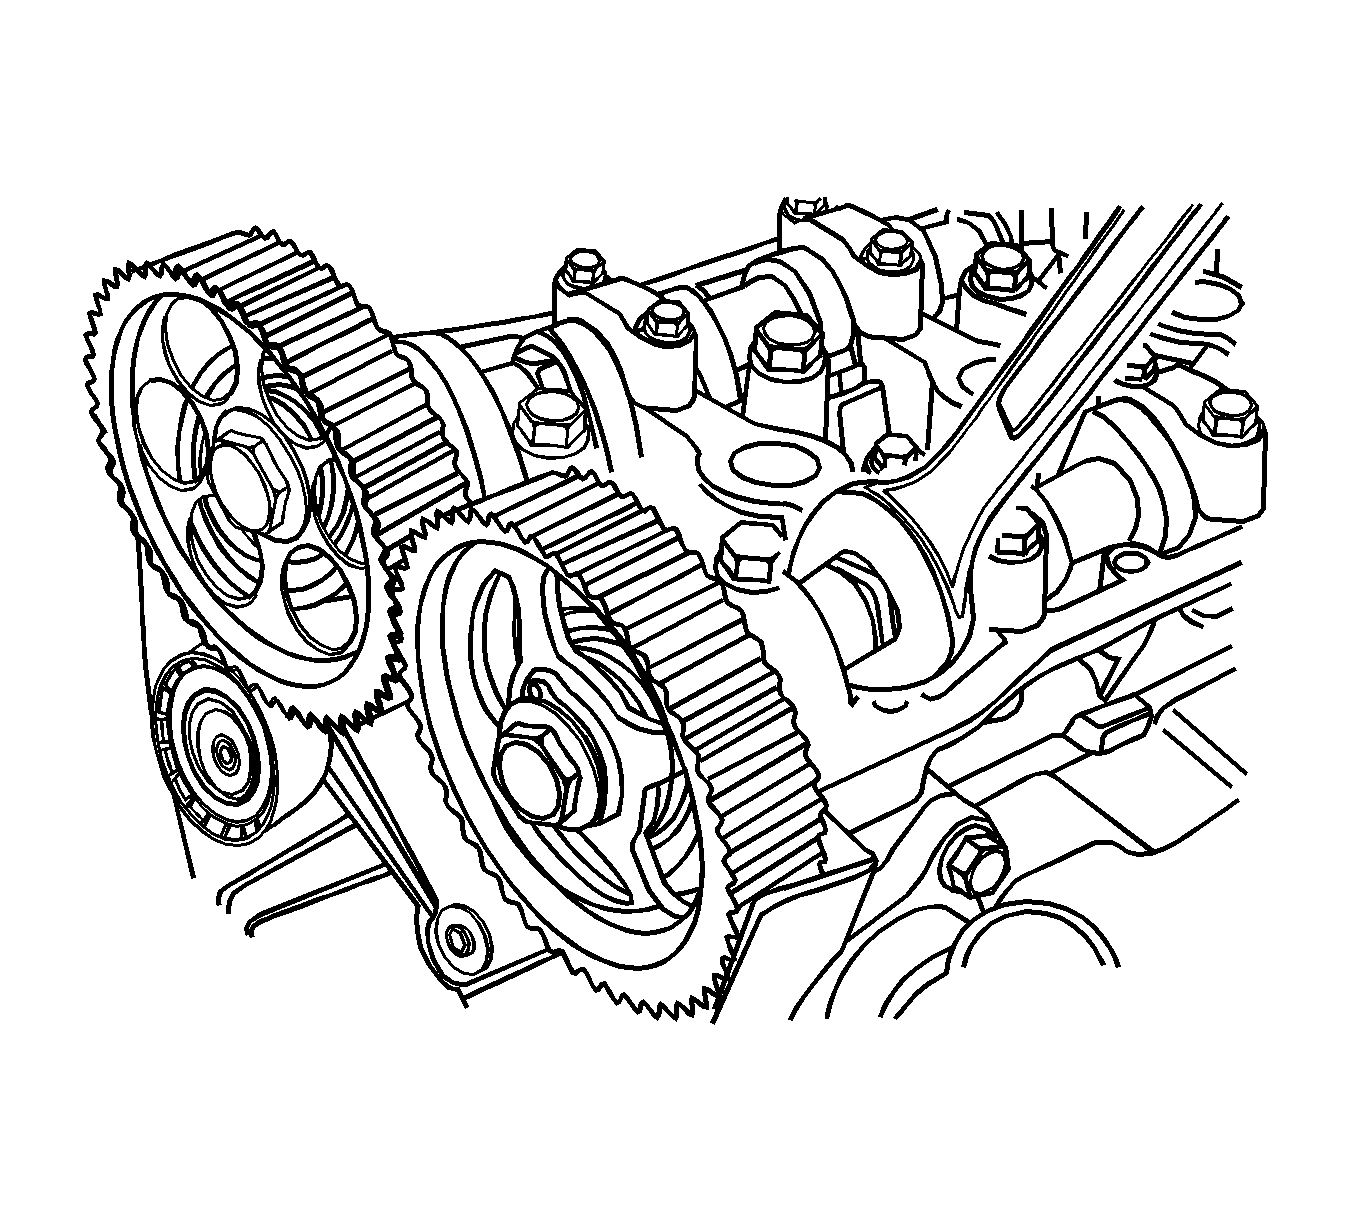
- While holding the intake camshaft firmly in place, remove the intake camshaft gear bolt and gear.
- While holding the exhaust camshaft firmly in place, remove the exhaust camshaft gear bolt and gear.
- Remove the camshaft cap bolts gradually in the sequence shown for each camshaft cap.
- Remove the intake and exhaust camshaft caps. Maintain the correct positions for installation.
- Remove the intake/exhaust camshaft.
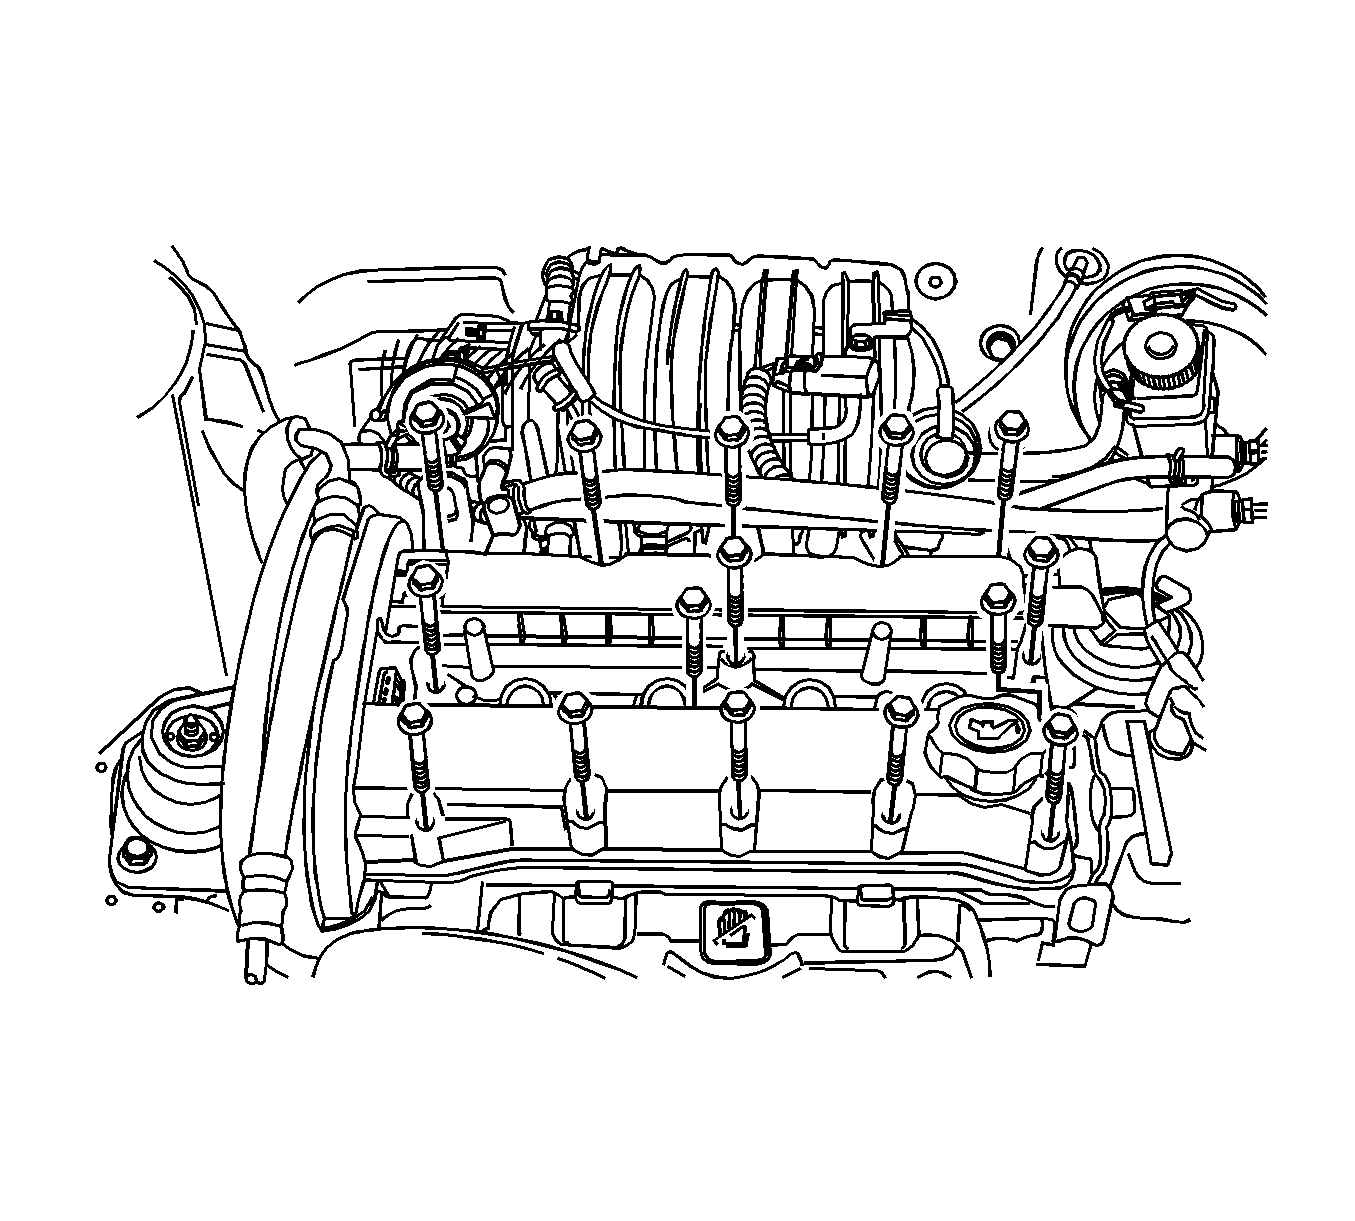
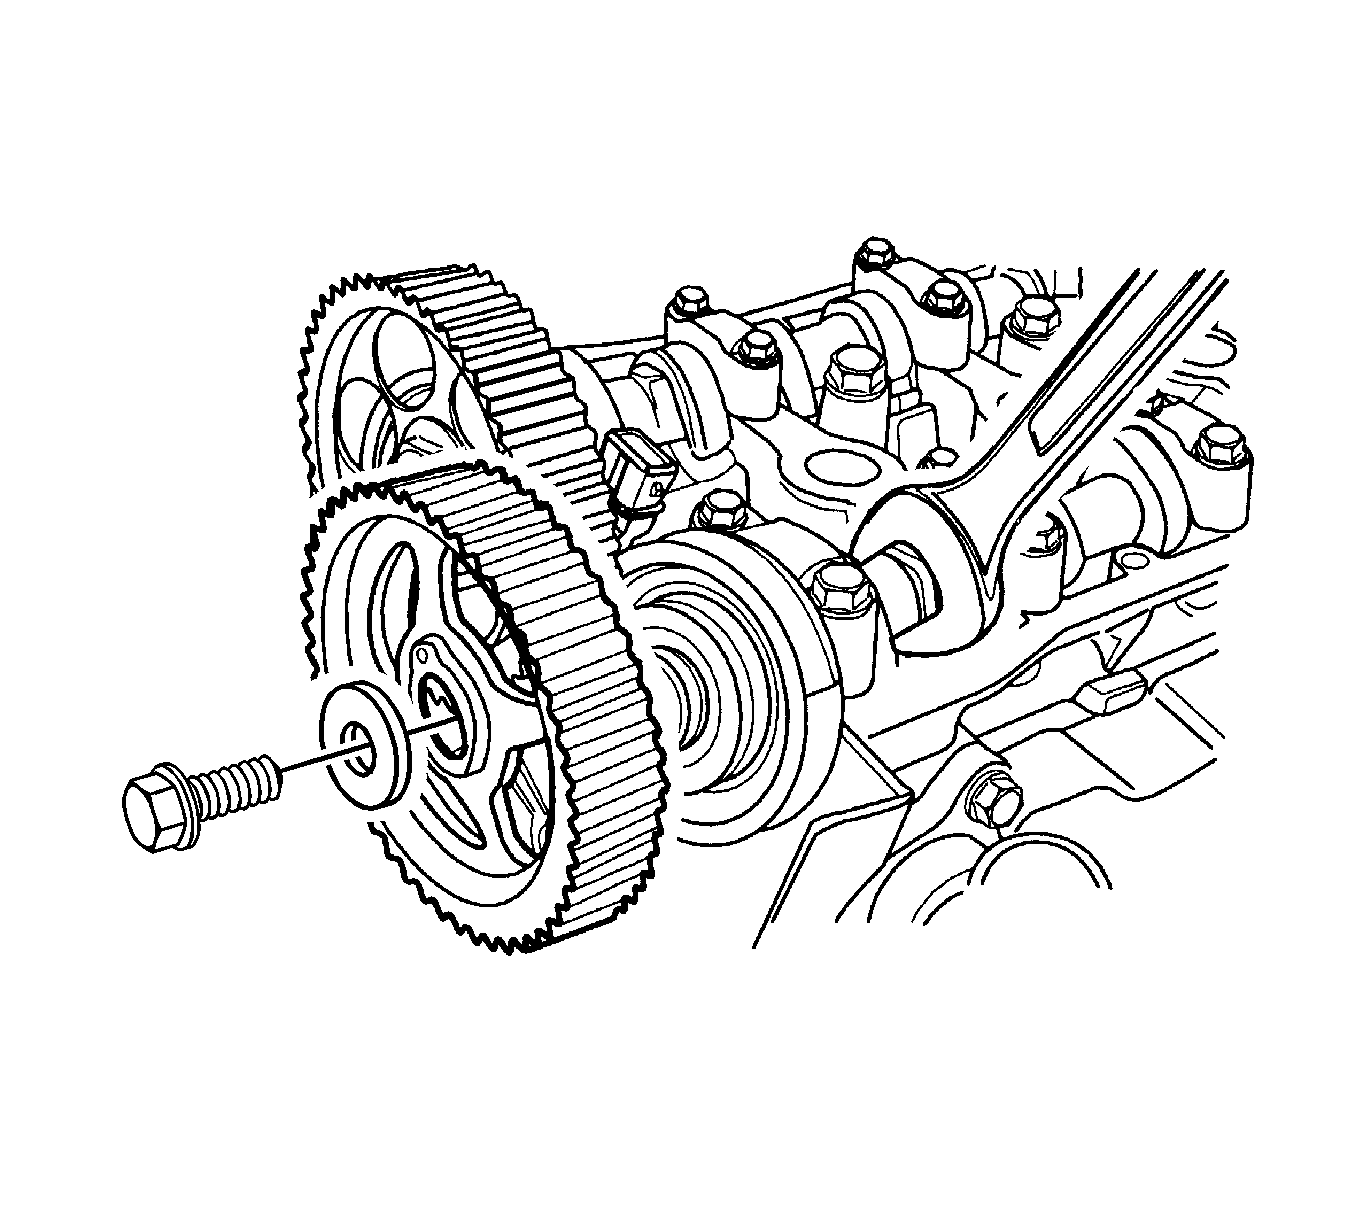
Important: Take extreme care to prevent any scratches, nicks or damage to the camshafts.
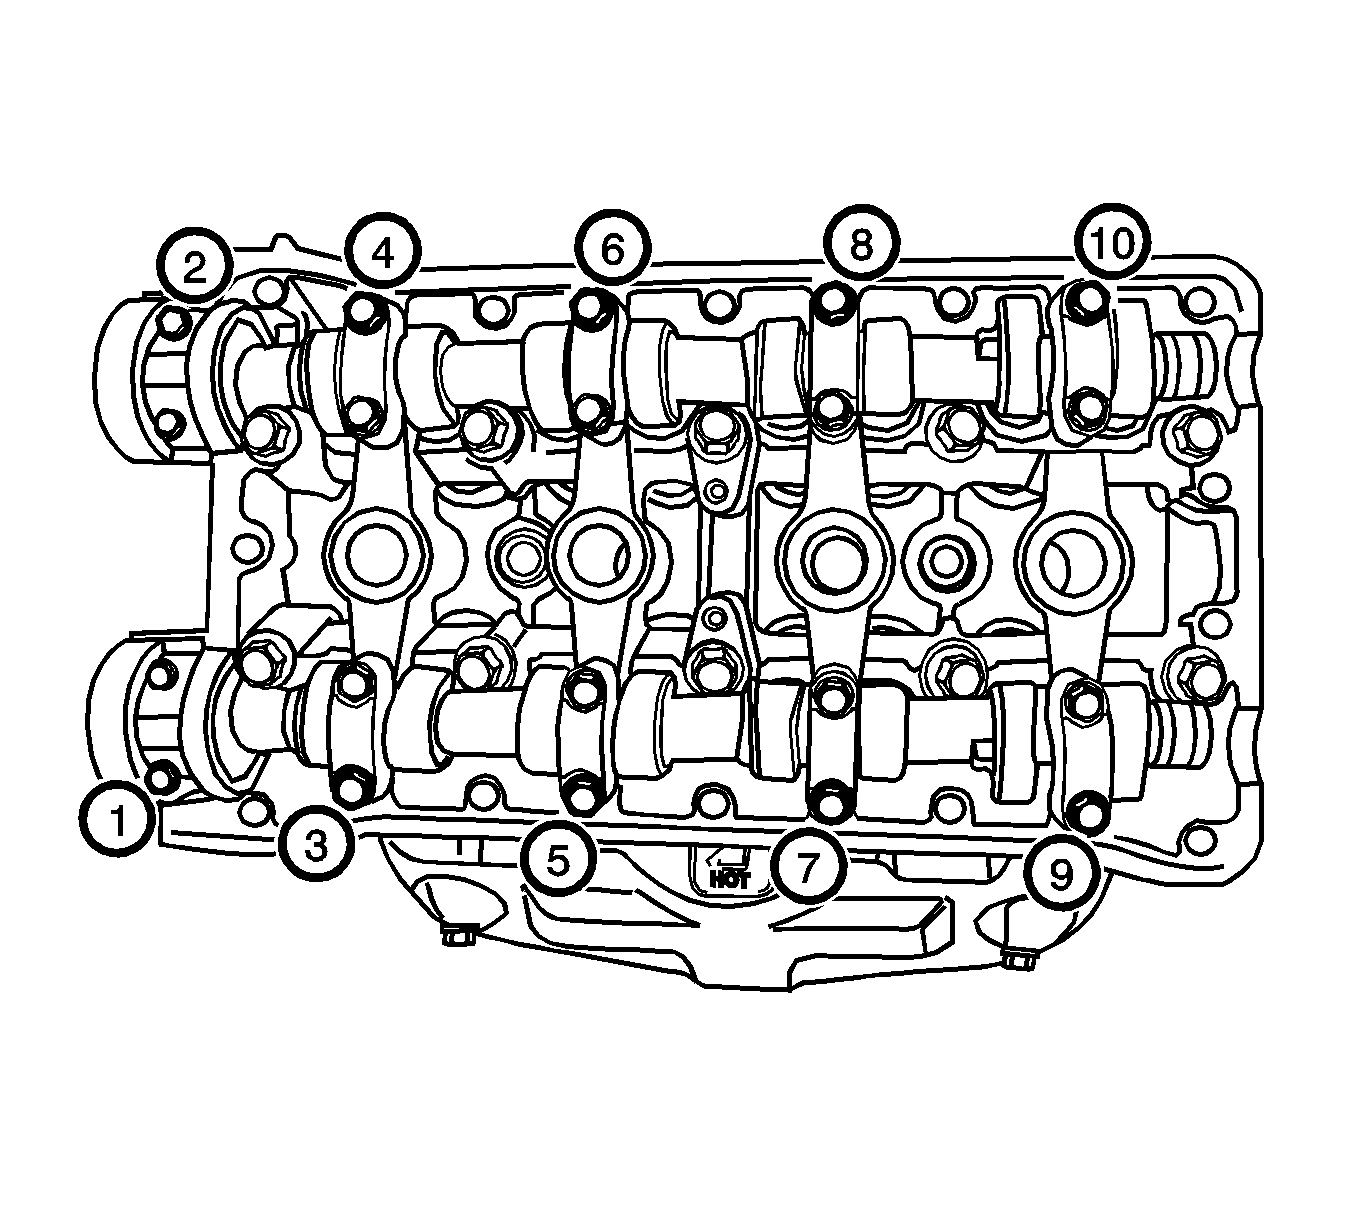
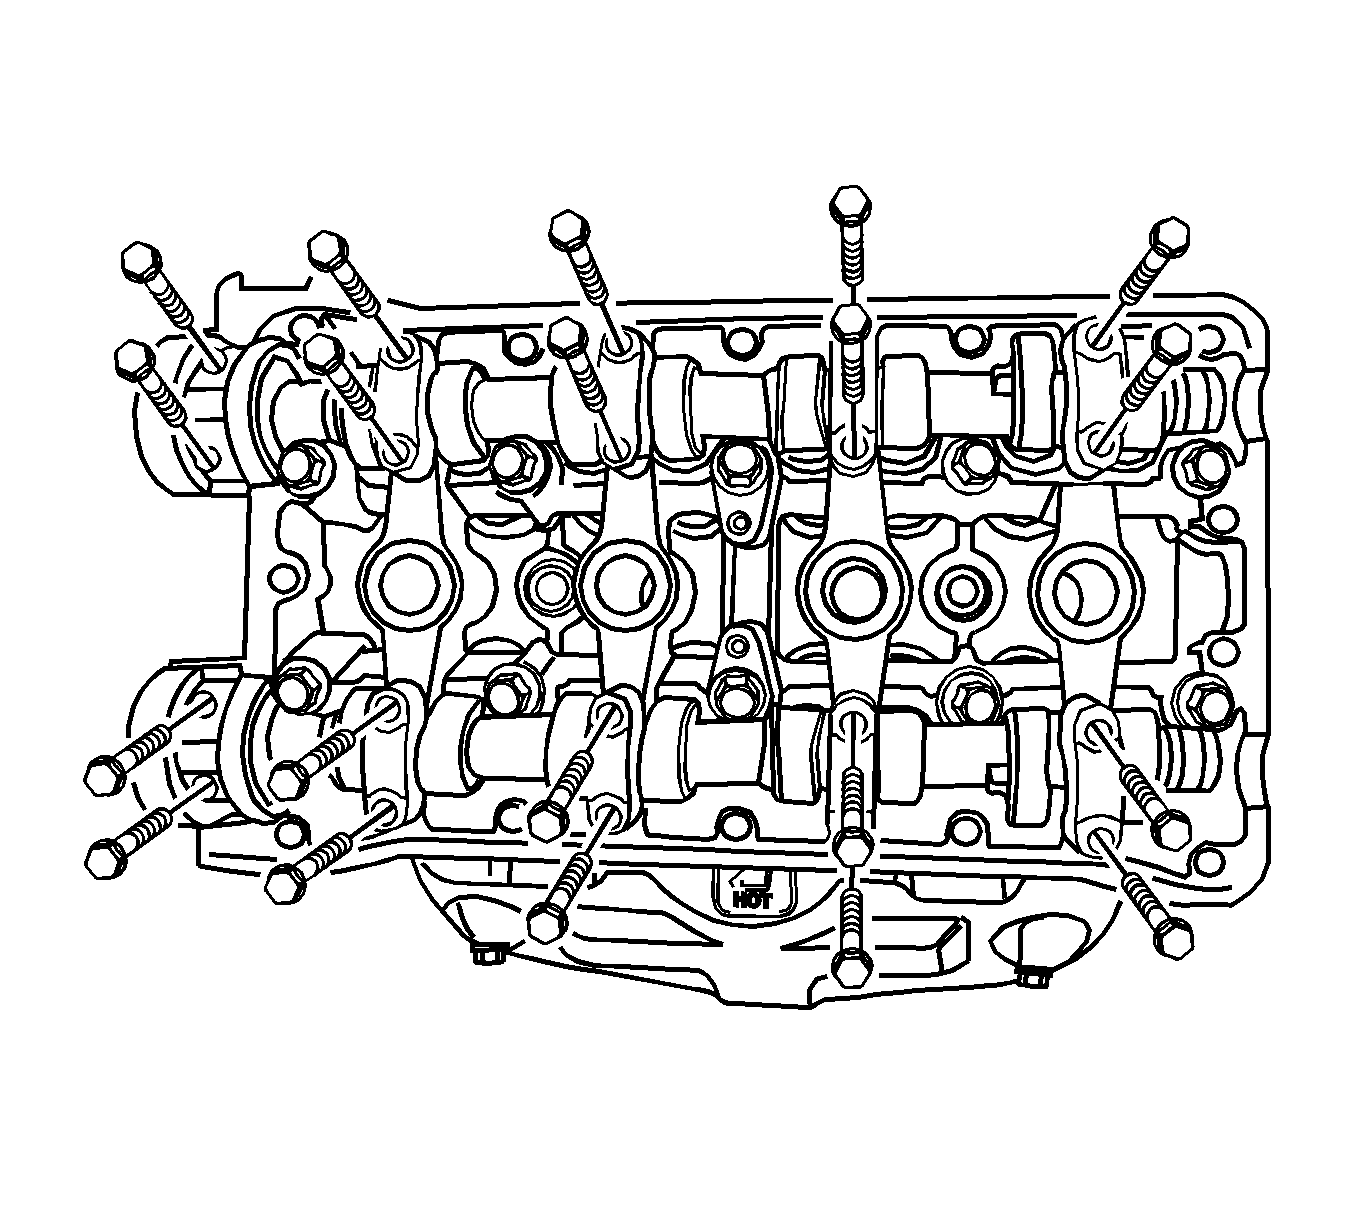
Notice: Use extreme care when removing the camshaft not to nick, scratch, or damage the camshaft lobes or bearing surfaces.
Installation Procedure
- Lubricate the camshaft journals and the camshaft caps with engine oil.
- Install the intake and exhaust camshafts.
- Install the intake and exhaust camshaft caps in their original positions.
- Measure the intake and exhaust camshaft end play. Refer to Engine Mechanical Specifications .
- Install the intake and exhaust camshaft gear.
- While holding the intake and exhaust camshafts firmly in place, install the intake and exhaust camshaft gear bolts.
- Install the timing belt. Refer to Timing Belt Replacement .
- Install the camshaft cover. Refer to Valve Rocker Arm Cover Replacement .

Notice: Refer to Fastener Notice in the Preface section.
Tighten
Tighten the intake/exhaust camshaft caps bolts to 16 N·m (12 lb ft).
Tighten
Tighten the intake and exhaust camshaft gear bolts to 67.5 N·m (49 lb ft).

