Removal Procedure
- Remove the HVAC module assembly. Refer to HVAC Module Assembly Replacement.
- Disconnect the air intake fresh/recirculation actuator electrical connector (1).
- Detach the wiring harness retaining clips (2) from the HVAC module assembly (3).
- Detach the wiring harness retaining clips (1) from the HVAC module assembly (2).
- Disconnect the defrost actuator air intake fresh/recirculation electrical connector (1).
- Disconnect the air mix actuator electrical connector (2).
- Disconnect the HVAC module electrical connectors (3) as required.
- Remove evaporator temperature sensor (1) from the HVAC module assembly (3).
- Detach the wiring harness retaining clips (1) from the under side of the HVAC module assembly (2).
- Detach the inside air temperature sensor aspirator venturi tube (4) from the HVAC module assembly retaining clip (1)
- Remove the inside air temperature sensor aspirator venturi (3) and inside air temperature sensor aspirator venturi tube (4) from the HVAC module assembly (2).
- Disconnect the face/floor actuator electrical connector (1).
- Disconnect the drivers side air mix actuator electrical connector (2) if equipped.
Caution: Refer to Safety Glasses Caution in the Preface section.
Important: The evaporator temperature sensor is part of the wiring harness.
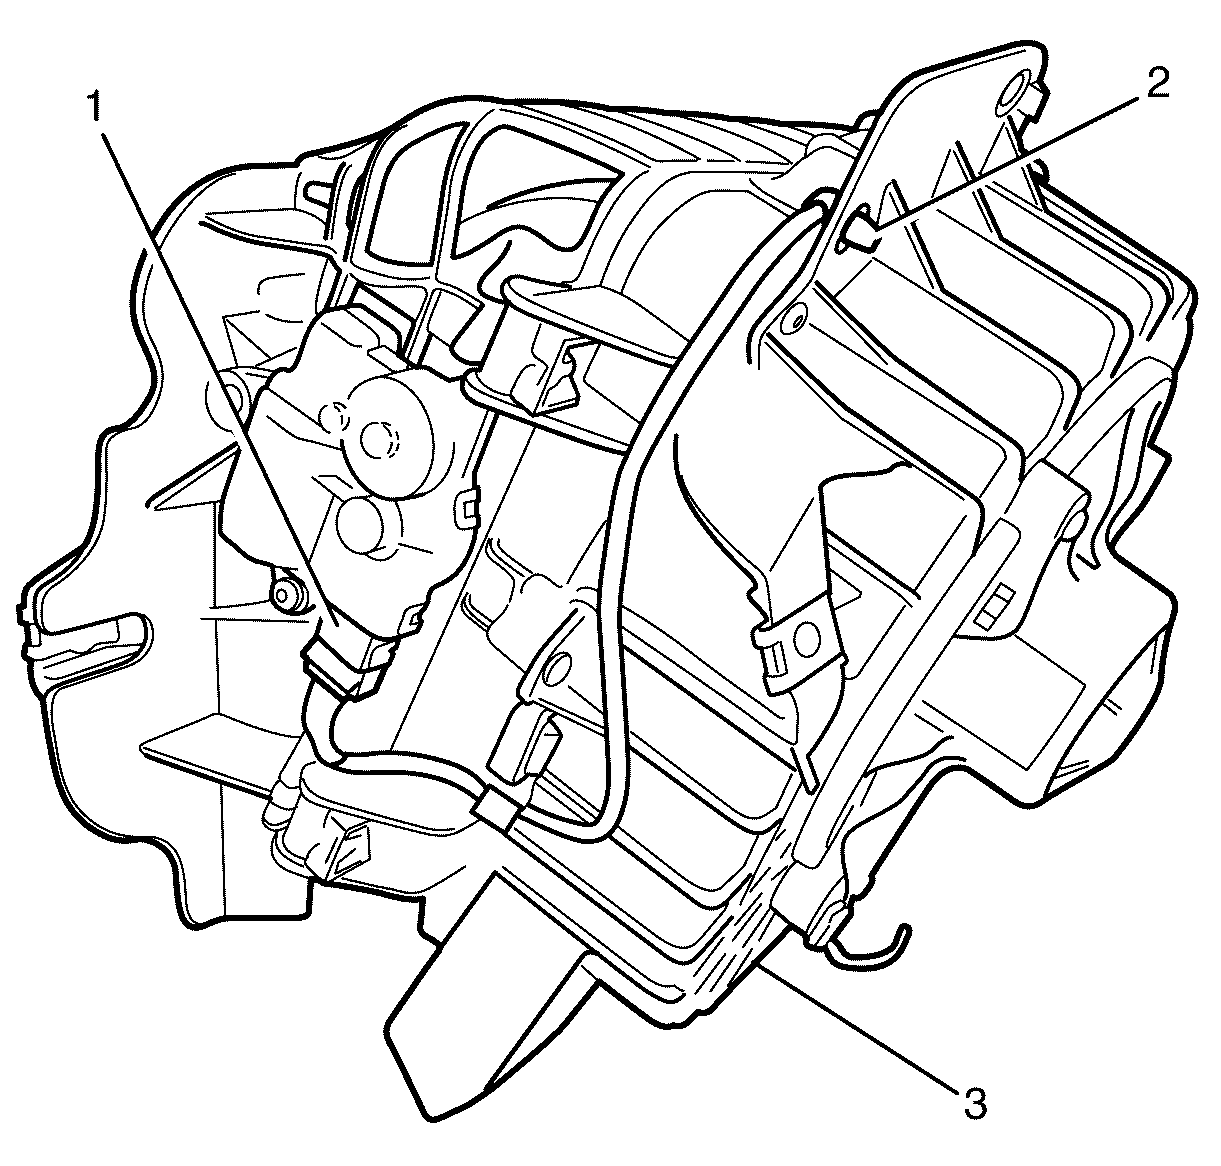
Important: Use a pair of long nose pliers to close the wiring harness retaining clip (2) ends to remove the wiring harness retaining clips (2) from the HVAC module assembly (3)
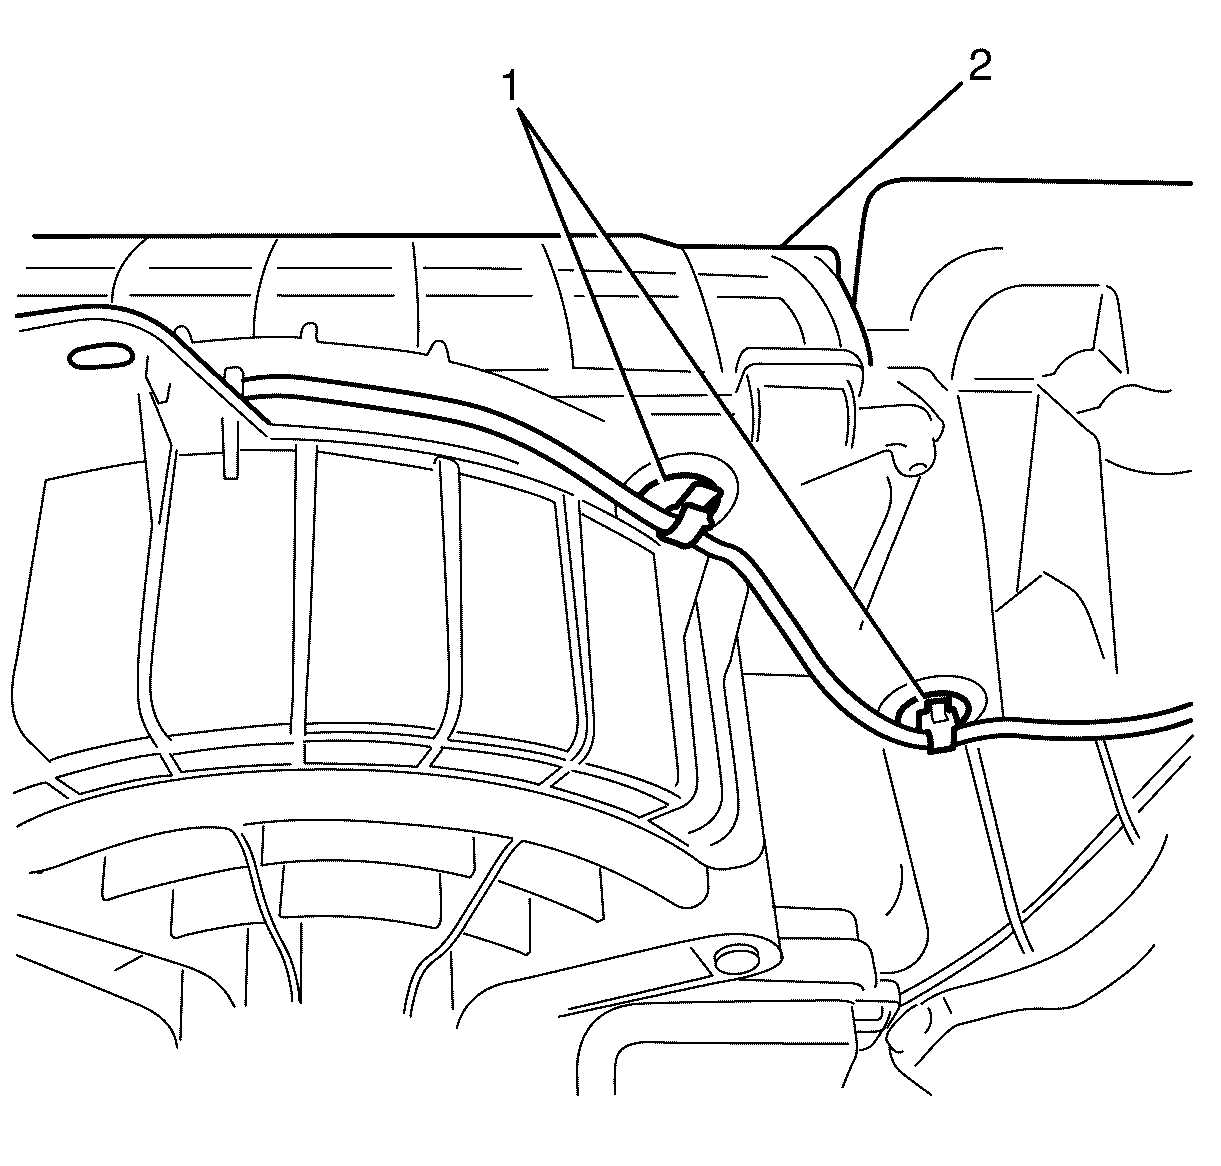
Important: Use a pair of long nose pliers to close the wiring harness retaining clip (1) ends to remove the wiring harness retaining clips (1) from the HVAC module assembly (2)
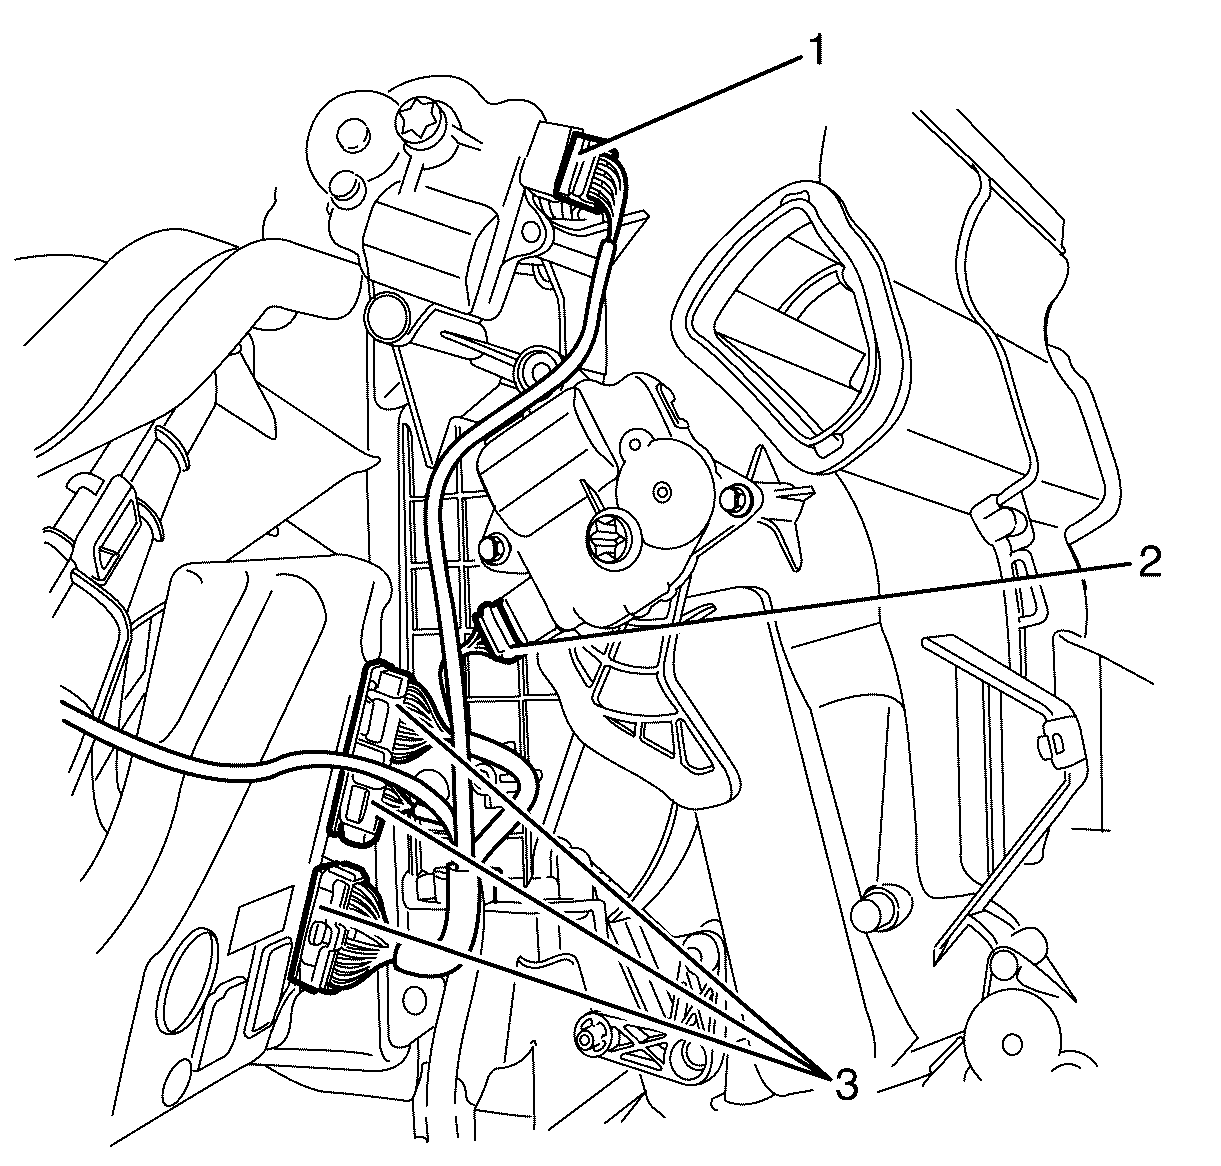
Important: The single zone HVAC module only has the one 22 pin connector. The dual zone HVAC module has a 22 pin connector and a 7 pin connector. The tri zone HVAC module has a 22 pin connector, a 7 pin connector and a 10 pin connector.
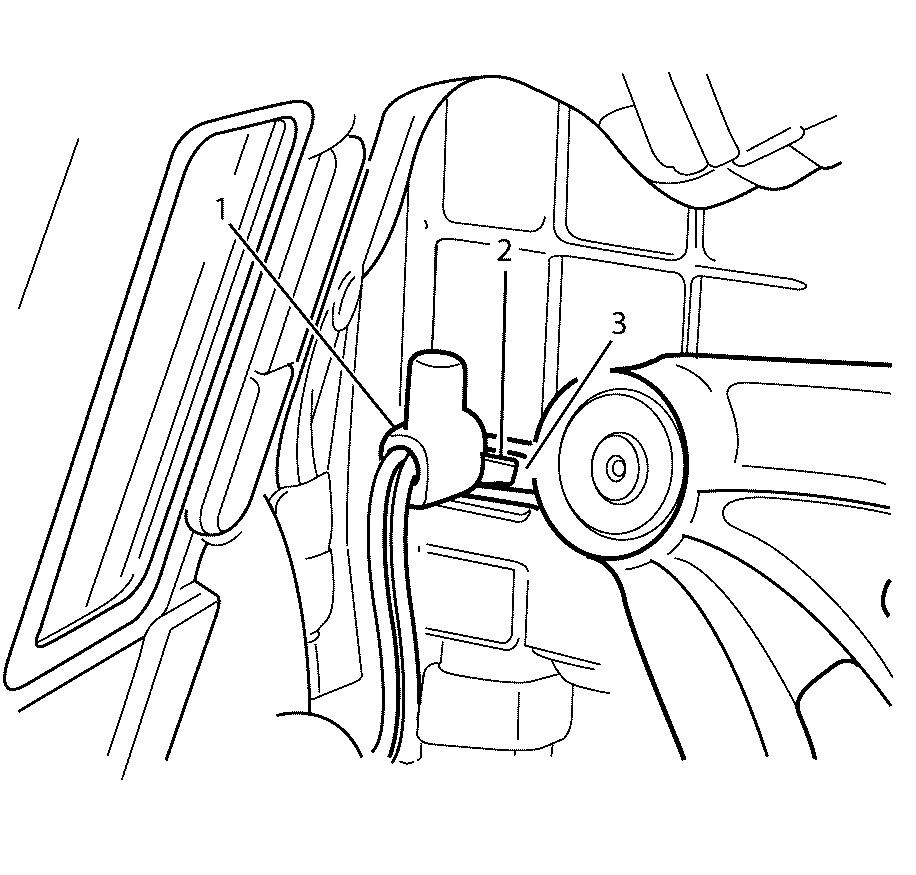
Important: The evaporator temperature sensor is part of the wiring harness.
Important: Using a suitable tool, raise the evaporator temperature sensor locating clip (2) to clear the locking recess in the HVAC module assembly (3) and turn the evaporator temperature sensor (1) 45 degrees clockwise to remove evaporator temperature sensor (1) from the HVAC module assembly (3).
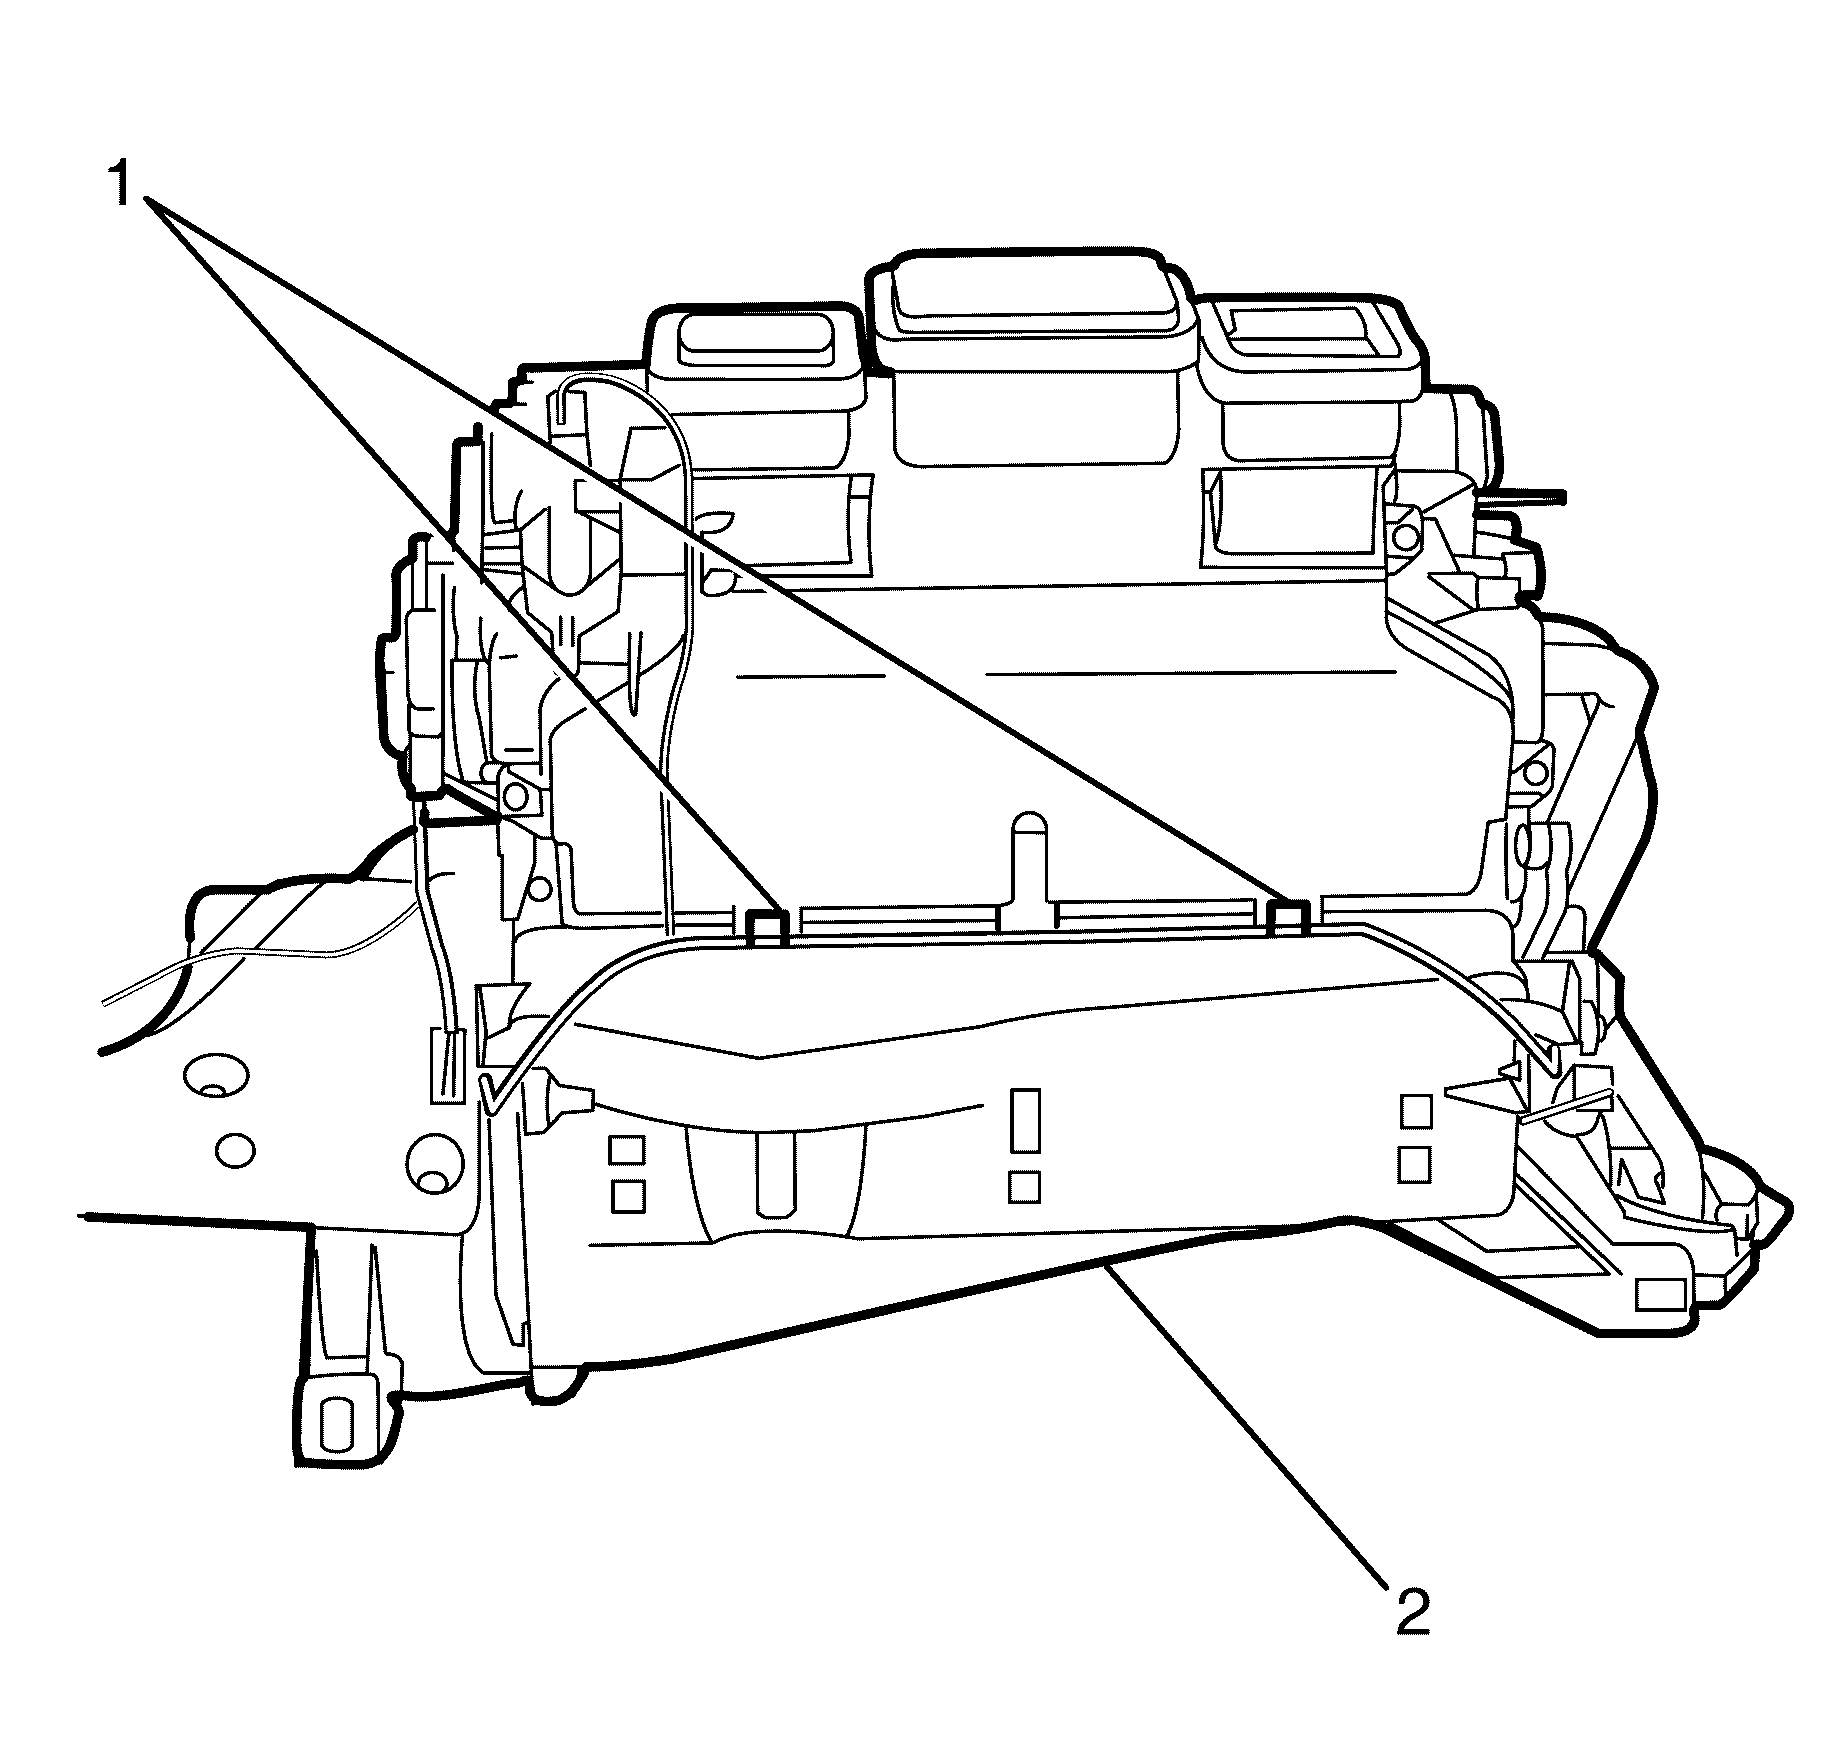
Important: Use a pair of long nose pliers to close the wiring harness retaining clip (1) ends to remove the wiring harness retaining clips (1) from the HVAC module assembly (2)
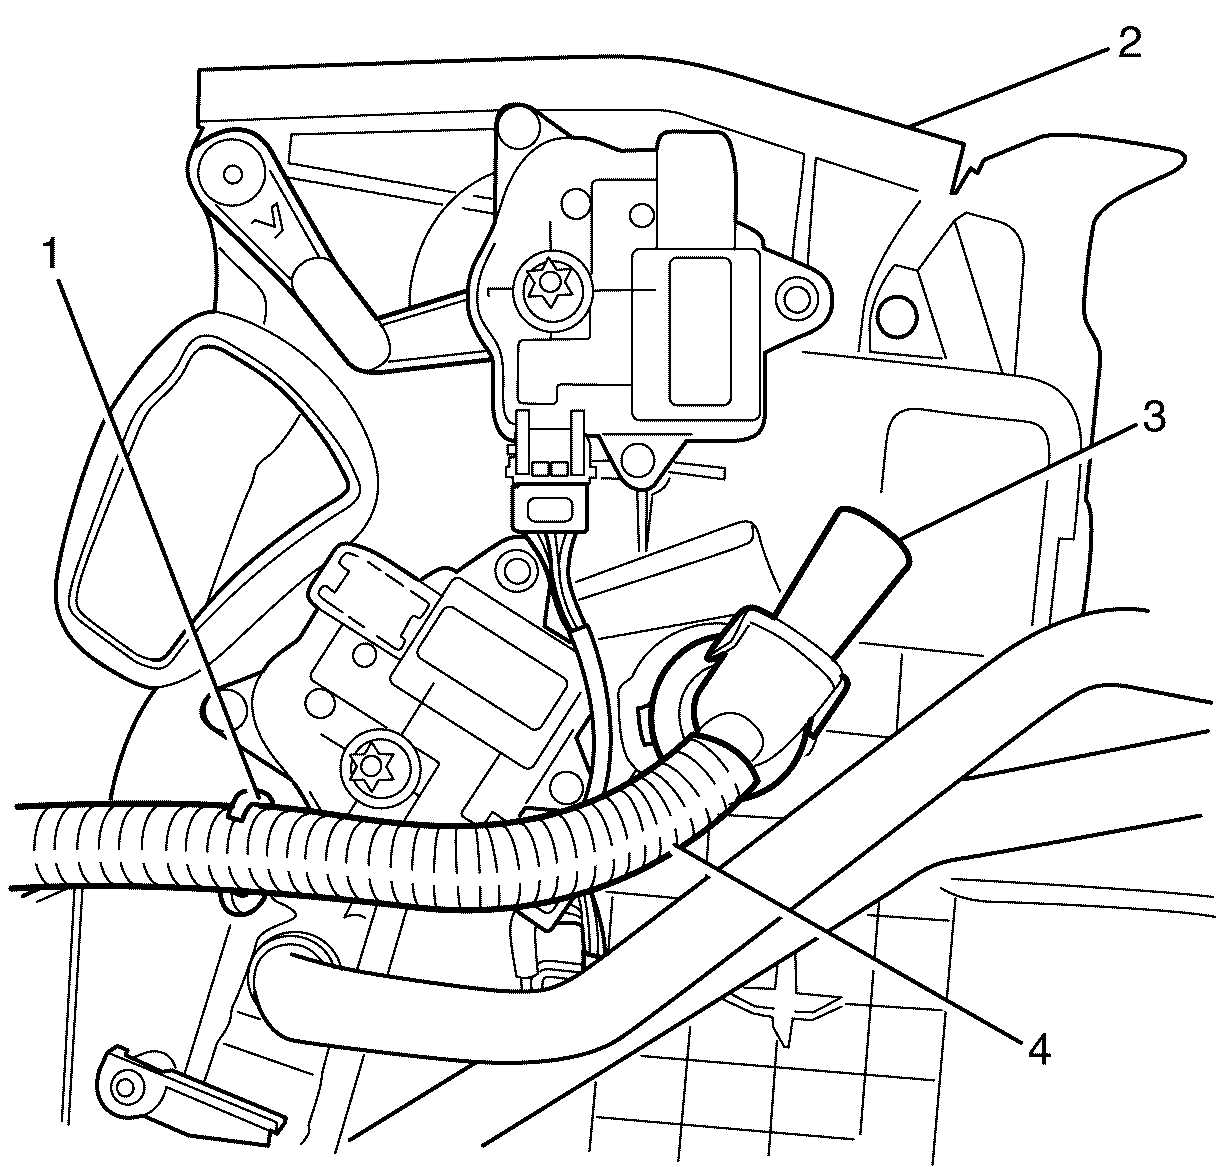
Important: The inside air temperature sensor aspirator venturi is only fitted to dual and tri zone HVAC module assemblies. Ignore steps 11 and 12 if working on a single zone HVAC equipped vehicle.
Important: Rotate the inside air temperature sensor aspirator venturi (3) clockwise to disengage the inside air temperature sensor aspirator venturi (3) retaining clips from the HVAC module assembly (2).
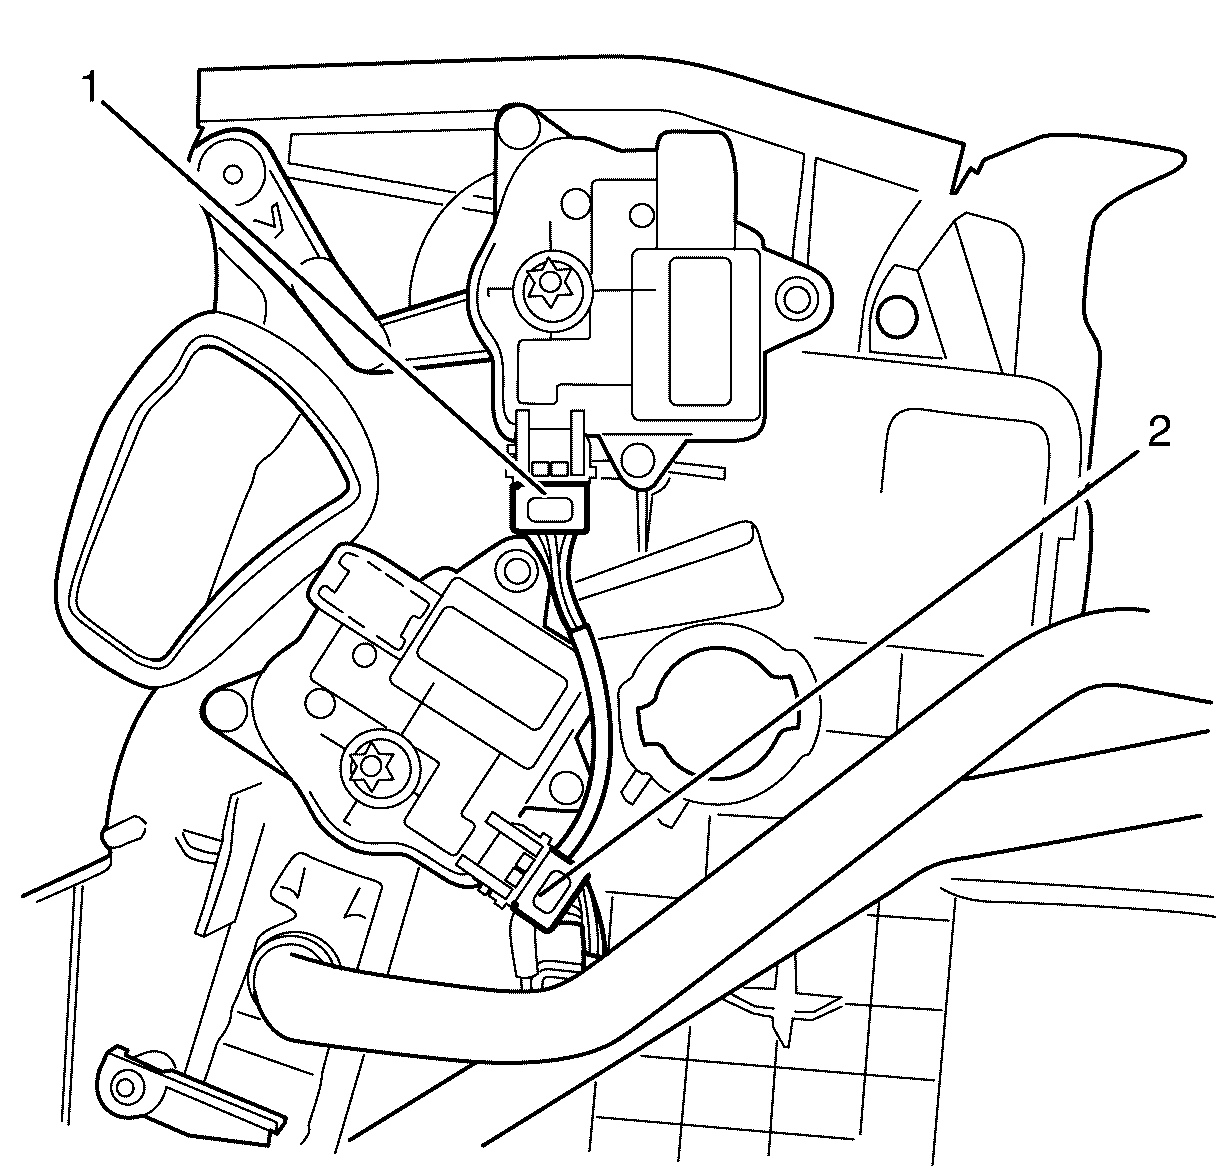
Important: The drivers side air mix actuator is only fitted to dual and tri zone HVAC module assemblies. Ignore this step if working on a single zone HVAC equipped vehicle.
Installation Procedure
- Connect the face/floor actuator electrical connector (1).
- Connect the drivers side air mix actuator electrical connector (2) if equipped.
- Install the inside air temperature sensor aspirator venturi (3) and inside air temperature sensor aspirator venturi tube (4) to the HVAC module assembly (2).
- Attach the inside air temperature sensor aspirator venturi tube (4) to the HVAC module assembly retaining clip (1)
- Install the clips (1) to the under side of the HVAC module assembly (2).
- Remove evaporator temperature sensor (1) from the HVAC module assembly (3).
- Connect the HVAC module electrical connectors (3) as required.
- Connect the air mix actuator electrical connector (2).
- Connect the defrost actuator air intake fresh/recirculation electrical connector (1).
- Attach the wiring harness retaining clips (1) from the HVAC module assembly (2).
- Attach the wiring harness retaining clips (2) from the HVAC module assembly (3).
- Connect the air intake fresh/recirculation actuator electrical connector (1).
- Install the HVAC module assembly. Refer to HVAC Module Assembly Replacement.

Important: The drivers side air mix actuator is only fitted to dual and tri zone HVAC module assemblies. Ignore this step if working on a single zone HVAC equipped vehicle.

Important: The inside air temperature sensor aspirator venturi is only fitted to dual and tri zone HVAC module assemblies. Ignore steps 3 and 4 if working on a single zone HVAC equipped vehicle.
Important: Rotate the inside air temperature sensor aspirator venturi (3) counterclockwise to engage the inside air temperature sensor aspirator venturi (3) retaining clips.


Important: Install the evaporator temperature sensor (1) to the HVAC module assembly (3) and turn the evaporator temperature sensor (1) 45 degrees counterclockwise to engage the evaporator temperature sensor locating clip (2) in the locking recess in the HVAC module assembly (3).

Important: The single zone HVAC module only has the one 22 pin connector. The dual zone HVAC module has a 22 pin connector and a 7 pin connector. The tri zone HVAC module has a 22 pin connector, a 7 pin connector and a 10 pin connector.


