For 1990-2009 cars only
Removal Procedure
- Disconnect the battery negative cable from the battery. Refer to Battery Negative Cable Disconnection and Connection.
- Remove the radiator grille. Refer to Radiator Grille Replacement.
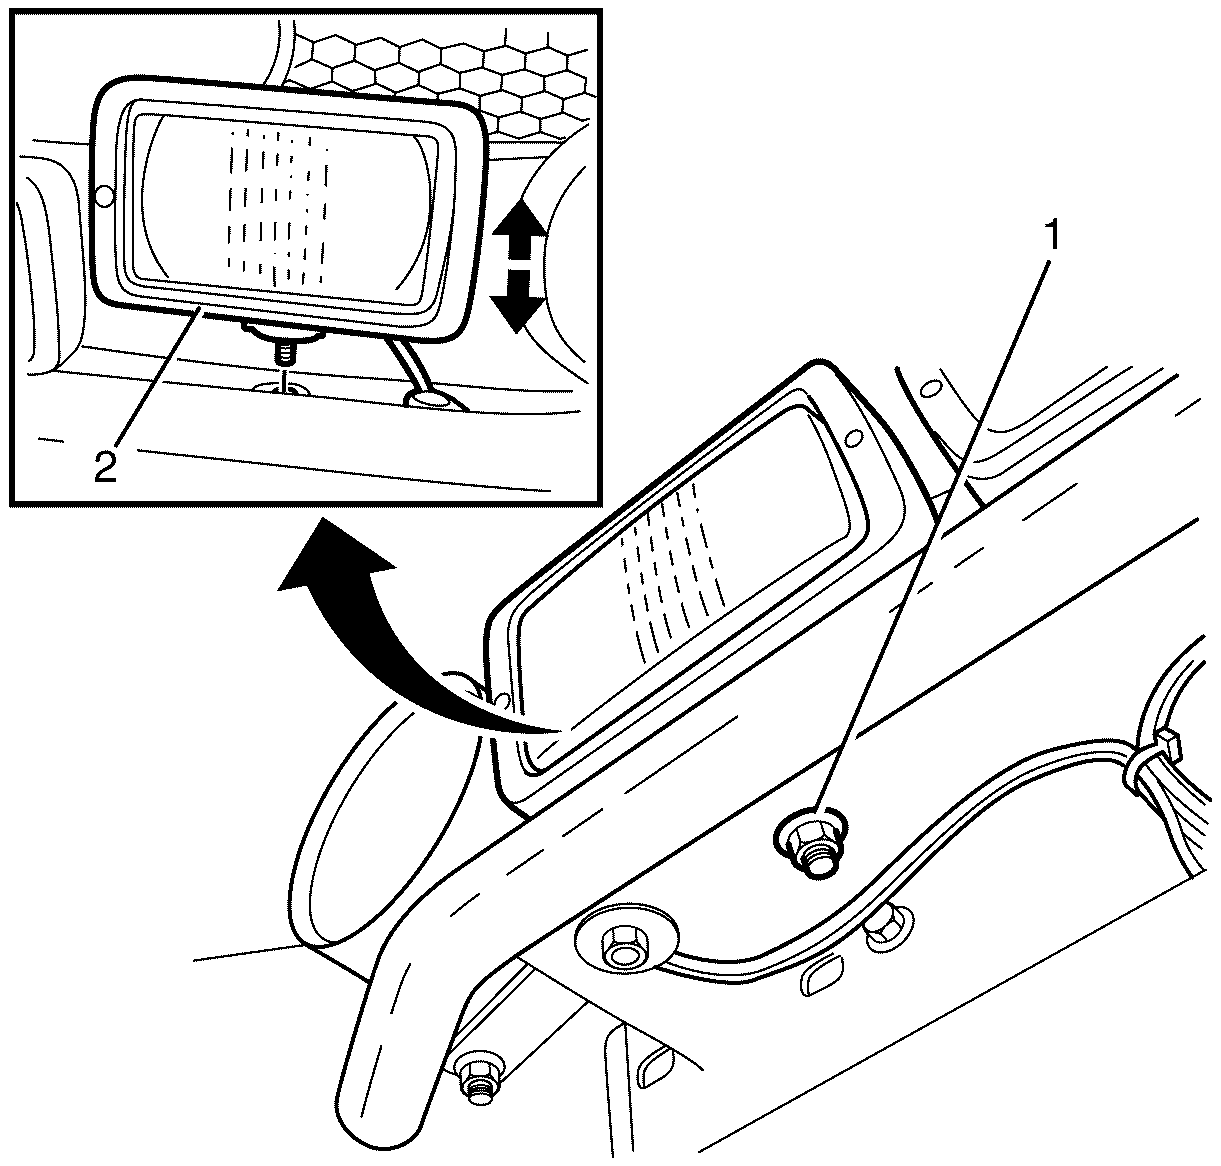
- Remove the front flashing light to bumper bar retaining nut (1).
- Detach the front flashing light (2) from the bumper bar.
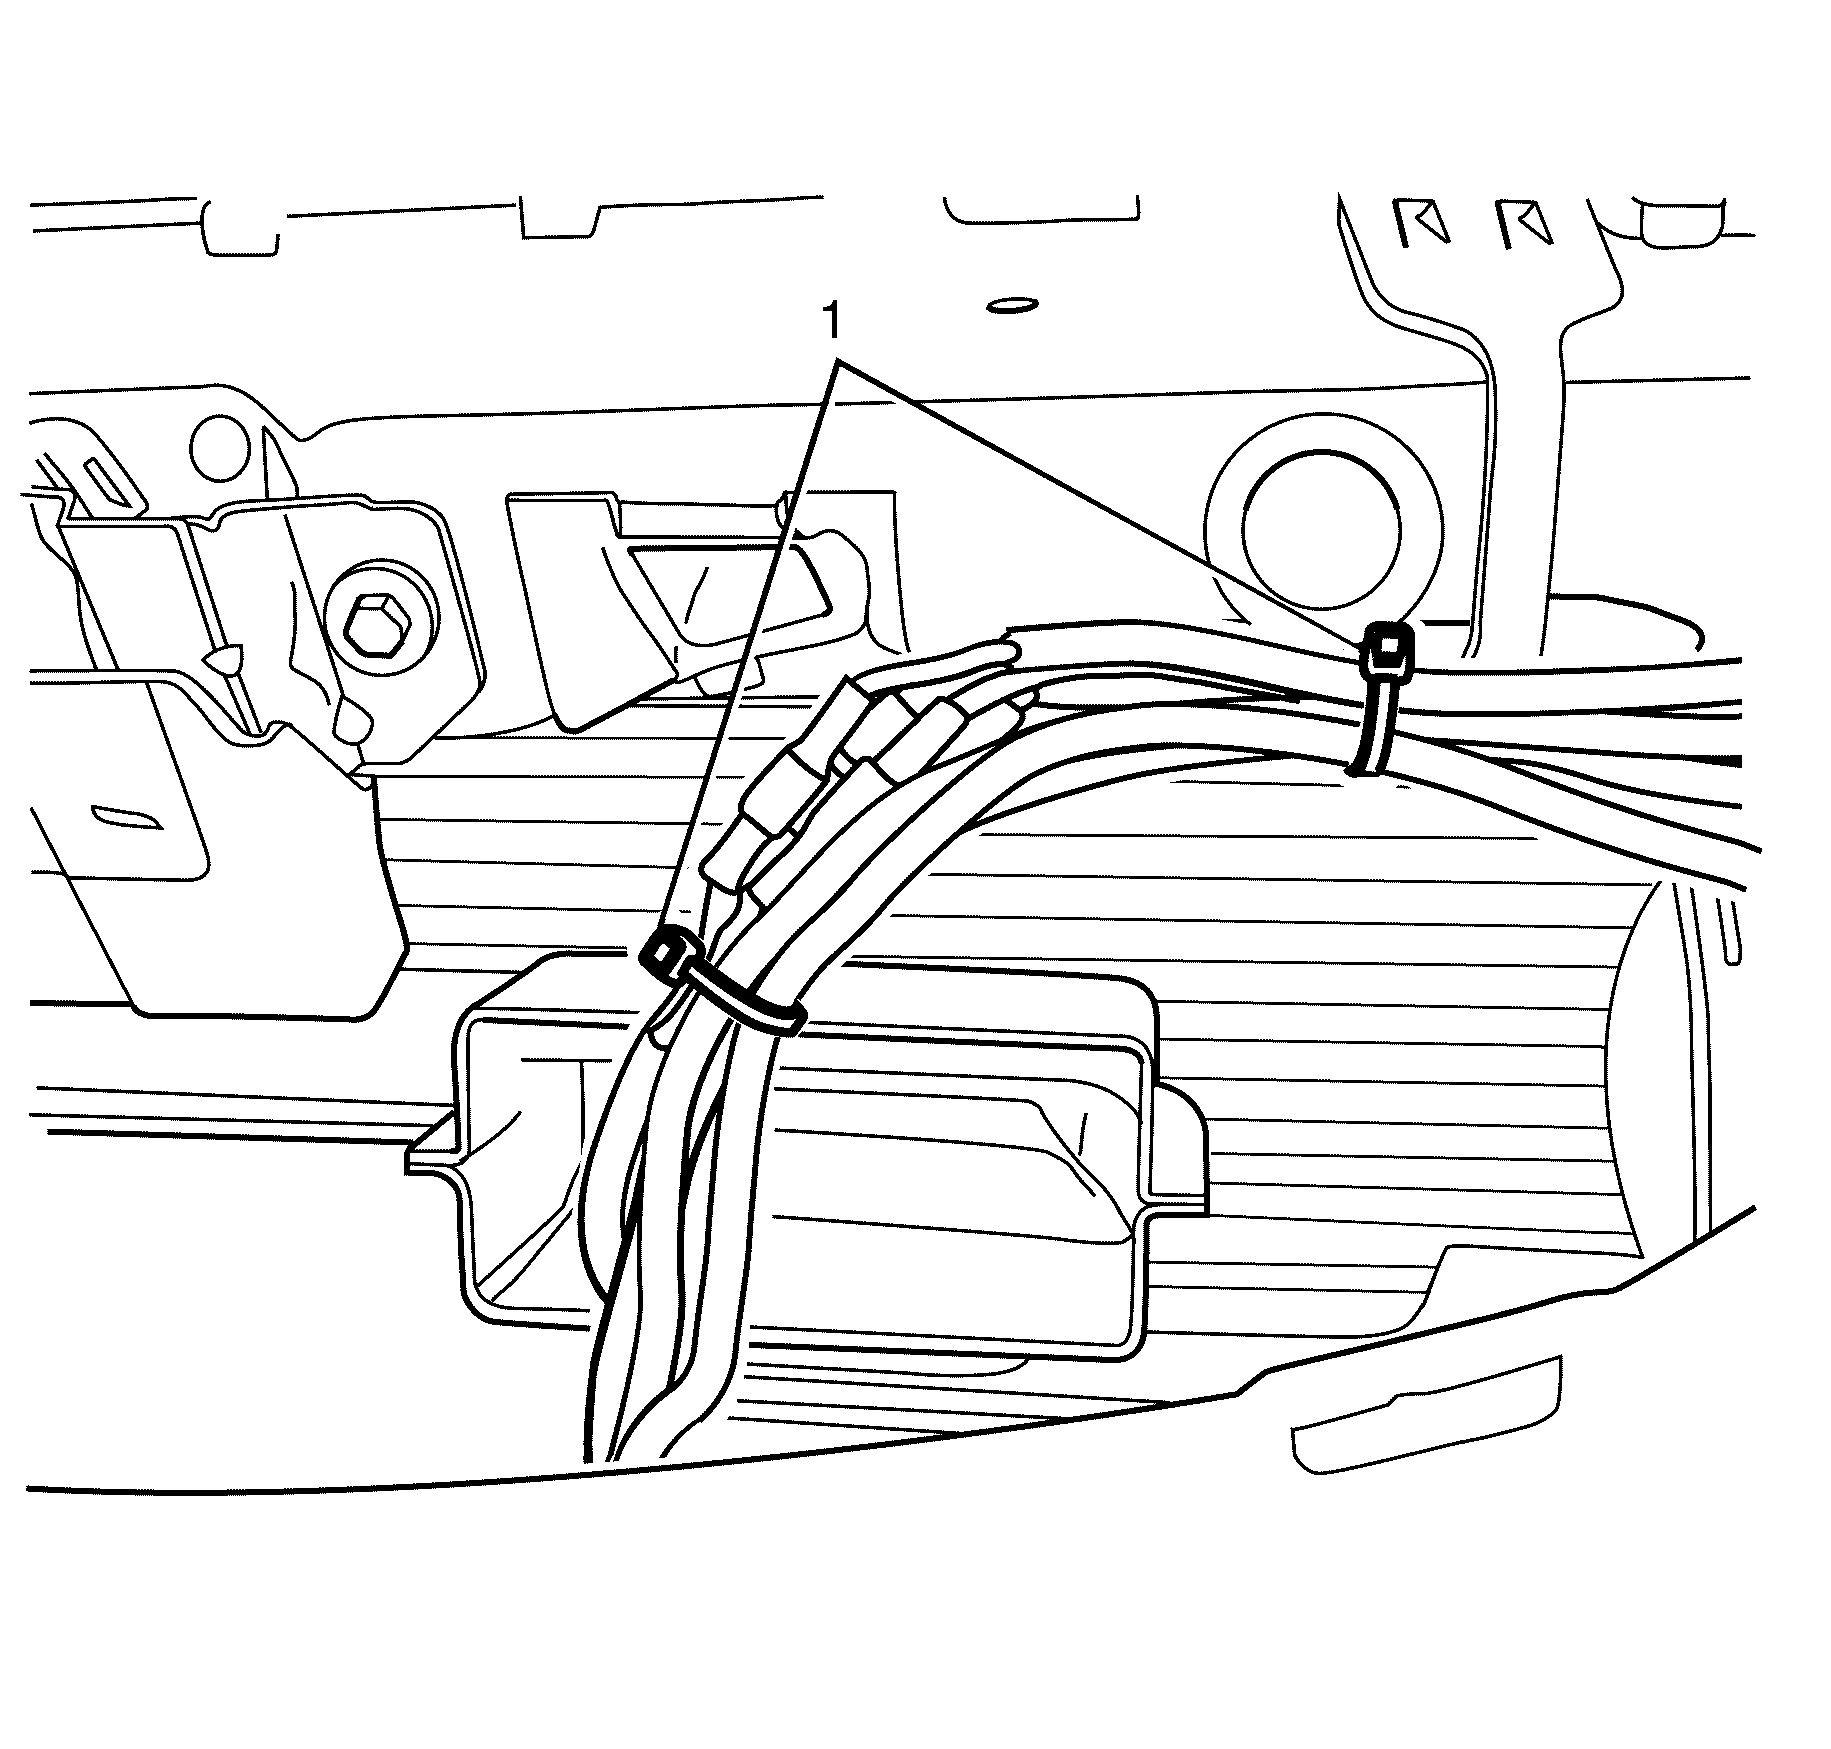
- Remove the cable ties (1) from the wiring harness.
- Locate the correct electrical connectors for the front flashing lights.
- Disconnect the front flashing light electrical connectors.
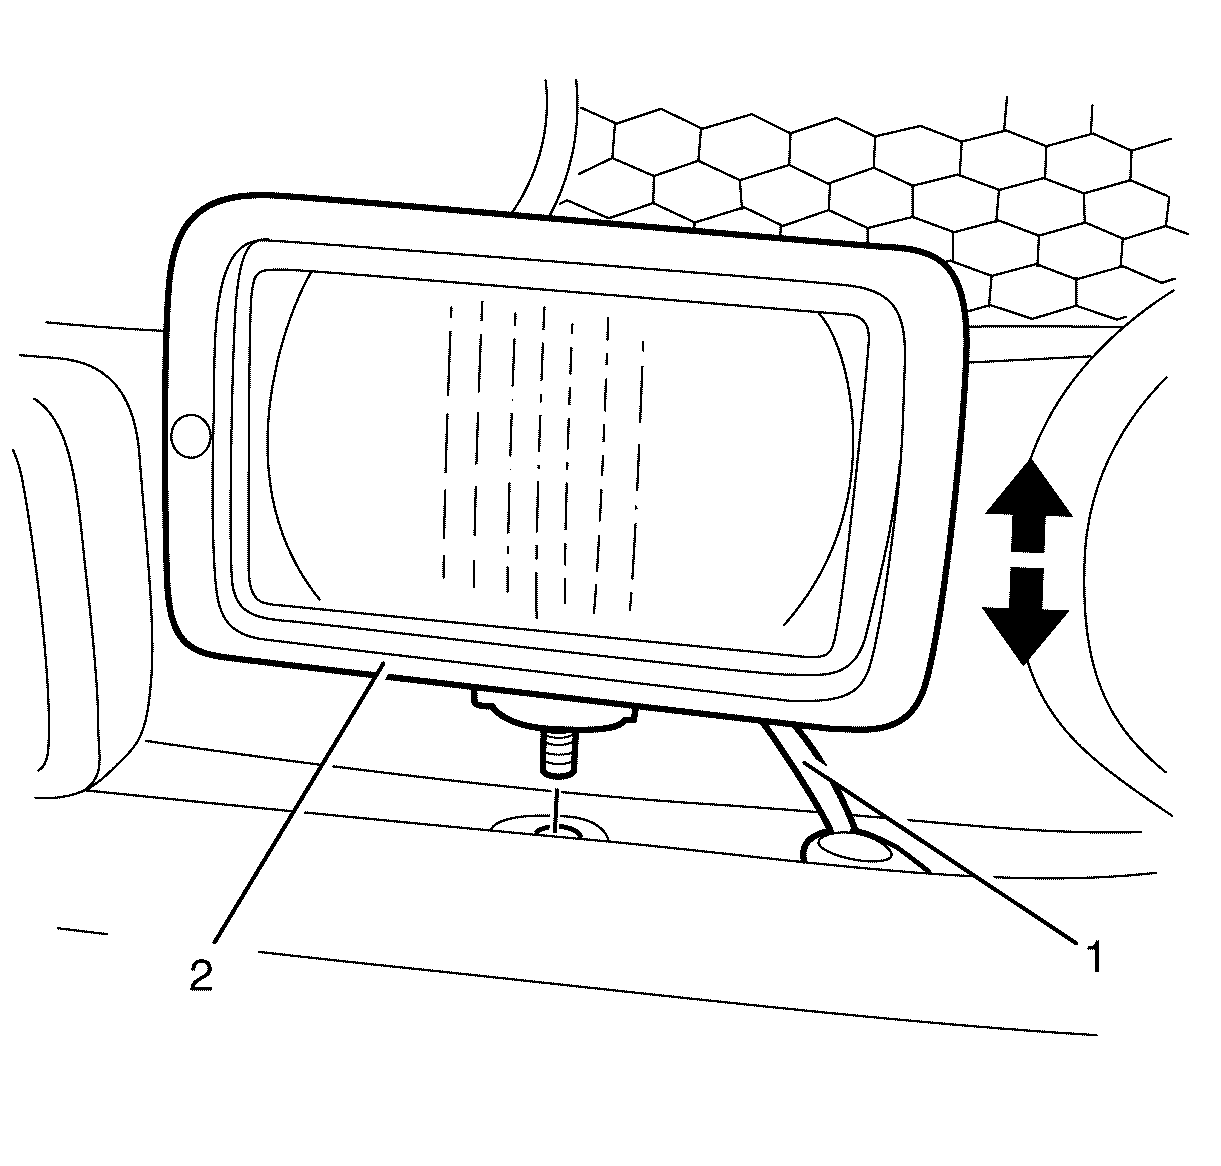
- Remove the front flashing lights (2) and wiring harness (1) from the vehicle.
- Repeat steps 3 to 9 for the opposite flashing light (if required).
Caution: Refer to Battery Disconnect Caution in the Preface section.


Important: When removing the cable ties care must be undertaken not to damage the wiring loom.
Important: Cable ties are a single use item.

Important: When removing the front flashing light, take note of the route of the wiring harness routing.
Installation Procedure
- Install the front flashing lights (2) and wiring harness (1).
- Connect the front flashing lights electrical connectors.
- Secure the wiring harness with new cable ties (1).
- Install the front flashing light to bumper bar retaining nut (1).
- Install the radiator grille. Refer to Radiator Grille Replacement.
- Repeat steps 1 to 4 for opposite side flashing light (if required).
- Connect the battery negative cable to the battery. Refer to Battery Negative Cable Disconnection and Connection.
- Test the front flashing lights for the correct operation.


Notice: Refer to Fastener Notice in the Preface section.

Tighten
Tighten the nut to xx N·m (xx lb in).
