Removal Procedure
- Raise and support the vehicle. Refer to Lifting and Jacking the Vehicle .
- Remove the rear wheels. Refer to Tire and Wheel Removal and Installation .
- Remove the rear strut assembly. Refer to Strut Assembly Replacement .
- Inspect the rear strut.
- Mount the rear strut assembly on a mounting trestle, or a vice.
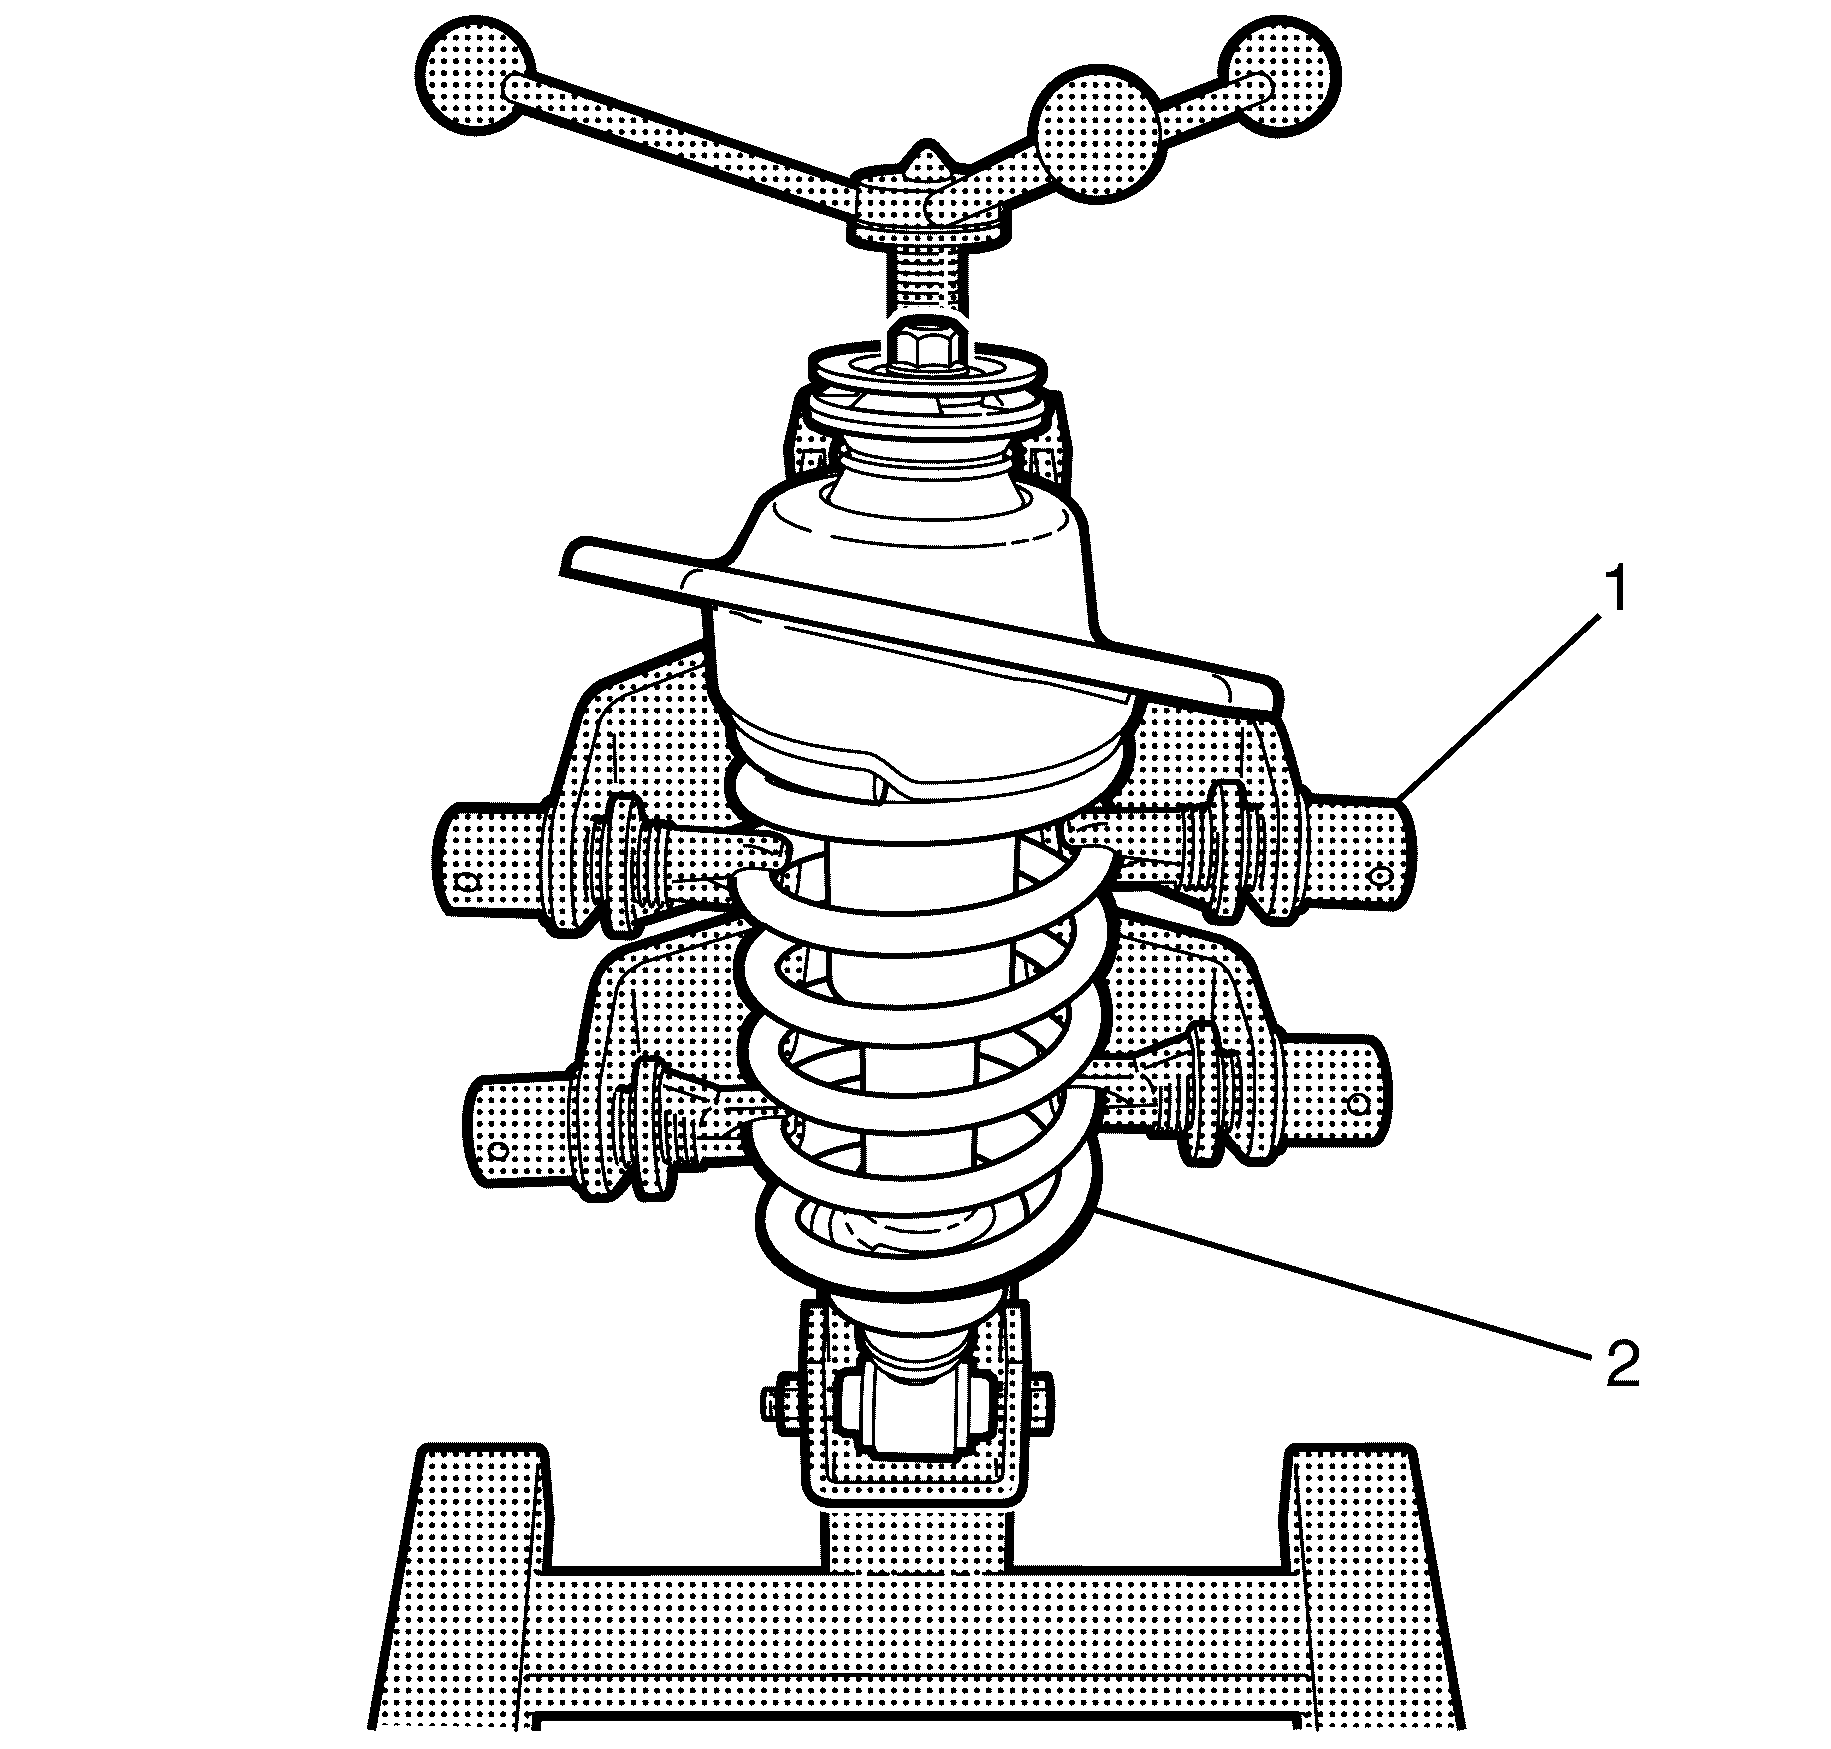
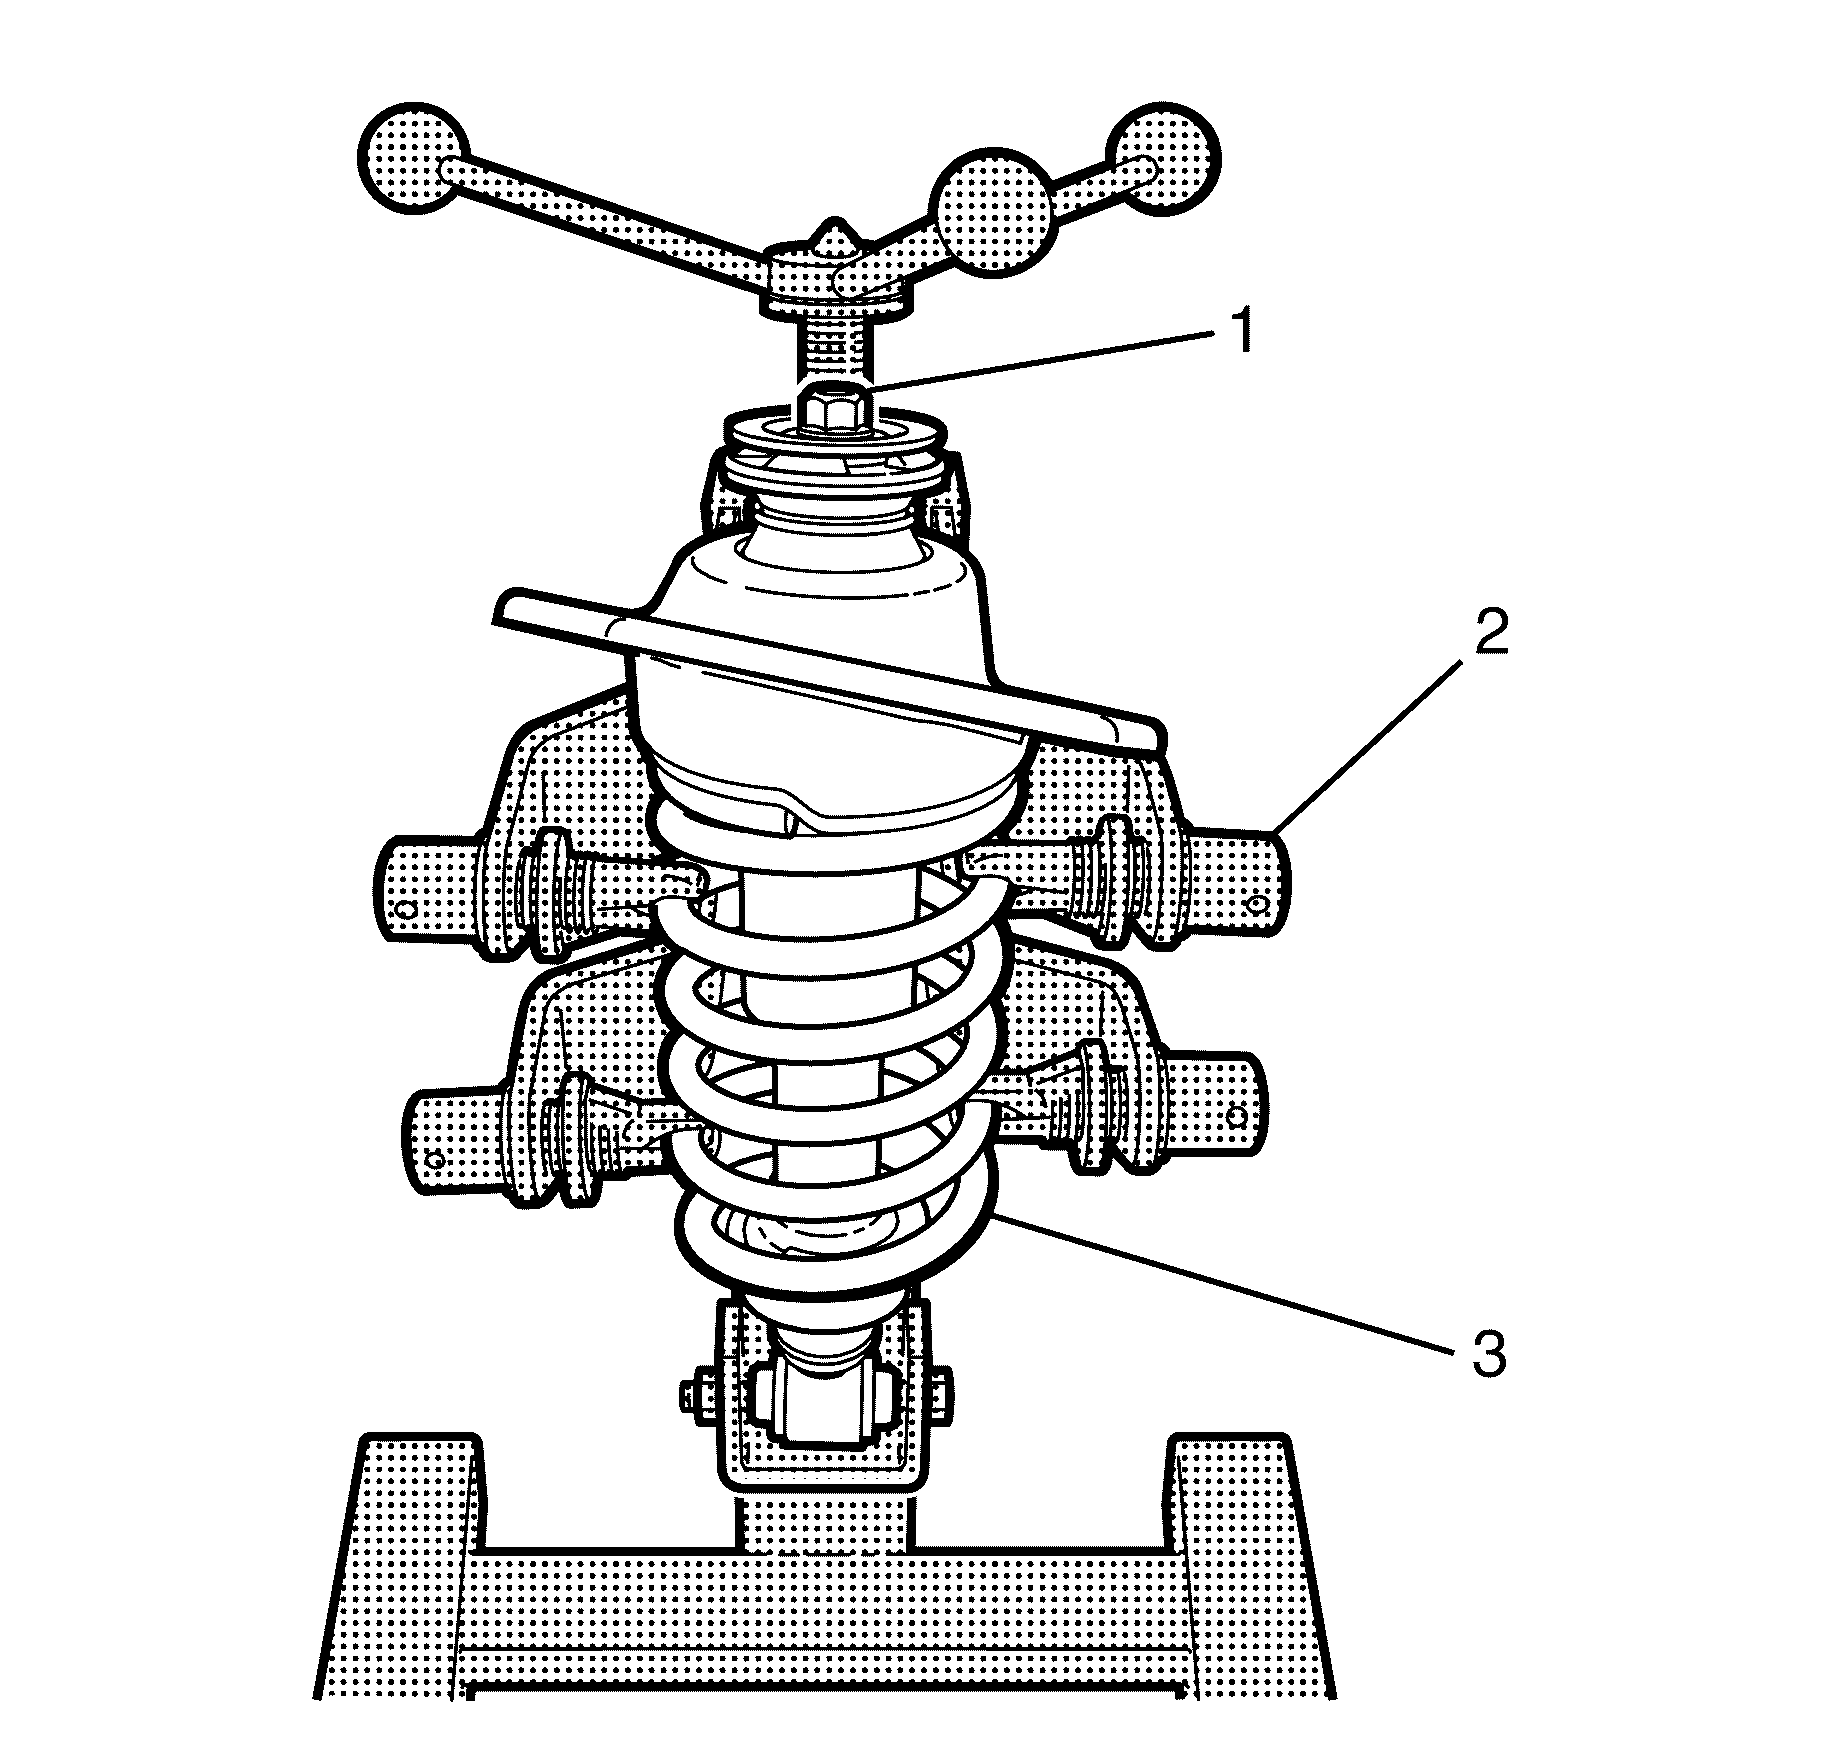
- Fasten the spring compressor (2) to the rear strut assembly. Make sure the hooks are seated on the coil spring (3) correctly.
- Compress the coil spring (3) using the spring compressor (2).
- Remove the rear strut assembly retaining nut (2).
- Note the orientation and remove the upper washer (3).
- Inspect the rear strut.
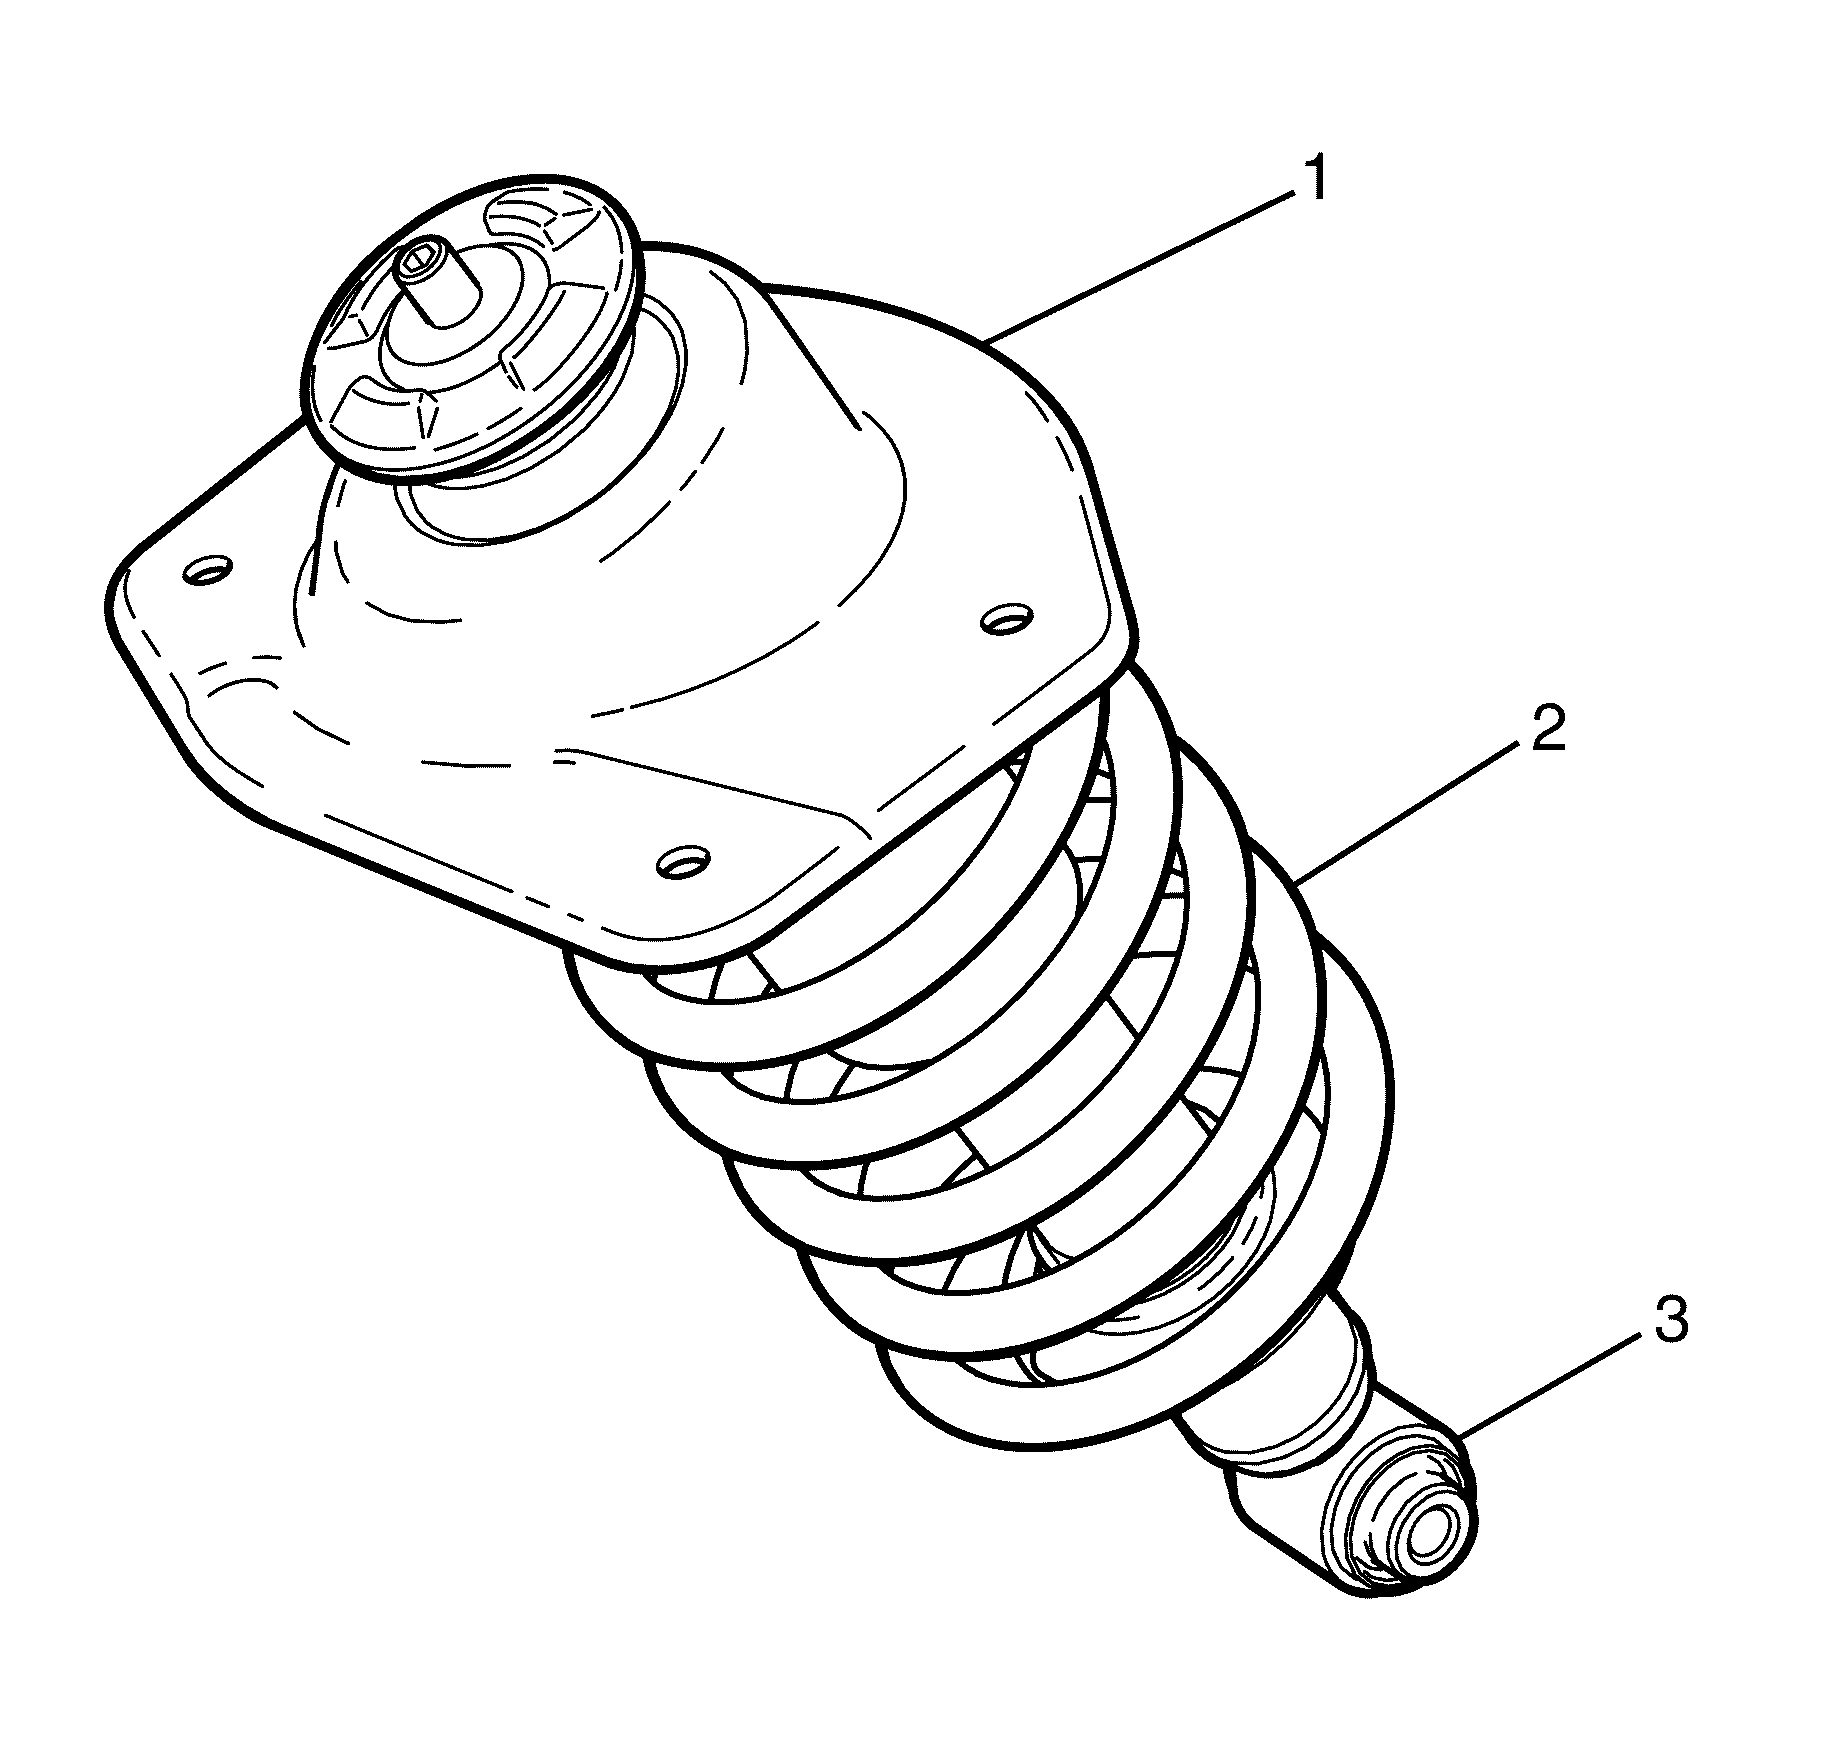
- Remove the rear strut assembly support mount (1) from the coil spring (2) and rear strut unit (3).
- Inspect all parts for wear and damage.
Caution: Refer to Safety Glasses Caution in the Preface section.
Caution: Refer to Vehicle Lifting Caution in the Preface section.
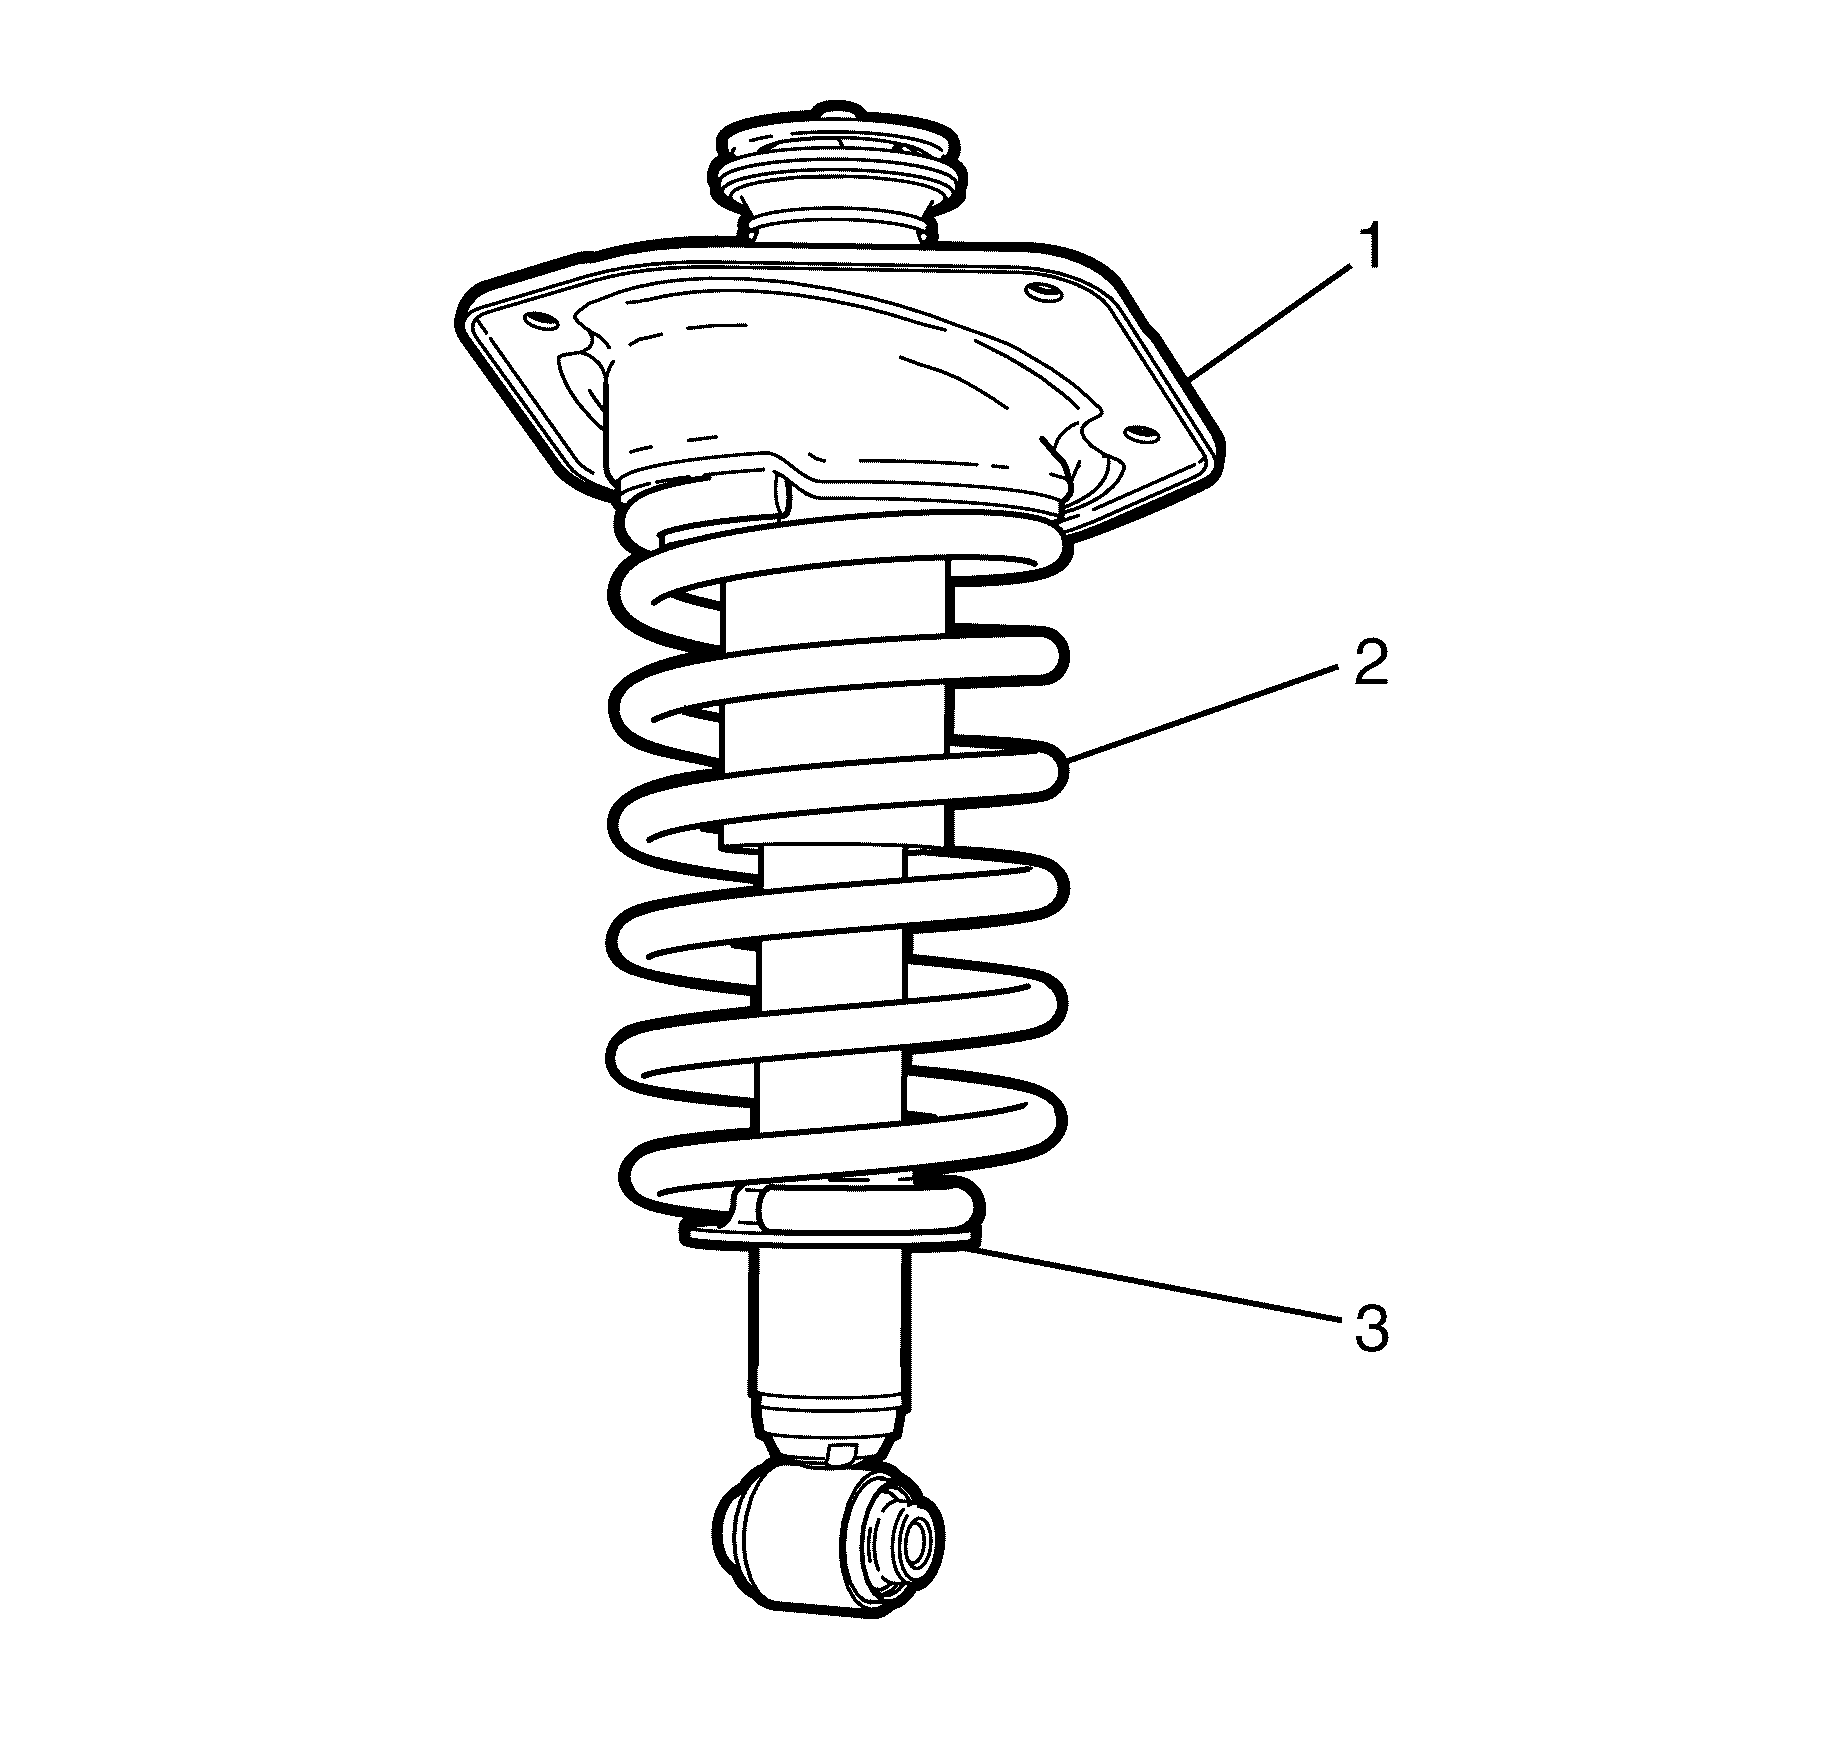
Important: Before disassembling the rear strut assembly observe the seating position of the coil spring (2) relative to the rear strut carrier plate (3) and rear strut assembly support mount (1).
Caution: Refer to General Repair Instructions in the Preface section.
Caution: Refer to General Repair Instructions in the Preface section.
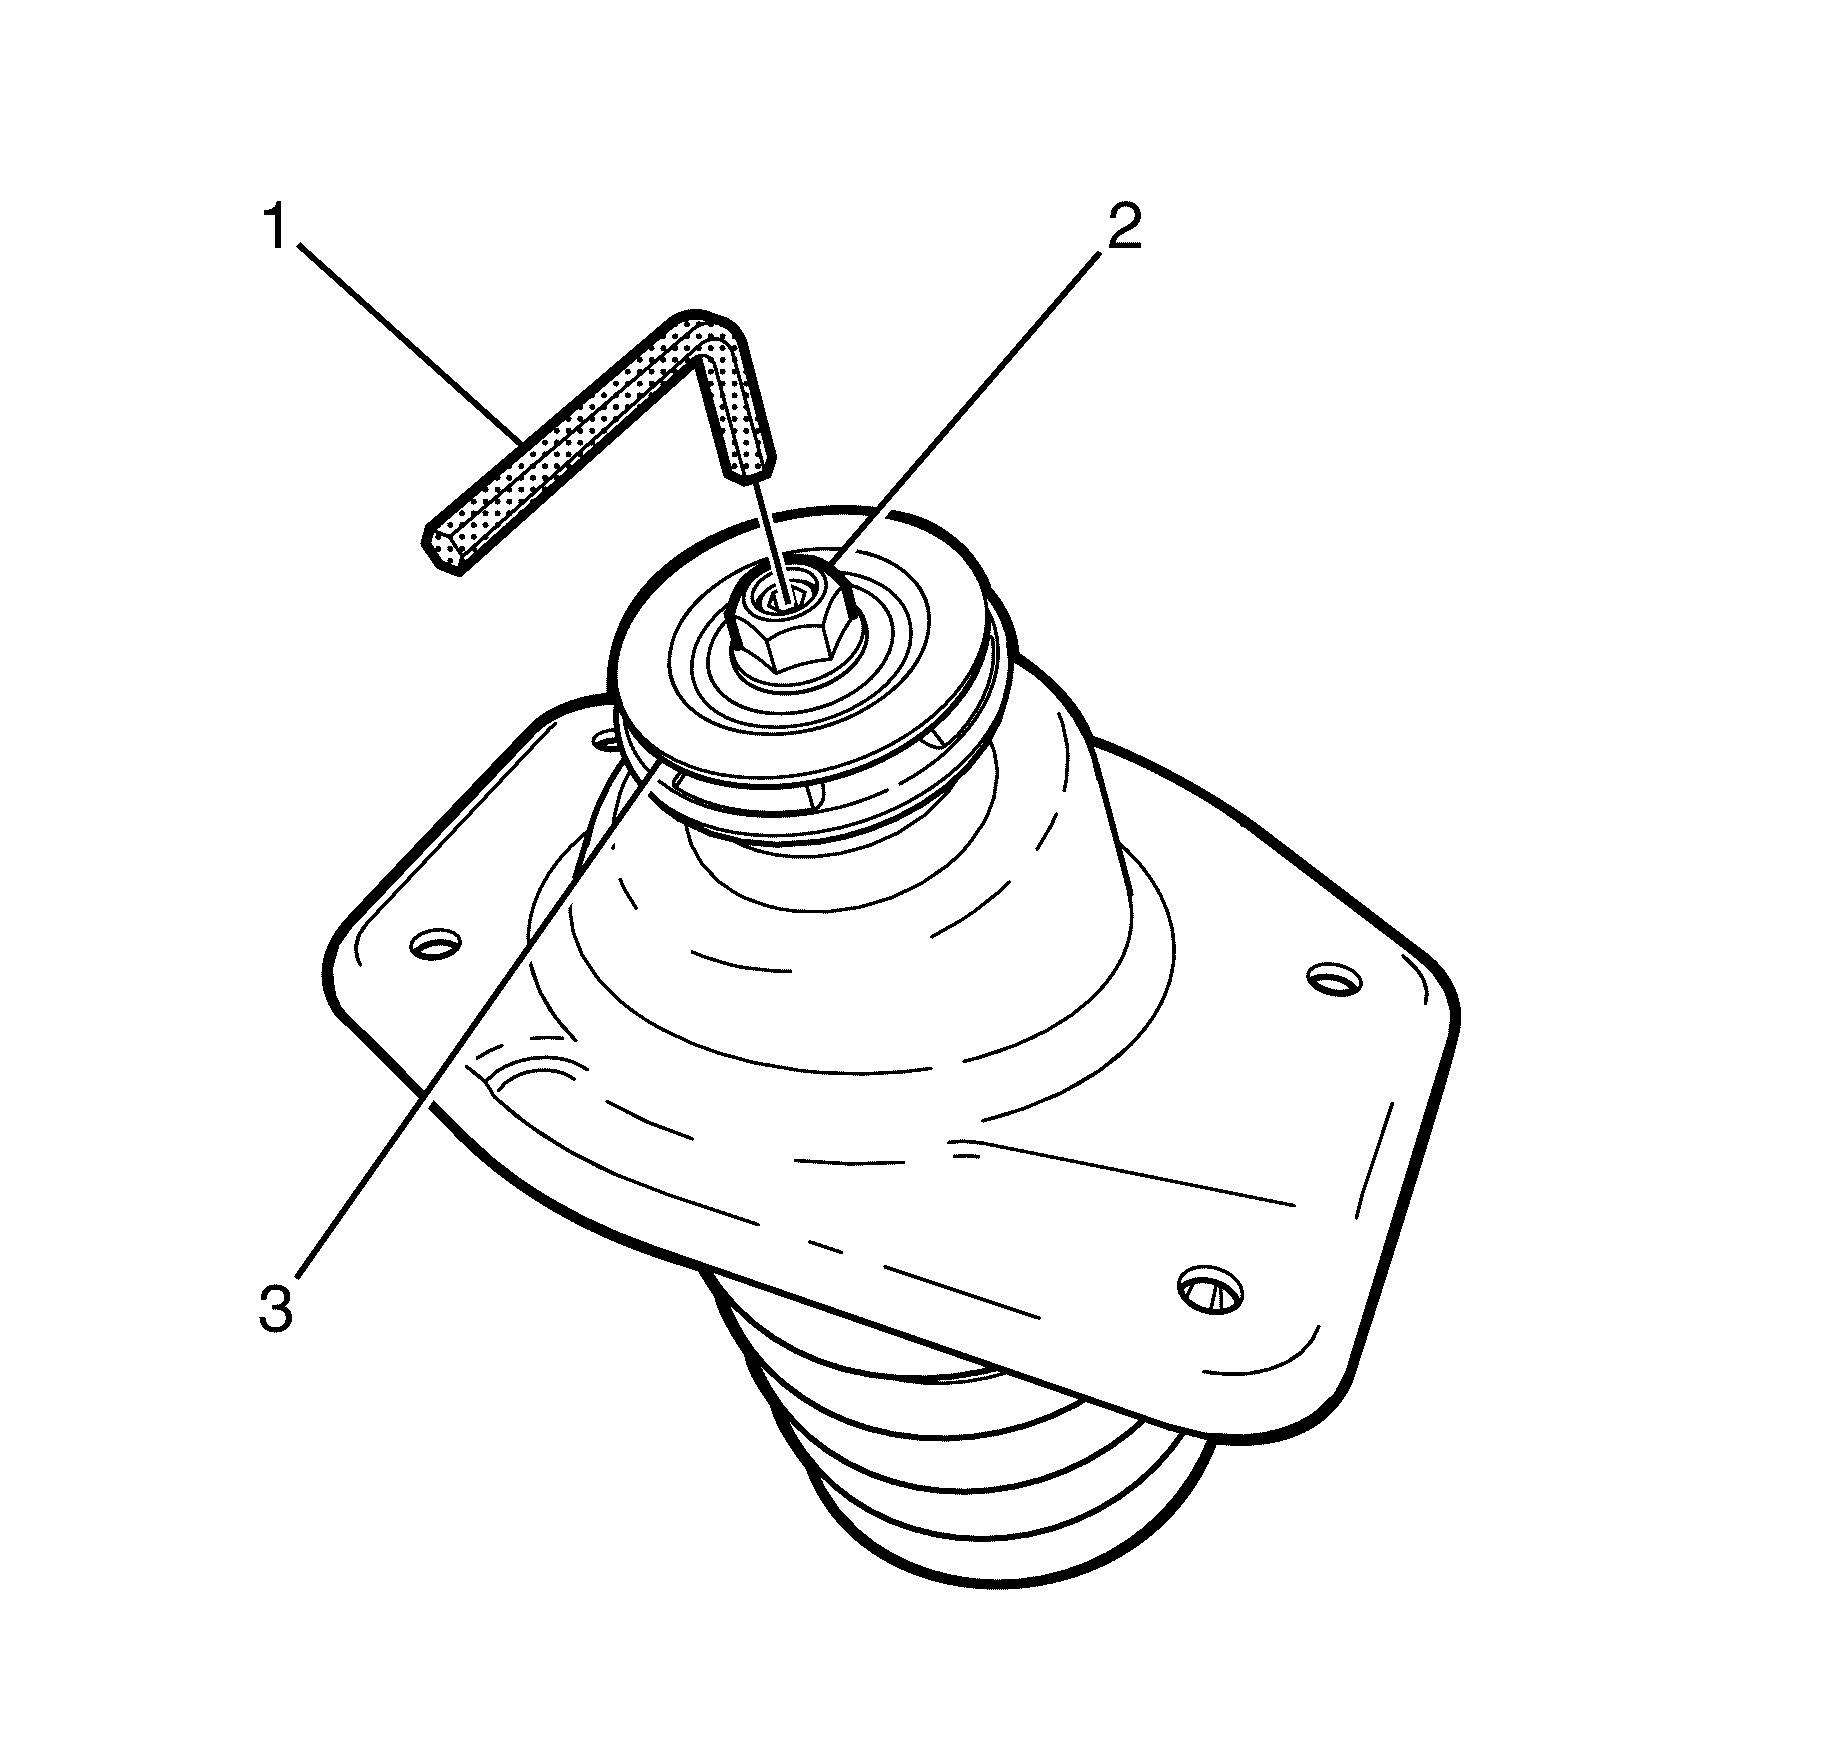
Important: Use a hex key (1) to prevent the rear strut assembly piston shaft from rotating while removing the strut assembly retaining nut (2).
Important: Nuts with micro-encapsulated thread sealant must be discarded after removal.
Discard the nut.

Important: The correct seating position of the coil spring (2) relative to the rear strut carrier plate (3) and rear strut assembly support mount (1) must be observed before removing the rear strut assembly support mount (1).
Installation Procedure
- Install the rear strut assembly support mount (1) to the coil spring (2) and rear strut unit (3).
- Inspect the rear strut.
- Note the orientation and install the upper washer (3).
- Install a NEW rear strut assembly retaining nut (2).
- Release and remove the spring compressor (1) from the coil spring (2).
- Remove the rear strut unit from the mounting trestle, or the vice.
- Install the rear strut assembly into the vehicle. Refer to Strut Assembly Replacement .
- Remove the safety stands.
- Lower the vehicle to the ground.


Important: The correct seating position of the coil spring (2) relative to the rear strut carrier plate (3) and rear strut assembly support mount (1) must be maintained.
Notice: Refer to Fastener Notice in the Preface section.

Important: Use a hex key (1) to prevent the rear strut unit piston shaft from rotating while tightening the rear strut assembly retaining nut (2).
Tighten
Tighten the nut to 45 N·m (33 lb ft).
