Tools Required
KM-619 Control Arm Bushing Remover/Installer.
Removal Procedure
- Raise and support the vehicle. Refer to Lifting and Jacking the Vehicle.
- Remove the lower control arm. Refer to Lower Control Arm Replacement.
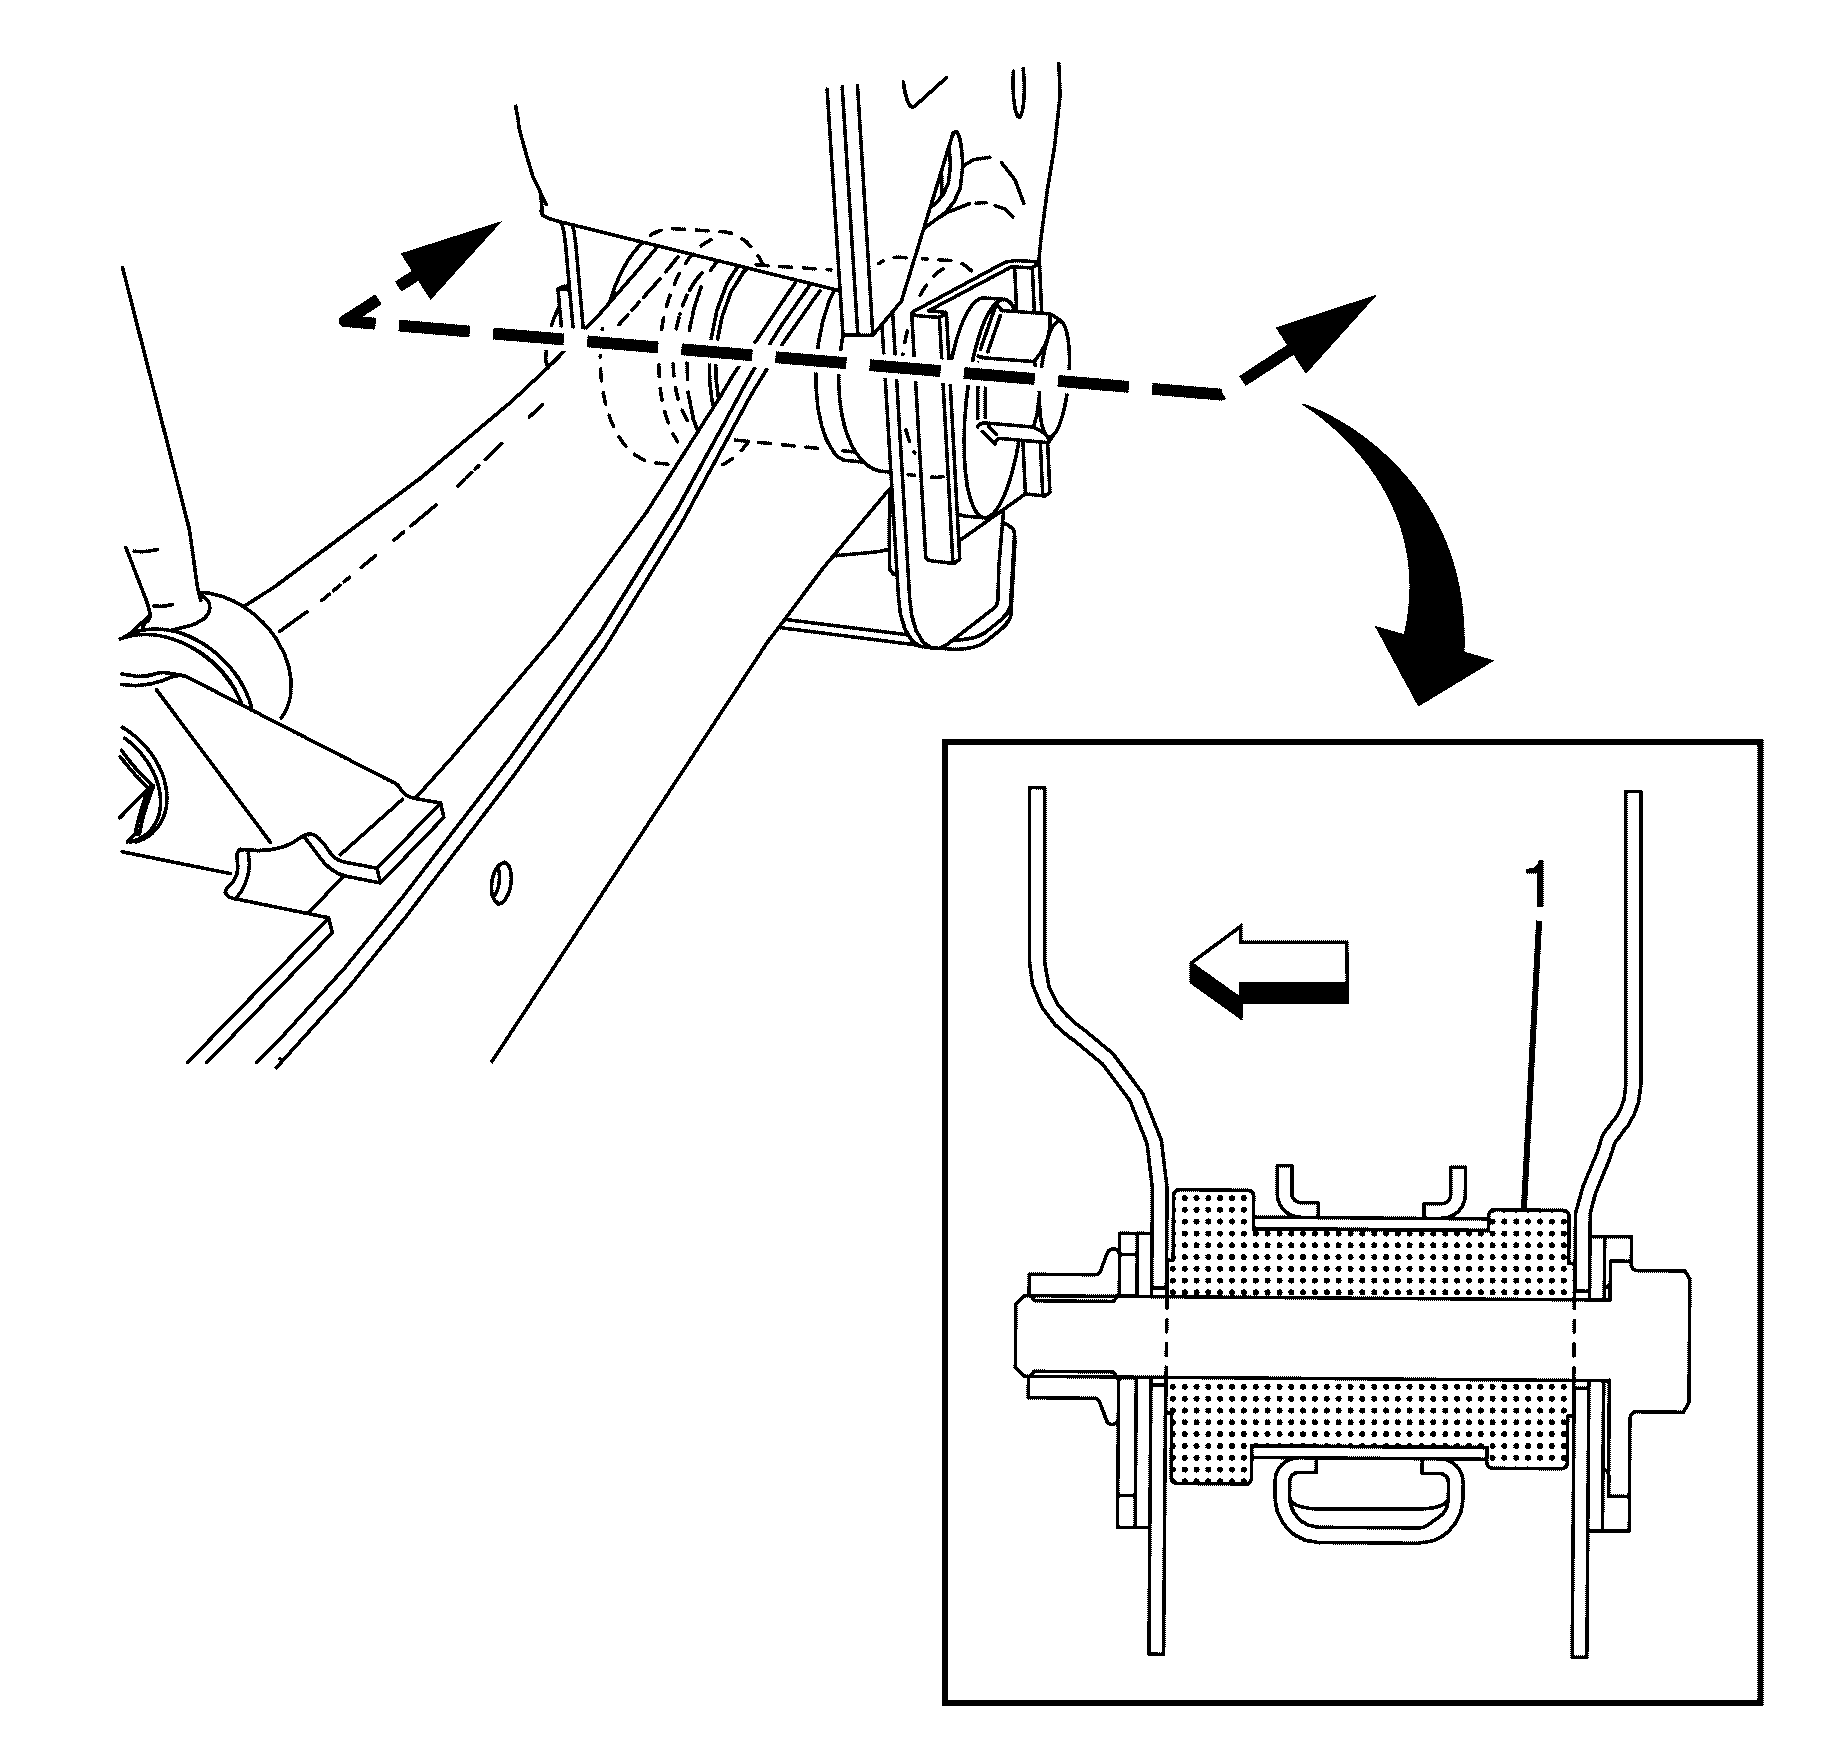
- Check the orientation of the lower control arm bushing.
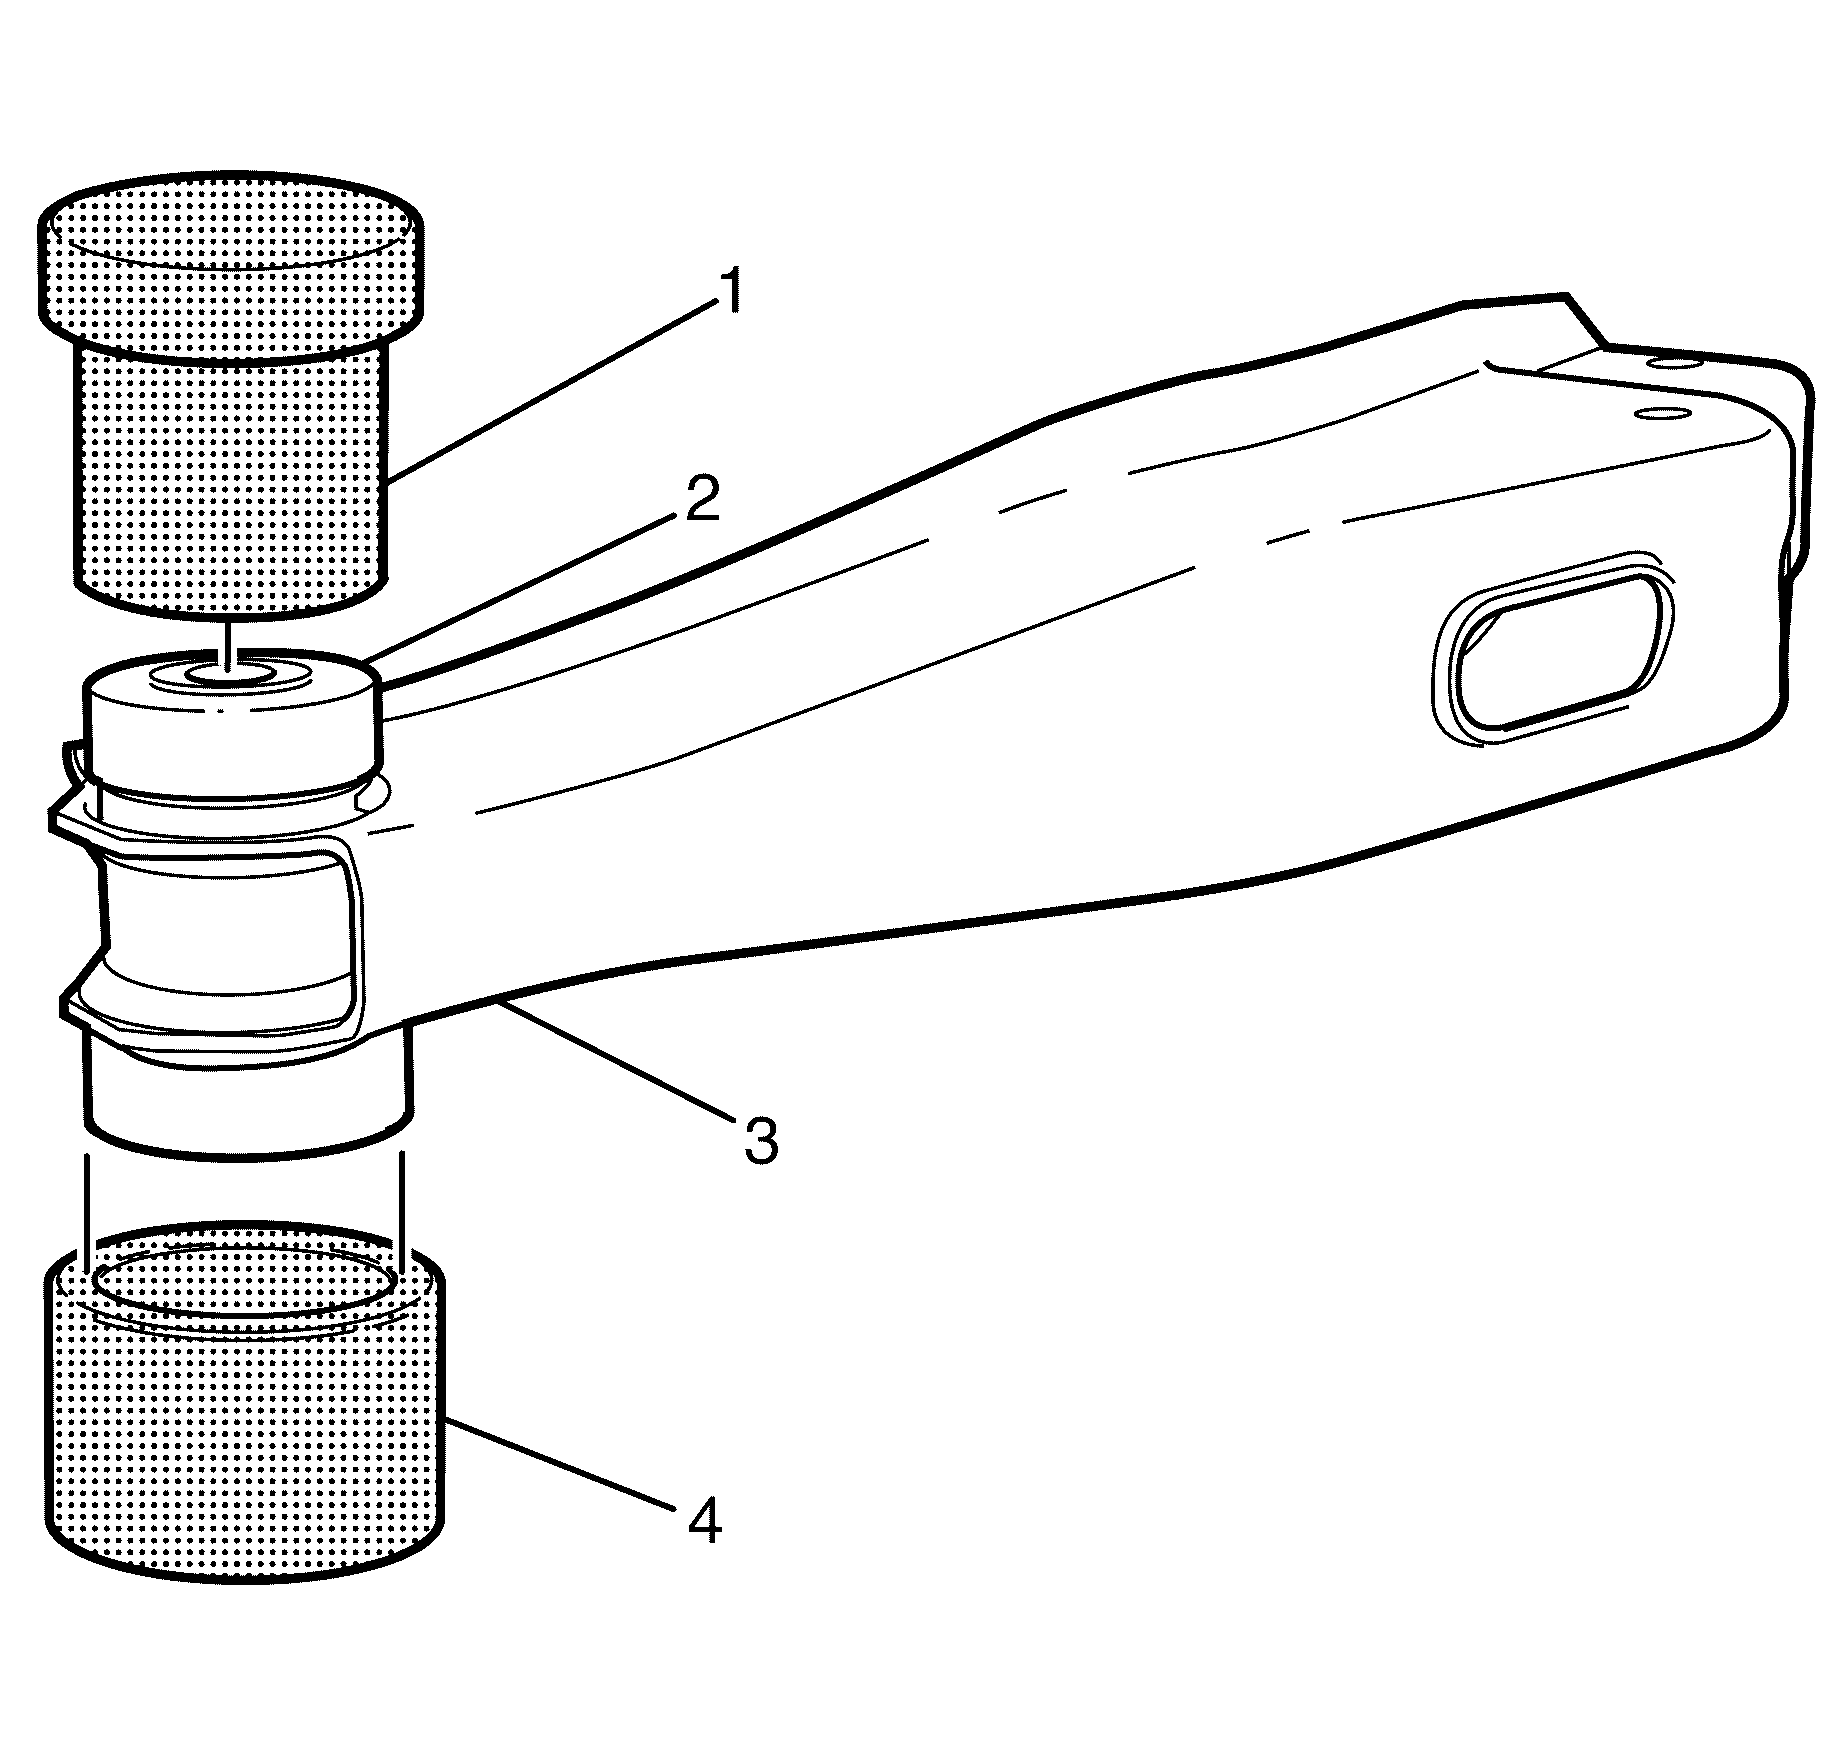
- Remove the lower control arm bushing (2) from the lower control arm (3) using the KM-619 (1, 4).
Caution: Refer to Safety Glasses Caution in the Preface section.
Caution: Refer to Vehicle Lifting Caution in the Preface section.

Important: The lower control arm bushing (1) has a conical shape with a mid-section recess that fits inside the lower control arm bushing cavity. The wider end of the lower control arm bushing (1) faces towards the front of the vehicle.

Important: The lower control arm bushing (2) must be lubricated with soapy water solution to ease the removal process.
Installation Procedure
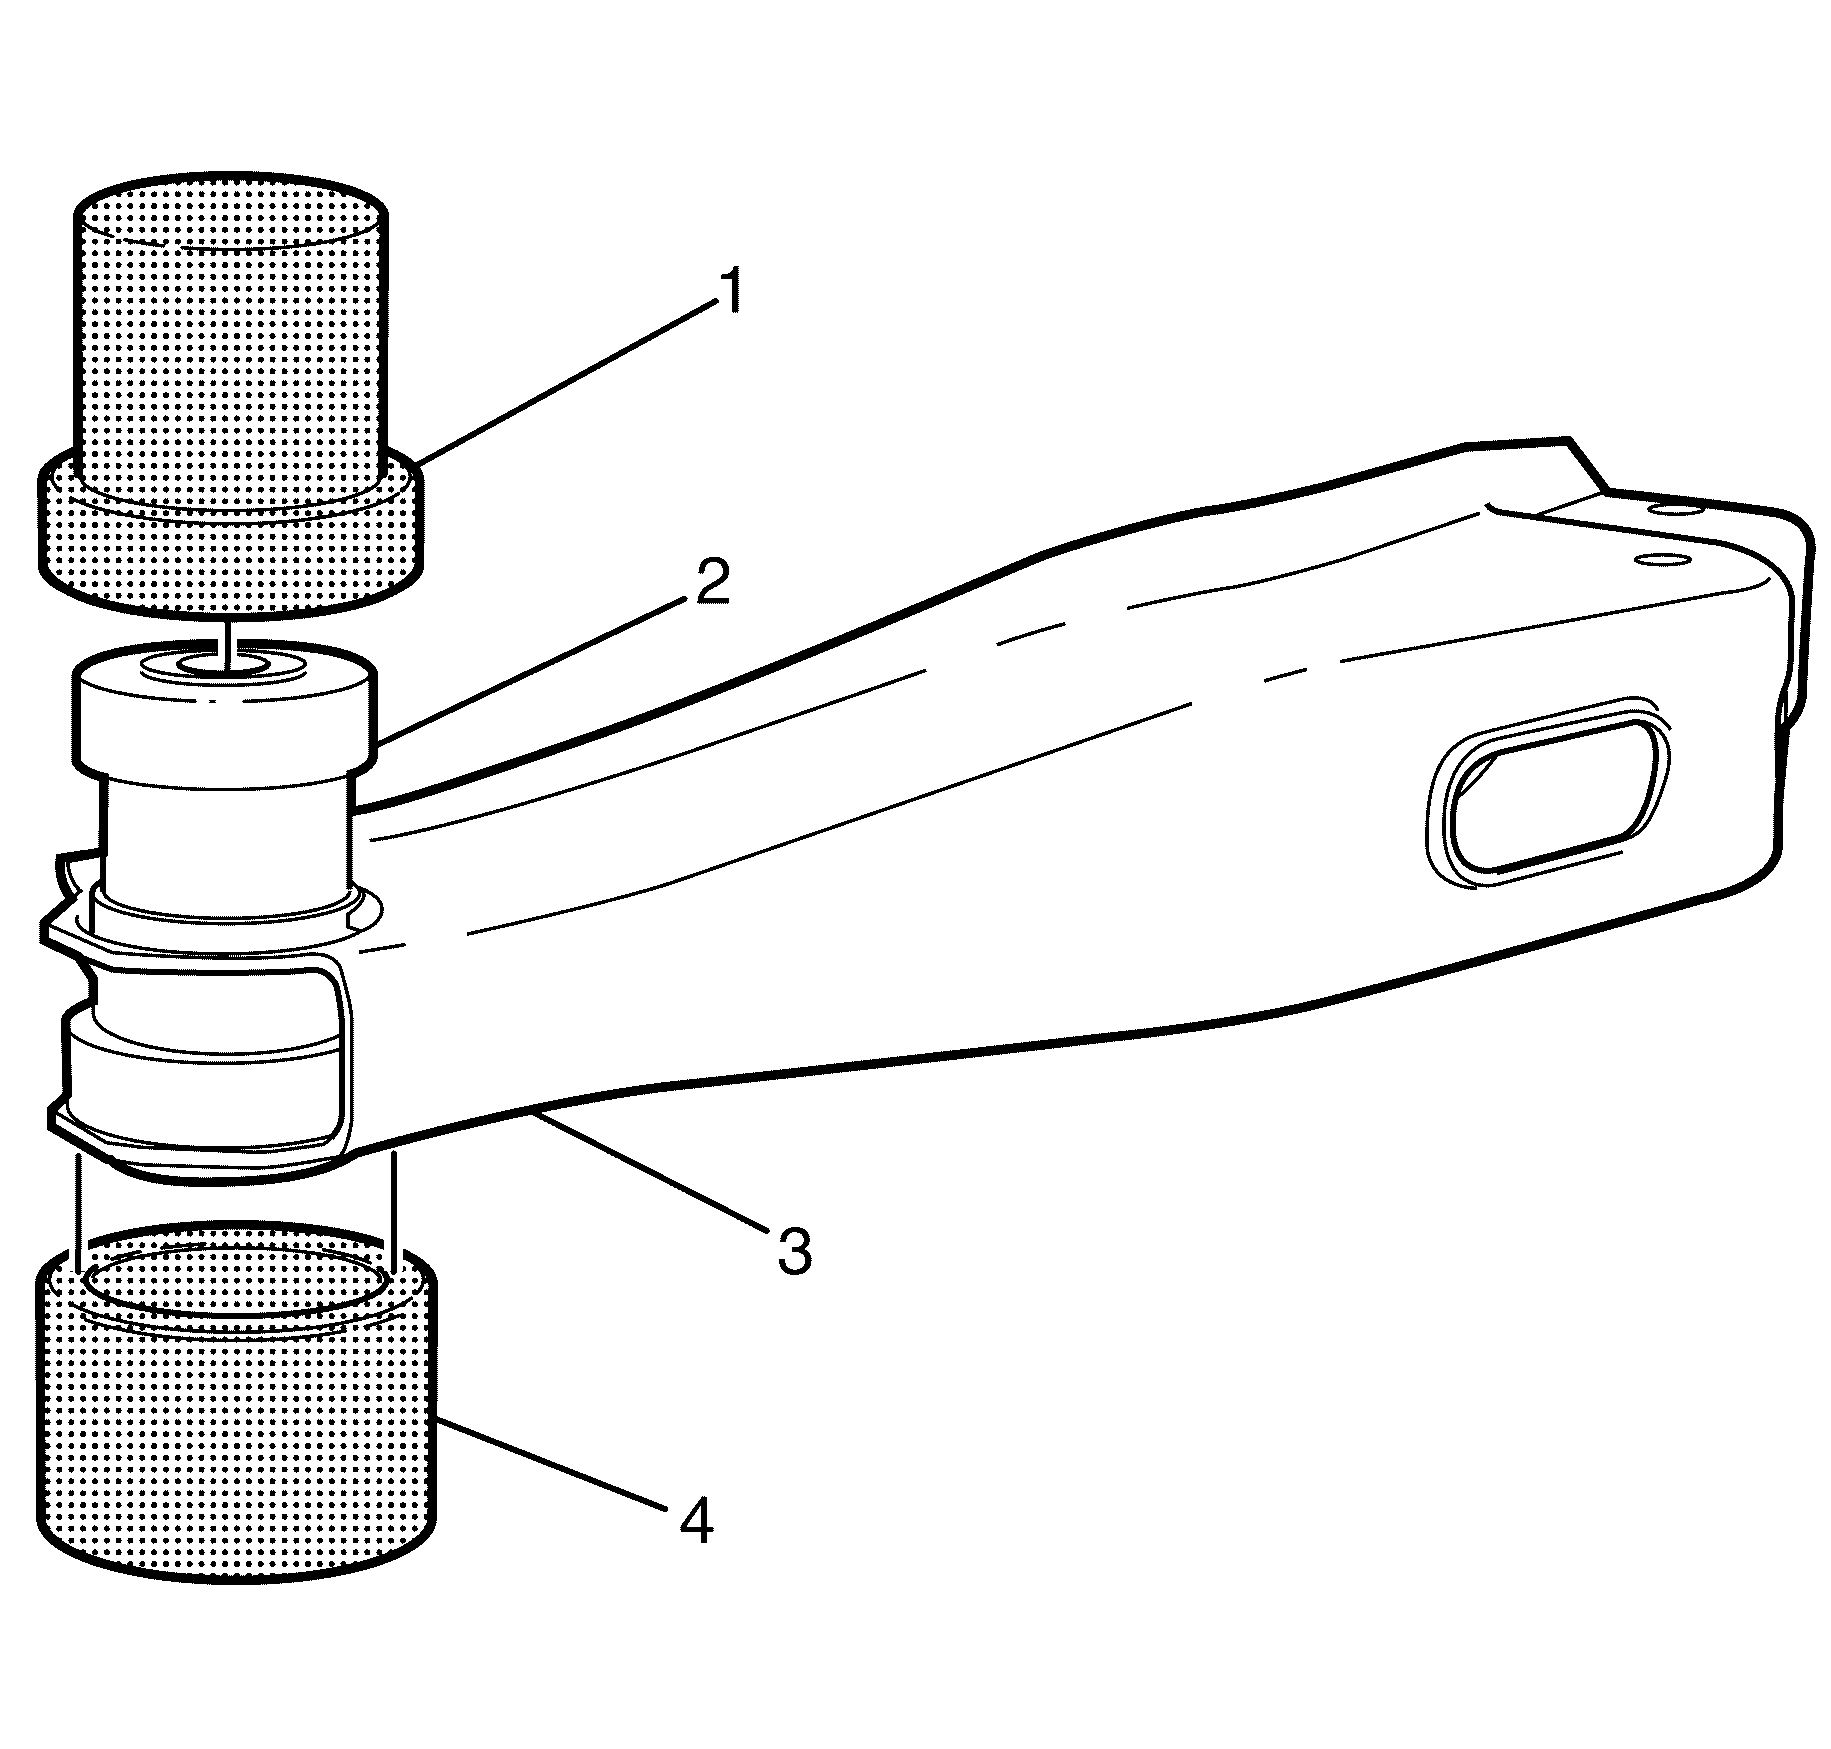
- Install the lower control arm bushing (2) using the KM-619 (1, 4).
- Install the lower control arm (3). Refer to Lower Control Arm Replacement.
- Remove the safety stands.
- Lower the vehicle to the ground.

Important: The wider end of the lower control arm bushing (2) must be installed facing towards the front of the vehicle.
Important: The lower control arm bushing (2) must be lubricated with soapy water solution to ease the installation process.
