For 1990-2009 cars only
Removal Procedure
- Raise the vehicle. Refer to Lifting and Jacking the Vehicle in General Information.
- Remove the fuel tank. Refer to Fuel Tank Replacement in Engine Controls - 4.2L.
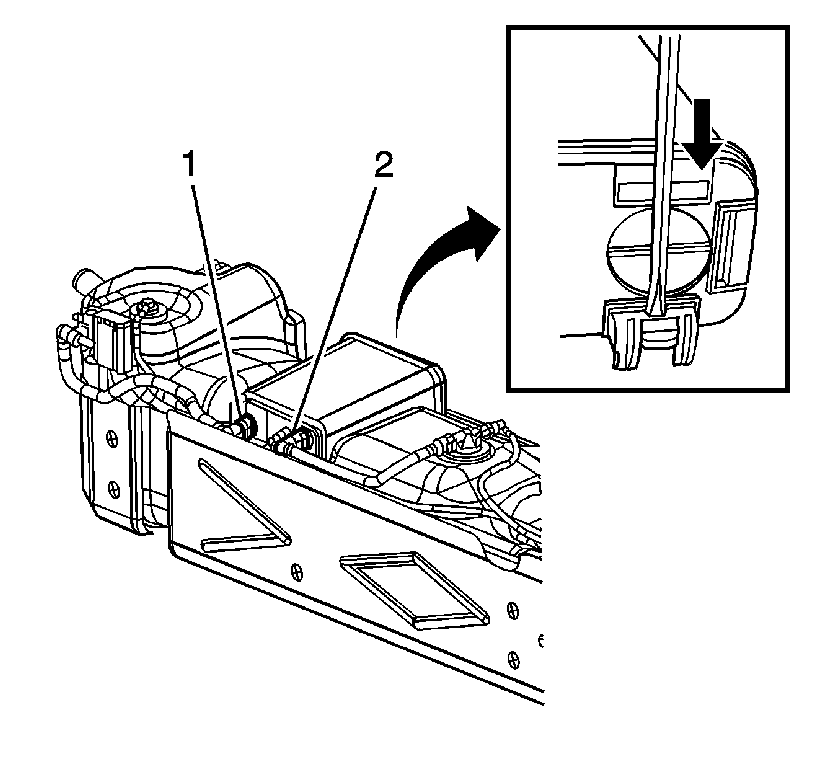
- Disconnect the evaporative emission (EVAP) vapor pipe (2) from the EVAP canister.
- Disconnect the EVAP vent pipe (1) from the EVAP canister.
- Disconnect the EVAP purge pipe from the EVAP canister. The purge pipe is the small pipe next to the vapor pipe (2).
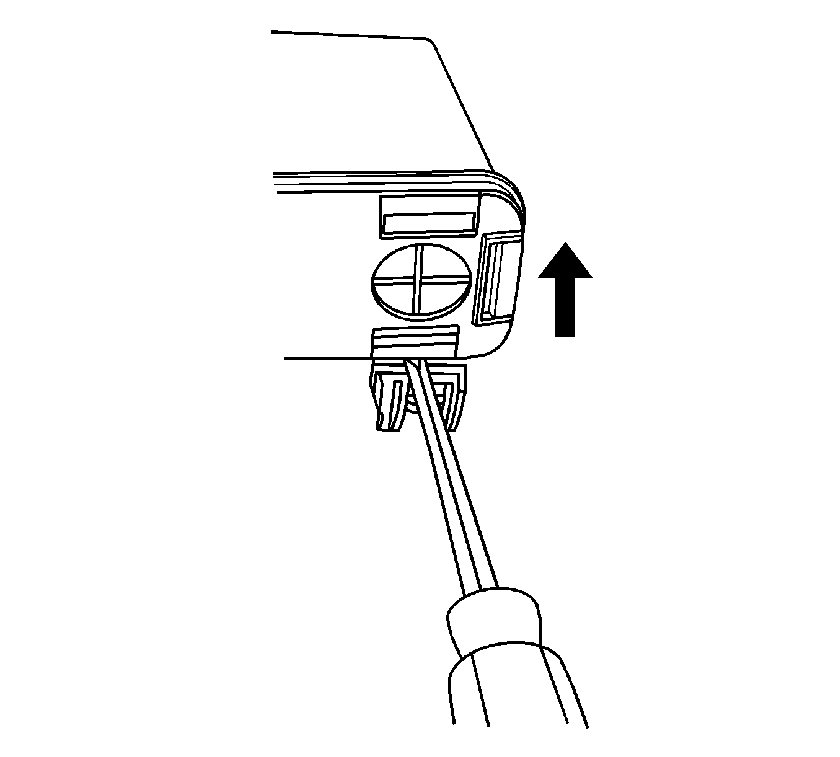
- Remove the EVAP canister from the tabs of the canister bracket by inserting a flat head screwdriver into the center slots of the tabs as indicated in the illustration.
- Pry the canister away from the tabs as indicated in the illustration.
- Slide the canister away from the single tab side to disengage the EVAP canister from the bracket.

Important: Do not pry against the surface of the evaporative emissions canister. This could damage the canister.

Installation Procedure
- Slide the EVAP canister into the single tab side and press the canister into the two tab side.
- Connect the EVAP purge pipe to the EVAP canister. The purge pipe is the small pipe next to the vapor pipe (2).
- Connect the EVAP vent pipe (1) to the EVAP canister.
- Connect the EVAP vapor pipe (2) to the EVAP canister.
- Install the fuel tank. Refer to Fuel Tank Replacement in Engine Controls - 4.2L.
- Lower the vehicle.
Important: Considerable force may be necessary to install the EVAP canister into the two tab side.
Ensure the tabs have completely engaged.

