For 1990-2009 cars only
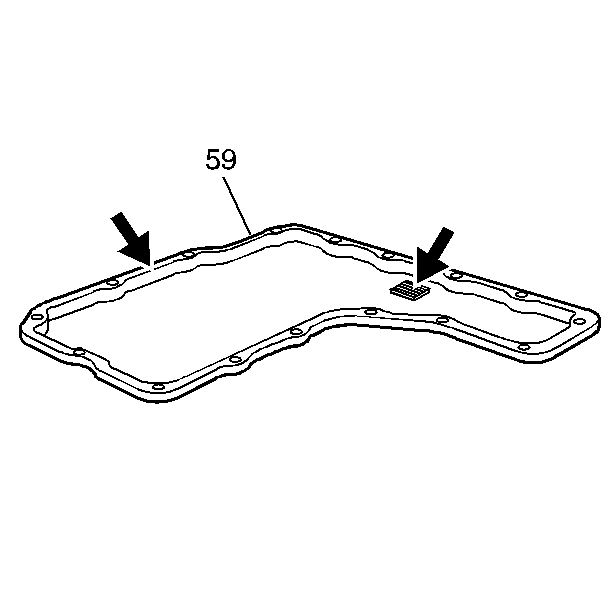
- Inspect the bottom pan (59) sealing surface for damage and inspect the bottom pan magnet for excessive metal filings. Clean if necessary.
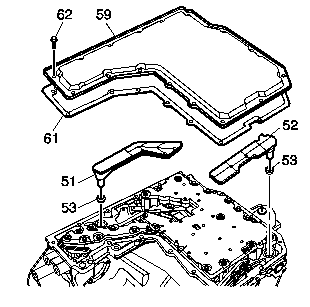
- Install the scavenge screen seals (53) into the case (6) and install the new scavenge screens (51, 52) into the seals.
- Remove any residual oil from the gasket surface of the case (6), from the bottom pan (59) and from the bolts (62).
- The bottom pan bolt threads in the case must be completely free of transmission fluid. Use a rubber tipped air hose to dry, if necessary.
- Install the new gasket (61) and install the bottom pan (59).
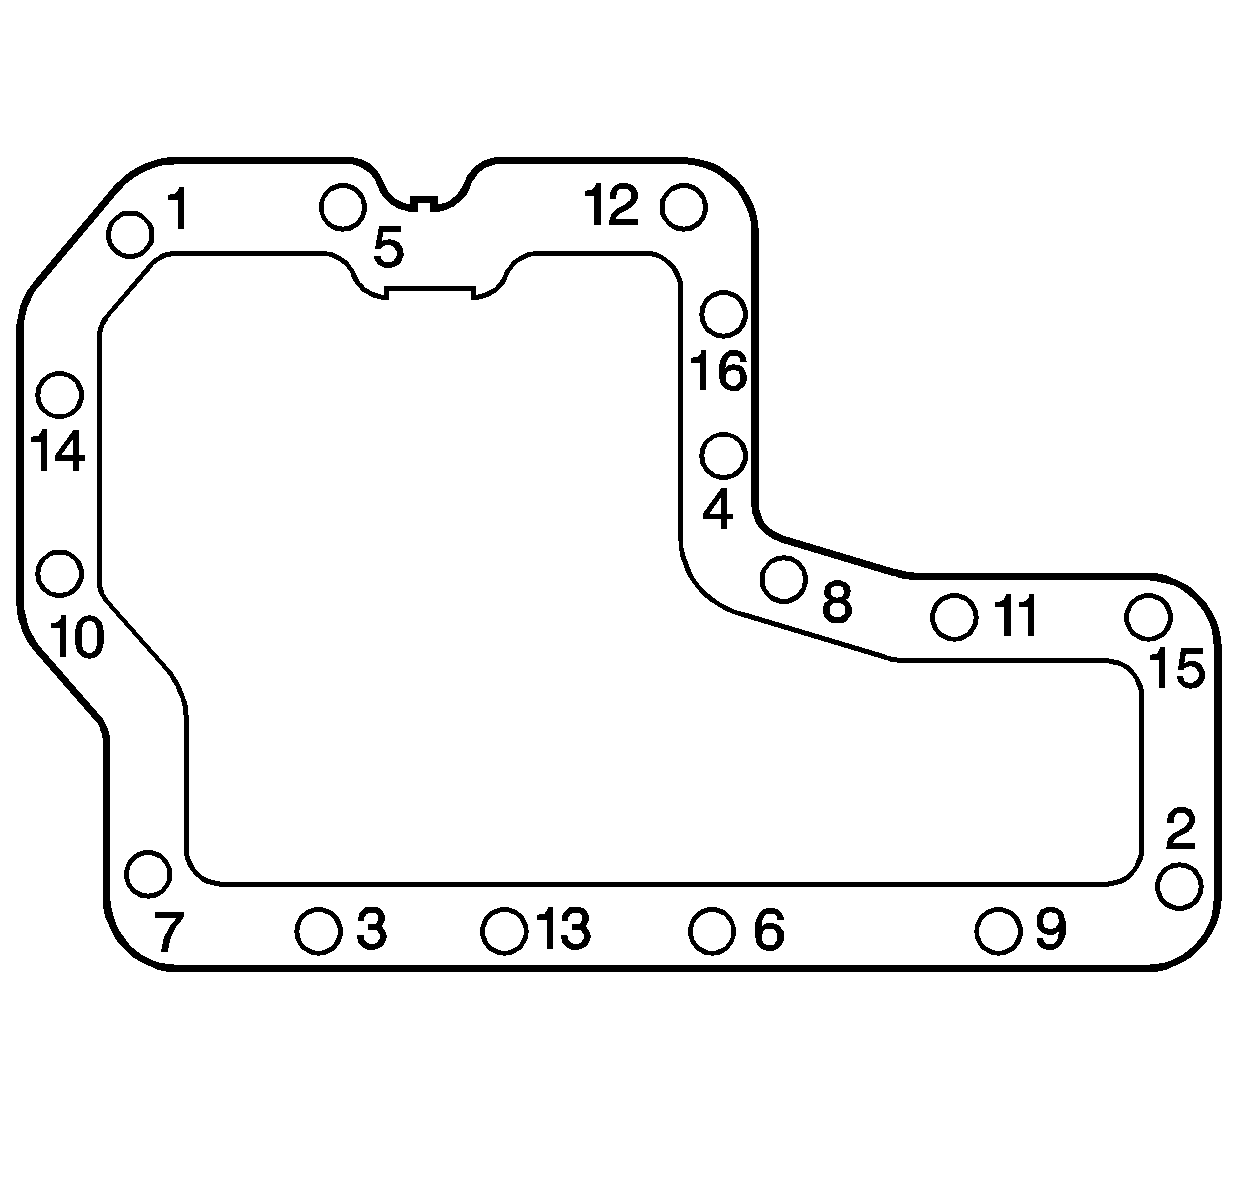
- Hand start the bottom pan bolts (62) and then tighten in the sequence pattern shown.
- Tighten the bolts first to 3 N·m (26.5 lb in).
- Then tighten the bolts to 6 N·m (53.1 lb in).
- Finally tighten the bolts to 10-12 N·m (8-9 lb ft).


Notice: Completely dry all bottom pan bolts (62) before installation or fluid leaks may occur.

Notice: Use the correct fastener in the correct location. Replacement fasteners must be the correct part number for that application. Fasteners requiring replacement or fasteners requiring the use of thread locking compound or sealant are identified in the service procedure. Do not use paints, lubricants, or corrosion inhibitors on fasteners or fastener joint surfaces unless specified. These coatings affect fastener torque and joint clamping force and may damage the fastener. Use the correct tightening sequence and specifications when installing fasteners in order to avoid damage to parts and systems.
Tighten
