For 1990-2009 cars only
Battery Positive Cable Replacement 4.2L Engine
Removal Procedure
- Disconnect the battery negative cable. Refer to Battery Negative Cable Disconnection and Connection .
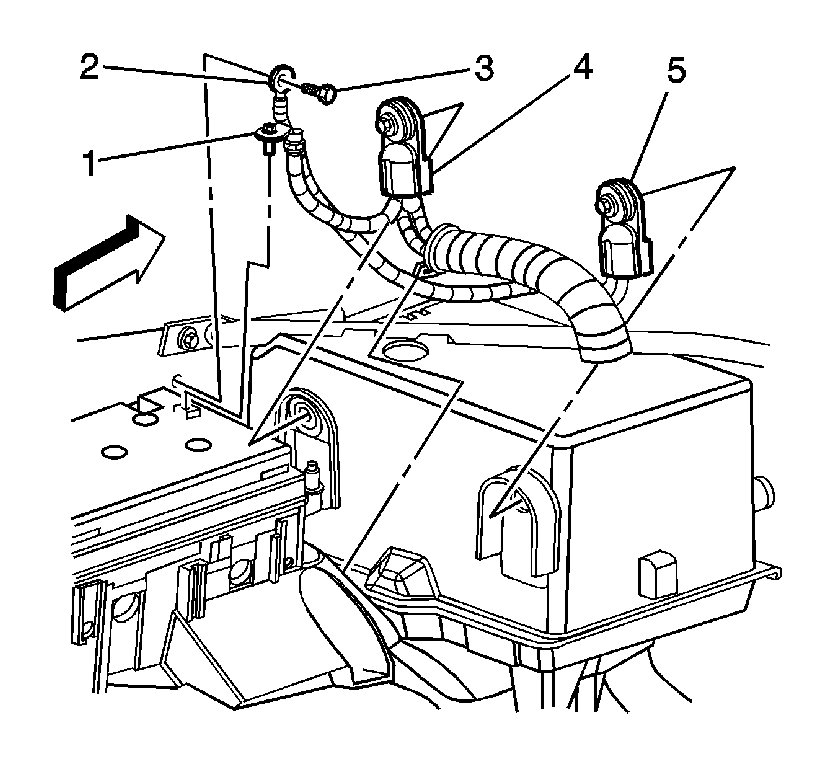
- Disconnect the battery positive cable (4) from the battery.
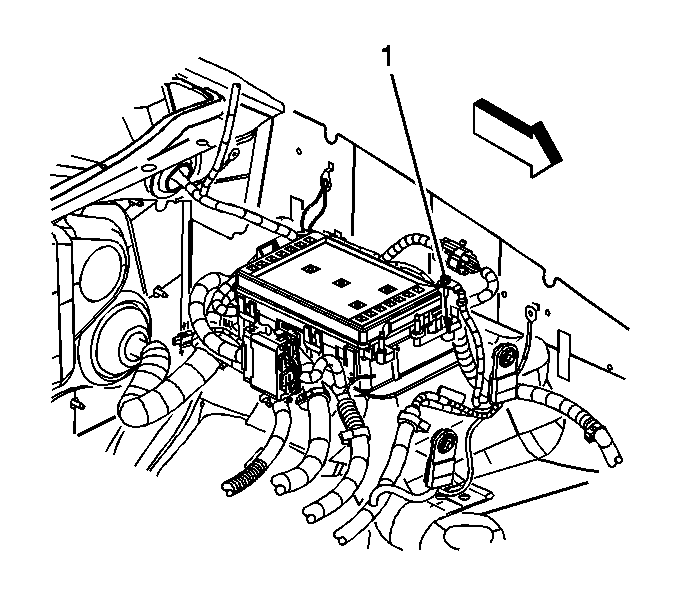
- Disconnect the positive cable lead from the junction block (1).
- Disconnect the battery cable conduit from the conduit retaining clip.
- Remove the battery positive cable from the conduit.
- Remove the battery positive cable harness from the fir-tree retainer on the powertrain control module (PCM) bracket.
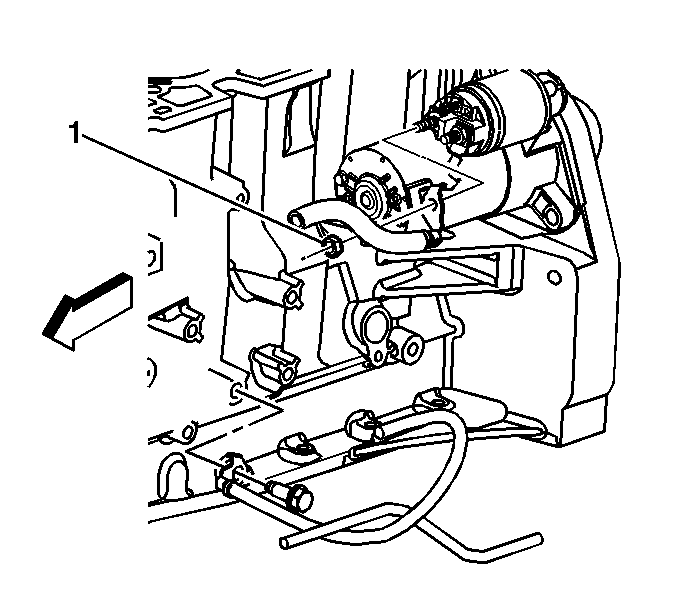
- Disconnect the positive cable lead from the starter (1).
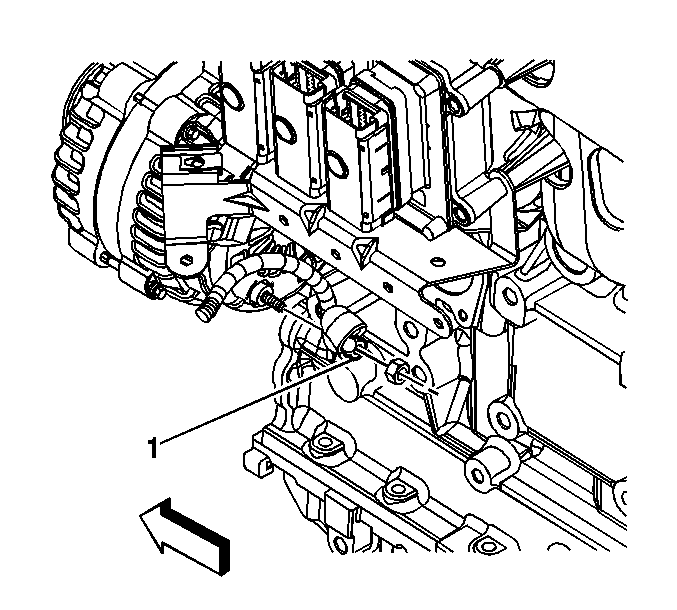
- Disconnect the positive cable lead from the generator (1).
- Remove the battery positive cable from the vehicle.
Installation Procedure
- Position the battery positive cable in the engine compartment.
- Install the battery positive cable to the generator and secure with the nut (1).
- Connect the positive cable to the starter and secure the positive cable with the nut (1).
- Install the battery positive cable harness to the fir-tree retainer on the PCM bracket.
- Install the battery positive cable into the conduit.
- Connect the battery cable conduit to the conduit retaining clip.
- Connect the positive cable to the junction block and secure the positive cable with the bolt (1).
- Connect the battery positive cable (4) to the positive battery post.
- Connect the battery negative cable. Refer to Battery Negative Cable Disconnection and Connection .
Notice: Refer to Fastener Notice in the Preface section.

Tighten
Tighten the nut to 9 N·m (80 lb in).

Tighten
Tighten the nut to 9 N·m (80 lb in).

Tighten
Tighten the bolt to 10 N·m (89 lb in).

Tighten
Tighten the battery positive bolt to 15 N·m (11 lb ft).
Battery Positive Cable Replacement 5.3L and 6.0L Engines
Removal Procedure
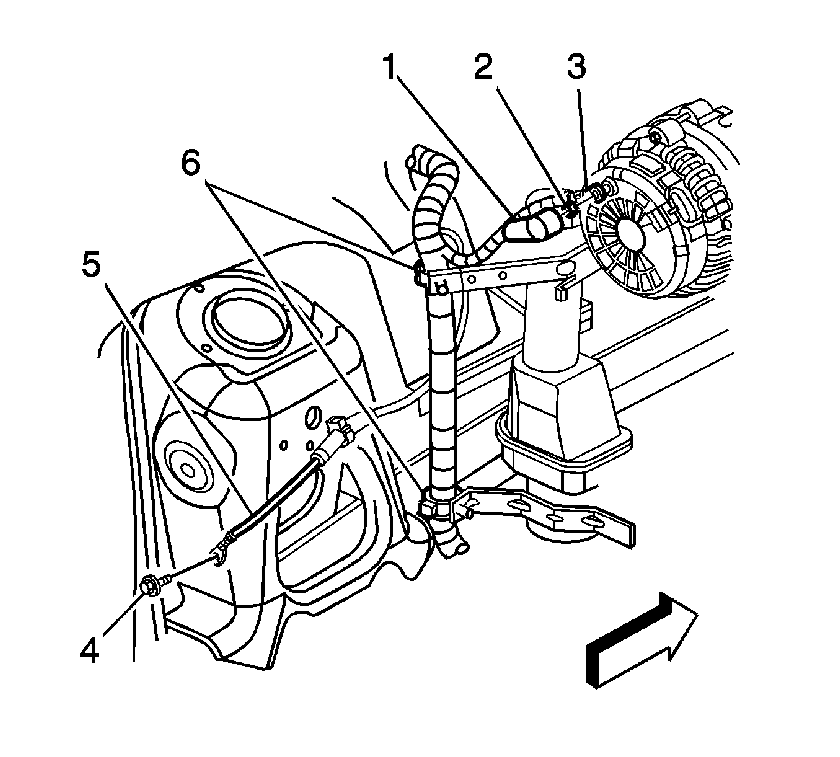
- Disconnect the negative battery cable (5). Refer to Battery Negative Cable Disconnection and Connection .
- Disconnect the positive battery cable (4).
- Loosen the positive terminal bolt (1) that secures the harness to the junction block.
- Reposition the generator cable boot (1).
- Remove the generator cable nut (2).
- Remove the generator cable lead (3).
- Open the clips on the retaining brackets.
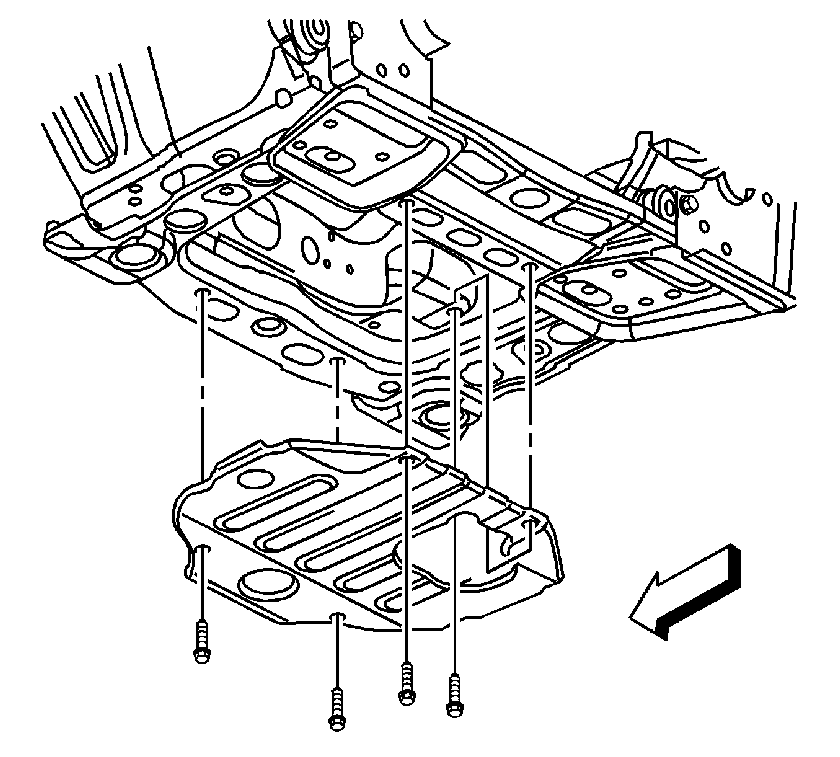
- Remove the engine protection shield. Refer to Engine Protection Shield Replacement.
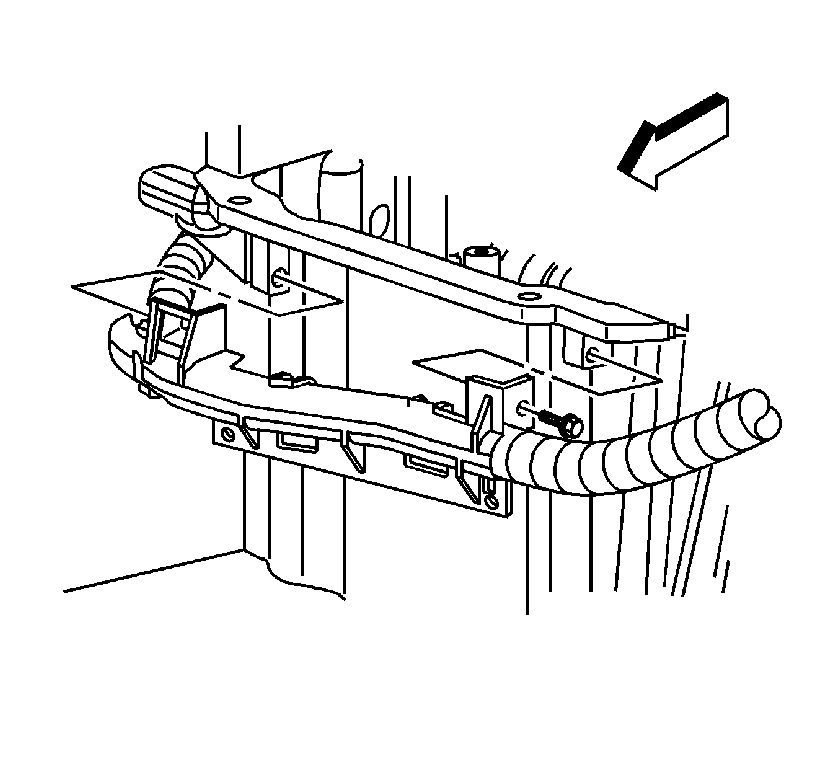
- Remove the battery cable channel bolt.
- Remove the battery cable channel.
- Remove the battery cable from the channel.
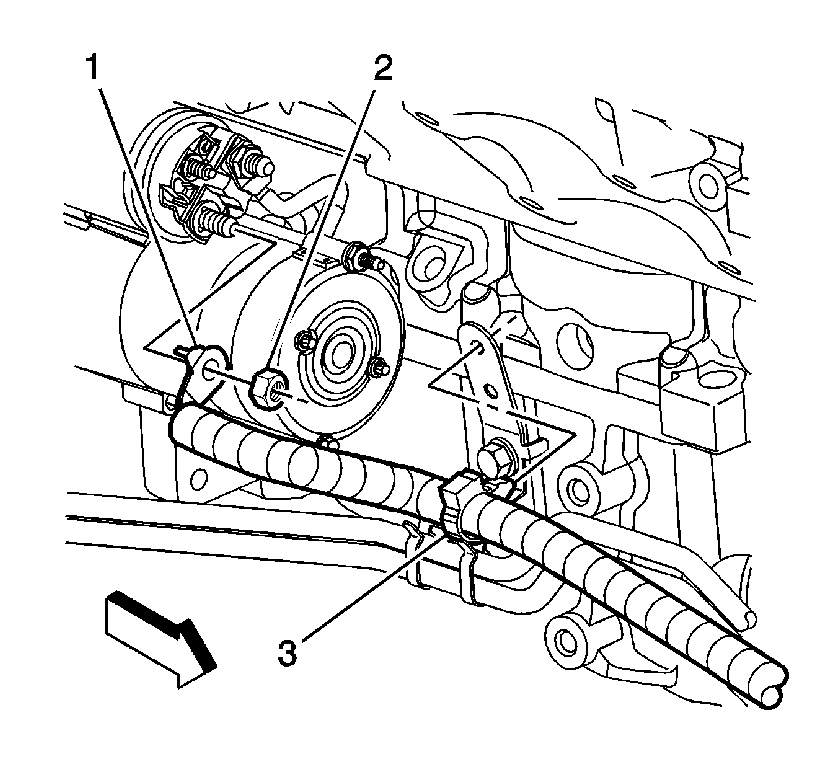
- Remove the positive cable lead nut (2) from the starter.
- Remove the positive cable lead (1).
- Remove the cable clip (3) from the bracket.
- Remove the battery cable from the conduit.

Installation Procedure
- Install the battery cable to the conduit.
- Install the cable clip (3) to the bracket.
- Install the positive cable lead (1).
- Install the positive cable lead nut (2) to the starter.
- Install the battery cable to the channel.
- Install the battery cable channel.
- Install the battery cable channel bolt.
- Install the engine protection shield. Refer to Engine Protection Shield Replacement .
- Install the generator cable lead (3).
- Install the generator cable nut (2).
- Position the generator cable boot (1).
- Close the clips on the retaining brackets.
- Tighten the positive terminal bolt (1) that secures the harness to the junction block.
- Connect the positive battery cable (4).
- Connect the negative battery cable (5). Refer to Battery Negative Cable Disconnection and Connection .

Notice: Refer to Fastener Notice in the Preface section.
Tighten
Tighten the nut to 9 N·m (80 lb in).

Tighten
Tighten the battery cable channel bolt to 12 N·m (106 lb in).


Tighten
Tighten the nut to 9 N·m (80 lb in).

Tighten
Tighten the bolt to 10 N·m (89 lb in).
Tighten
Tighten the positive cable to 15 N·m (11 lb ft).
