For 1990-2009 cars only
Removal Procedure
- Remove the 3 seat switch bezel screws. Refer to Driver Seat and Passenger Seat Adjuster Switch Bezel Replacement.
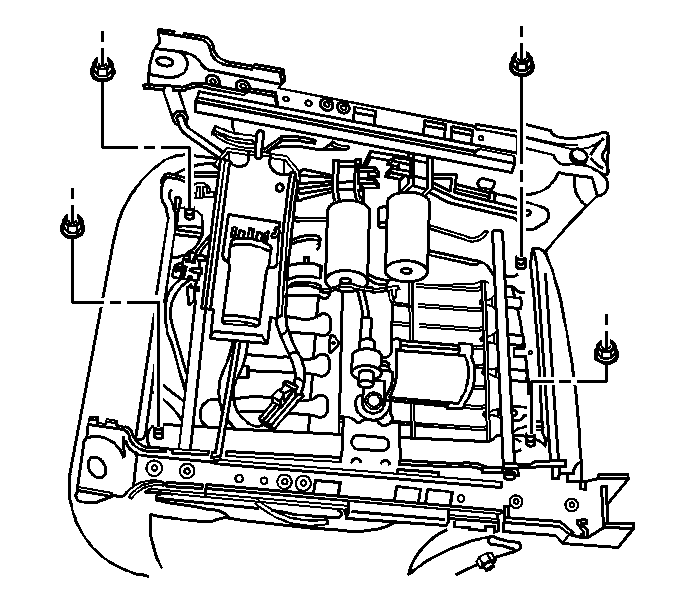
- Remove 4\ nuts that attach the seat pan to the seat assembly.
- Remove the clip from the front outboard seat pan stud. Discard the clip.
- Lift the seat pan up in order to allow access to the seat control module retaining screw.
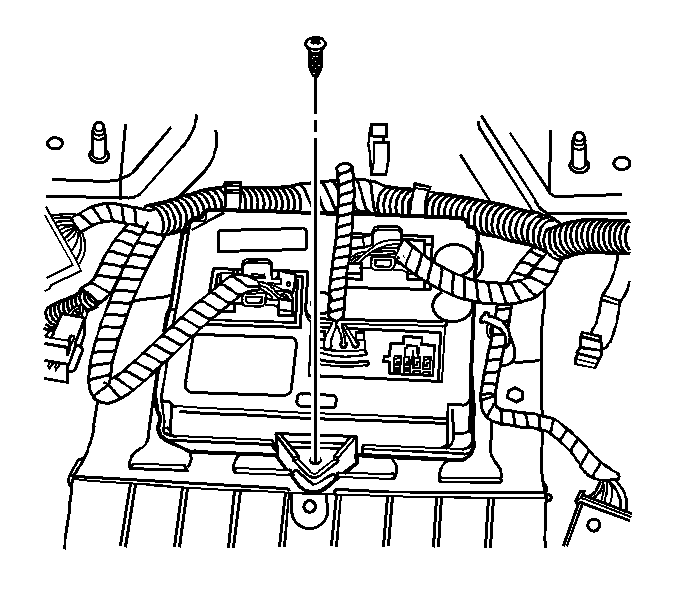
- Remove the seat control module retaining screw.
- Disconnect the electrical connectors from the seat control module as necessary.
- Remove the seat control module from the seat assembly.


Installation Procedure
- Align and install the locating tabs on the seat control module with the seat pan.
- Connect the electrical connectors to the seat control module as necessary.
- Install the screw that retains the seat control module to the seat pan.
- Install the seat pan to the seat assembly.
- Install the nuts which retain the seat pan to the seat assembly.
- Install the 3 seat switch bezel screws. Refer to Driver Seat and Passenger Seat Adjuster Switch Bezel Replacement.
- Calibrate the seat. Refer to Memory Seat Calibration.
- Refer to Control Module References for programming and setup information.
Notice: Refer to Fastener Notice in the Preface section.

Tighten
Tighten the screw to 3 N·m (26 lb in).

Tighten
Tighten the nuts to 25 N·m (18 lb ft).
