For 1990-2009 cars only
Tools Required
| • | J 2619-01 Slide Hammer with Adapter |
| • | J 29369-1 Bushing and Bearing Remover |
| • | J 29369-2 Bushing and Bearing Remover (2-3 in) |
| • | J 45232 Differential Bearing Adjuster Needle Bearing Installer -- LH |
| • | J 45233 Differential Bearing Adjuster Needle Bearing Installer -- RH |
| • | J 45225 Axle Seal Installer |
| • | J 6125-B Slide Hammer |
Removal Procedure
Important: The seals used in the differential carrier assembly have built in tabs that are used to retain the position of the differential side bearing adjusters. When removing the seal, do not twist or rotate the seal or the preload on the differential case side bearings may be affected.
- Raise the vehicle. Refer to Lifting and Jacking the Vehicle .
- Drain the lubricant from the differential carrier assembly. Refer to Front Axle Lubricant Replacement .
- Remove the left wheel drive shaft. Refer to Wheel Drive Shaft Replacement .
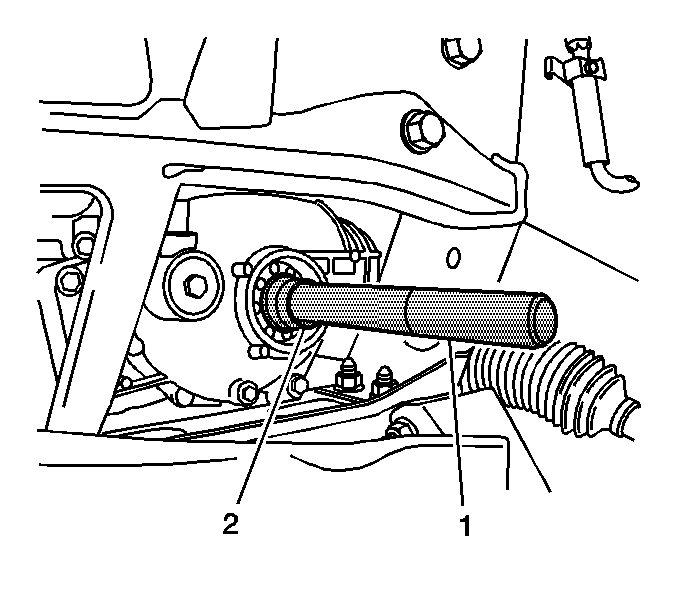
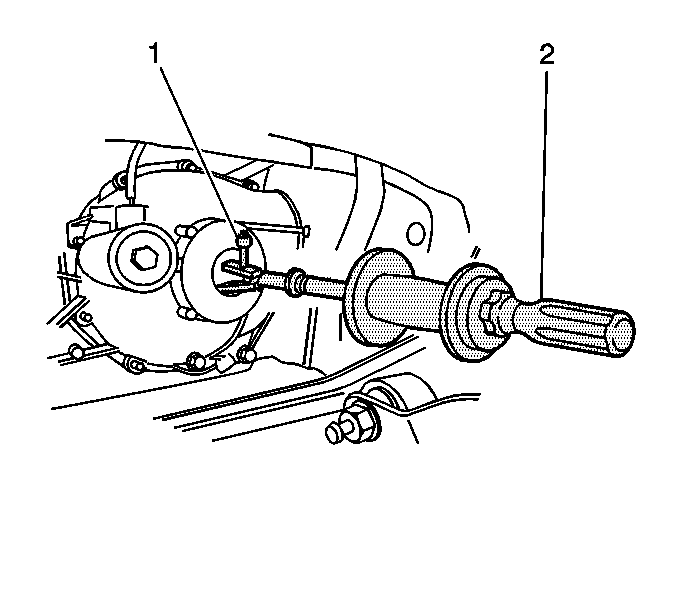
- Install the J 6125-B (2) and the J 29369-2 (1) onto the backside of the seal as shown.
- Remove the seal by pulling on the J 6125-B (1).
- Place an alignment mark between the differential bearing adjuster and the differential carrier assembly case.
- Install the J 6125-B and the J 29369-2 onto the backside of the bearing cage.
- Remove the bearing by pulling on the J 6125-B .
- Remove the differential carrier assembly. Refer to Differential Carrier Assembly Replacement .
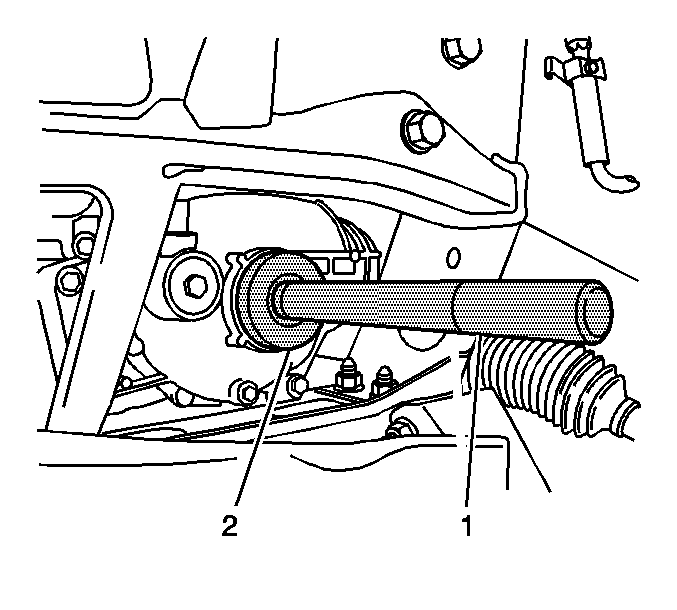
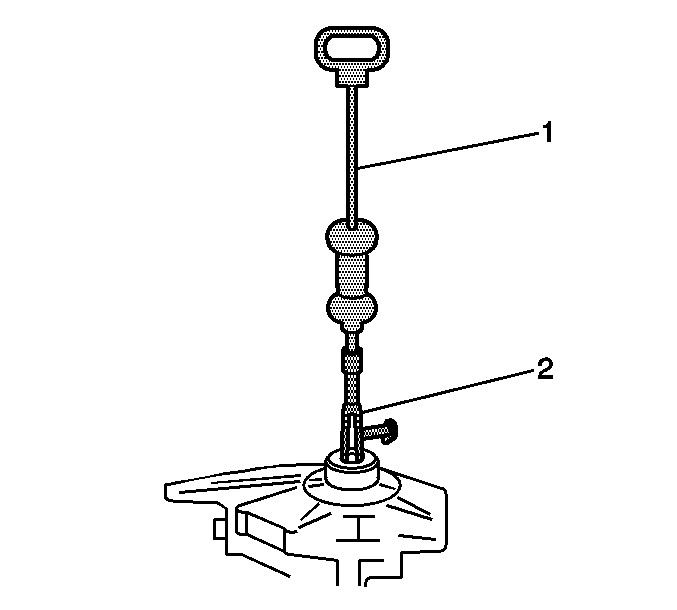
- Install the J 29369-1 (2) and the J 2619-01 (1) onto the backside of the seal as shown.
- Remove the seal by pulling on the J 2619-01 (1).
- Place an alignment mark between the differential bearing adjuster and the differential carrier assembly case.
- Install the J 6125-B and the J 29369-2 onto the backside of the bearing cage.
- Remove the bearing by pulling on the J 6125-B .
Installation Procedure
Important: The seals used in the differential carrier assembly have built in tabs that are used to retain the position of the differential side bearing adjusters. When installing the seal, it is not necessary to align the tabs to the slots on the differential side bearing adjuster. Two of the tabs on the seal will automatically align themselves with the slots on the differential side bearing adjuster when the seal is installed.
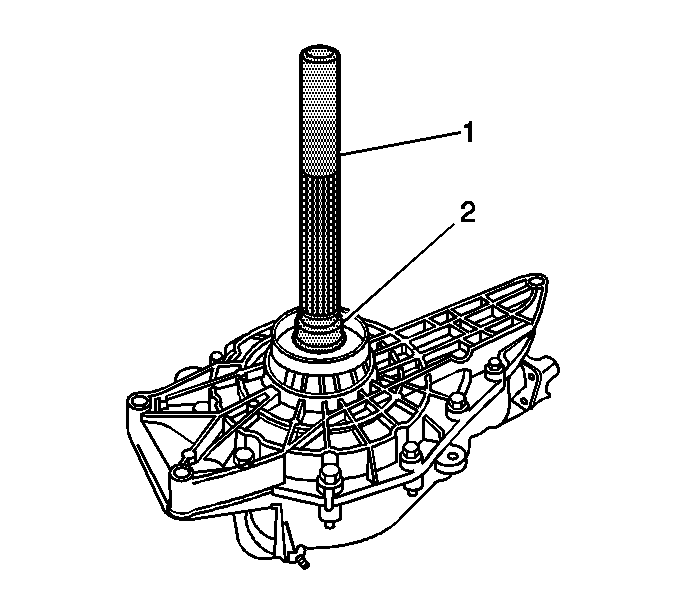
- Install the bearing (print side out) using the J 45233 (2) and the J 8092 (1).
- Inspect the alignment between the differential bearing adjuster and the differential carrier assembly case. If the line between the differential bearing adjuster and the differential carrier assembly case is not aligned, re-align the 2 components as necessary.
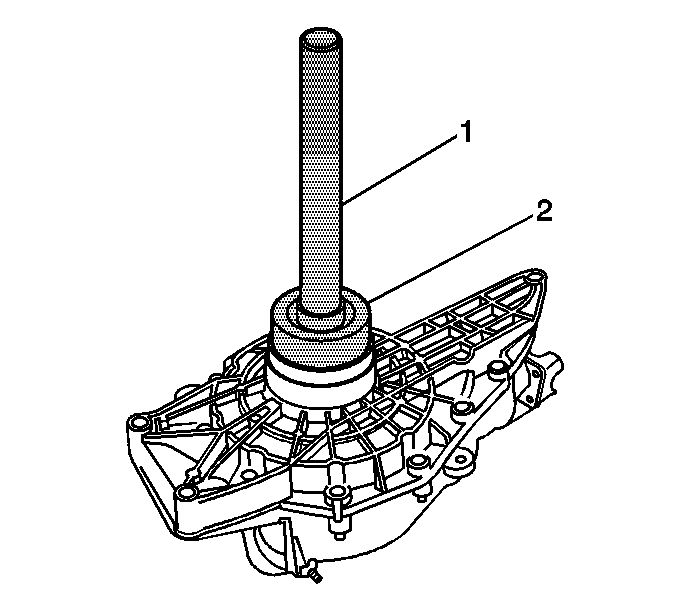
- Install the new inner shaft seal using the J 45225 (2) and the J 8092 (1).
- Install the differential carrier assembly. Refer to Differential Carrier Assembly Replacement .
- Install the bearing (print side out) using the J 45232 (2) and the J 8092 (1).
- Inspect the alignment mark between the differential bearing adjuster and the differential carrier assembly case. If the line between the differential bearing adjuster and the differential carrier assembly case is not aligned, re-align the 2 components as necessary.
- Install the new inner shaft seal using the J 45225 (2) and the J 8092 (1).
- Install the left wheel drive shaft. Refer to Wheel Drive Shaft Replacement .
- Fill the differential carrier assembly with axle lubricant. Use the proper lubricant. Refer to Front Axle Lubricant Replacement .
- Lower the vehicle.
