For 1990-2009 cars only
Auxiliary Blower Motor Replacement Except Rainier
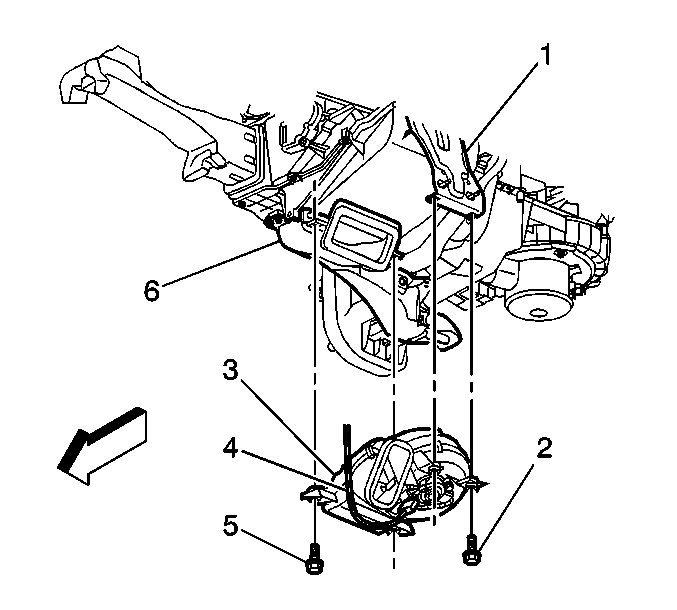
Removal Procedure
- Remove the front floor console. Refer to Console Replacement .
- Disconnect the electrical connectors (4) from the blower motor-auxiliary (3).
- Remove the air outlet duct from the blower motor-auxiliary.
- Remove the screws (2, 5) from the blower motor-auxiliary.
- Remove the blower motor-auxiliary (3).
Installation Procedure
- Install the blower motor-auxiliary (3).
- Install the retaining screws (2, 5) to the blower motor-auxiliary.
- Install the air outlet duct to the blower motor-auxiliary.
- Connect the electrical connectors (4) to the blower motor-auxiliary (3).
- Install the front floor console. Refer to Console Replacement.
Notice: Refer to Fastener Notice in the Preface section.
Tighten
Tighten the screws to 10 N·m (88 lb in).
Auxiliary Blower Motor Replacement Rainier
Removal Procedure
- Remove the instrument panel assembly. Refer to Instrument Panel Assembly Replacement .
- Disconnect the electrical connectors (4) from the blower motor-auxiliary (3).
- Remove the air outlet duct from the blower motor-auxiliary.
- Remove the screws (2, 5) from the blower motor-auxiliary.
- Remove the blower motor-auxiliary (3).
Installation Procedure
- Install the blower motor-auxiliary (3).
- Install the retaining screws (2, 5) to the blower motor-auxiliary.
- Install the air outlet duct to the blower motor-auxiliary.
- Connect the electrical connectors (4) to the blower motor-auxiliary (3).
- Install the instrument panel assembly. Refer to Instrument Panel Assembly Replacement.
Notice: Refer to Fastener Notice in the Preface section.
Tighten
Tighten the screws to 10 N·m (88 lb in).
