For 1990-2009 cars only
Removal Procedure
- Raise the vehicle. Refer to Lifting and Jacking the Vehicle.
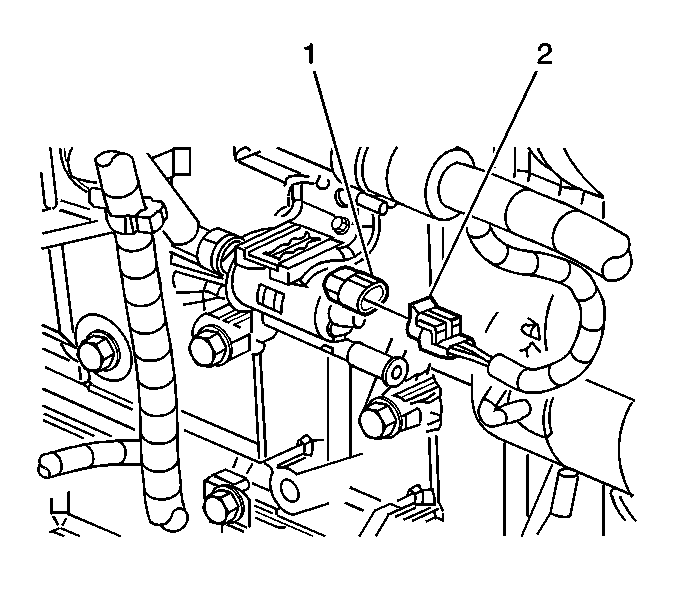
- Disconnect the harness electrical connector (2) from the evaporative emission (EVAP) canister purge valve (1).
- Disconnect the EVAP purge pipe from the EVAP canister purge valve.
- Disconnect the engine vacuum pipe from the EVAP canister purge valve.
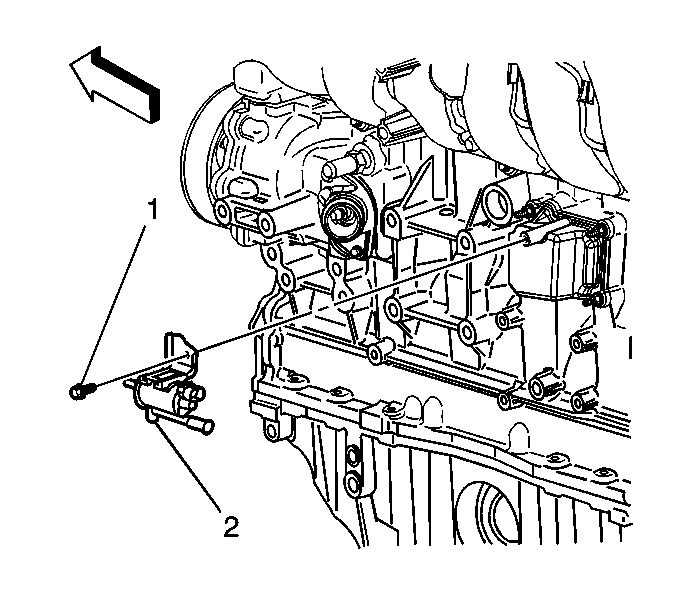
- Remove the purge valve (2) from the purge valve mounting bracket.
- If replacing the purge valve bracket, remove the attaching bolt (1) and purge valve bracket.


Installation Procedure
- If replacing the purge bracket, install the purge valve bracket and the attaching bolt (1). Tighten the purge valve mounting bracket attaching bolt to 10 N·m (89 lb in).
- Install purge valve (2) on to the purge valve mounting bracket.
- Connect the EVAP purge pipe to the EVAP canister purge valve.
- Connect the engine vacuum pipe to the EVAP canister purge valve.
- Connect the electrical harness connector (2) to the EVAP canister purge valve (1).
- Lower the vehicle.
Caution: Refer to Fastener Caution in the Preface section.


